Client Push Upgrade
Client Push Upgrade
Updated:2025-09-05 18:25
1.1 configure software cache
Note: The installation package naming rule is: [agent-version number-operating system name+operating system version number-architecture.tar]. For the operating system name, operating system version number and architecture, see the initialization data in the general method of the management node. If the operating system name contains spaces, remove them
Examples are as follows:
├── 3.0.1
│ ├── agent-3.0.1-CentOS7.6-x86_64.tar
│ ├── agent-3.0.1-EulerOS2.0-aarch64.tar
│ ├── agent-3.0.1-KylinLinuxAdvancedServerV10-aarch64.tar
│ ├── pre-upgrade.sh
│ └── upgrade.sh
└── 3.0.3
├── agent-3.0.3-CentOS7.8-x86_64.tar
├── agent-3.0.3-EulerOS2.0-aarch64.tar
├── agent-3.0.3-KylinLinuxAdvancedServerV10-aarch64.tar
├── agent-3.0.3-KylinLinuxAdvancedServerV10-x86_64.tar
├── agent-3.0.3-NeoKylinLinuxAdvancedServerV7-x86_64.tar
├── agent-3.0.3-VMware6.7-x86_64.tar
├── agent-3.0.3-Windows2003-x86_64.tar
├── agent-3.0.3-OracleLinux7-x86_64.tar
├── agent-3.0.3-RedhatEnterpriseLinux7-x86_64.tar
├── agent-3.0.3-Ubuntu18.04LTS-x86_64.tar
├── pre-upgrade.sh
├── upgrade.sh
├── us-server-3.0.3-CentOS7.6-x86_64.tar
├── us-server-3.0.3-EulerOS2.0-aarch64.tar
├── us-server-3.0.3-KylinLinuxAdvancedServerV10-aarch64.tar
├── us-server-3.0.3-KylinLinuxAdvancedServerV10-x86_64.tar
└── us-server-3.0.3-NeoKylinLinuxAdvancedServerV7-x86_64.tar1.1.1 Software cache configuration process
-
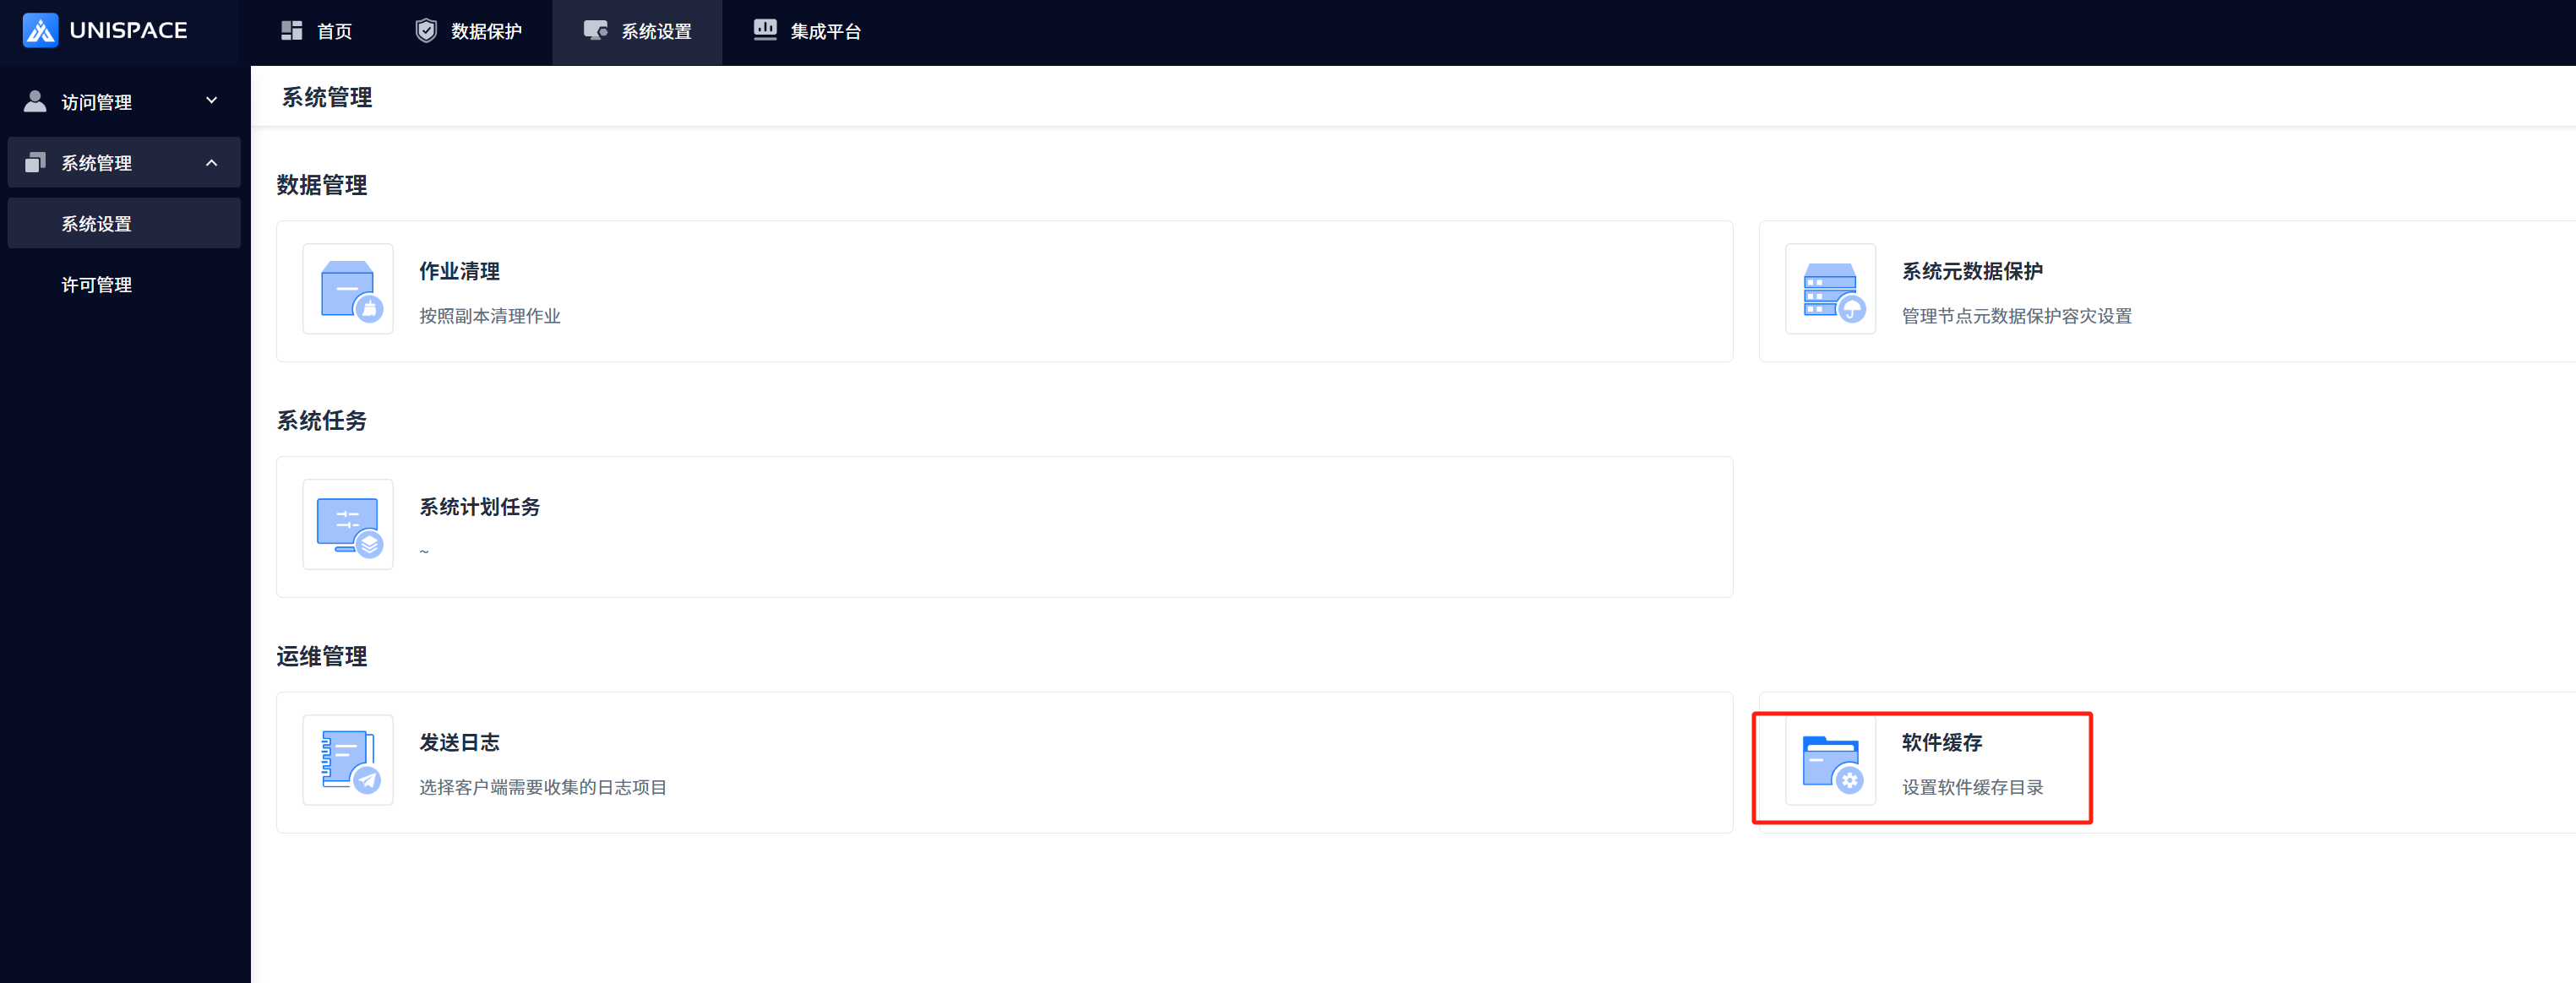
Menu [System Settings]-[System Management]-[System Settings]-[Software Cache]
-
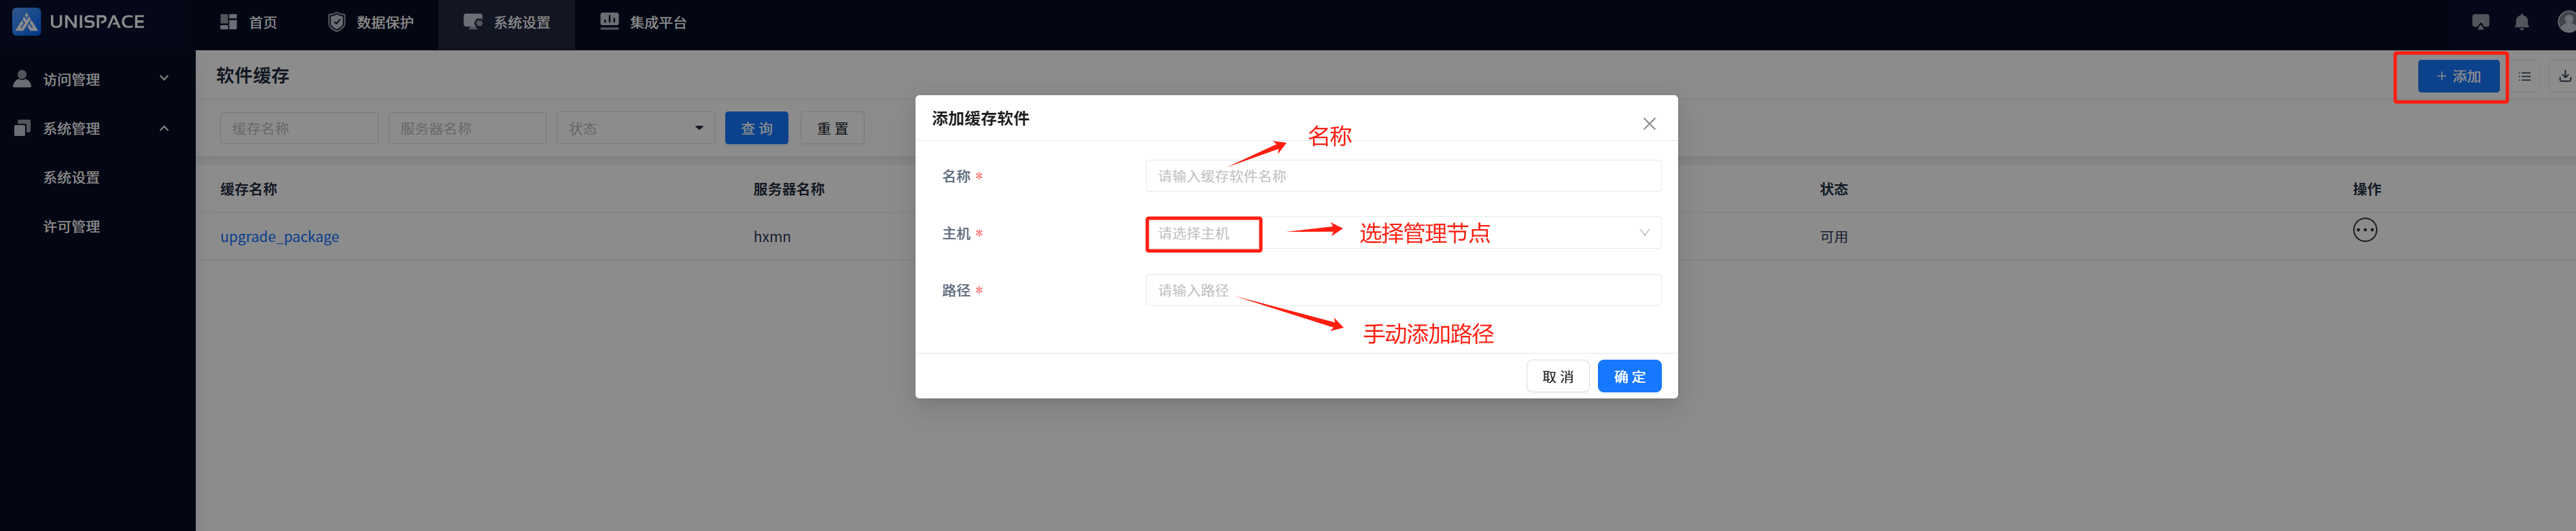
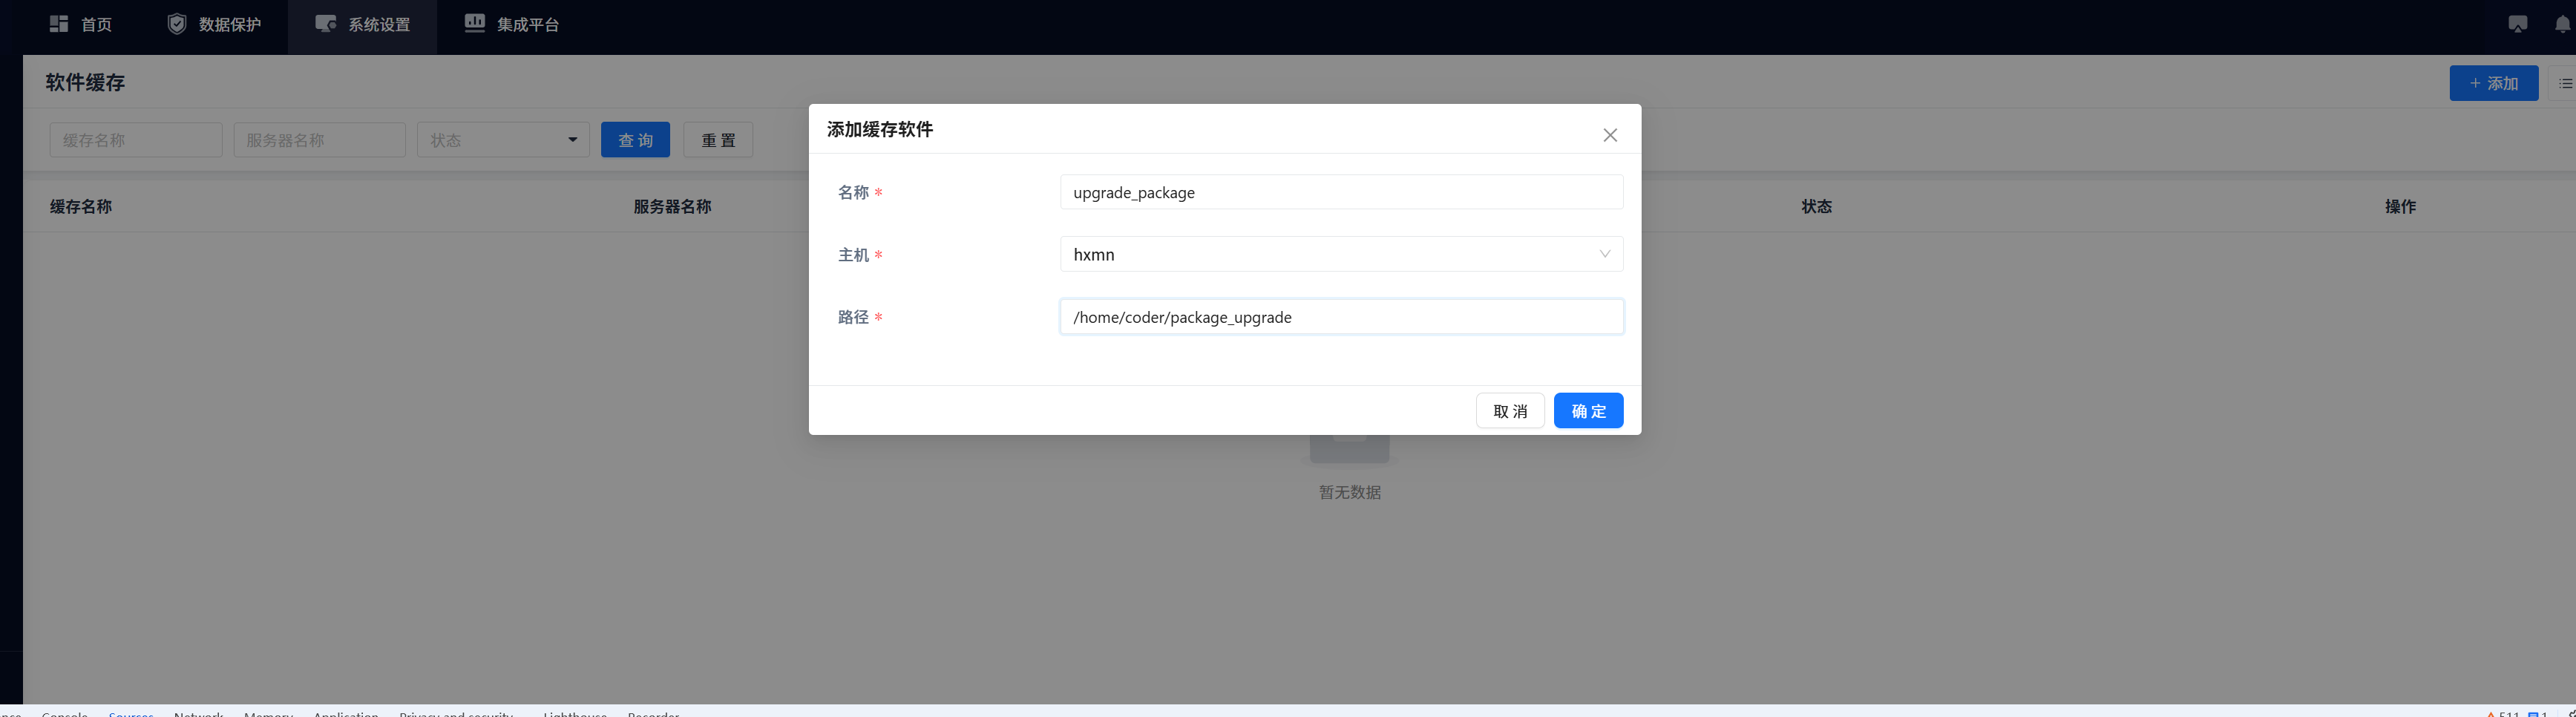
Set the name and path[]
-
Upload the client upgrade package of the system that needs to be upgraded to the path configured on the management node server. If the path does not exist, you need to create it manually.

-
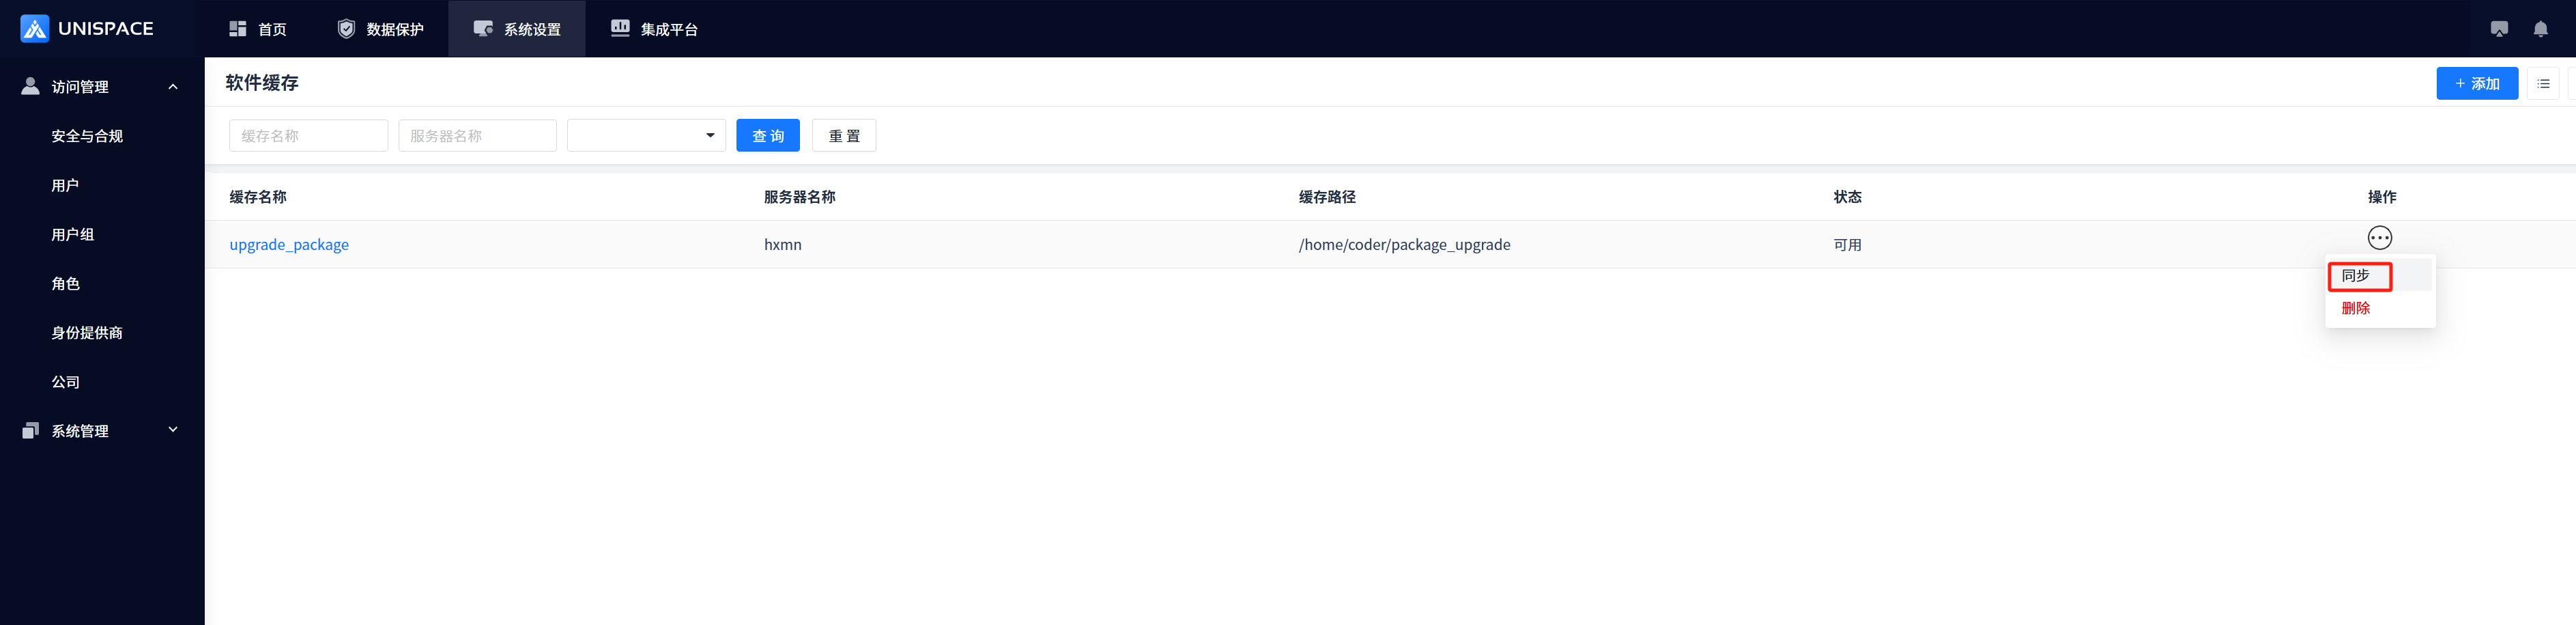
Click the [Sync] button
-
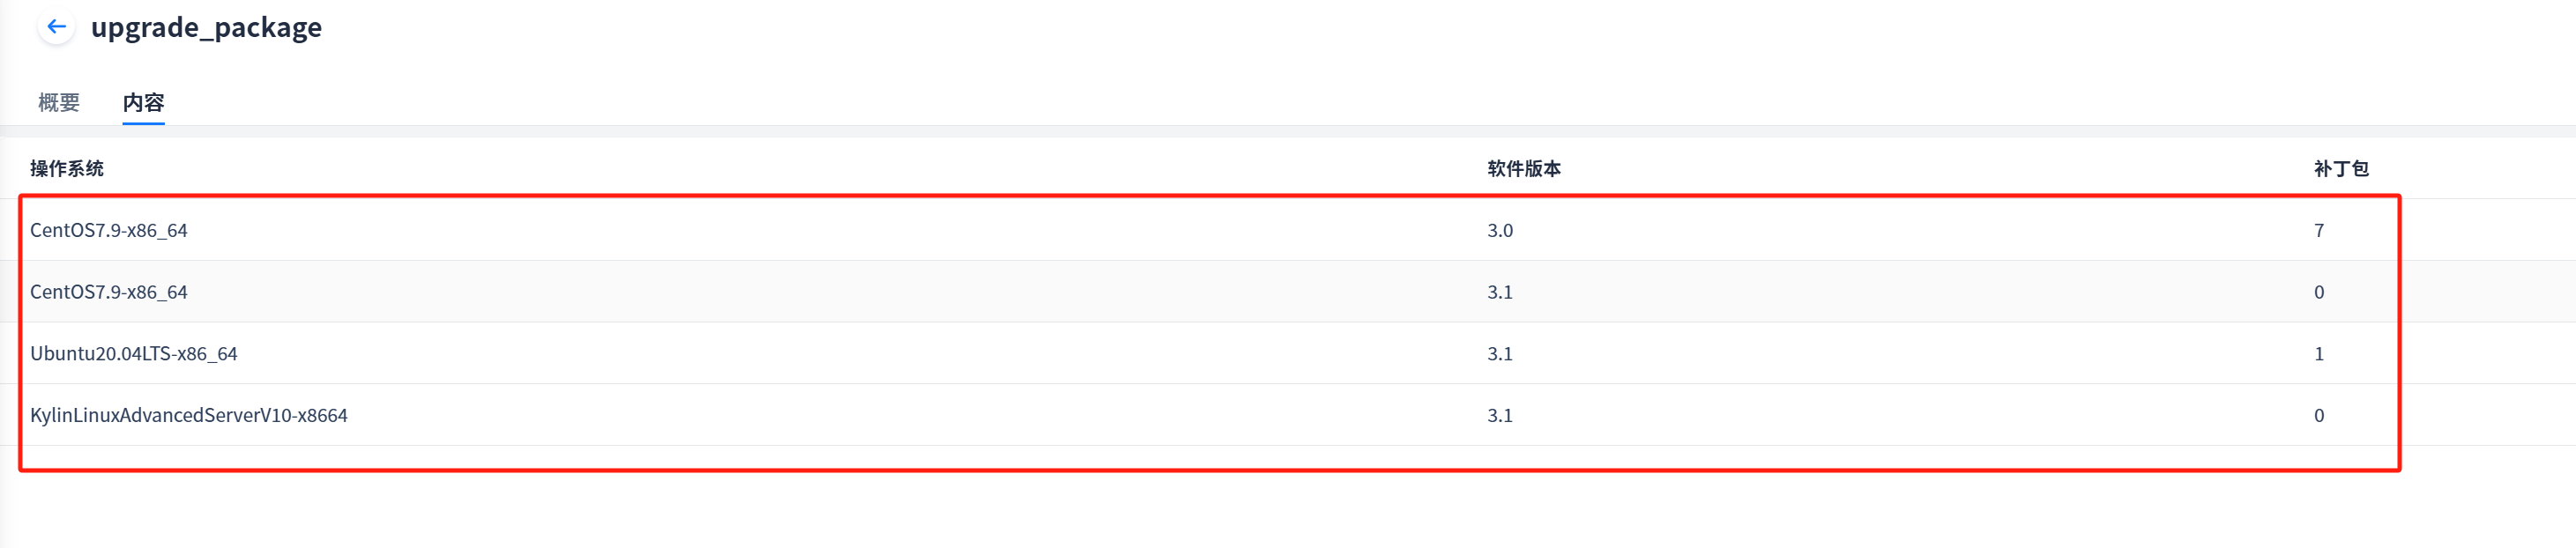
After synchronization succeeds, the upgrade packages are synchronized to the software cache
1.2 default resource group
1.2.1 Upgrade all clients (if there are too many clients, it is recommended to upgrade in batches and follow steps 1.3 to prevent memory overflow)
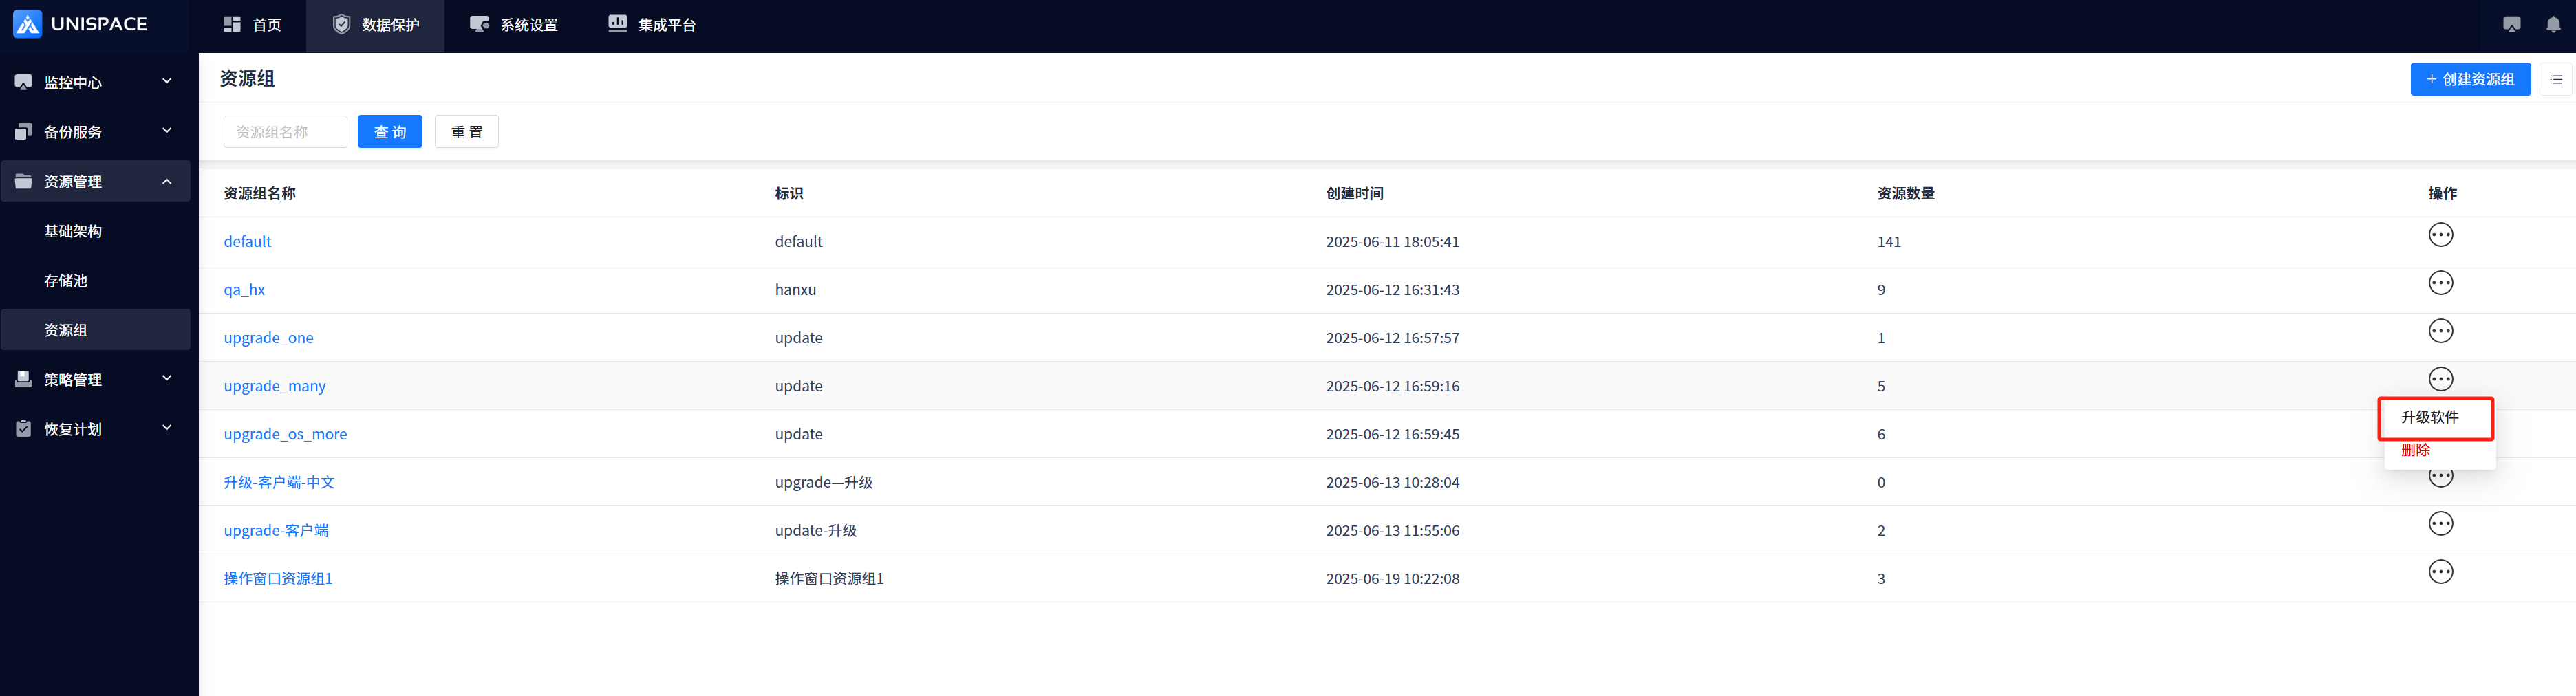
- Click Upgrade Software in the default resource group

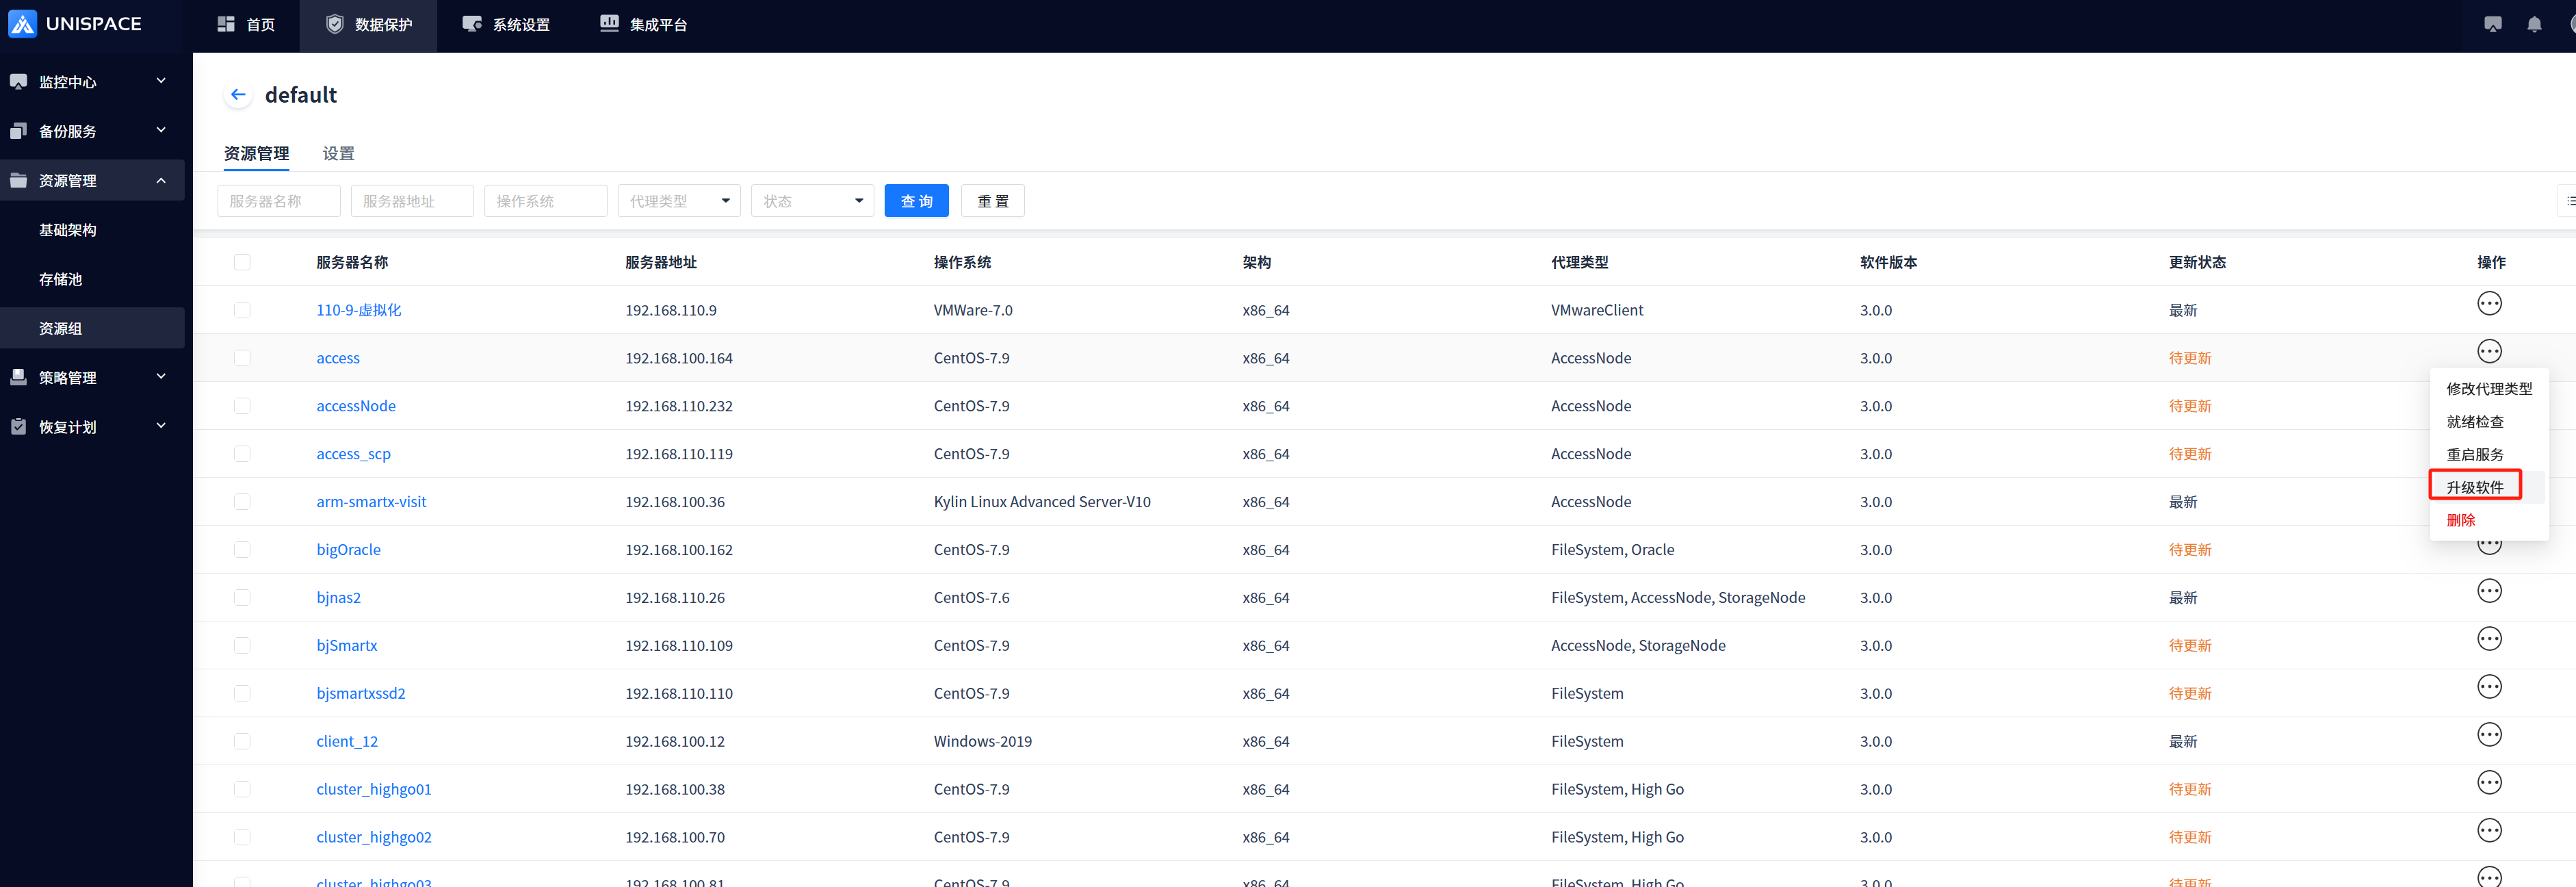
1.2.2 Partial client upgrade (optional client upgrade)
-
Open the default resource group

-
Select the client to be upgraded and click
-
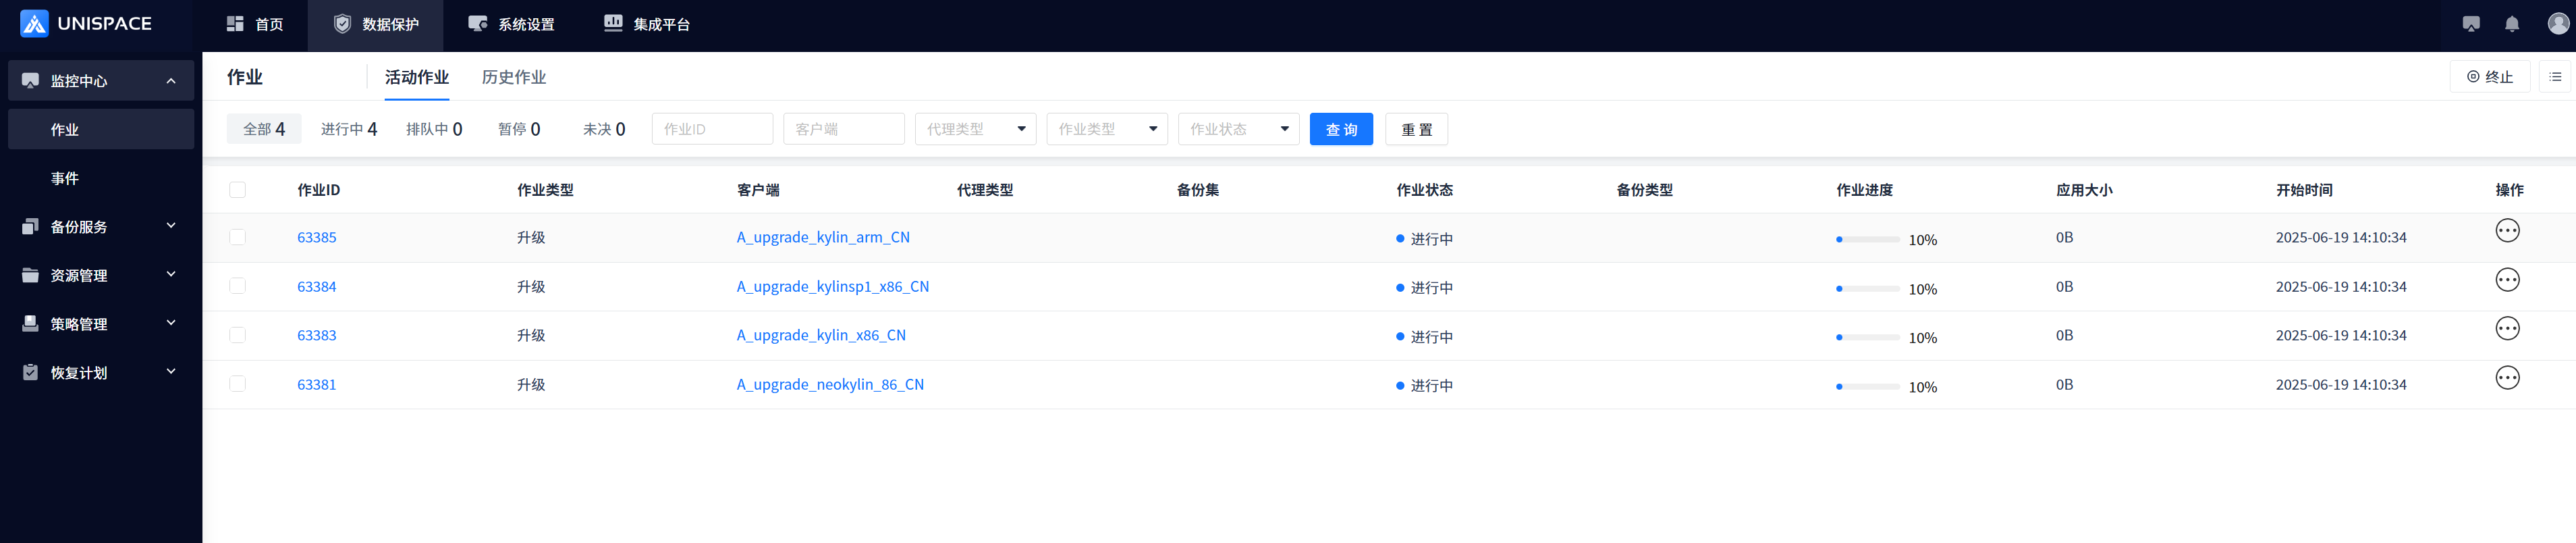
Active job display triggers client upgrade, each client corresponds to a job ID

-
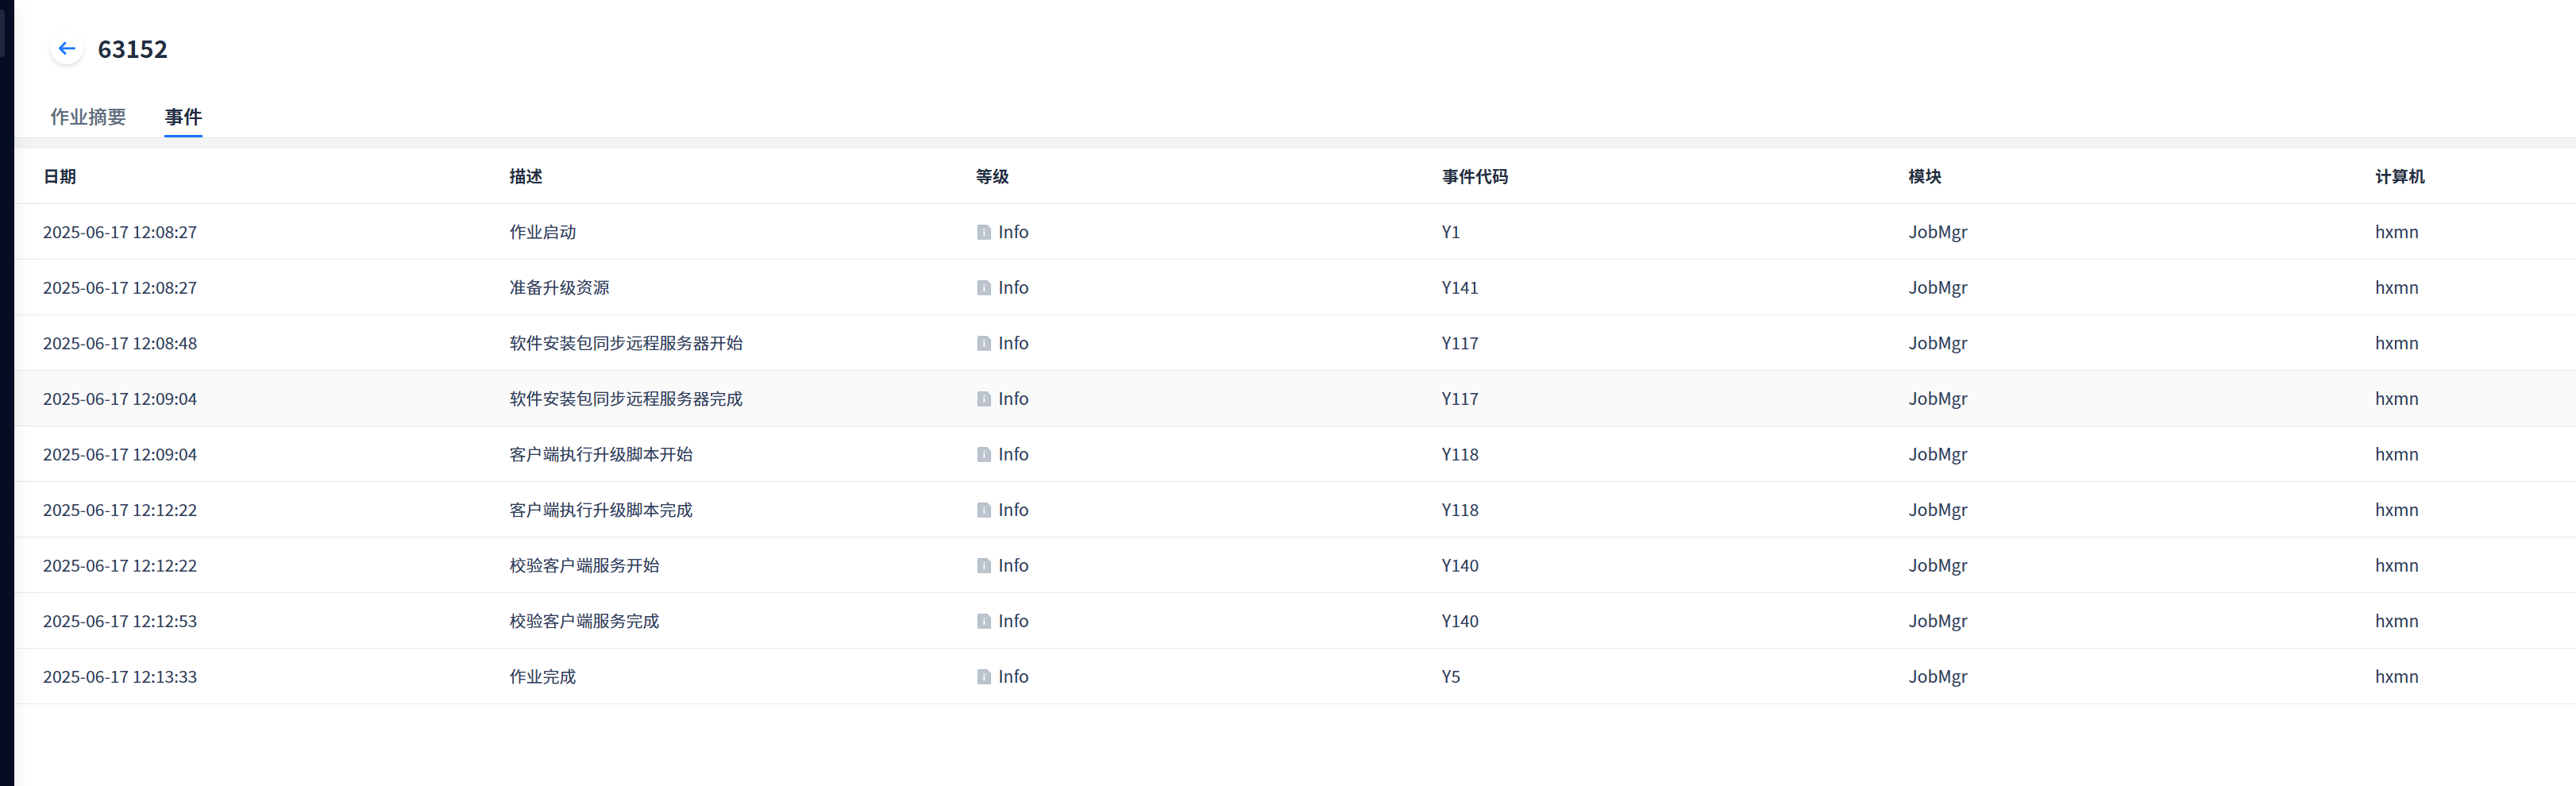
The upgrade is successful and can be viewed through events
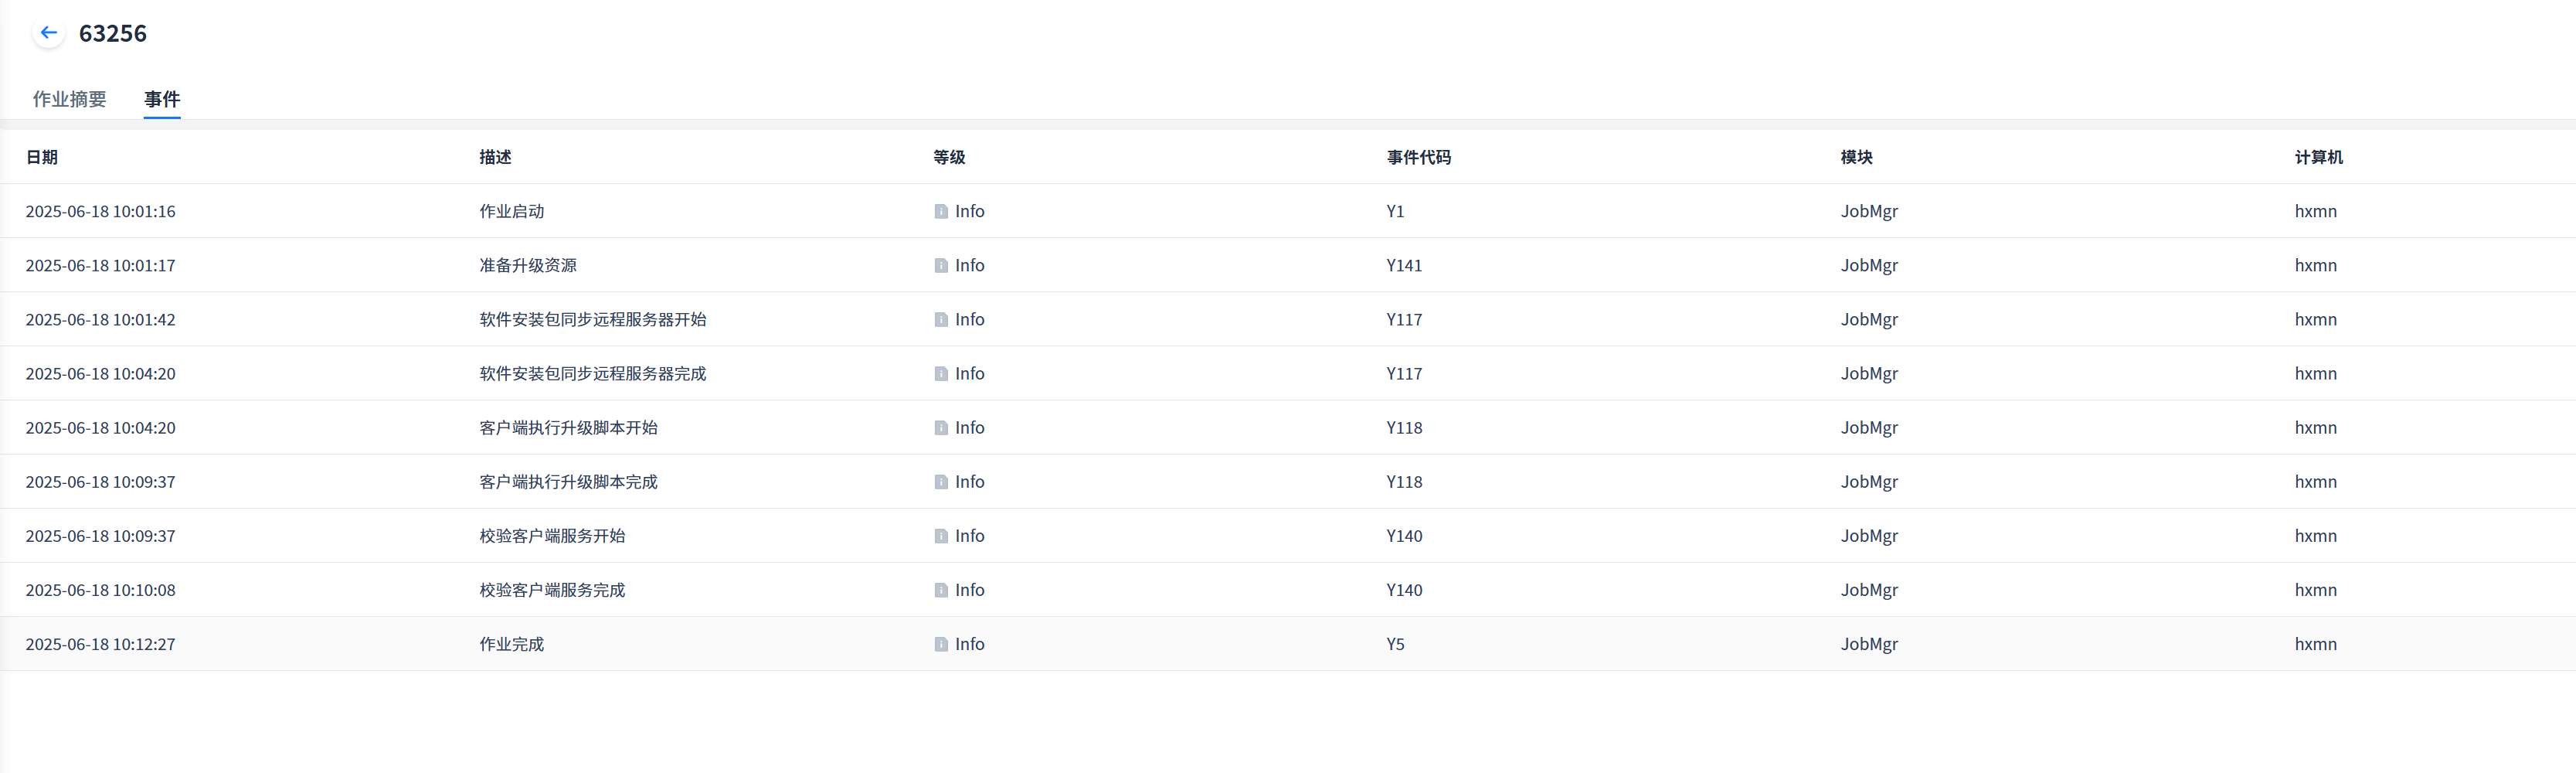
-
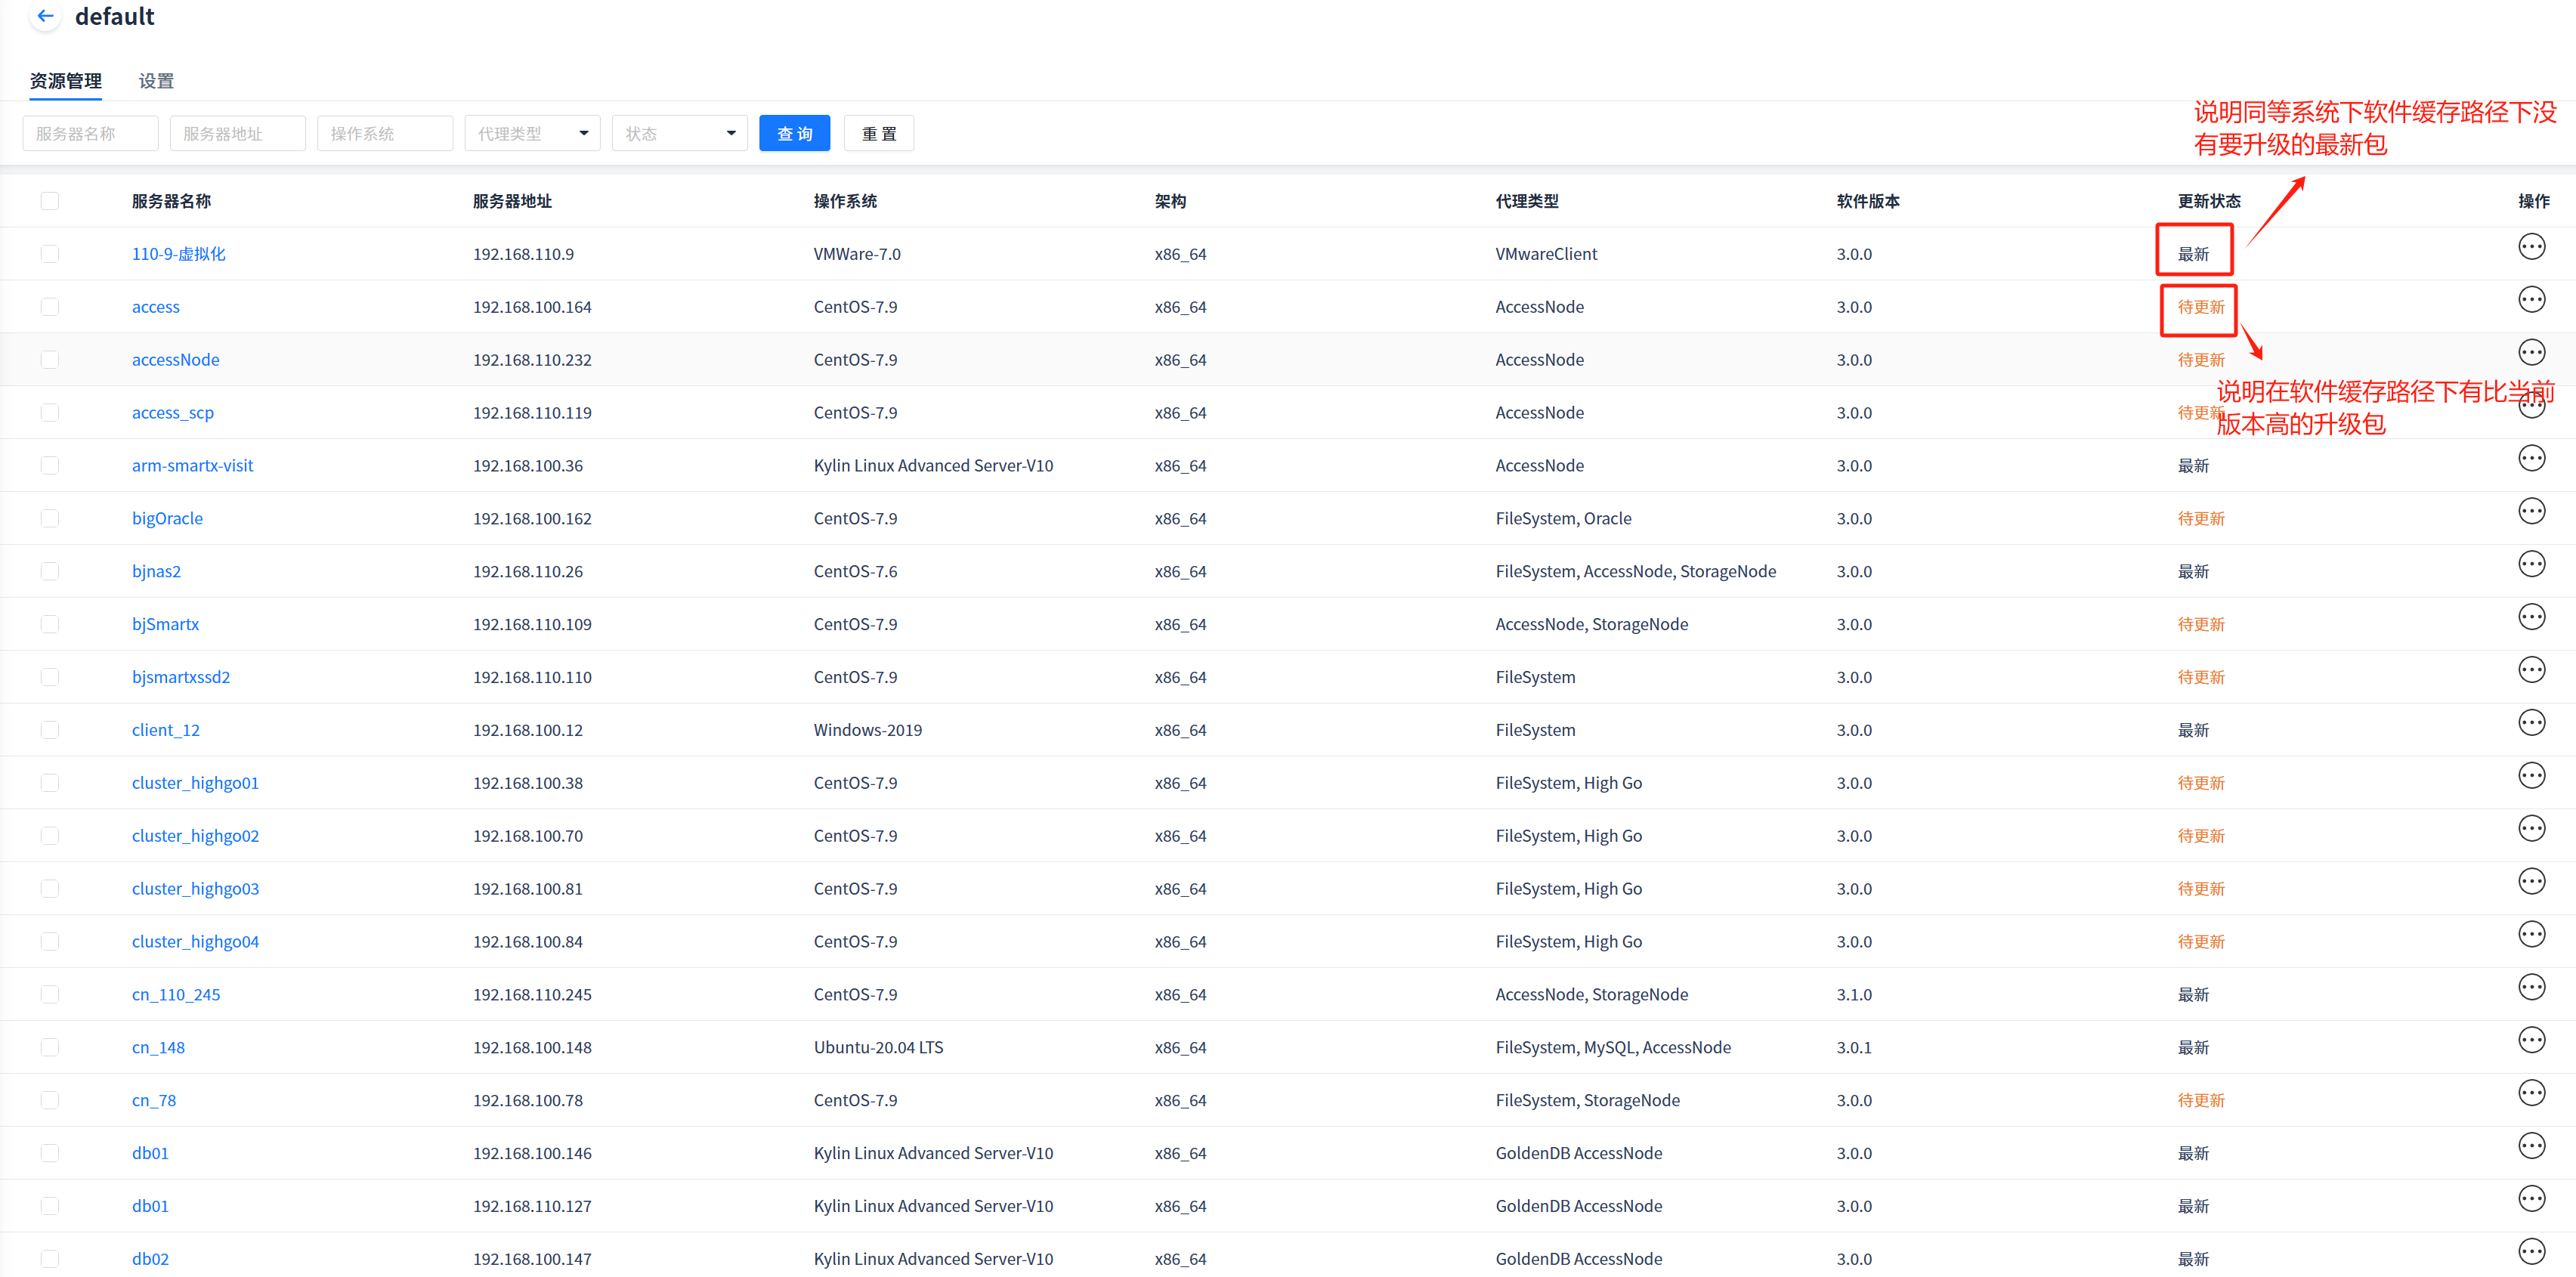
See Status description after upgrading
1.3 Create a new resource group (this step is not needed if 1.2default is upgraded)
1.3.1 Select the newly created resource group to upgrade (new resource group batch upgrade)
-
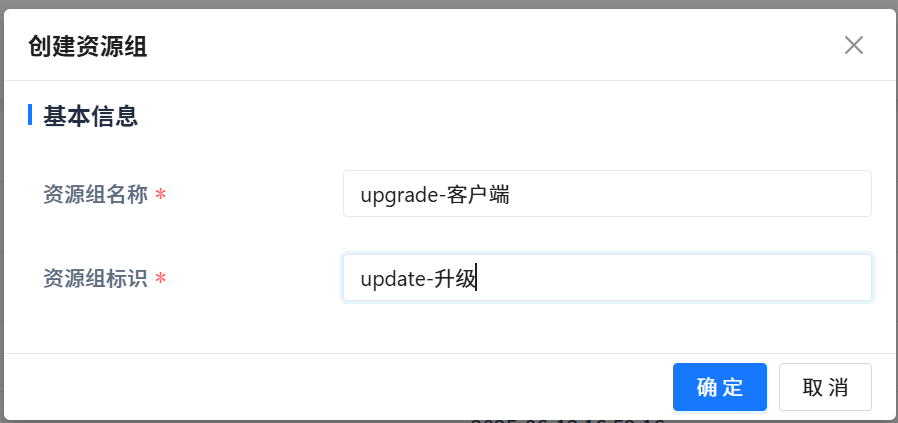
Click directly on [Create Resource Group]

-
Fill out the form and click [OK]
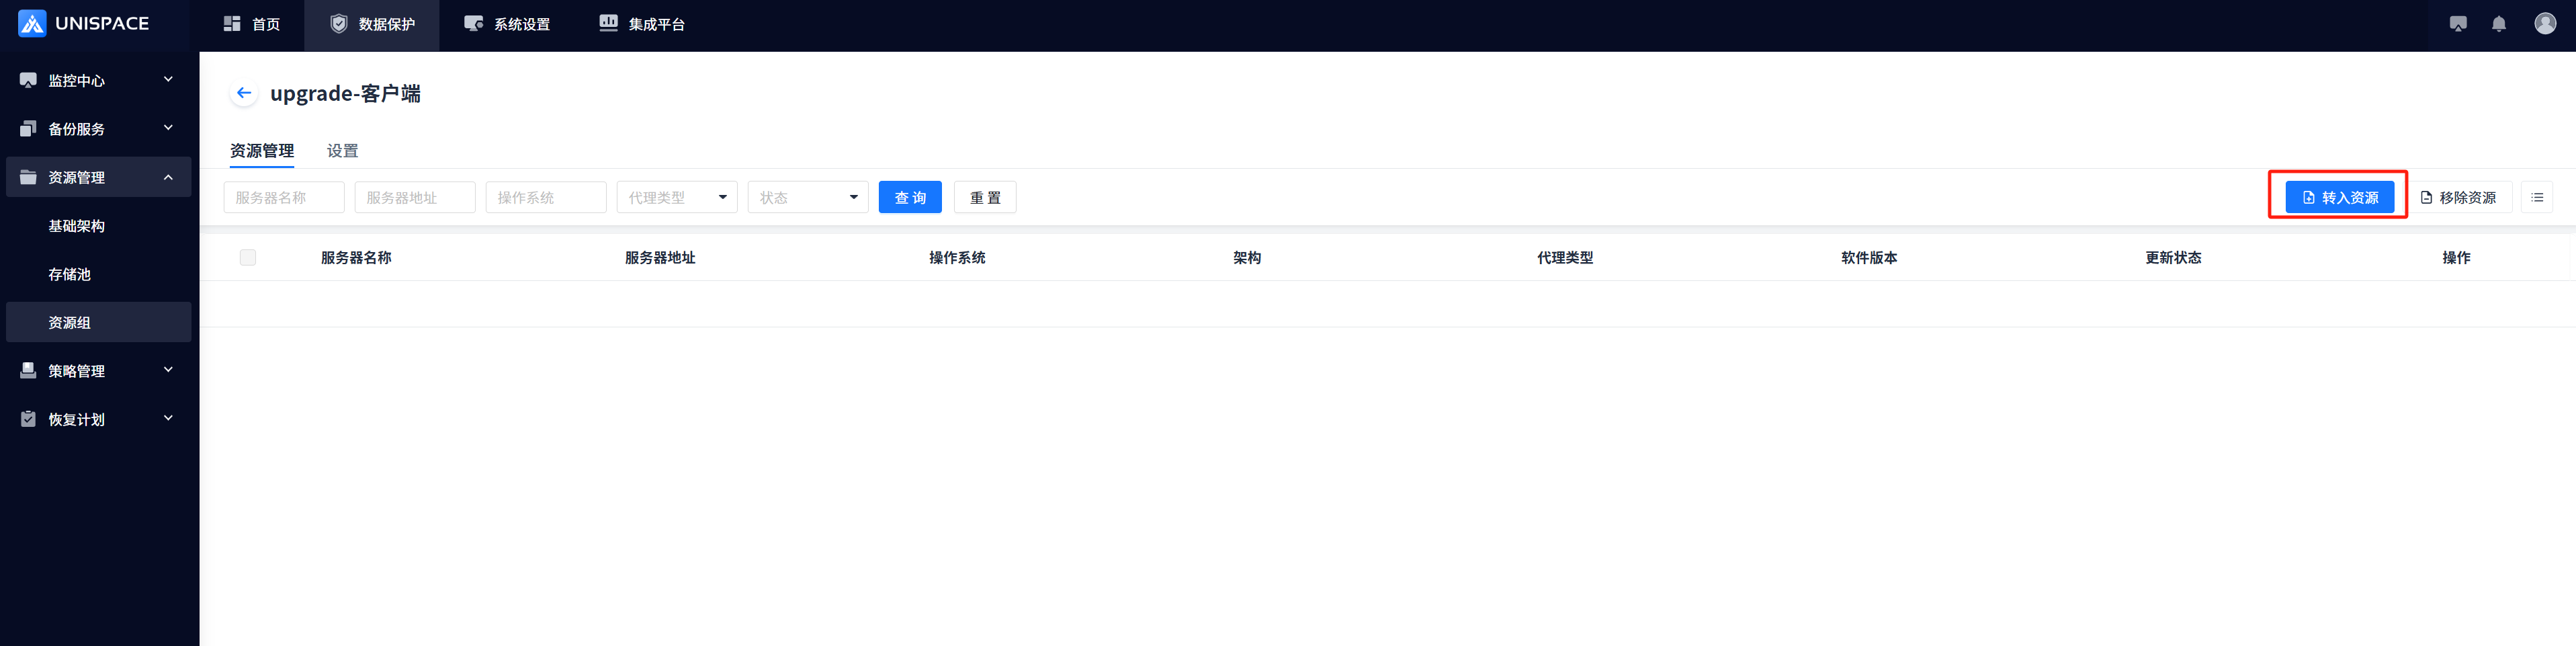
-
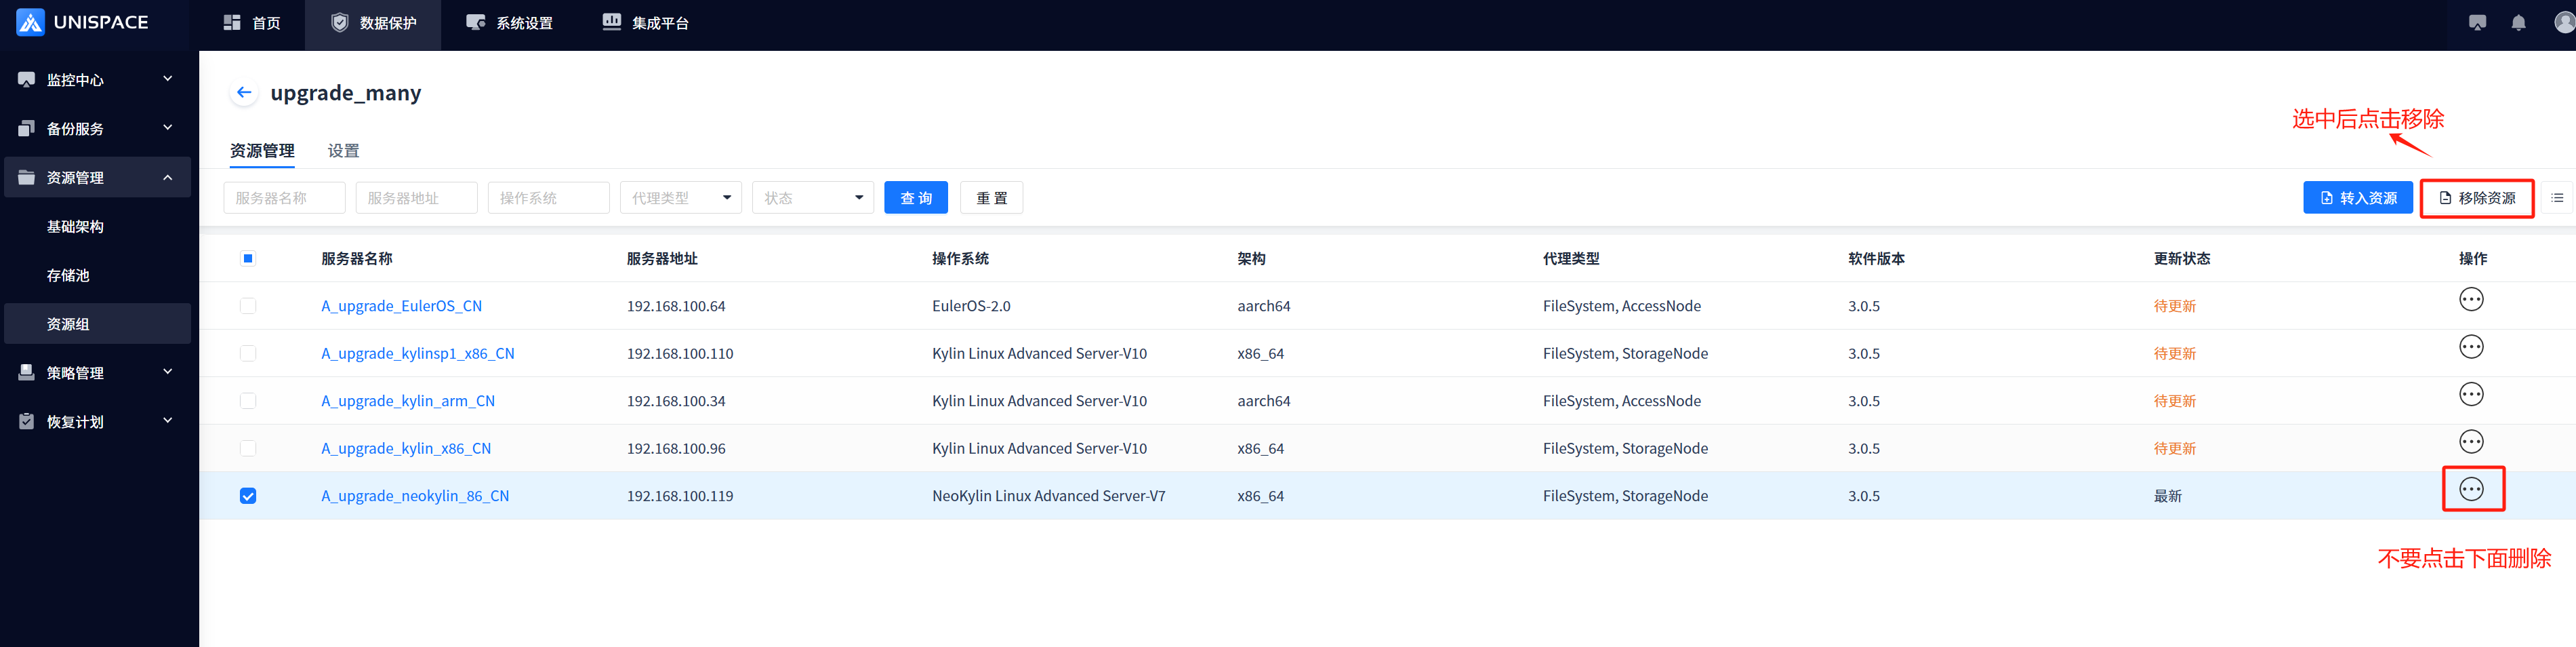
Enter the resource group and click [Transfer Resources] to add the client to be upgraded.
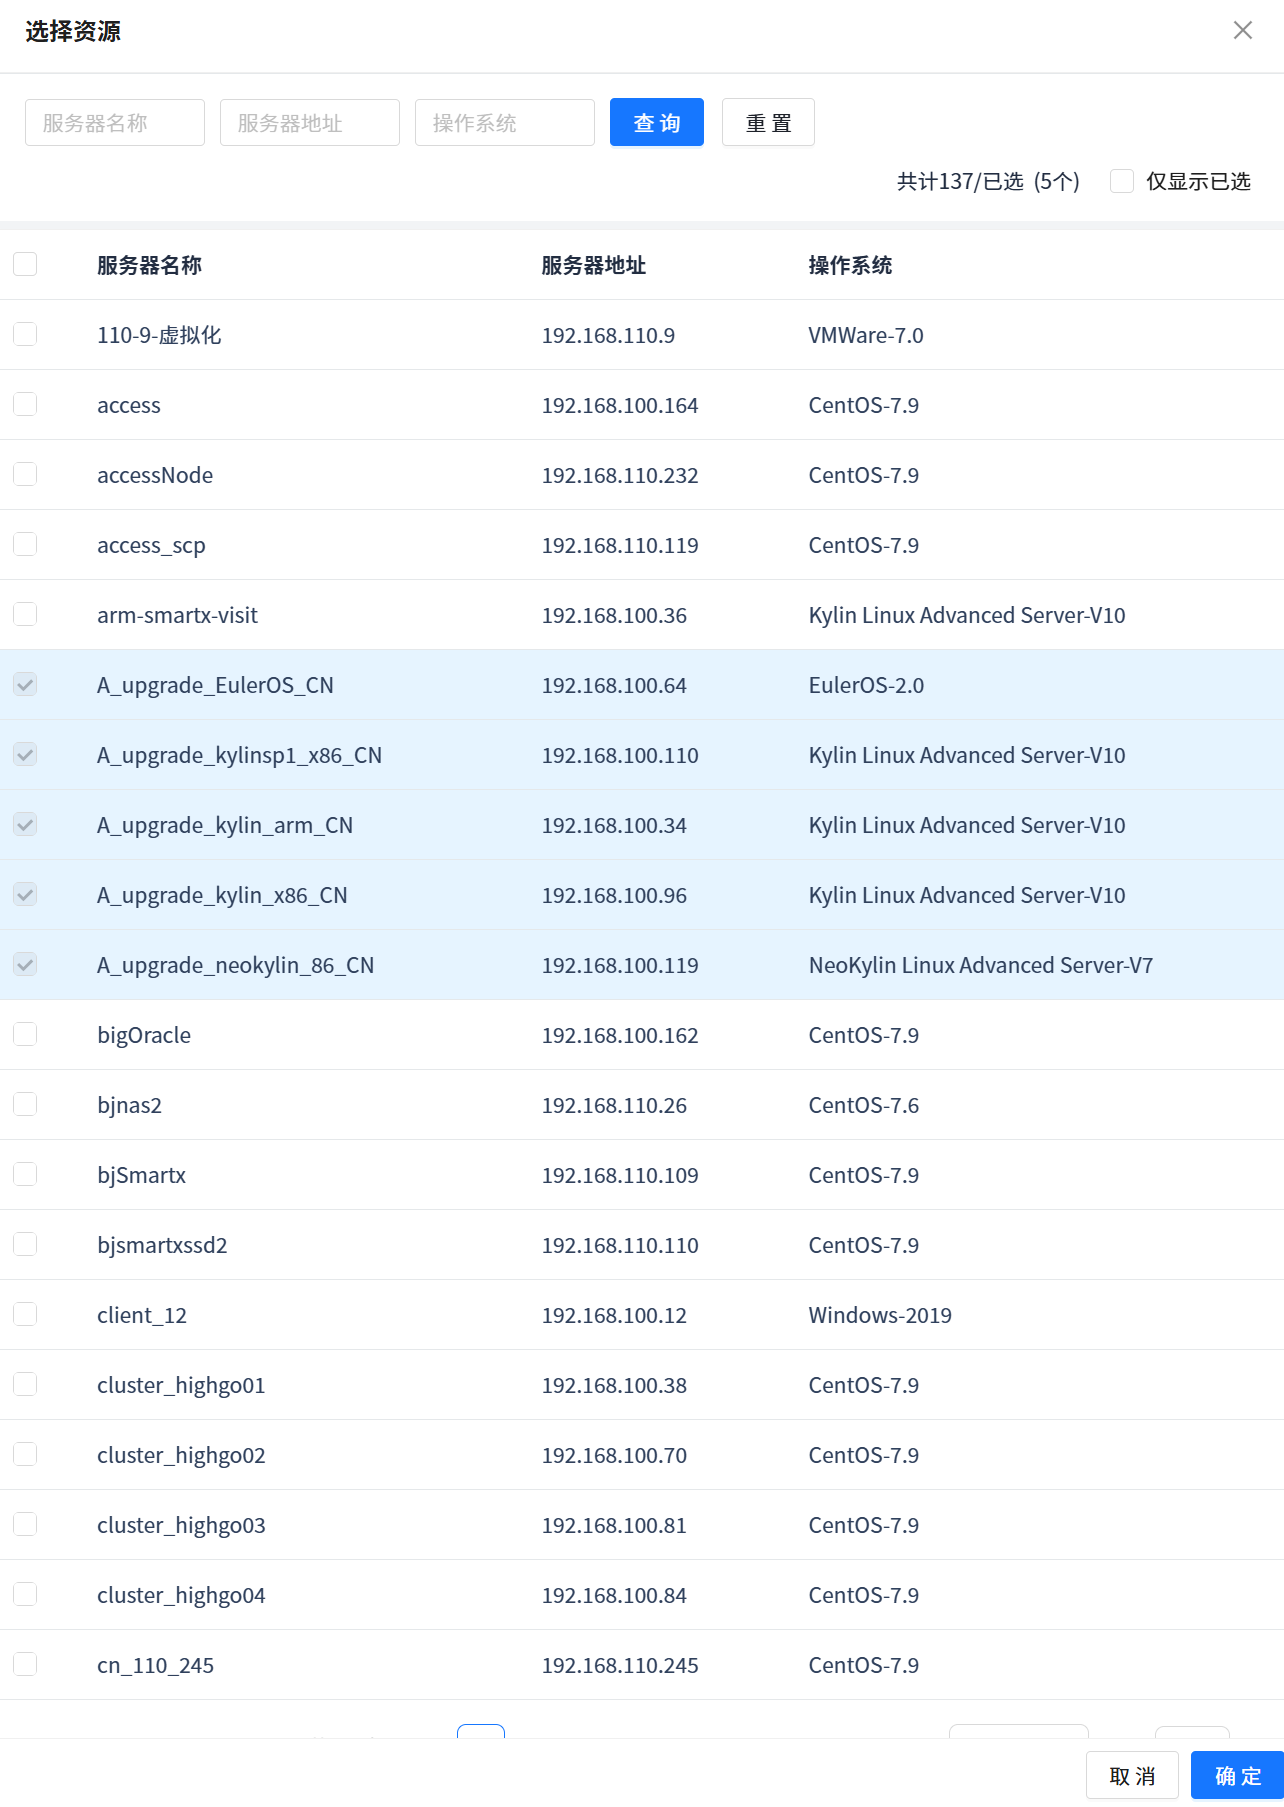
-
Select the client to be added and click [OK]
-
Add successfully
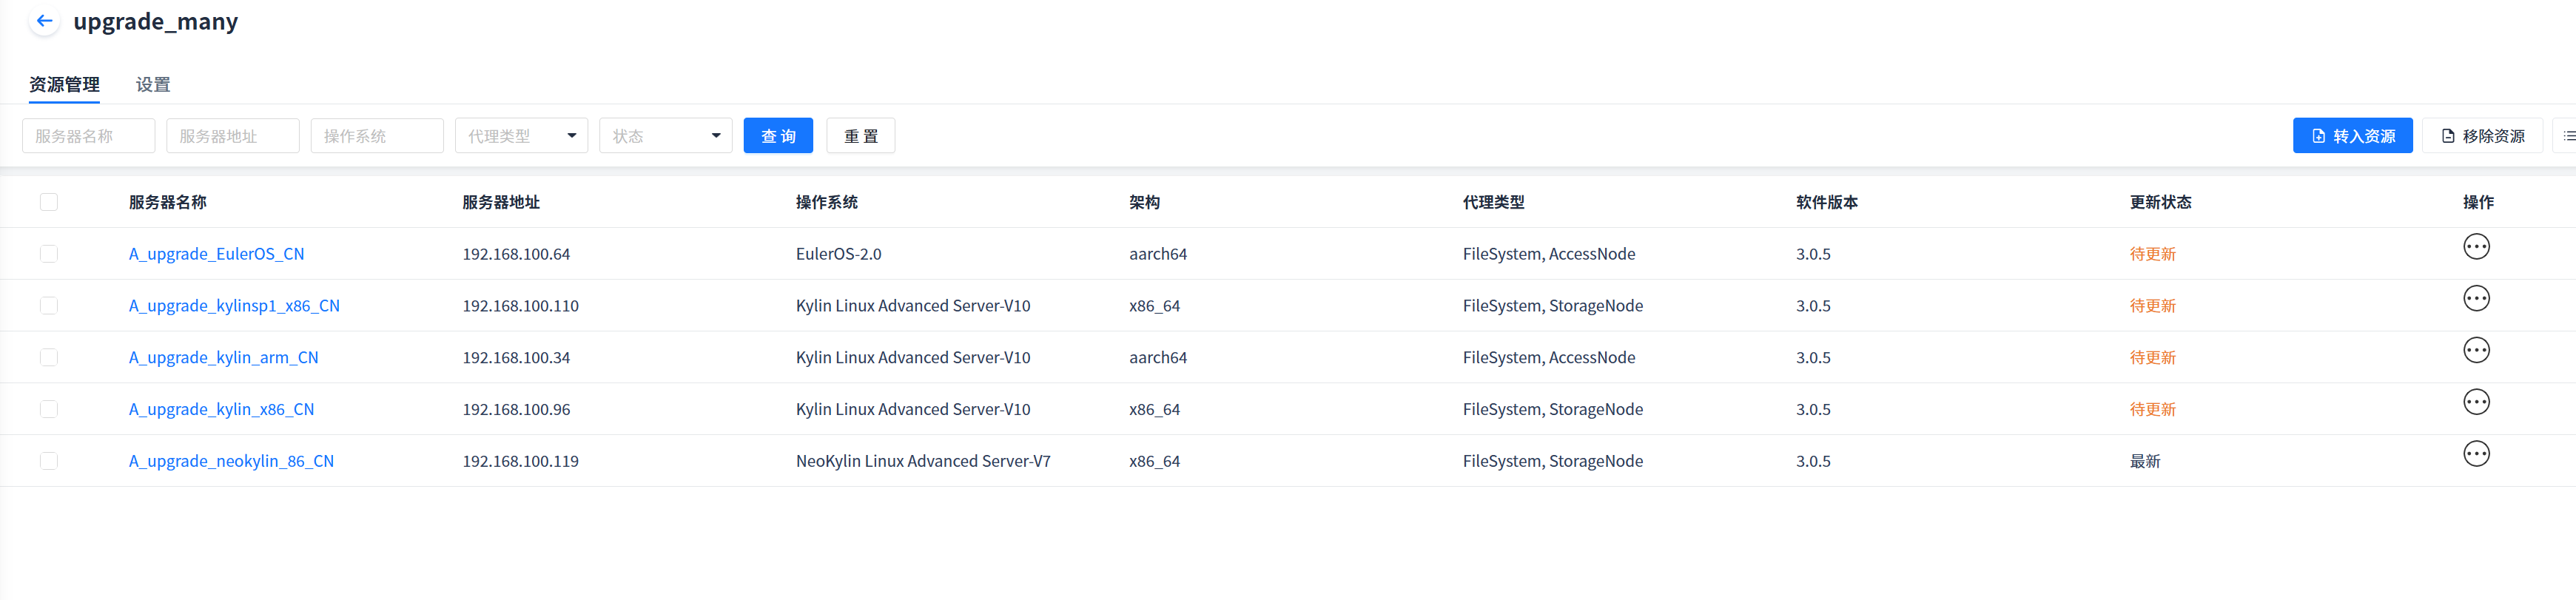
-
Note: Clients who do not want to upgrade can remove resources, do not click Delete
-
Batch upgrade
-
Each client has one job number
-
Upgrade success

-
Successfully upgraded events are viewable
-
If a client that has already been updated resides in a resource group, a secondary upgrade event notification will be triggered
