Agent--GoldenDB
1.1 Create GoldenDB Cluster
Prerequisites
- Created a storage repository.
- Created a service plan.
- All GoldenDB nodes have been registered in the system.
- Network requirements:
| No. | Source | Target | Port | Description |
|---|---|---|---|---|
| 1 | UniSpace management node | Storage node | 9000 | Bidirectional |
| 2 | UniSpace management node | All GoldenDB nodes | 9000 | Bidirectional |
| 3 | Storage node | All GoldenDB nodes | 9000 | Bidirectional |
| 4 | GoldenDB management node | All GoldenDB nodes | 9000 | Bidirectional |
| 5 | GoldenDB tenant data node | Same tenant data nodes | 9000 | Bidirectional (nodes within the same tenant must communicate; nodes from different tenants do not need to) |
Note:
If the business IP and management IP of the GoldenDB node are separated, port 9000 needs to be open to both IPs.
Point 5 is the requirement that data nodes within a tenant are interoperable。 Data nodes from different tenants do not need to be interoperable
Steps
Step 1: Click Database - Virtual Cluster - Add button.
Step 2: Select the GoldenDB icon and click Next.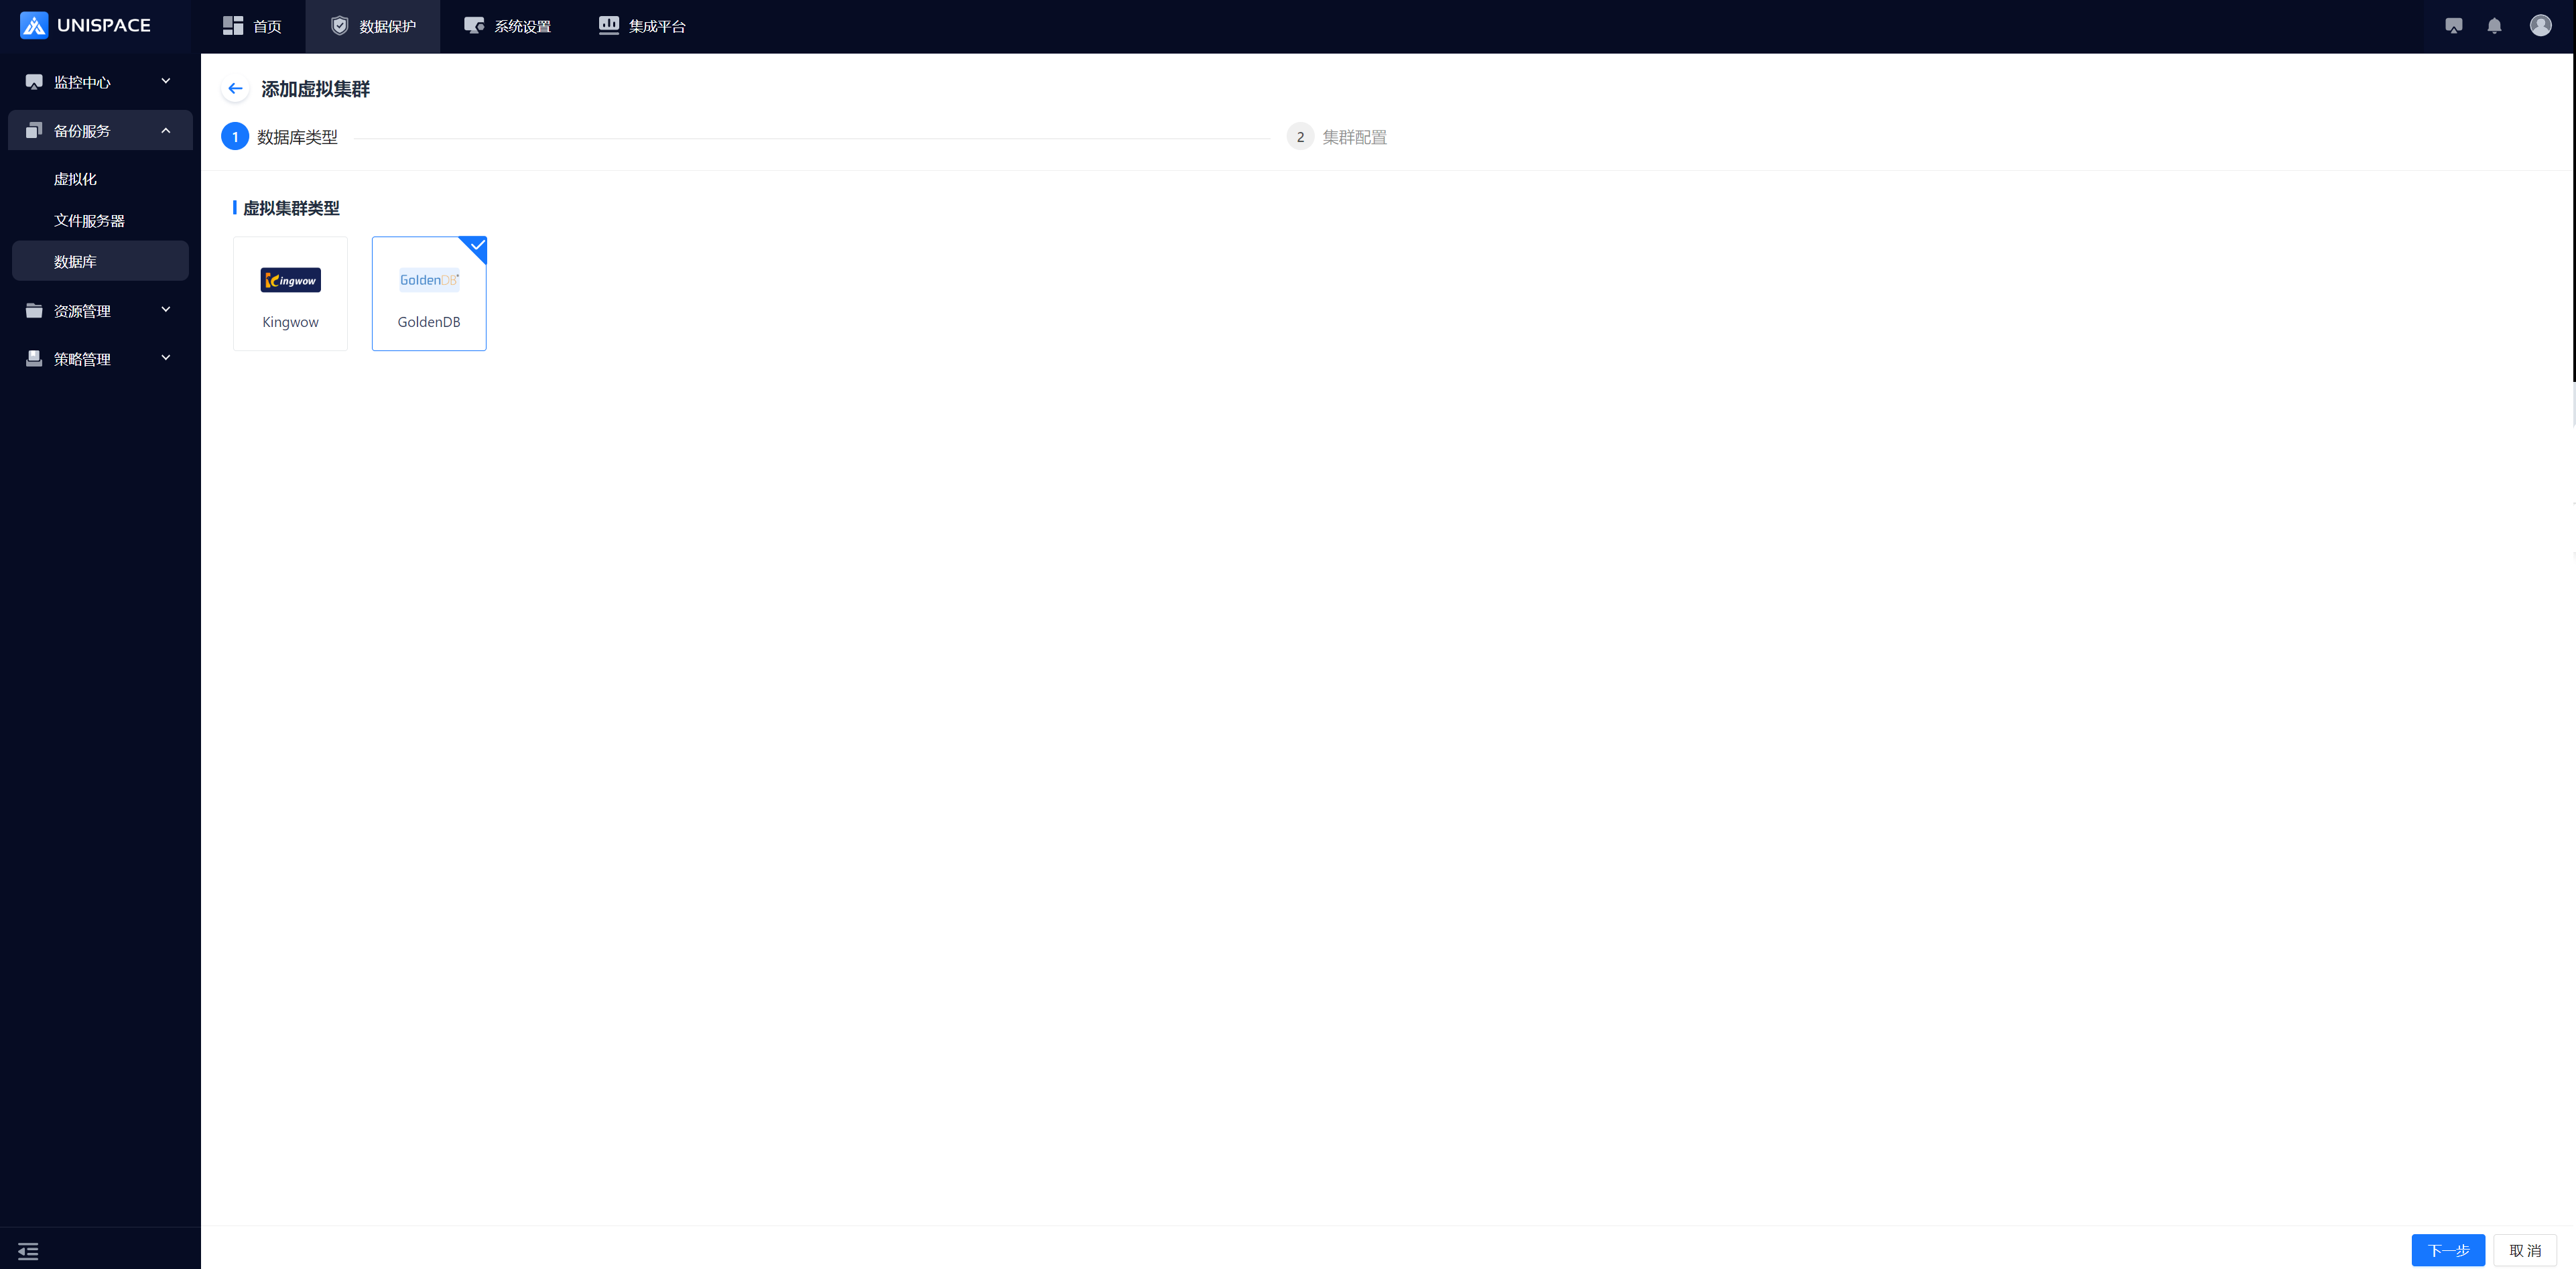
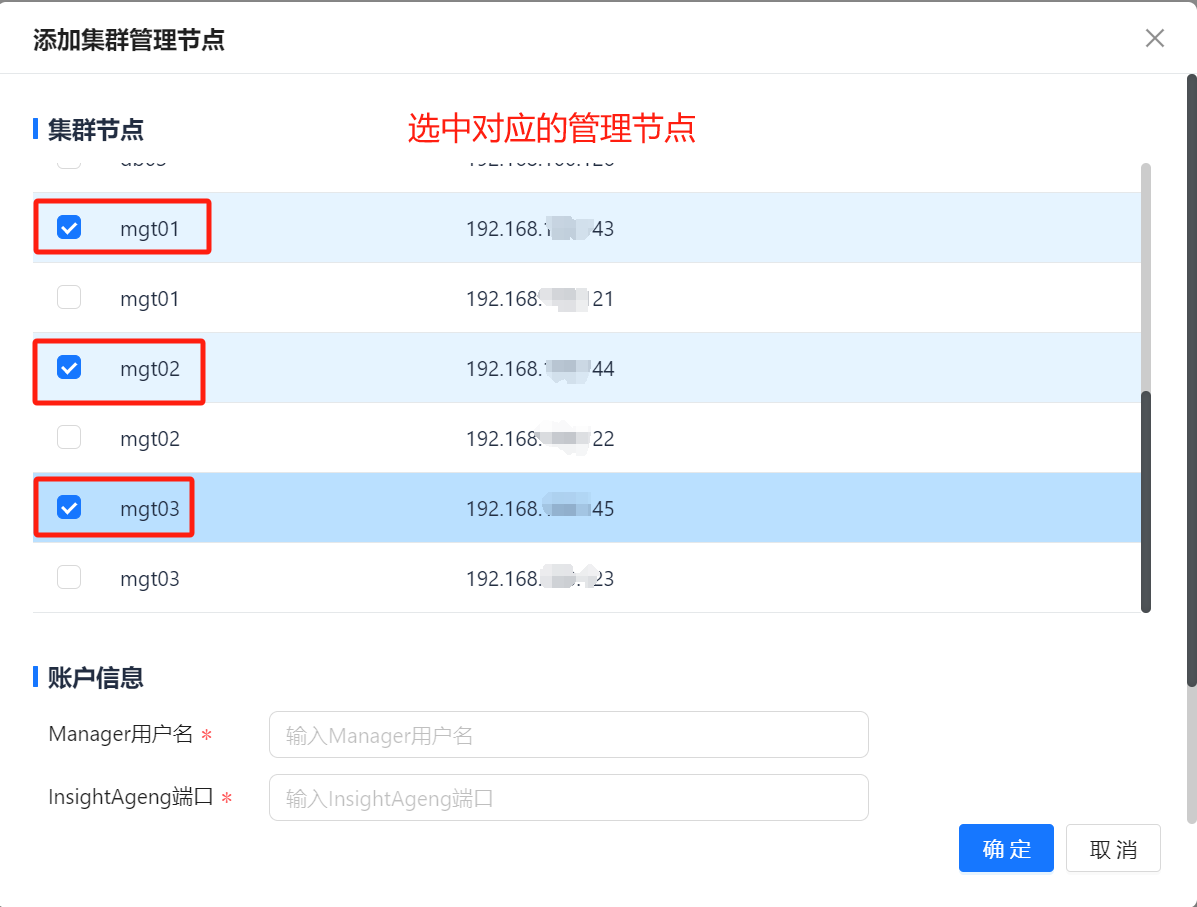
Step 3: Fill in the Add Virtual Cluster form. 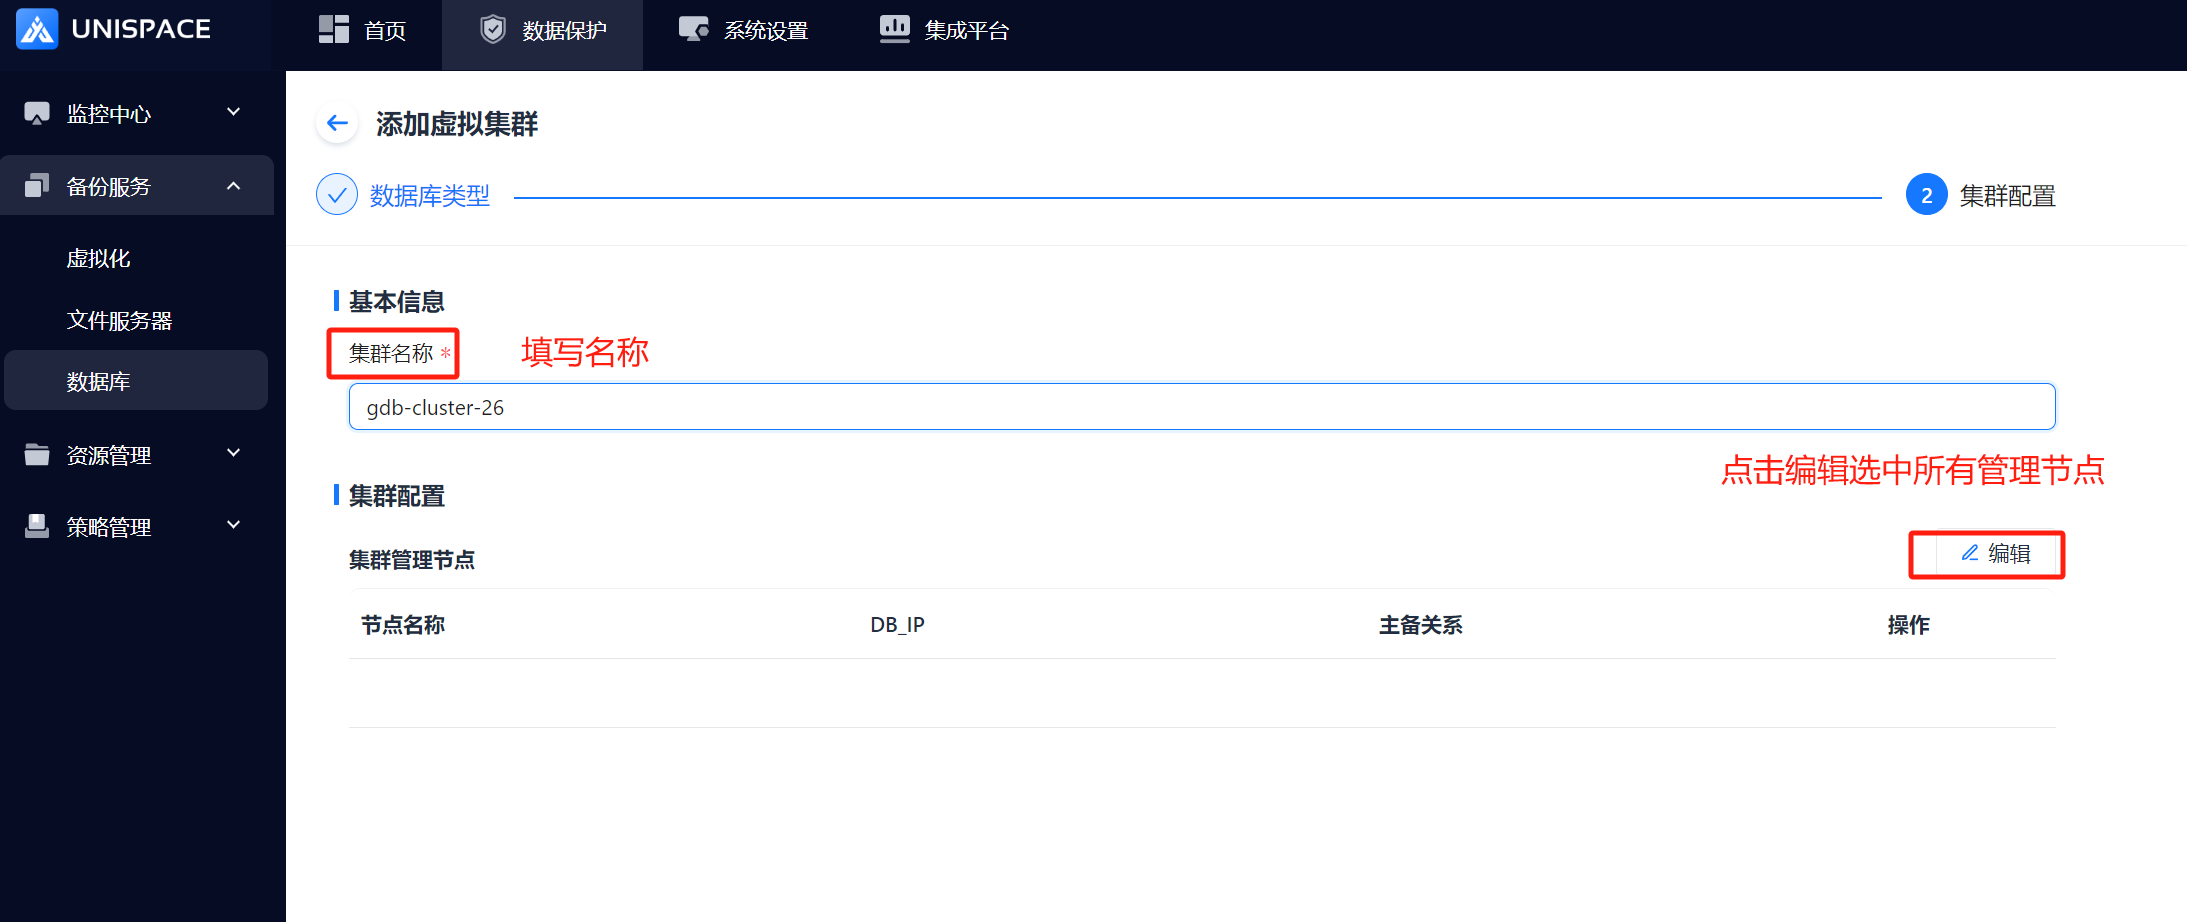
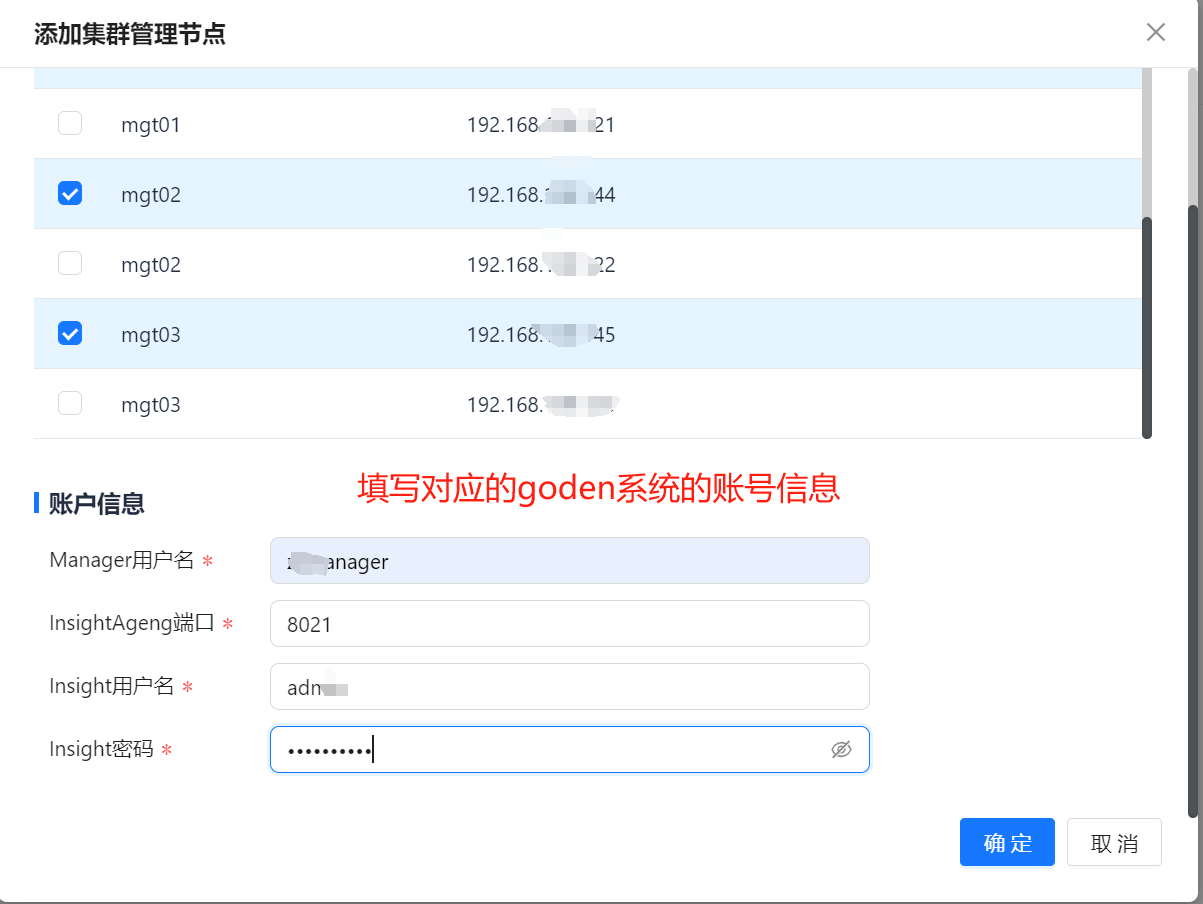 If the GoldenDB system account information is correct, a success message will appear.
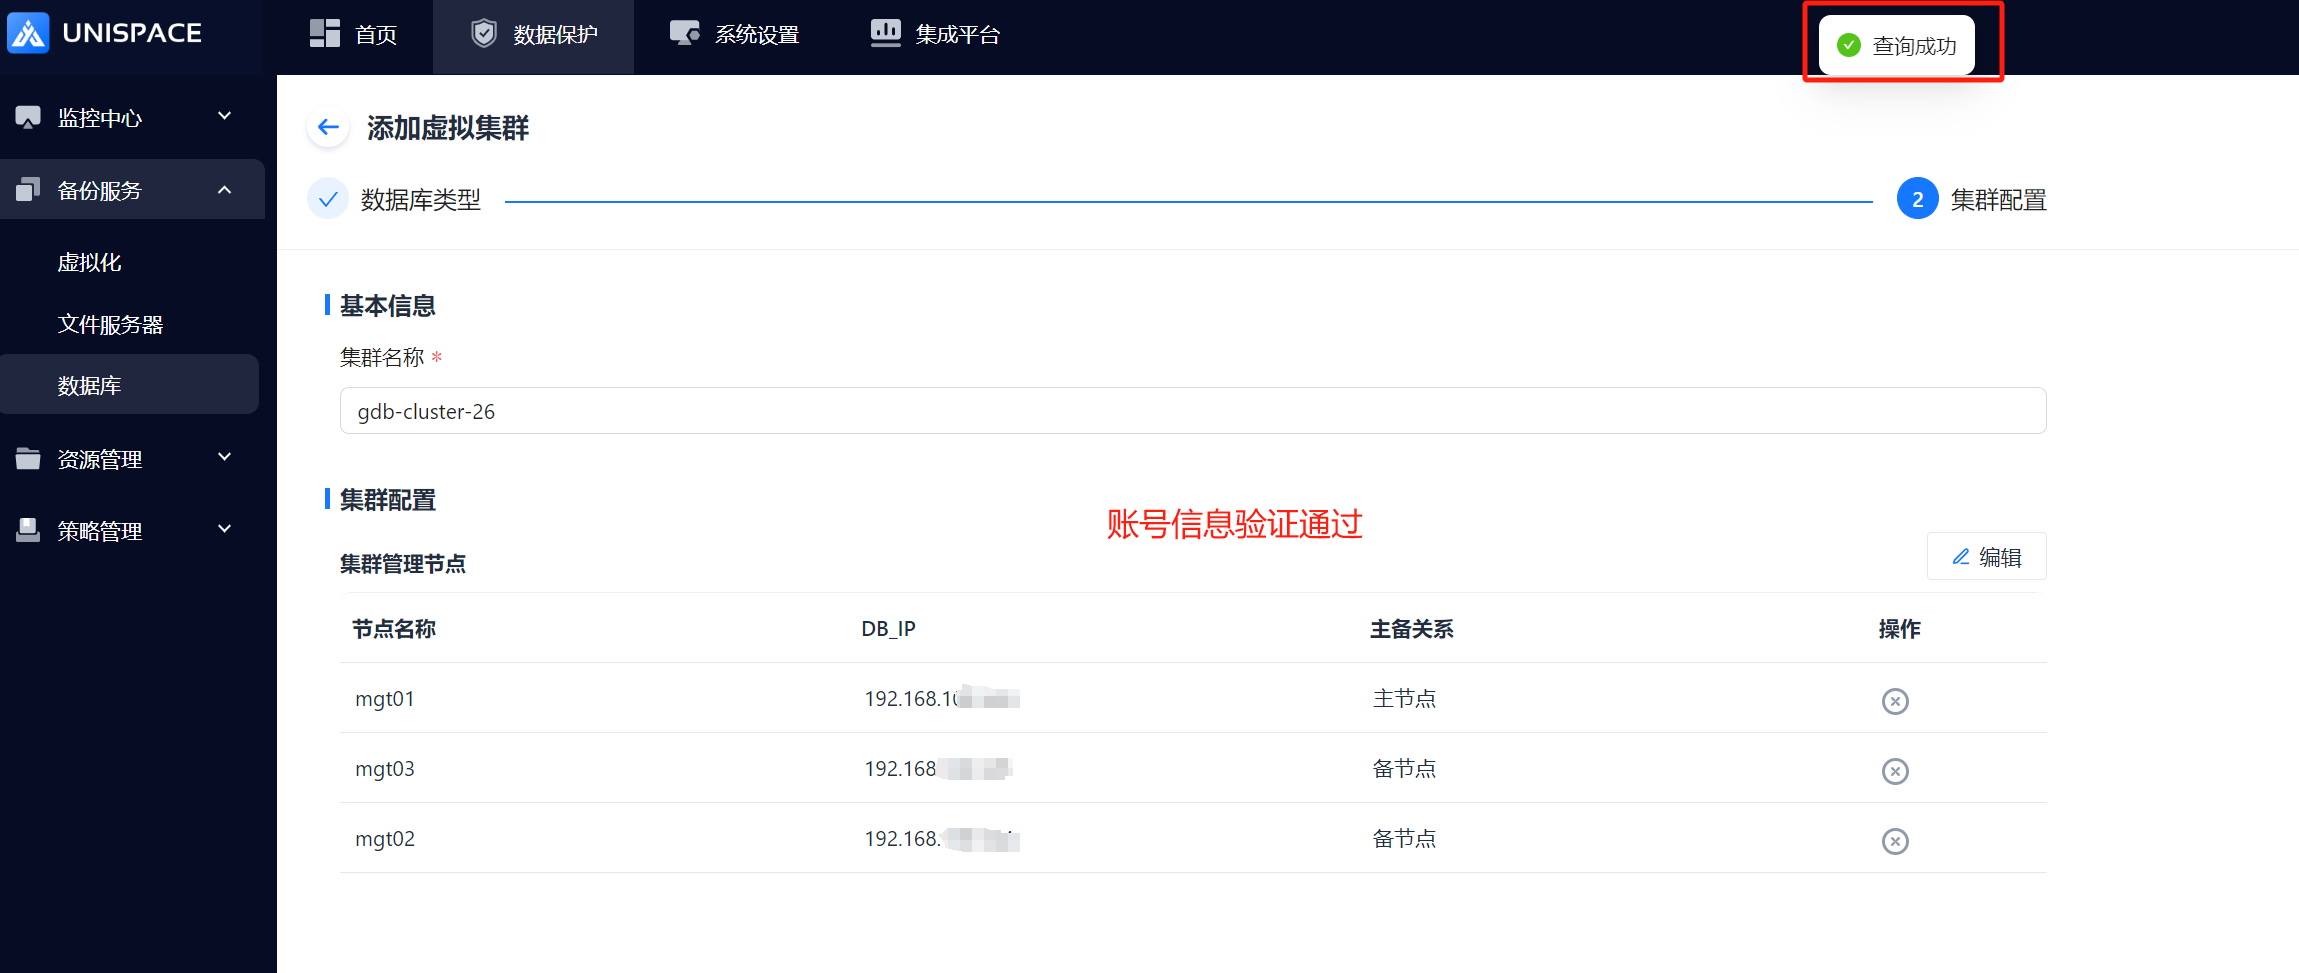
Step 4: Click OK to complete the cluster creation.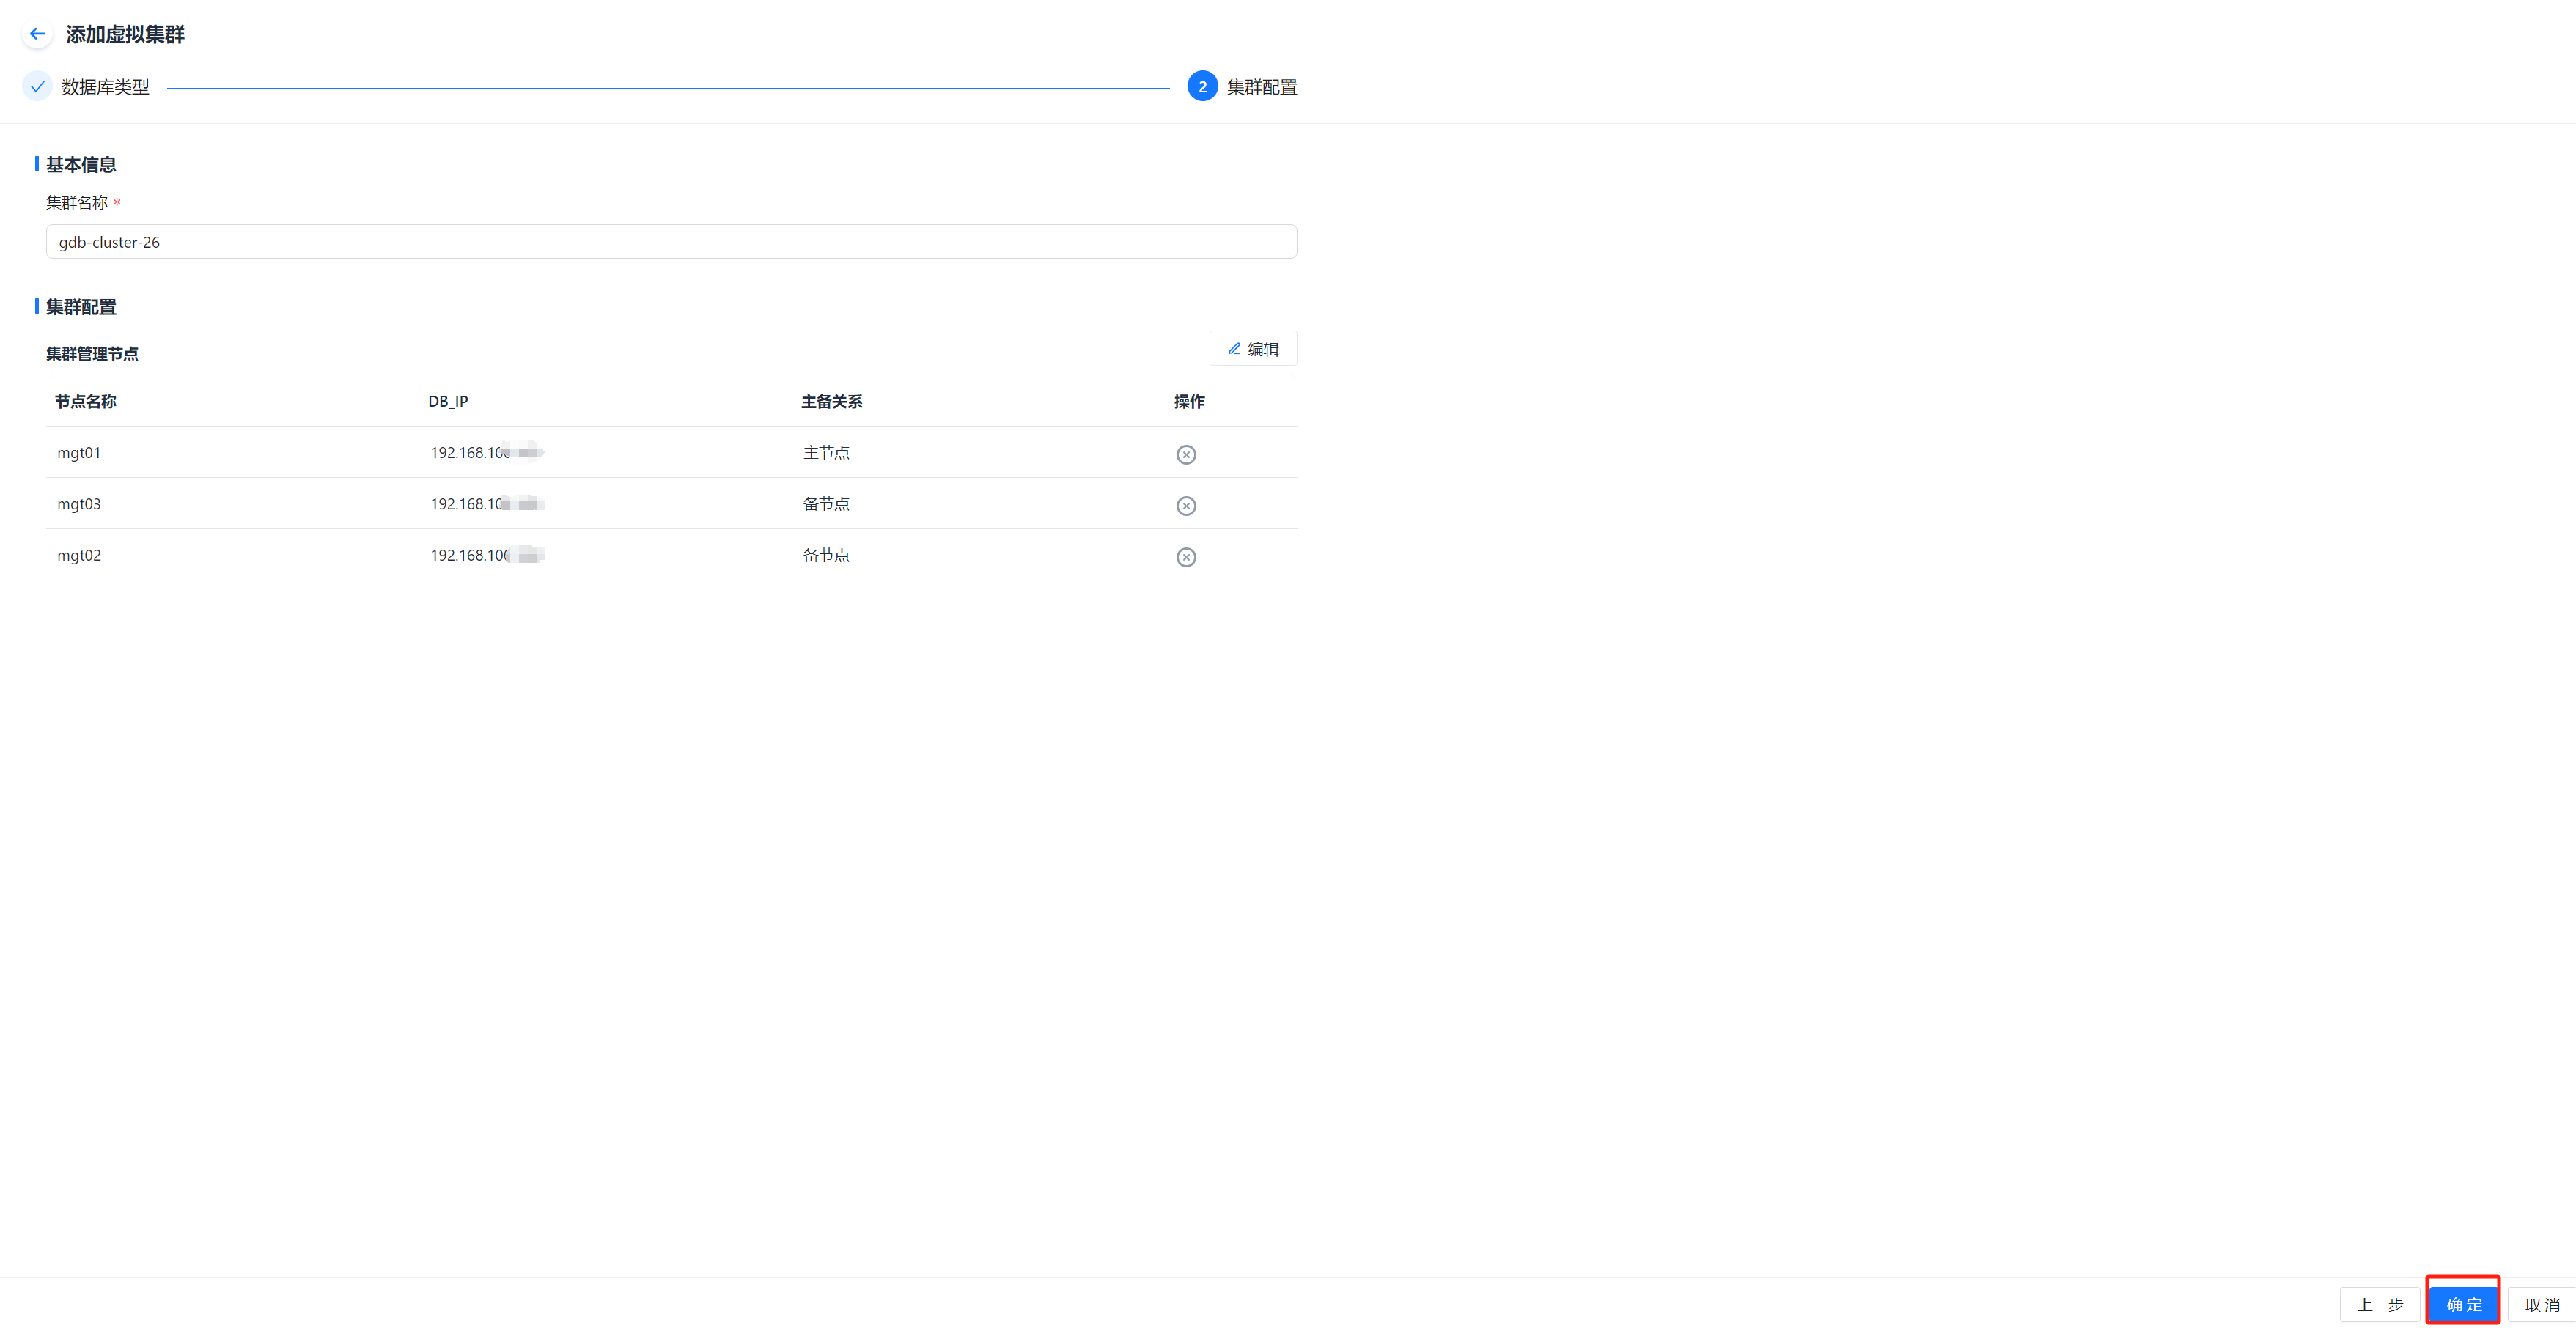

1.2 Create GoldenDB Instance
Prerequisites
- The GoldenDB cluster has been added.
Steps
Step 1: Click Database - Virtual Cluster - Cluster Name, then click the Add button in the top right of Instance.

Step 2: Fill in the Add Instance form and click Next.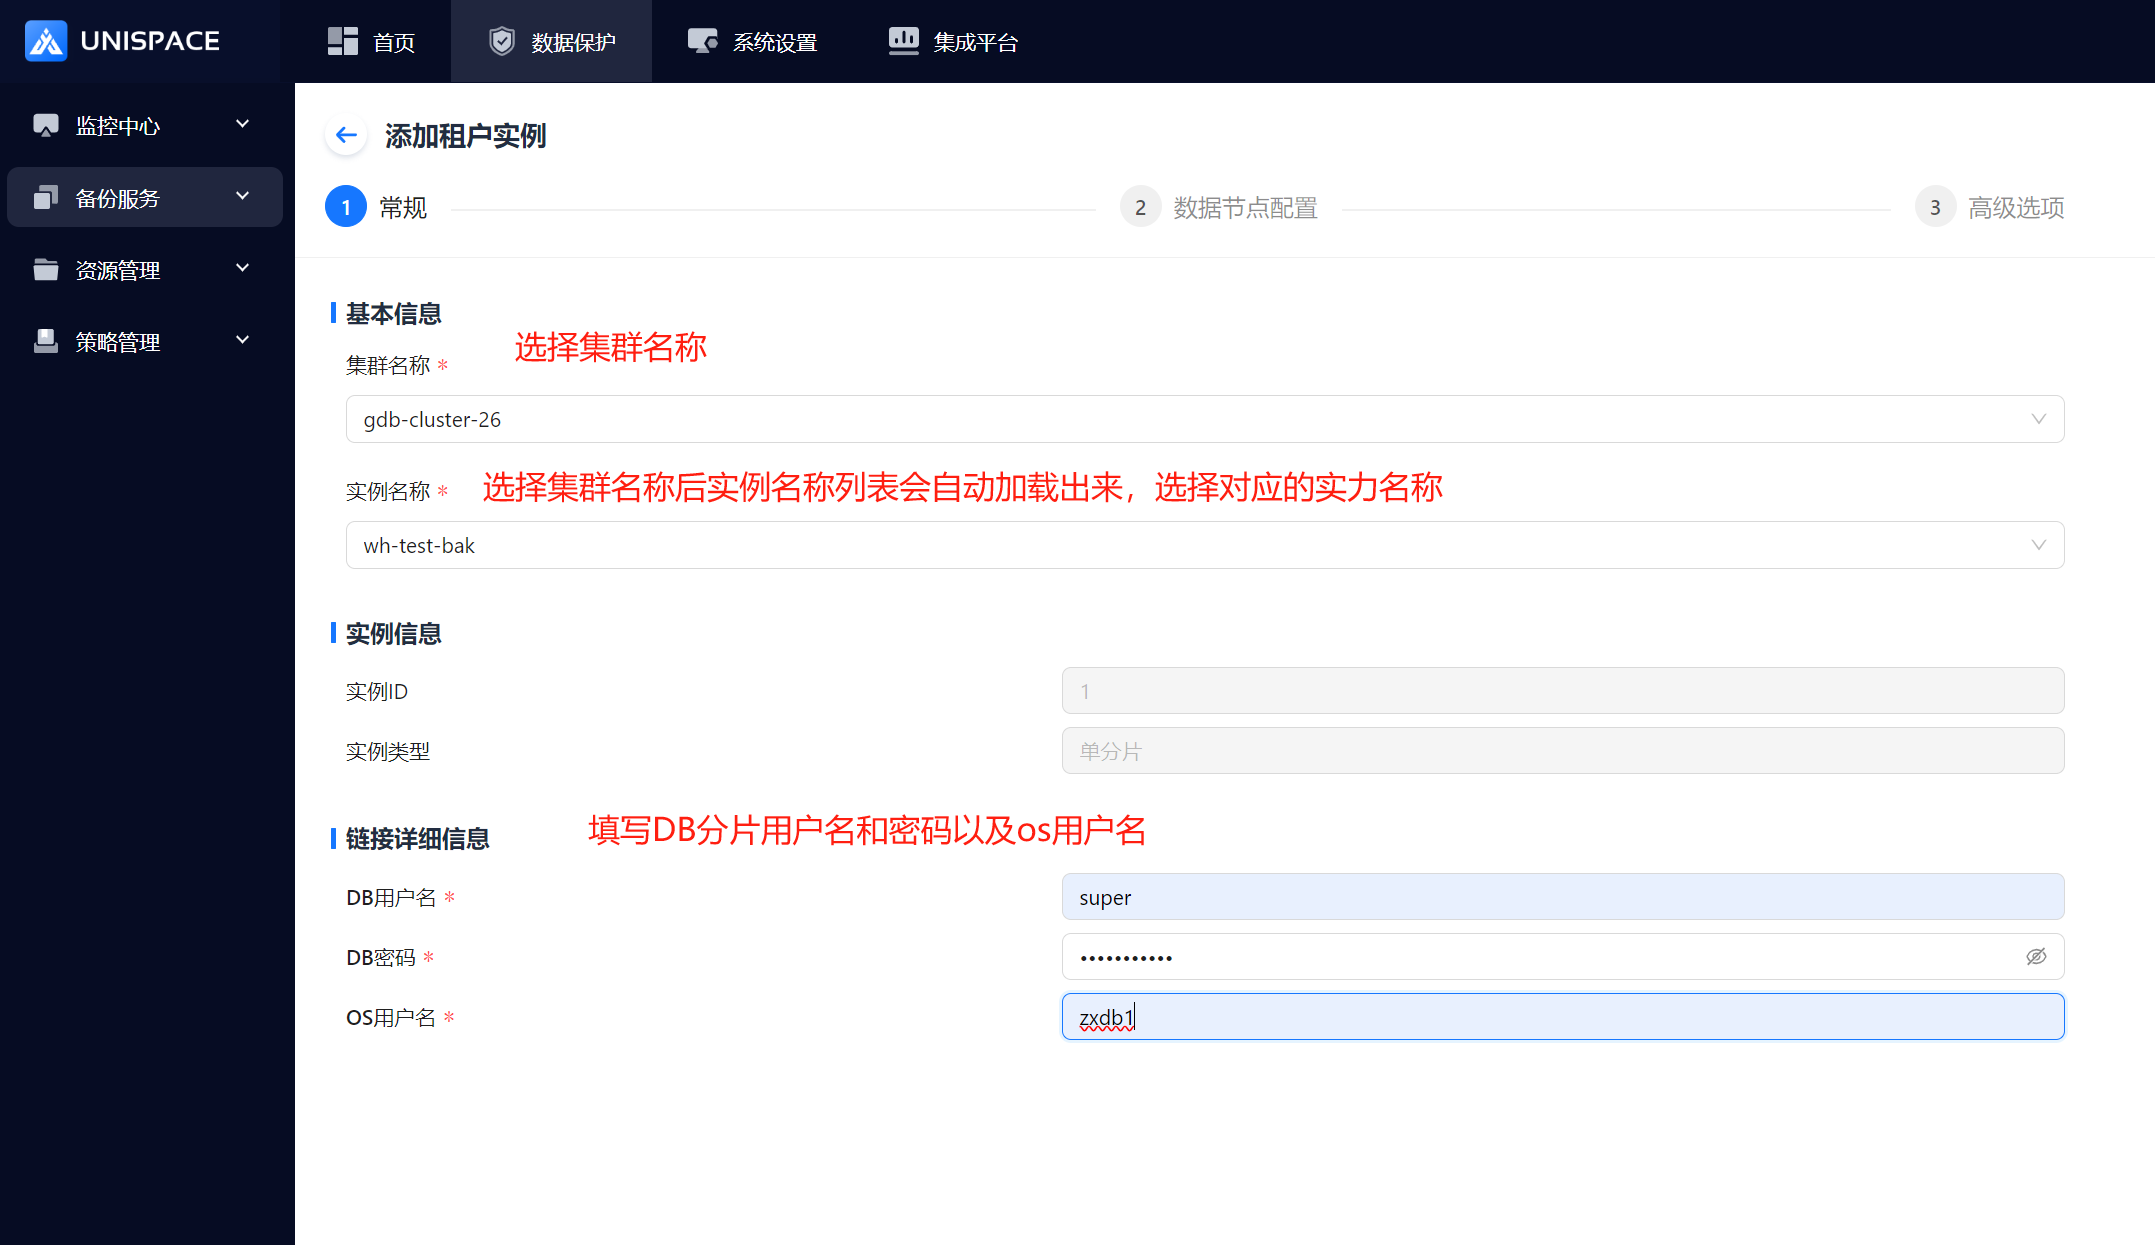
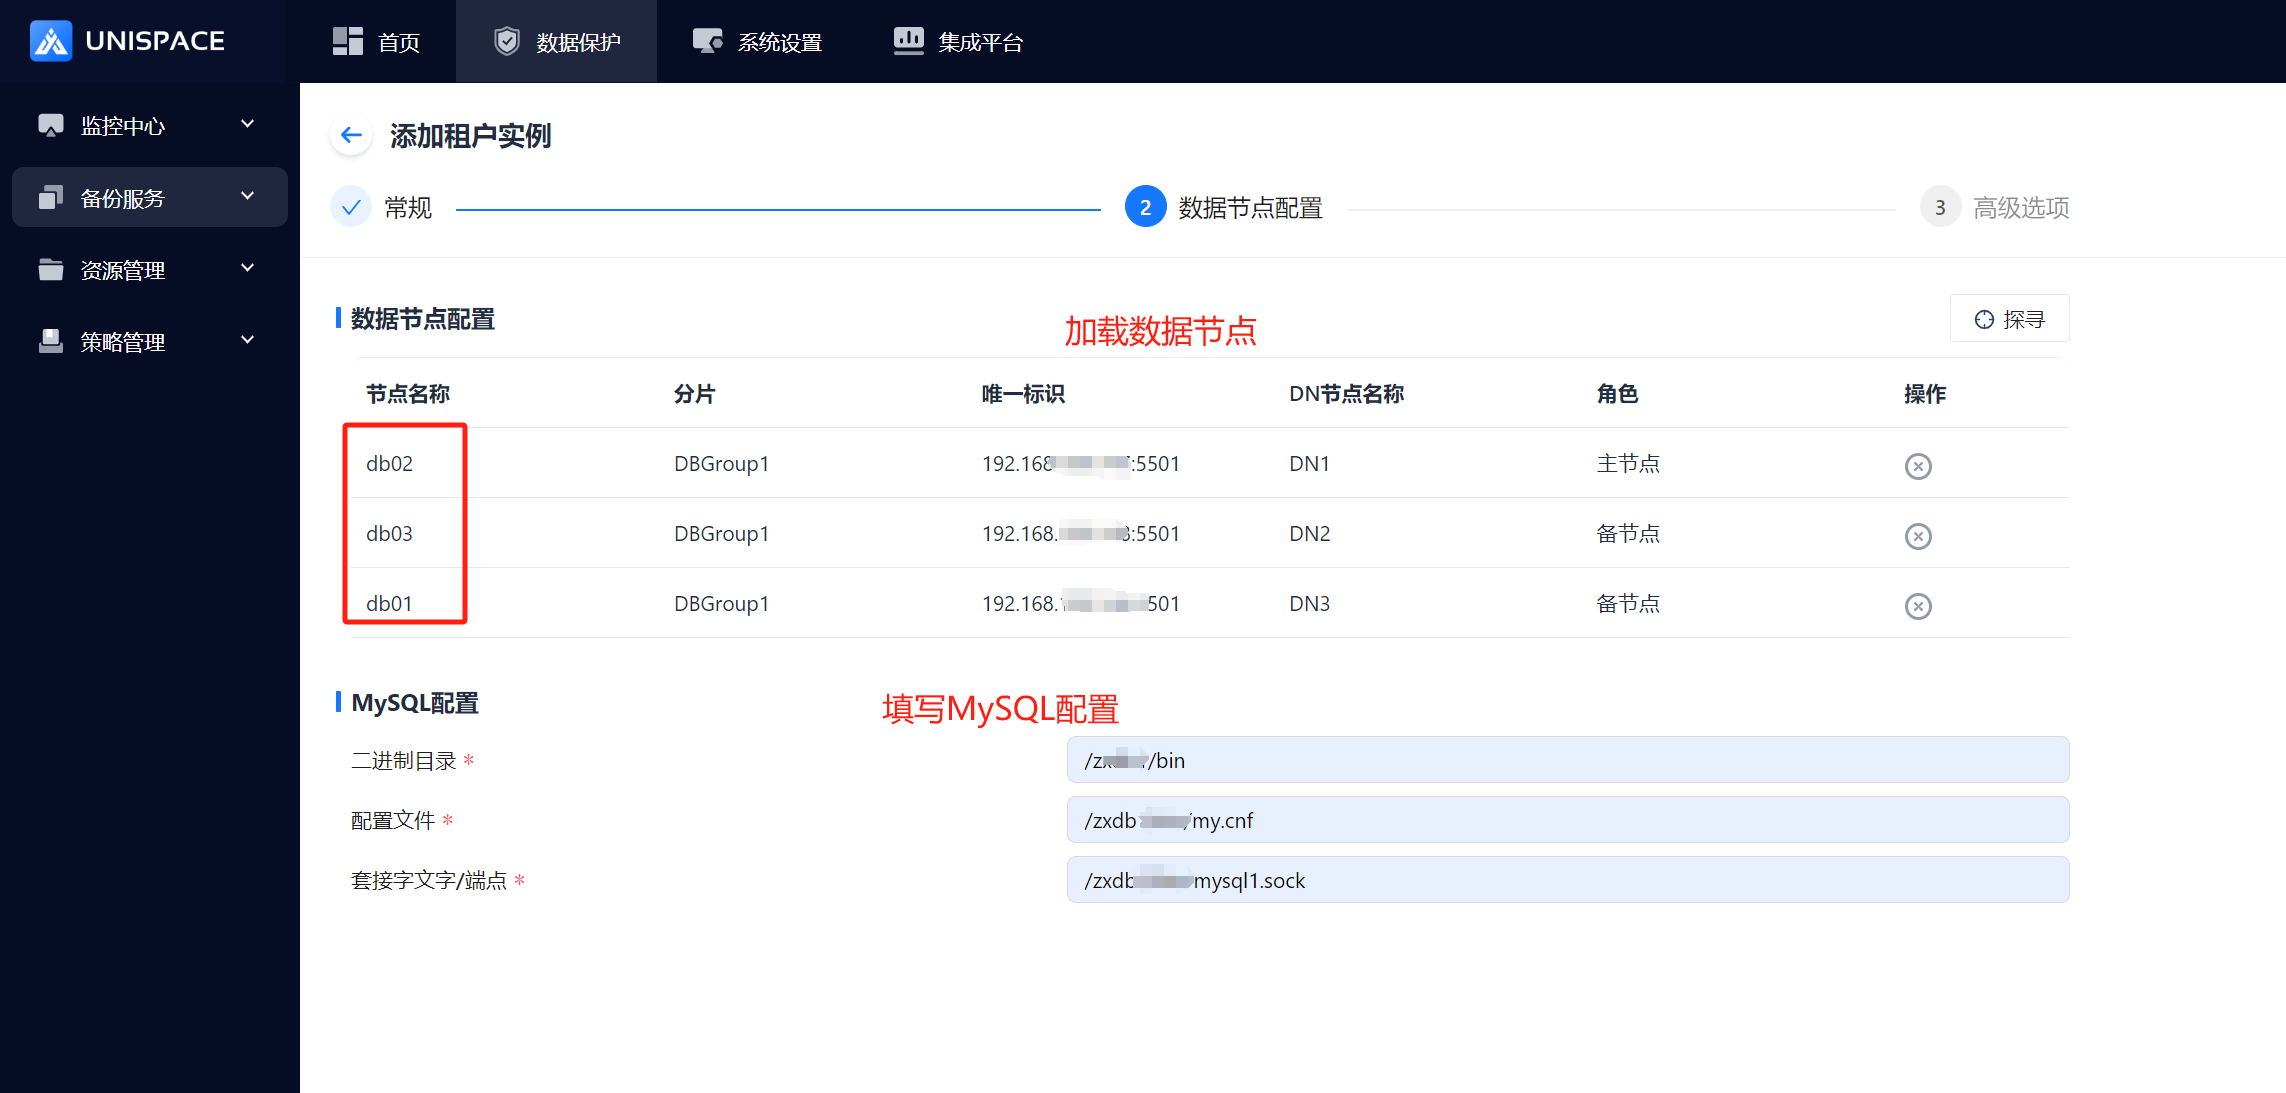
Step 3: Fill in the Data Node Configuration and click Next.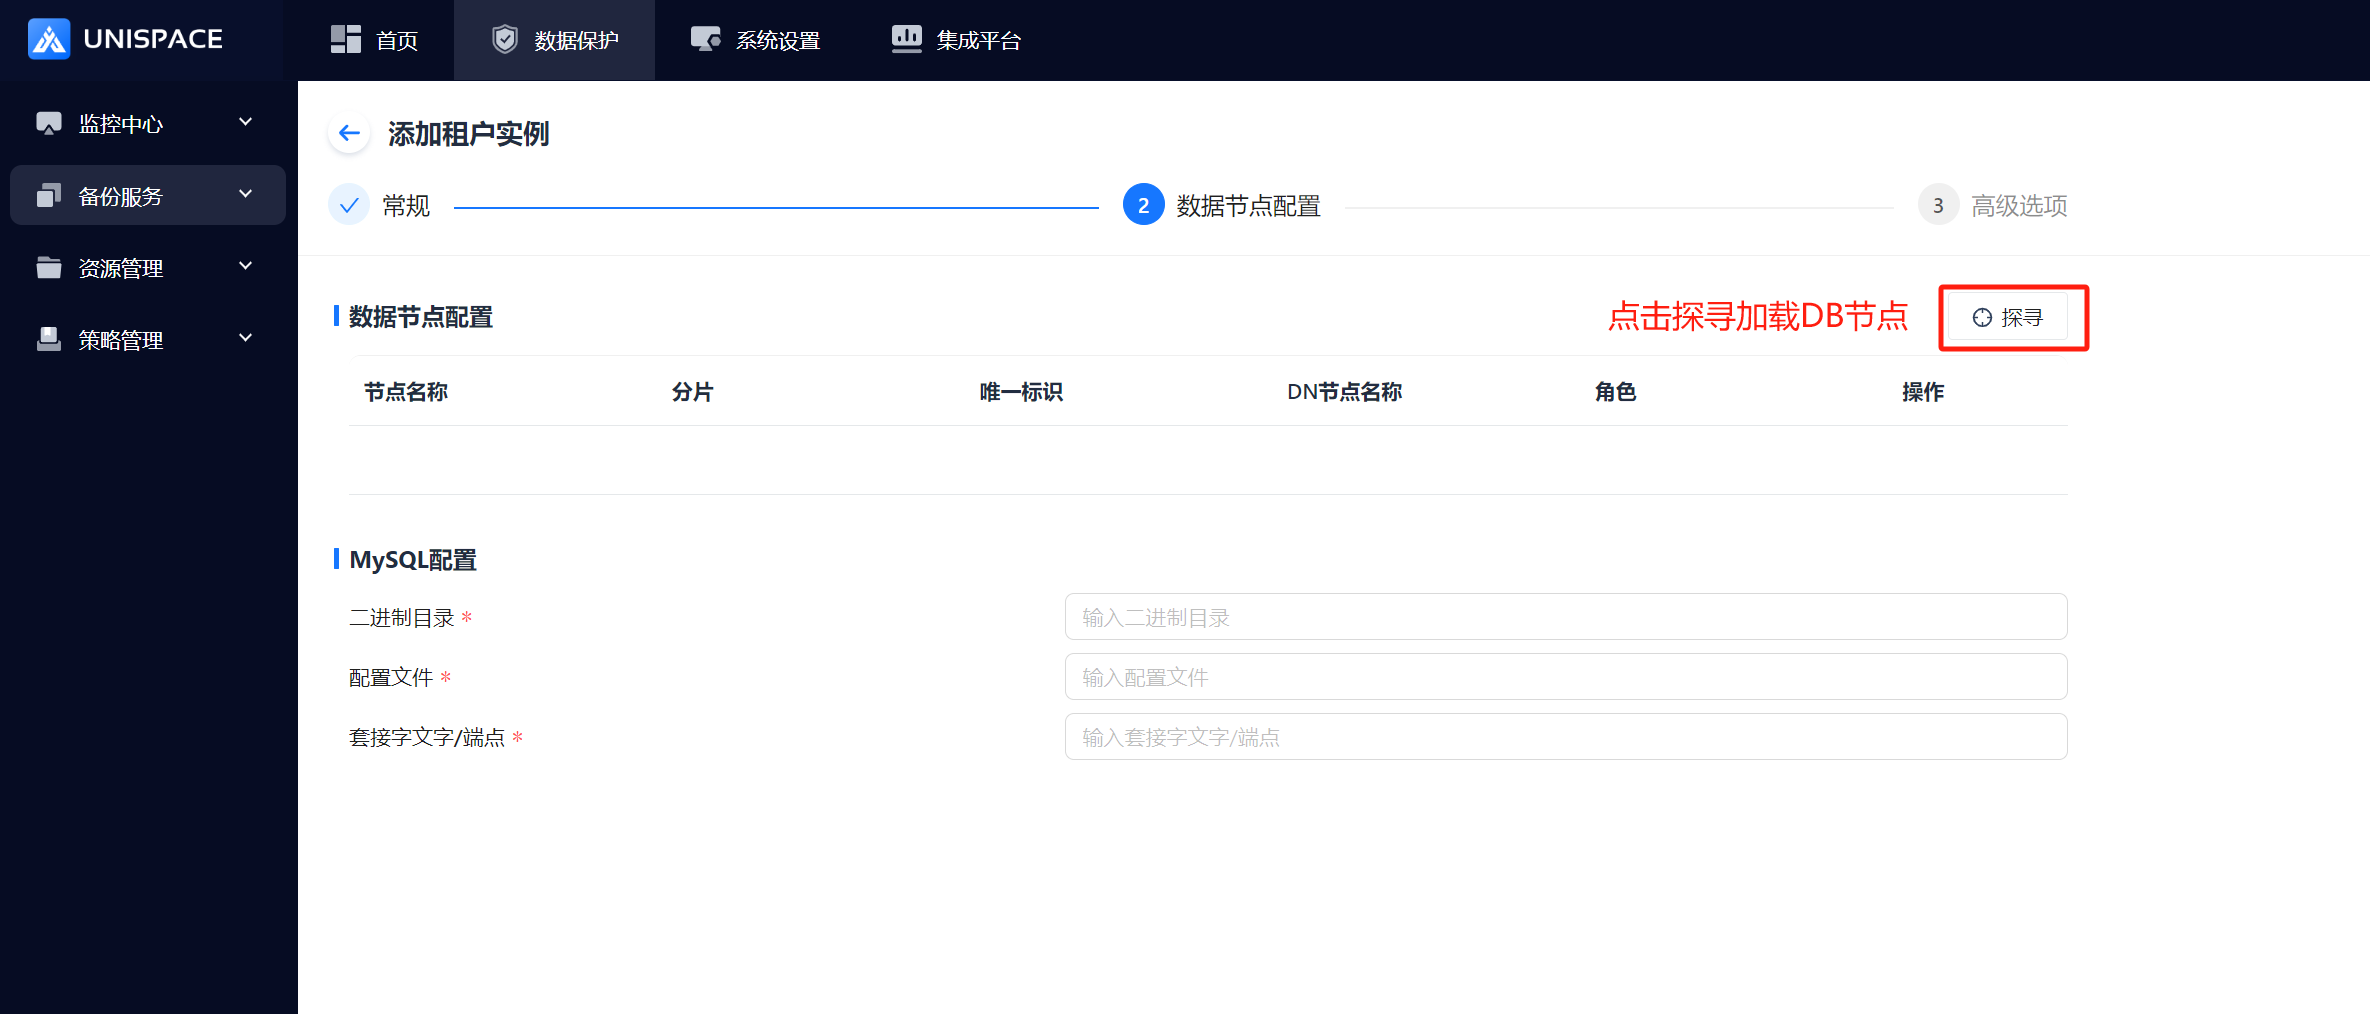
Step 4: Complete the "xtrabackup" form and click OK.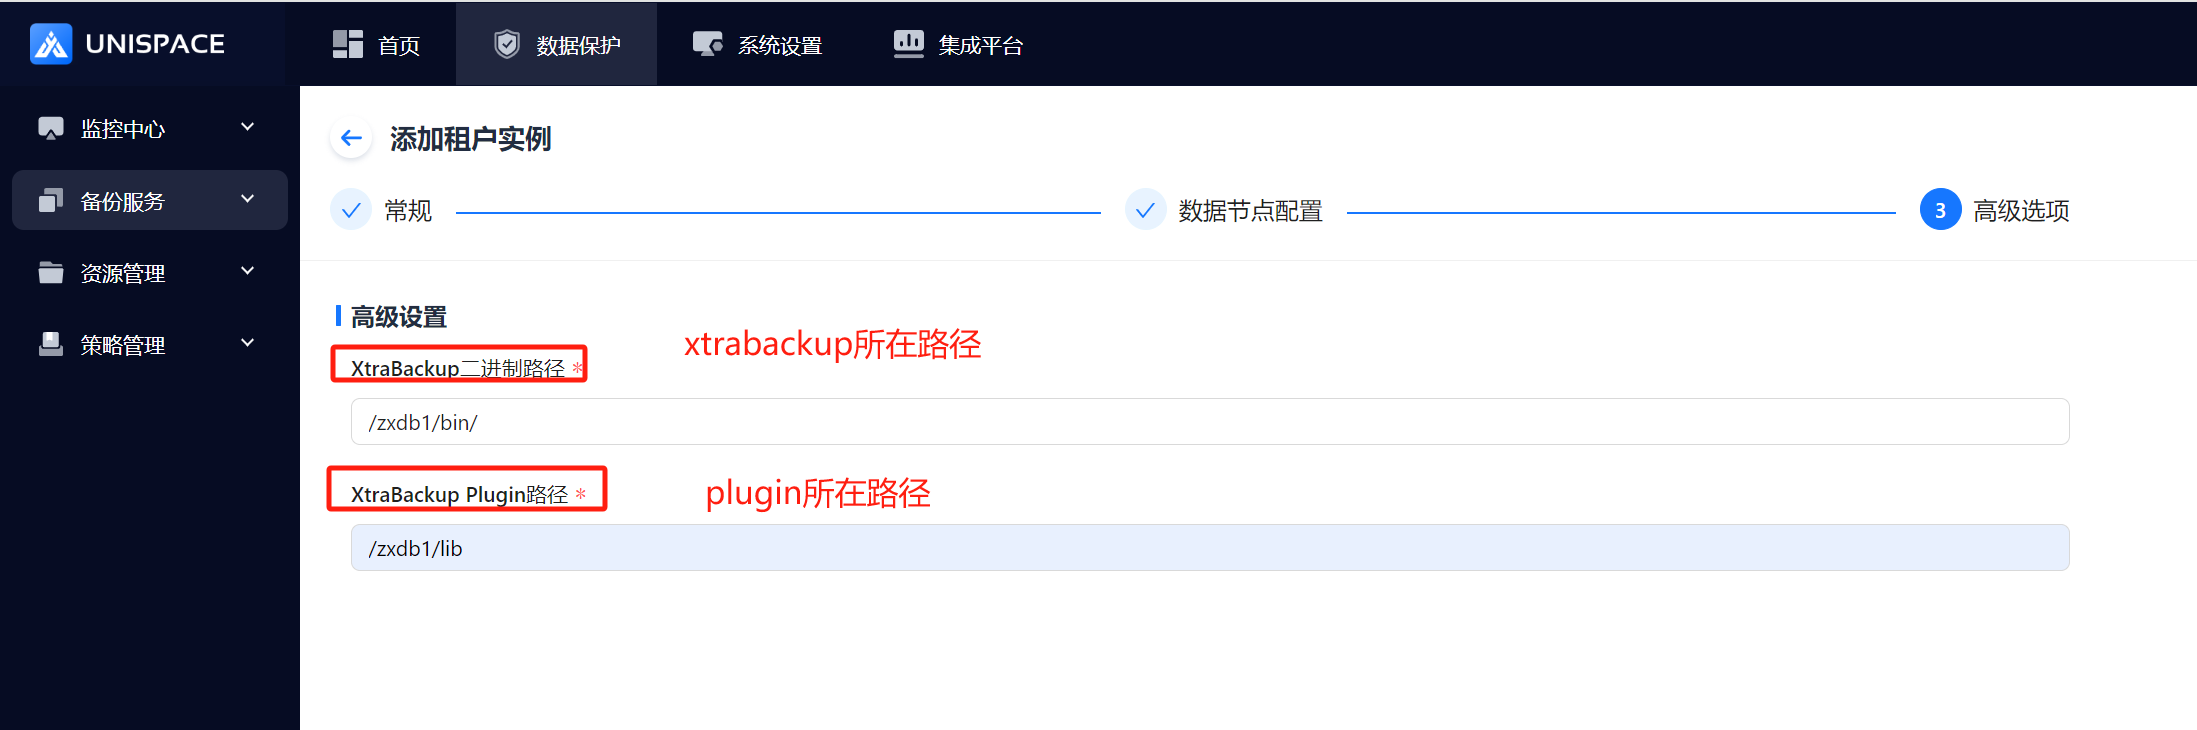
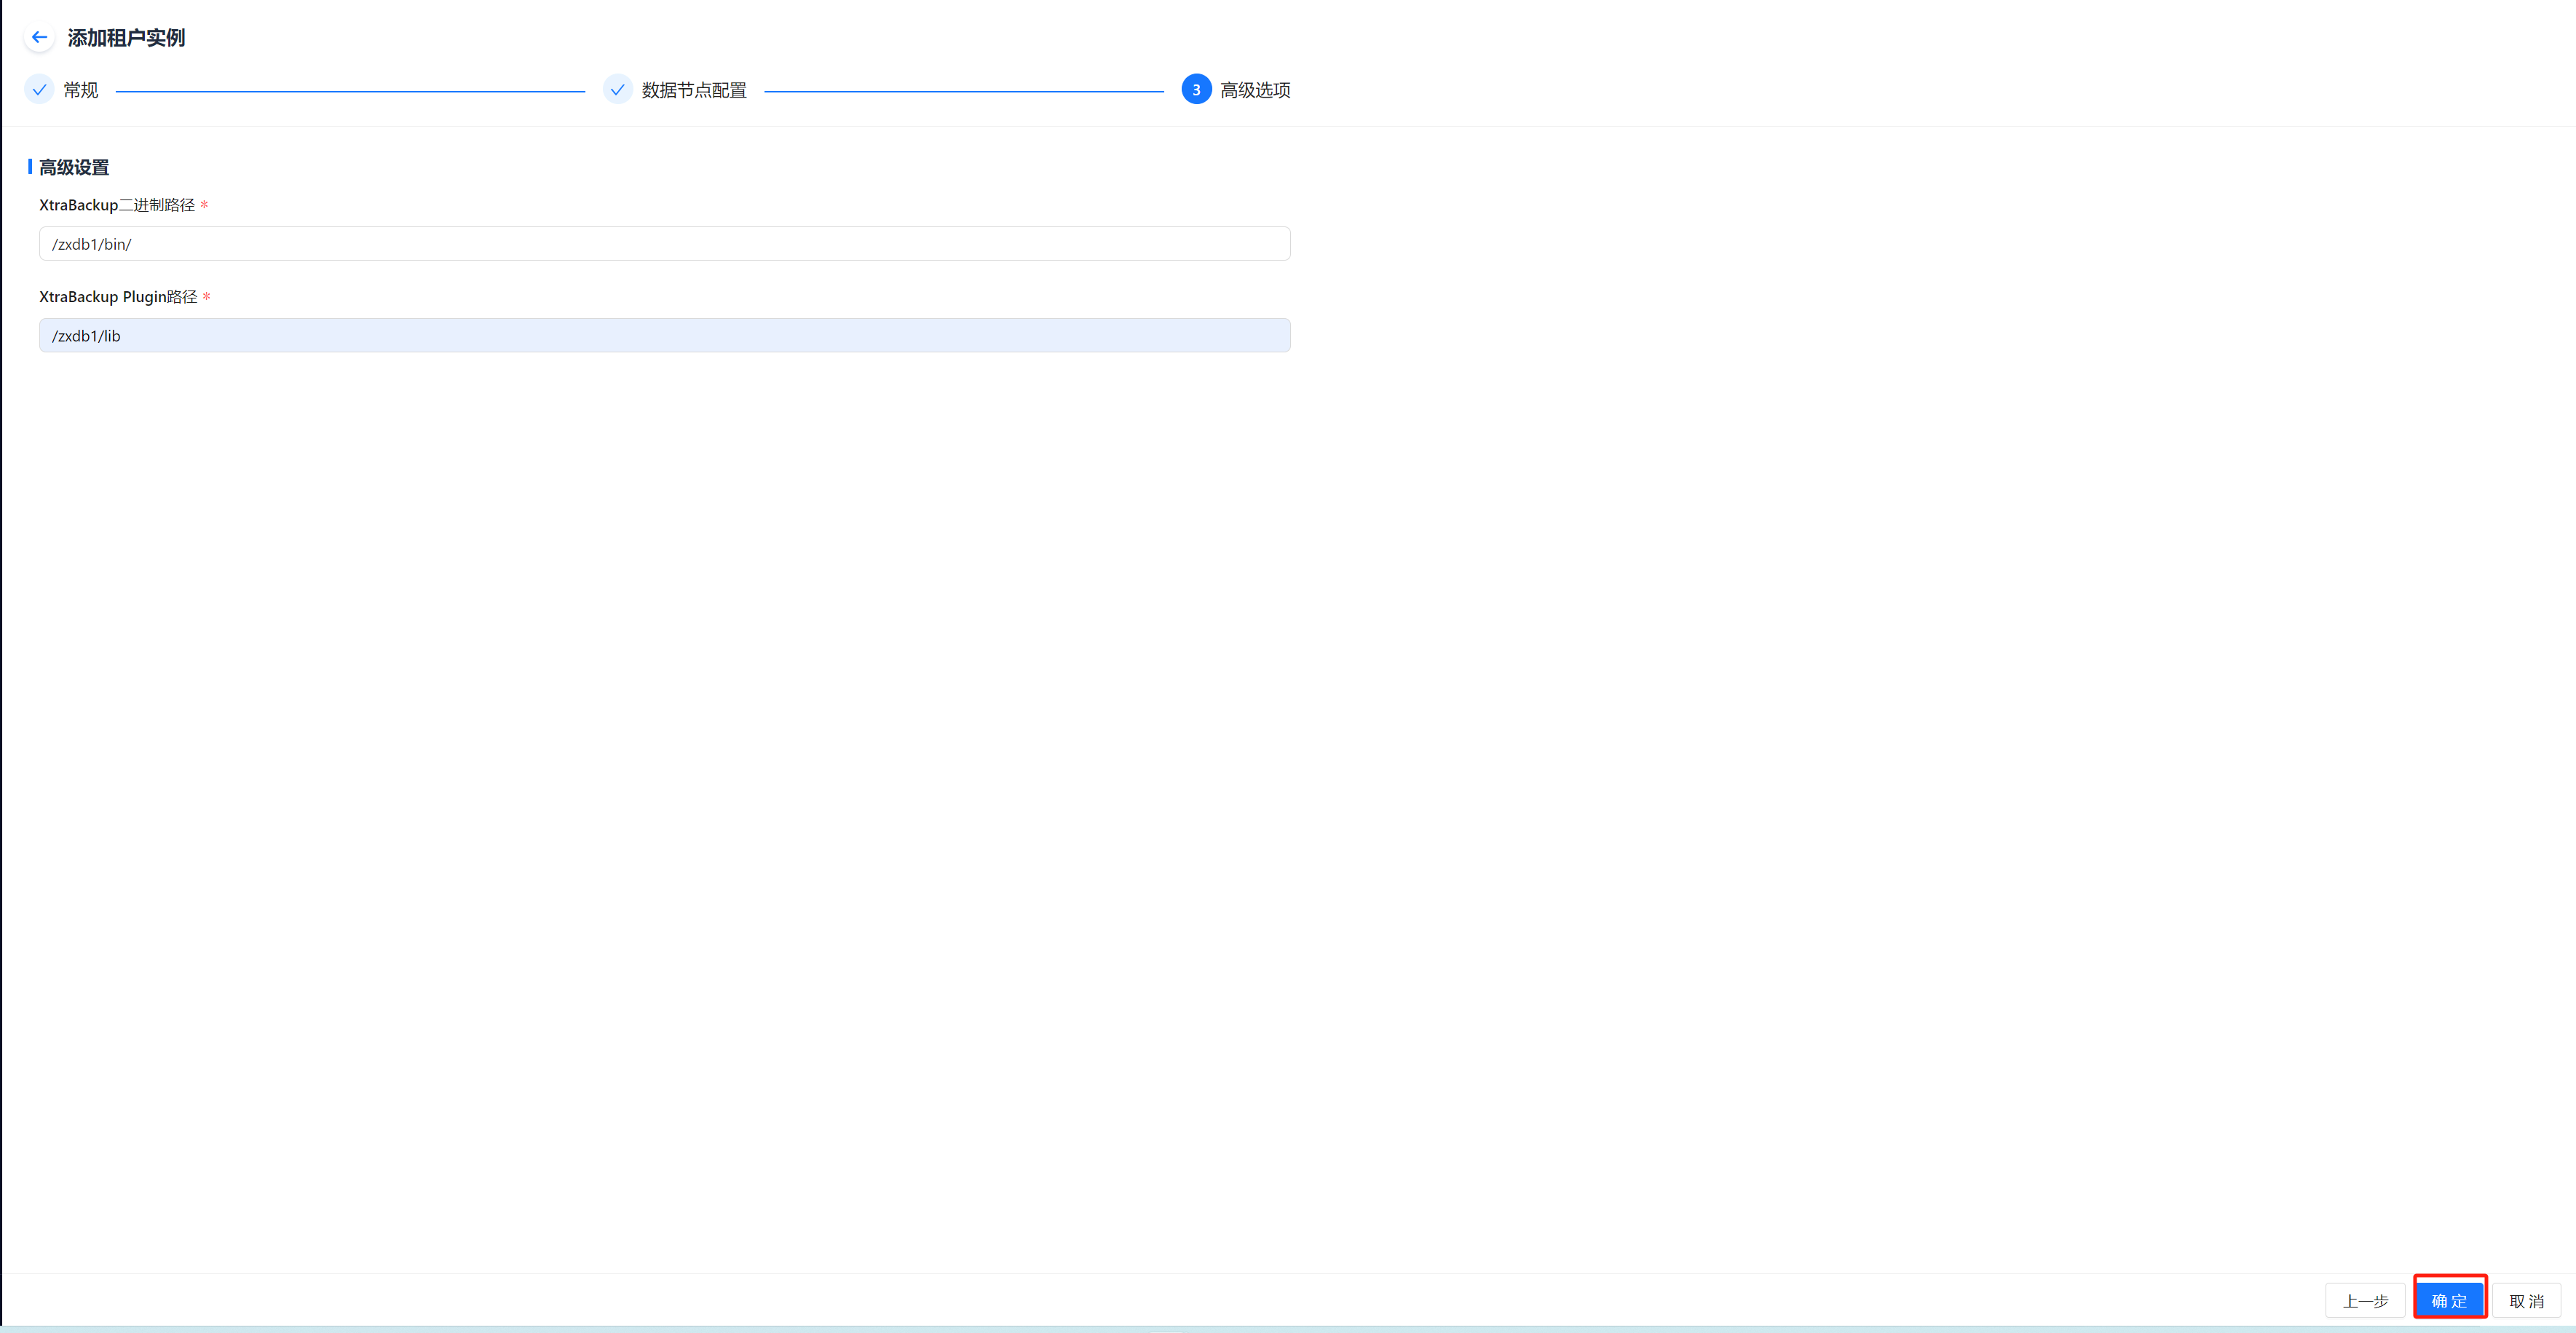
Instance creation will be successful.
1.3 Create GoldenDB Backup Set
Prerequisites
- A GoldenDB instance has been created.
Steps
Step 1: Click Database → Virtual Cluster → Cluster Name, then click the Add button at the top right of Backup Set.
Step 2: The Add Backup Set form will pop up. Fill it out completely.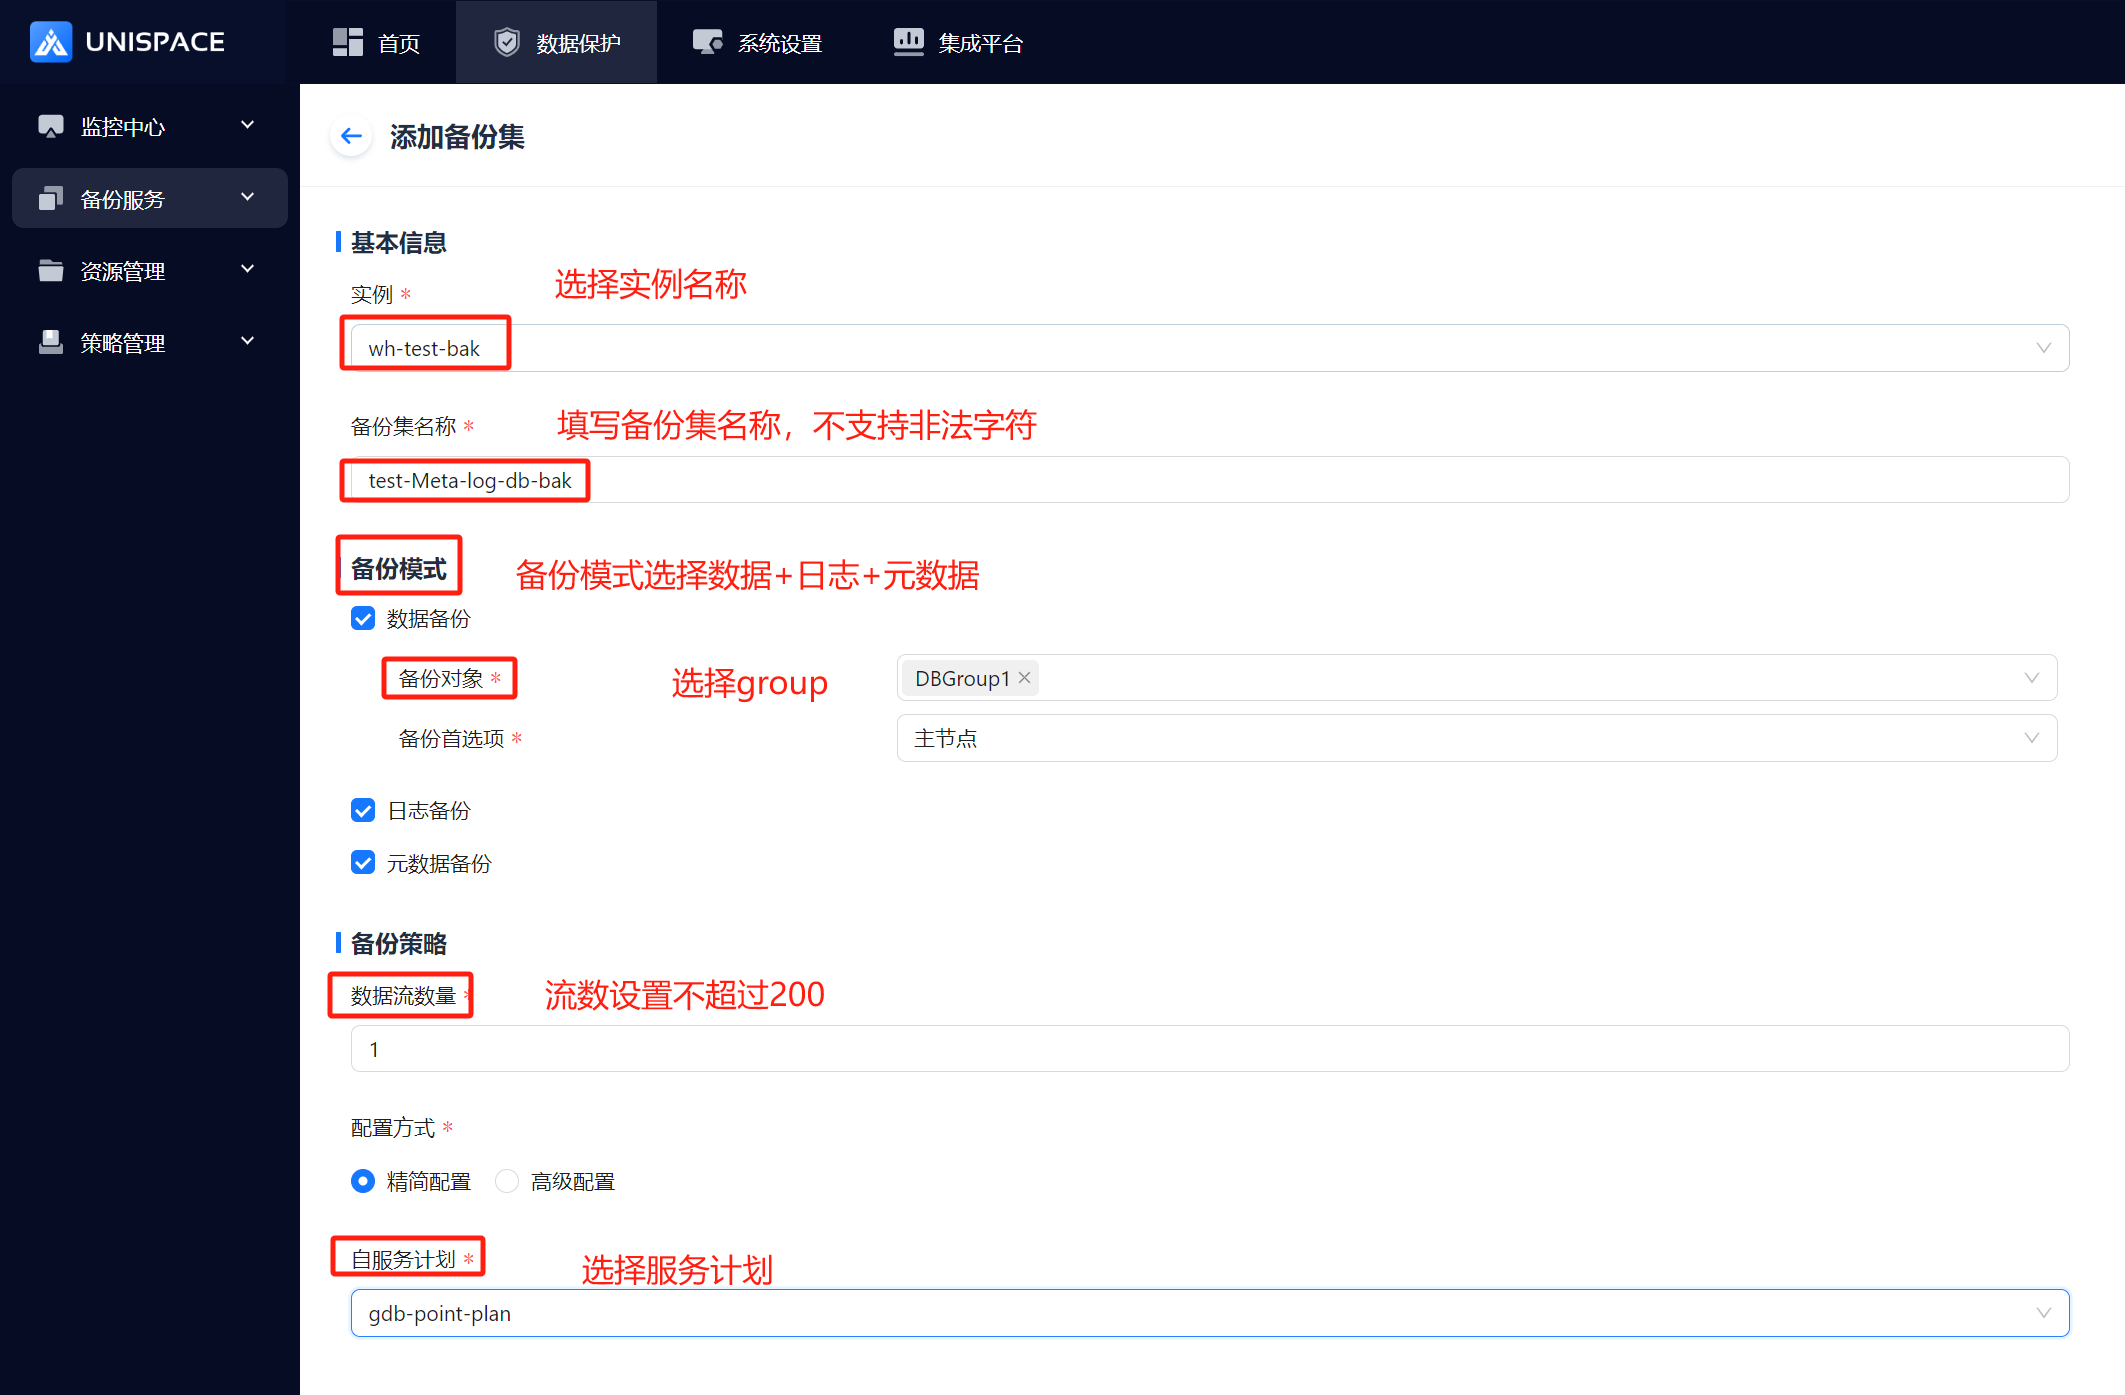
Step 3: Click OK to complete the creation.
1.4 Initiate GoldenDB Backup
1.4.1 GoldenDB Data and Meta Backup
Prerequisites
- A GoldenDB backup set has been created.
Steps
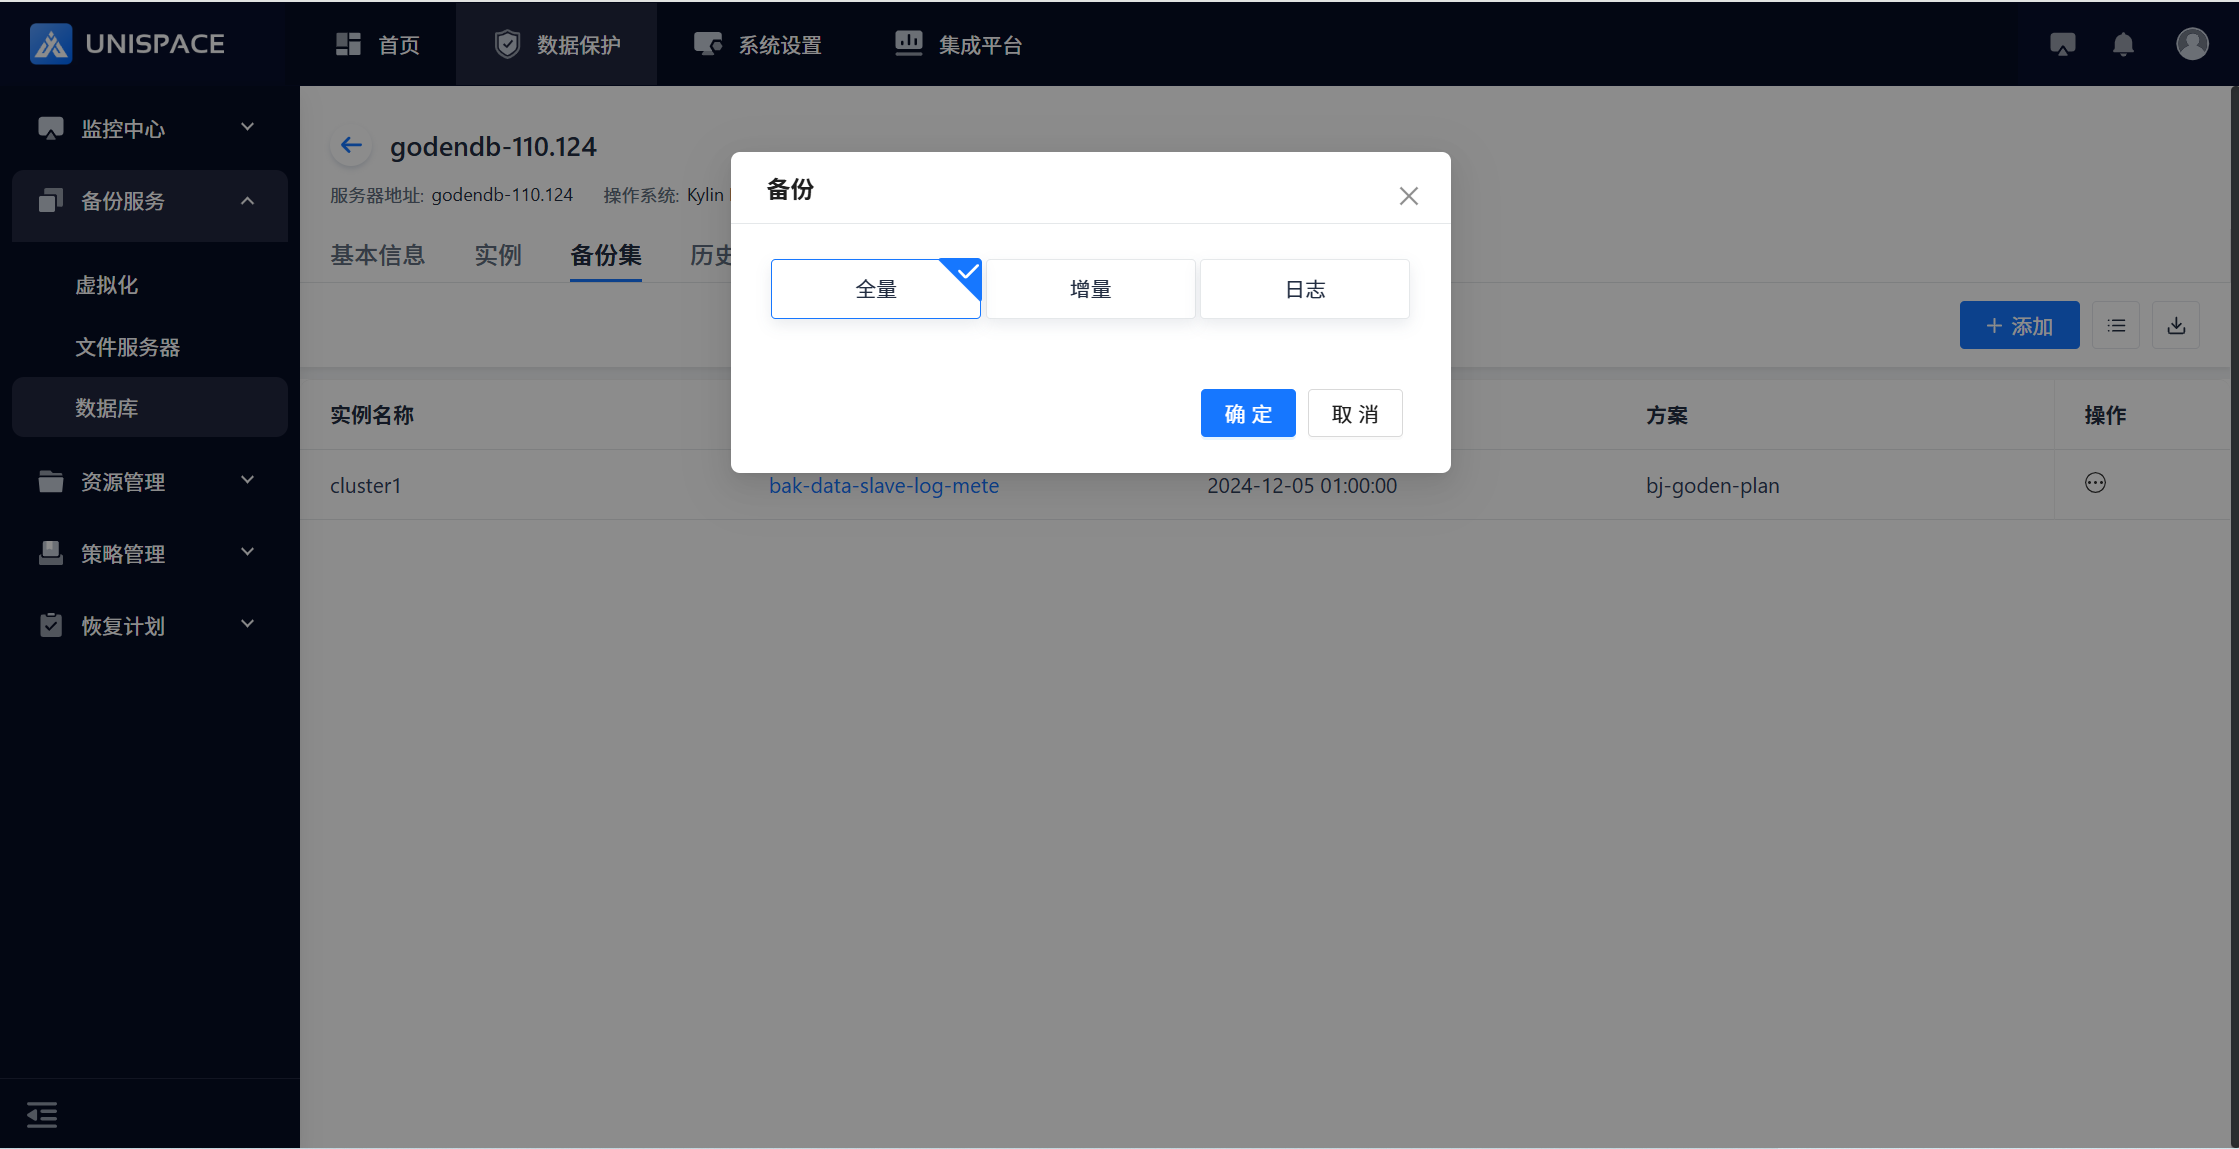
Step 1: Click Backup Set → Operation → Backup to start a Full or Incremental backup.

Step 2: Once the job starts successfully, click Monitoring Center - Jobs - Active Jobs to view it.
Step 3: After the job finishes, click Monitoring Center - Jobs - Job History to check the job and its status.
Note:
If the first initiated job is an incremental backup, it will automatically convert to a full backup. Once completed, it will be marked as a full backup.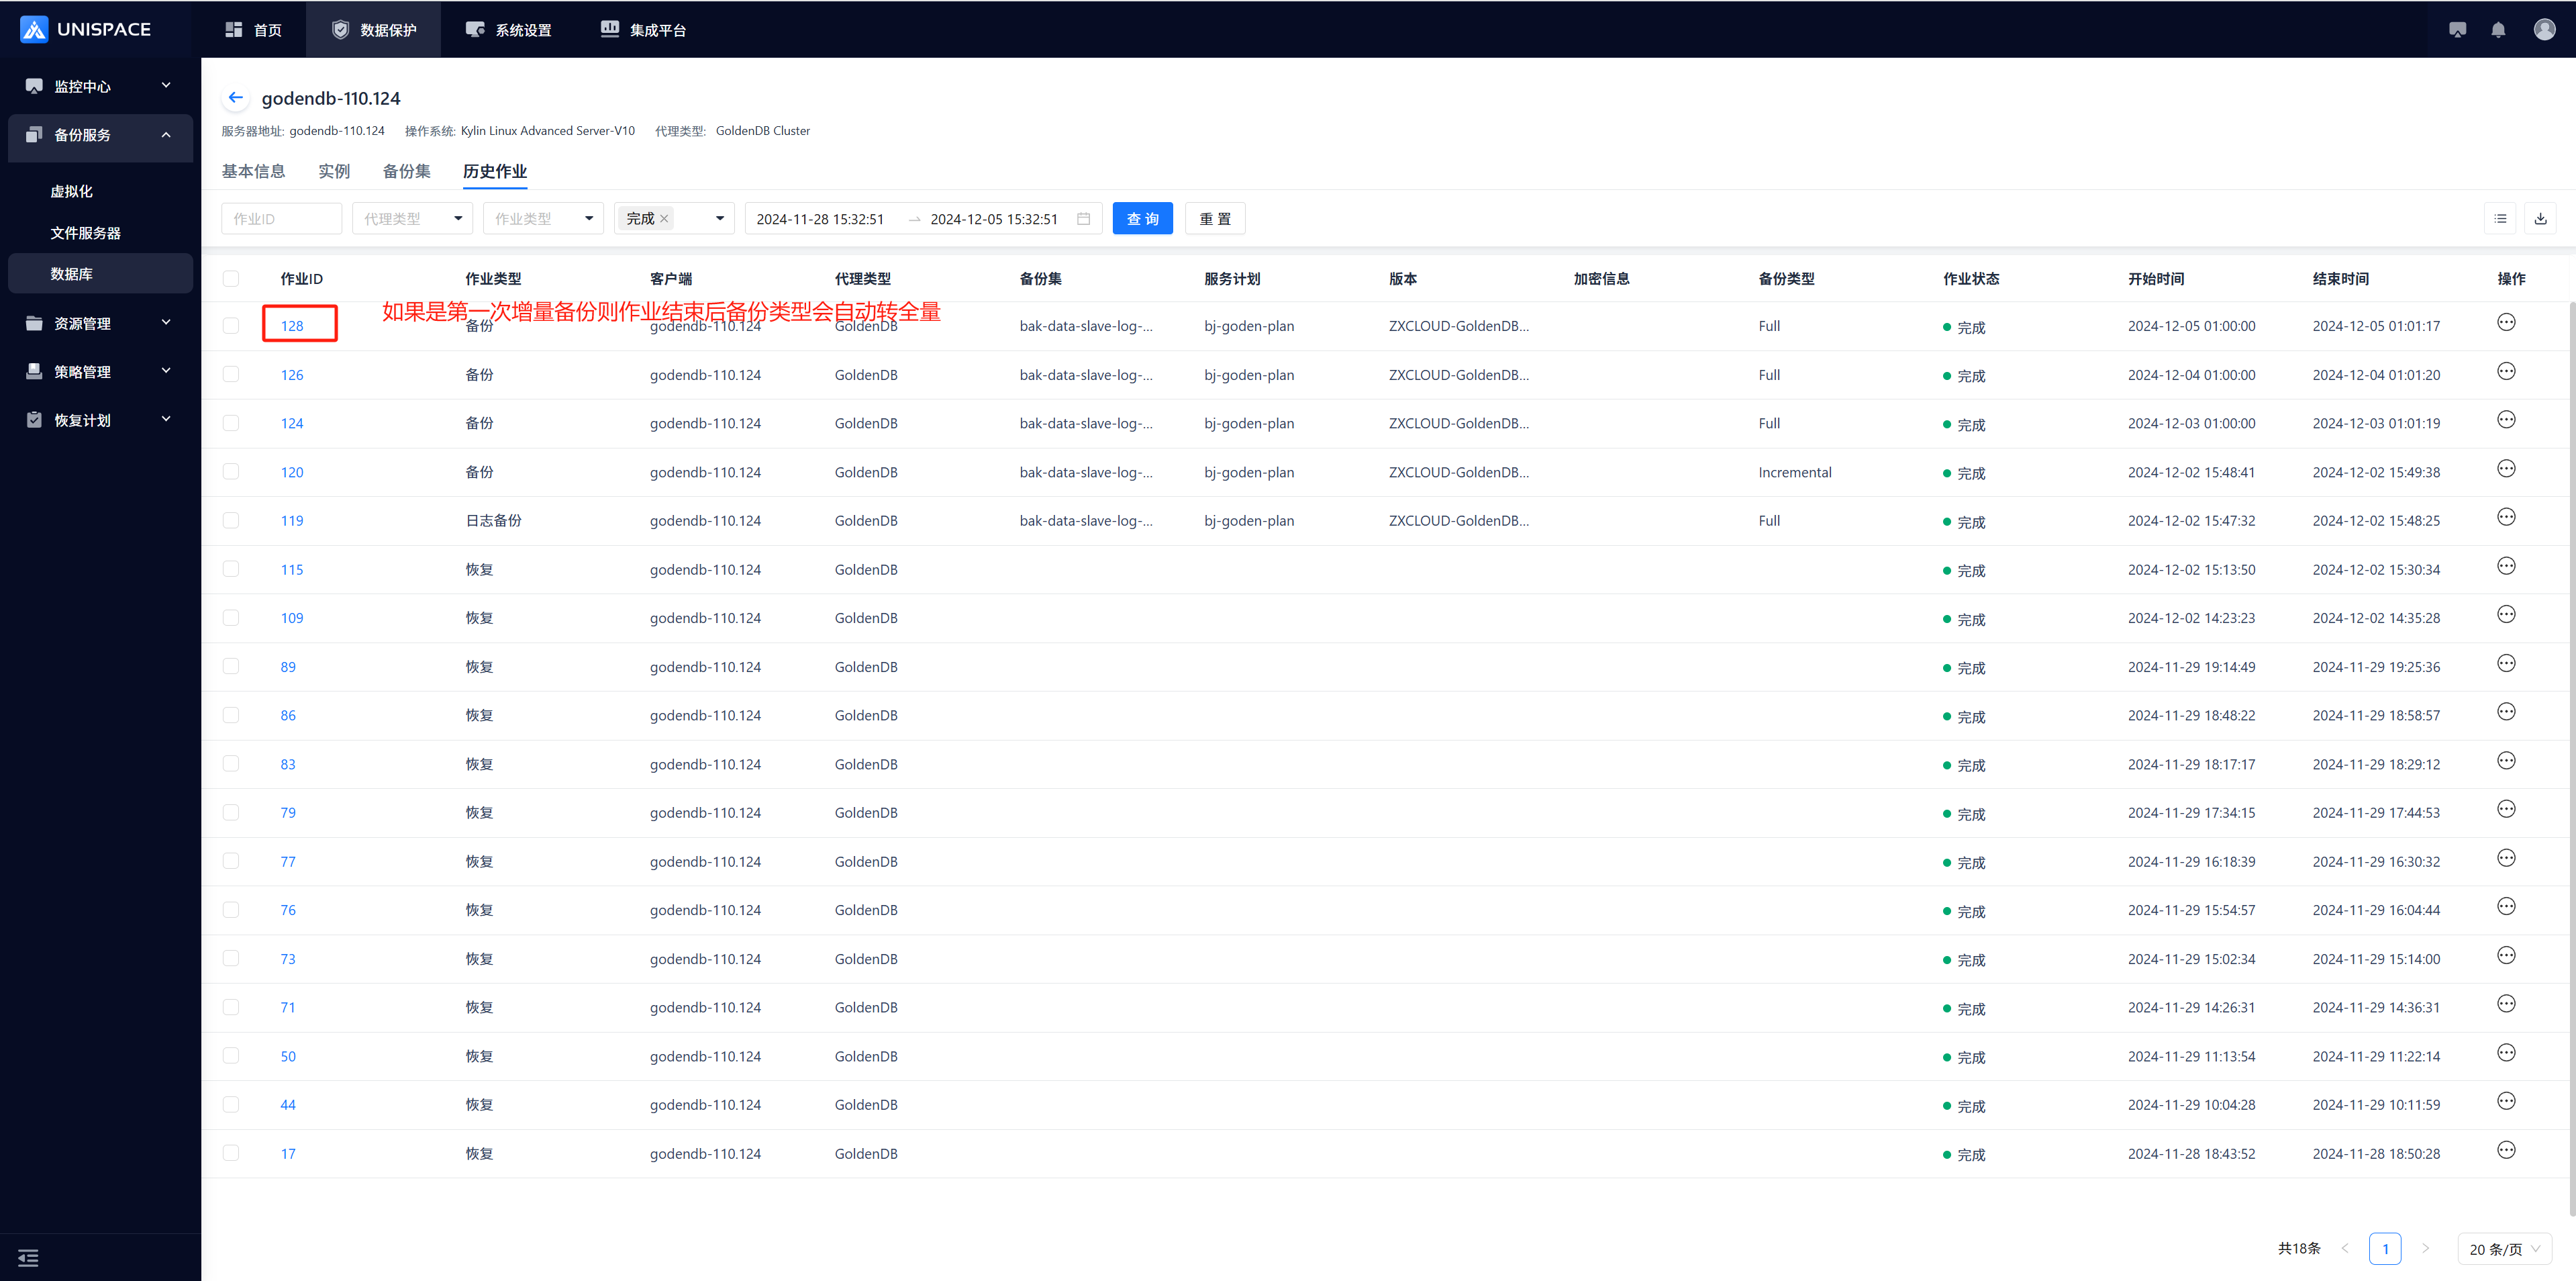
1.4.2 GoldenDB Log Backup
Prerequisites
- A GoldenDB backup set has been created.
Steps
Step 1: Click Backup Set - Operation - Backup to initiate a Log Backup.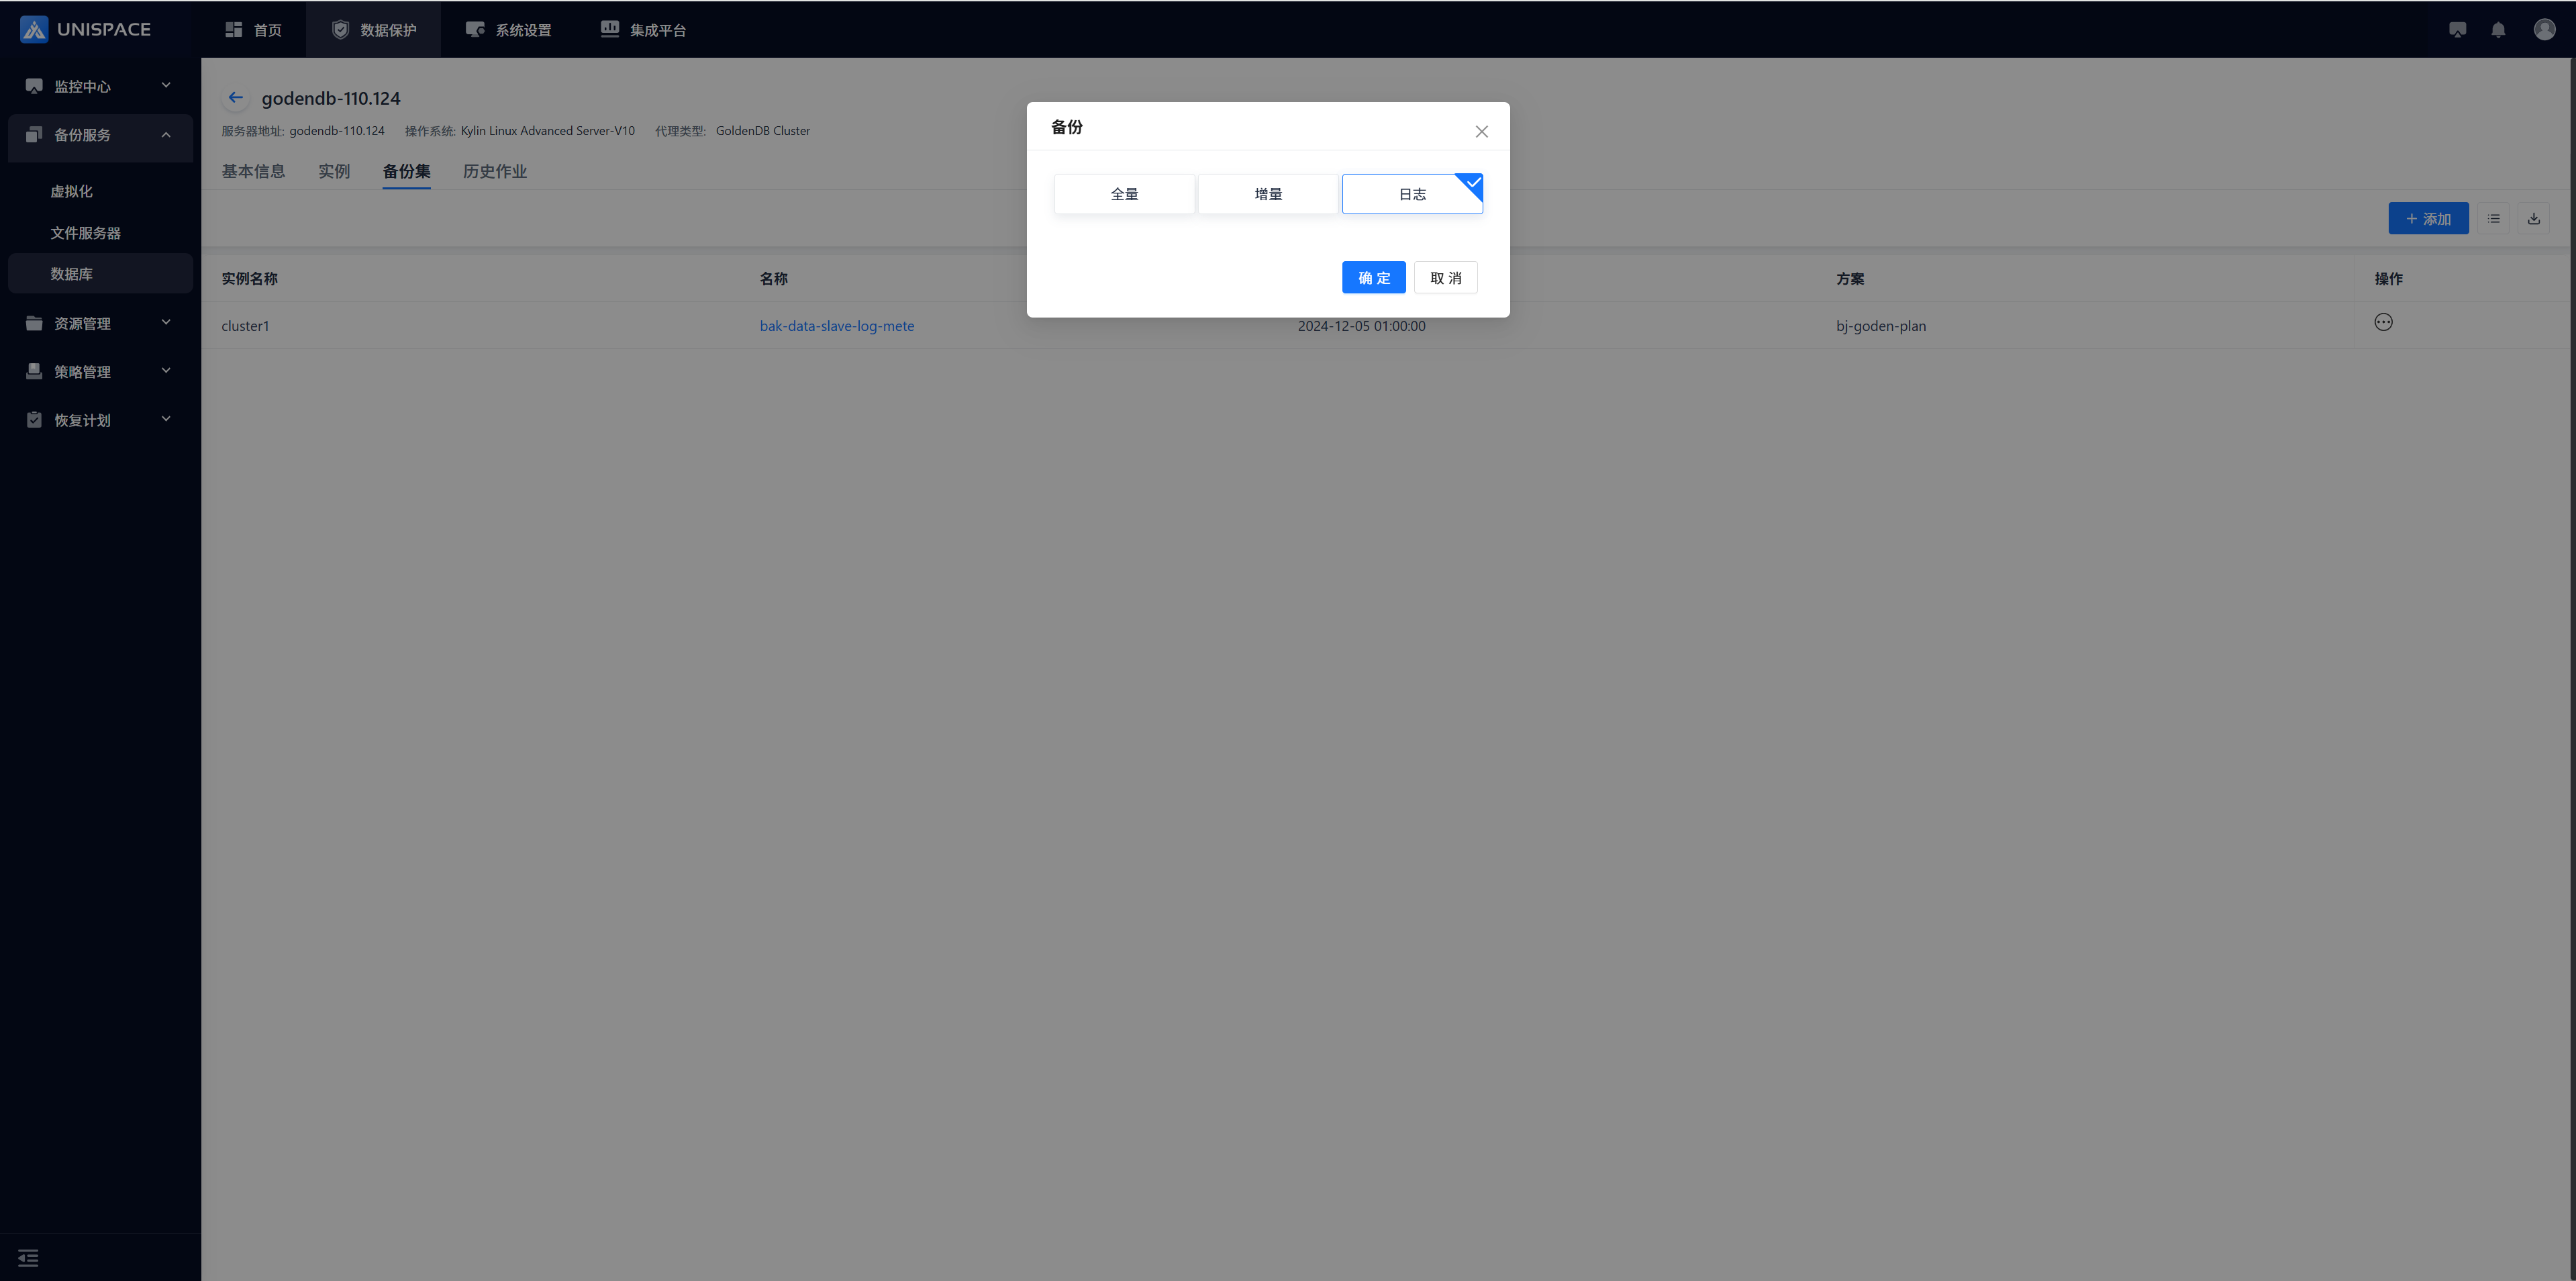
Step 2: Once the job starts successfully, click Monitoring Center - Jobs - Active Jobs to view it.
Step 3: After the job finishes, click Monitoring Center - Jobs - Job History to check the job and its status.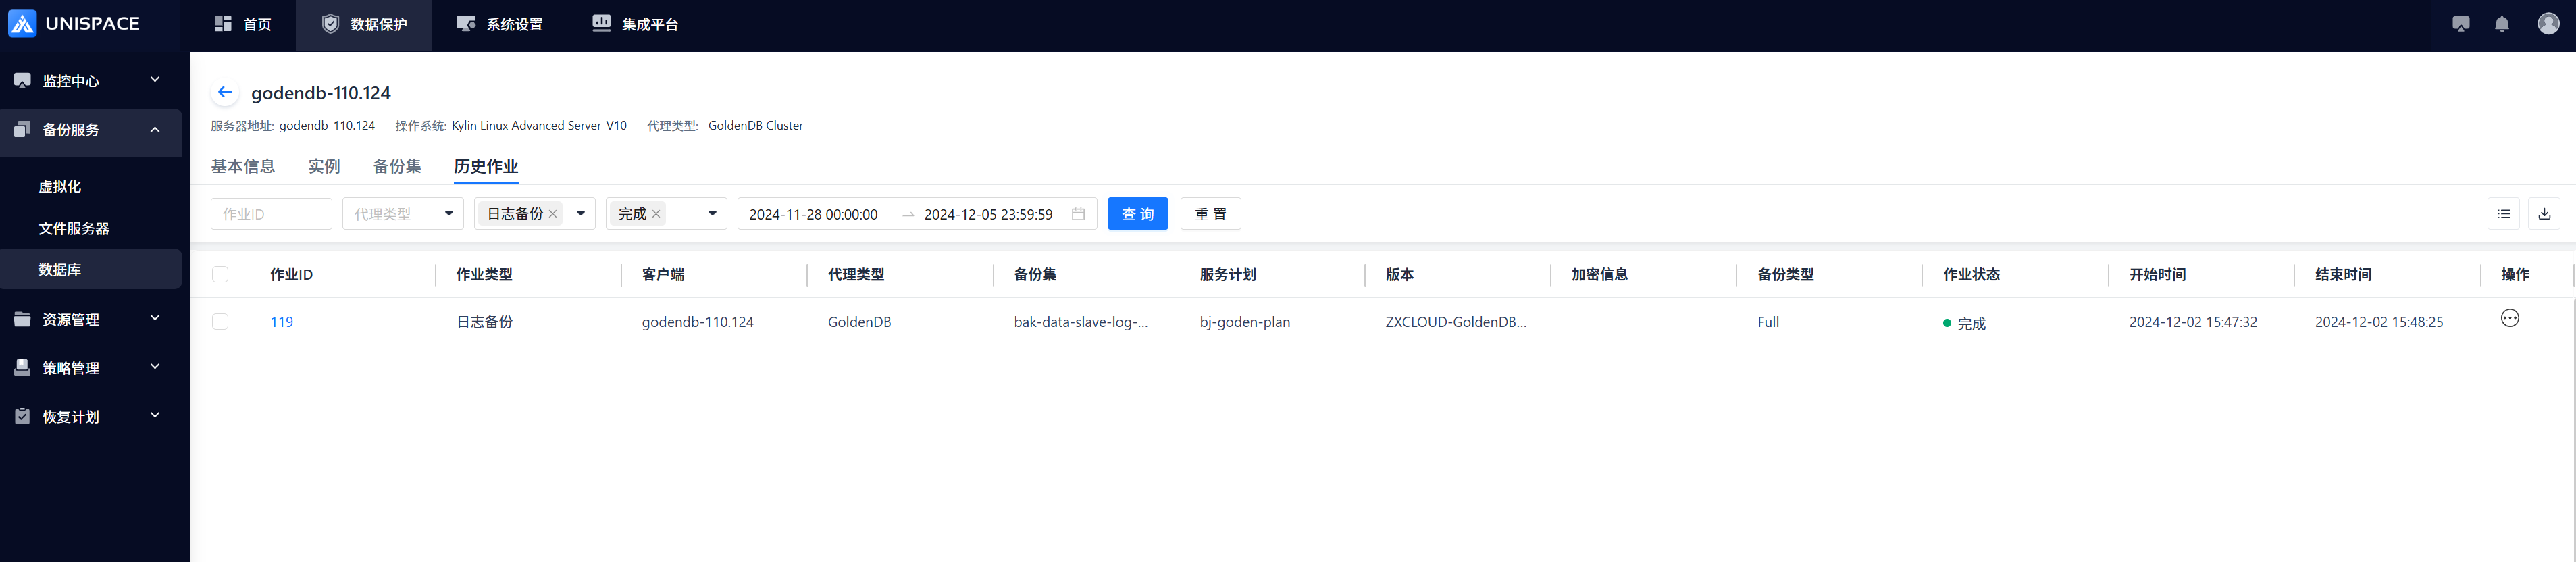
1.5 GoldenDB Recovery
1.5.1 GoldenDB Instance Recovery
Prerequisites
- The GoldenDB backup set has been successfully backed up.
Steps
Step 1: Click Instance - Operation - Recovery.
Step 2: Query the recovery point based on the time range, select the job ID to be recovered, and click Next.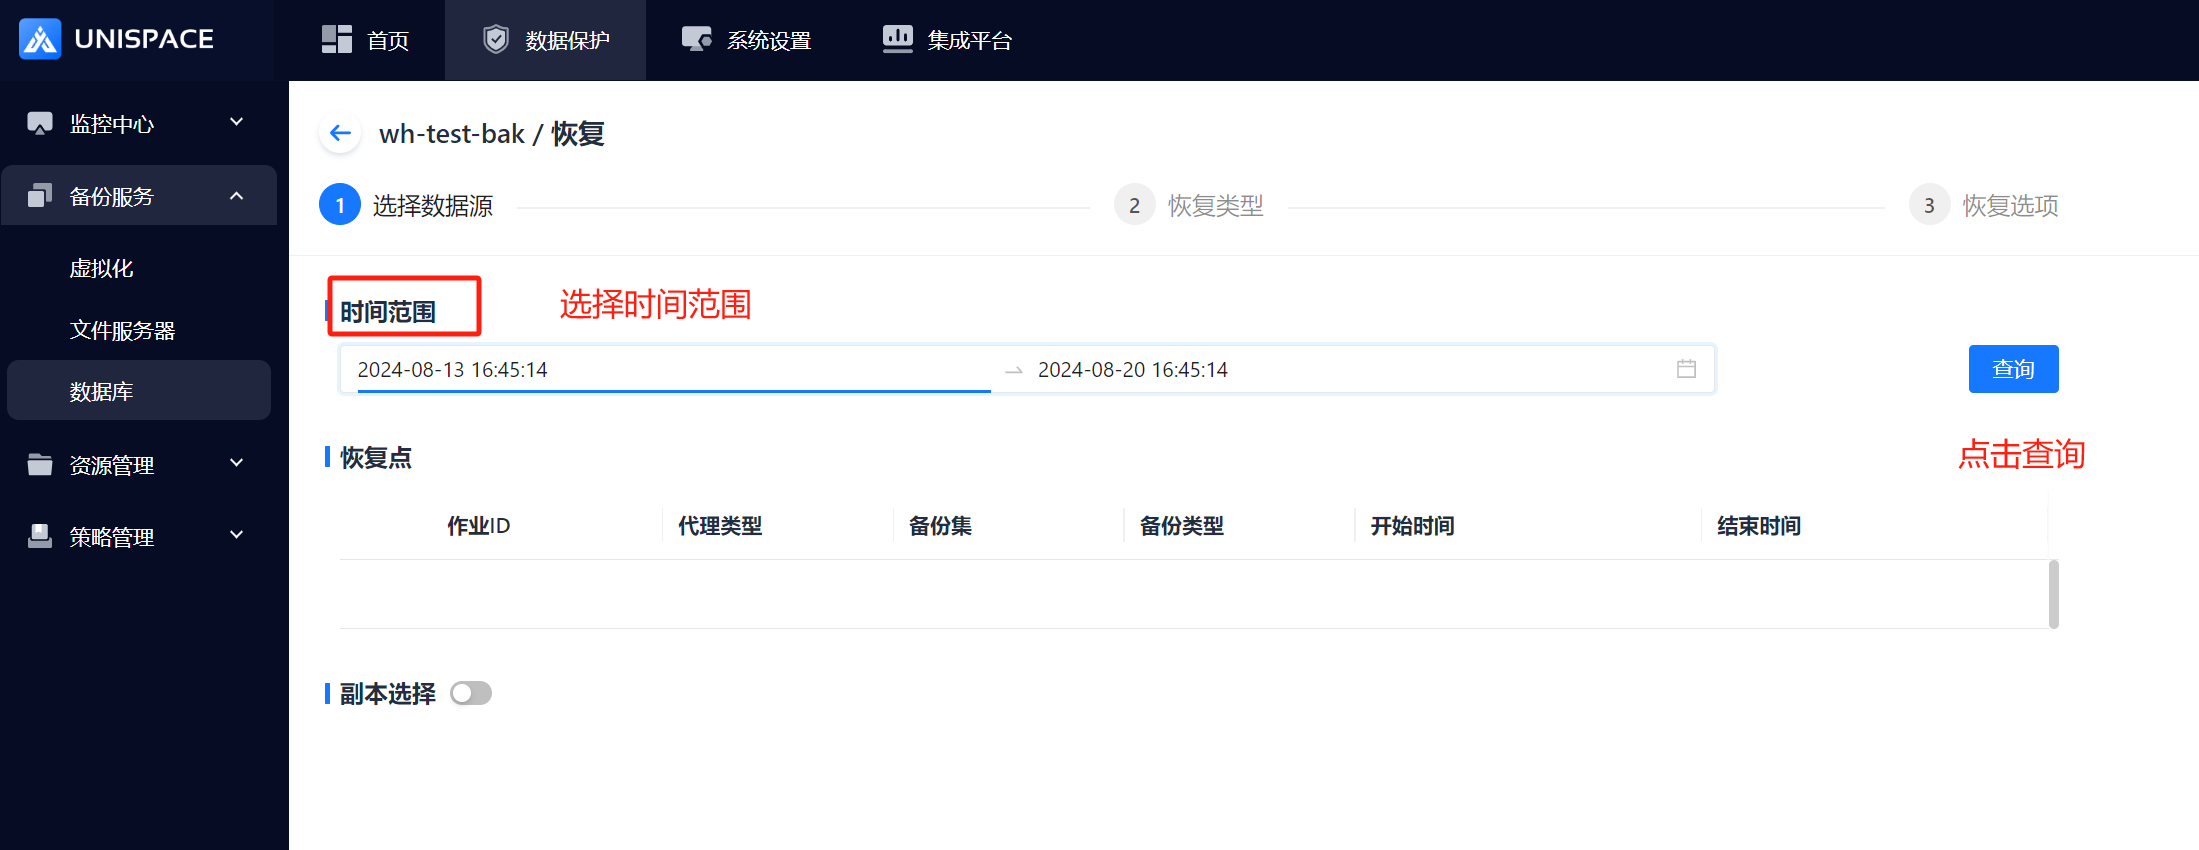

Step 3: Choose the "Instance Recovery" type and click Next.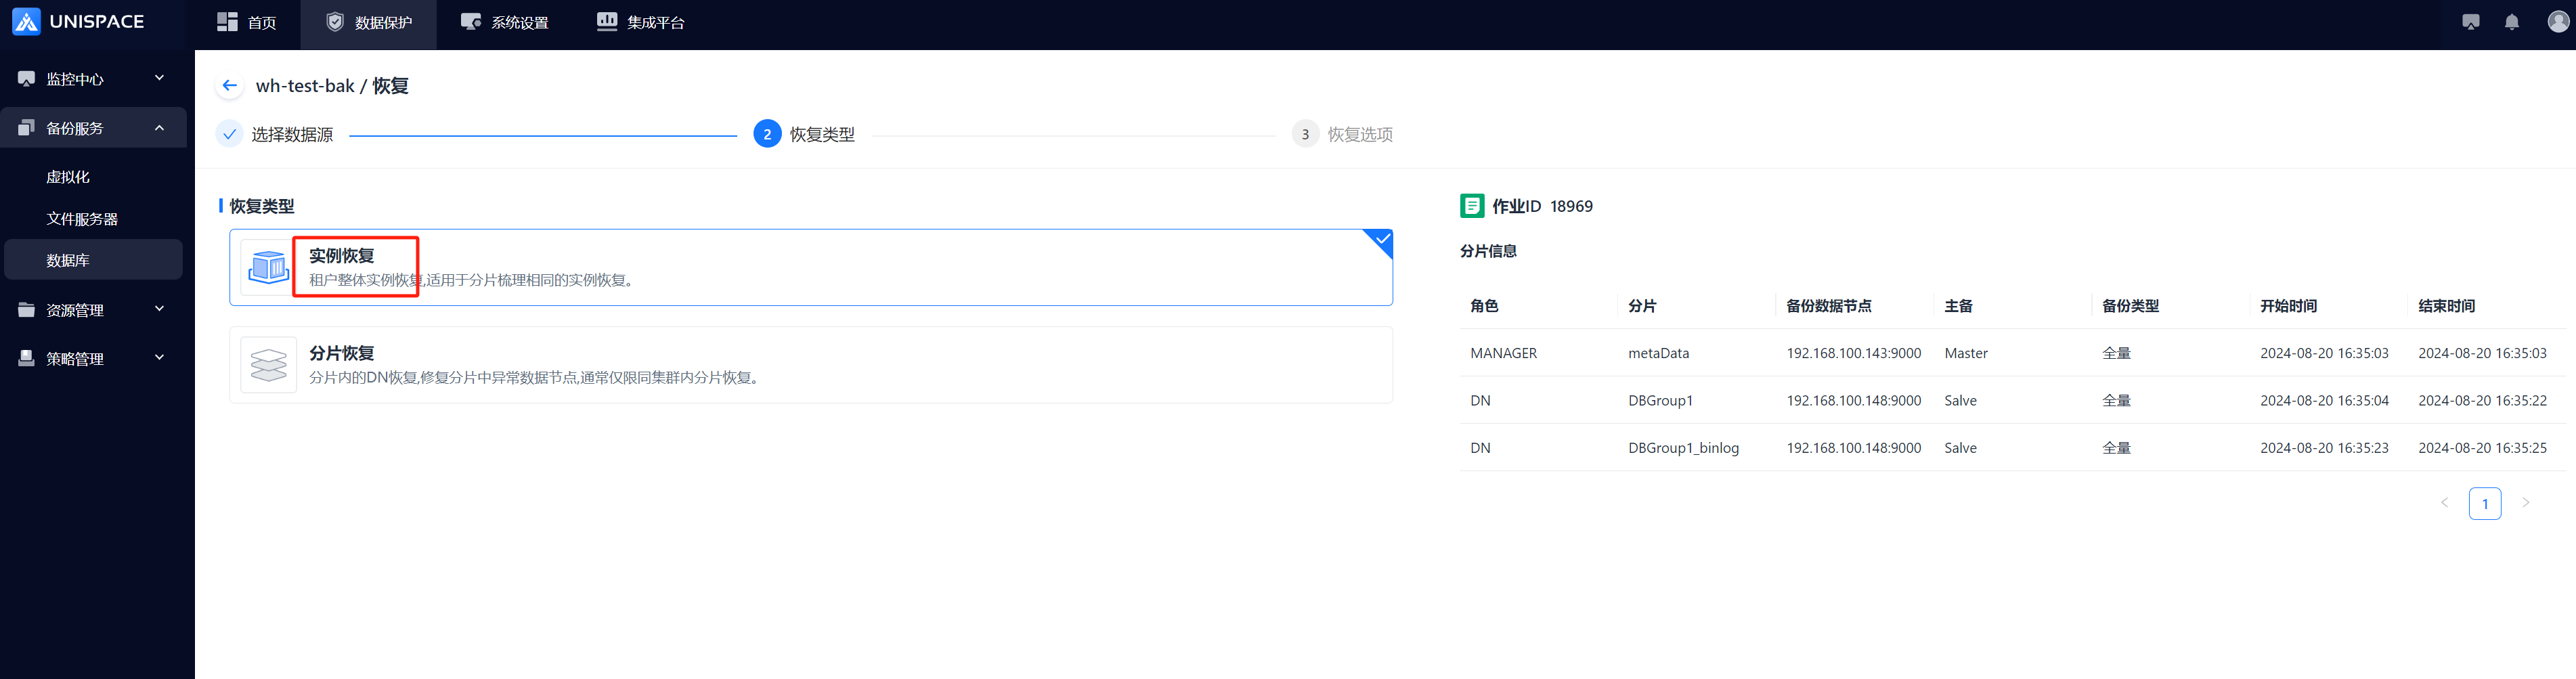
Step 4: For in-place recovery, fill in the form.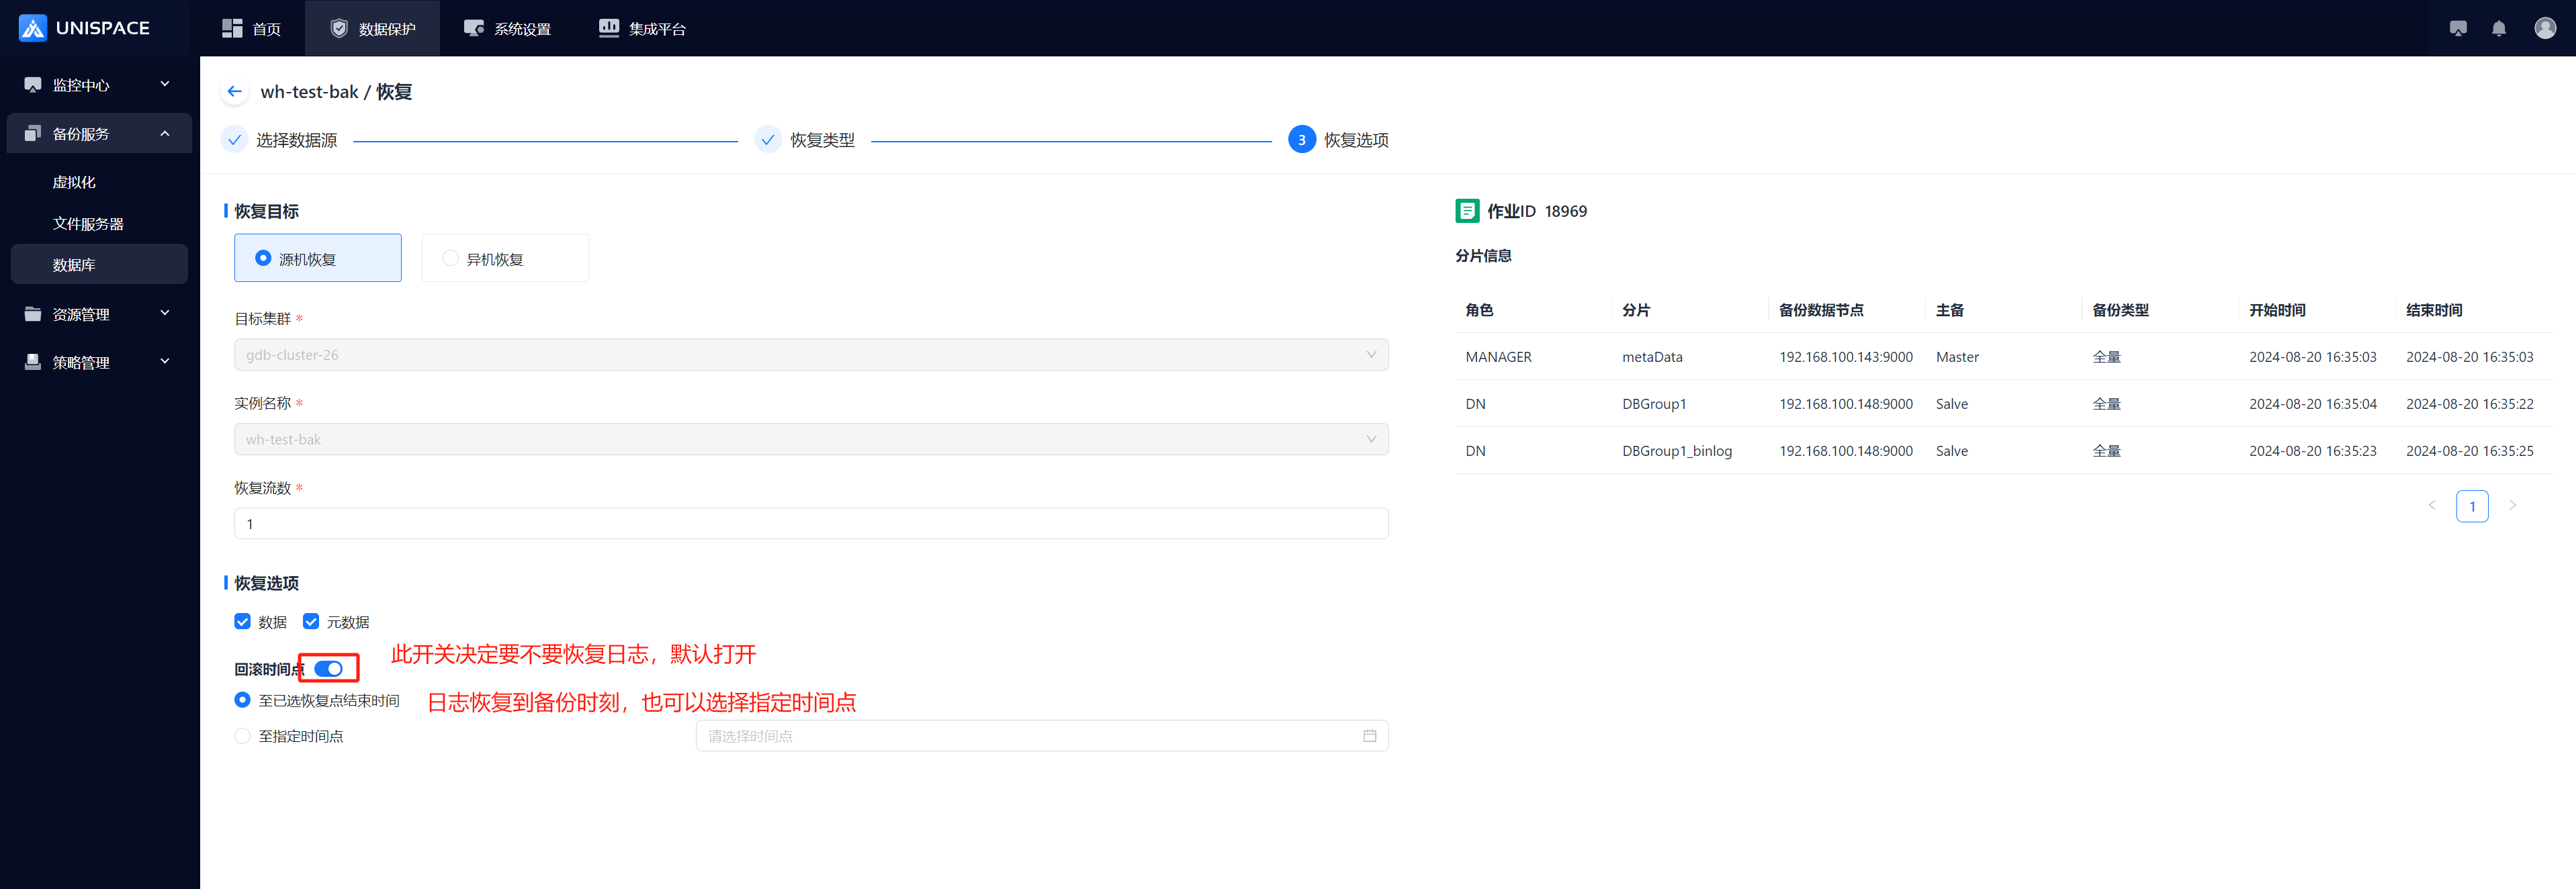
Step 5: For cross-machine recovery, fill in the form and click OK.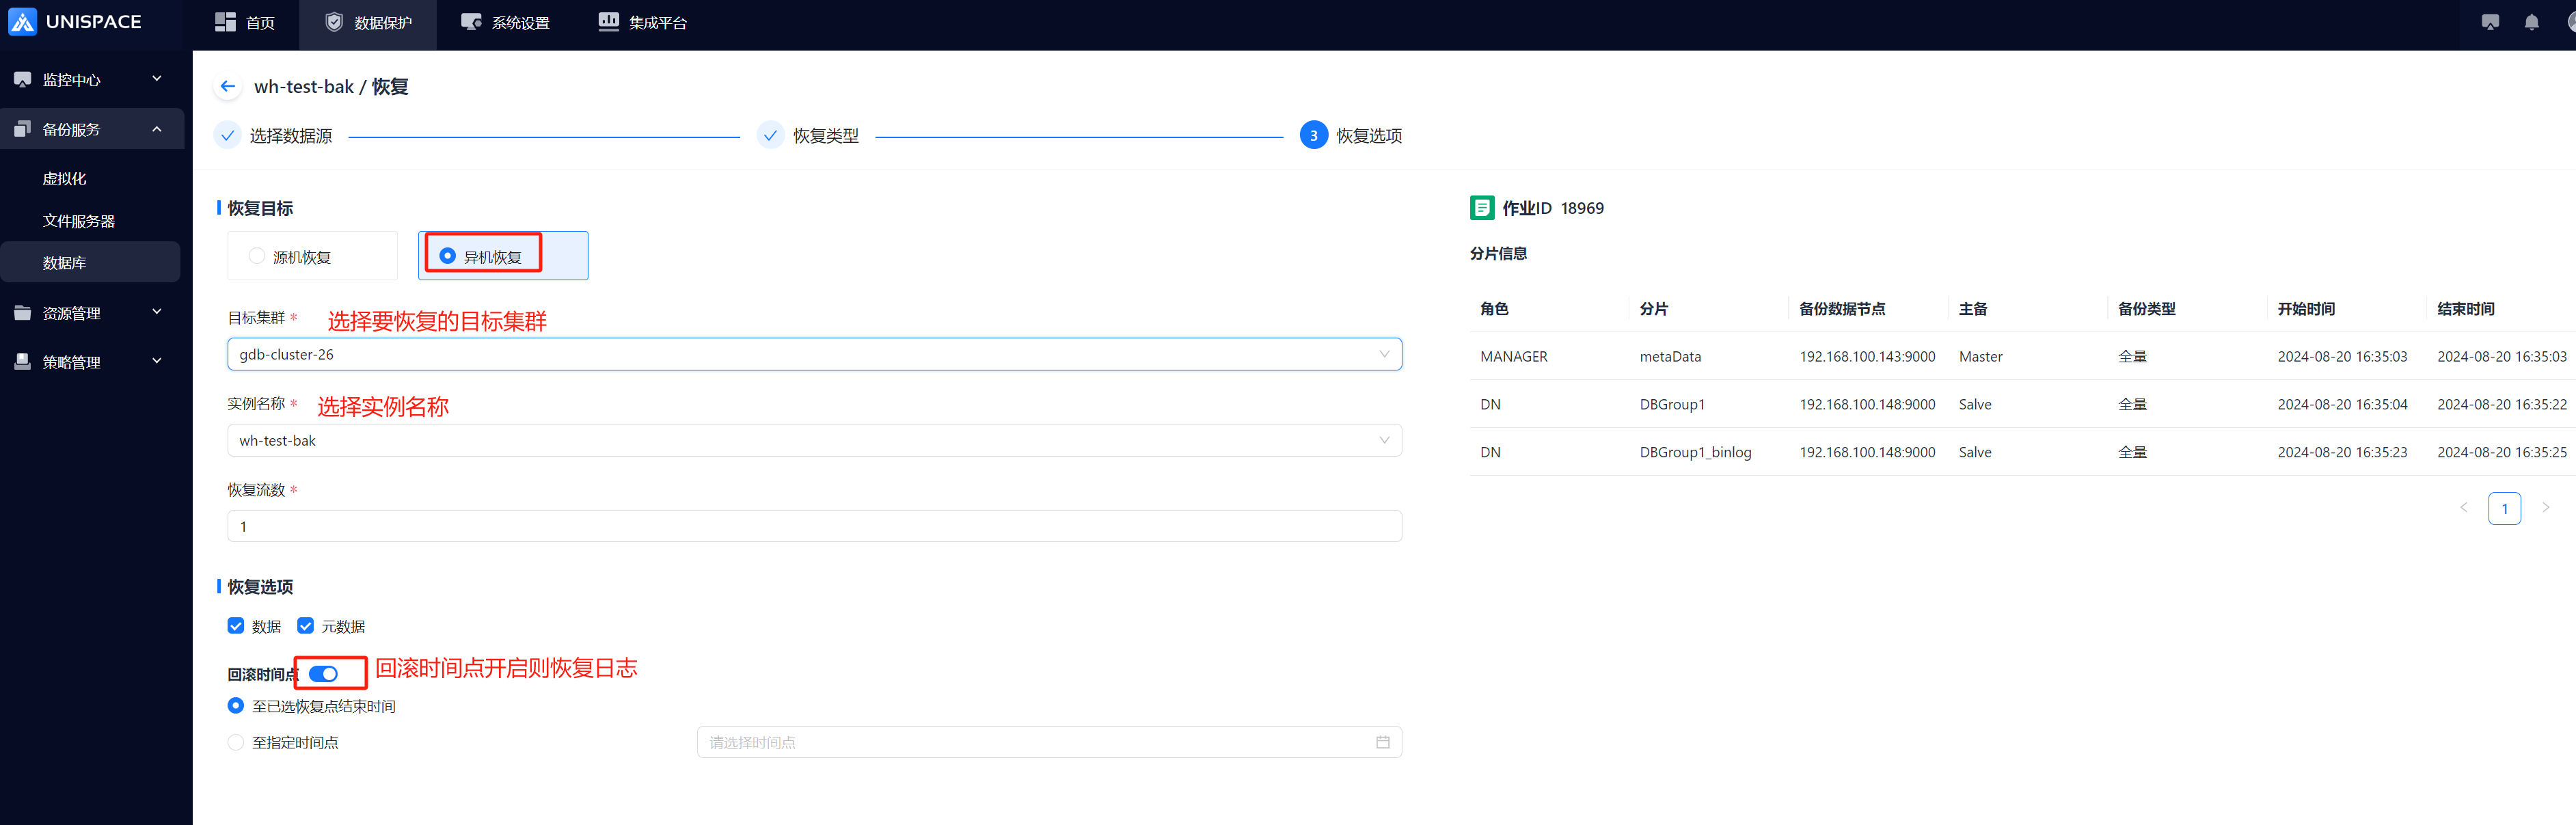

Step 6: Once the job starts successfully, click Monitoring Center - Jobs - Active Jobs to view it.
Step 7: After the job finishes, click Monitoring Center - Jobs - Job History to check the job and its status.
1.5.2 GoldenDB Shard Recovery
Prerequisites
- The GoldenDB backup set has been successfully backed up.
Steps
Step 1: Click Instance - Operation - Recovery.
Step 2: Query the recovery point based on the time range, select the job ID to be recovered, and click Next.
Step 3: Choose the "Shard Recovery" type and click Next.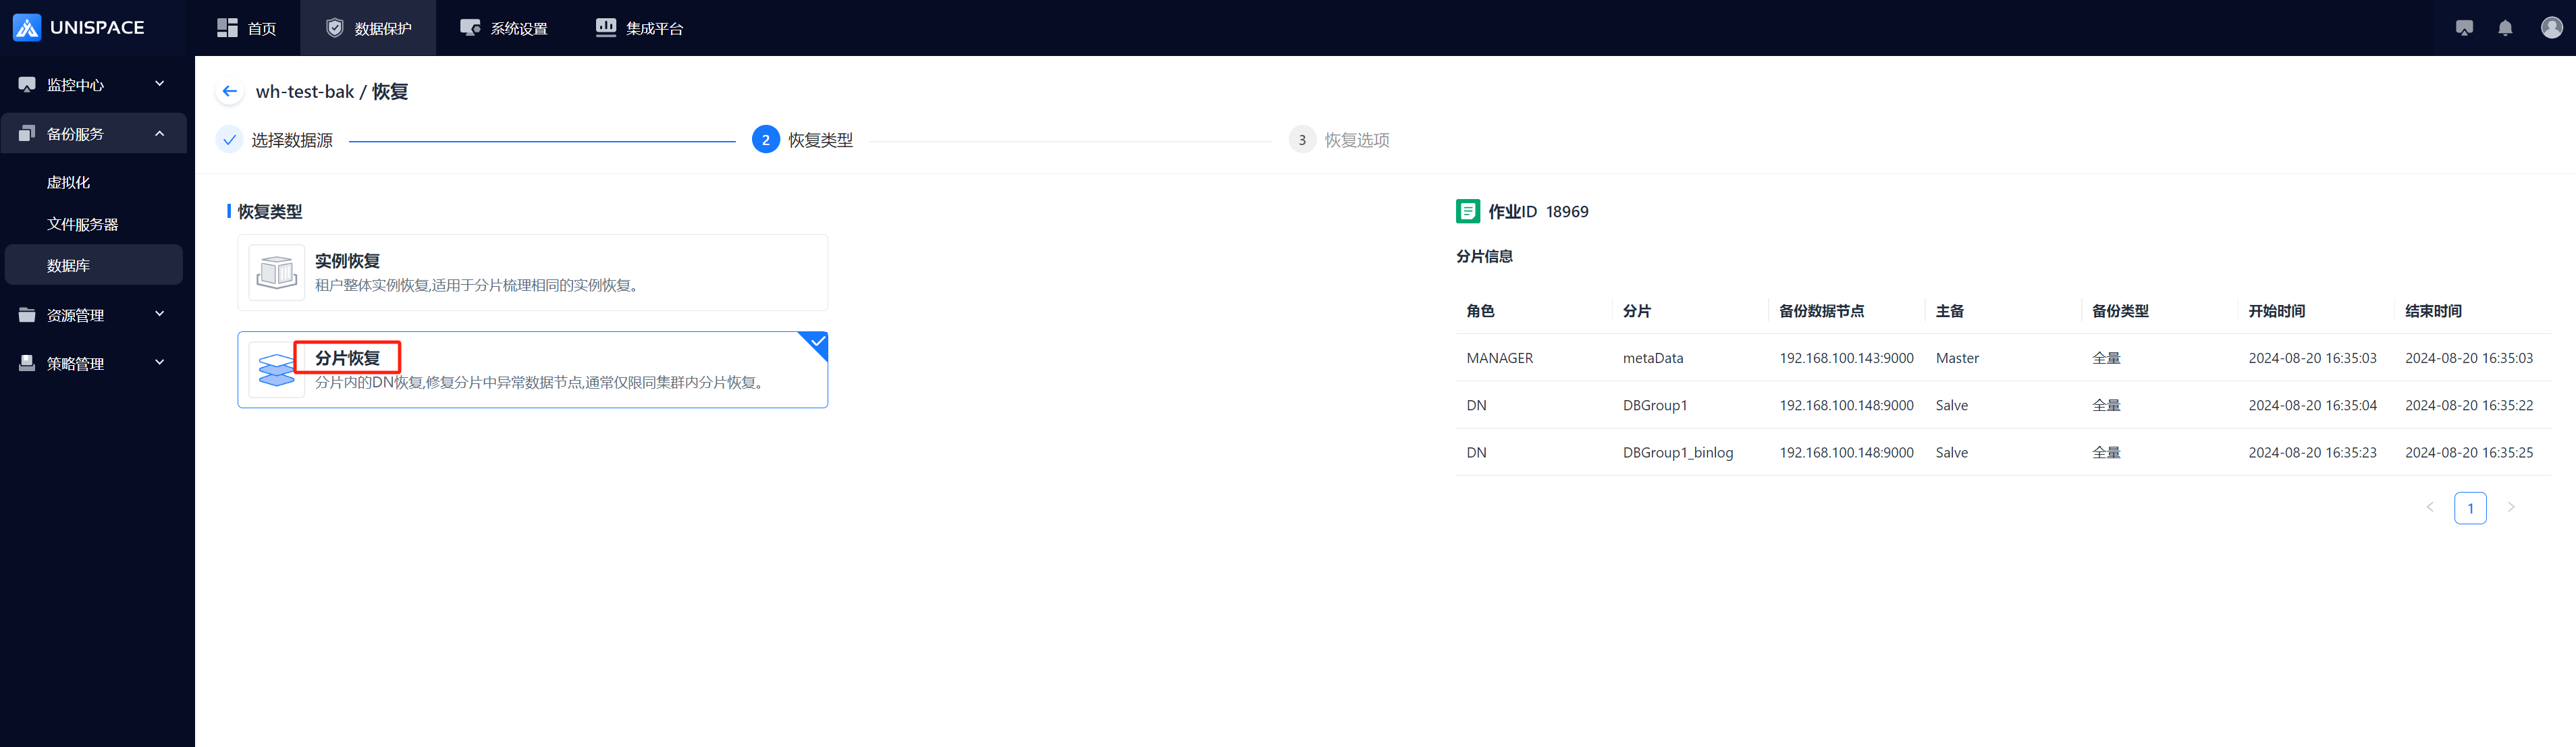 Step 4: For in-place recovery, fill in the form and click OK.
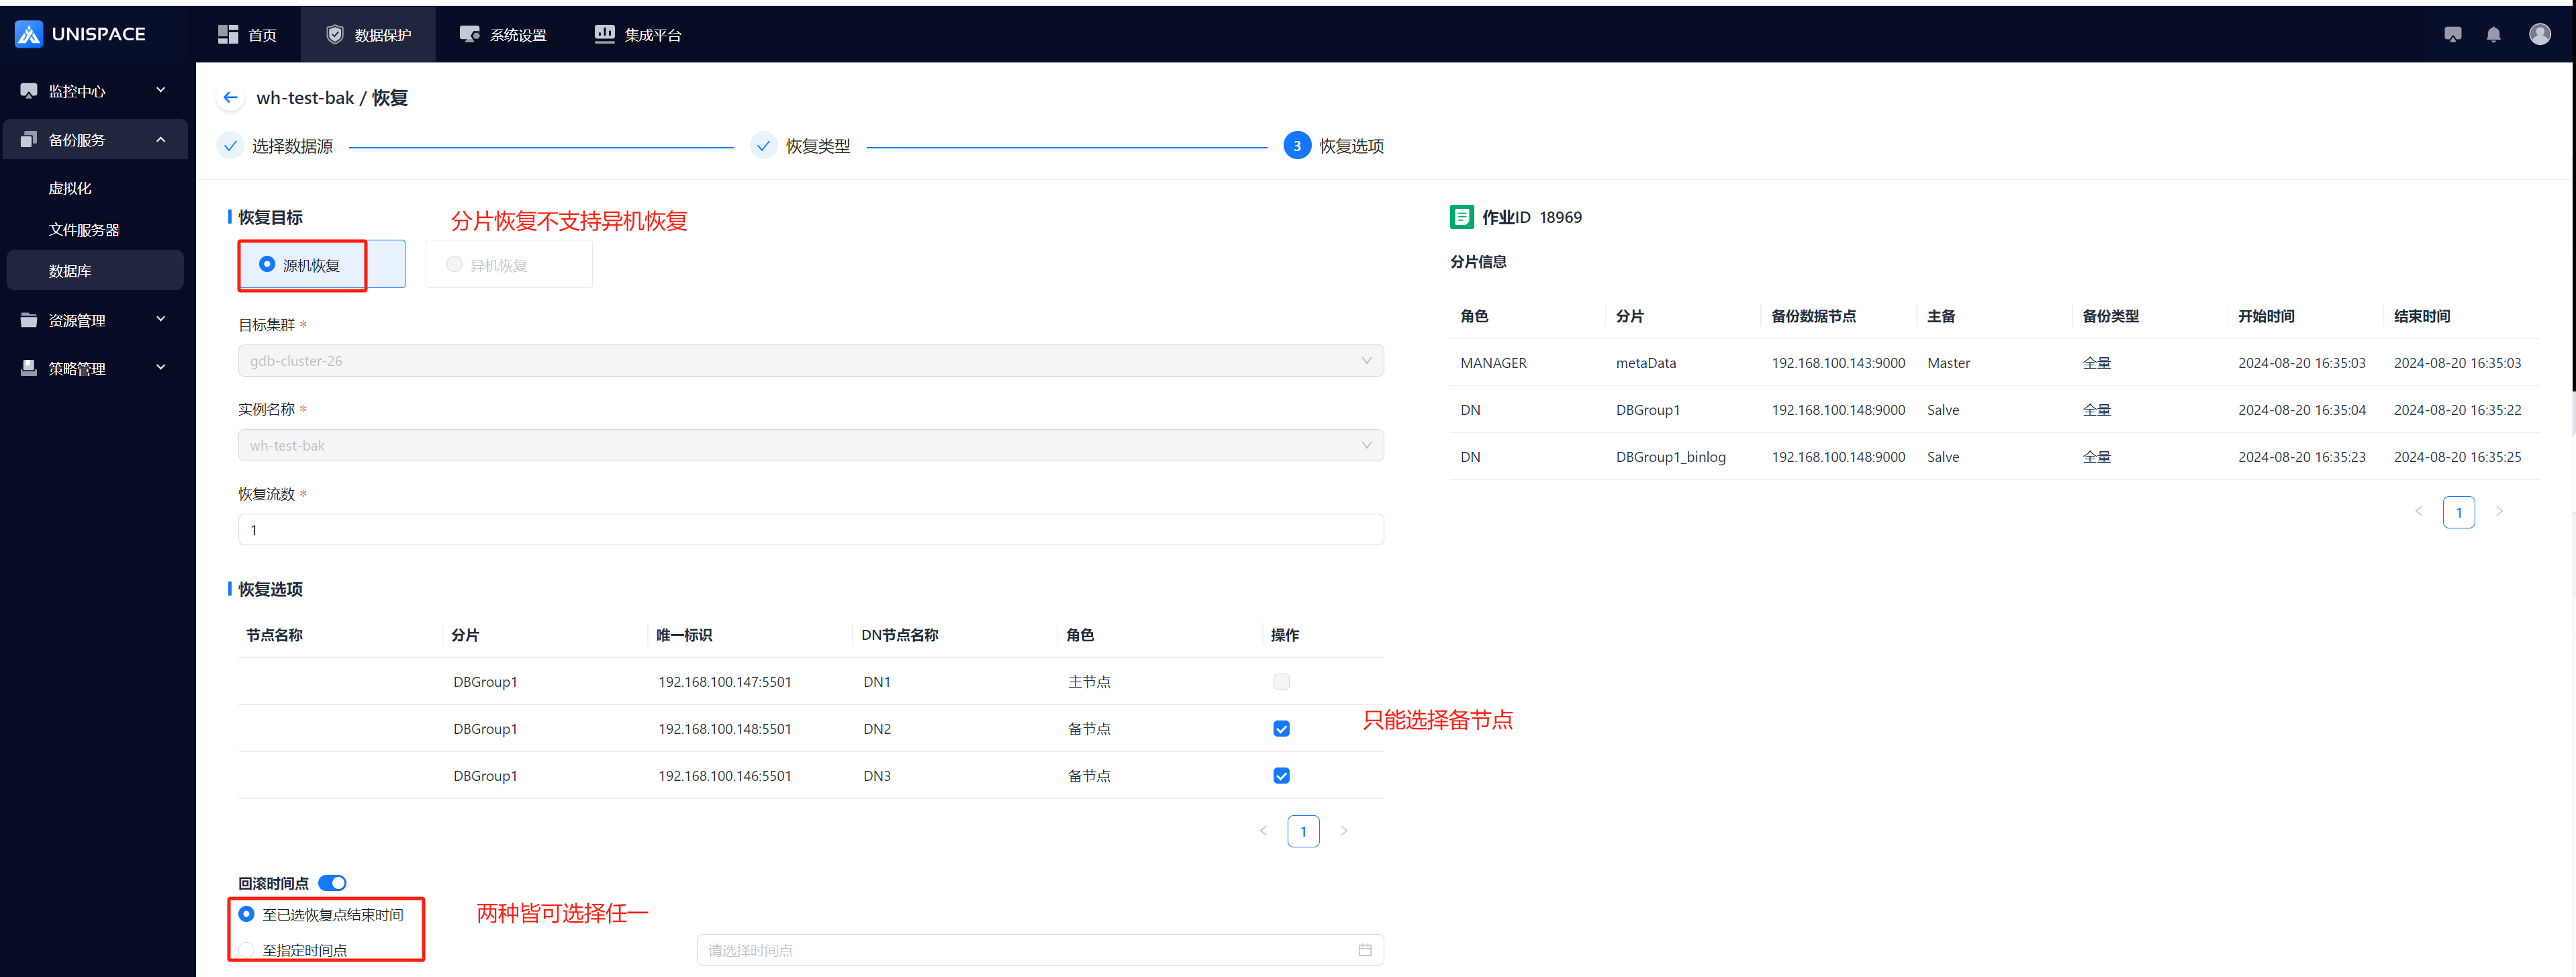

Step 5: Once the job starts successfully, click Monitoring Center - Jobs - Active Jobs to view it.
Step 6: After the job finishes, click Monitoring Center - Jobs - Job History to check the job and its status.