Agent--Dameng
1.1 Create a Dameng Instance
Prerequisites
- Created a new user.
- Created a new storage repository.
- Created a new service plan.
- Access to a Dameng service that has been installed.
Steps
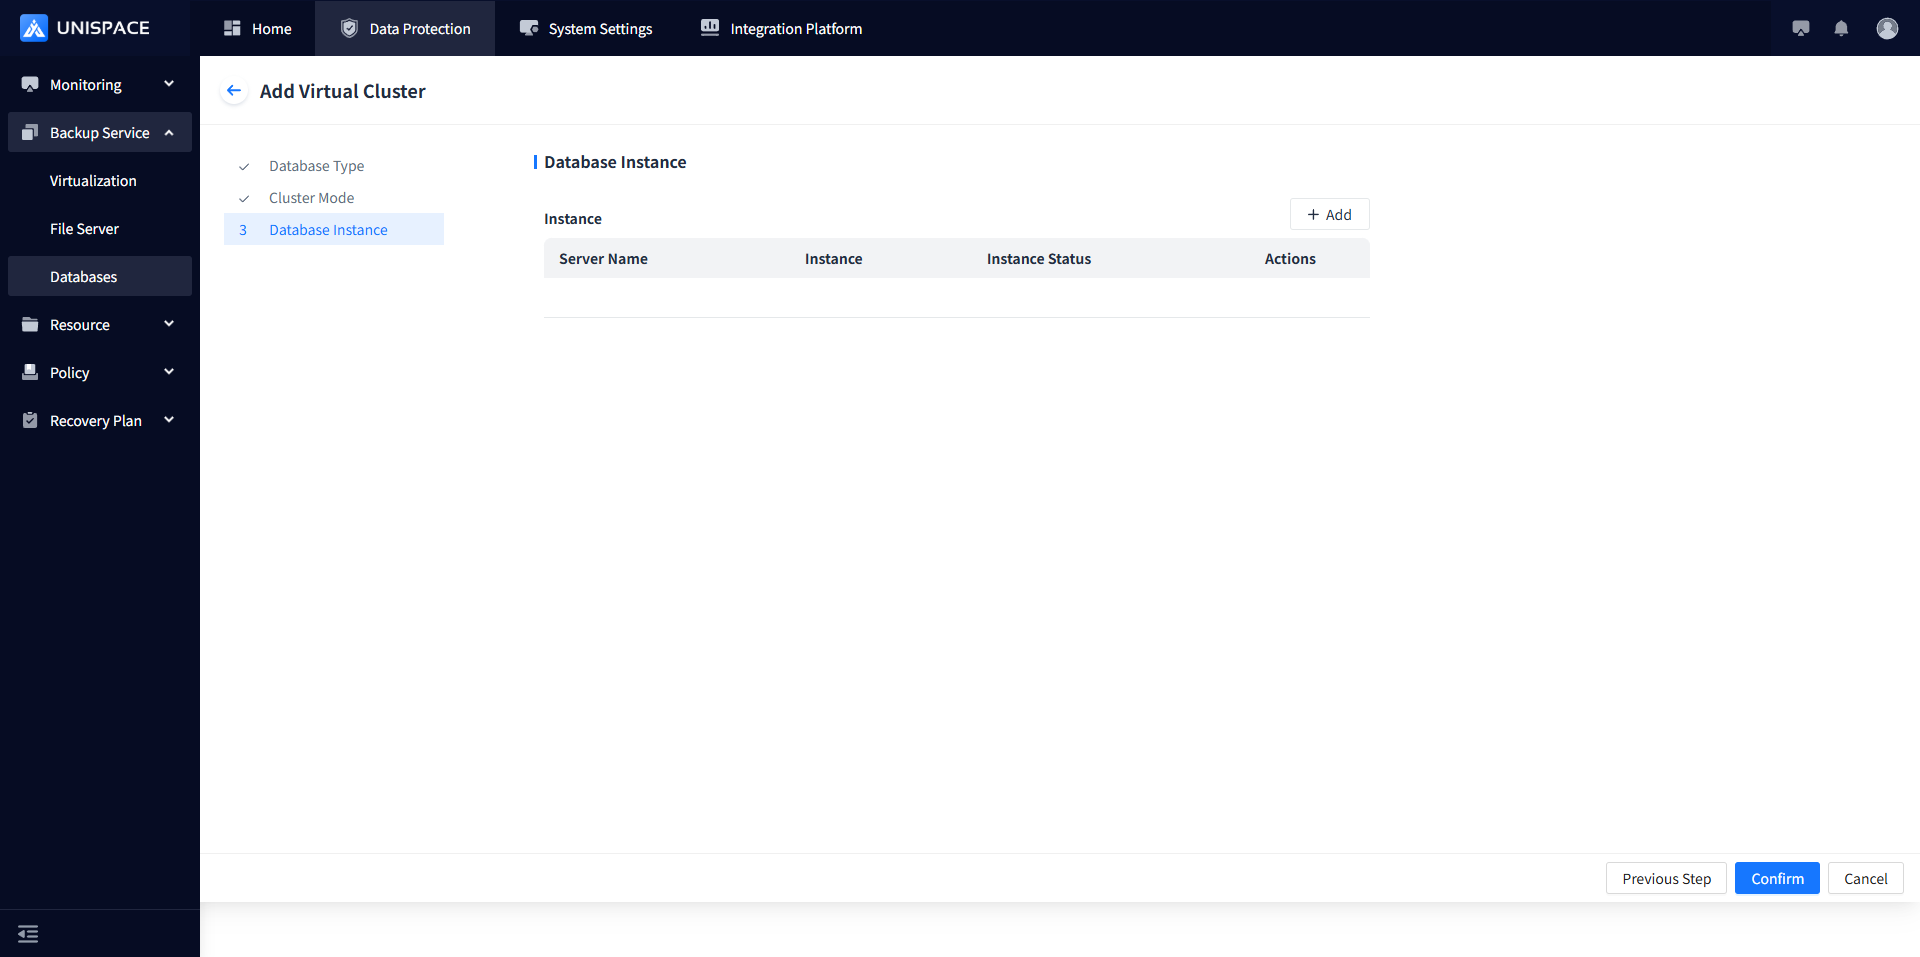
Step 1: Click on the system menu Backup Service - Database, select Server Name to enter the database instance page.
Step 2: Click Instance.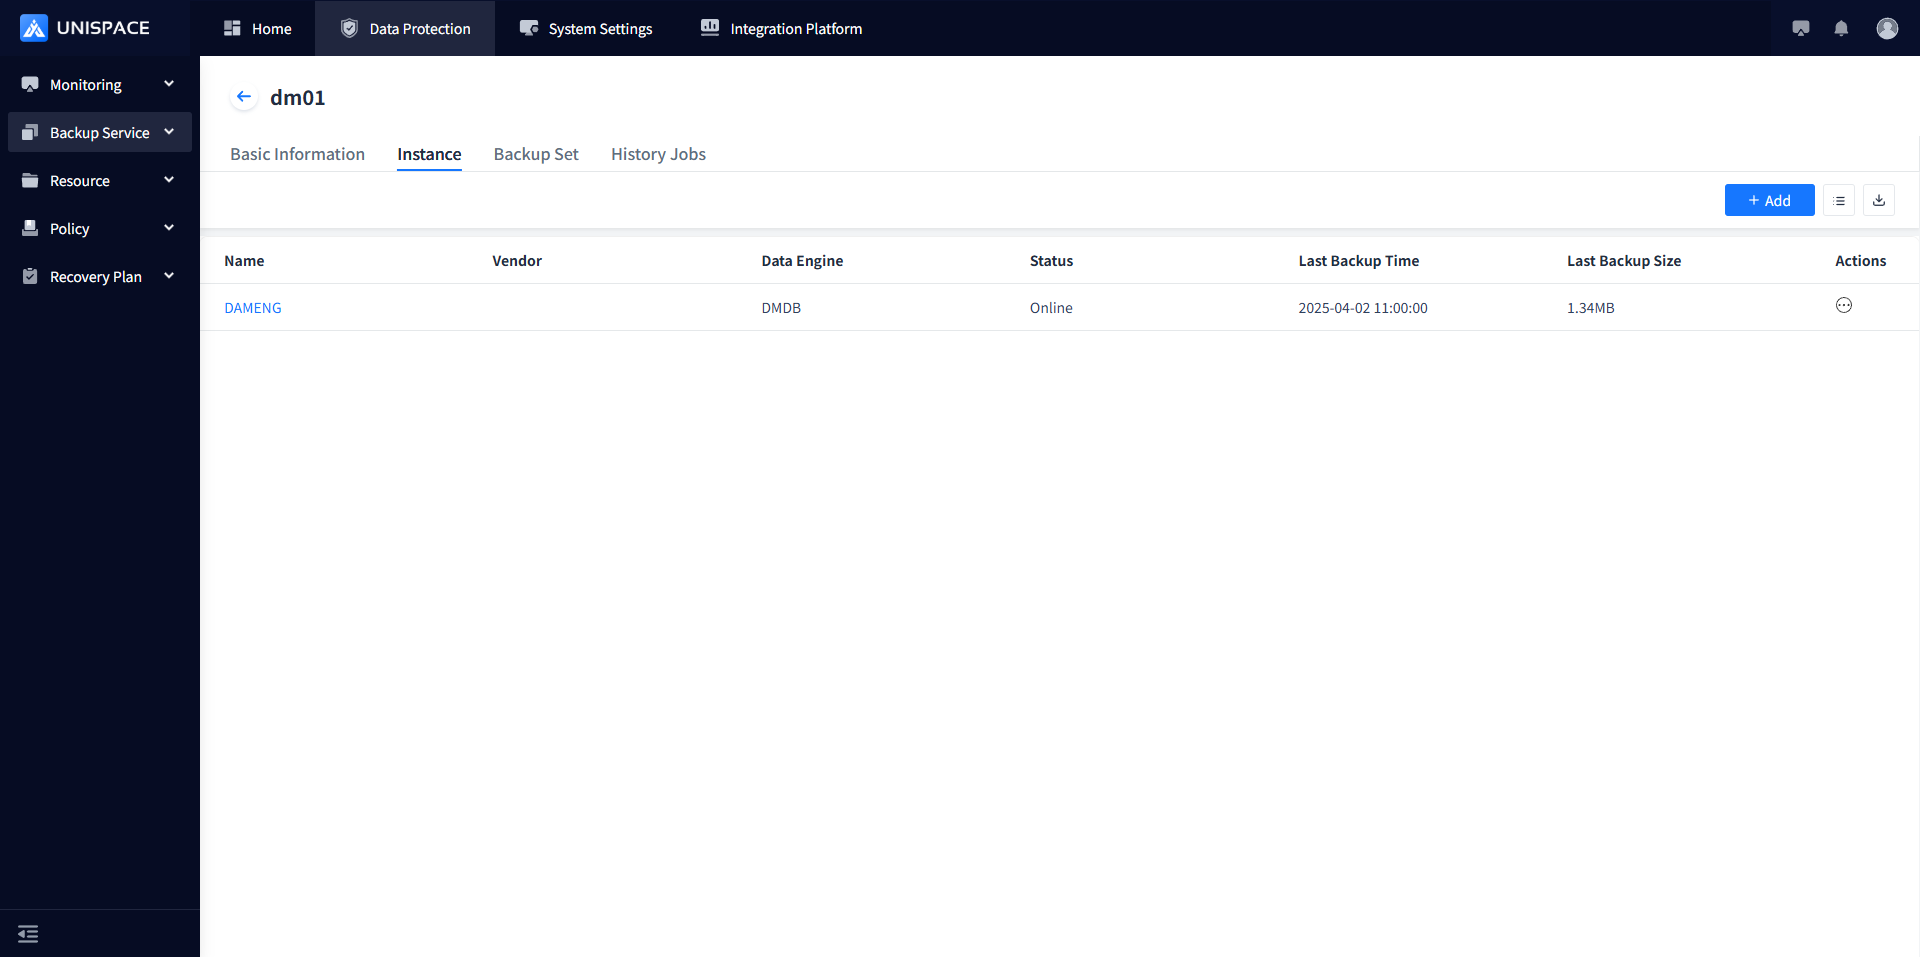
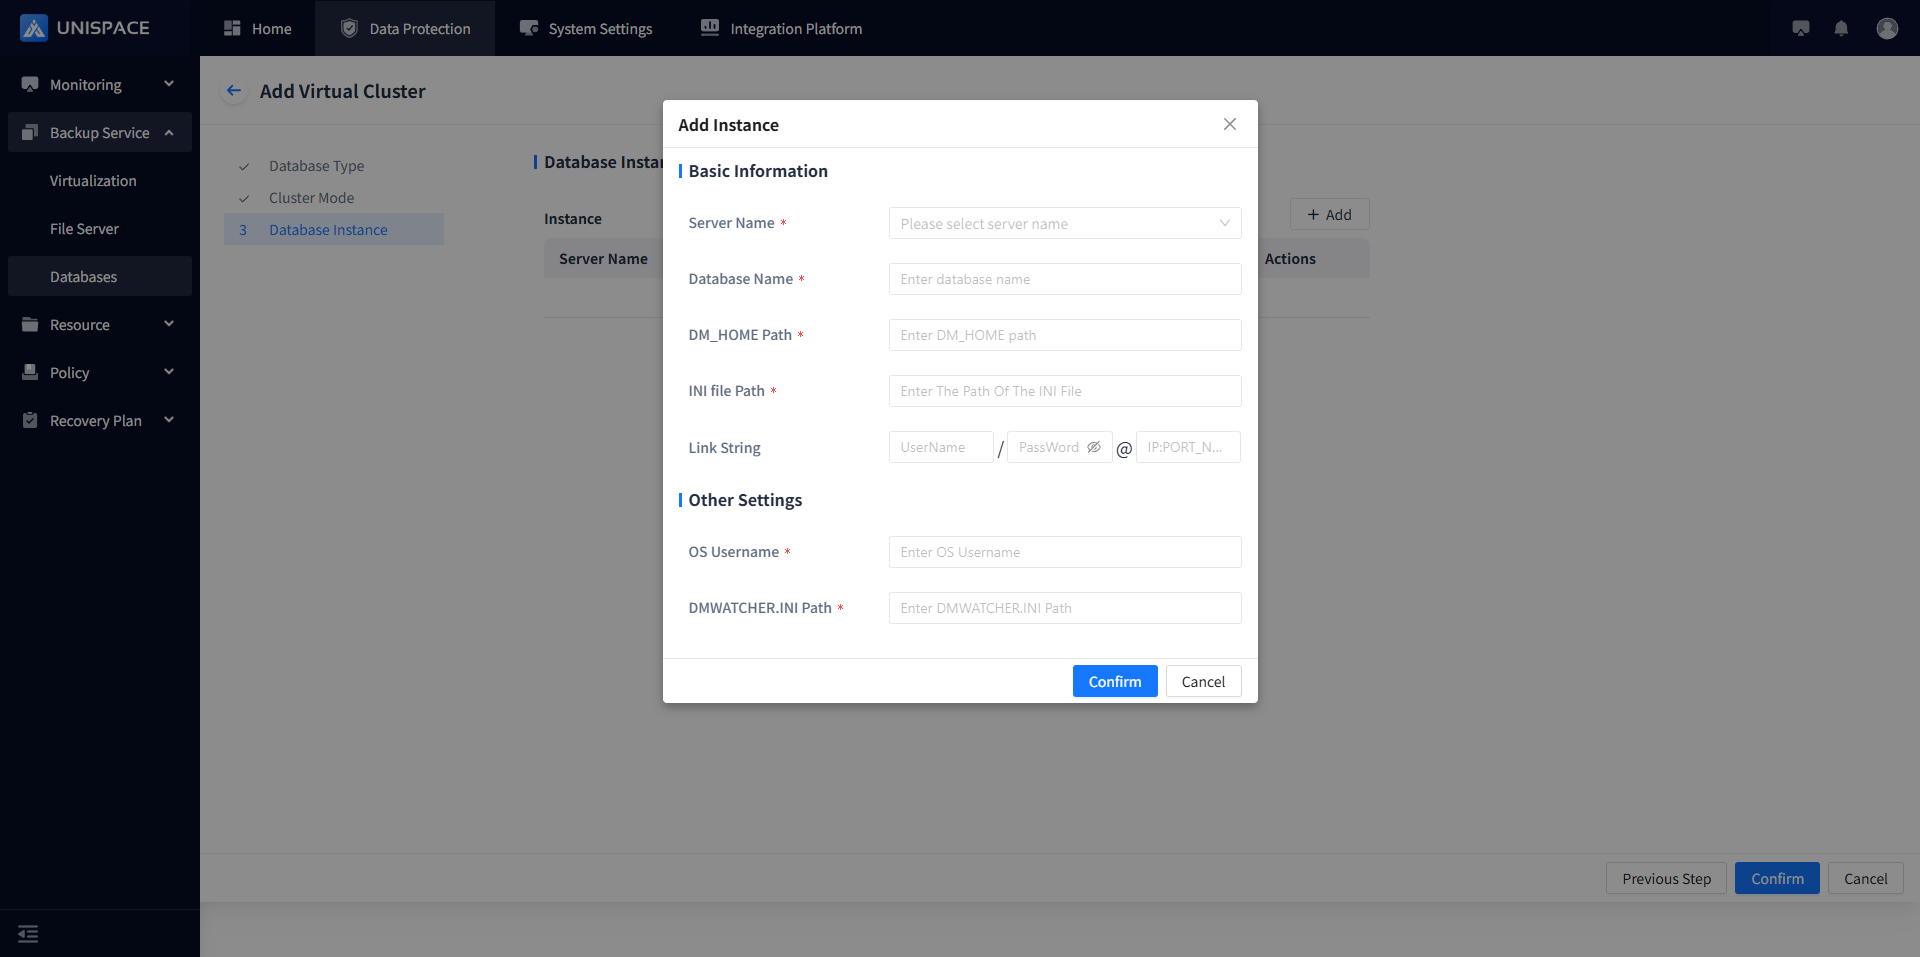
Step 3: Click the Add button in the upper right corner of Instance. A pop-up window will appear as shown below: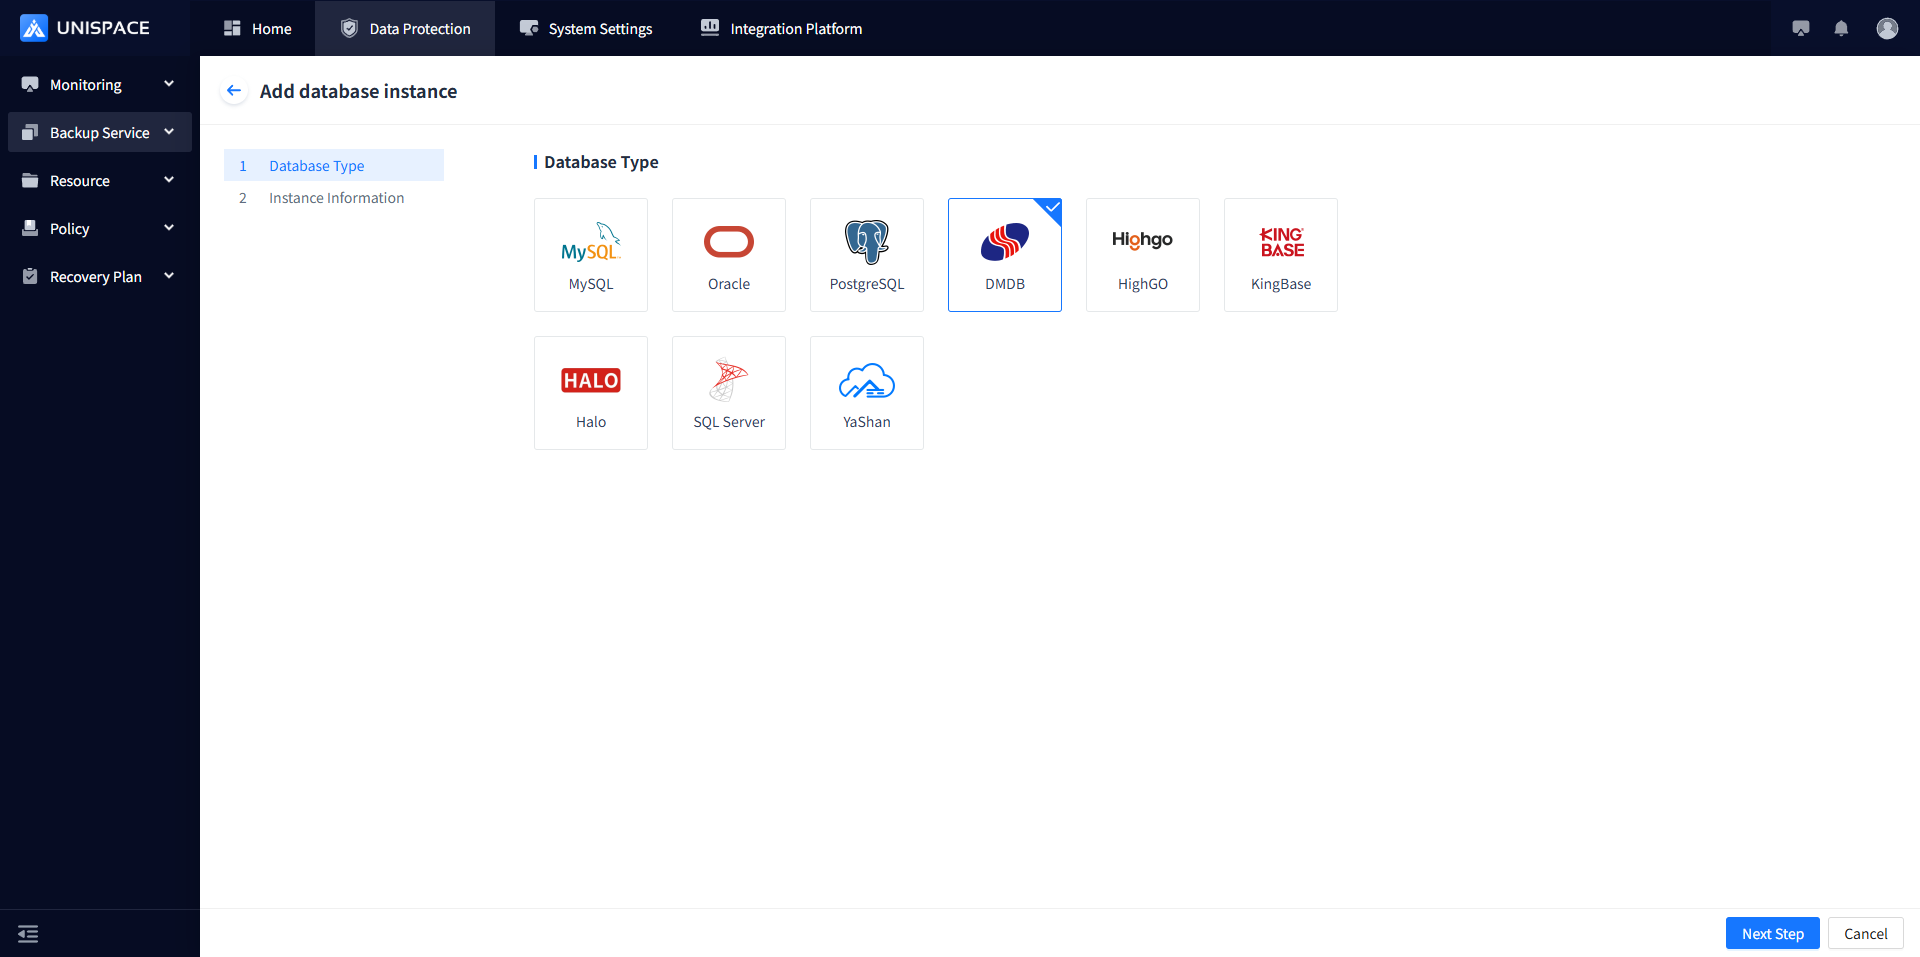
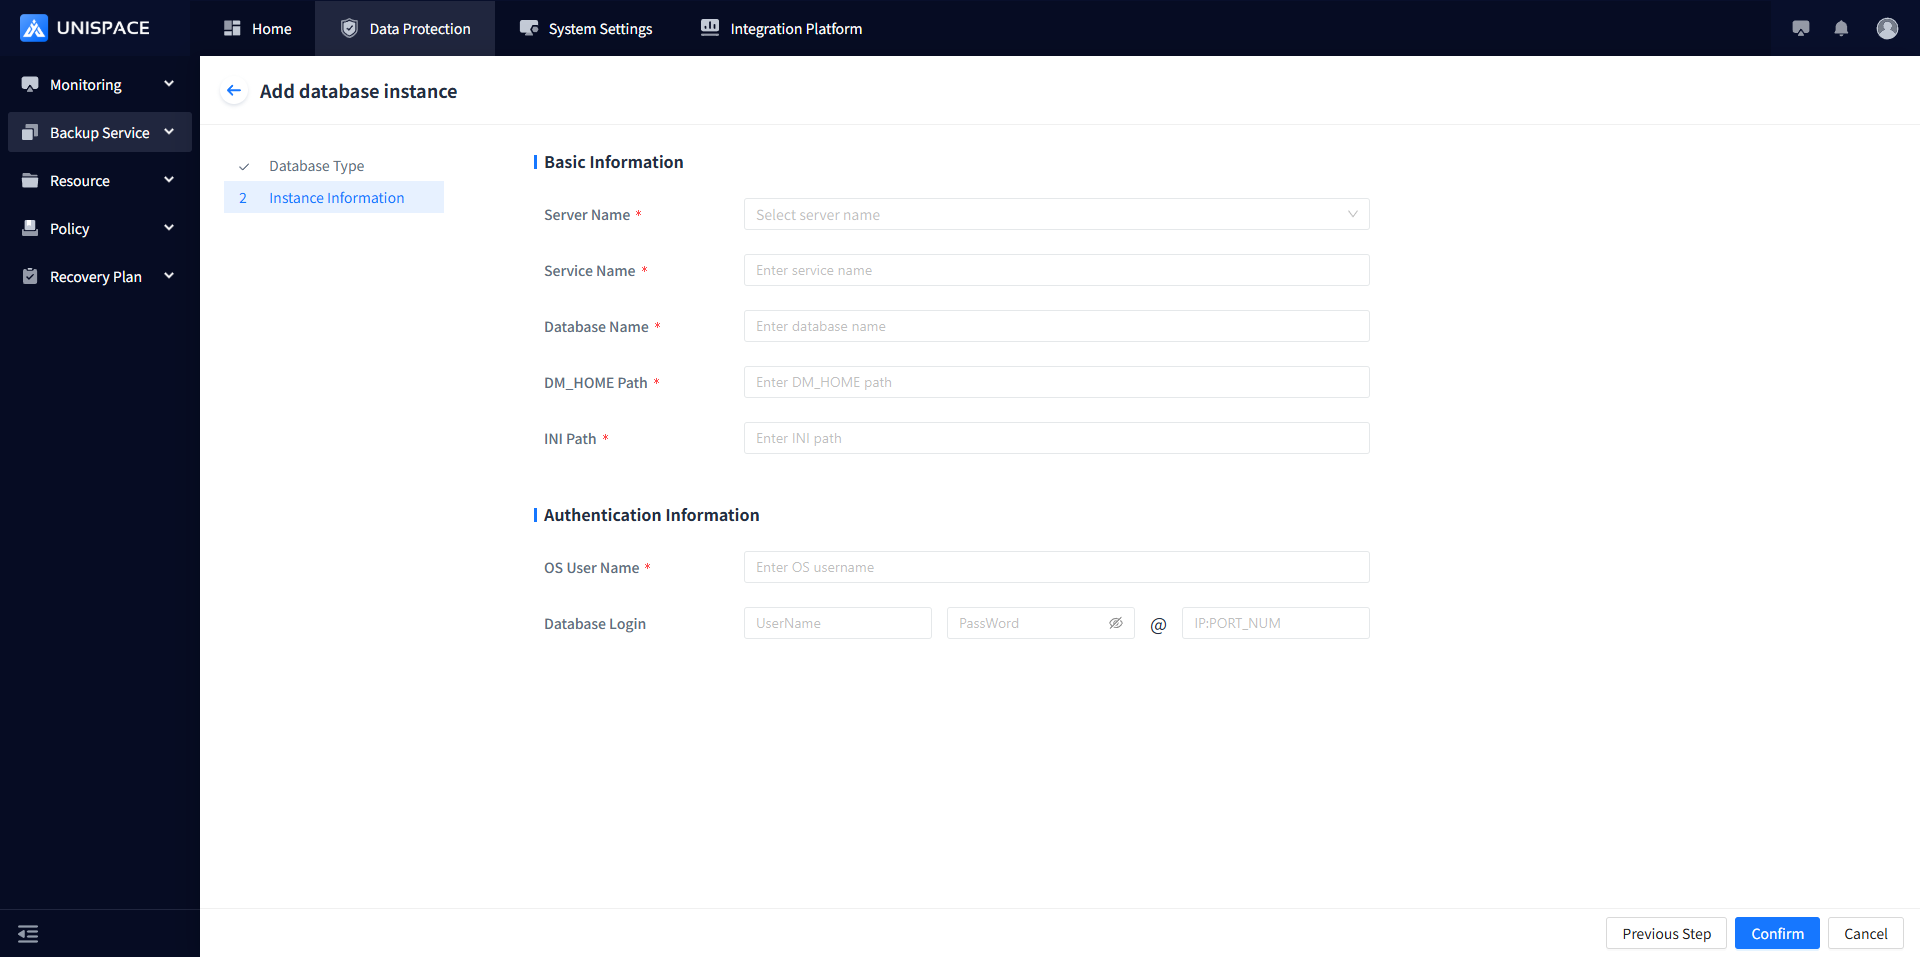
Step 4: Fill in the required parameters as described below:
| Parameter Name | Description | Setting Principle |
|---|---|---|
| Database Type | Single selection, required, default is MySQL | Select Dameng |
| Server Name | Single selection, required | Select the server name where Dameng is located |
| Service Name | Text input, required, customizable | No length or special character restrictions for now |
| Database Name | Text input, required | Enter the name of the Dameng database as specified during creation |
| DM_HOME Path | Text input, required | Enter the installation path of Dameng software |
| INI Path | Text input, required | Enter the INI path |
| OS Username | Text input, required | Default username for Dameng |
| Username | Text input, required | Enter the Dameng username |
| Password | Password input, required | Enter the Dameng password |
| IP:PORT_NUM | Text input | Enter the Dameng host IP and port number |
Step 5: Click Confirm and a success message will be displayed.
1.2 Create a Dameng Backup Object Set
Prerequisites
- A Dameng instance has been created.
Steps
Step 1: Click on the system menu Backup Service - Database - Server Name, select Backup Set.

Step 2: Click the Add button in the upper right corner of Backup Set. A pop-up window will appear as shown below:
Step 3: Fill in the necessary parameters as described below:
| Parameter Name | Description | Setting Principle |
|---|---|---|
| Instance | Single selection, required | Can choose the current Oracle instance, not selected by default |
| Backup Set Name | Text input, required | Up to 50 characters, no special characters allowed |
| Backup Mode | Single selection, default is database backup | Supports database backup (including logs), archive log backup, with optional deletion after backup |
| Advanced Options | Switch, default to automatic backup of configuration and control files | The switch is currently ineffective, keep it turned on |
| Data Stream Count | Numeric value | The number will not exceed 200 |
| Configuration Mode | Single selection, required | Simplified configuration or advanced configuration |
| Service Plan | Single selection, required | Choose the appropriate plan |
Step 4: Click OK, and a success message will be displayed.
1.3 Dameng Database Backup
Prerequisites
- The Dameng backup set has been configured.
Steps
Step 1: Click on the system menu Backup Service - Database - Server Name, select Backup Set.

Step 2: Select the backup set, click the Backup column under Actions.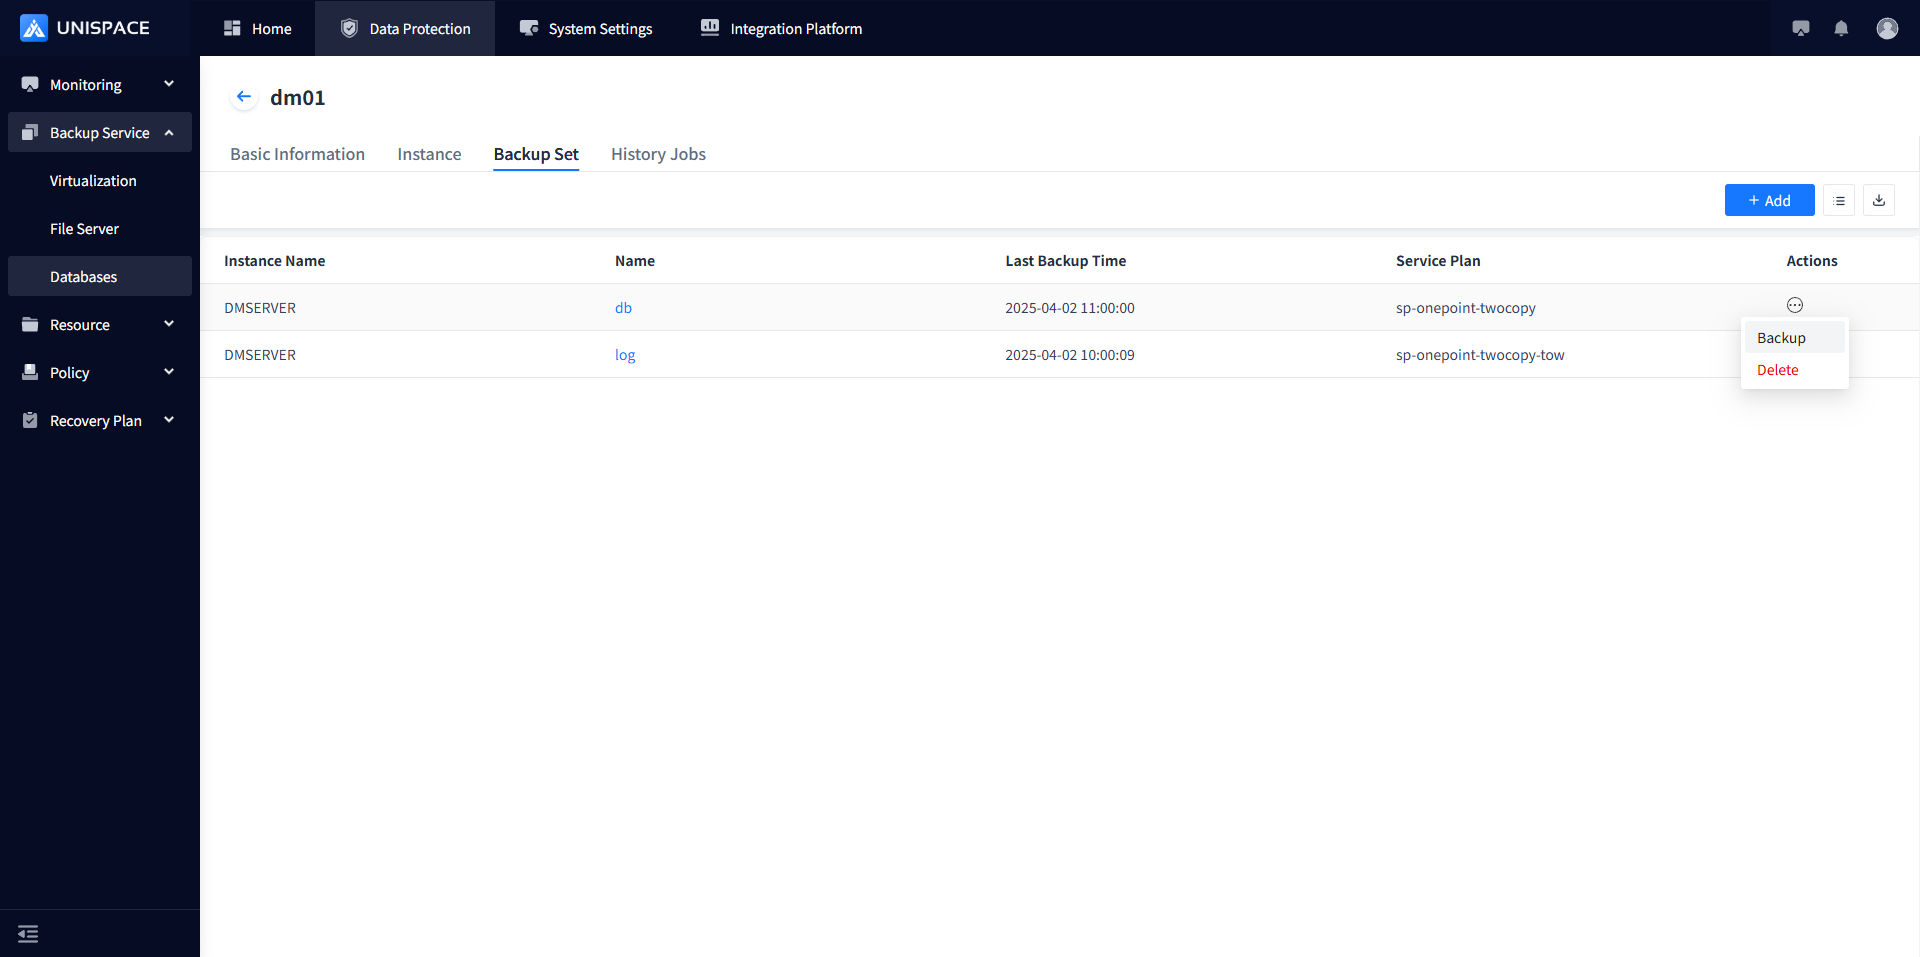
Select Full (Incremental, Log) and click **Confirm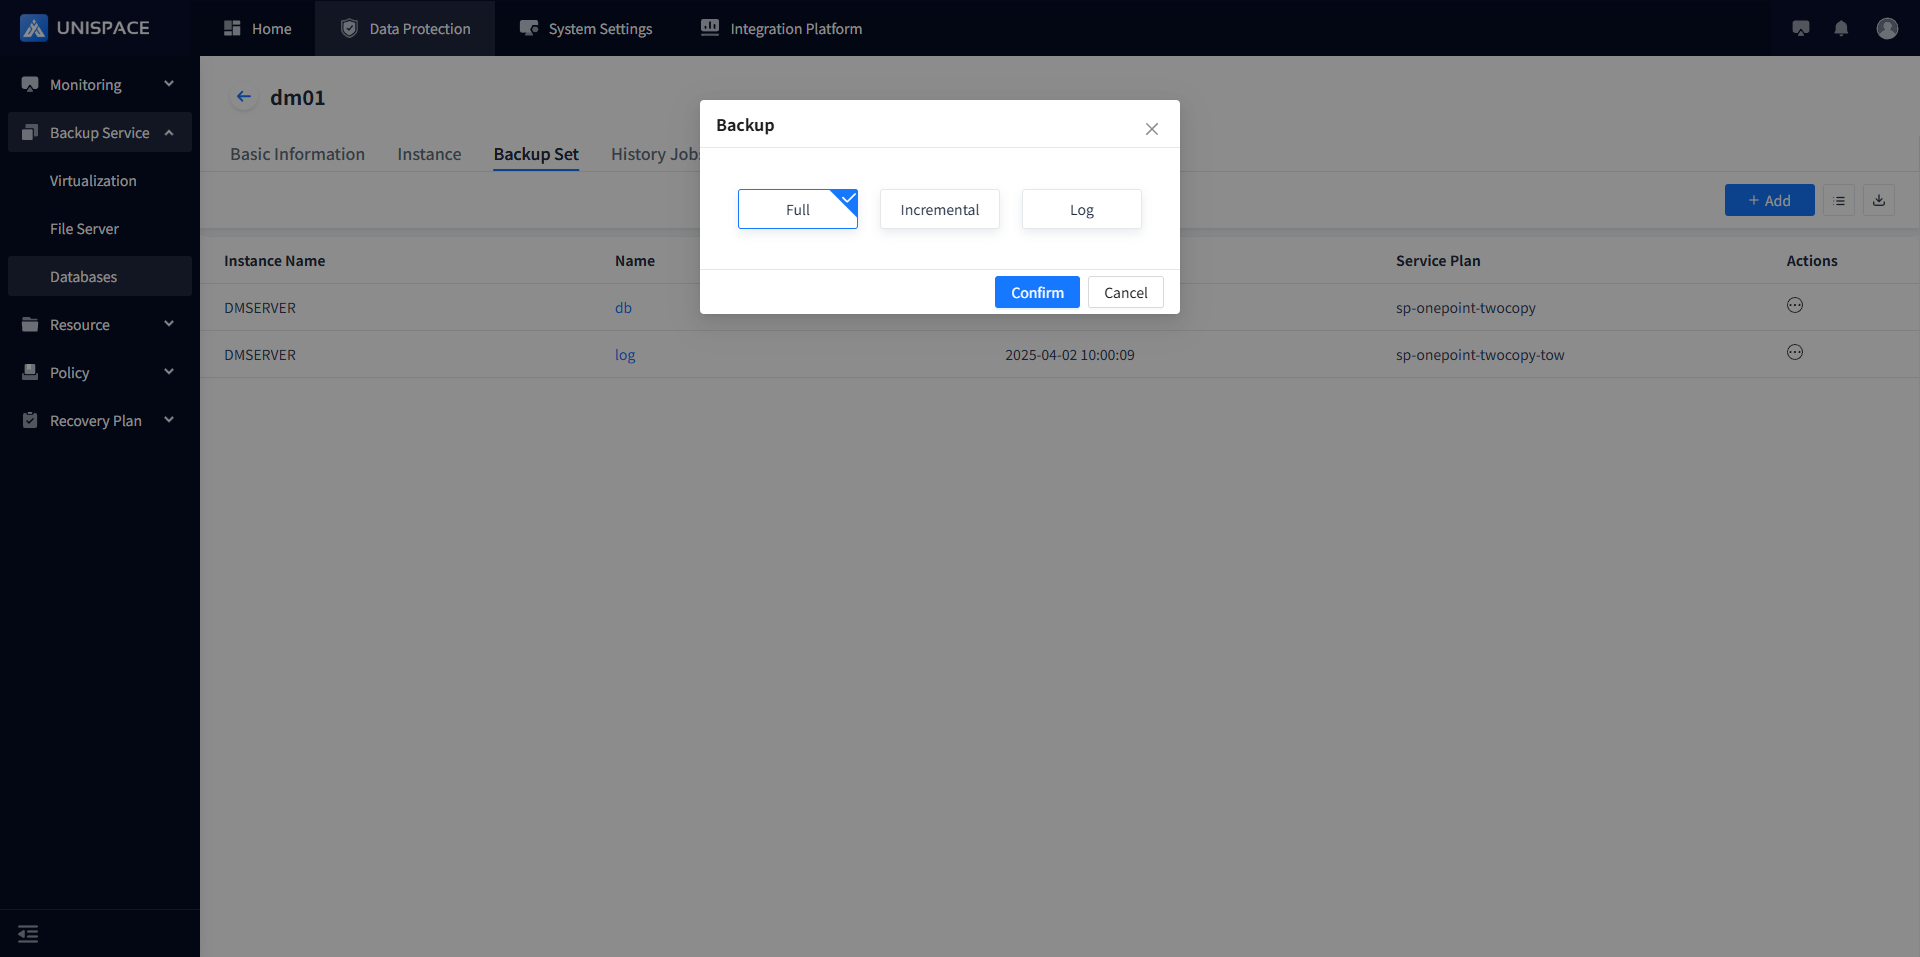 **A success message "Backup job submitted successfully" will be displayed.

Step 3: After the backup job starts successfully, go to Monitoring Center - Job - Active Job to view the job.
Step 4: Once the backup is complete, check Monitoring Center - Job - History Job for the job status as "Completed".
1.4 Dameng Log Backup
Prerequisites
- The Dameng instance has been added.
Steps
Step 1: Click on the system menu Backup Service - Database - Server Name, select Backup Set.

Step 2: Select the log Backup Set under the Operation column, click Backup.
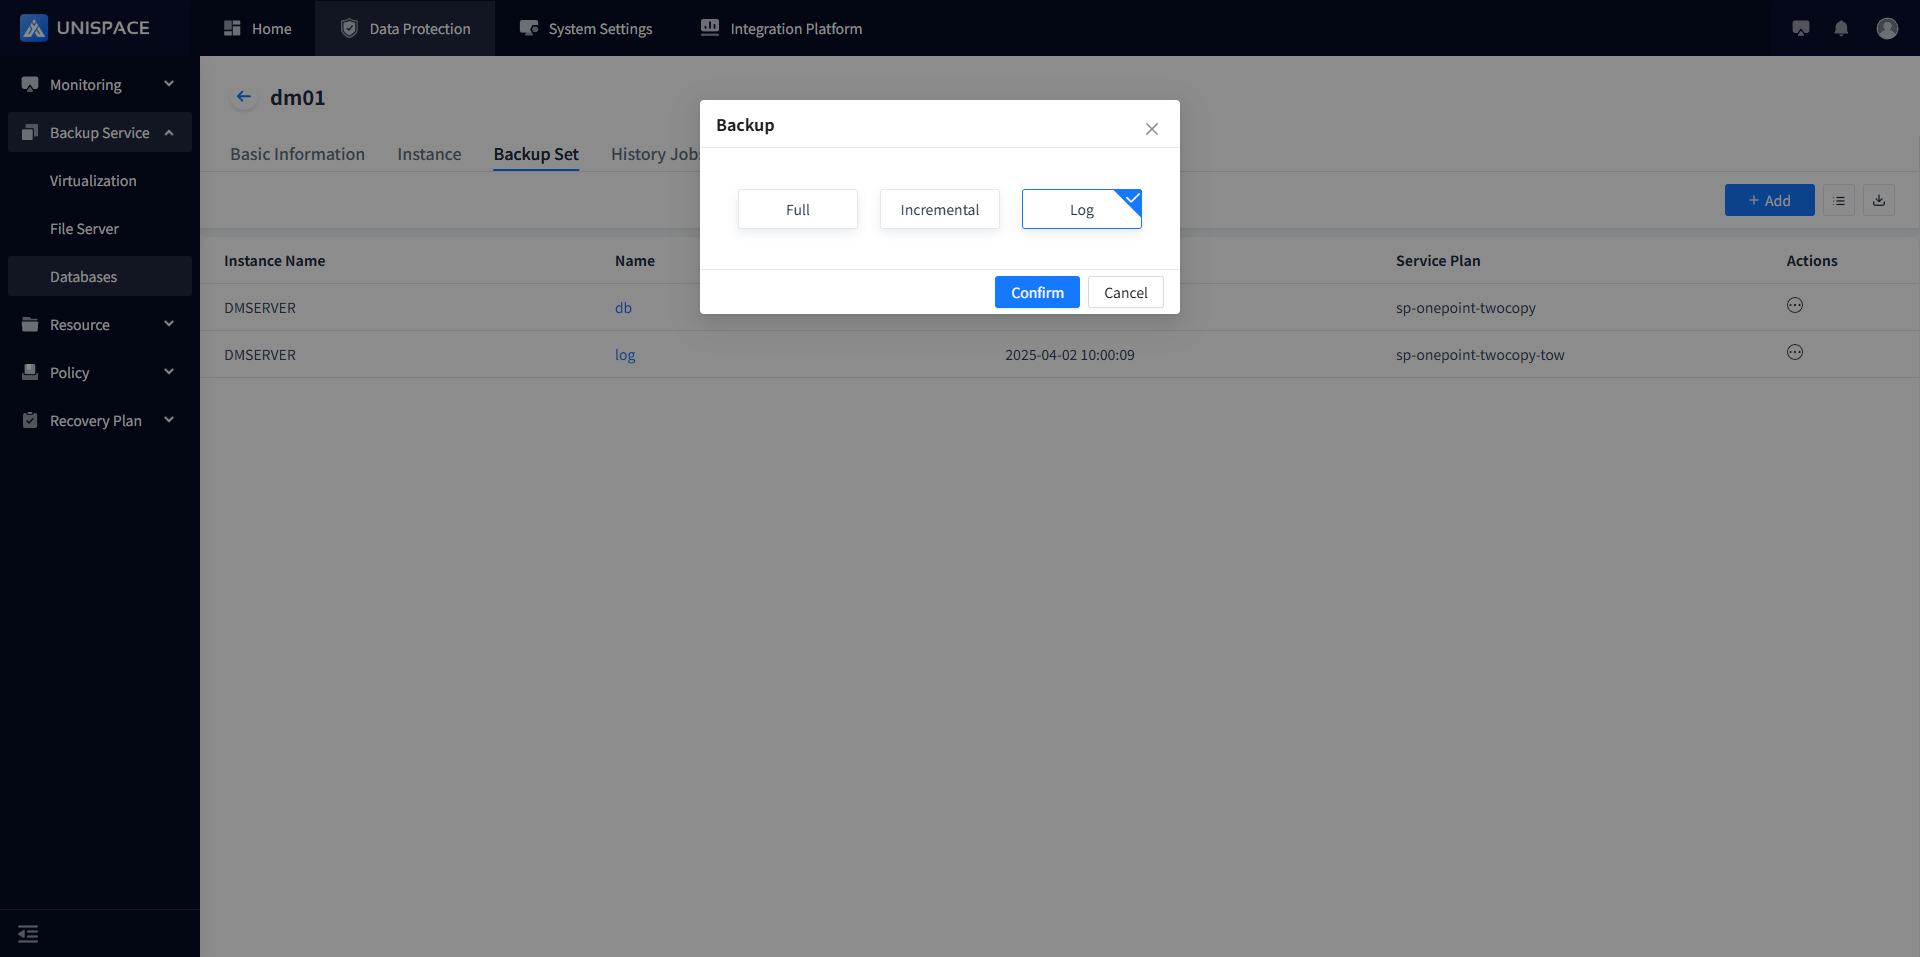
Step 3: Click OK, and a success message "Backup job submitted successfully" will be displayed.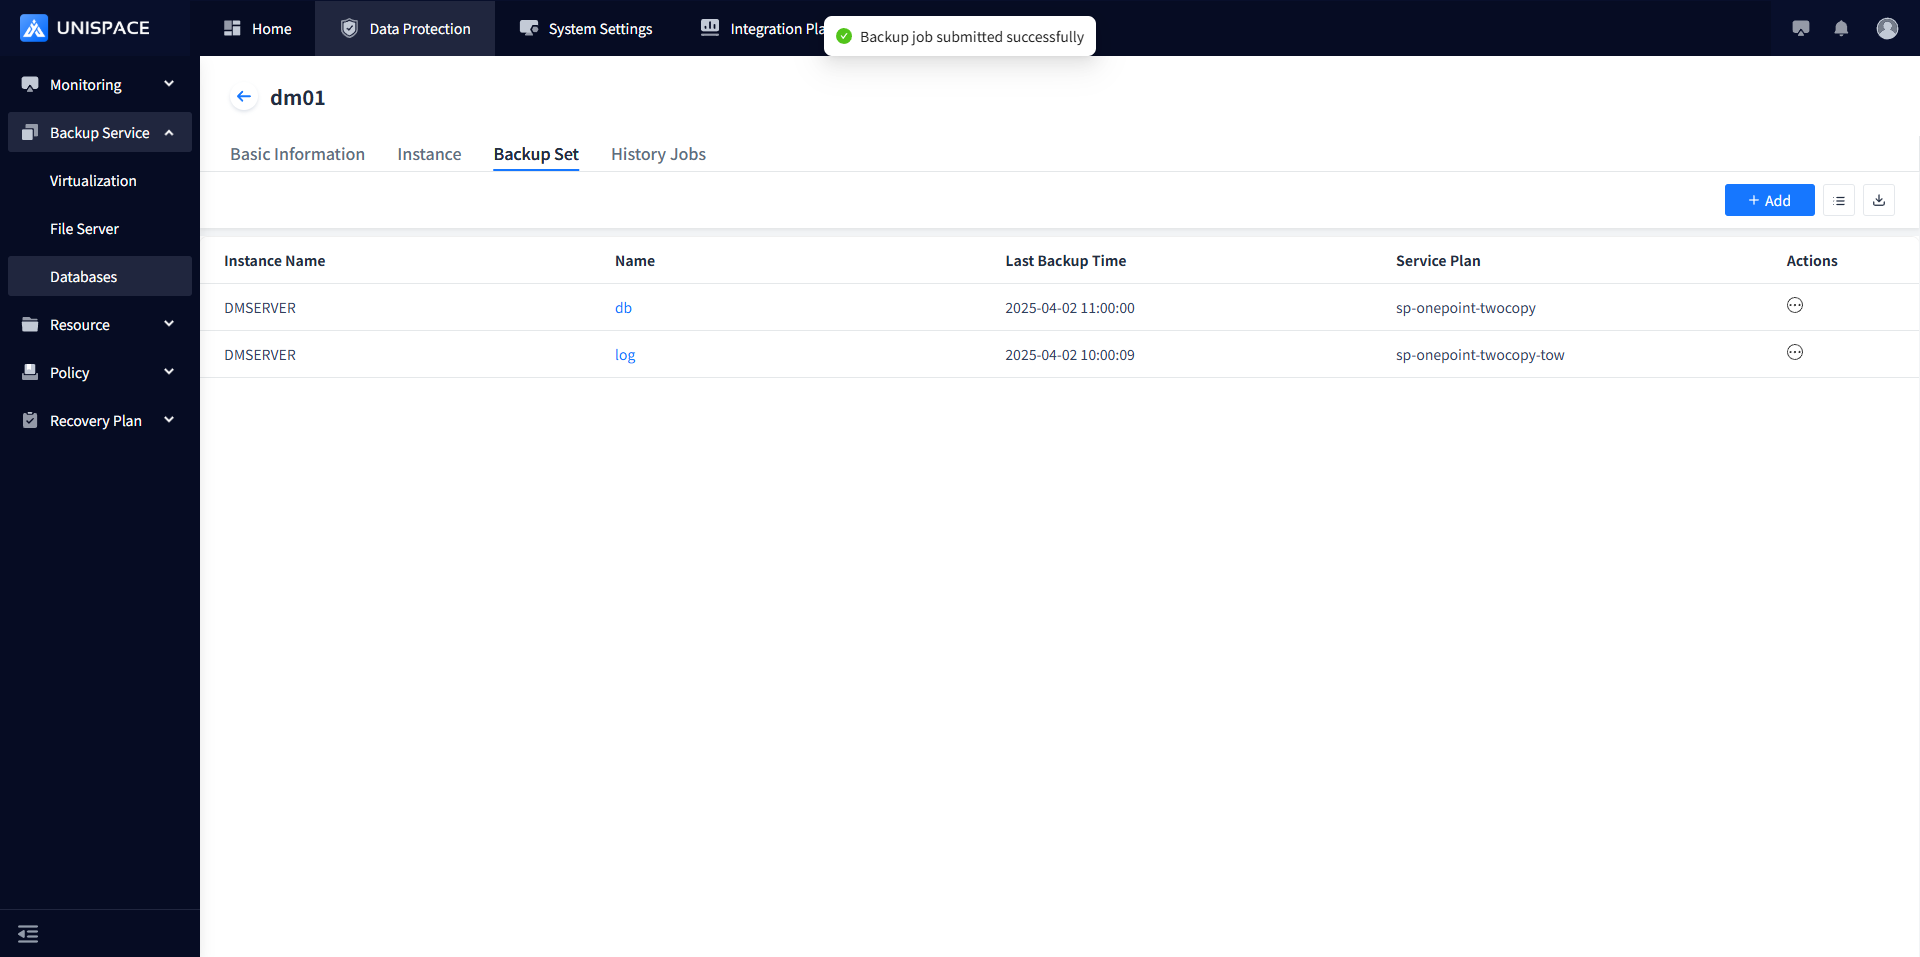
Step 4: After the backup job starts successfully, go to Monitoring - Job - Active Jobs to view the job.
Step 5: Once the backup is complete, check Monitoring - Job - History Jobs for the job status as "Completed".
1.5 Dameng Database Recovery
Prerequisites
- The Dameng database has been backed up.
Steps
Step 1: Click on the system menu Backup Service - Database - Server Name, select Instance.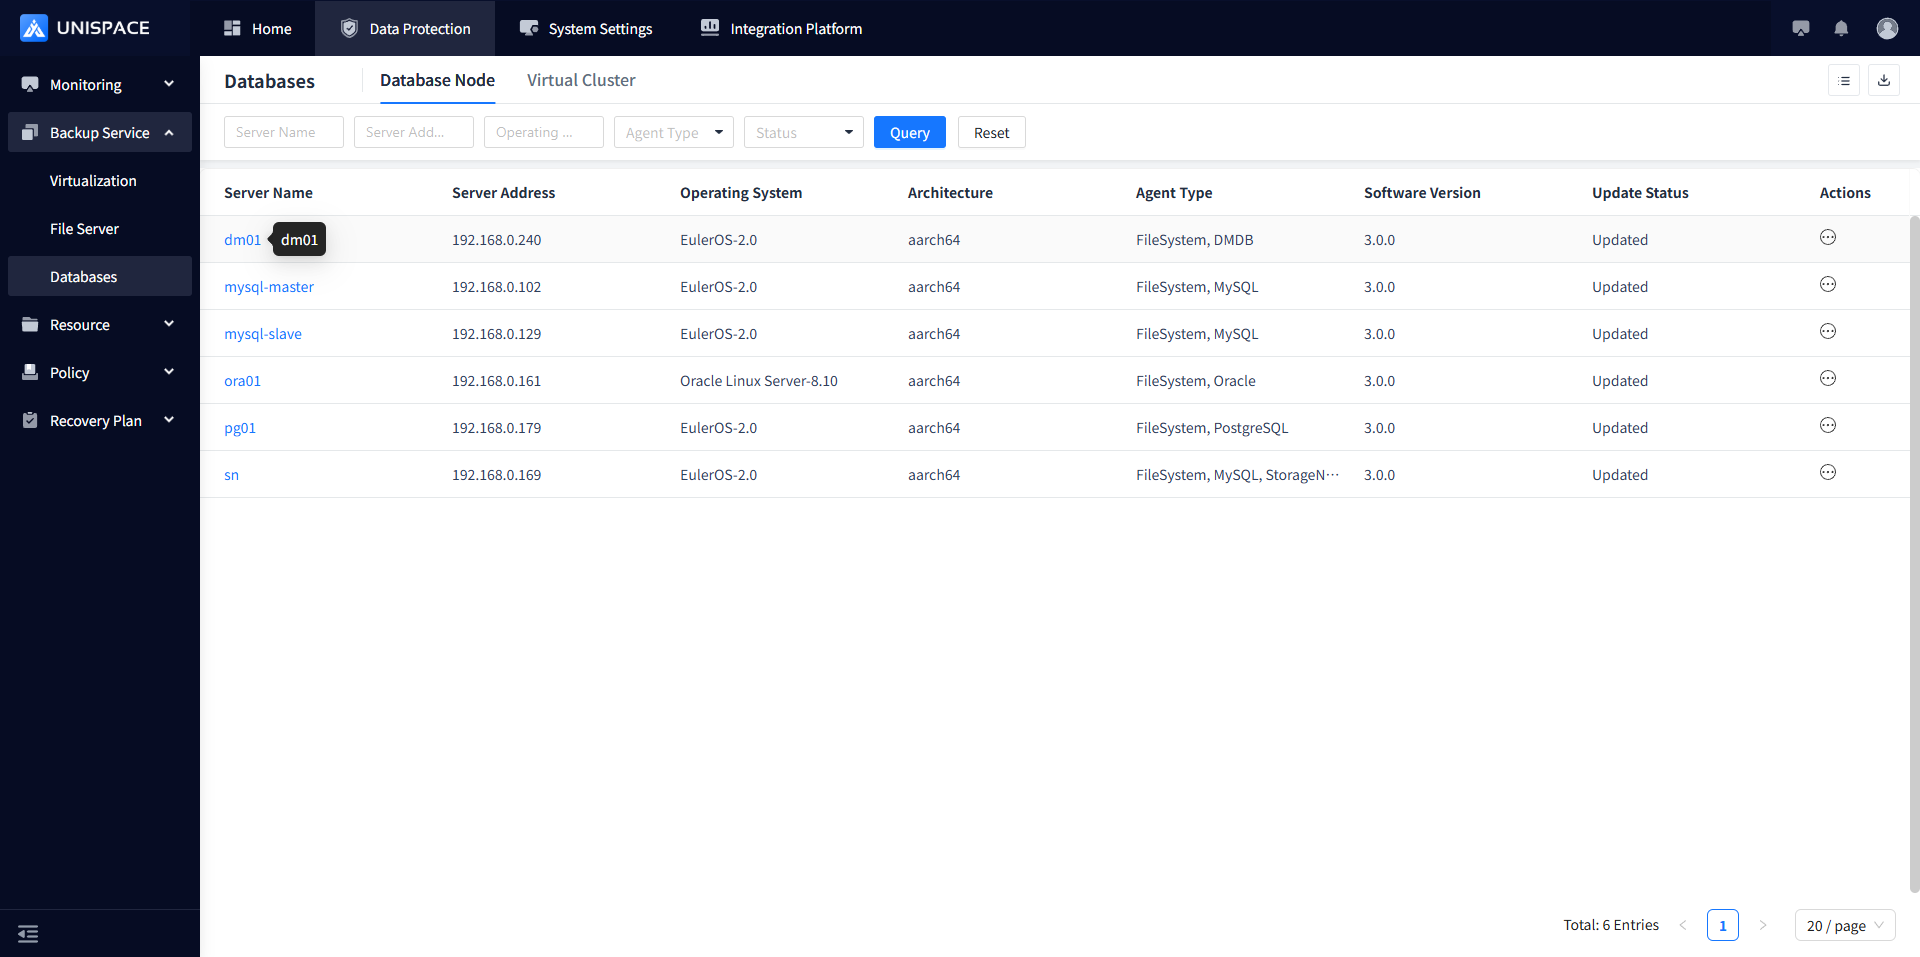

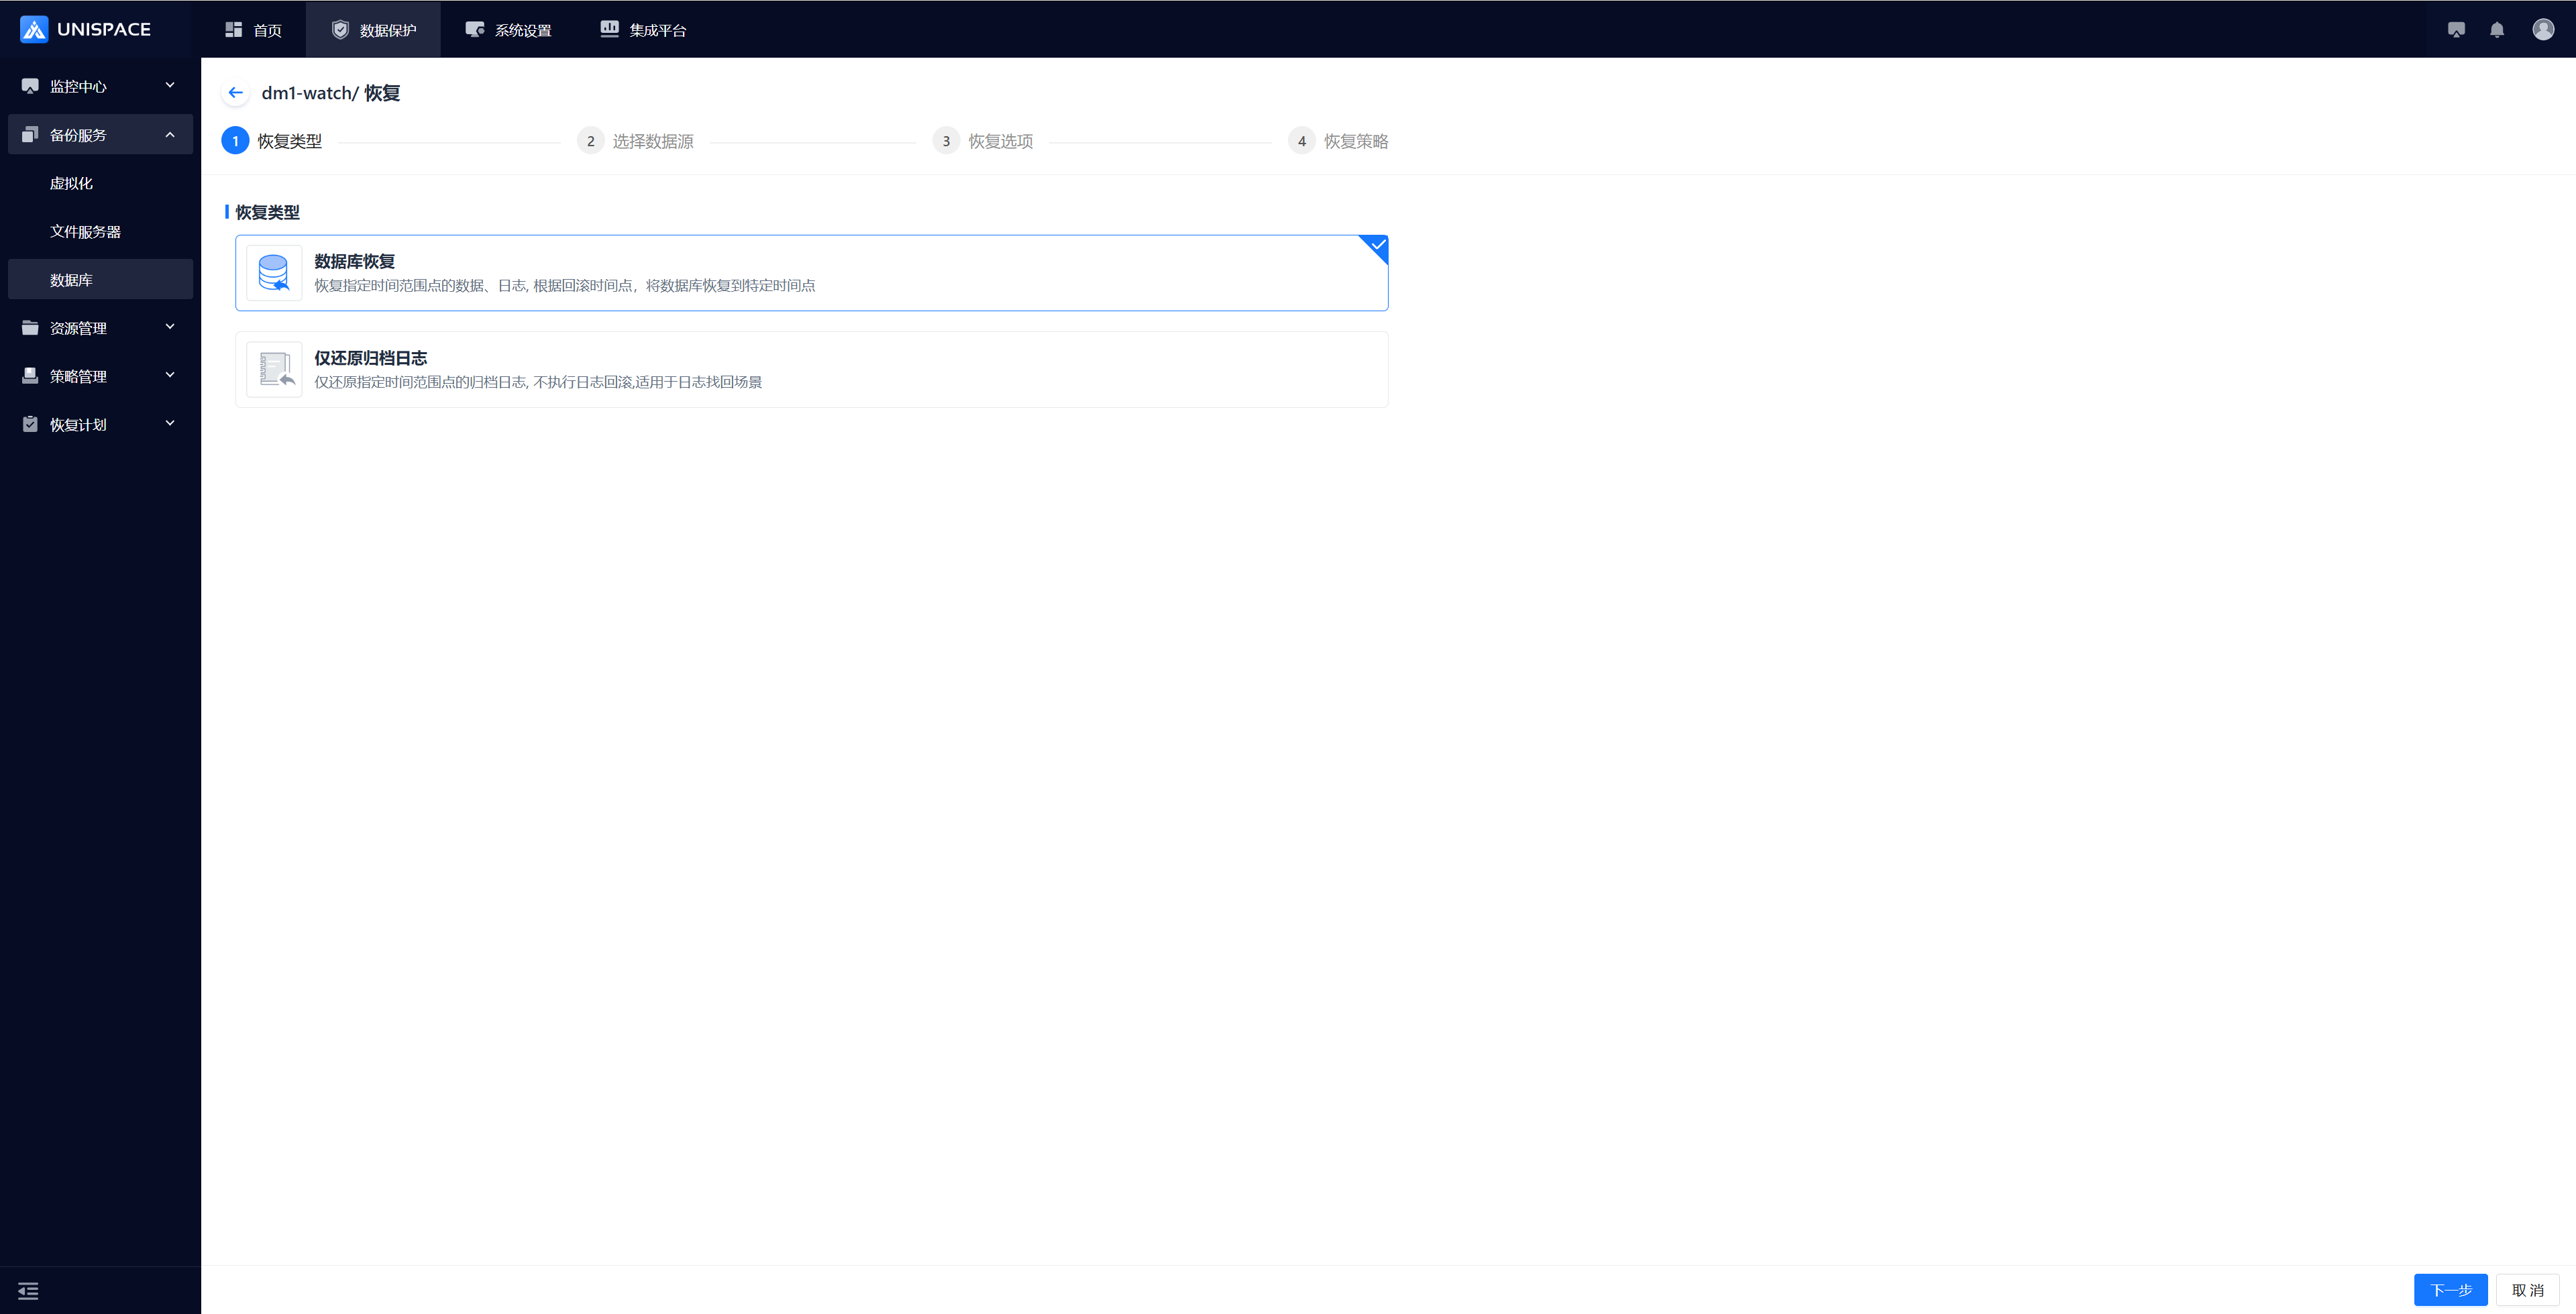
Step 2: Select Instance, click Restore under **Actions**.

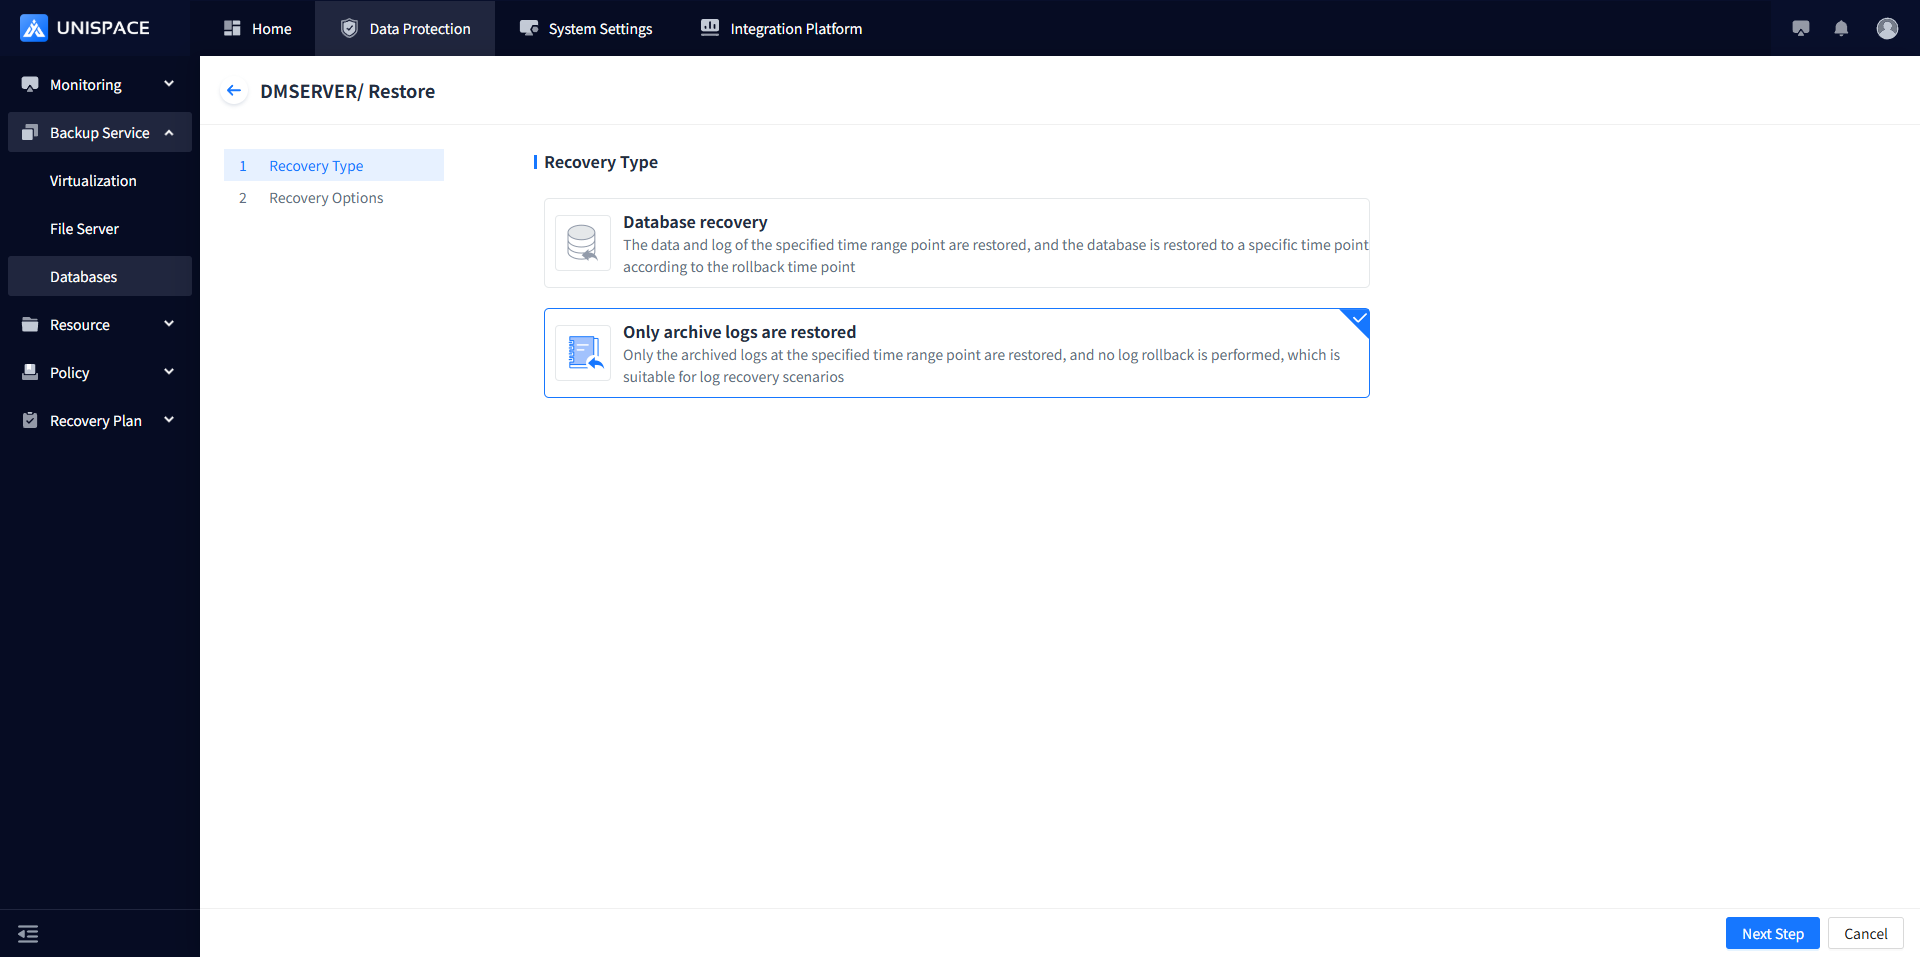
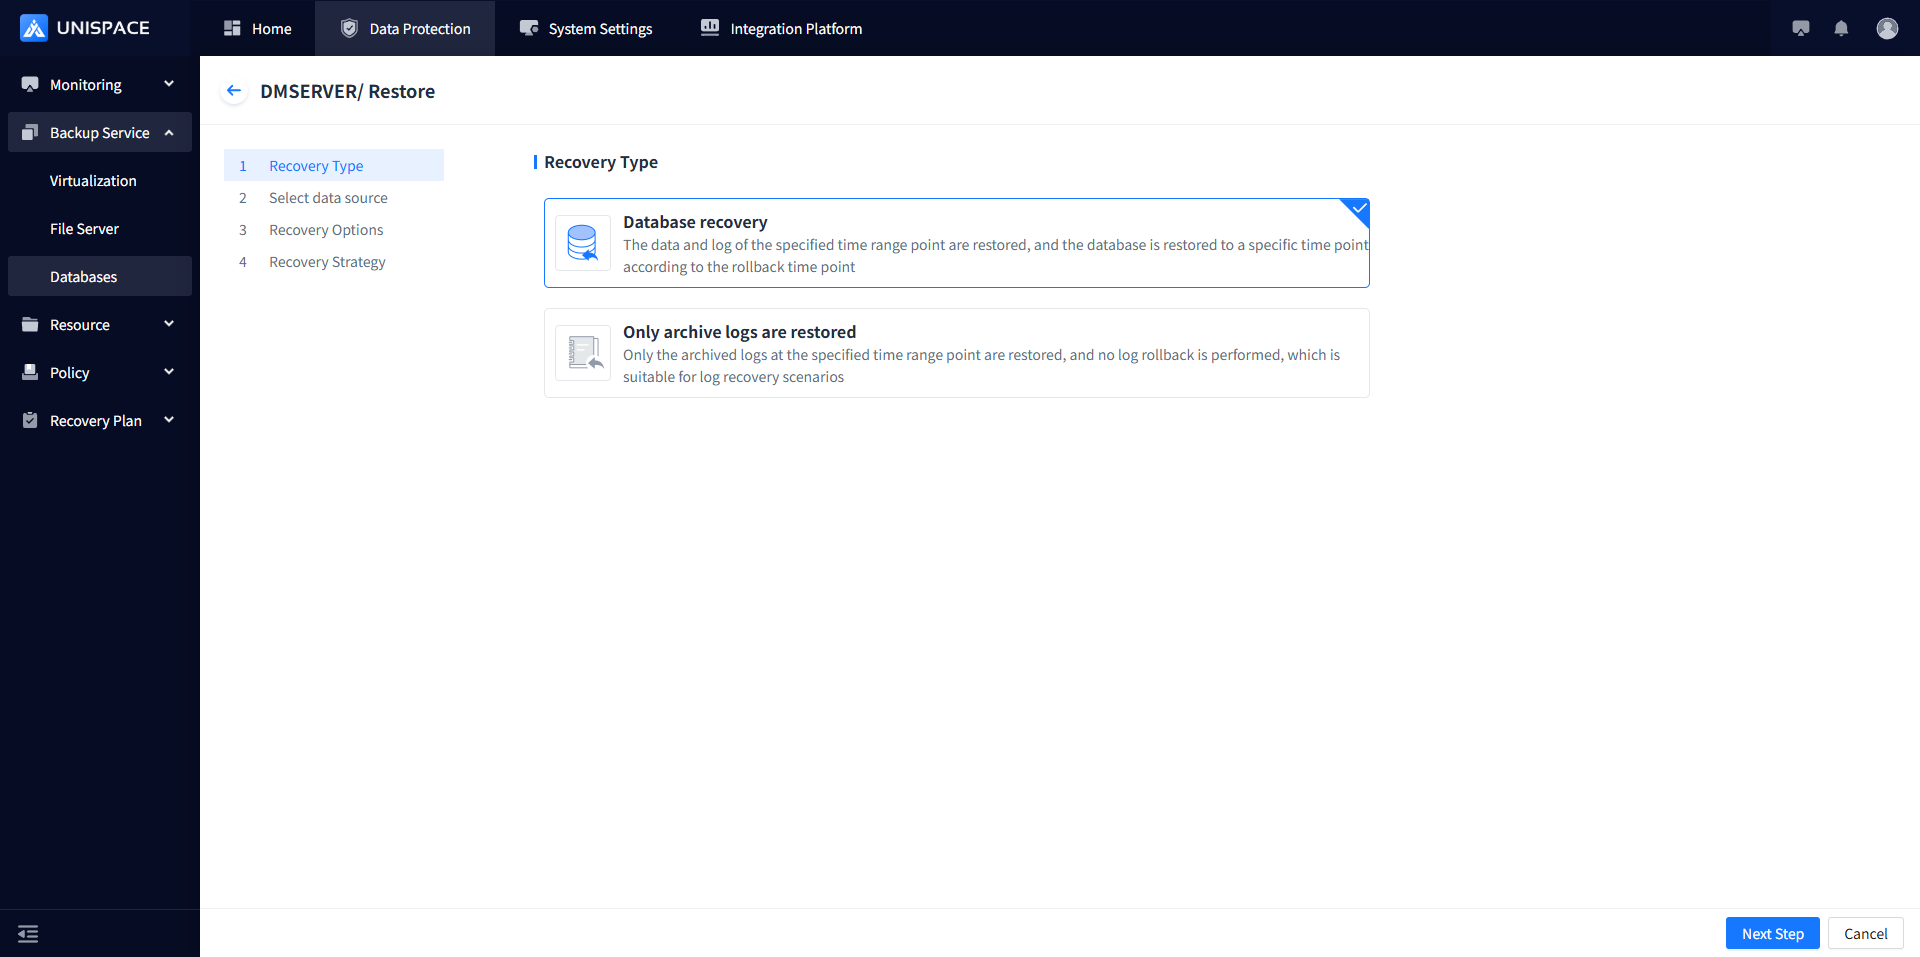
Step 3: A recovery window will pop up. Select the recovery point based on the time range, and click Next.
Step 4: Set recovery options and click OK.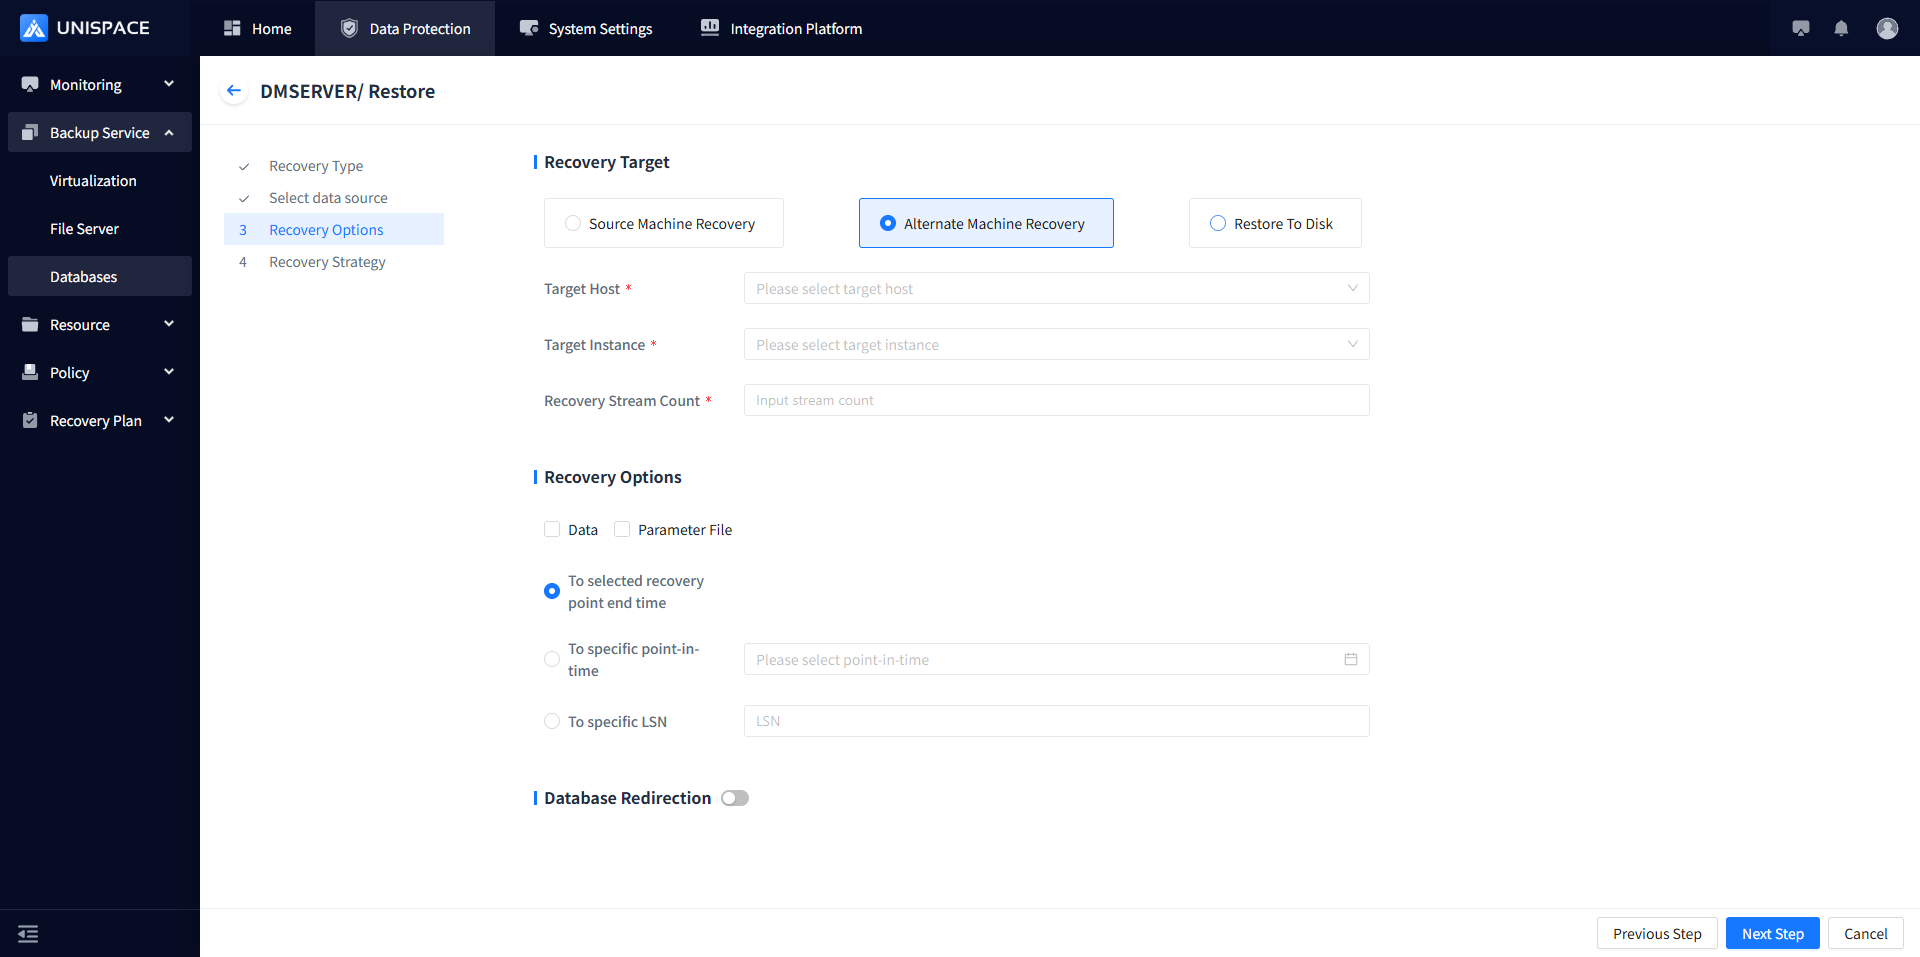
Step 5: Fill in the necessary parameters as described below:
| Parameter Name | Description | Setting Principle |
|---|---|---|
| Recovery Option | Default to source machine recovery | Options: Source Machine Recovery, Cross-Machine Recovery, or Recovery to Disk |
| Target Host | Default to source machine, greyed out | For Cross-Machine Recovery - Select the appropriate target host |
| Target Instance | Default to source instance, greyed out | For Cross-Machine Recovery - Select the created Dameng instance |
| Recovery Stream Count | Numeric type | Maximum stream count = 1 |
| Recovery Option | 1. Restore: Checkbox, combinable options | 2. Recovery Type: Single choice (To selected recovery point end time, To specific point in time, To specific LSN) |
| Database Redirection | Switch, default is off | Options: Tablespace redirection or REDO log redirection, supports custom path |
Step 6: Check "Advanced Recovery Options" and click Confirm.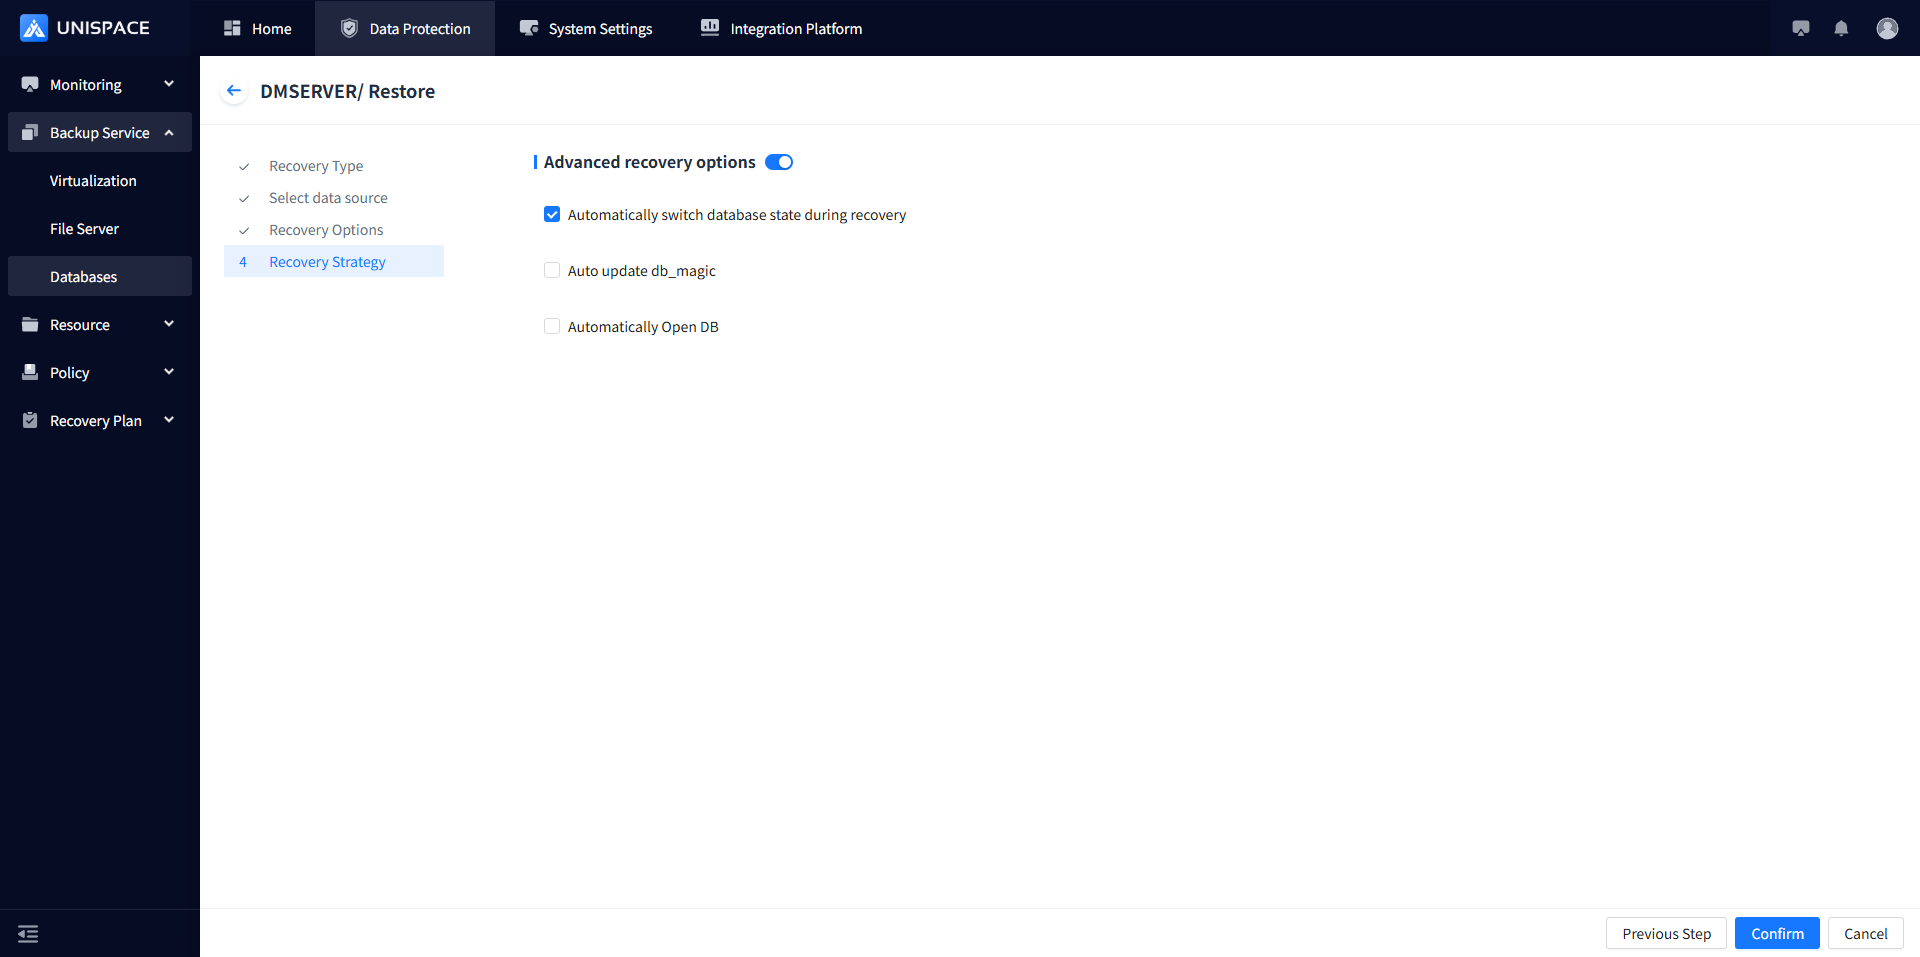
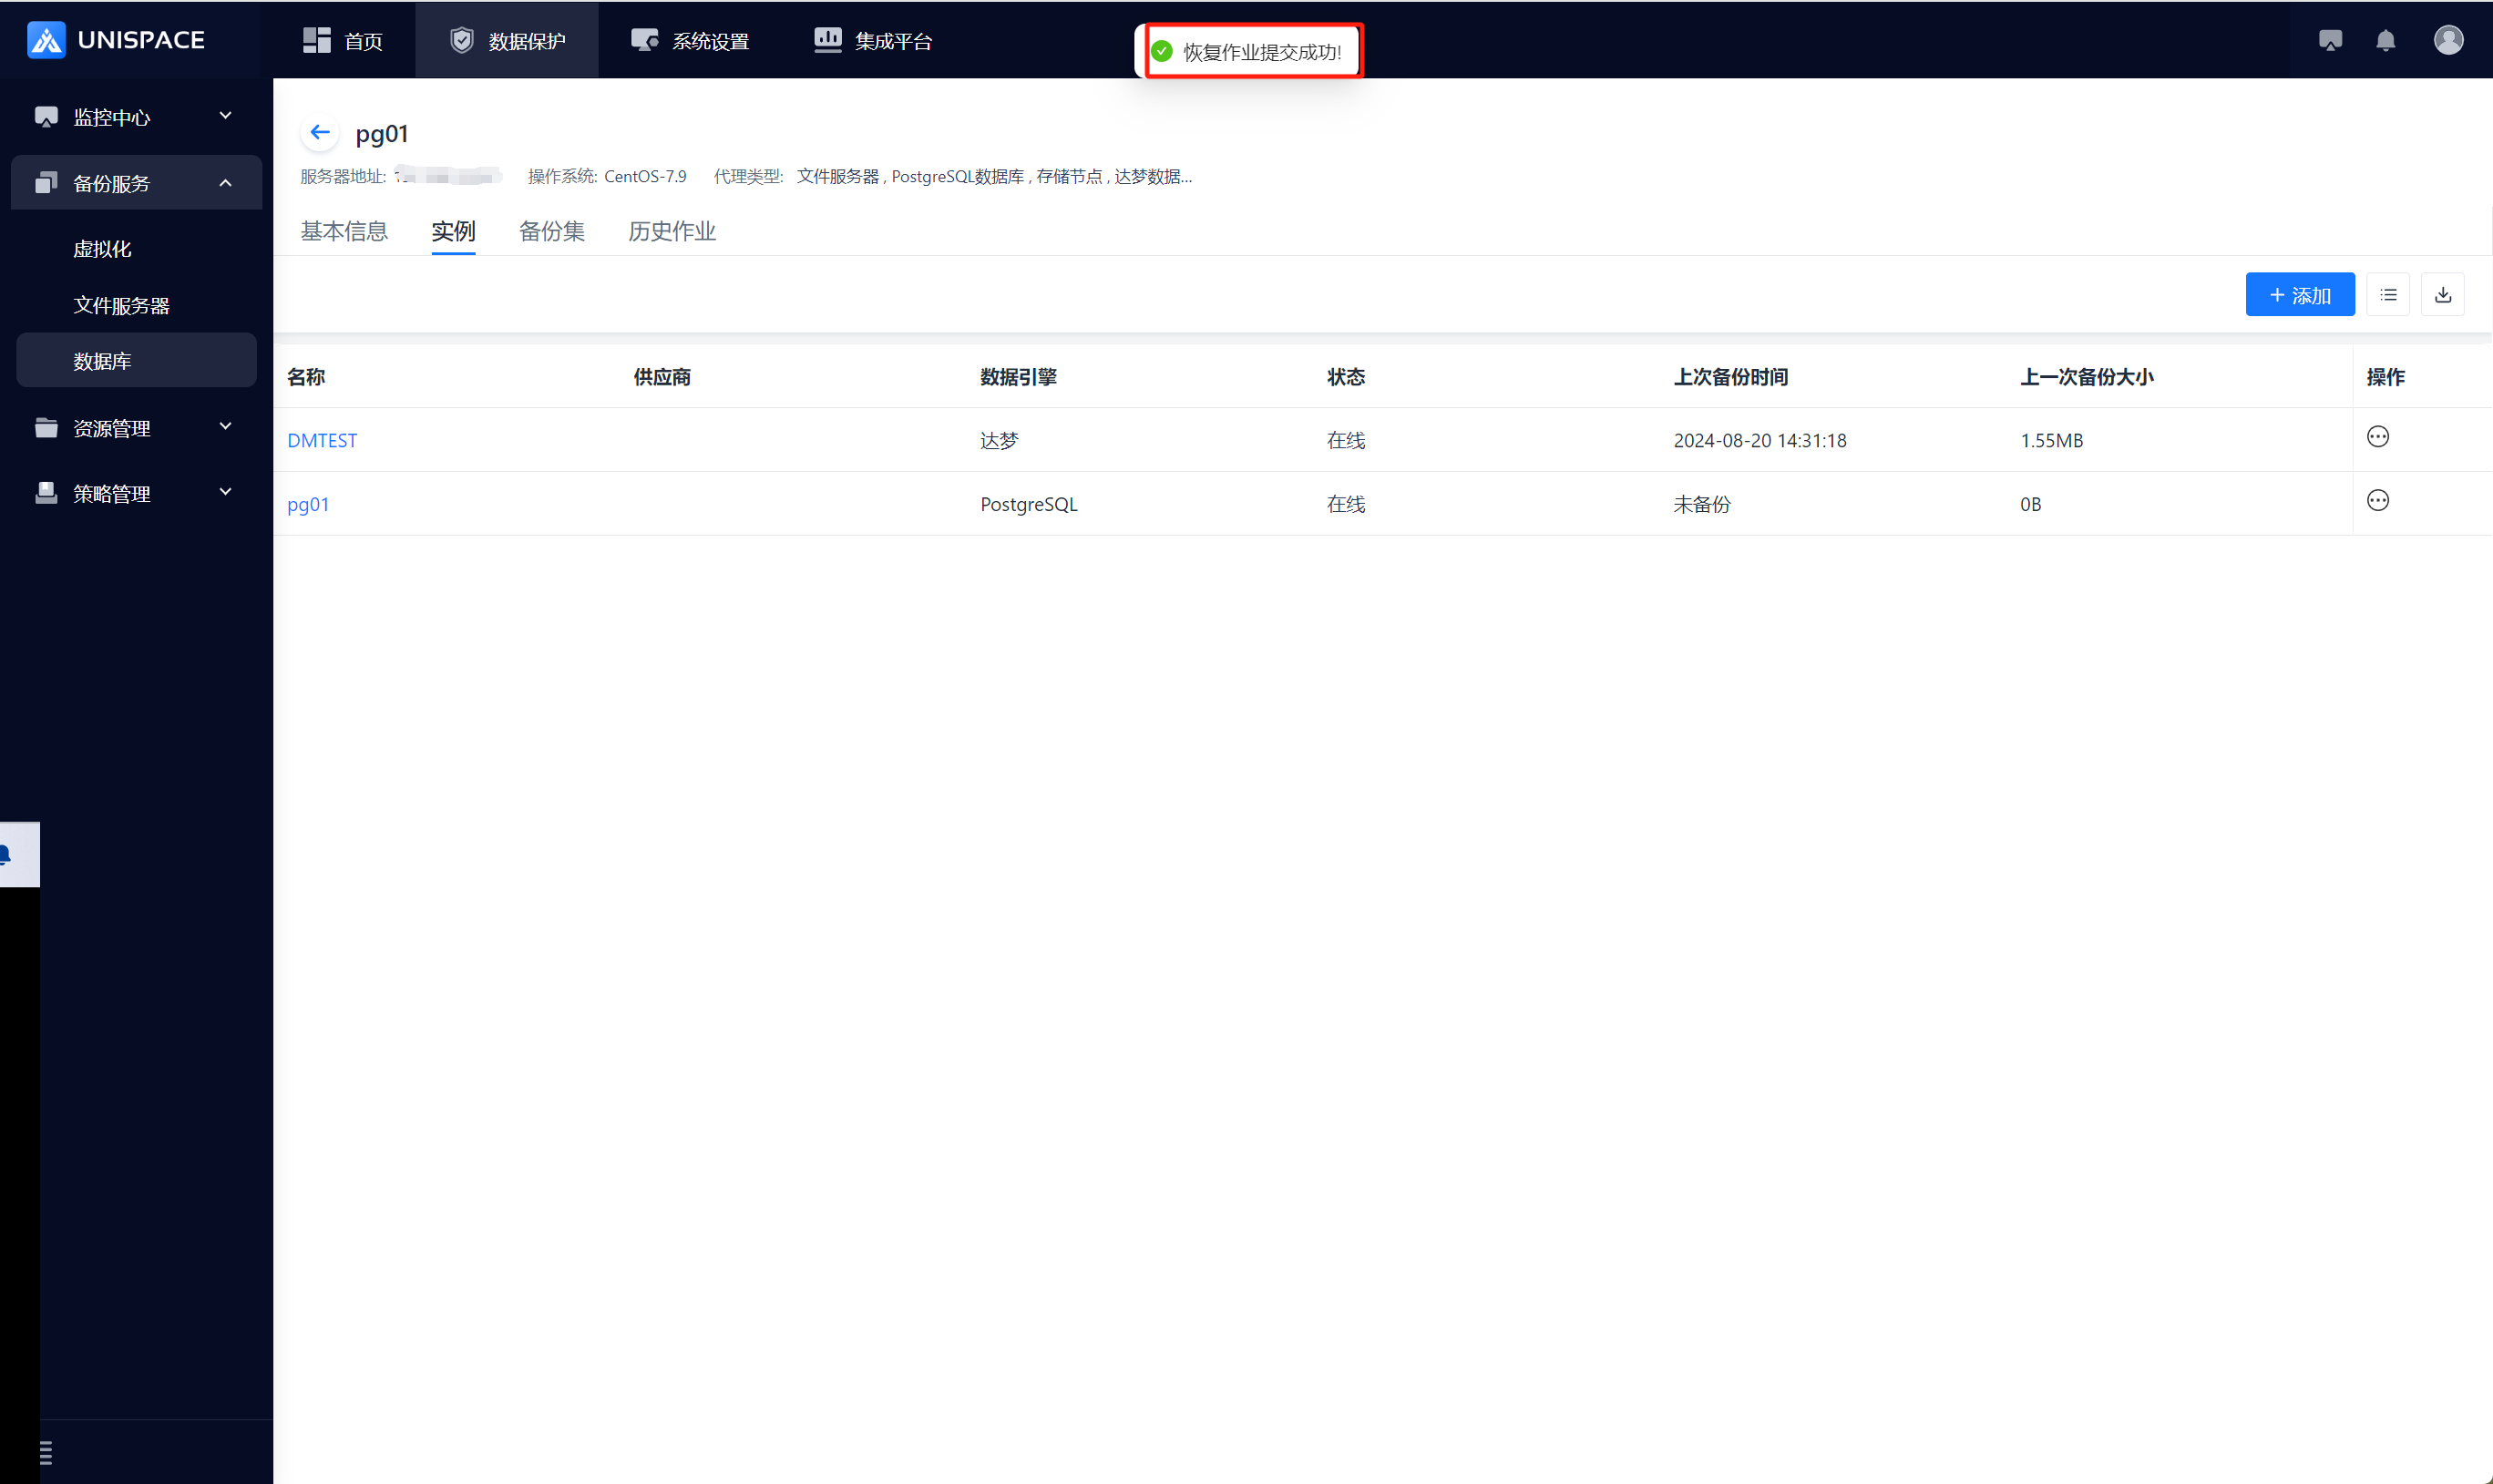
Step 7: Once the job starts successfully, go to Monitoring - Job - Active Jobs to view the job.
Step 8: After the job completes, check Monitoring Center - Job - History Job to see the job status.
1.6 Dameng Log Recovery
Prerequisites
- The Dameng log has been backed up.
Steps
Step 1: Click on the system menu Backup Service - Database - Server Name, select Backup Set.

Step 2: Choose **Instance**, click Restore under Actions.
Step 3: Set the recovery options and click Confirm.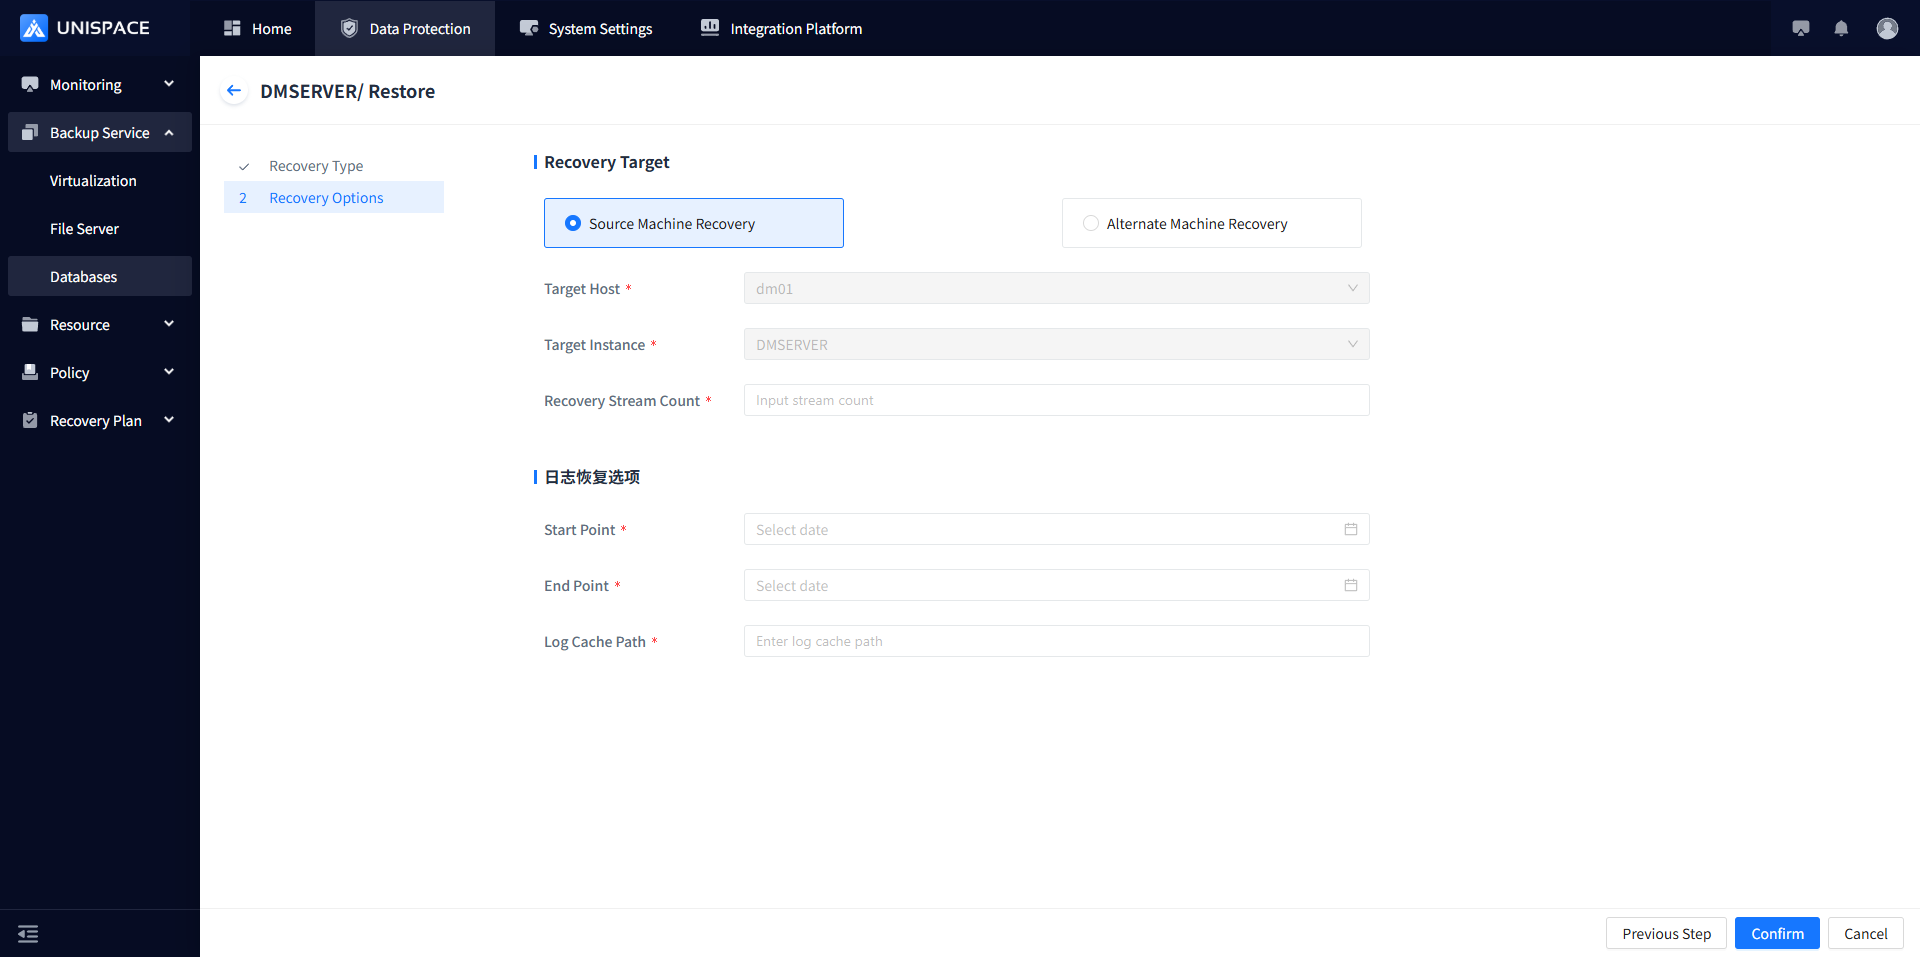
Step 4: Fill in the necessary parameters as described below:
| Parameter Name | Description | Setting Principle |
|---|---|---|
| Recovery Option | Default to source machine recovery | Options: Source Machine Recovery, Cross-Machine Recovery, or Recovery to Disk |
| Target Host | Default to source machine, greyed out | For Cross-Machine Recovery - Select the appropriate target host |
| Target Instance | Default to source instance, greyed out | For Cross-Machine Recovery - Select the created Dameng instance |
| Recovery Stream Count | Numeric type | Maximum stream count = 1 |
| Log Recovery Options | Required | 1. Start time must be earlier than the end time, and logs must exist within the time range 2. Log cache path, customizable |
Step 5: Check "Advanced Recovery Options" and click Confirm.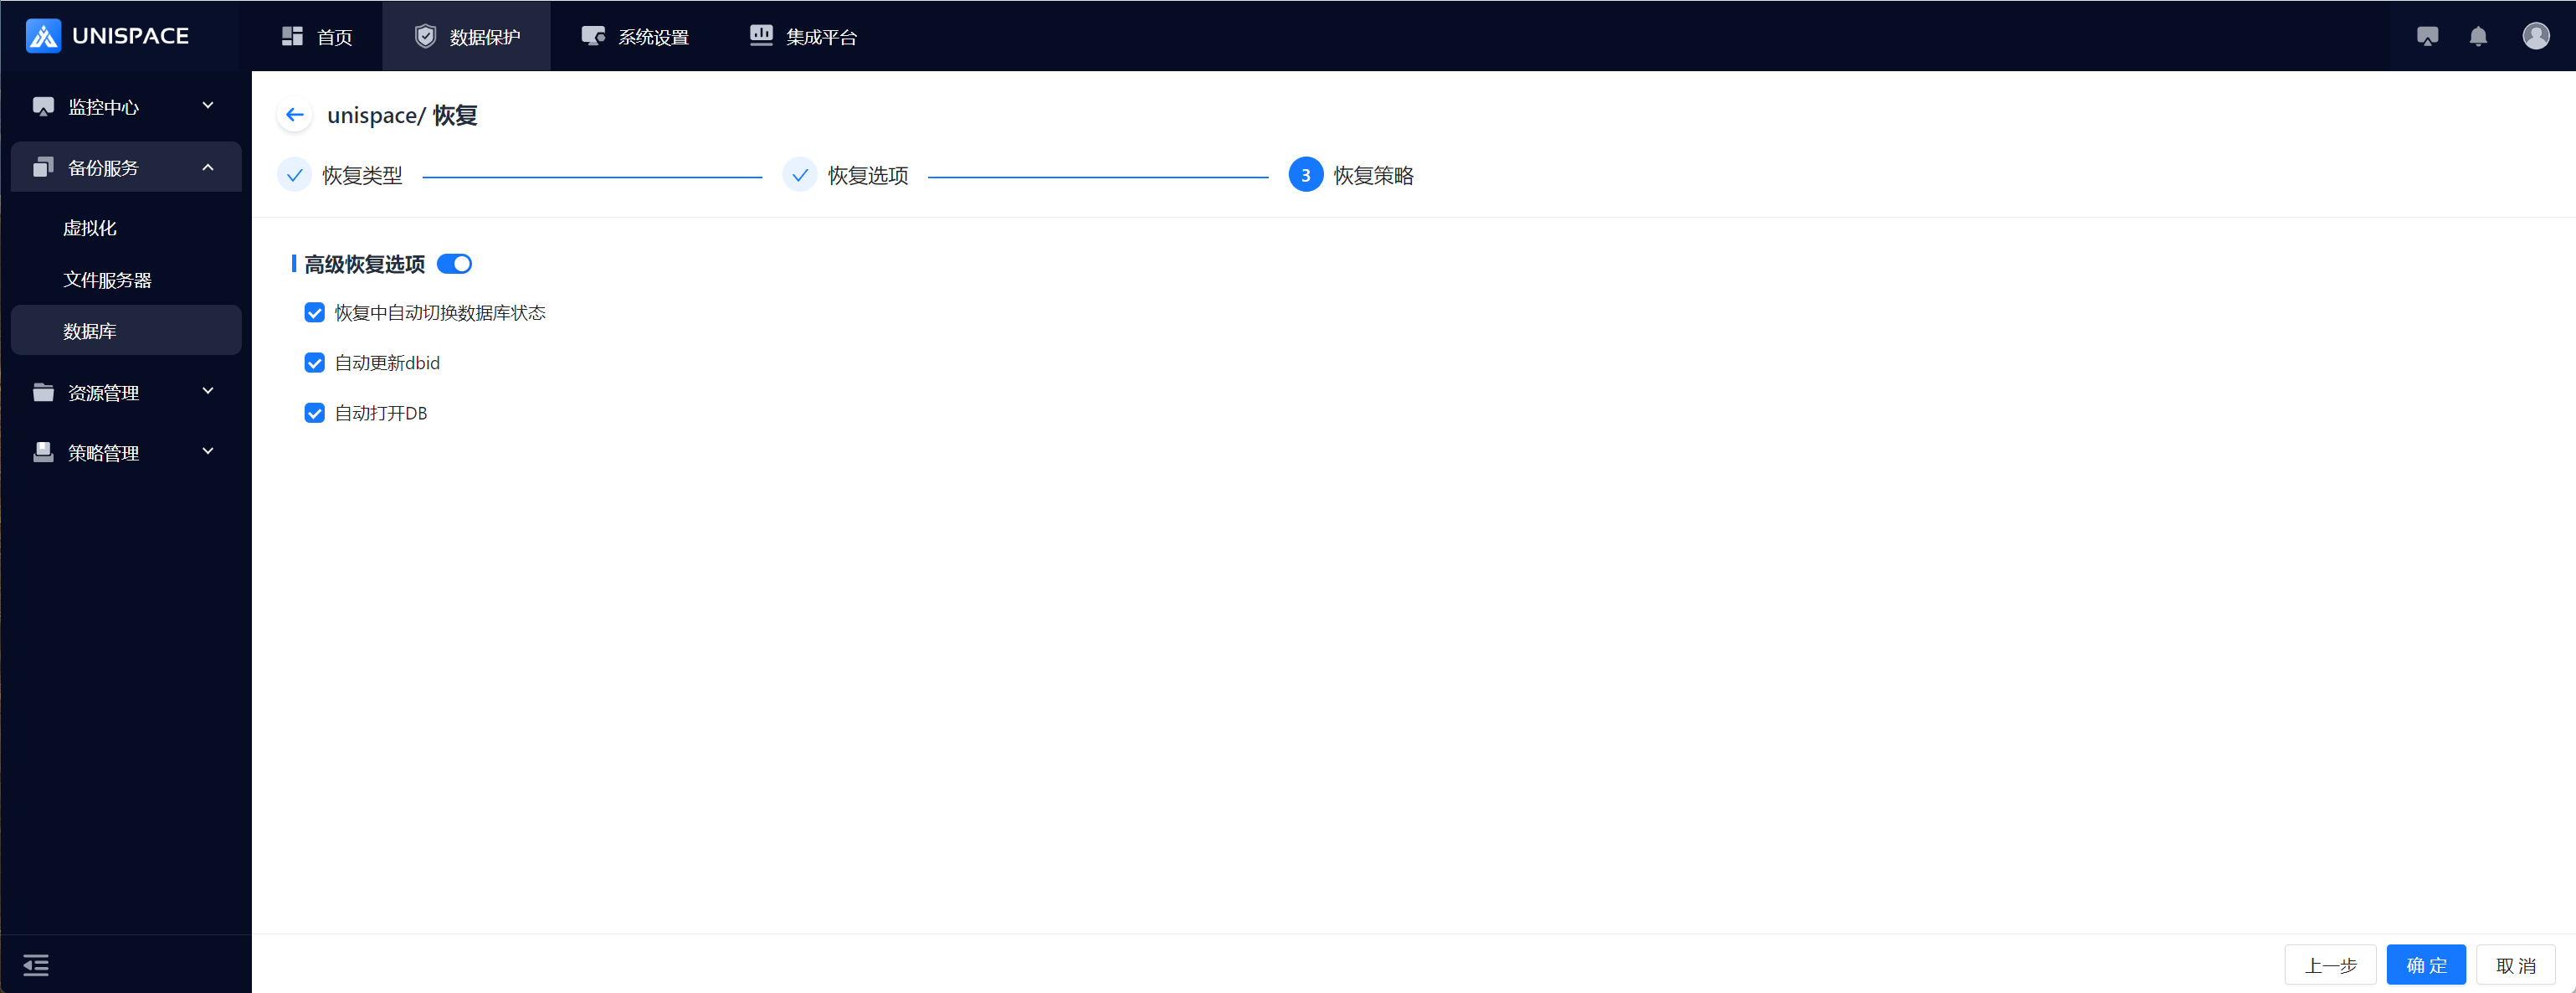

Step 6: Once the job starts successfully, go to Monitoring Center - Job - Active Job to view the job.
Step 7: After the job completes, check Monitoring Center - Job - History Job to see the job status.
1.7 Dameng Database Recovery to Disk
Prerequisites
- The Dameng database has been backed up.
Steps
Step 1: Click on the system menu Backup Service - Database - Server Name, select Backup Set.

Step 2: Choose Instance, click **Recovery** under the Actions option.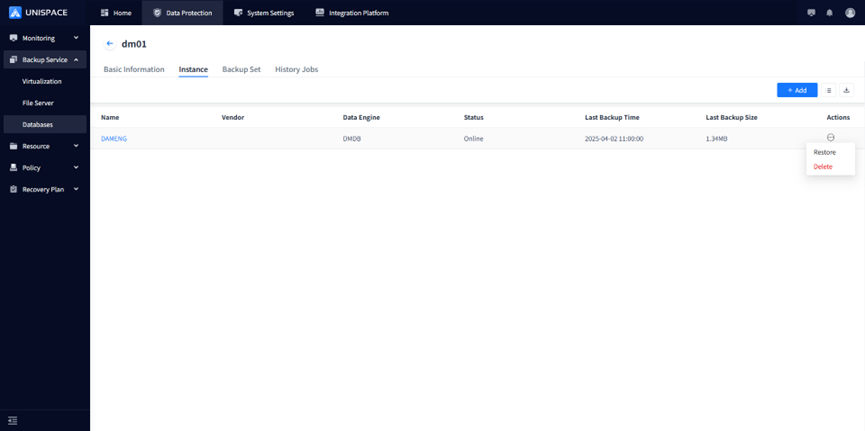
Step 3: A recovery window will pop up. Select the recovery point, which can be filtered by time range. If replicas are closed, the default replica will be passed. If open, other replicas can be selected. Choose "Recovery Point" and click Next.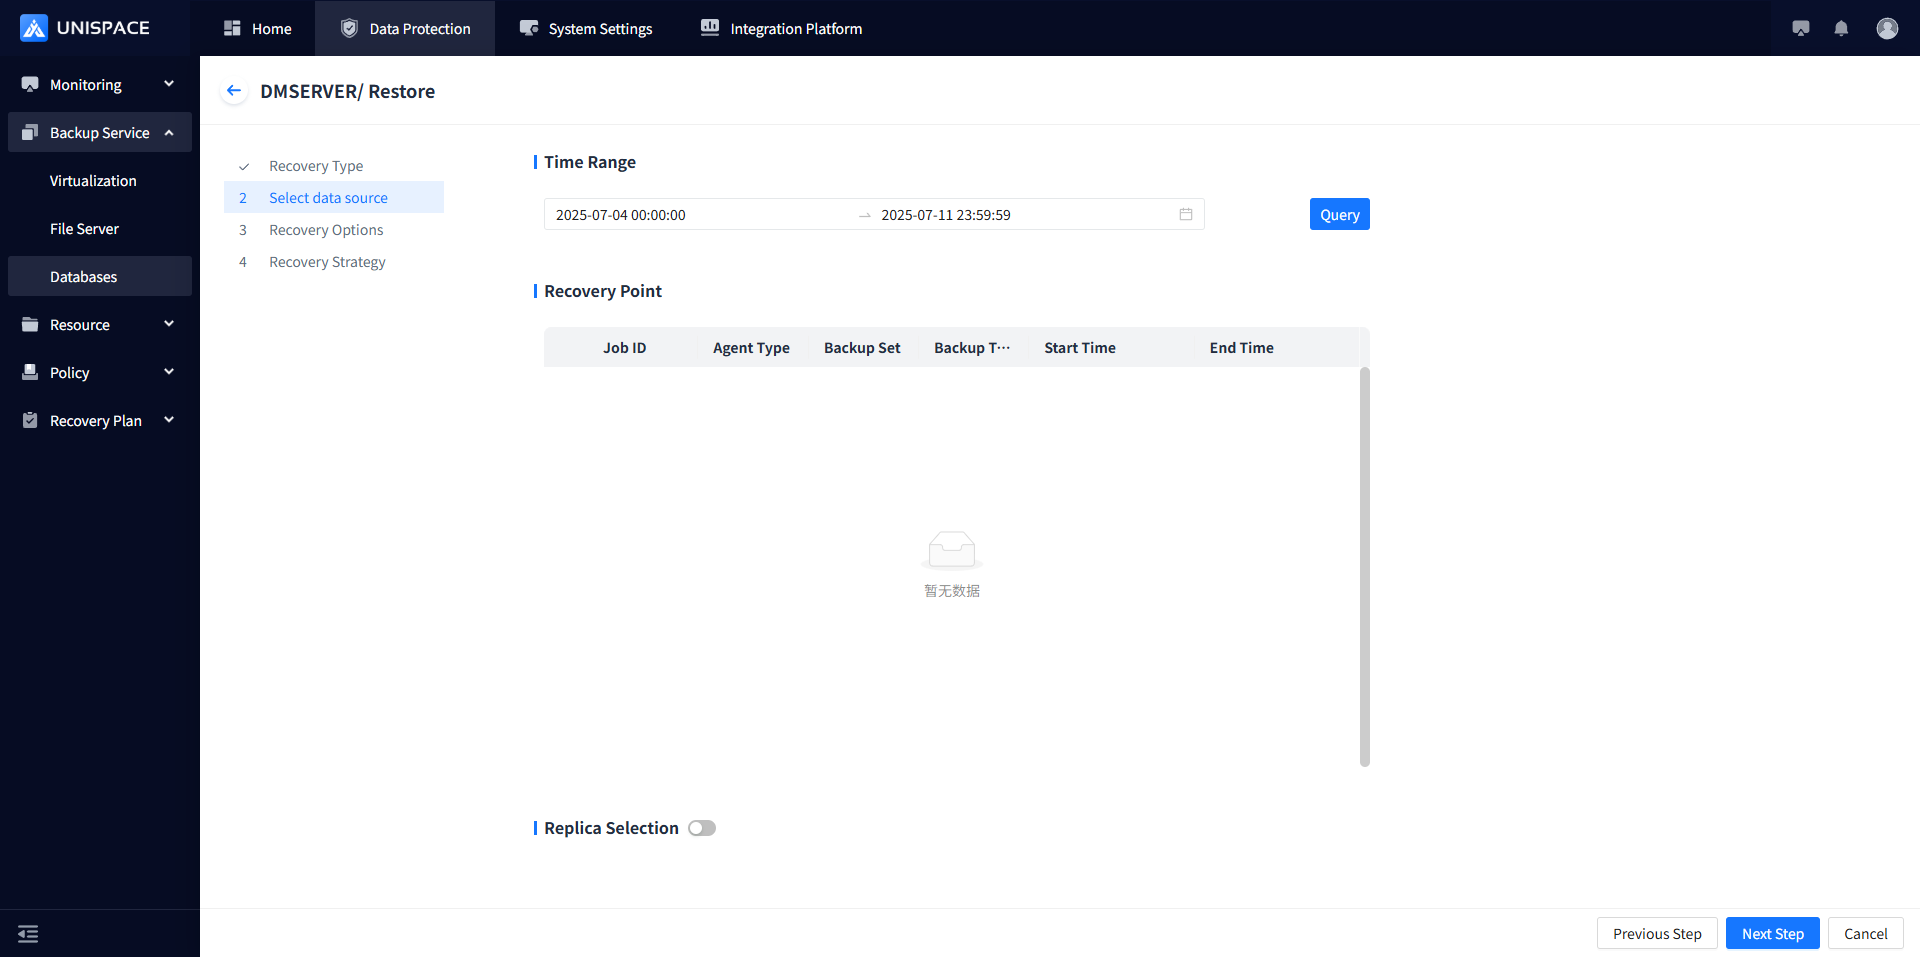
Step 4: Set the recovery options, select the target host, set the stream count to 1, specify a custom target path, and click OK.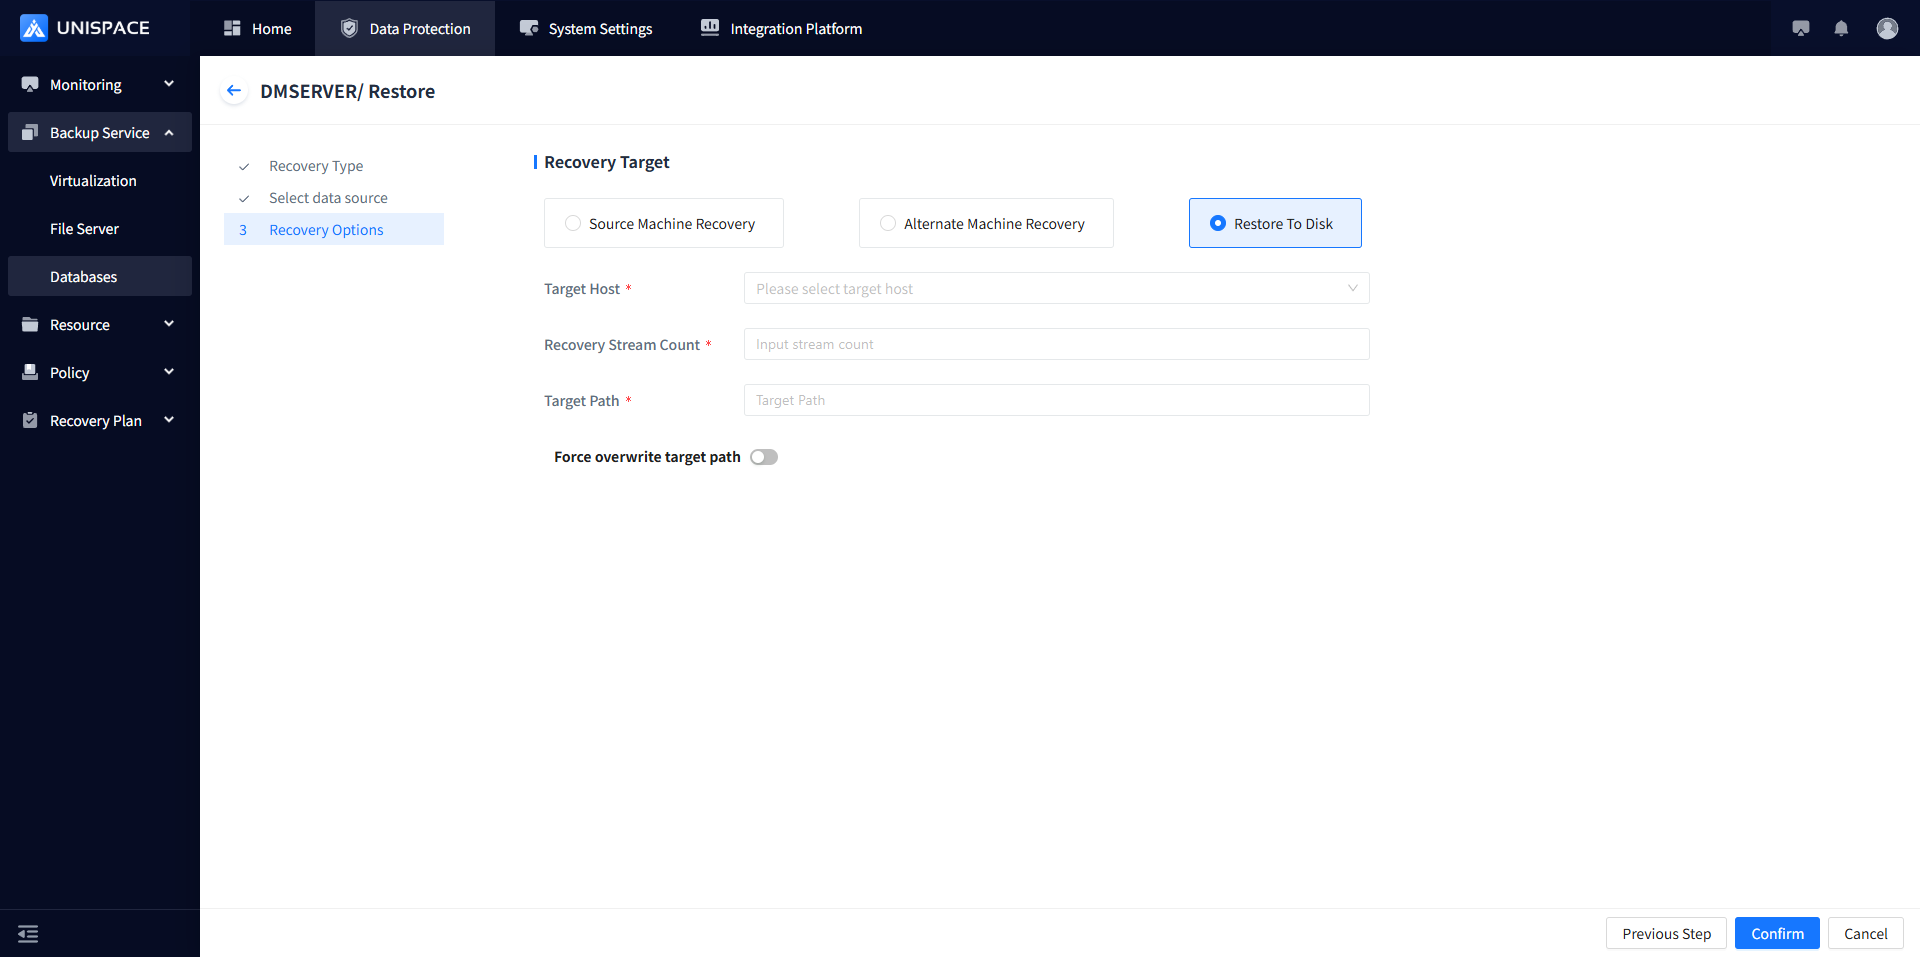

Step 5: Once the job starts successfully, go to Monitoring Center - Job - Active Job to view the job.
Step 6: After the job completes, check Monitoring Center - Job - History Job to see the job status.
2.1 Adding Dameng Virtual Cluster
Prerequisites
- The Dameng service is installed and accessible.
- The client with the Dameng service is registered to the management node.
Steps
Step 1: Click on the system menu Backup Service - Database - Virtual Cluster to enter the virtual cluster list.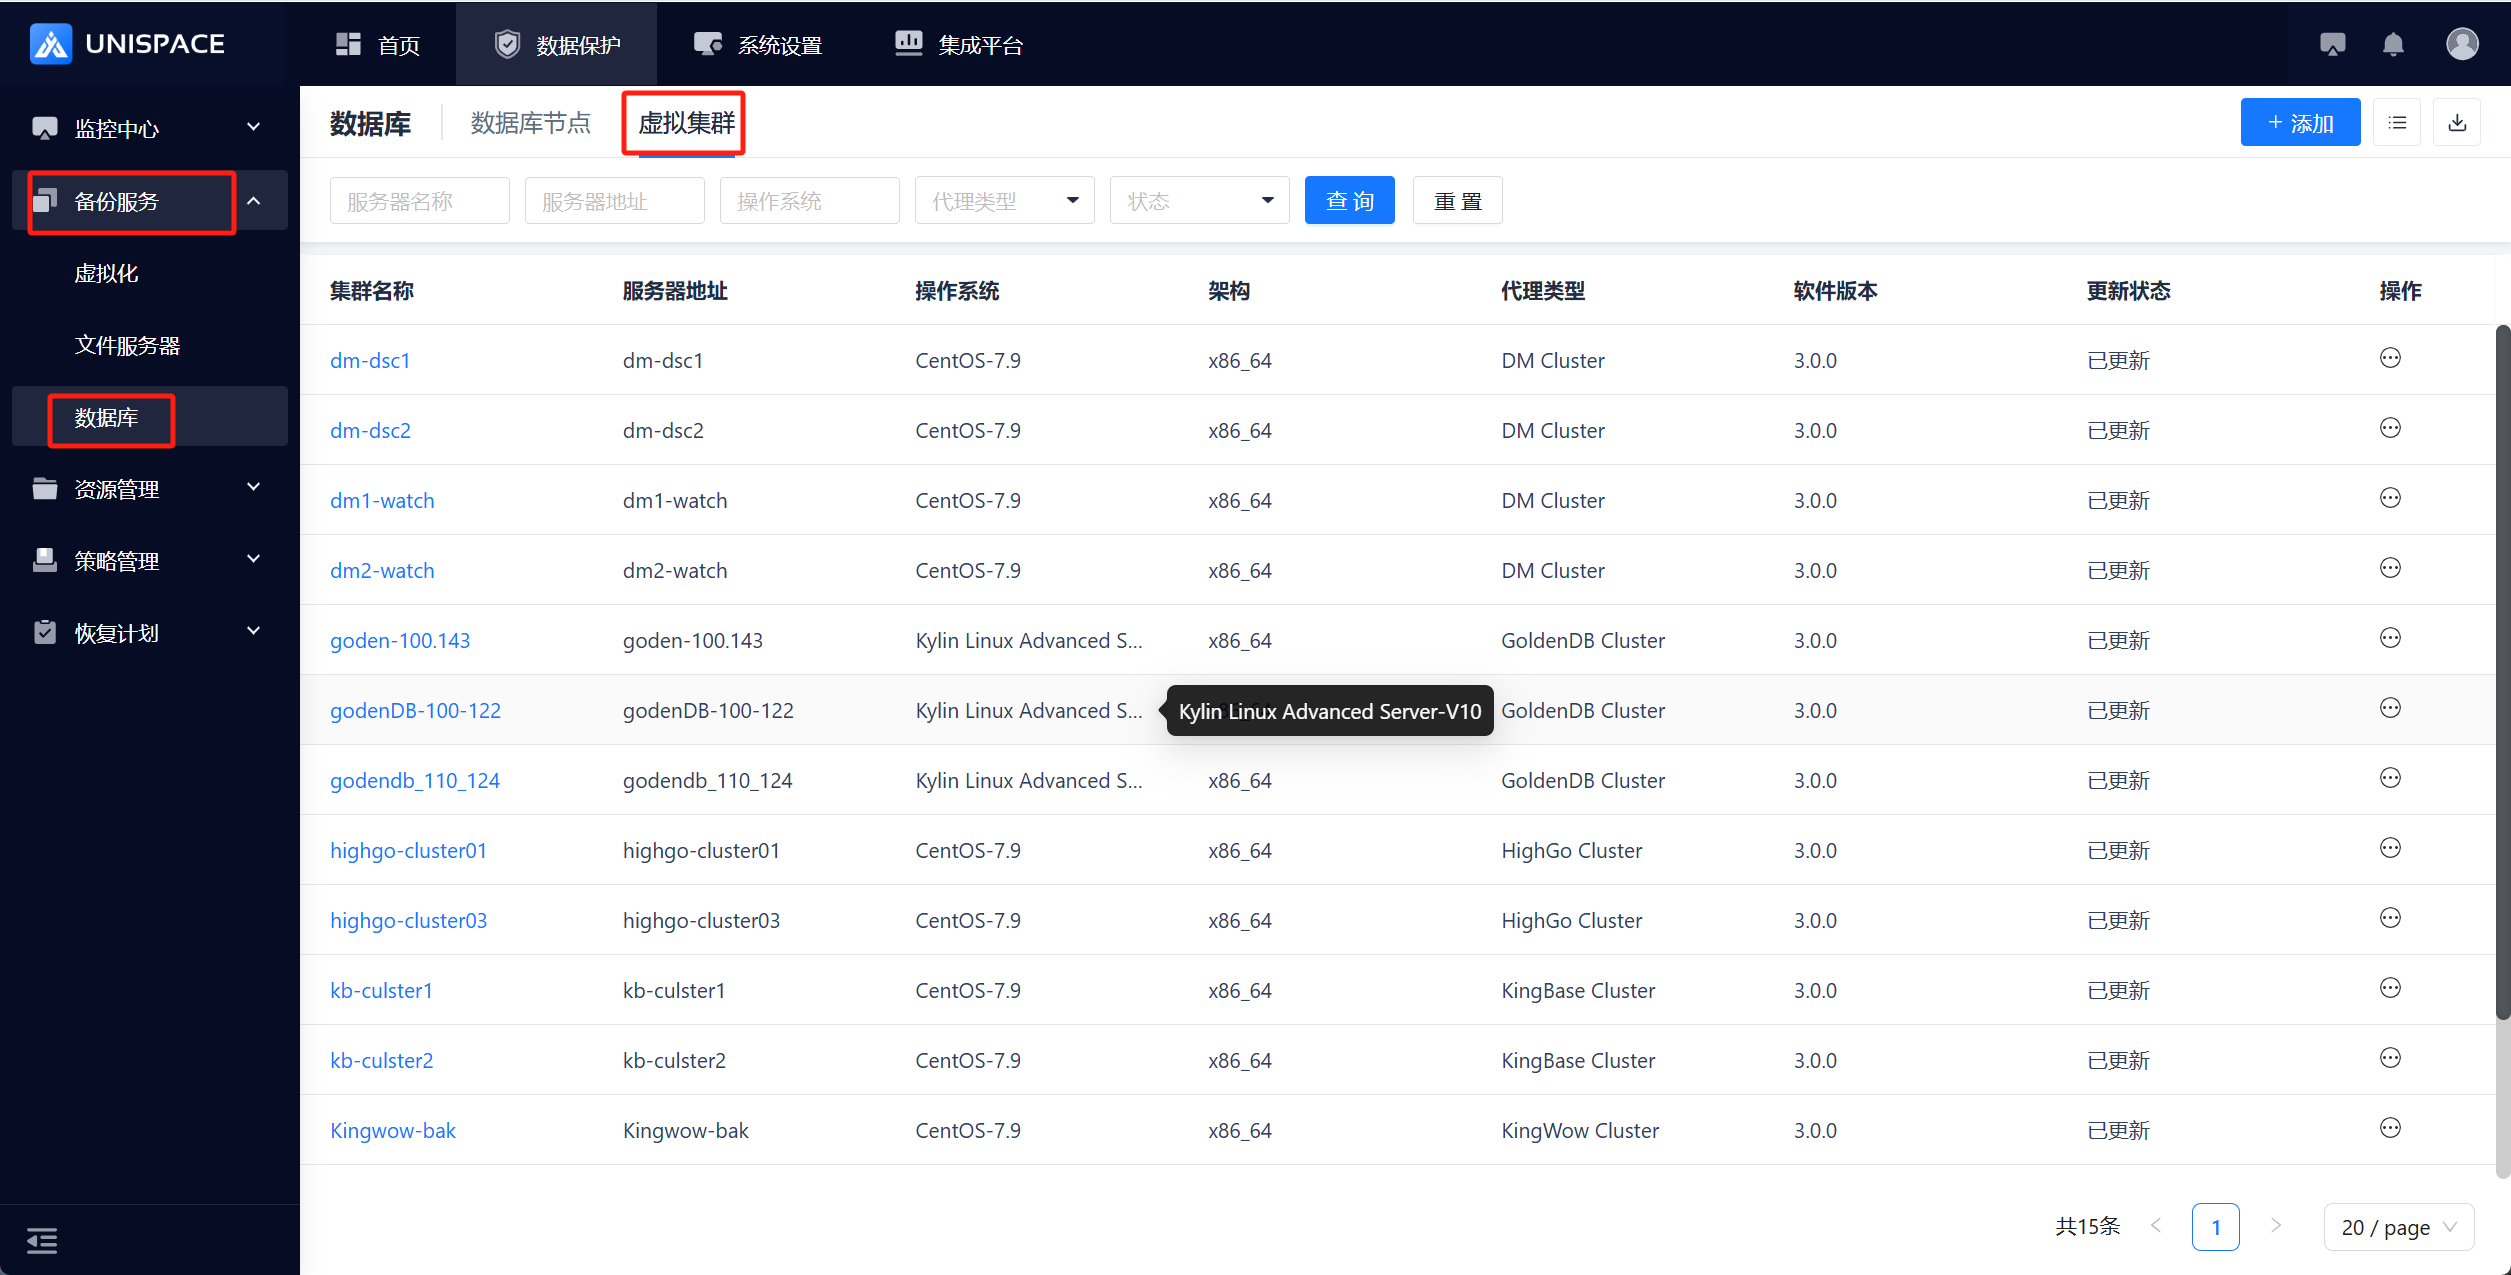
Step 2: Click Add in the upper right corner. A pop-up window will appear. Select "Dameng" and click Next.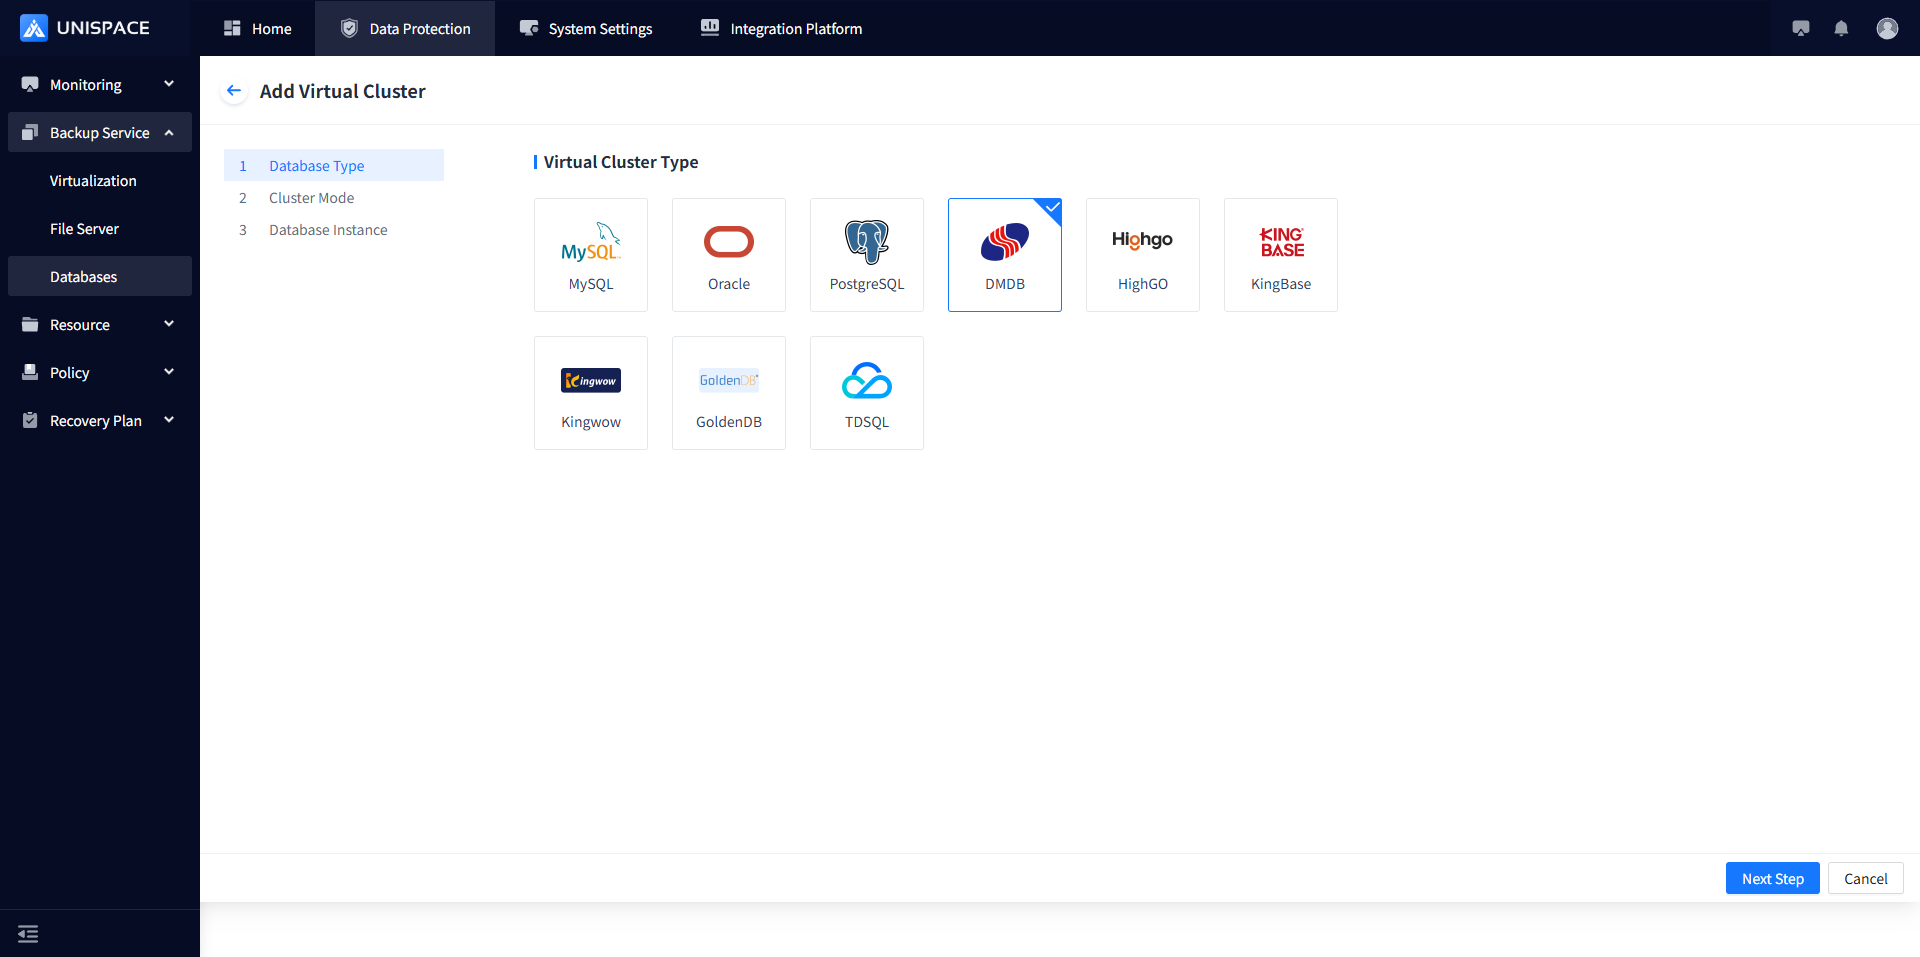
Step 3: Add a virtual cluster and instance, and fill in the required parameters.
Step 4: Fill in the necessary parameters as described below:
| Parameter Name | Description | Setting Principle |
|---|---|---|
| Cluster Type | DMDataWatch or DMDSC | Drop-down list, single choice, required |
| Cluster Name | Text input box, required, custom | No length or special character restriction at the moment |
| Instance Information | ||
| Server Name | Registered Dameng client node | Drop-down list, single choice, required |
| Database Name | Text input box, required | Enter the name of the Dameng database |
| DM_HOME Path | Text input box, required | Enter the Dameng software installation path, e.g., /opt/dmdbms |
| INI Path | Text input box, required | Enter the INI path, e.g., /opt/dmdbms/data/dmdw |
| UserName | Username input box, required | Enter the Dameng username |
| PassWord | Password input box, Password type | Enter the Dameng password |
| IP:PORT_NUM | Input box | Dameng host IP:Port number |
| OS Username | Text input box, required | Default: dmdba |
| DMWATCHER.INI Path | Text input box, required | Example: /opt/dmdbms/data/dmdw/dmwatcher.ini |
Step 5: Click Confirm to complete the addition. For multi-node clusters, add each instance accordingly. After adding, the cluster information will appear as follows: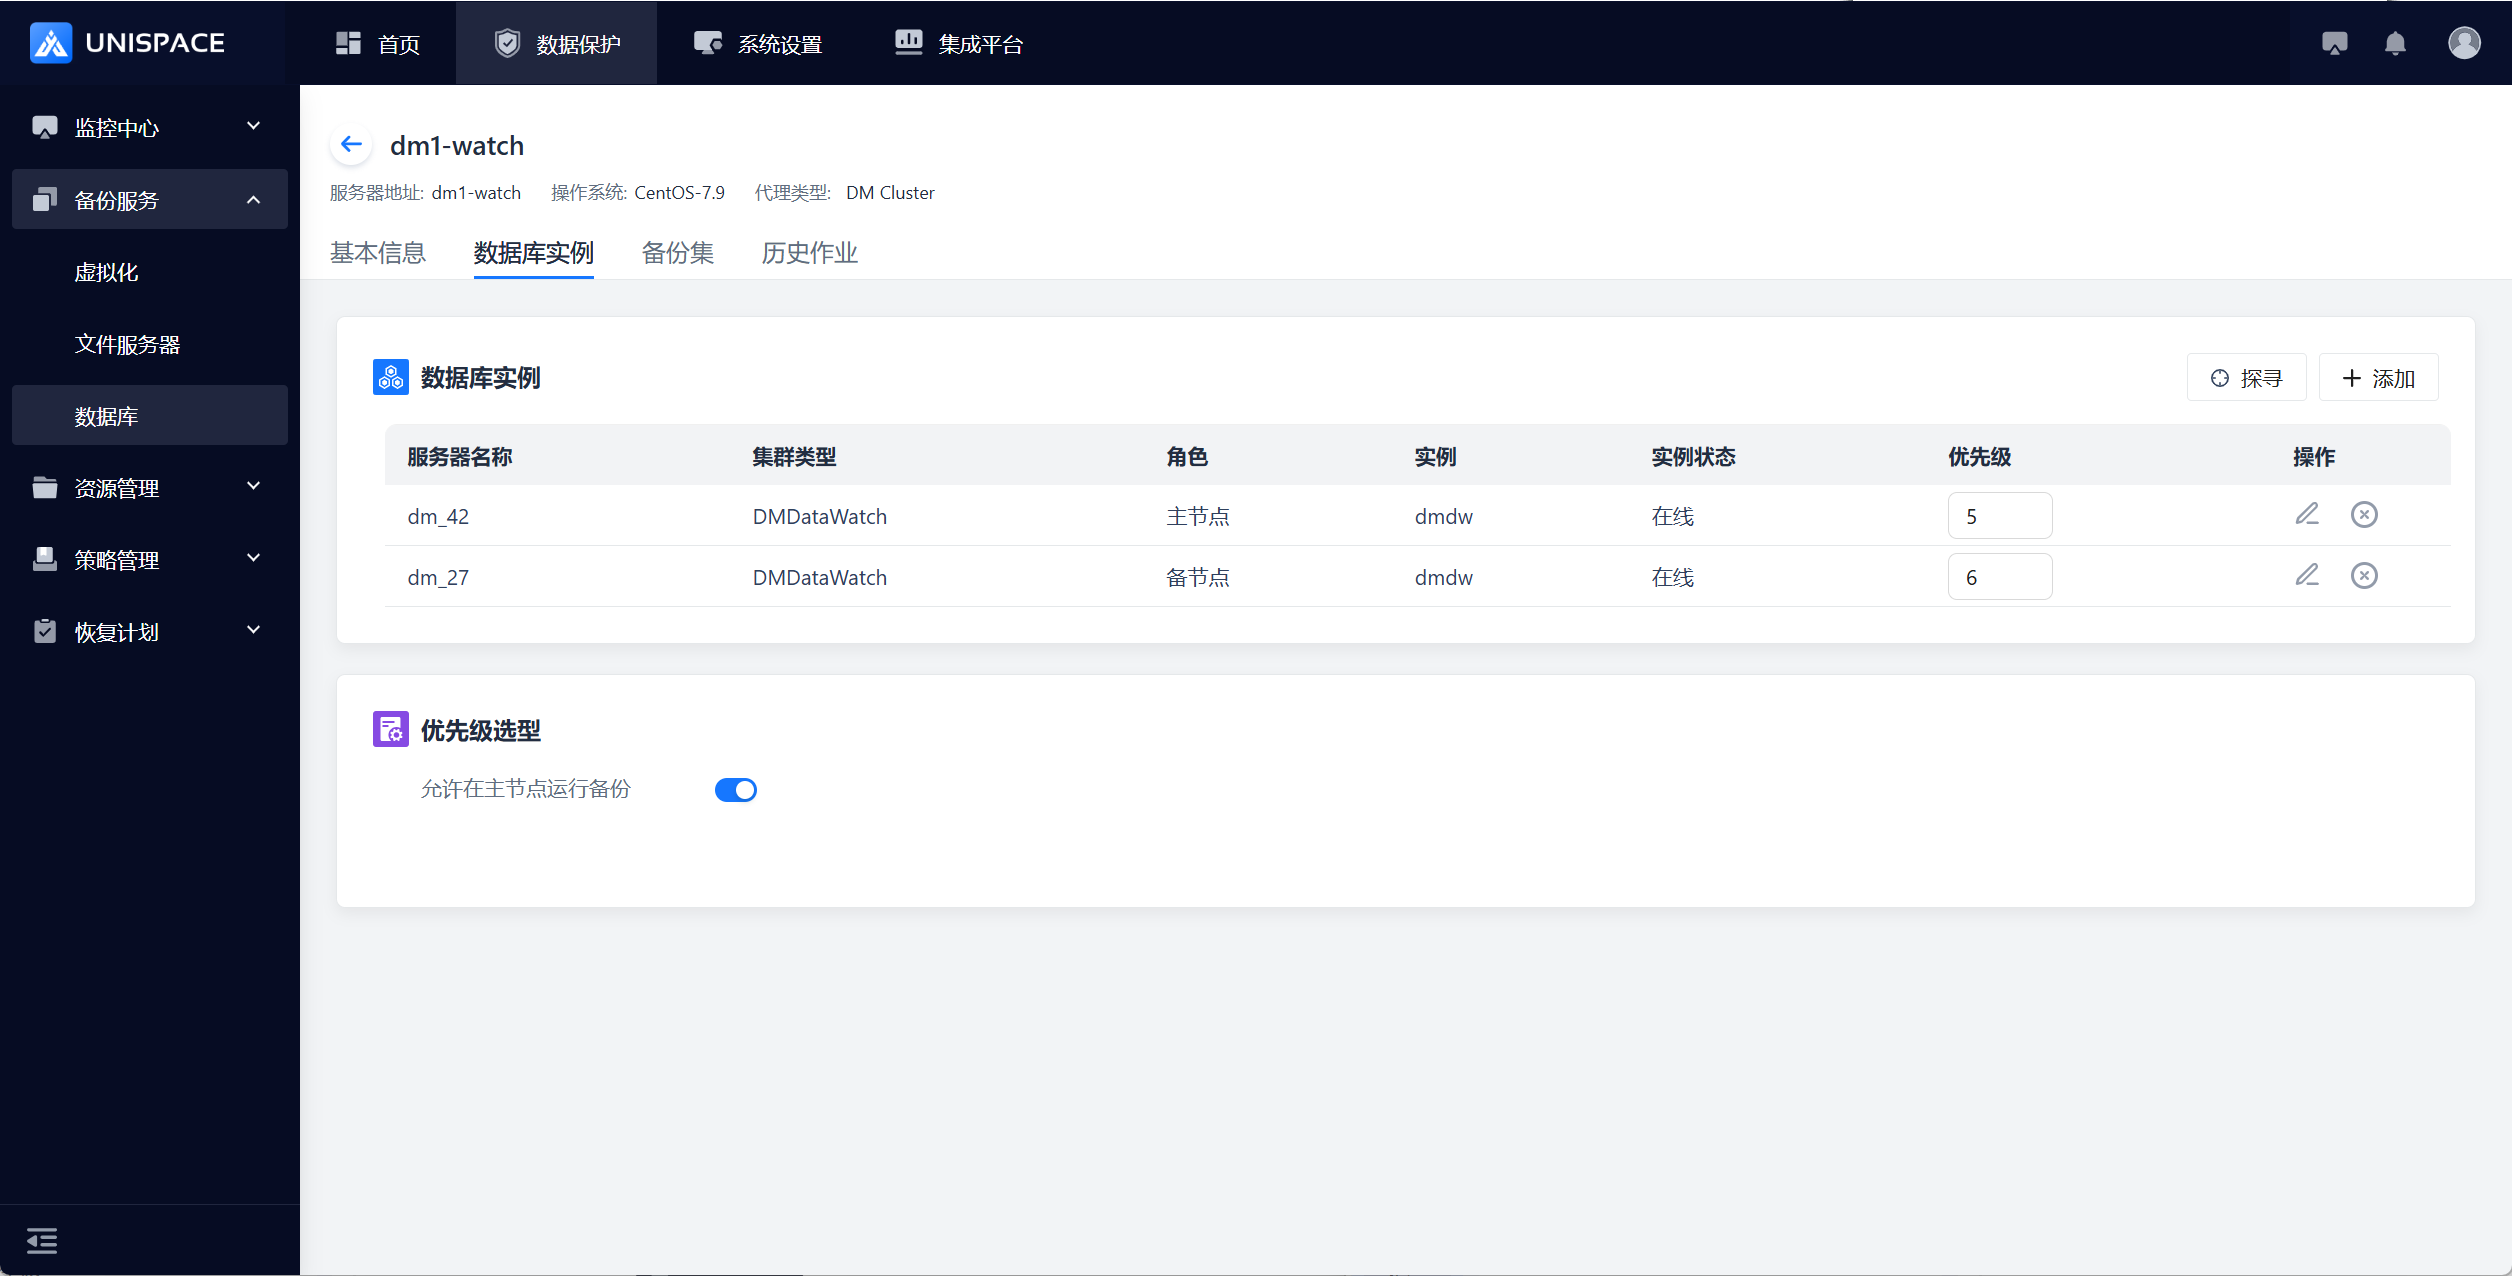
2.2 Create Dameng Backup Object Set (Refer to 1.2)


2.3 Dameng (Cluster) Database/Log Backup (Refer to 1.3 - 1.4)
2.4 Dameng (Cluster) Recovery (Refer to 1.5 - 1.7)
Prerequisites
- The Dameng database/log has been backed up.
Steps
Step 1: Select Cluster, click **Recovery** under the Actions column, choose Database Recovery, and click Next.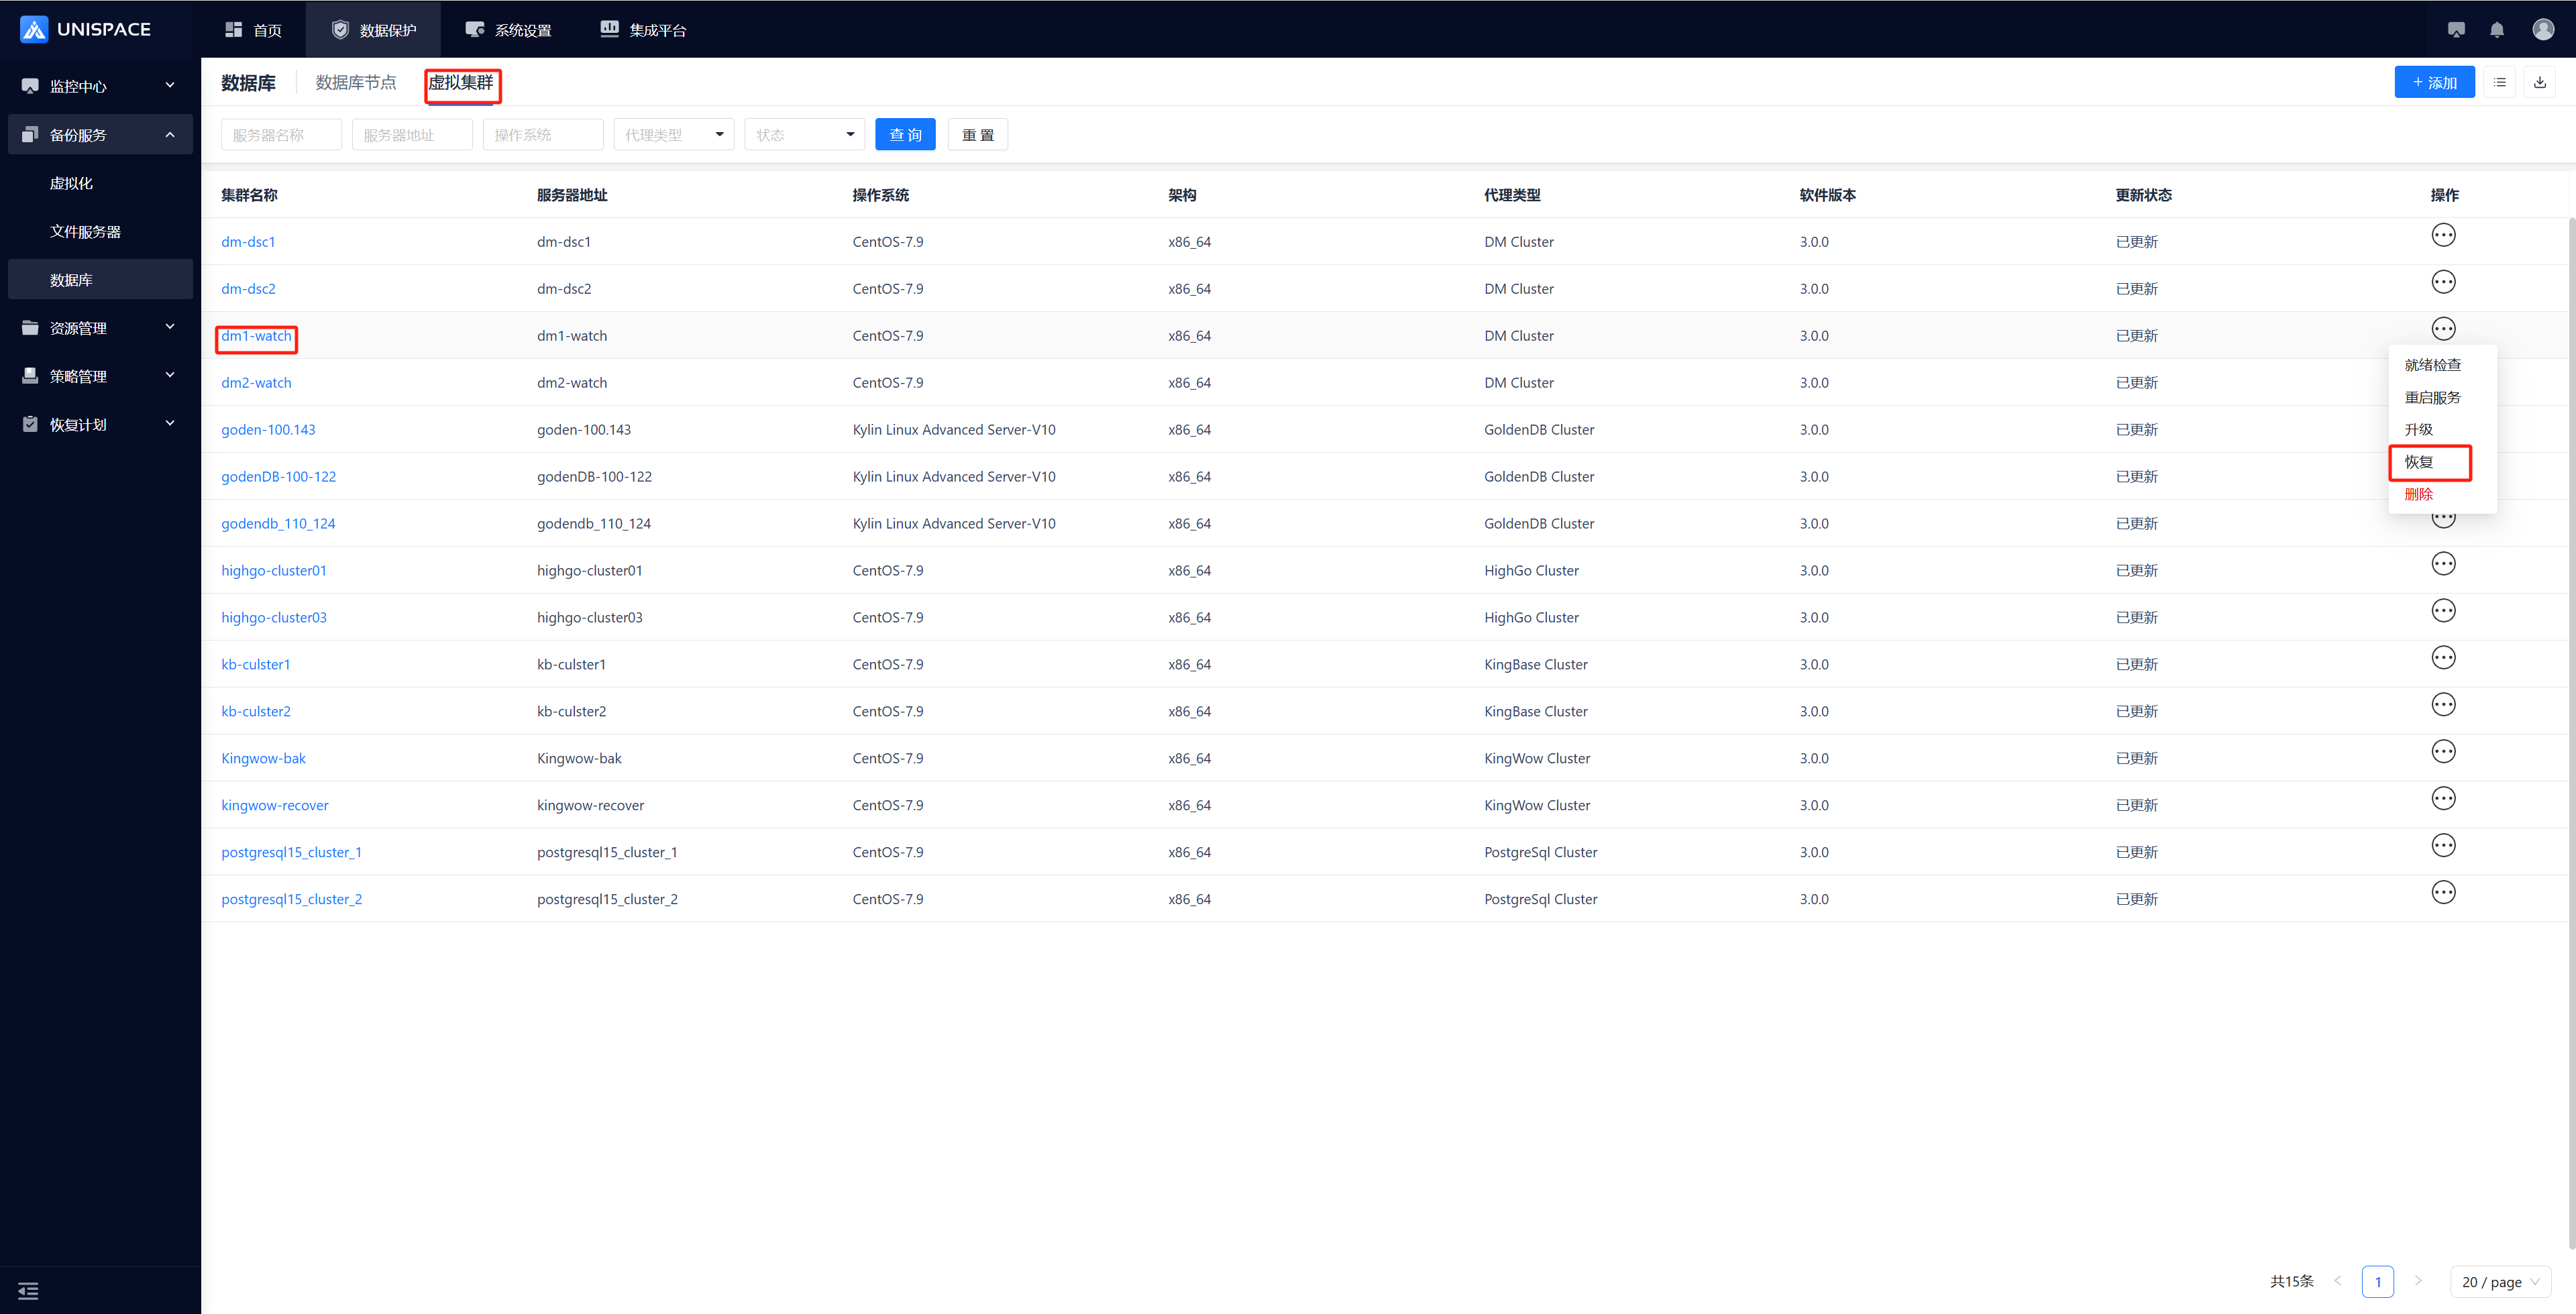
Step 2: A recovery window will pop up. Select the recovery point, which can be filtered by time range. Choose the "Recovery Point" and click Next.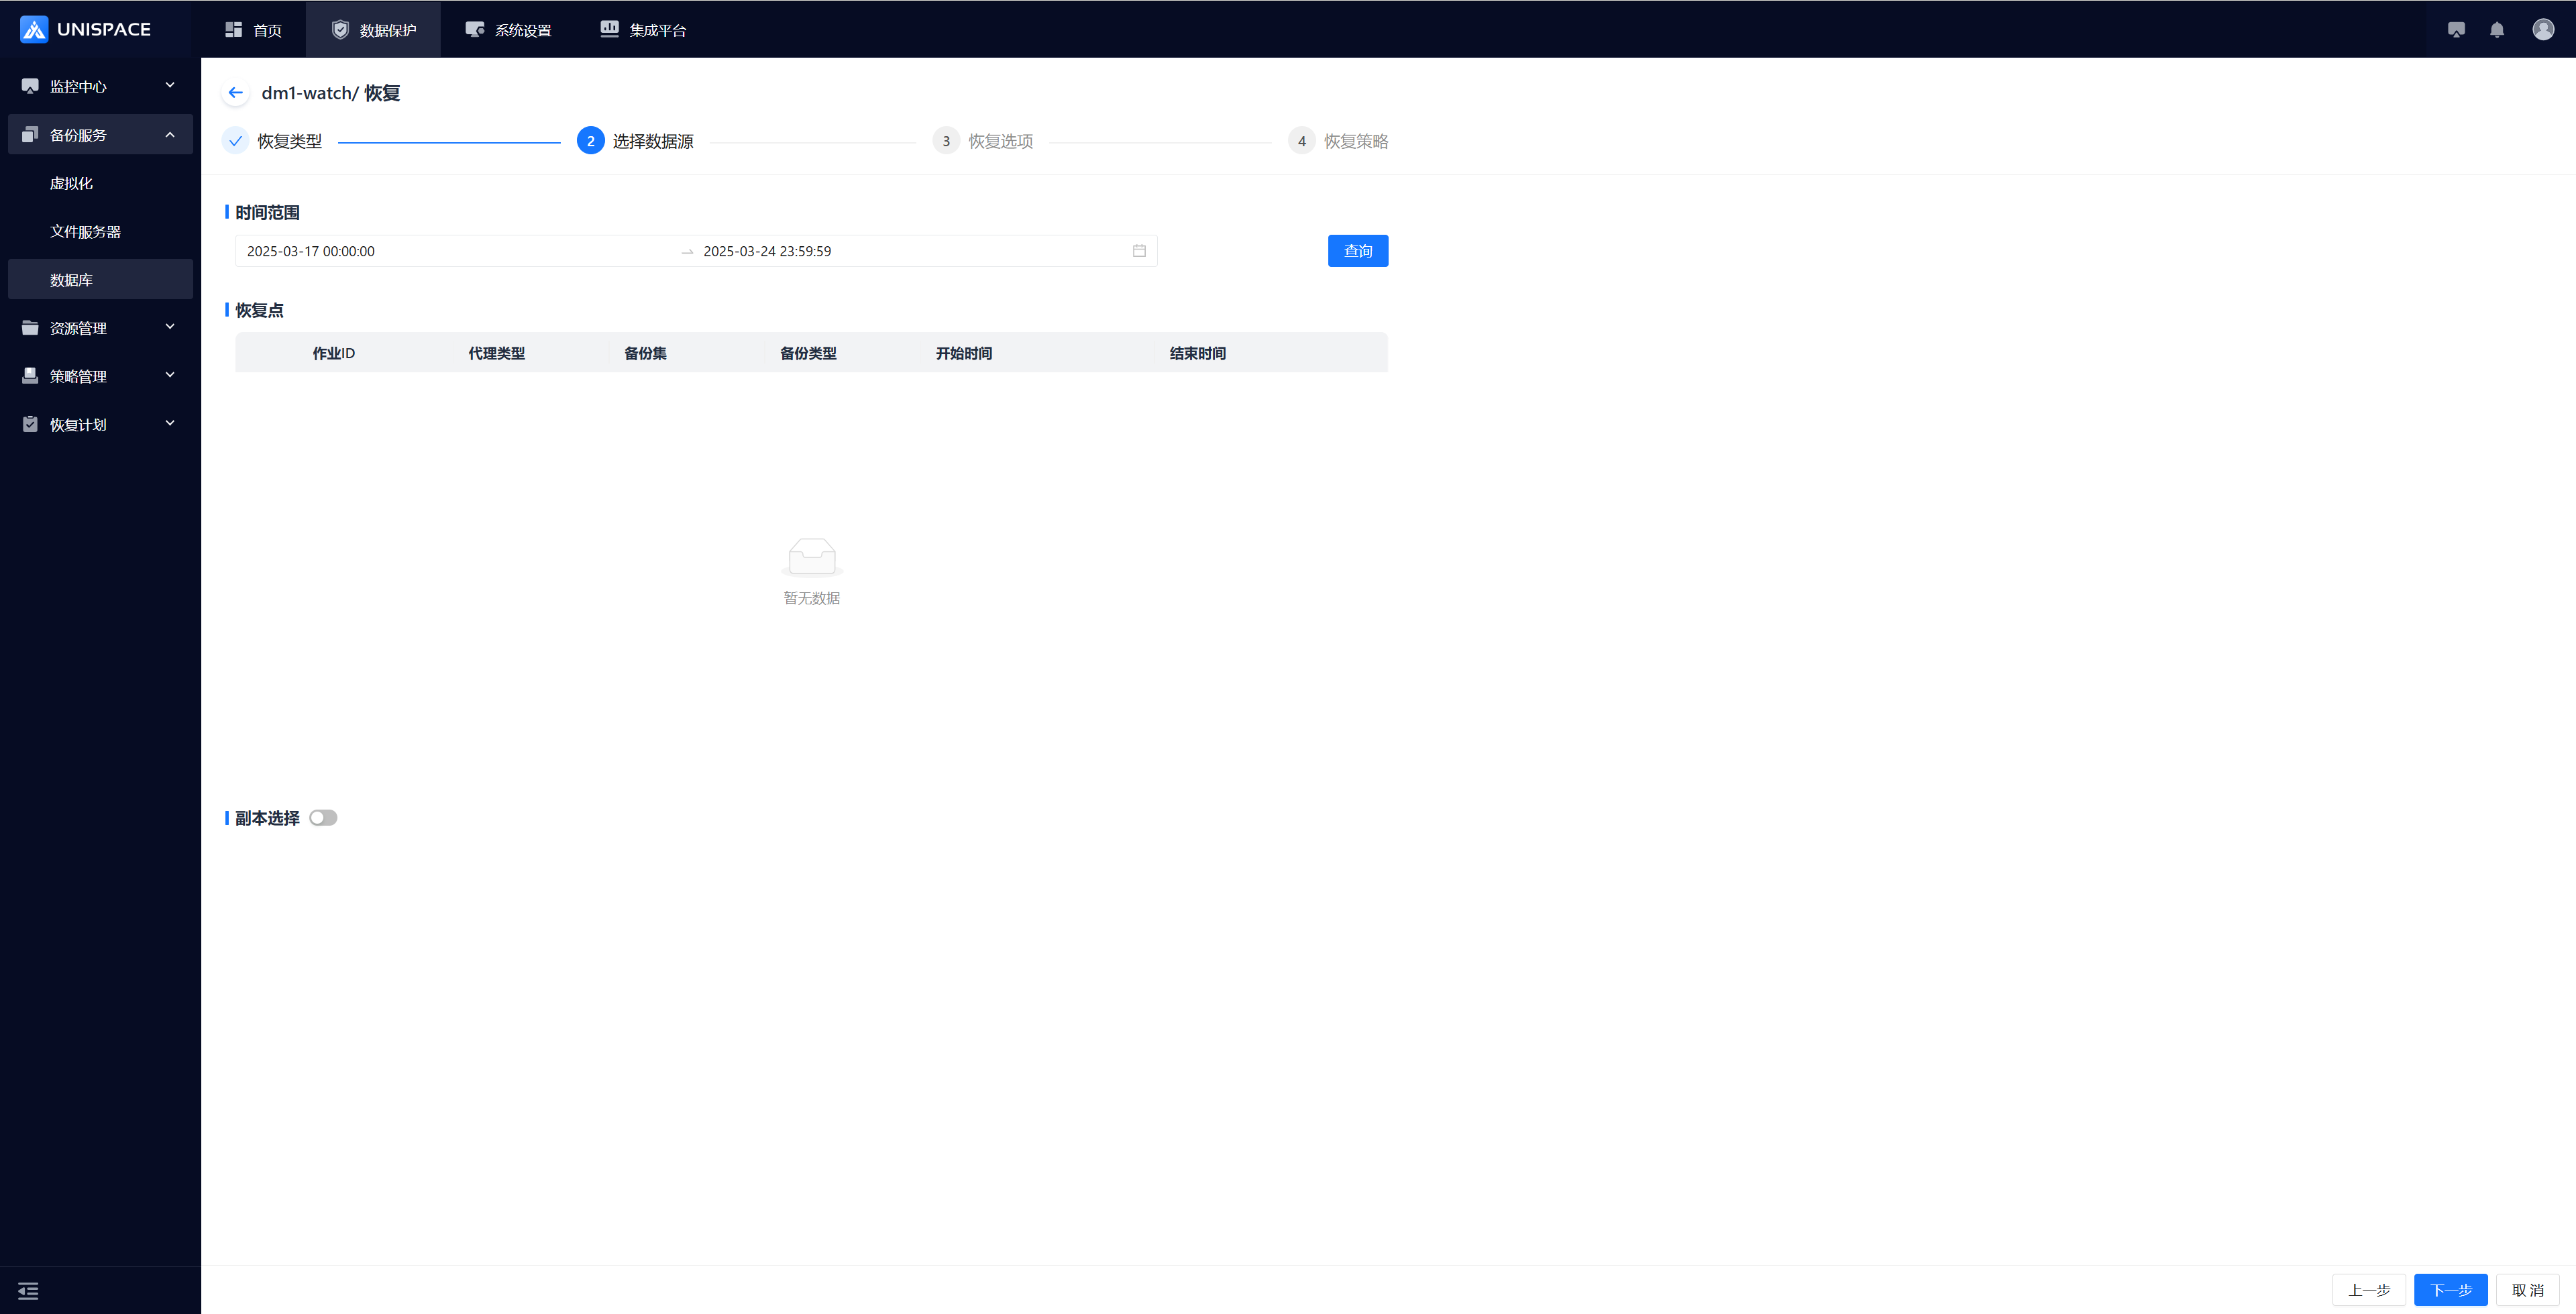
Step 3: Set the recovery options and click Confirm.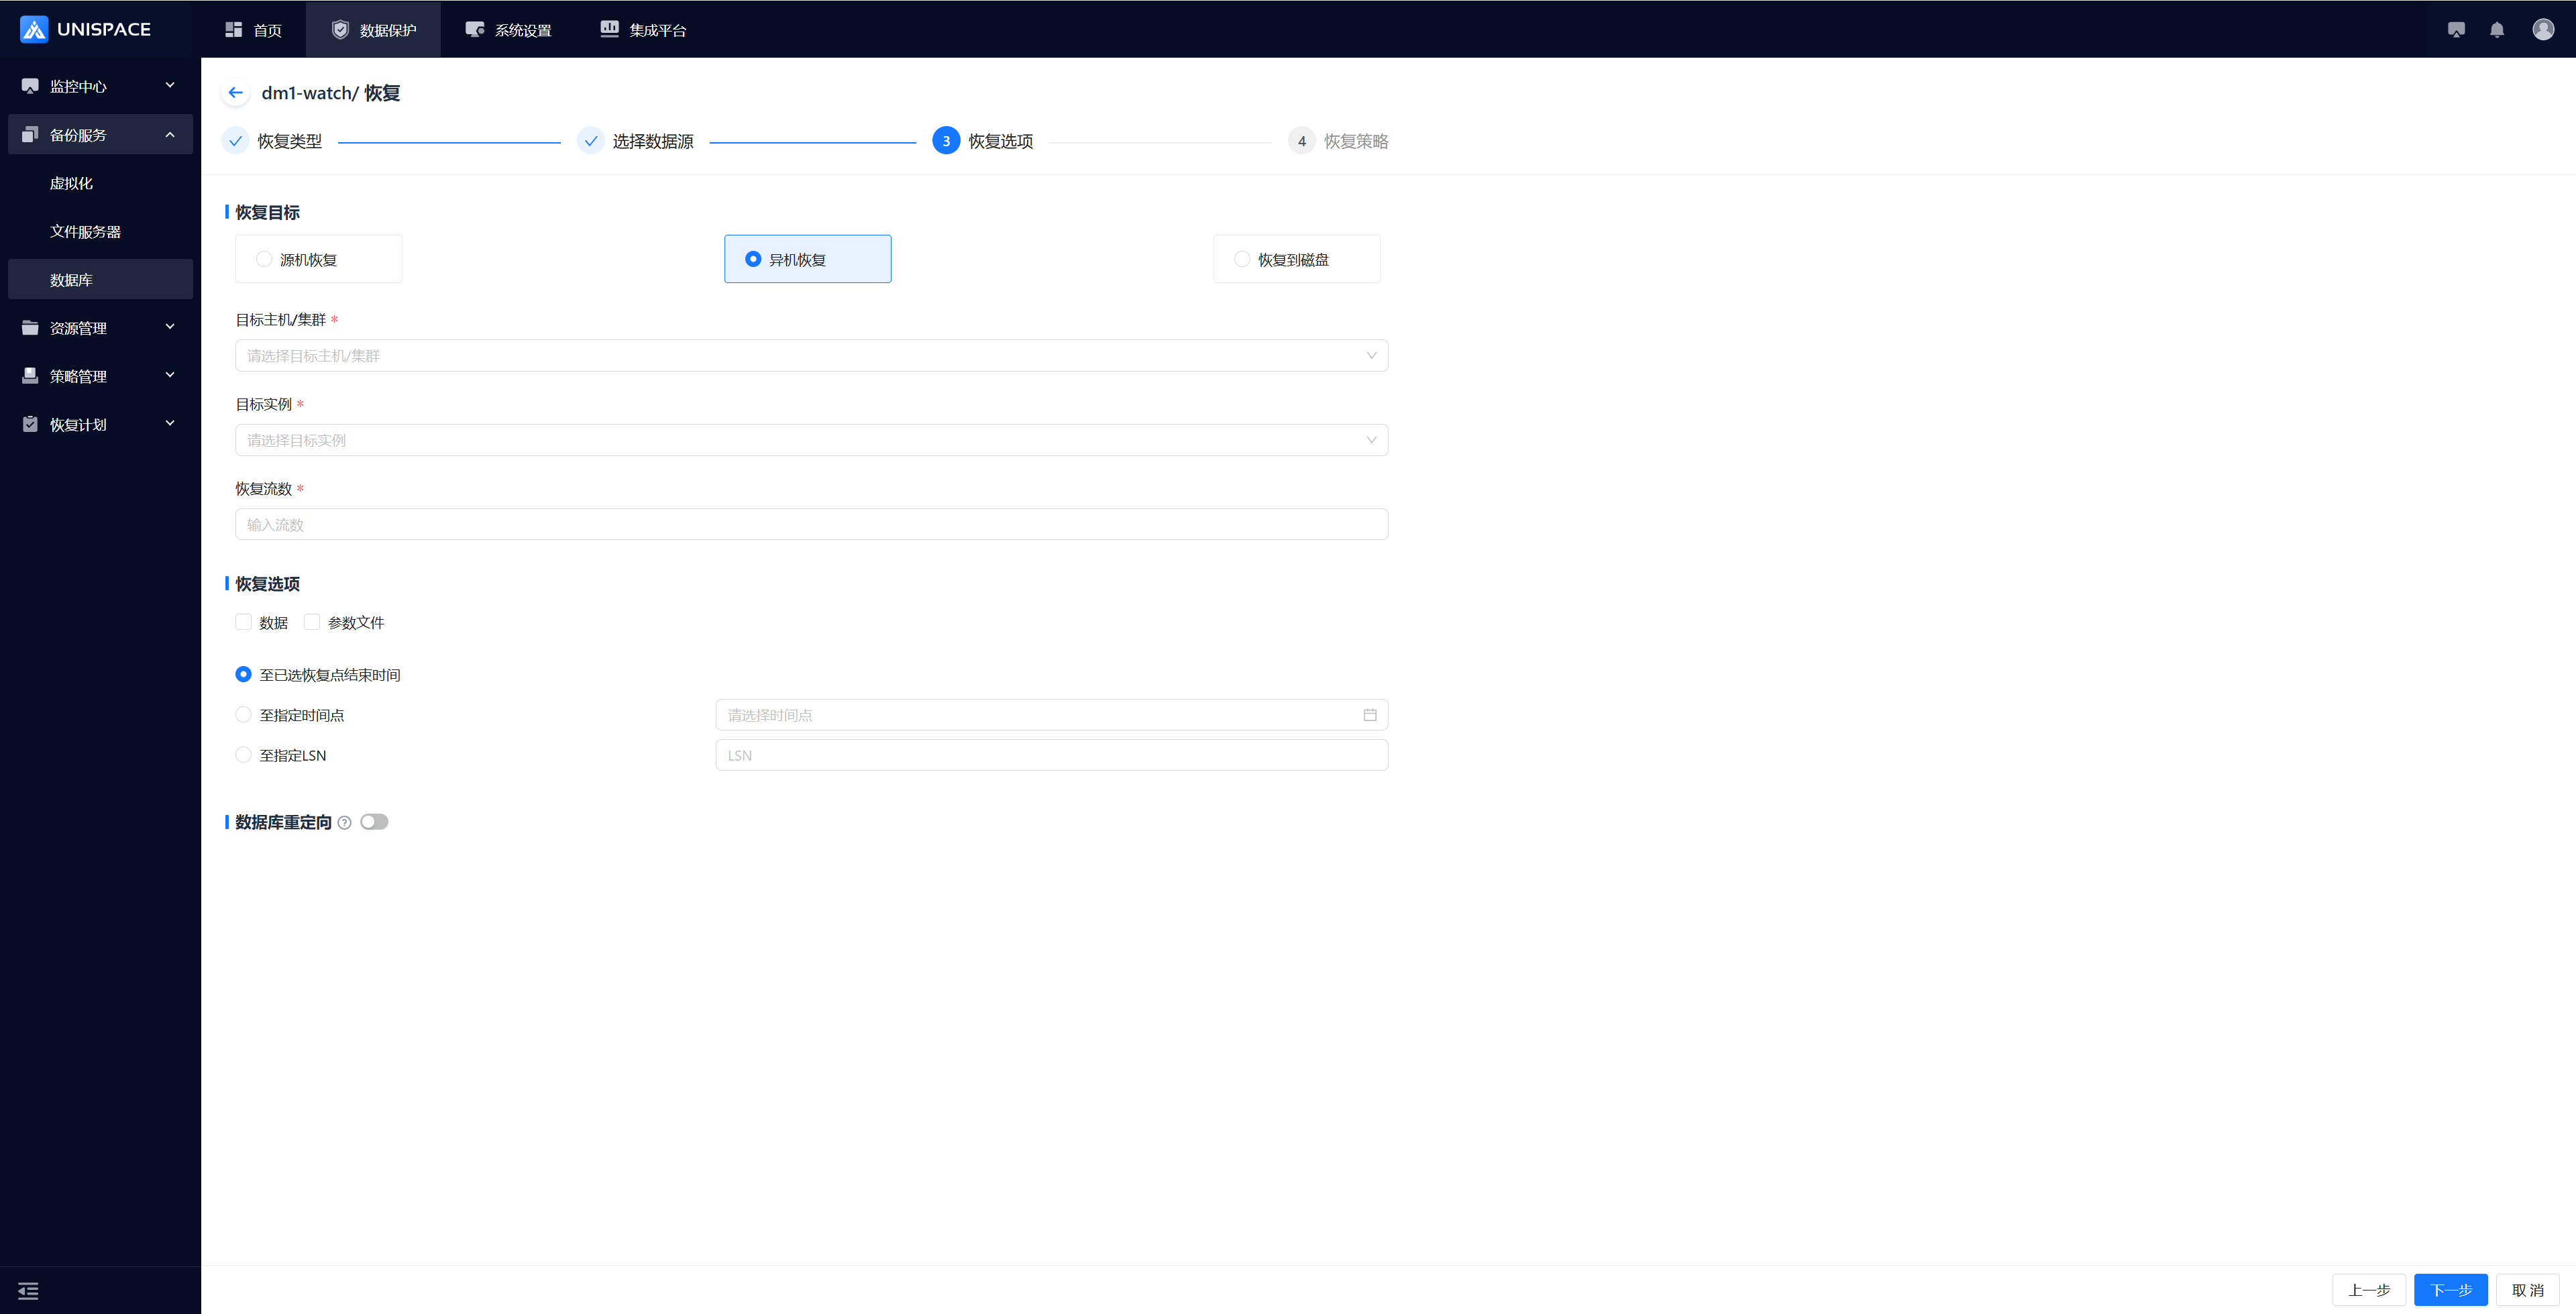
Step 4: Fill in the necessary parameters as described below:
| Parameter Name | Parameter Description | Setting Principle |
|---|---|---|
| Recovery Option | Default source machine recovery | Source machine recovery, cross-machine recovery, or recovery to disk |
| Target Host | Default source machine, greyed out | - Cross-Machine: Client node with Dameng service, cluster node, or standalone - Source Machine: Target host is greyed out, set to the local machine - Recovery to Disk: All client nodes |
| Target Instance | Linked to the target host, select the created Dameng instance | Choose the target instance that can be recovered to any node under the cluster |
| Recovery Stream Count | Numeric type | Maximum stream count = 1 |
| Recovery Option | 1. Recovery: Checkbox, can be combined 2. Recovery Type: Single choice (Until selected recovery point end time, Until specified time, Specified LSN) | 1. Data, parameter file, or data + parameter file 2. Until specified time: Enter a valid time; Until specified LSN: Enter a valid LSN |
| Database Redirection | Toggle option, default off | Tablespace redirection or REDO log redirection, supports custom paths |