Client Installation and Deployment-Windows
- Pre-Installation Preparation
1.1 Supported Architectures
UniSpace supports the following architectures:
1.1.1 Supported Operating Systems
- Windows Server 2019
- Windows Server 2022
1.2 System Hardware Requirements
The following are the minimum hardware requirements for installing the UniSpace agent:
| Type | Physical Machine / Virtual Machine |
|---|---|
| Processor | 8vCPU |
| Memory | 32GB |
| System Disk | 200GB |
| Data Disk | 200GB |
| Network | 1G |
1.3 System Network Requirements
| Source Host | Target Host | Port Requirement |
|---|---|---|
| MetaServer | StorageNode | 9000 TCP |
| ClientNode | 9000 TCP | |
| StorageNode | MetaServer | 9000 TCP |
| ClientNode | 9000 TCP | |
| ClientNode | MetaServer | 9000 TCP |
| StorageNode | 9000 TCP |
1.4 Obtaining the Installation Media
Please contact YuanShuo Technology Support (support@yuanshuotech.com) to obtain the installation media.
- Manual Installation of UniSpace
The installation method for StorageNodes and ClientNodes is the same. This document uses a StorageNode as an example.
2.1 Upload the Installation Package
Upload the installation package to the specified directory, switch to the root user (only the root user is supported for installation):
unzip unispace.zip2.2 Extract the installation package (you can specify the installation directory)
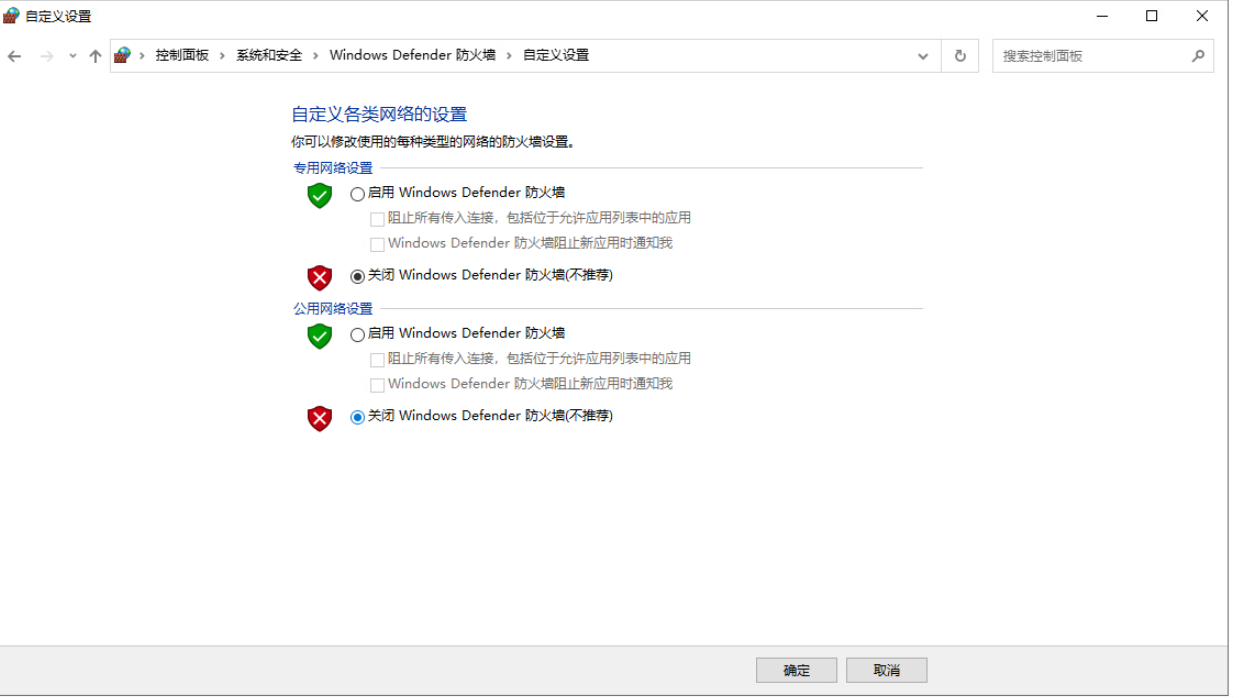
2.3 Close the firewall or open port 9000
2.4 Execute the unis_cn.exe script to register the client
- -n — StorageNode name (customizable)
- -i — StorageNode IP address (local IP)
- -a — StorageNode type
- -m — MetaServer IP address (startup IP/service IP)
Node Type Description: 1-Management Node, 2-File System, 3-MySQL, 5-Access Node, 6-Storage Node, 8-PostgreSQL, 9-DM Database, 10-KingWow, 11-Oracle, 13-GoldenDB, 15-XiHe Database, 16-HIGHGO Database, 18-Kingbase Database, 20-SQL Server Database
Note: If the node type is GoldenDB or KingWow, you must additionally add the -d parameter to specify the database address.
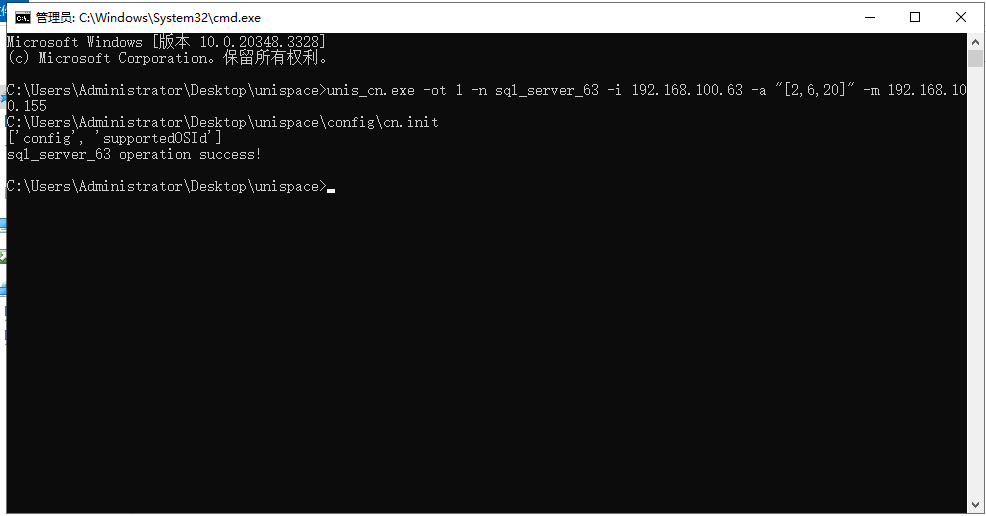
#Open the CMD window and execute in the installation package directory.
./unis_cn.exe -ot 1 -n wind_client -i 192.168.100.84 -a "[2,20]" -m 192.168.100.155
2.5 Start the client service
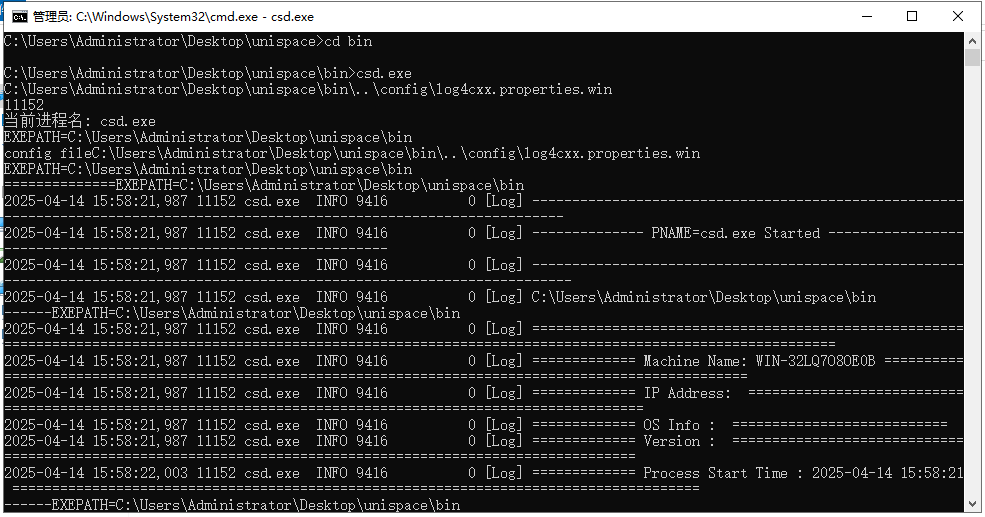
#Execute in the client's bin directory.
csd.exe
Open an additional CMD tool and execute in the client's bin directory.
#Execute in the client's bin directory.
launchd.exe ..\config\launchd.json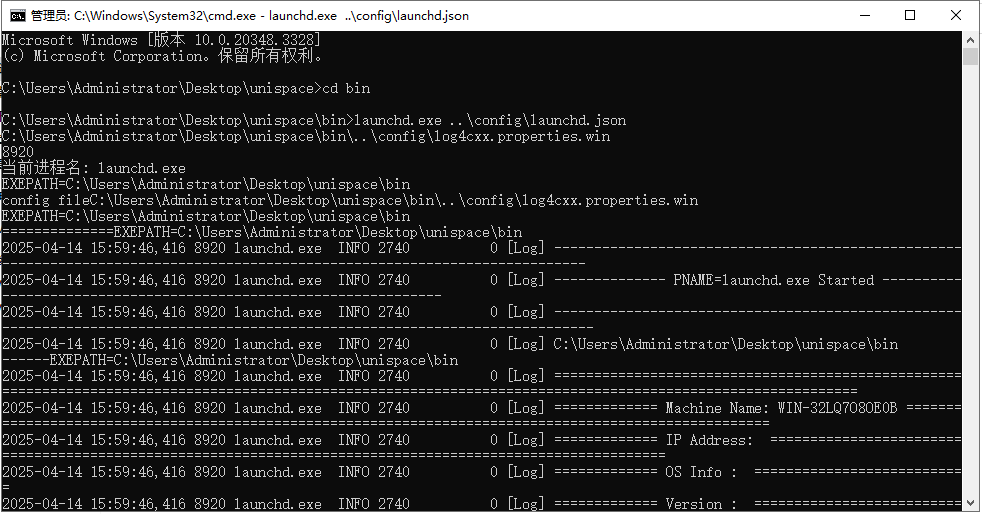
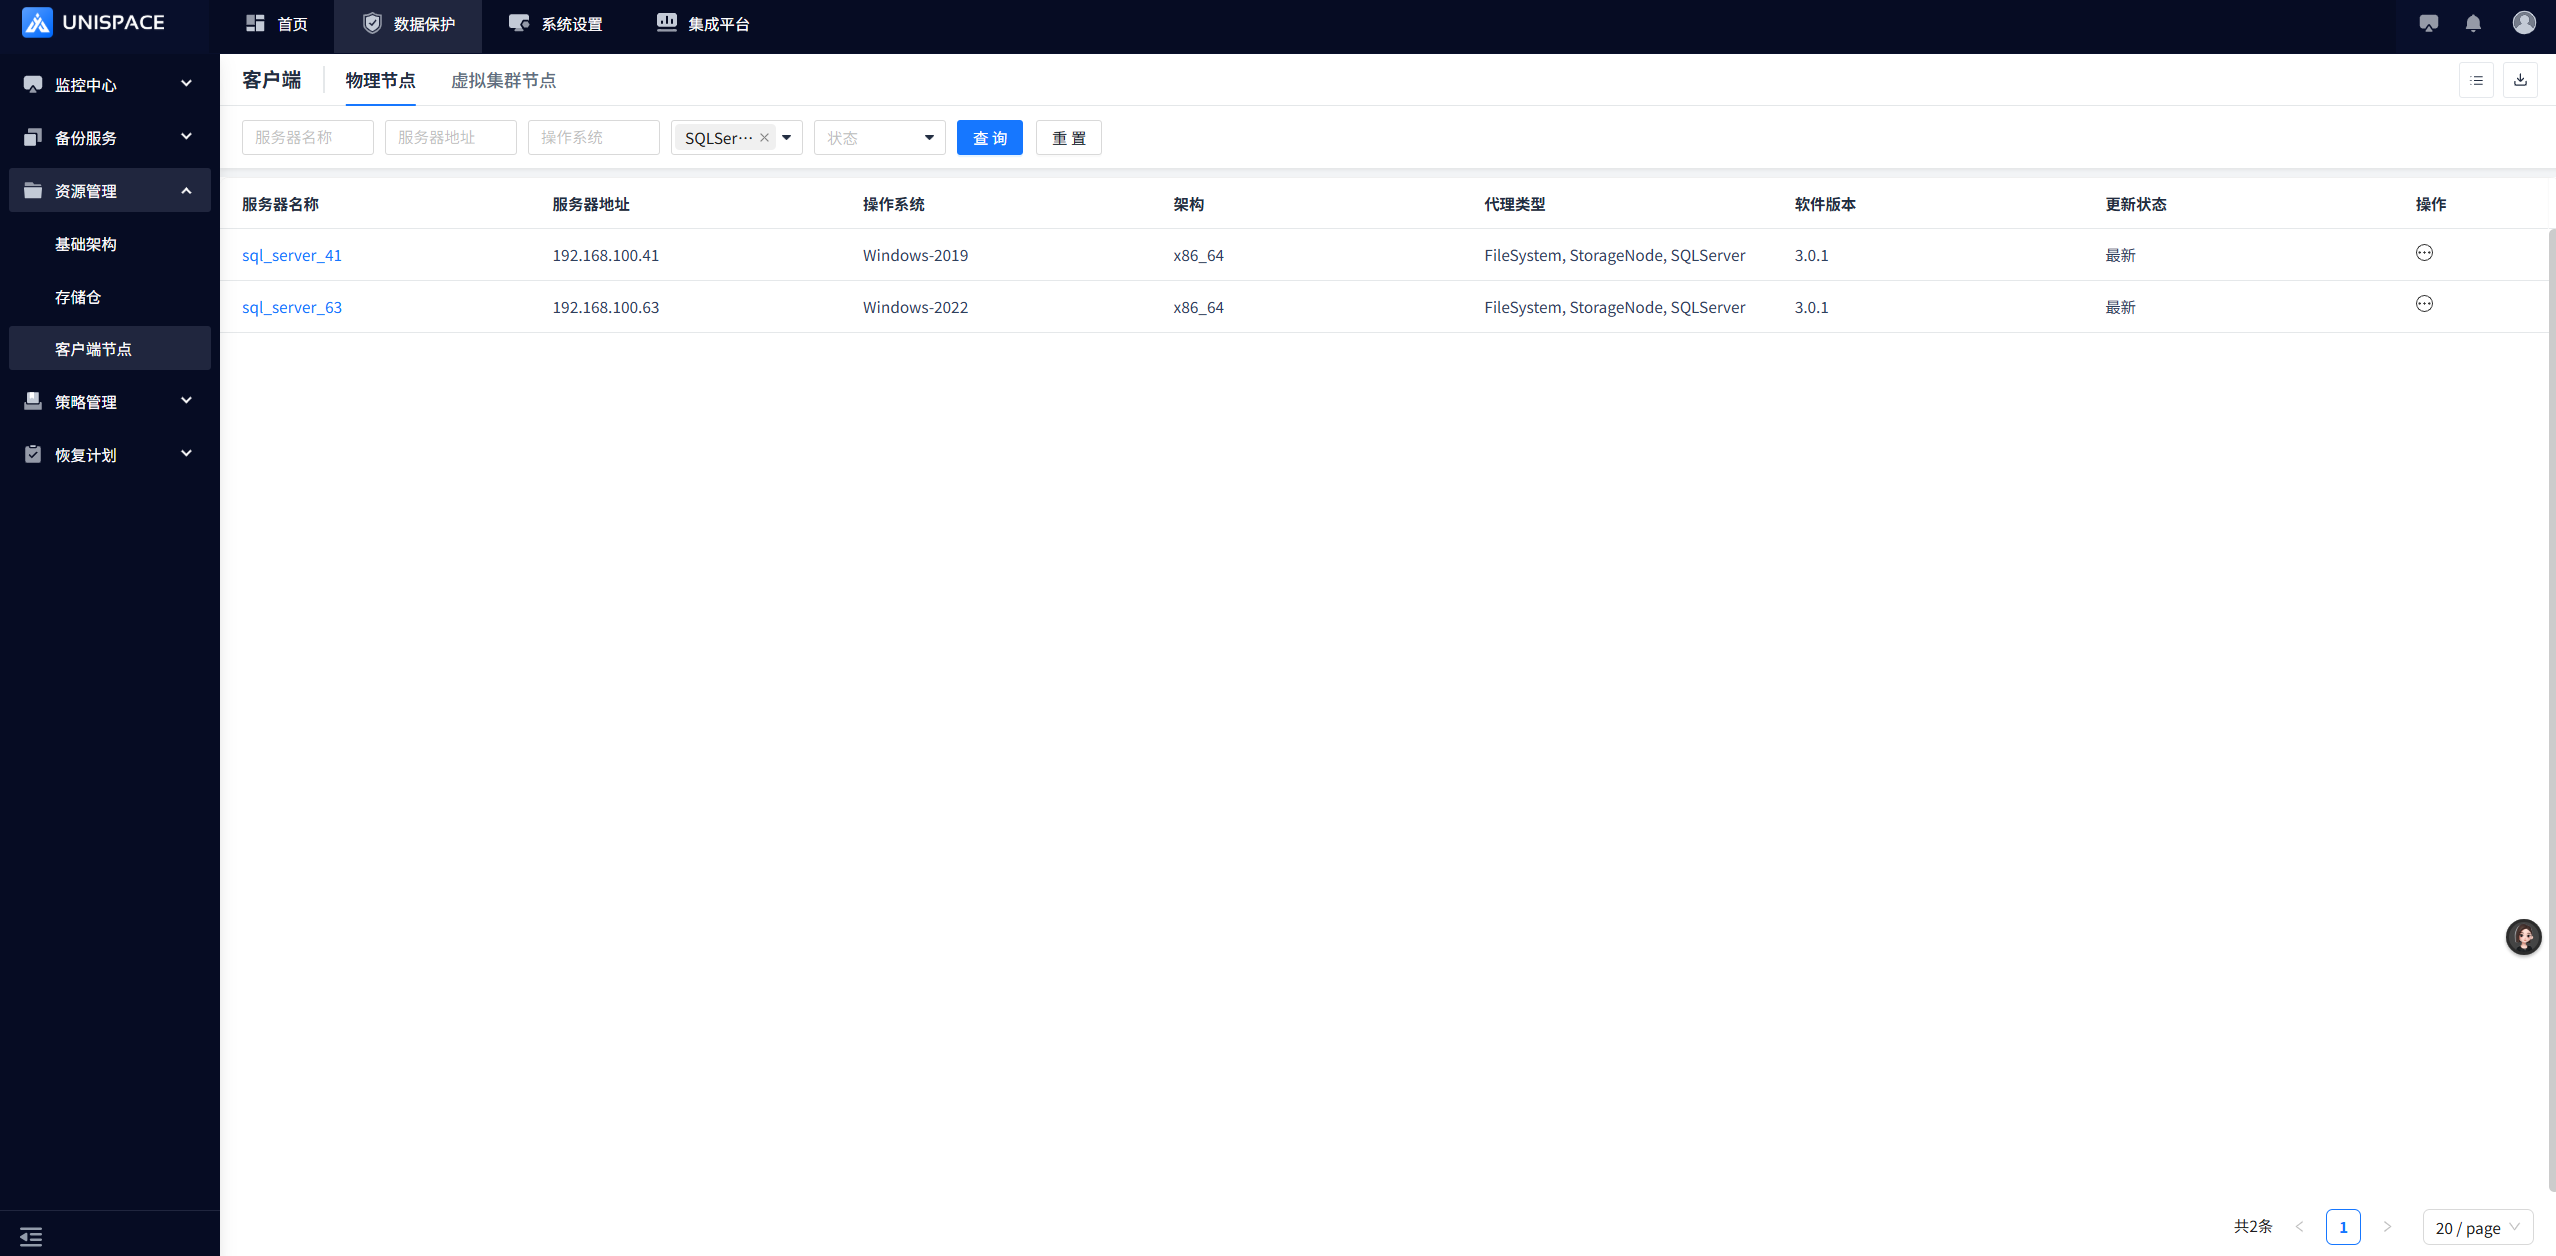
2.6 After installation is complete, you can access the web page to view client information.