Client Installation and Deployment-Linux
1 Pre-Installation Preparation
1.1 Supported Architectures
The document was last updated on 2026-03-25 19:50
1.1.1 Supported Operating Systems
- Red Hat Enterprise Linux 7.x/8.x
- CentOS 7.x/8.x
- Oracle Linux 7.x/8.x
- NeoKylin v7
- Kylin Linux v10 sp1-sp3
- Rocky Linux 8.x
- UOS V20
- Anolis 8.x
- OpenEuler 22.x
- EulerOS 2.0
- Ubuntu 22.04 LTS / 24.04 LTS
- InLinux 23.12
1.1.2 Supported CPU Chips
- Inter/AMD x86_64
- Hygon x86_64
- Zhaoxin x86_64
- Kunpeng aarch64
- Phytium aarch64
1.2 System Hardware Requirements
The following are the minimum requirements for installing the UniSpace agent:
| Type | Physical Machine / Virtual Machine |
|---|---|
| Processor | 8vCPU |
| Memory | 32GB |
| System Disk | 200GB |
| Data Disk | 200GB |
| Network | 1G |
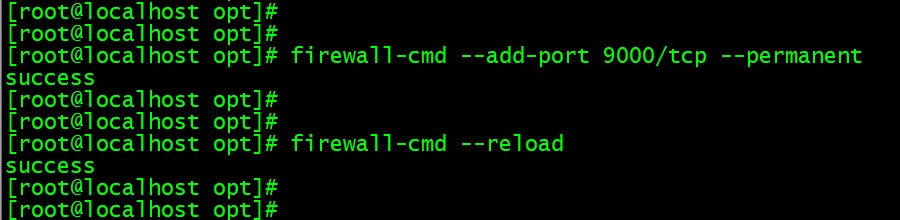
1.3 System Network Requirements
| Source Host | Target Host | Port Requirements |
|---|---|---|
| Meta Server | Storage Node | 9000 TCP |
| Client Node | 9000 TCP | |
| Storage Node | Meta Server | 9000 TCP |
| Client Node | 9000 TCP | |
| Client Node | Meta Server | 9000 TCP |
| Storage Node | 9000 TCP |
1.4 Pre-Installation Checks
1.4.1 Operating System Time Check
Check and adjust the target timezone and system time:
timedatectl
timedatectl list-timezones|grep -i beijing
timedatectl set-timezone Asia/Beijing
date -s "2024-09-20 14:00:00"
clock -w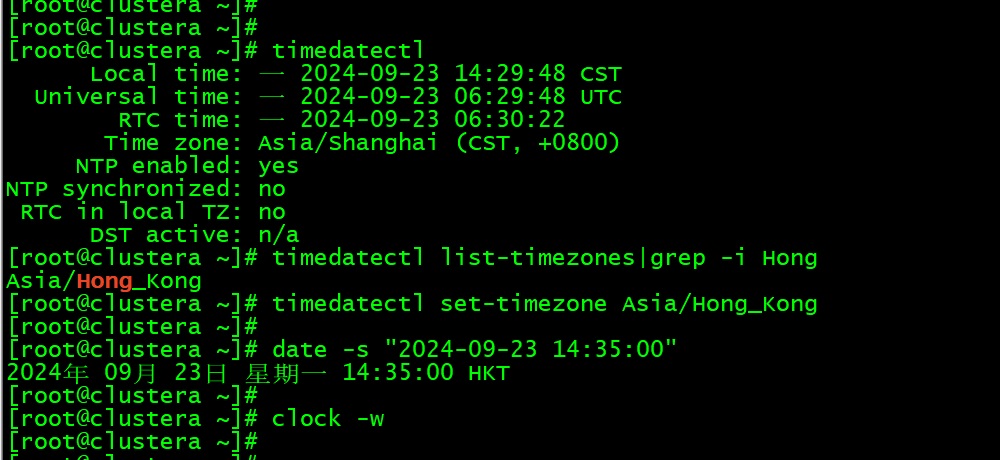
1.5 Obtain the Installation Media
Please contact Yuanshuo Technology Support (support@yuanshuotech.com) to obtain the installation media.
2 Manual Installation of UniSpace
The installation method for Storage Nodes and Client Nodes is the same. This document uses a Storage Node as an example.
2.1 Upload the Installation Package
Upload the installation package to the specified directory, switch to the root user (only the root user is supported for installation):
sudo -i
2.2 Extract the installation package (you can specify the installation directory)
tar -xvf us-agent-xxx-xxx.tar -C /opt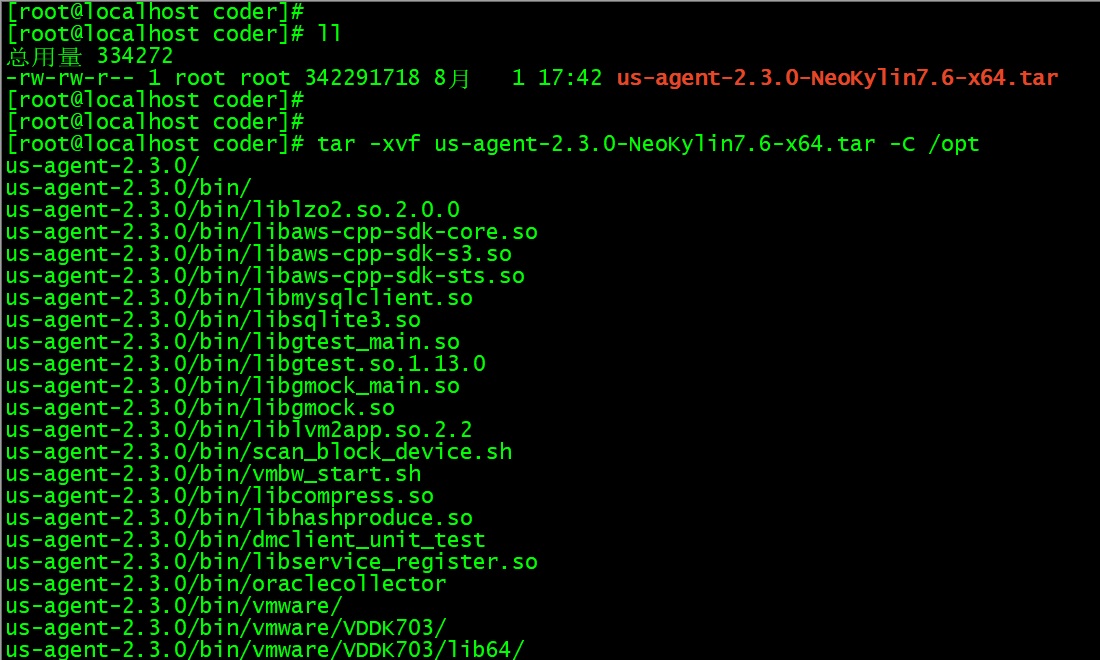
2.3 Rename the extracted folder
cd /opt
mv us-agent-xxx unispace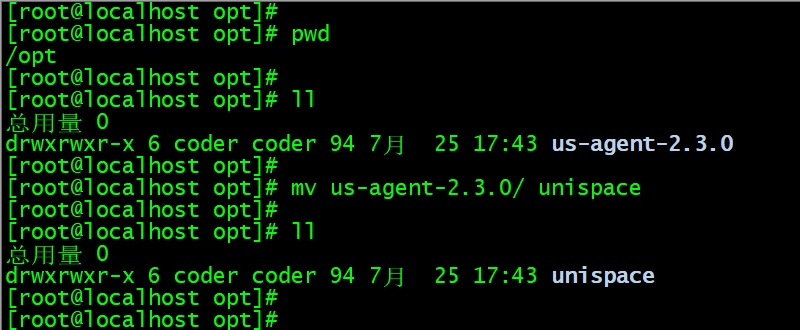
2.4 The default client port is 9000. If you need to change the client port number before installation, refer to the document "[Changing Node Port Numbers](https://docs.yuanshuotech.com/en/docs/Changing-Node-Port-Numbers".
2.5 Execute the register.sh script to register the client (Note: for version 2.x)
Parameters:
-n— Storage Node name (customizable)-i— Storage Node IP address (local IP)-a— Storage Node type-m— Meta Server IP address (startup IP/service IP)
./register.sh -n StorageNode -i 192.168.xxx.xxx -a "[2,6]" -m 192.168.xxx.xxxNode Type Description: 1-management node, 2-file system, 3-MySQL, 5-Access Node, 6-Storage node, 8-PostgreSQL, 9-DM Database, 10-KingWow, 11-Oracle, 13-GoldenDB. Refer to the table below:
| Agent Type | Value (-a set value) |
|---|---|
| File System | 2 |
| MySQL | 3 |
| Access Node | 5 |
| Storage Node | 6 |
| PostgreSQL Database | 8 |
| DM Database | 9 |
| KingWow Access Node | 10 |
| Oracle | 11 |
| GoldenDB | 13 |
| Xihe Database | 15 |
| HIGHGO | 16 |
| Kingbase | 18 |
| SQLServer | 20 |
| YaShan | 25 |
| TDSQL Access Node | 26 |
| GBase | 28 |
| Informix | 29 |
Note:
If the node type is GoldenDB or KingWow, an additional -d parameter must be added to specify the database address.
./register.sh -n KingWow -i 192.168.xxx.xxx -a "[2,10]" -m 192.168.xxx.xxx -d 192.168.xxx.xxx2.6 Execute the unis_cn script to register the client (Note: for version 3.0 and above)
Parameters:
-ot— 1 for registration, 2 for update-n— Storage Node name (customizable)-i— Storage Node IP address (local IP)-a— Storage Node type
./unis_cn -ot 1 -n highgo84 -i 192.168.100.84 -a "[2,16]" -m 192.168.100.155 -d 192.168.100.84
2.7 Execute the unis_cn script to register the client
Note: Applicable to version 3.2 and above – defaults to file registration. To add additional agent types, modify the agent type in the resource group and restart:
-ot— 1 for registration, 2 for update-n— Storage Node name (customizable)-i— Storage Node IP address (local IP)
./unis_cn -ot 1 -n highgo84 -i 192.168.100.84 -m 192.168.100.155
2.8 Start the client service
./unis_cn.sh start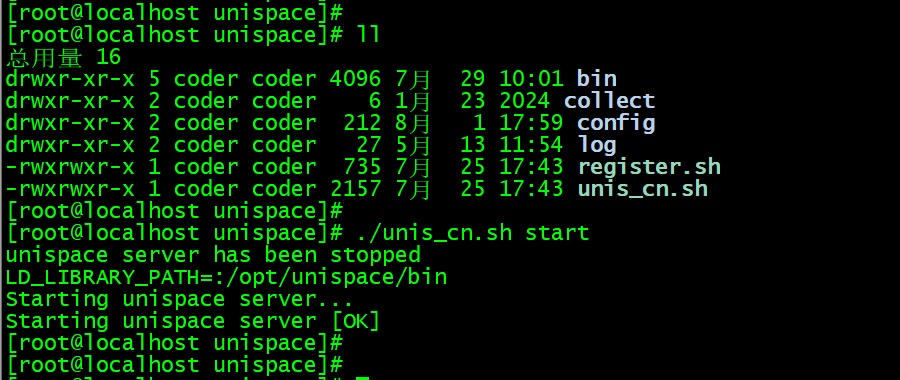
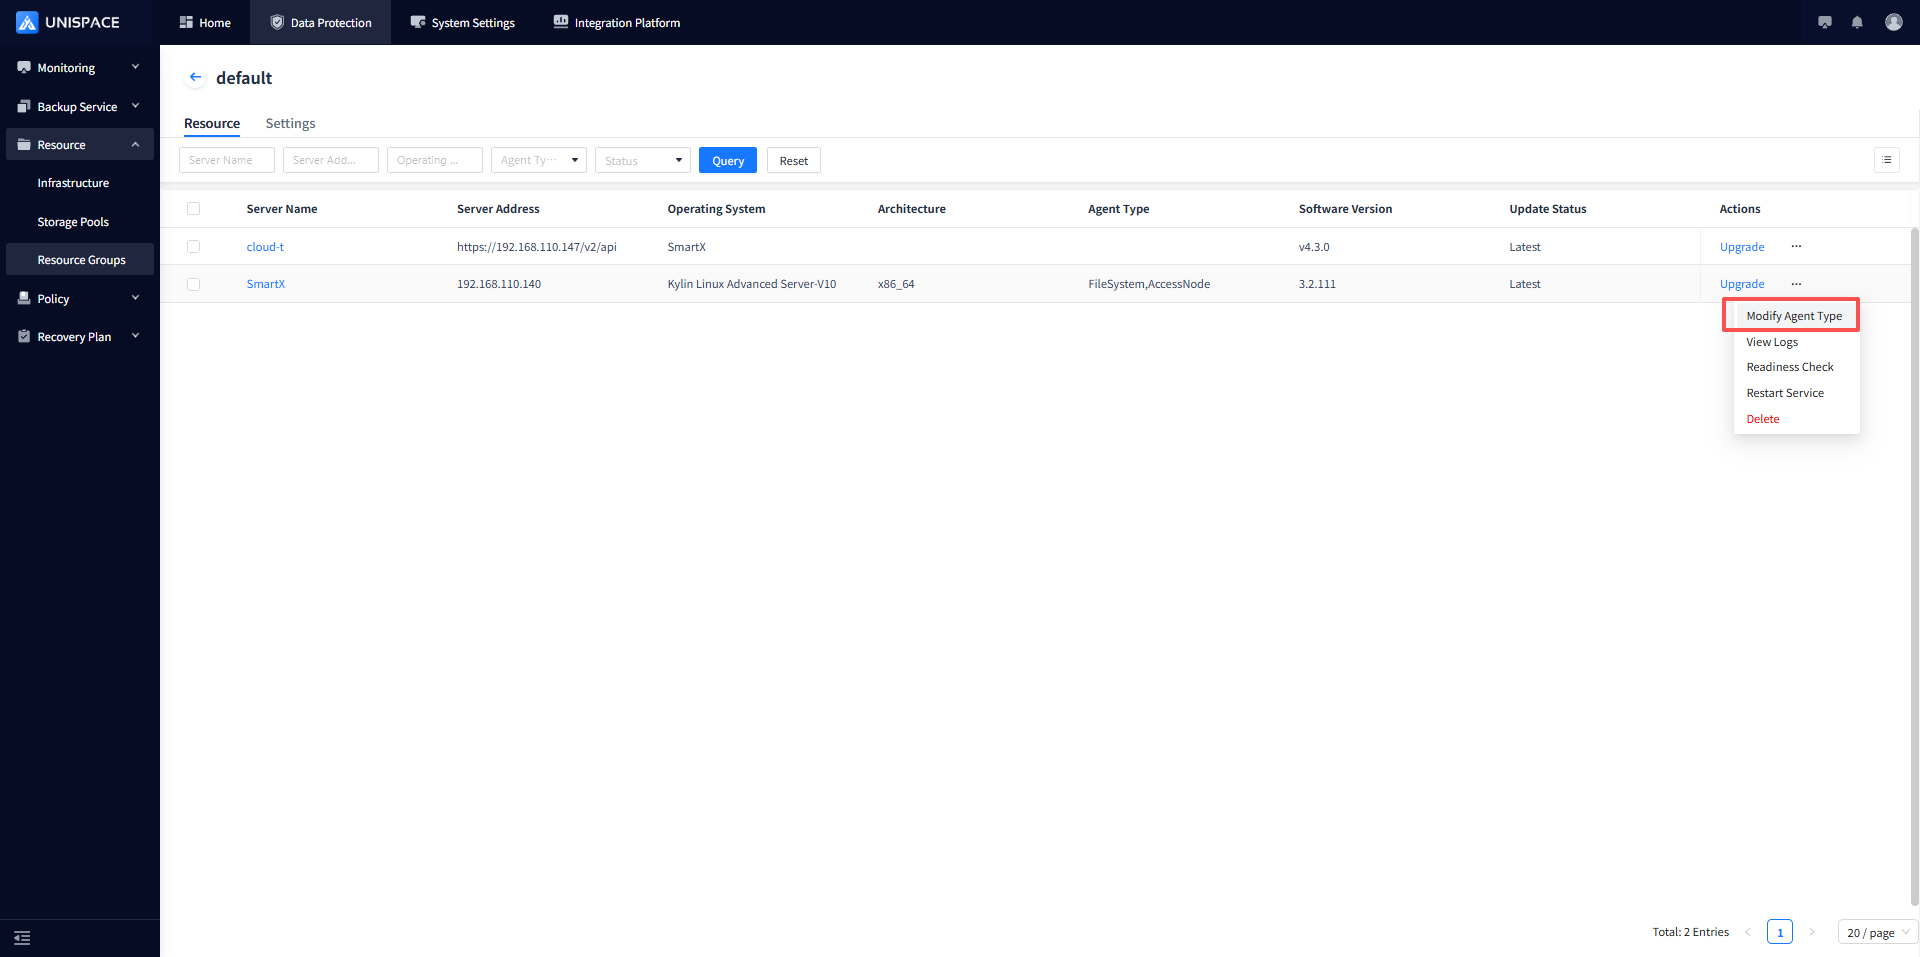
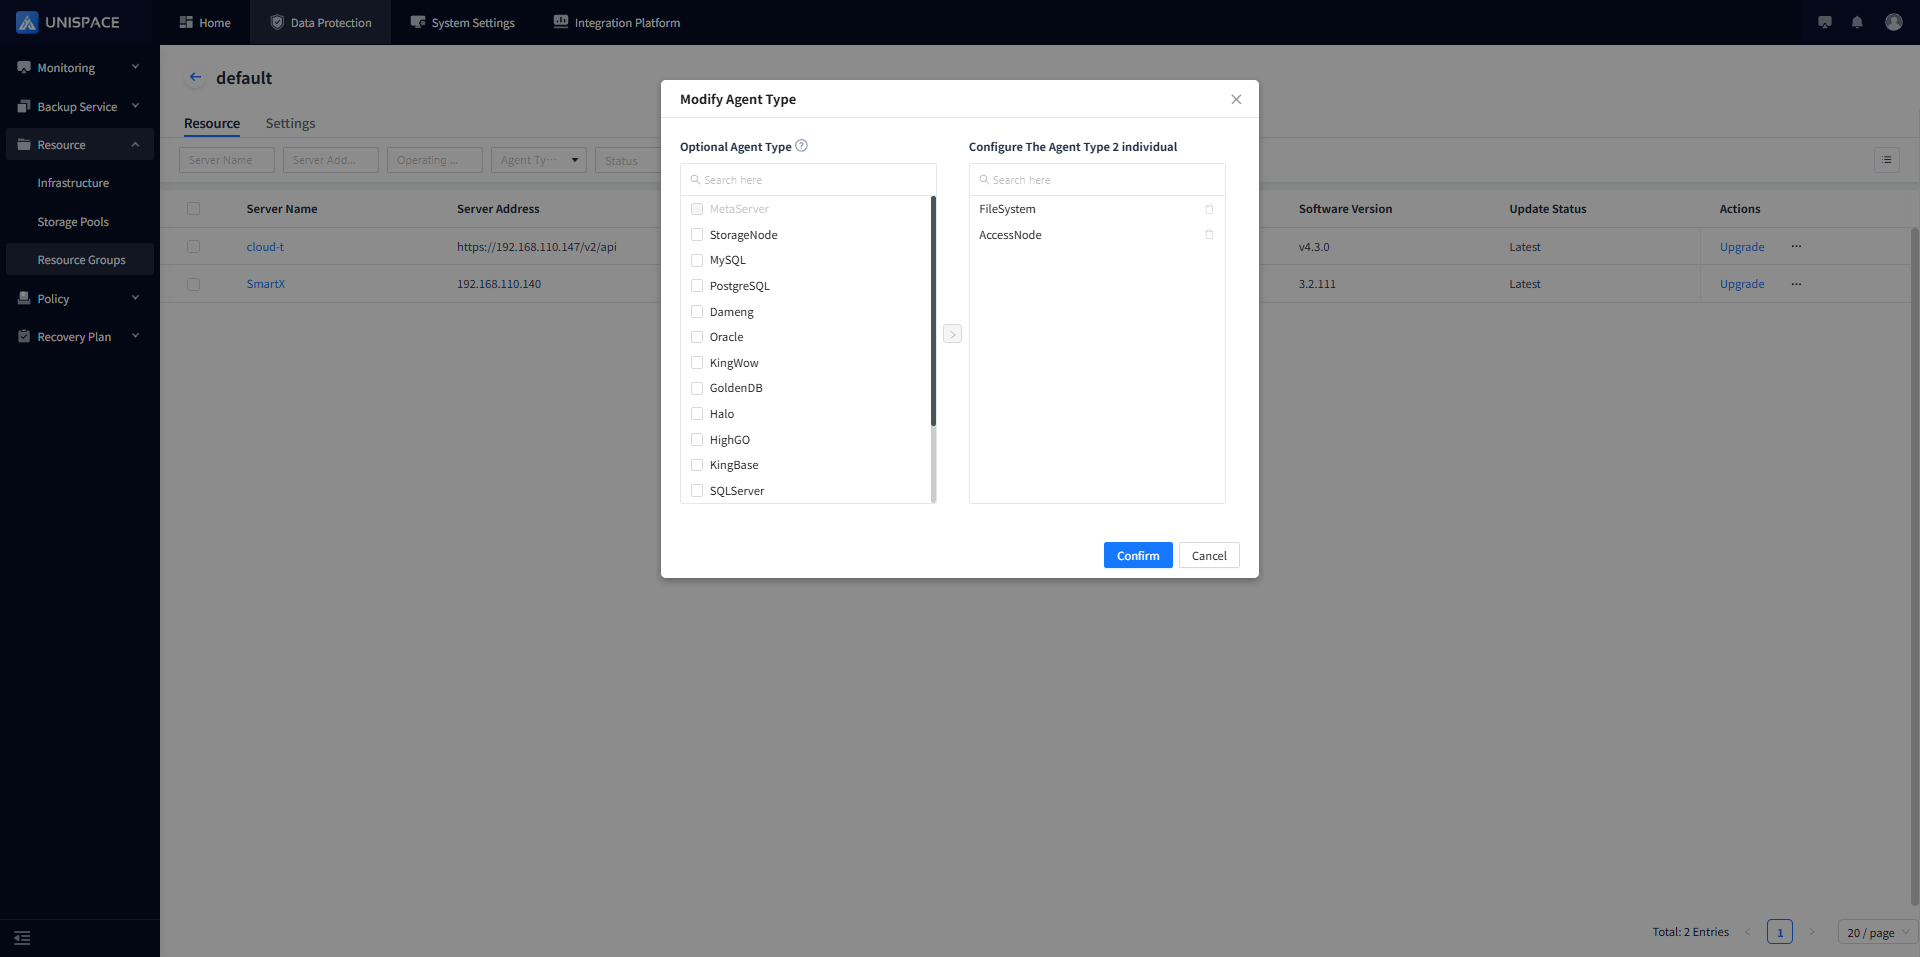
2.9 Modify the agent type (refer to the node type table above).
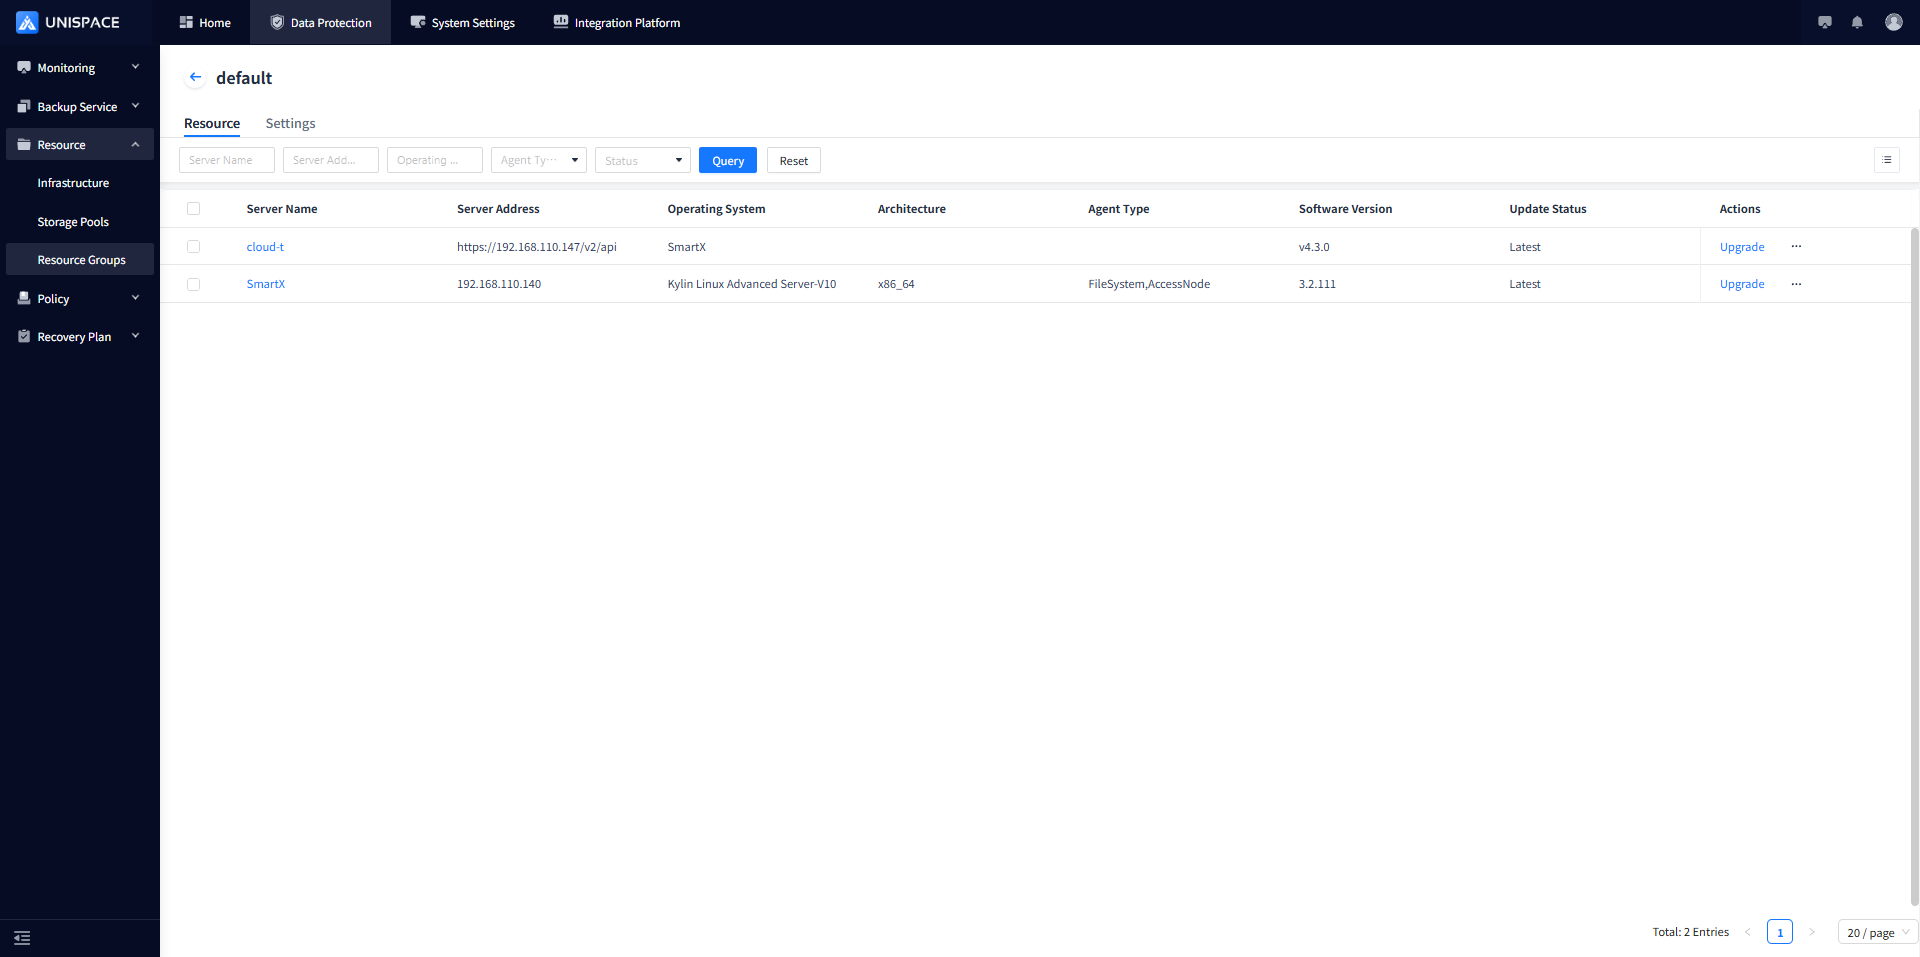
2.10 After installation is complete, you can access the web page to view the client information.
3 Post-Installation Checks
3.1 Check Service Status
After installation is complete, you can go into the installation directory and use the script to check the UniSpace service status:
./unis_cn.sh status
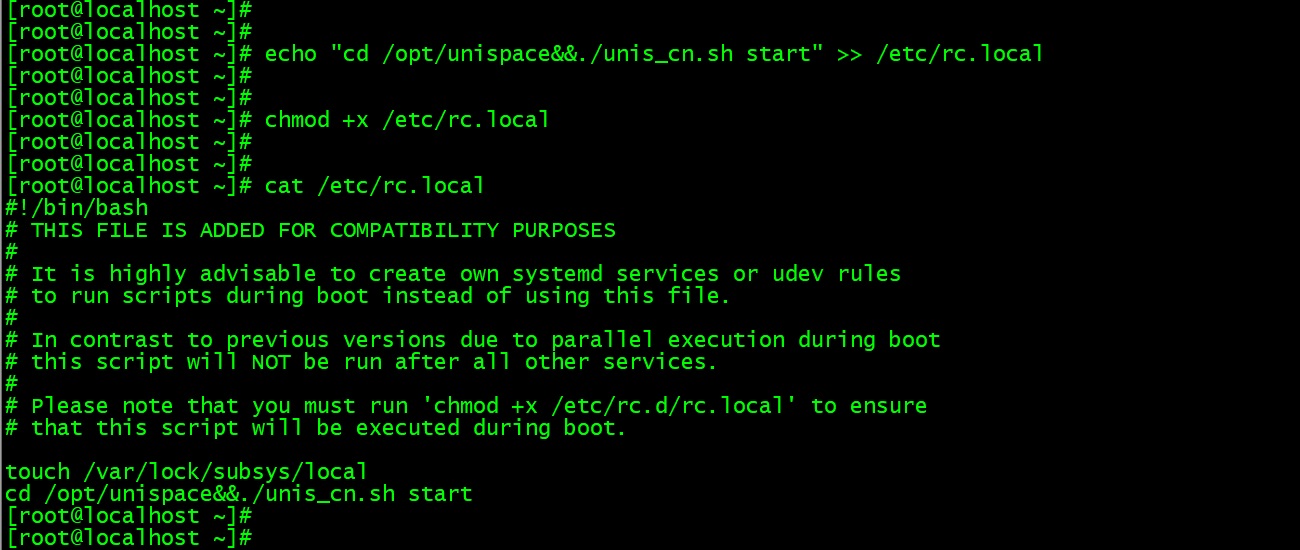
3.2 Set the Service to Auto-Start on Boot
Add a startup script to enable auto-start:
echo "cd /opt/unispace&&./unis_cn.sh start" >> /etc/rc.local
chmod +x /etc/rc.local
cat /etc/rc.local