Agent--Kingwow
1.1 Create Kingwow Cluster
Prerequisites
- Created a storage repository.
- Created a service plan.
- All Kingwow nodes are registered in the system.
Steps
Step 1: Click Database - Virtual Cluster - Add button.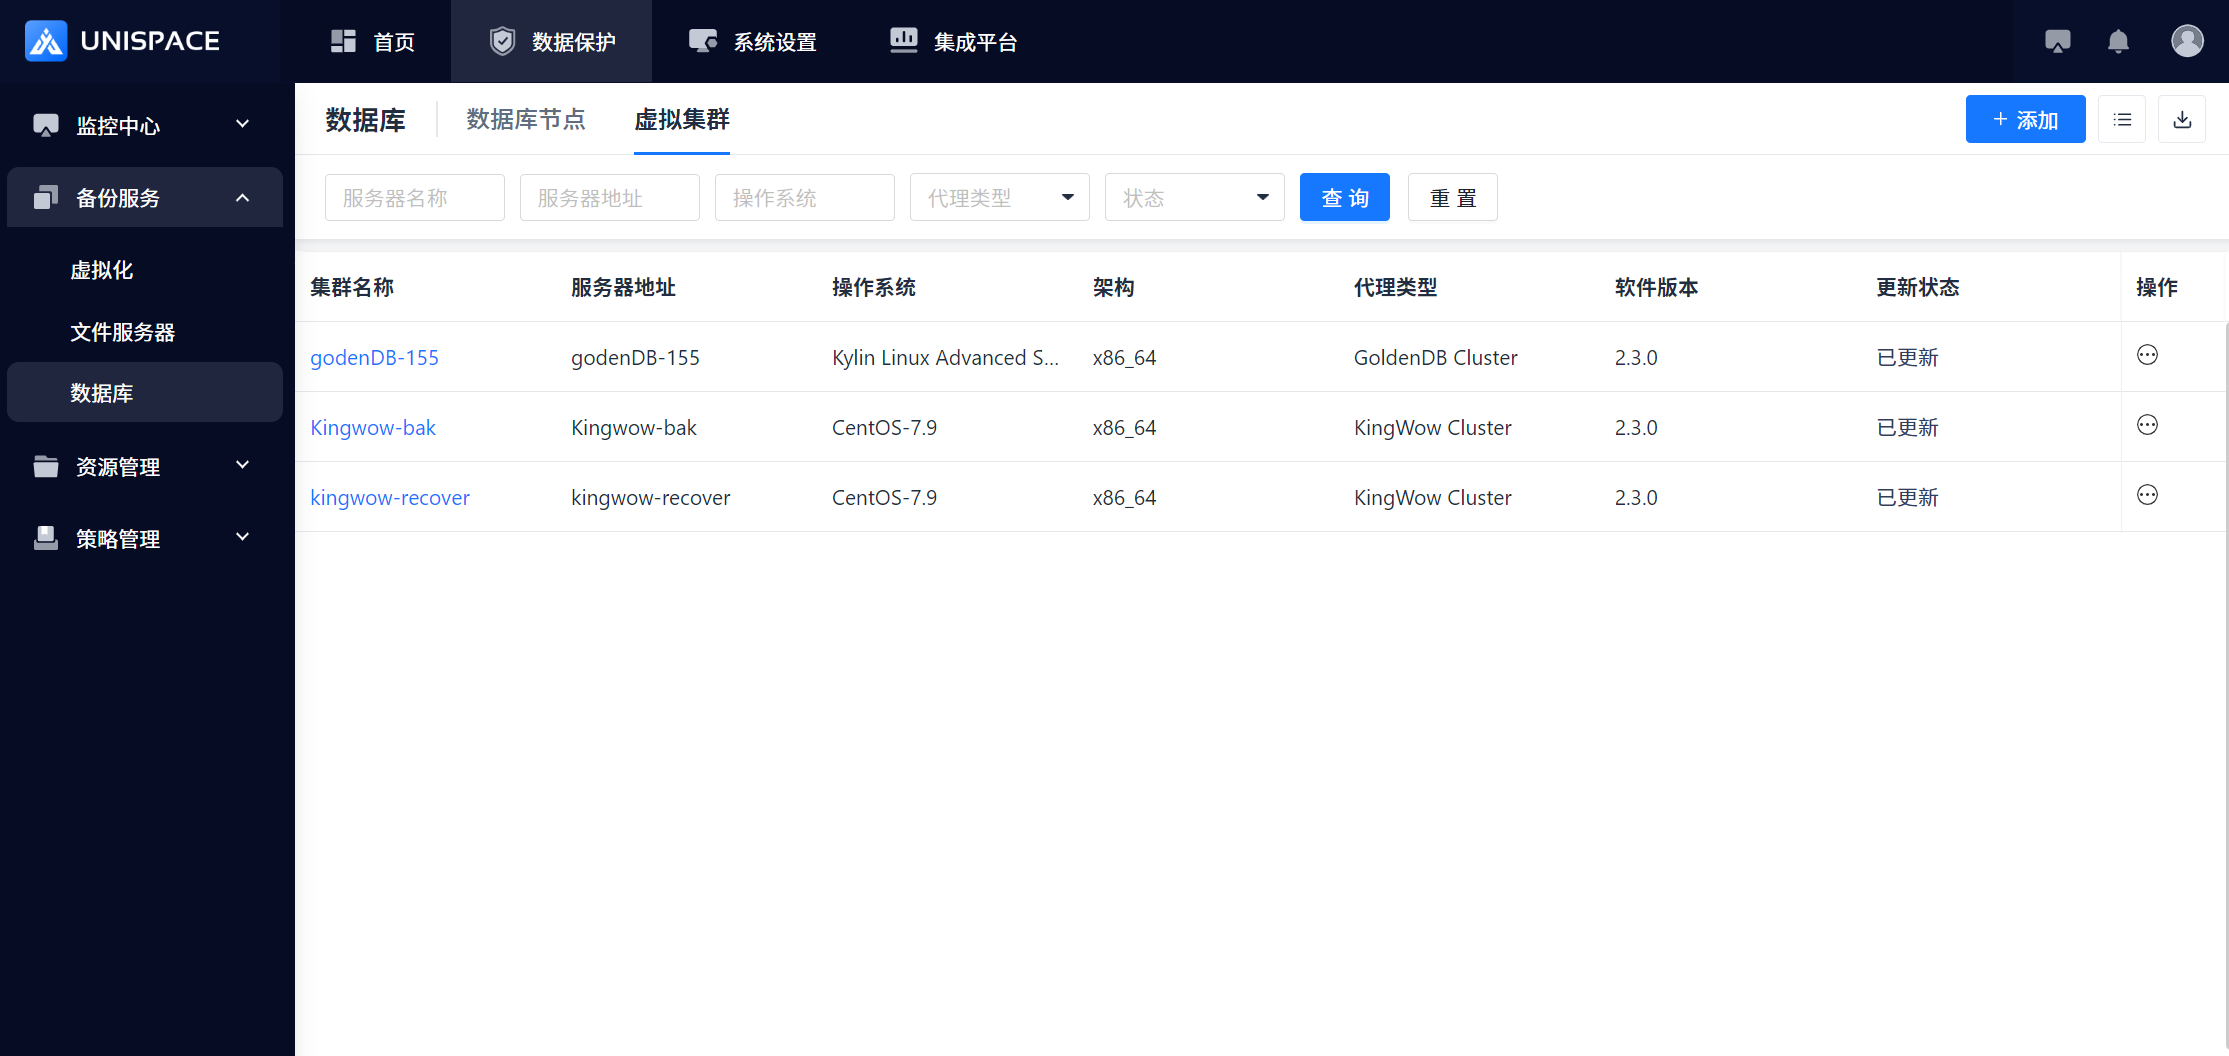 Step 2: Select the Kingwow icon and click Next.
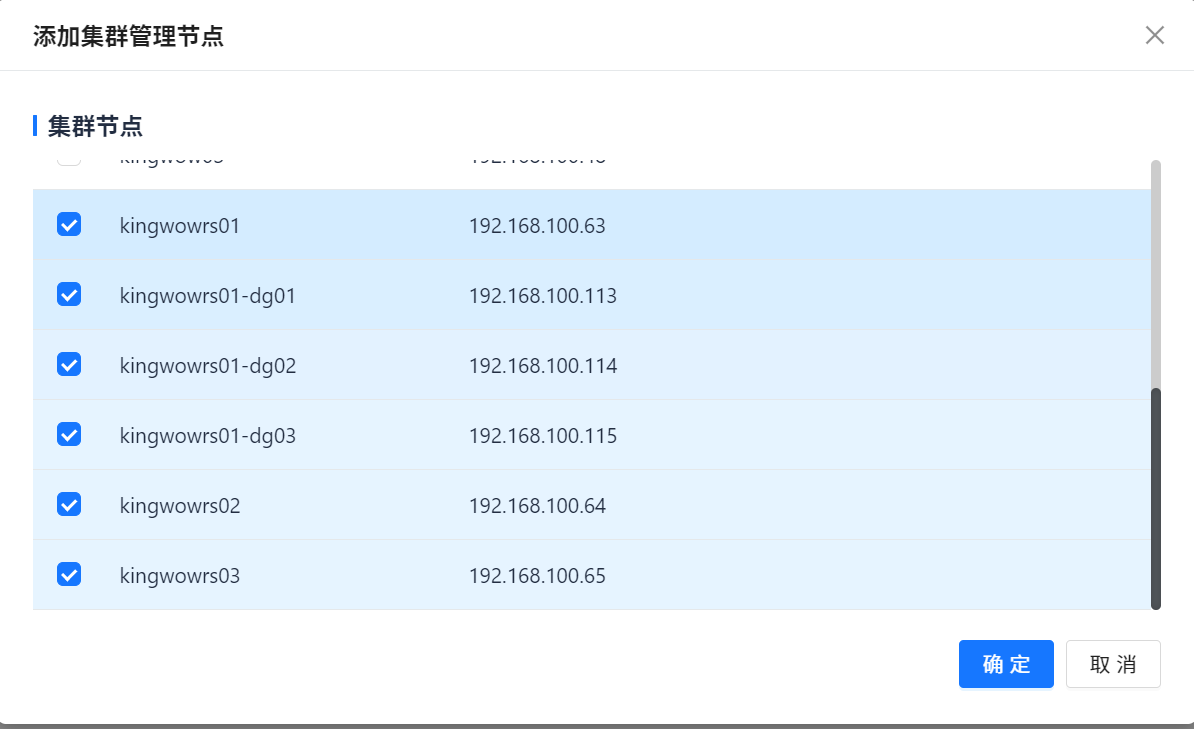
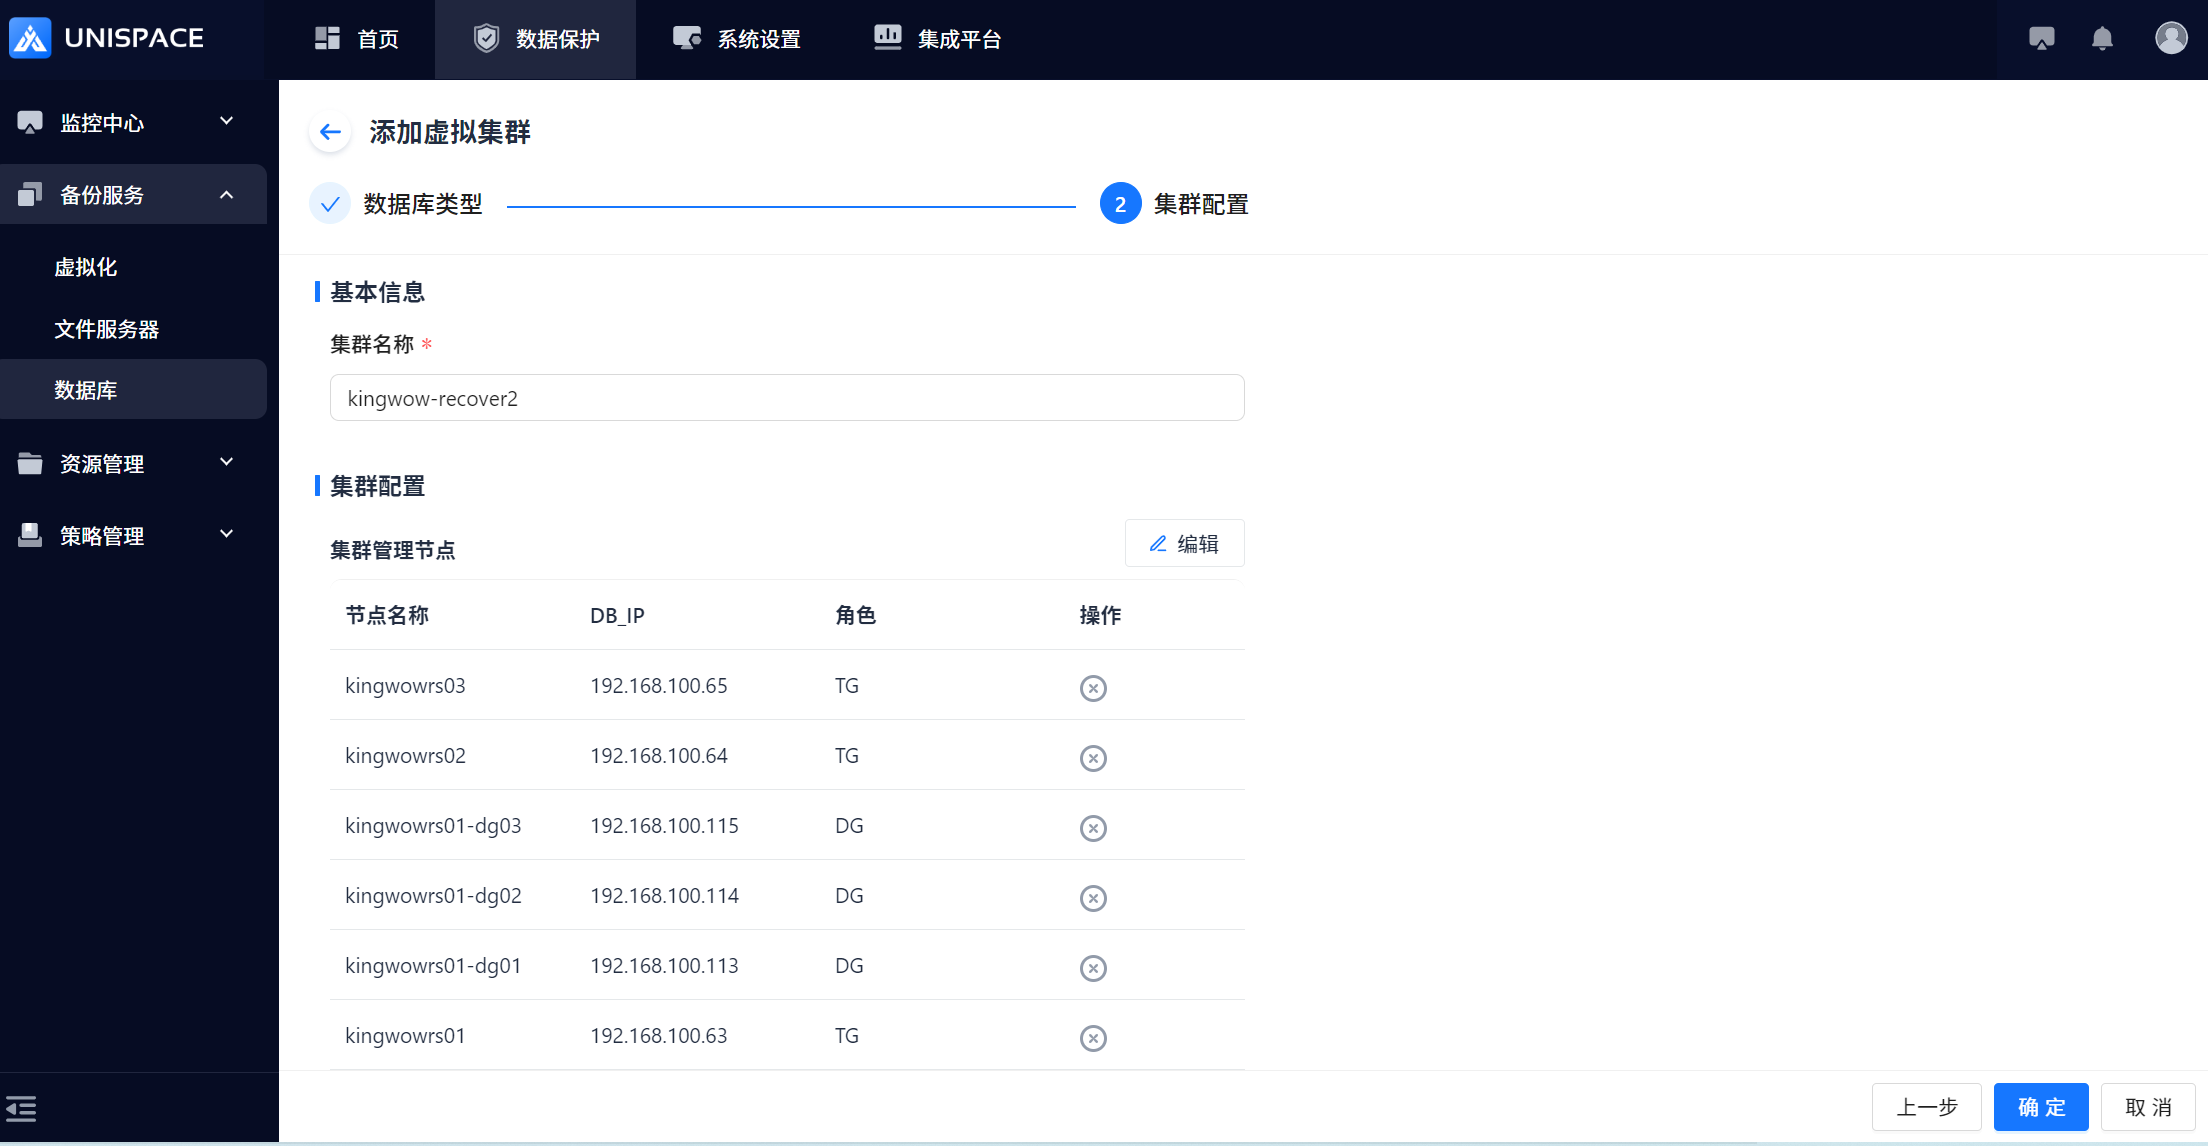
 Step 3: Fill in the Add Virtual Cluster form.
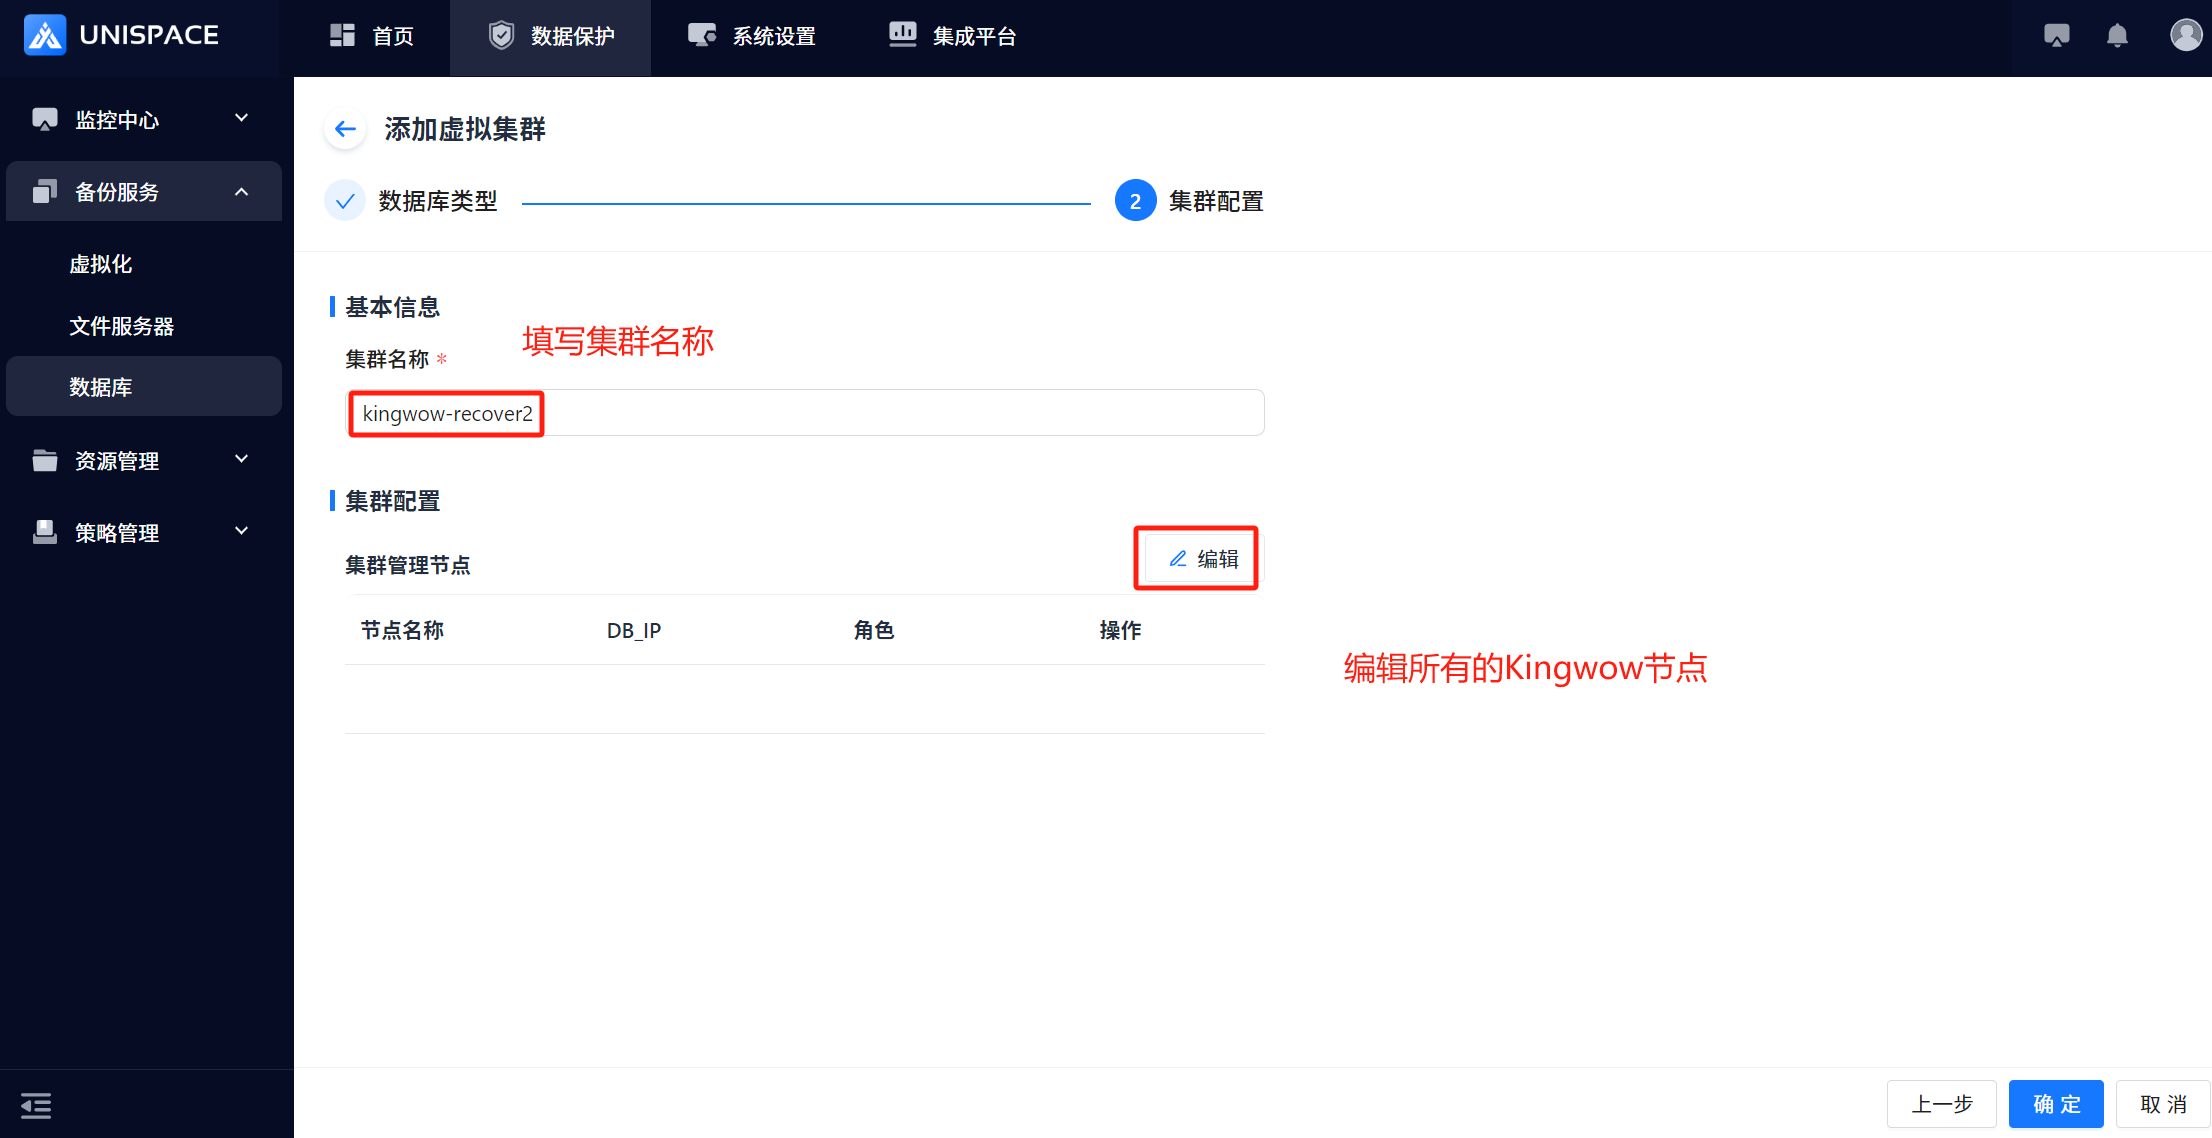
 Step 4: After clicking OK, the cluster is successfully added.
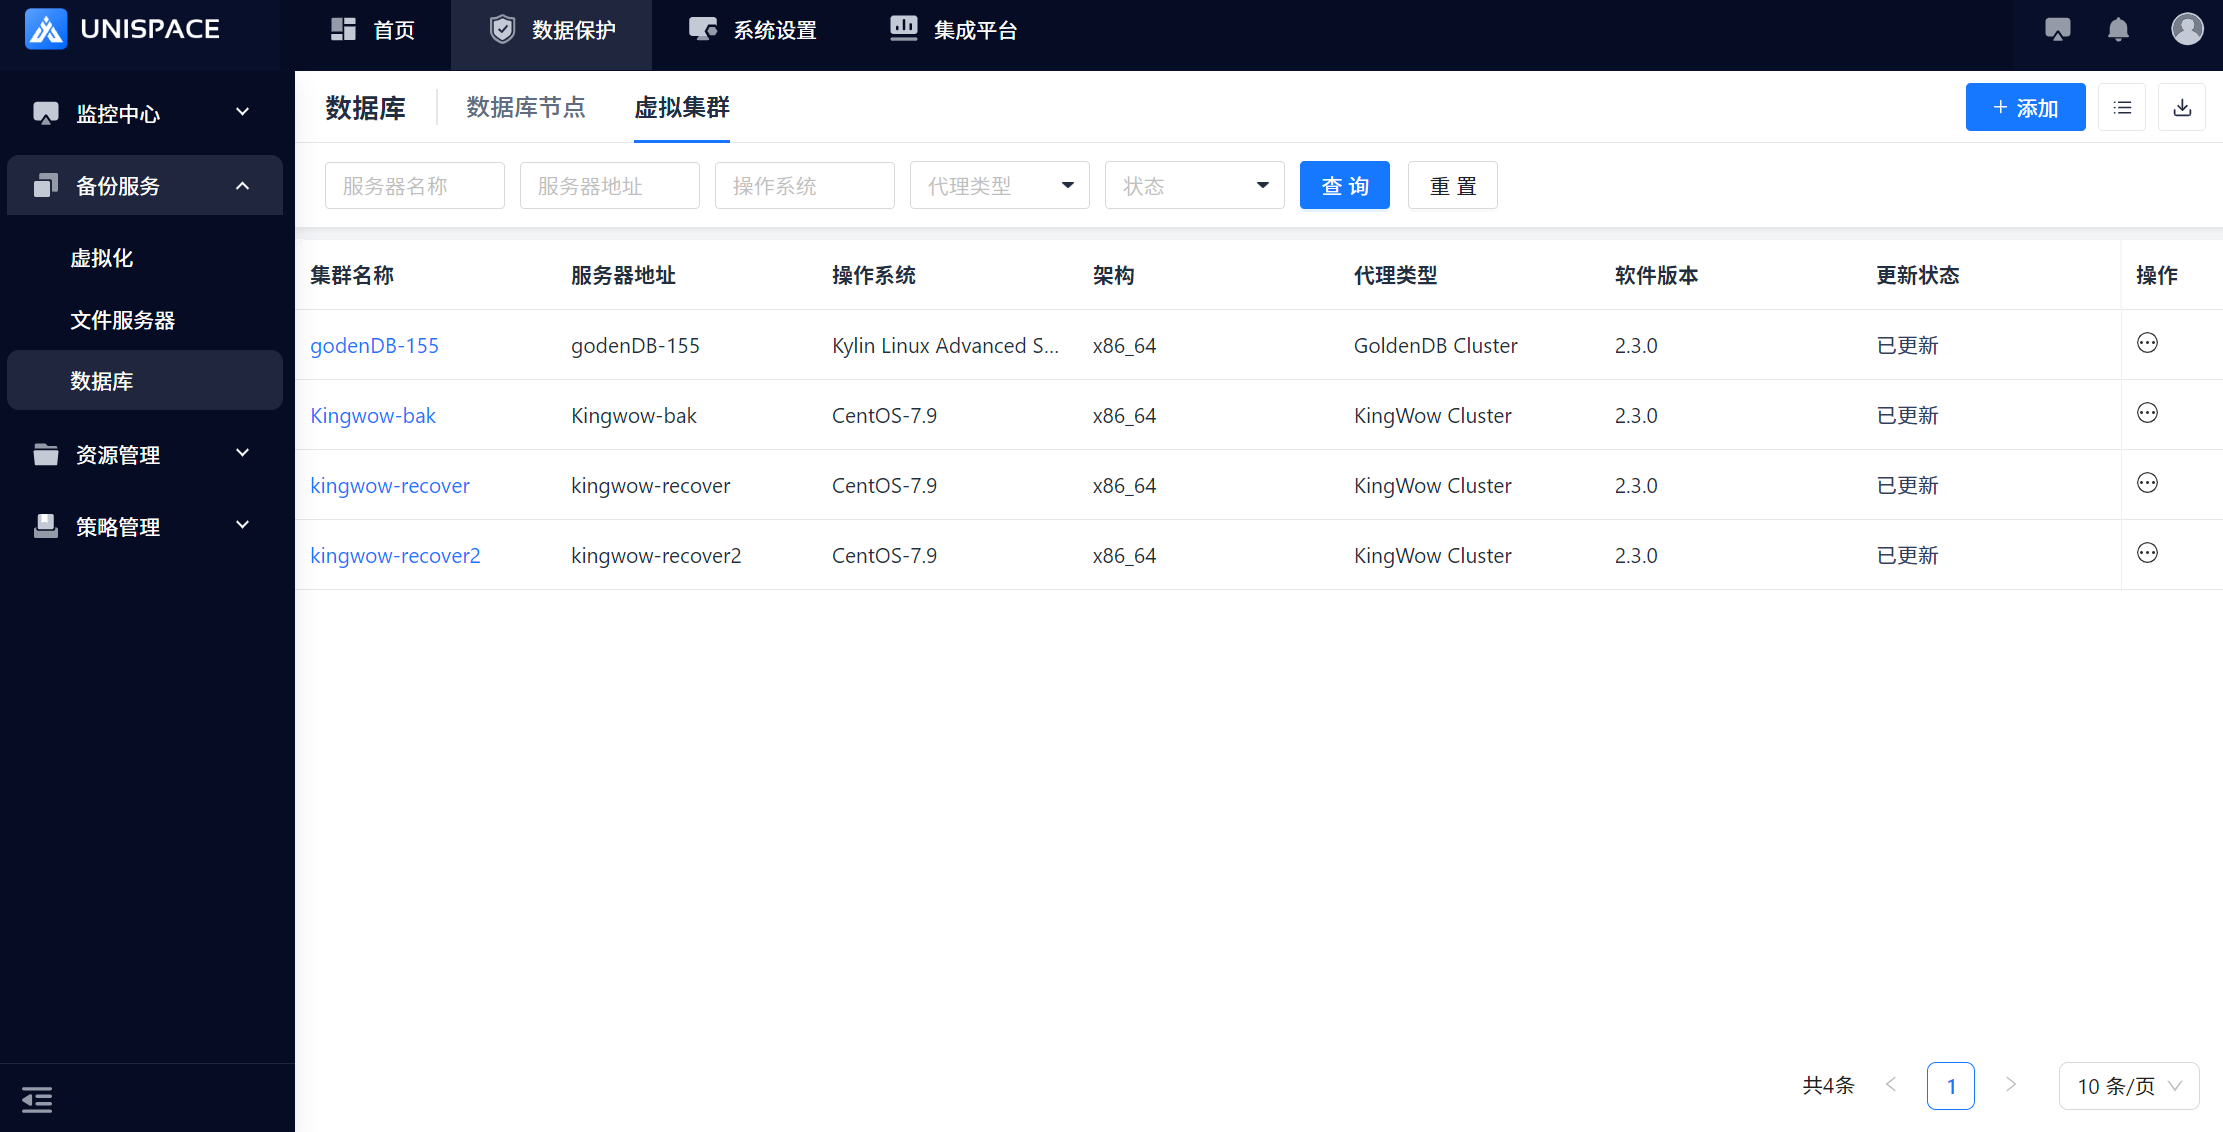
1.2 Create Kingwow Application
Prerequisites
- The Kingwow cluster has been added.
Steps
Step 1: Click Database - Virtual Cluster - Cluster Name, then click the Add button at the top right of Application.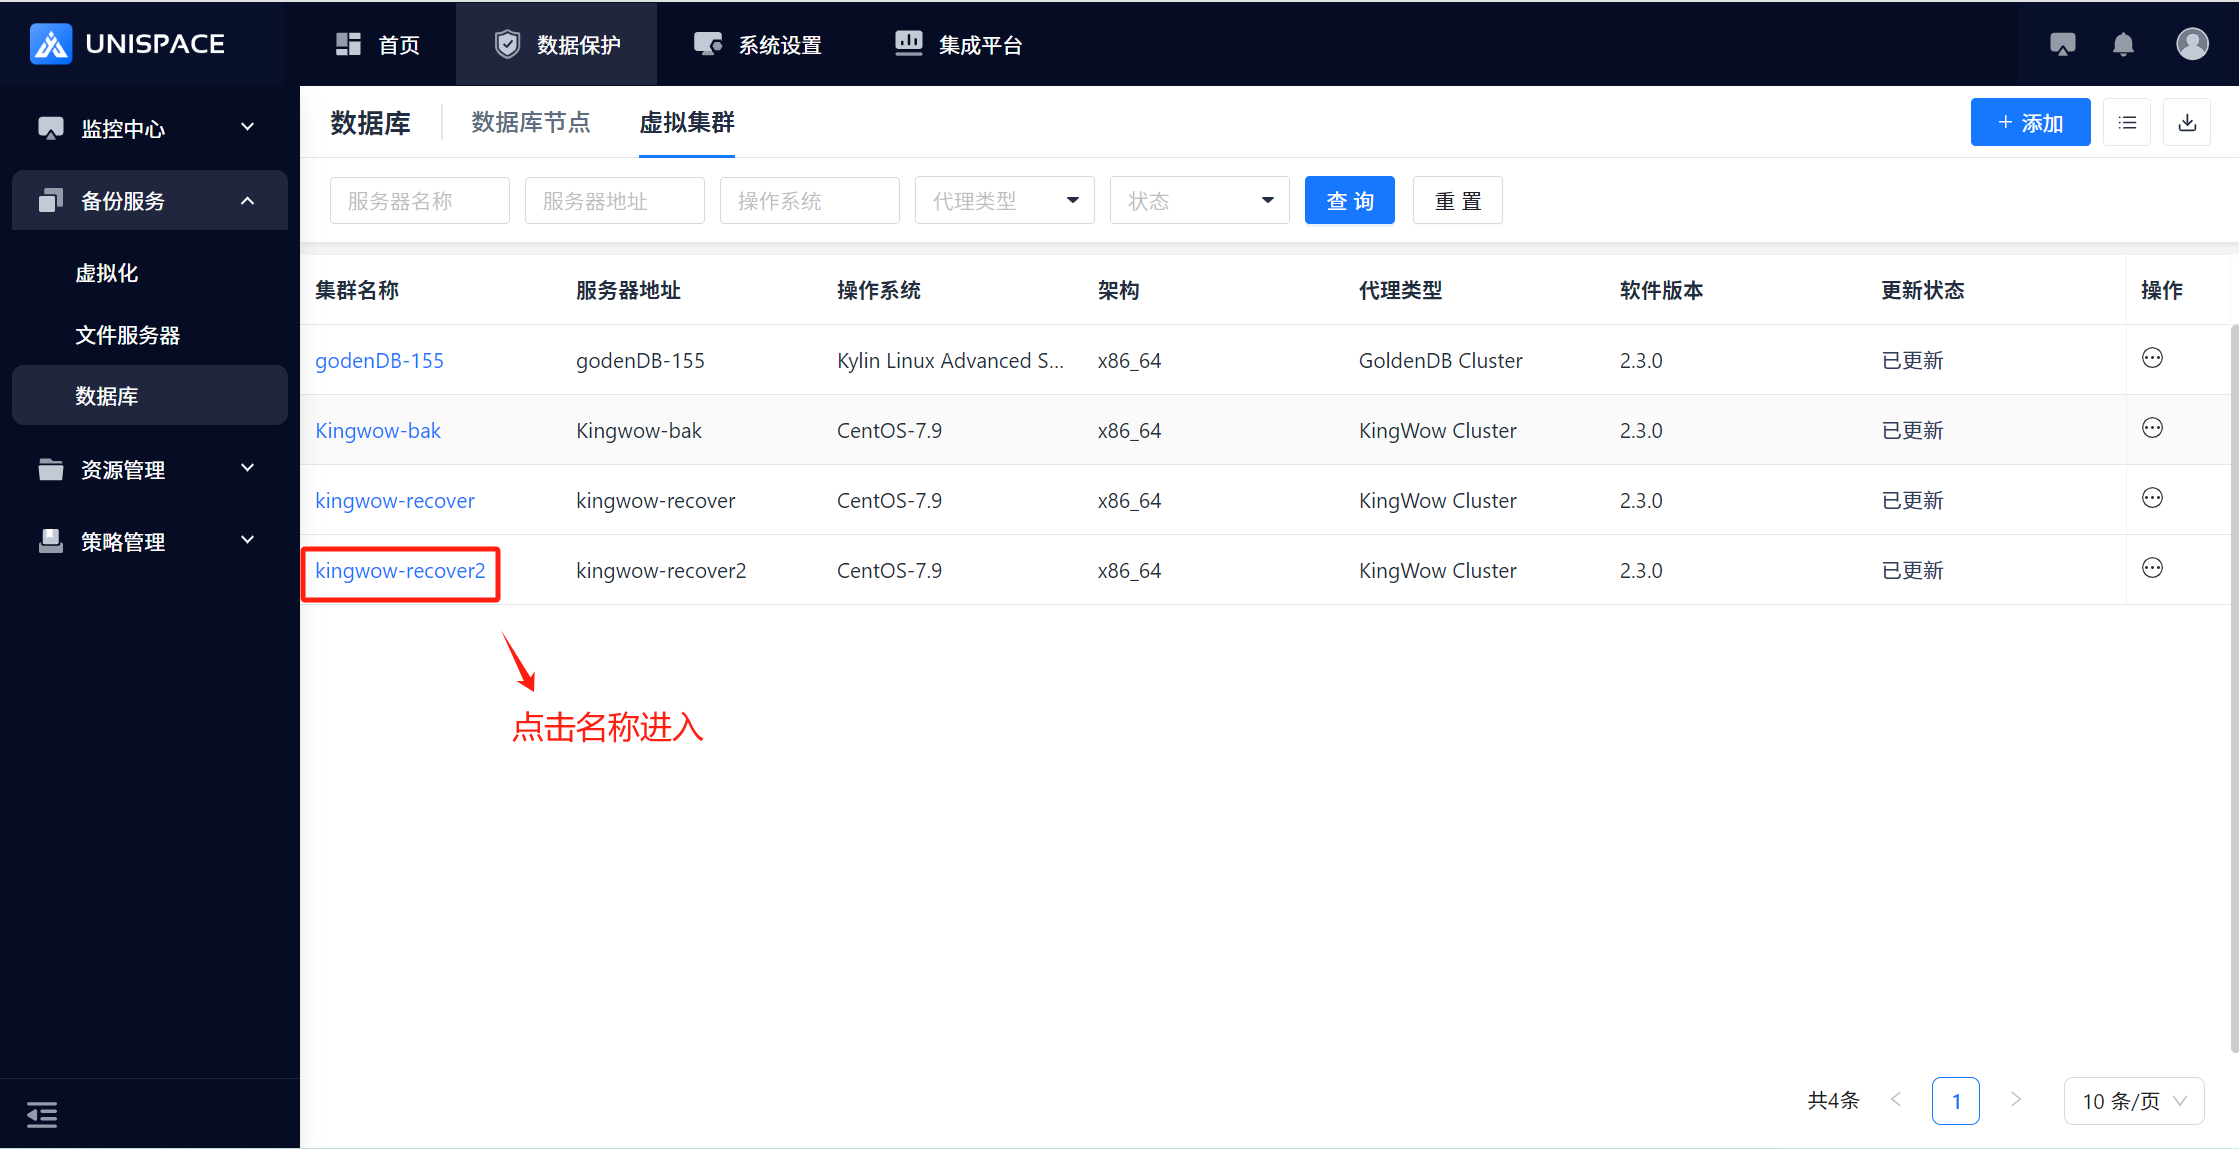
 Step 2: Fill in the Add Application form and click OK.
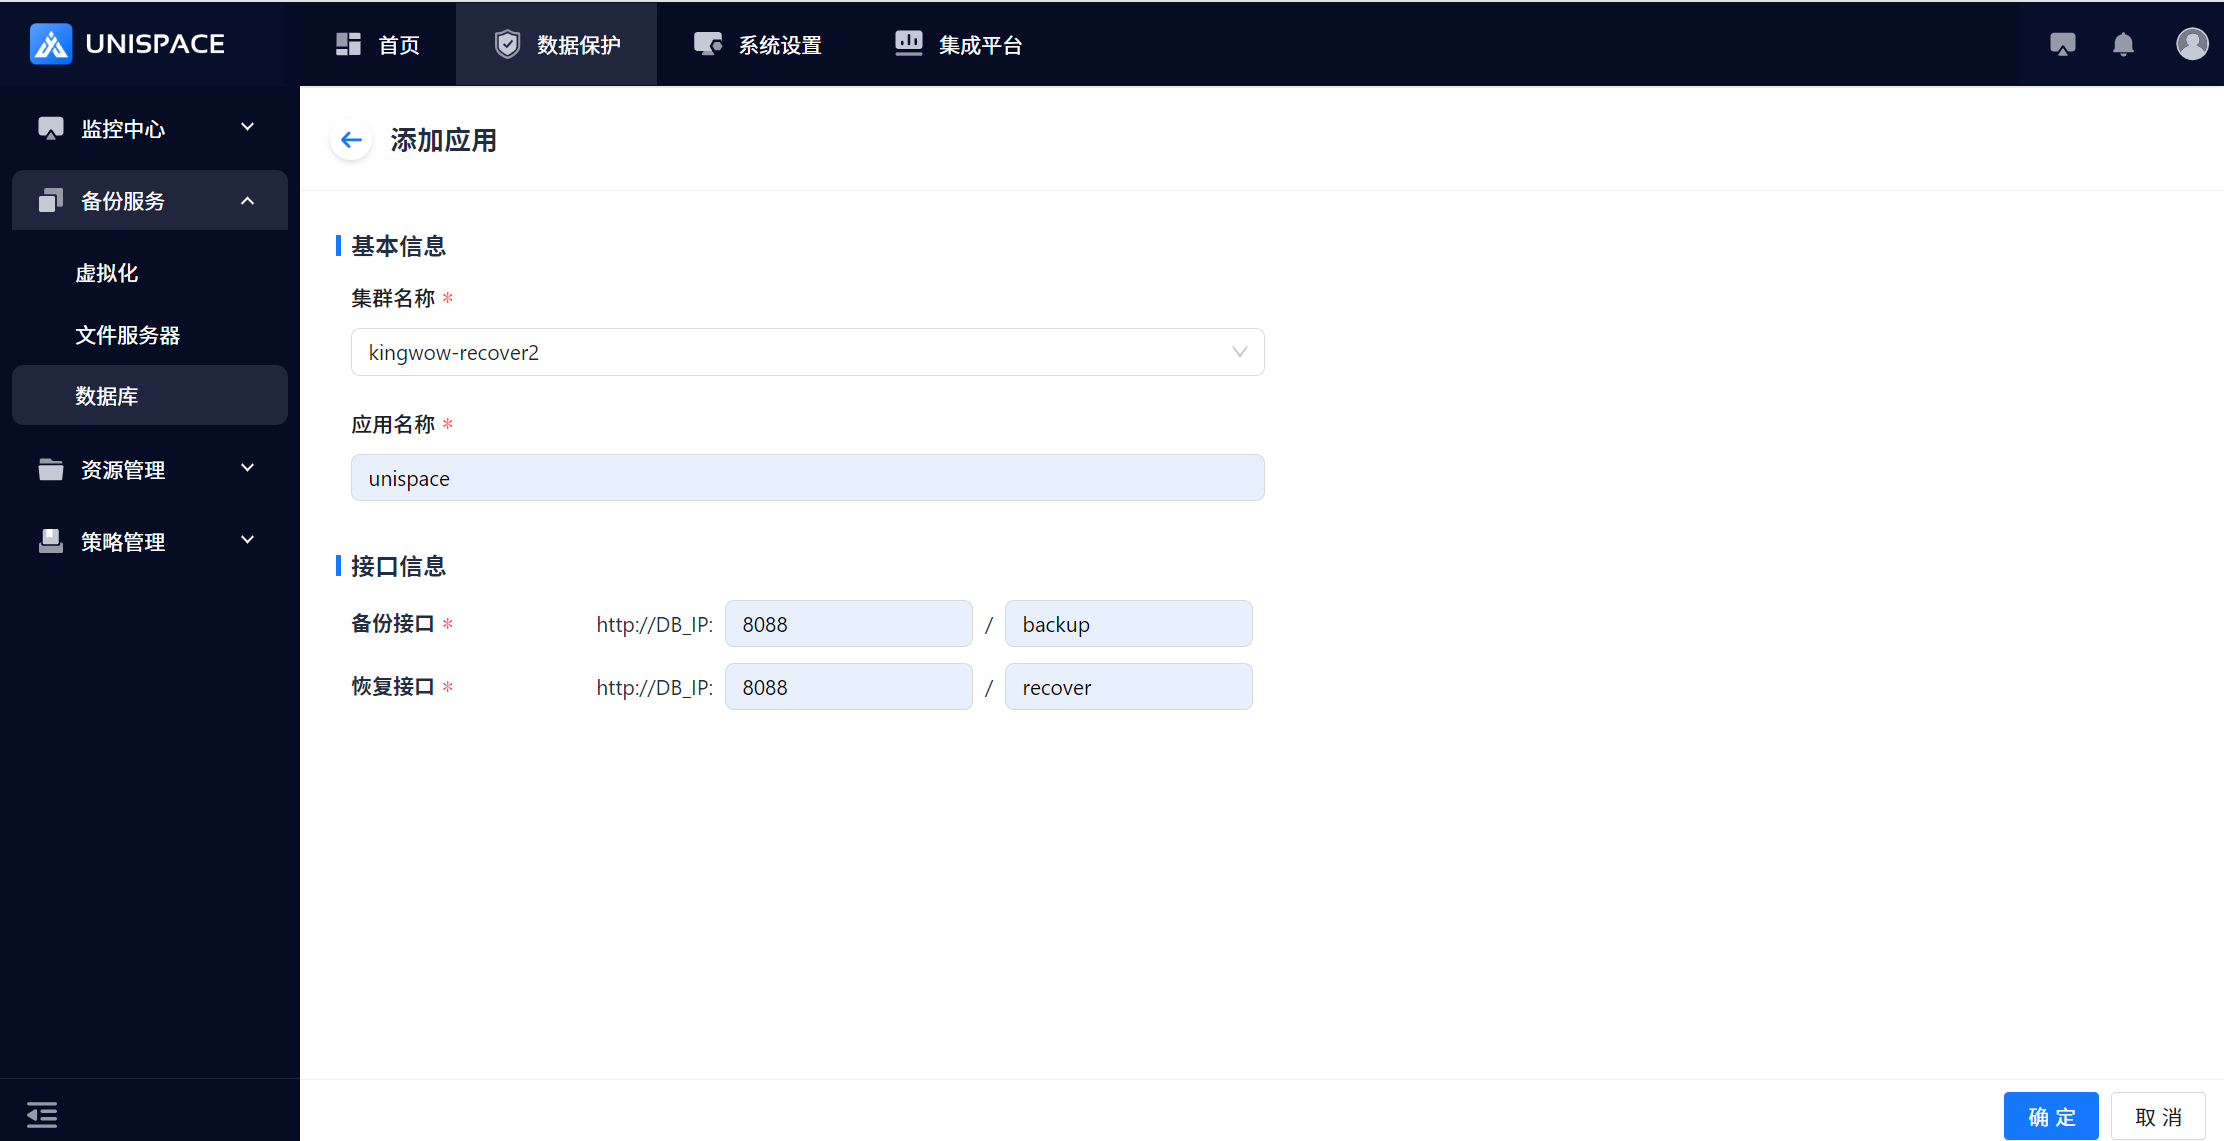 The Kingwow application is successfully created.
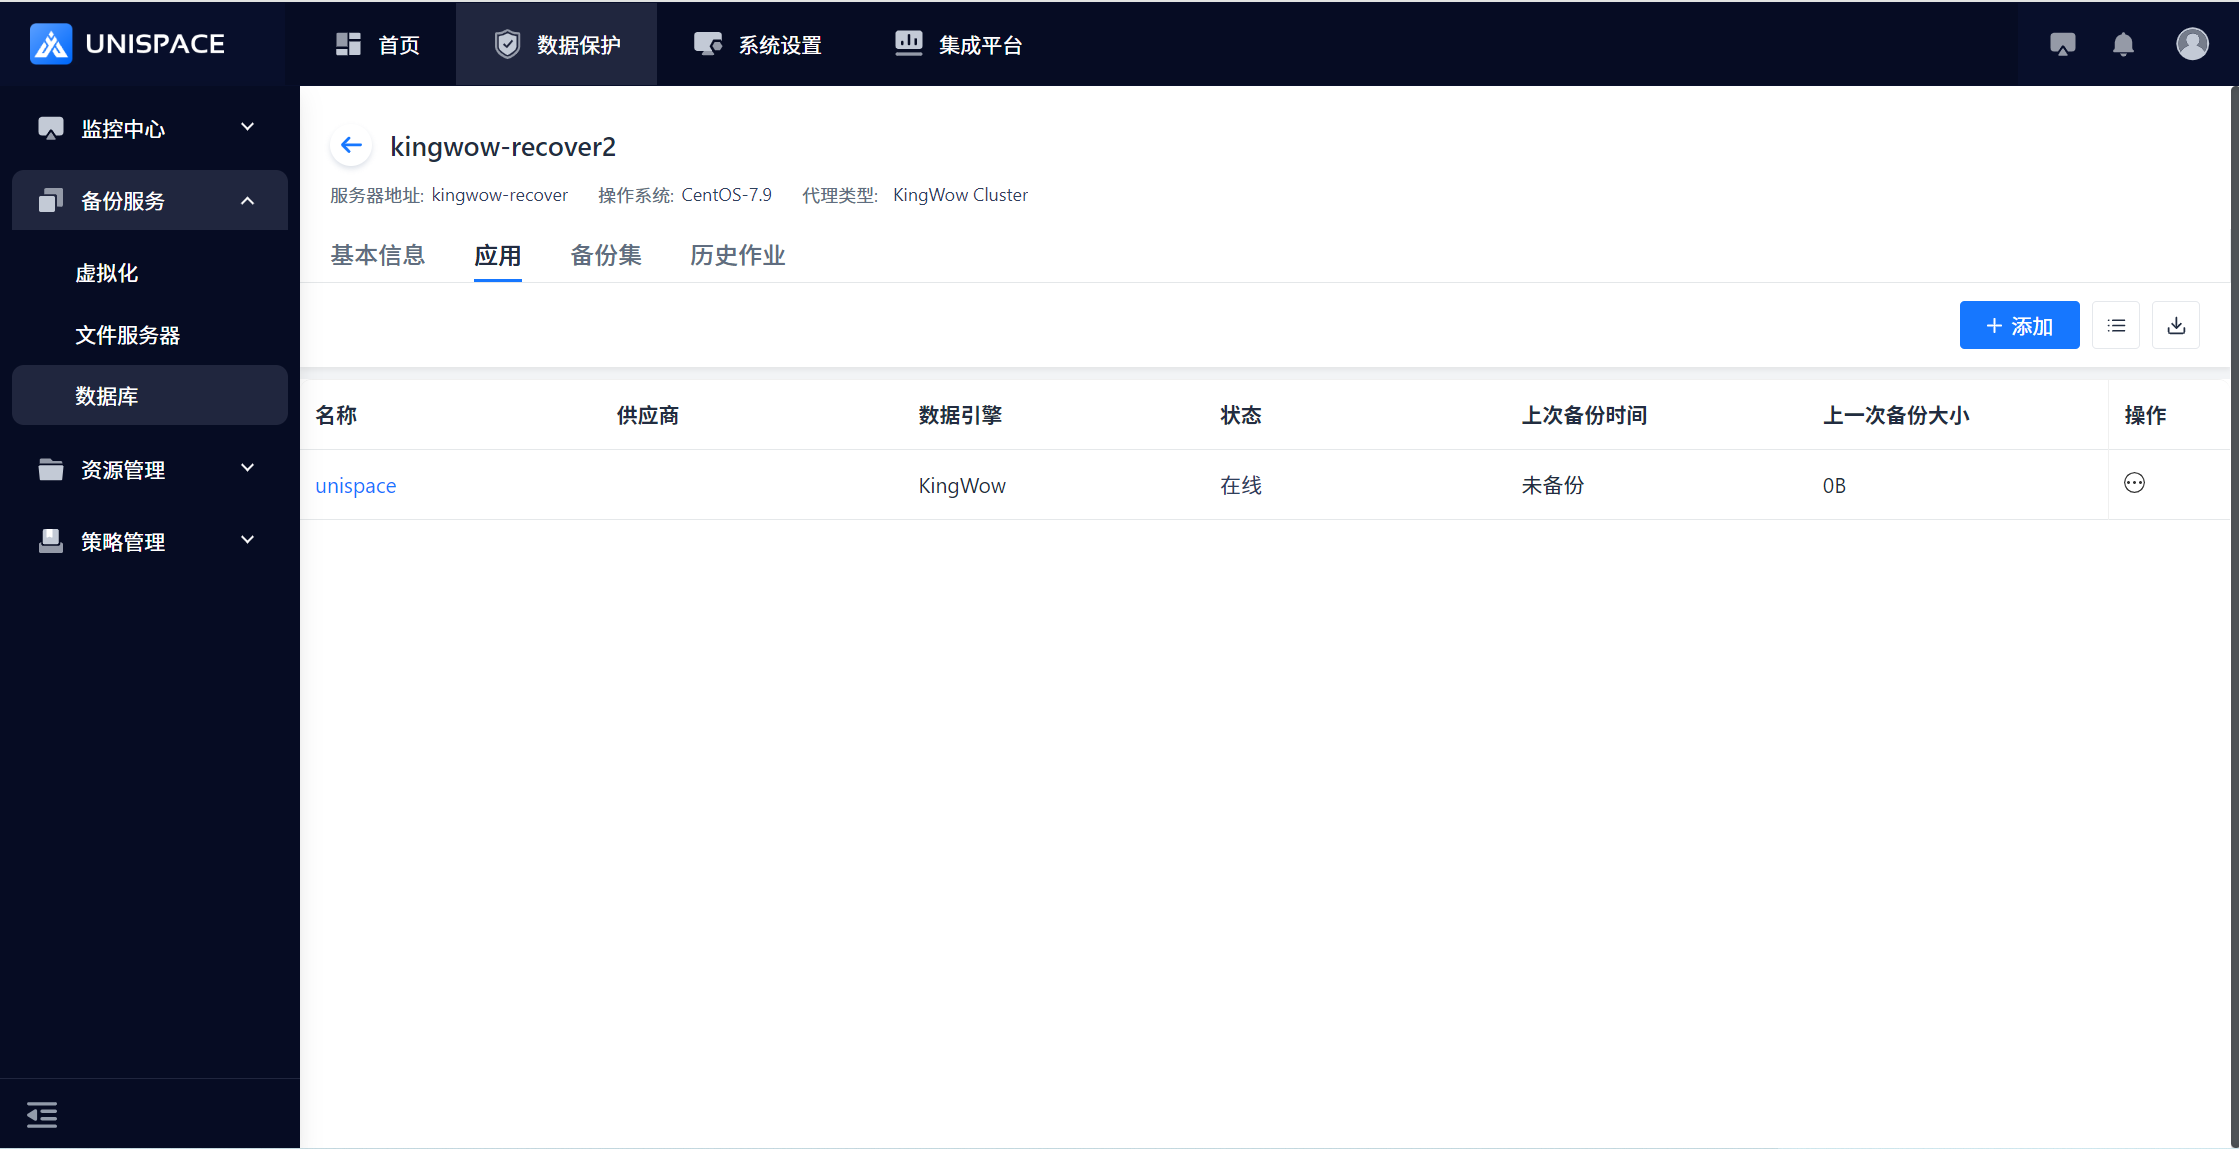
1.3 Create Kingwow Backup Set
Prerequisites
- A Kingwow instance has been created.
Steps
Step 1: Click Database - Virtual Cluster - Cluster Name, then click the Add button at the top right of Backup Set.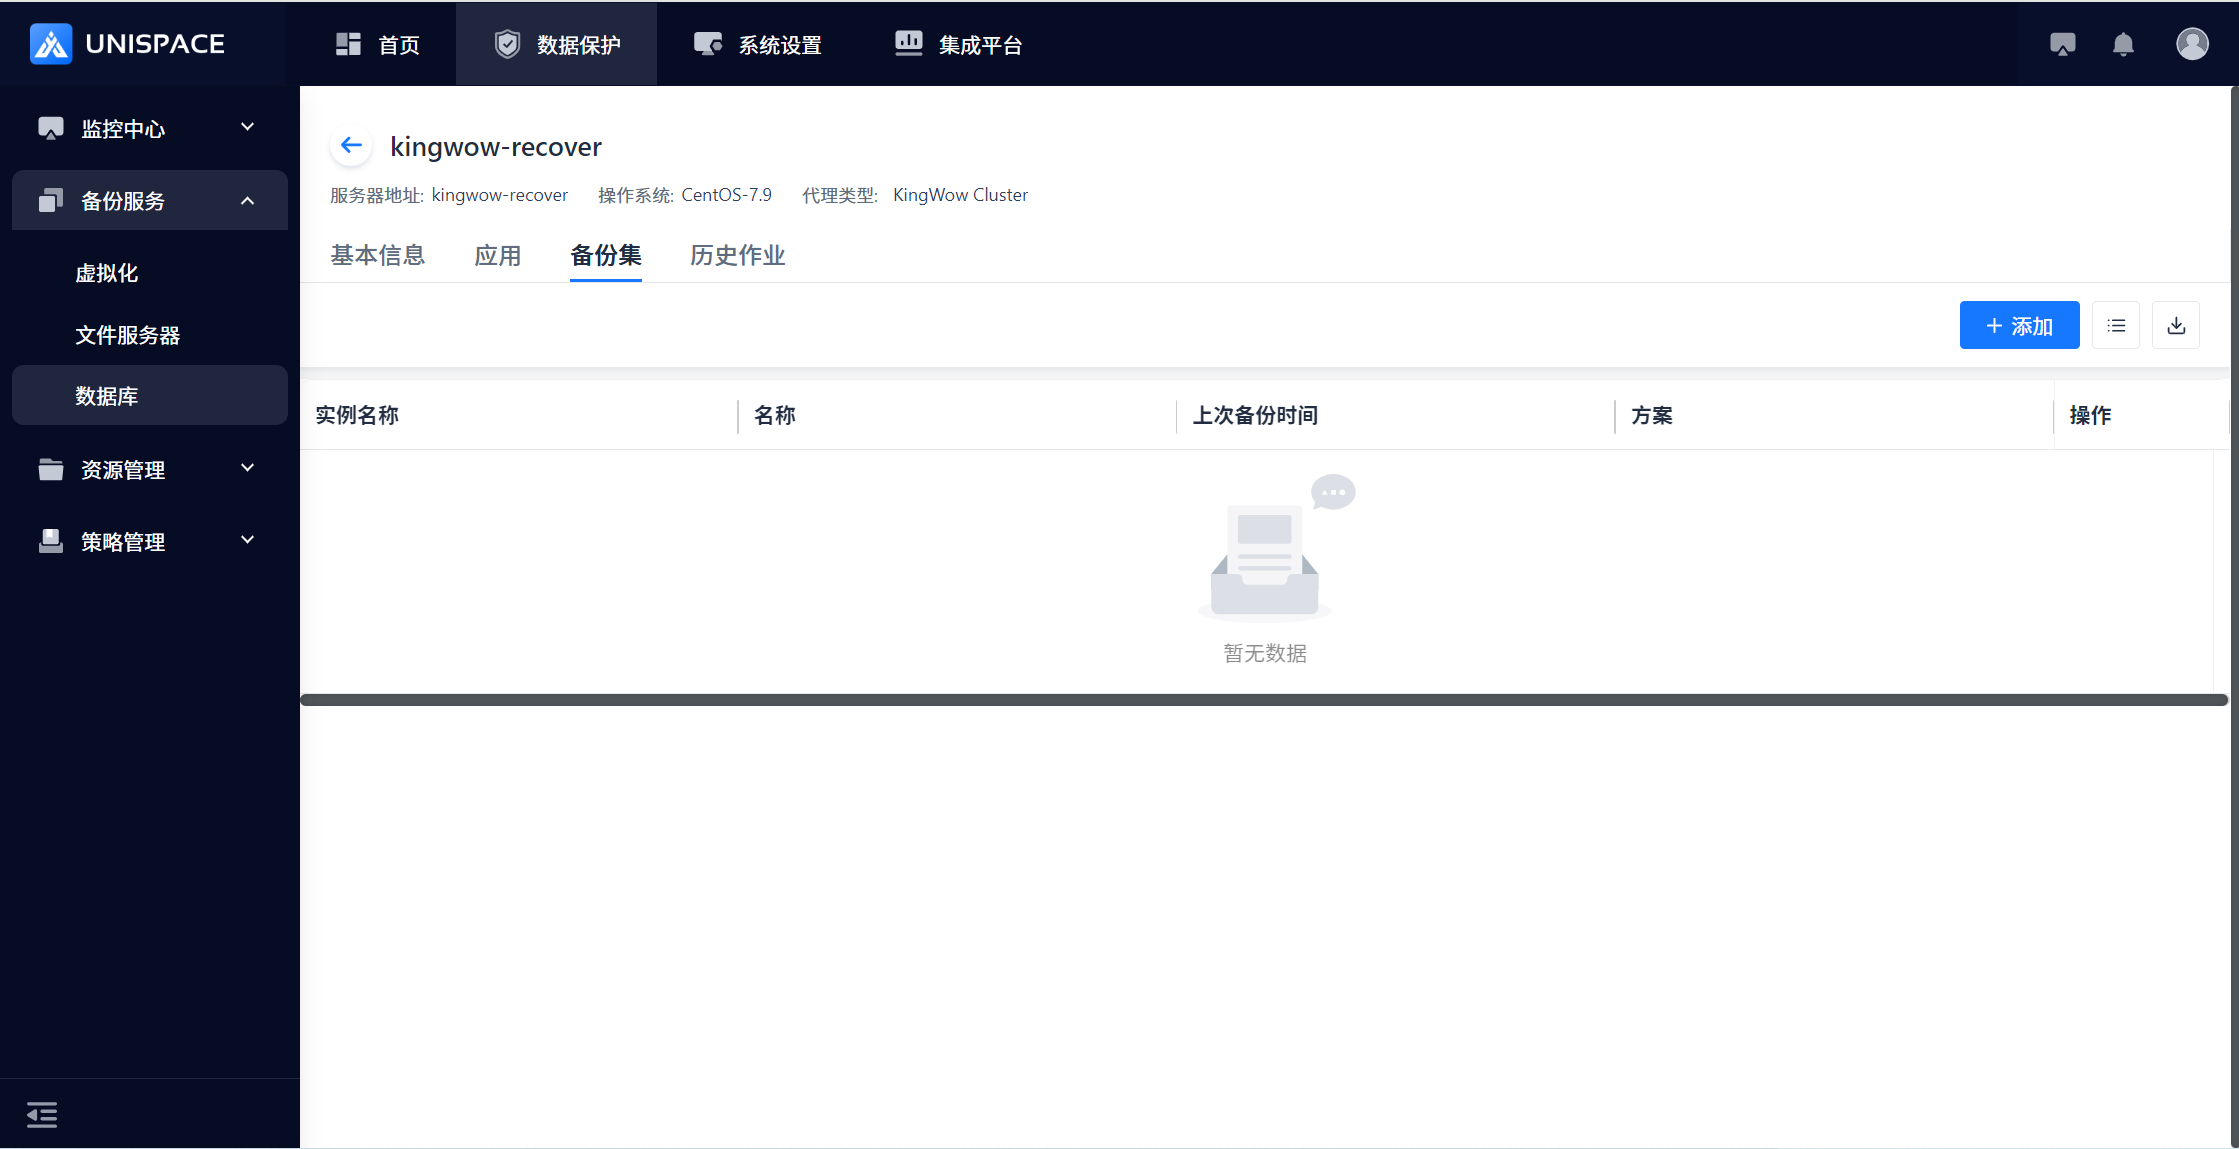 Step 2: The Add Backup Set form will appear. Complete the form.
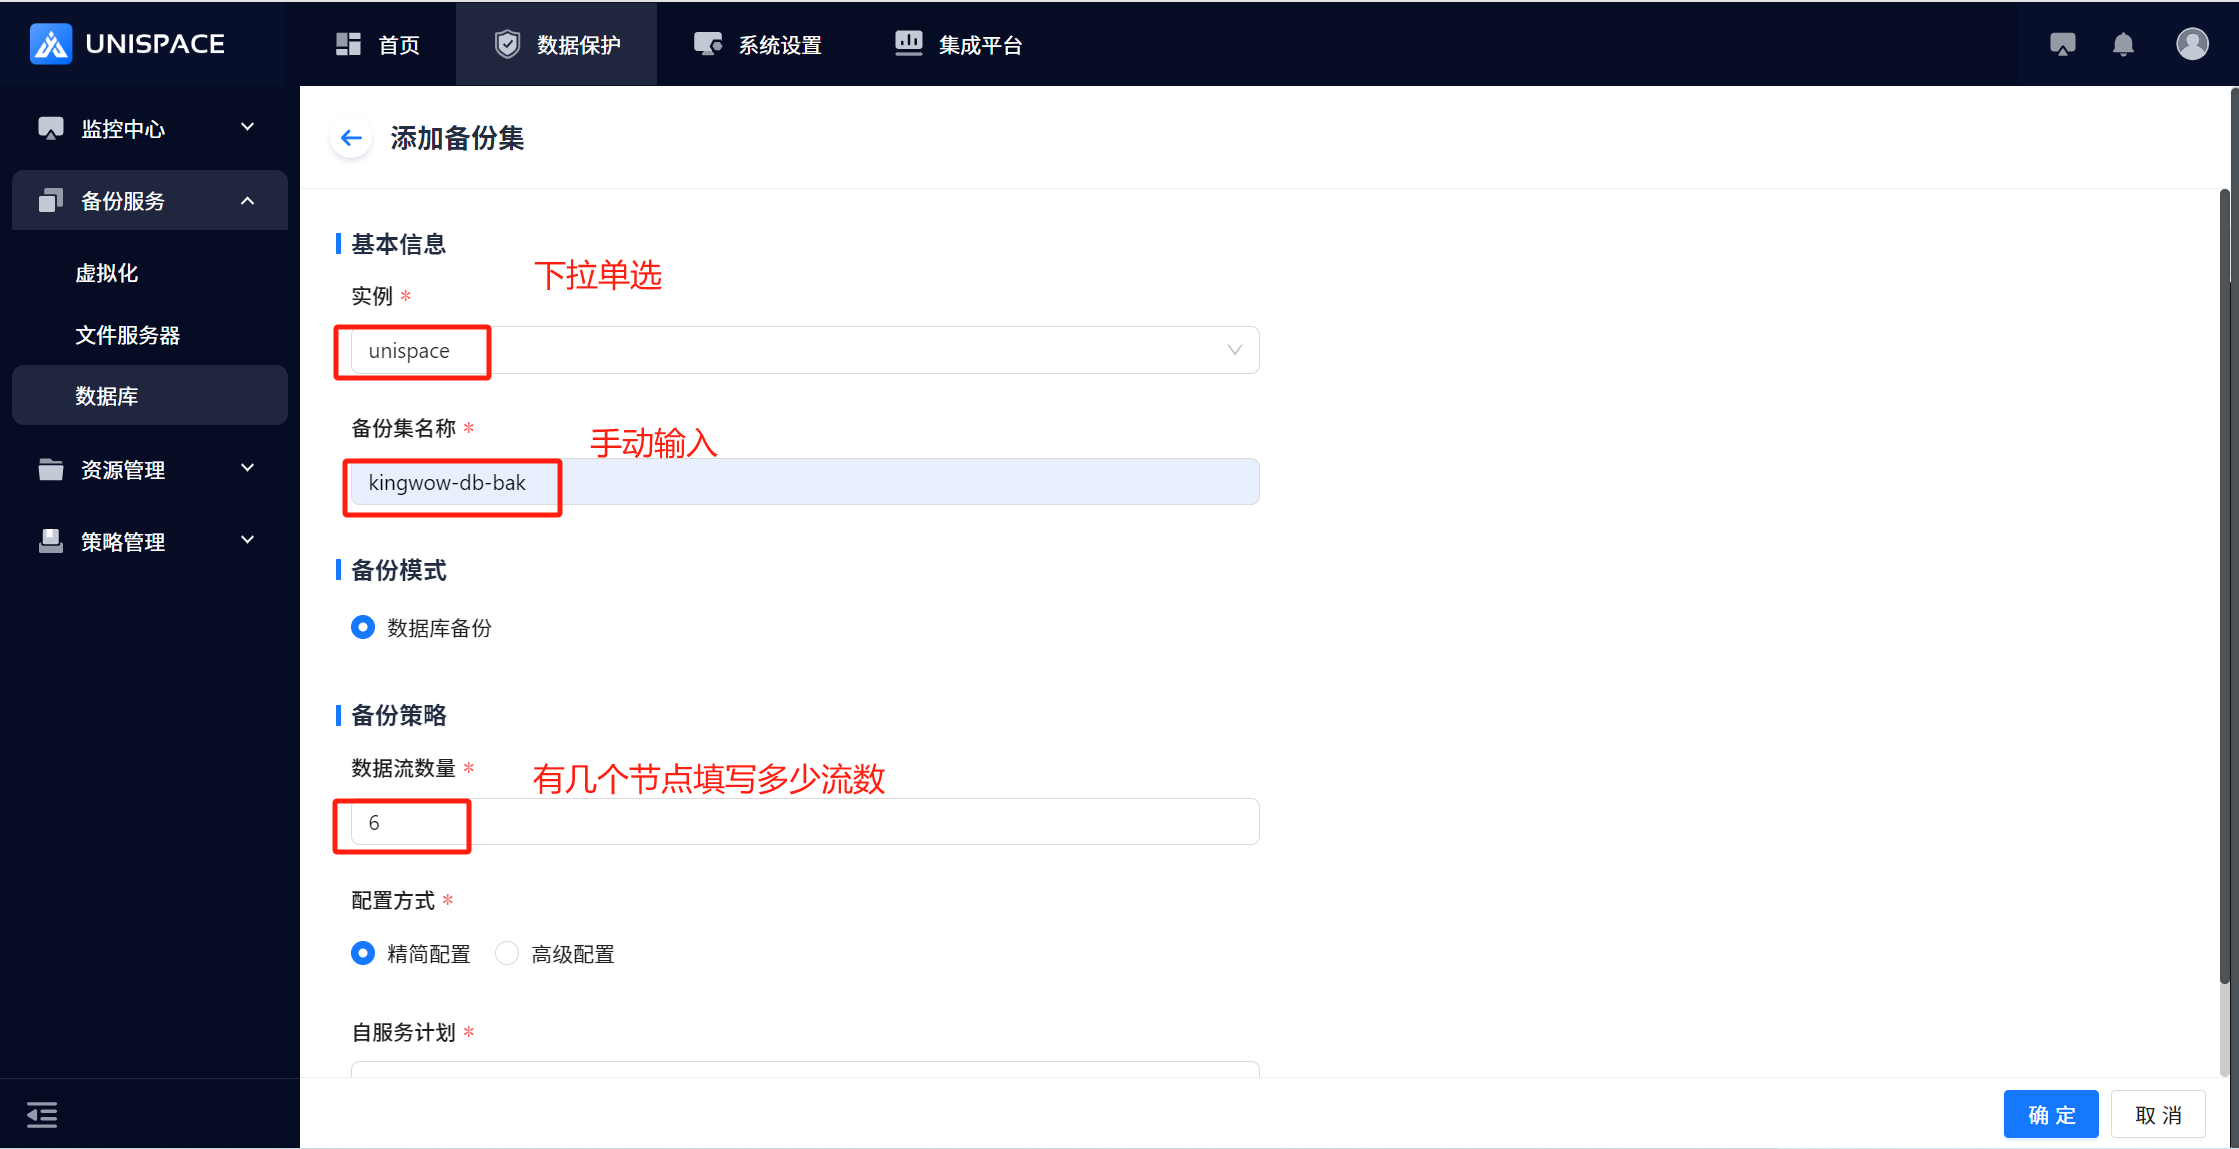 Step 3: After clicking OK, the backup set is successfully added.
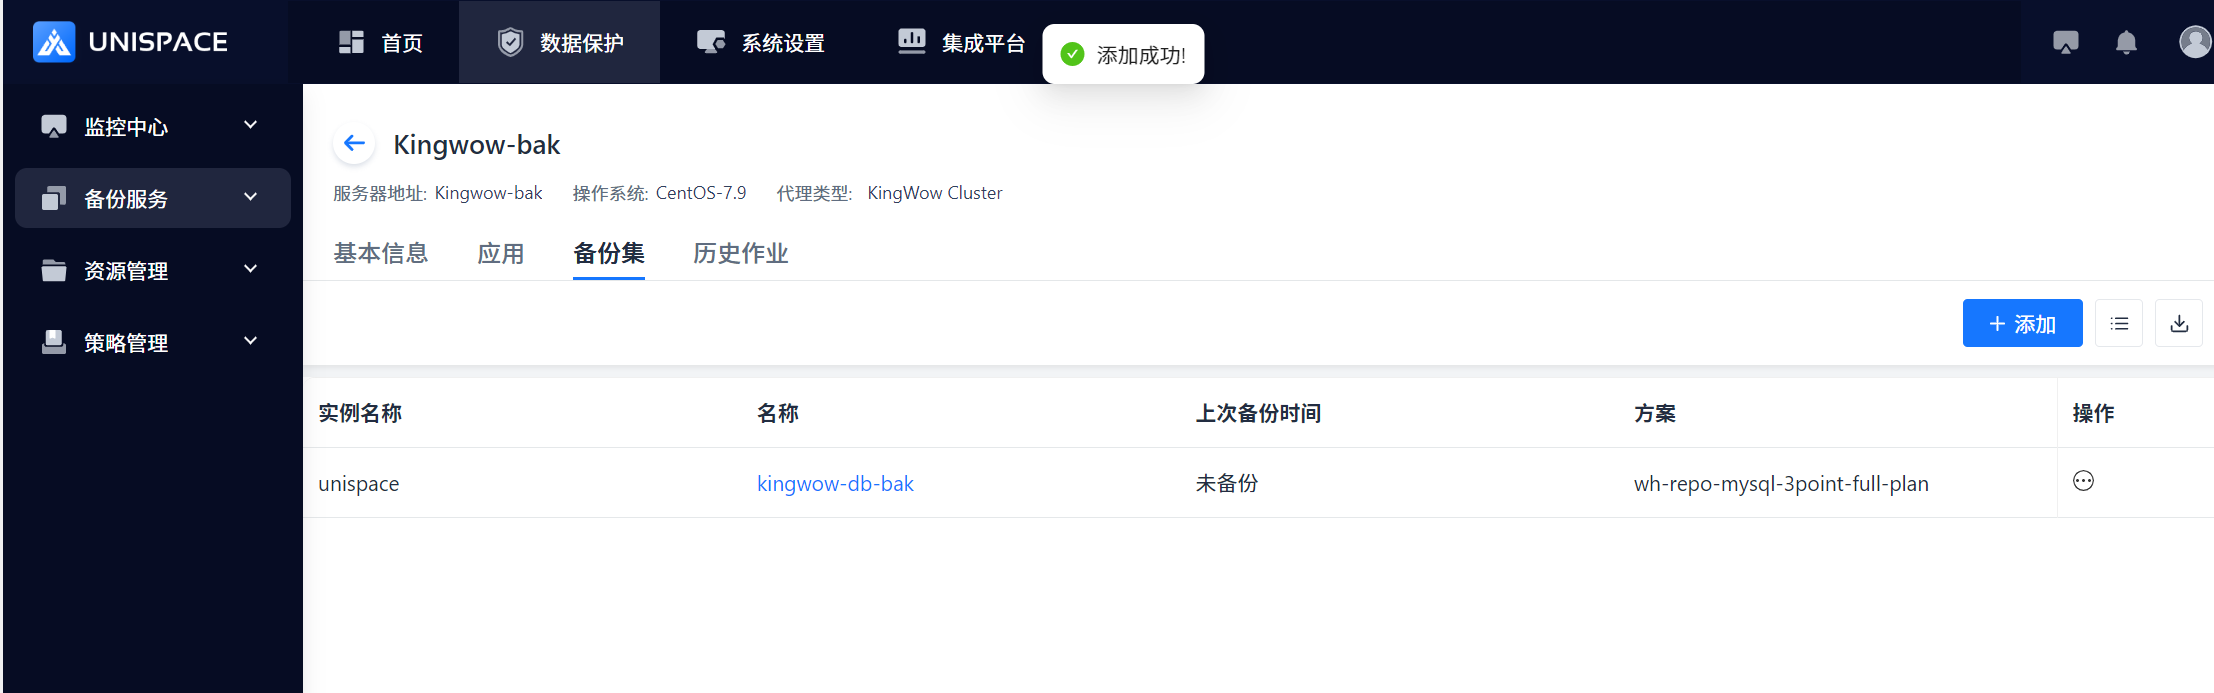
1.4 Start Kingwow Backup
Prerequisites
- A Kingwow backup set has been created.
Steps
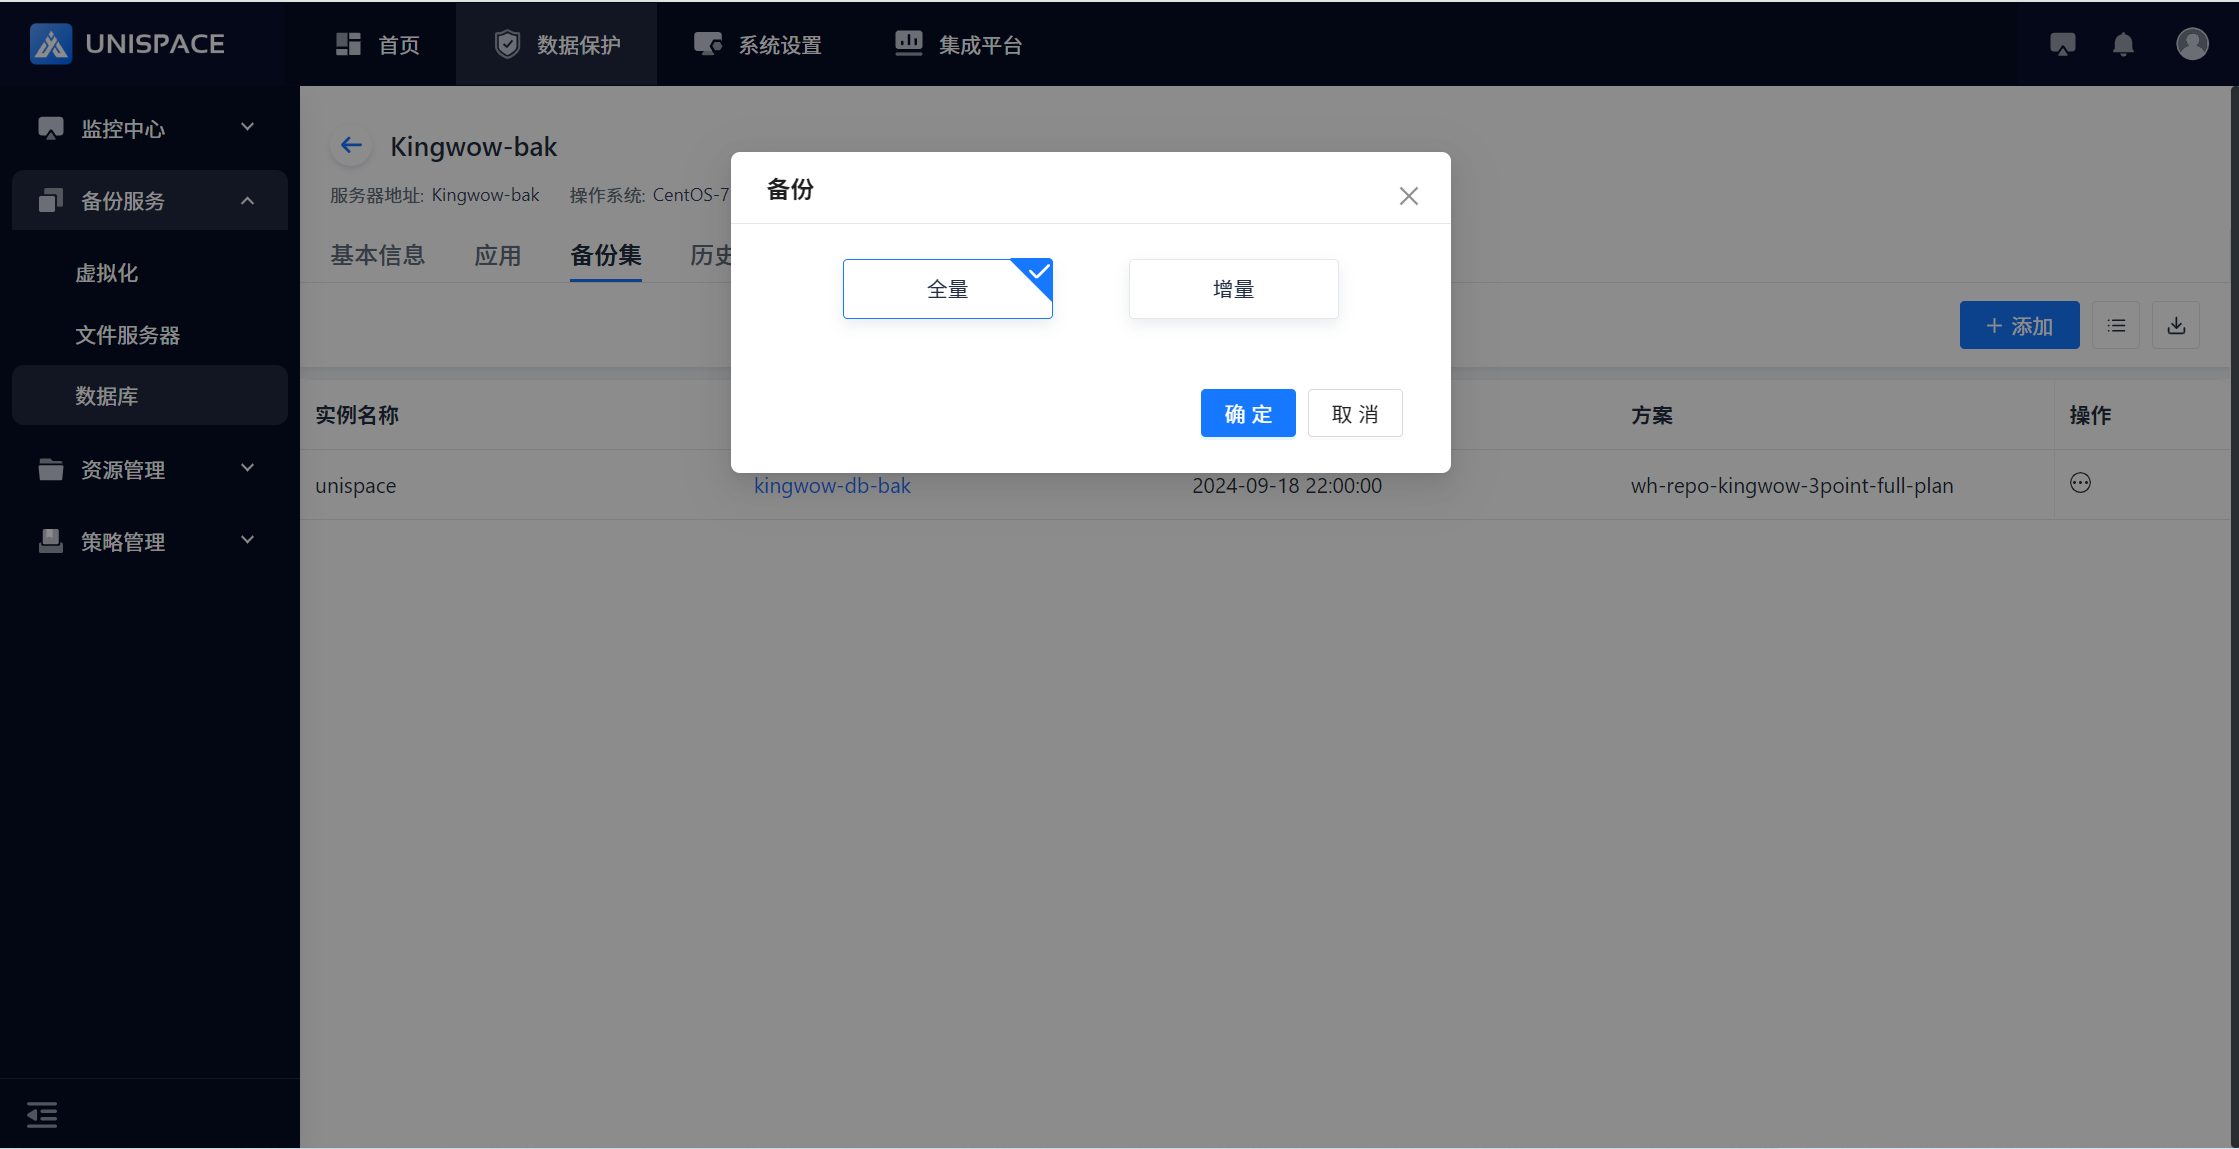
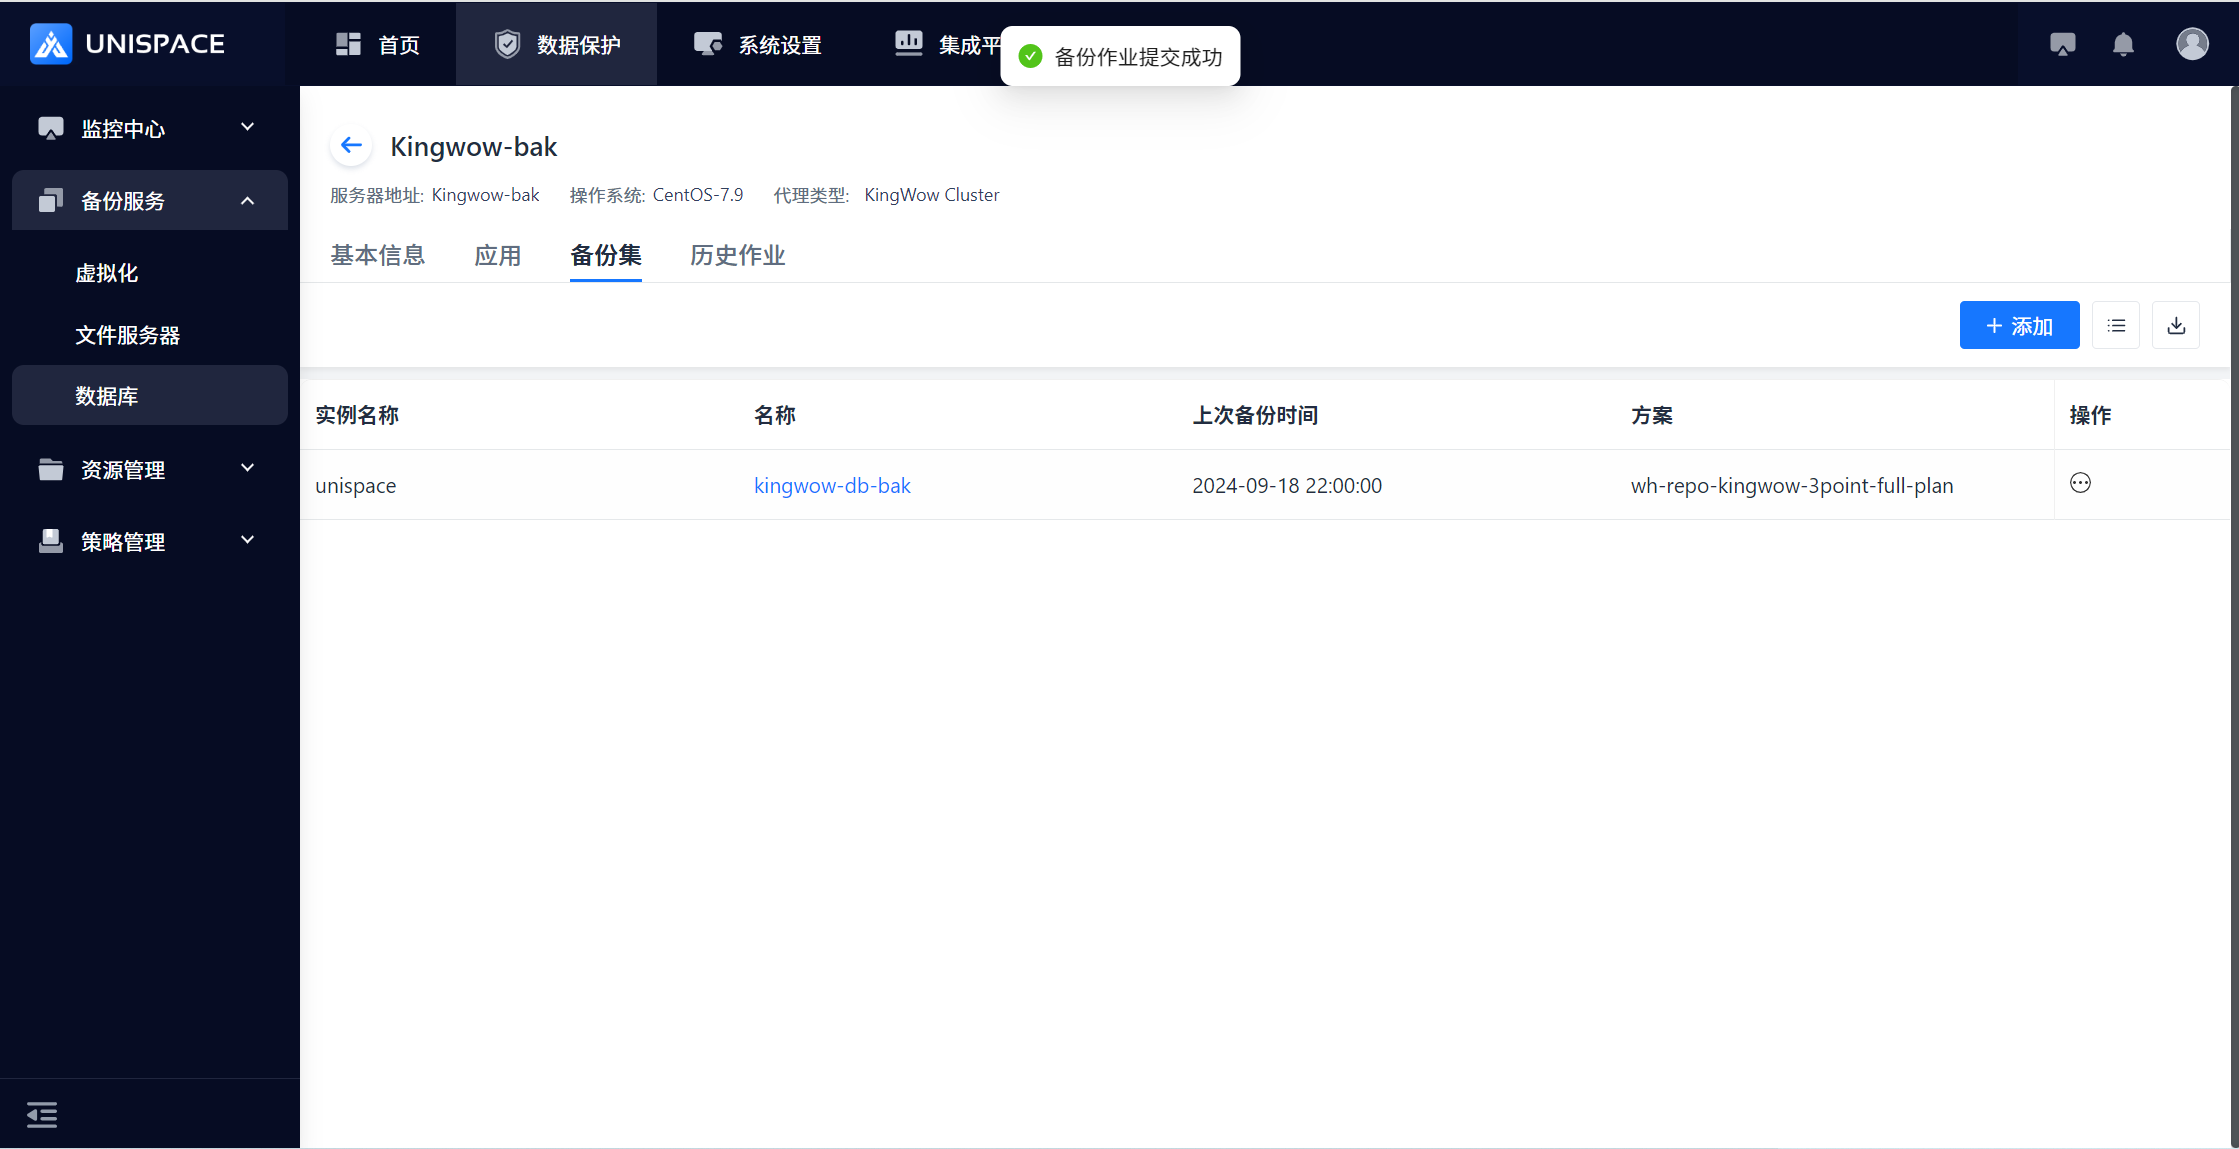
Step 1: Click Backup Set - Operation - Backup to initiate a Full or Incremental backup.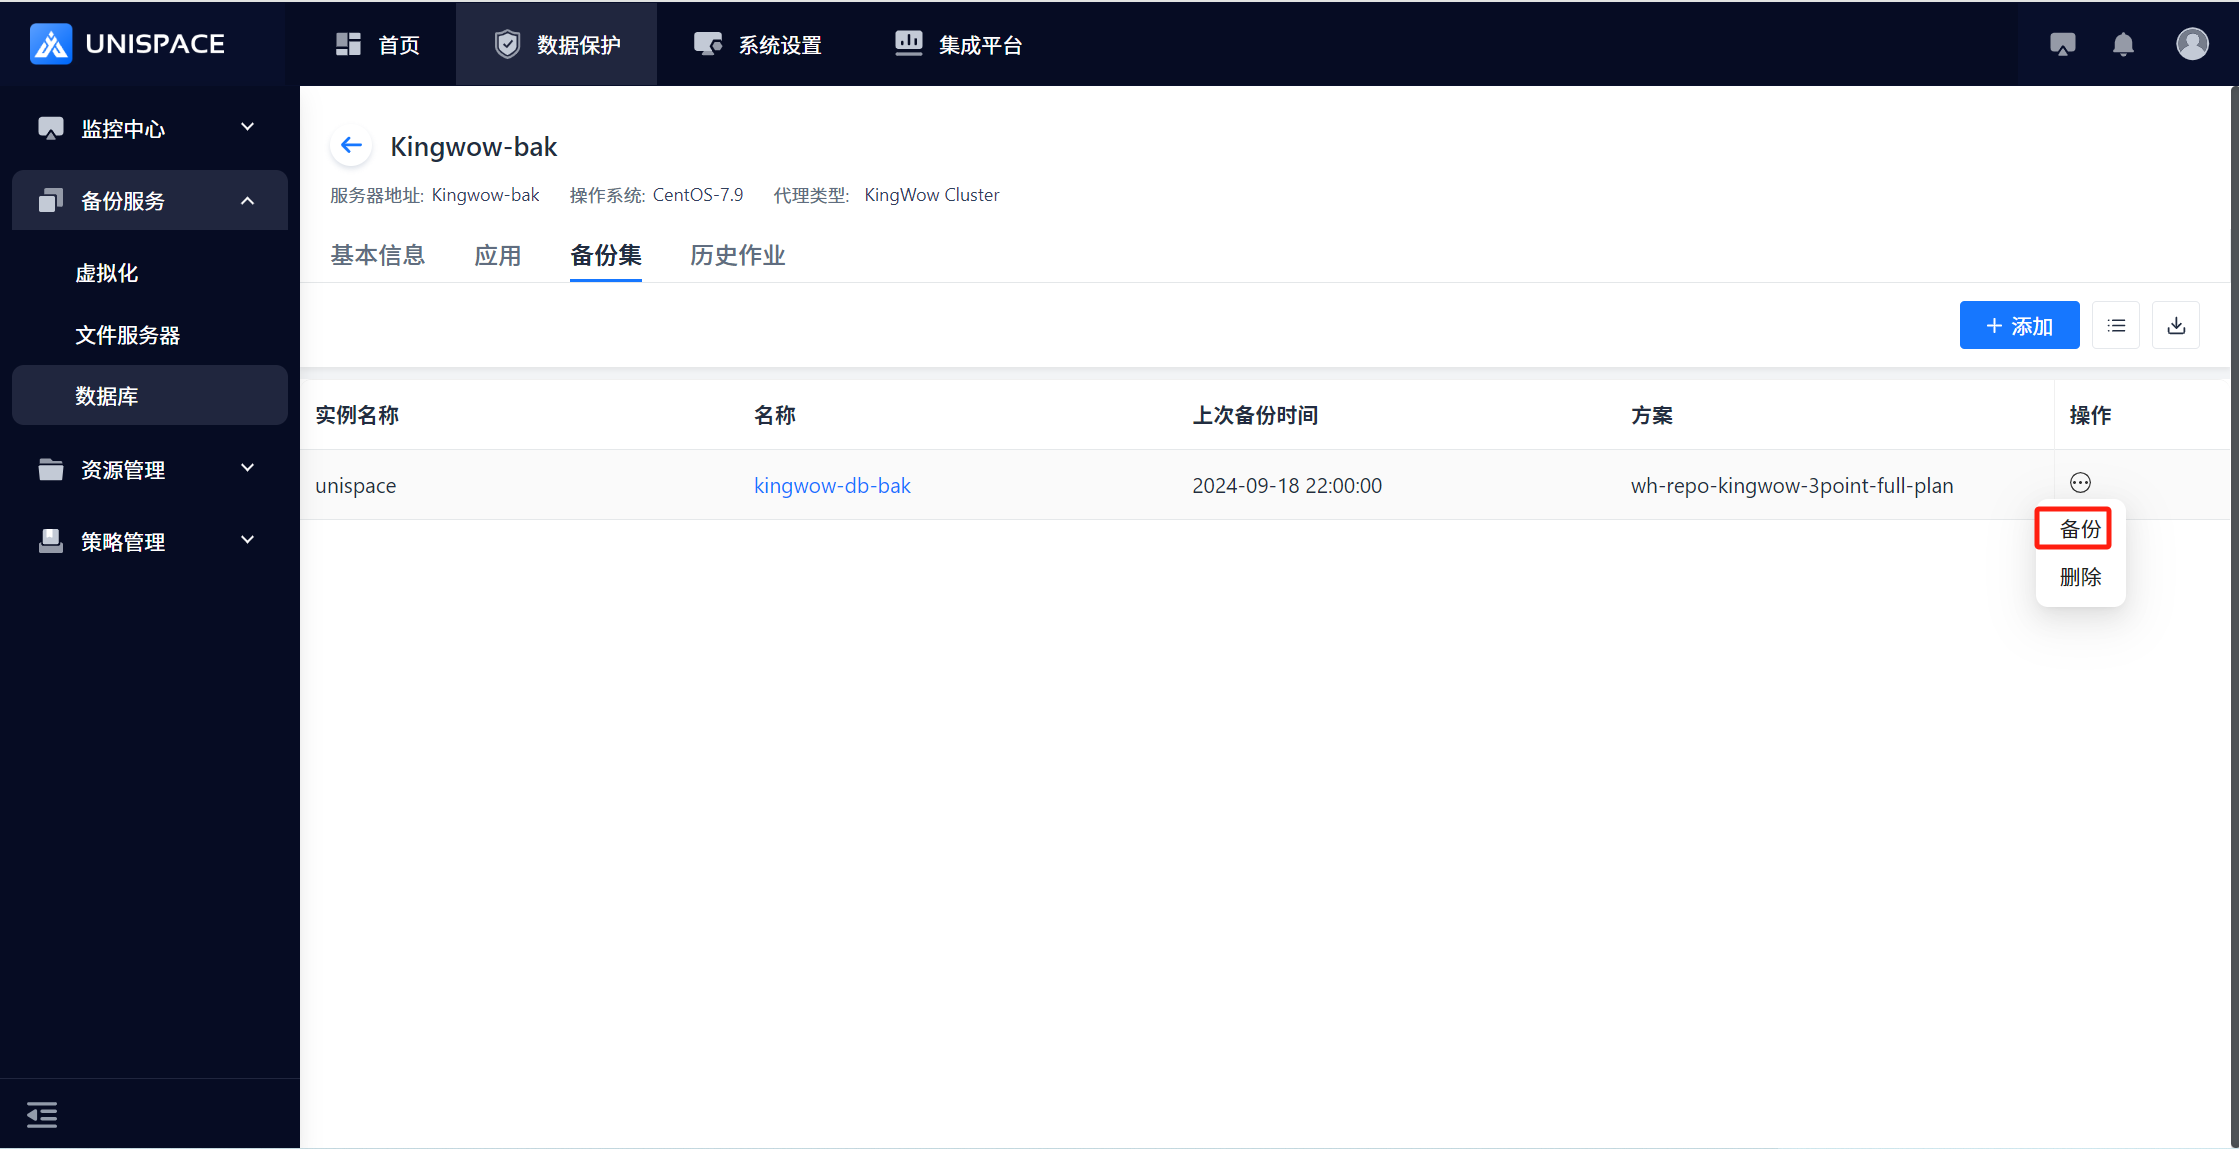
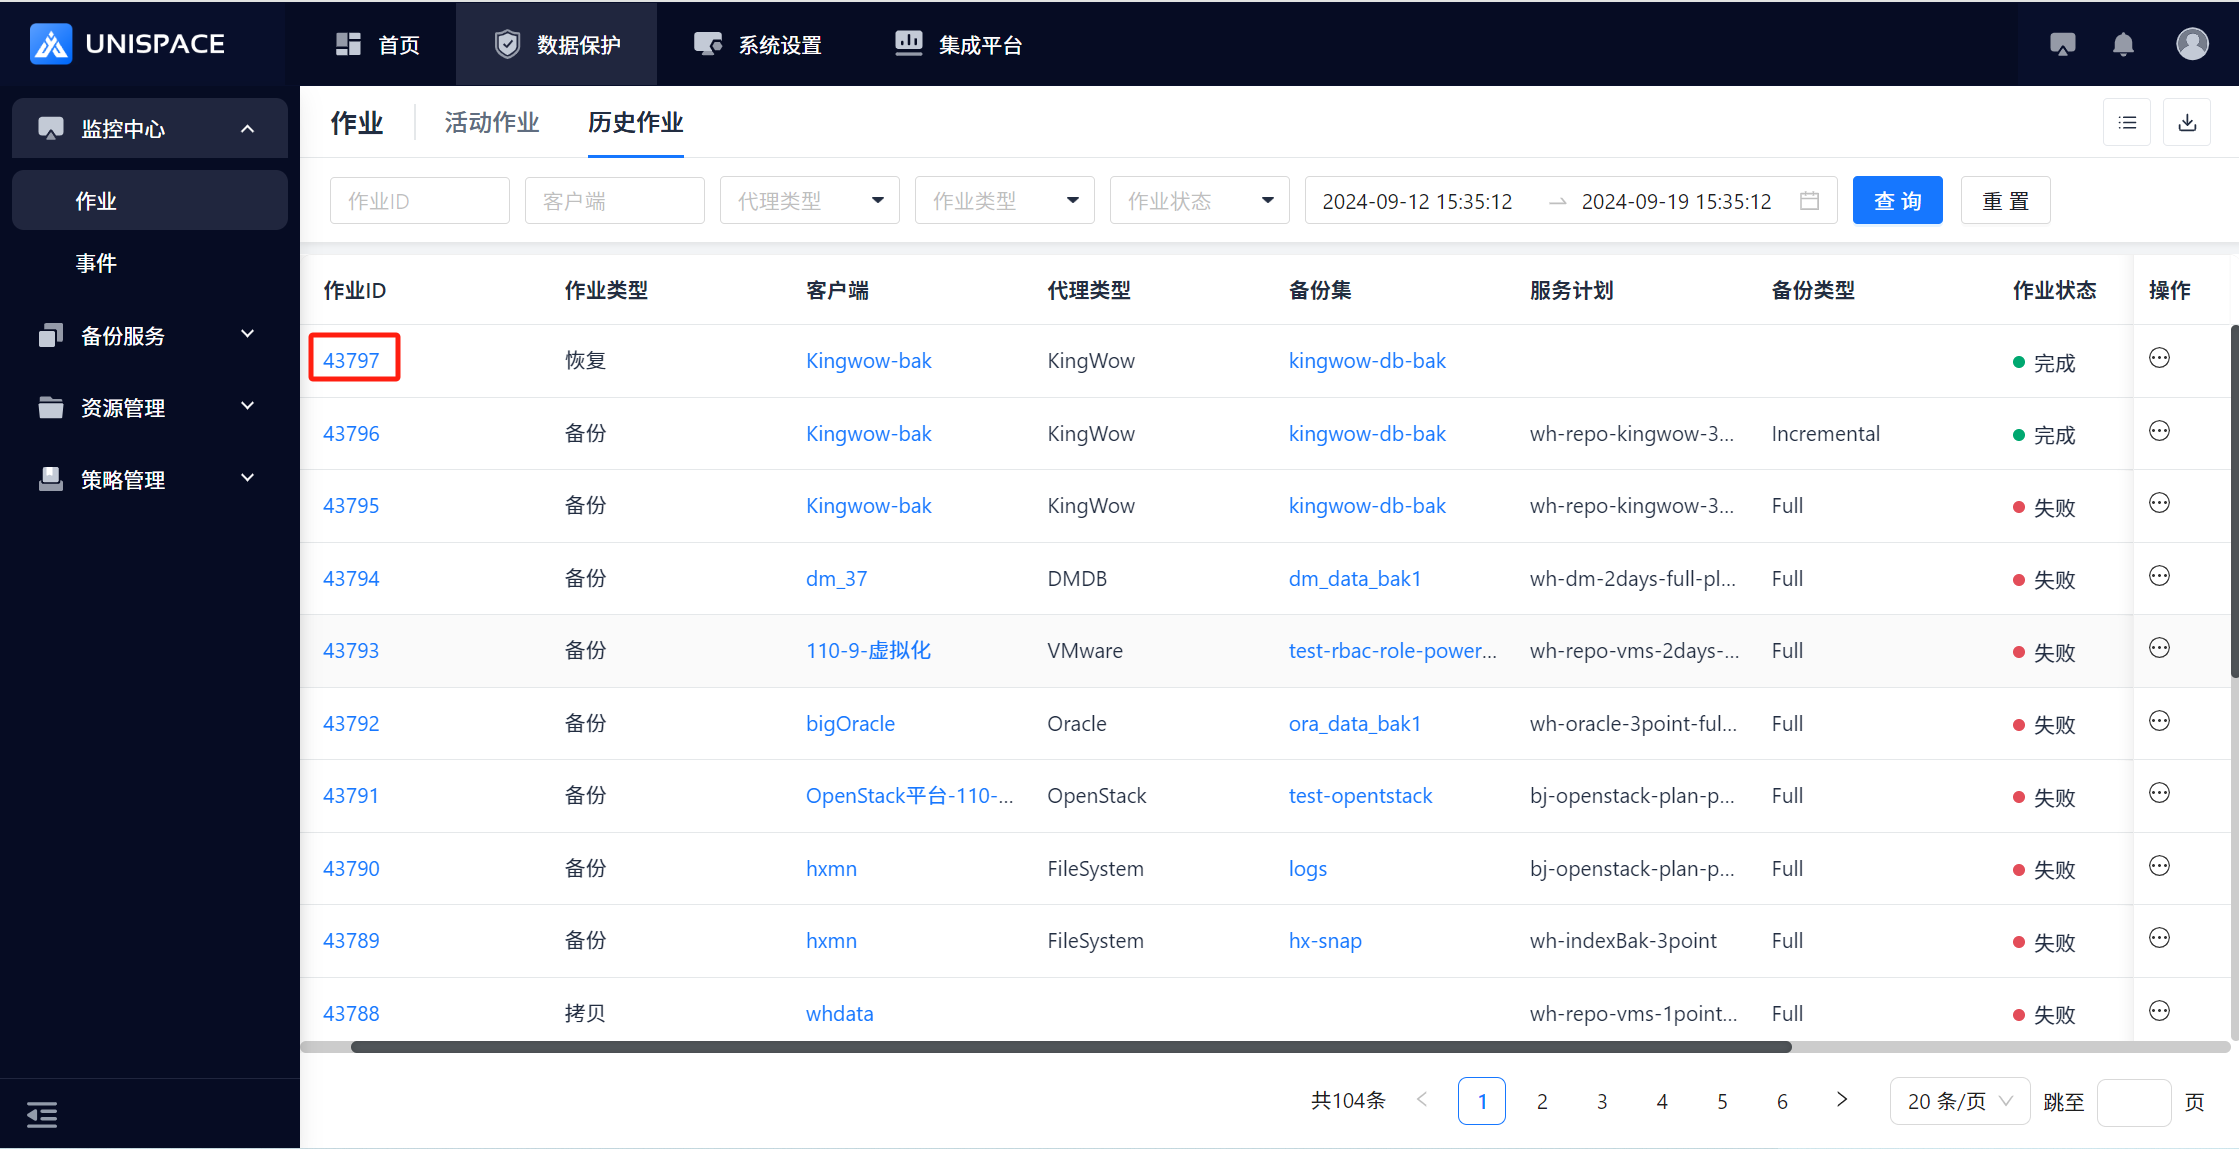
 Step 2: After the job starts successfully, go to Monitoring Center - Jobs - Active Jobs to view the running job.
 Step 3: Once the job completes, go to Monitoring Center - Jobs - Job History to view the job and its status.
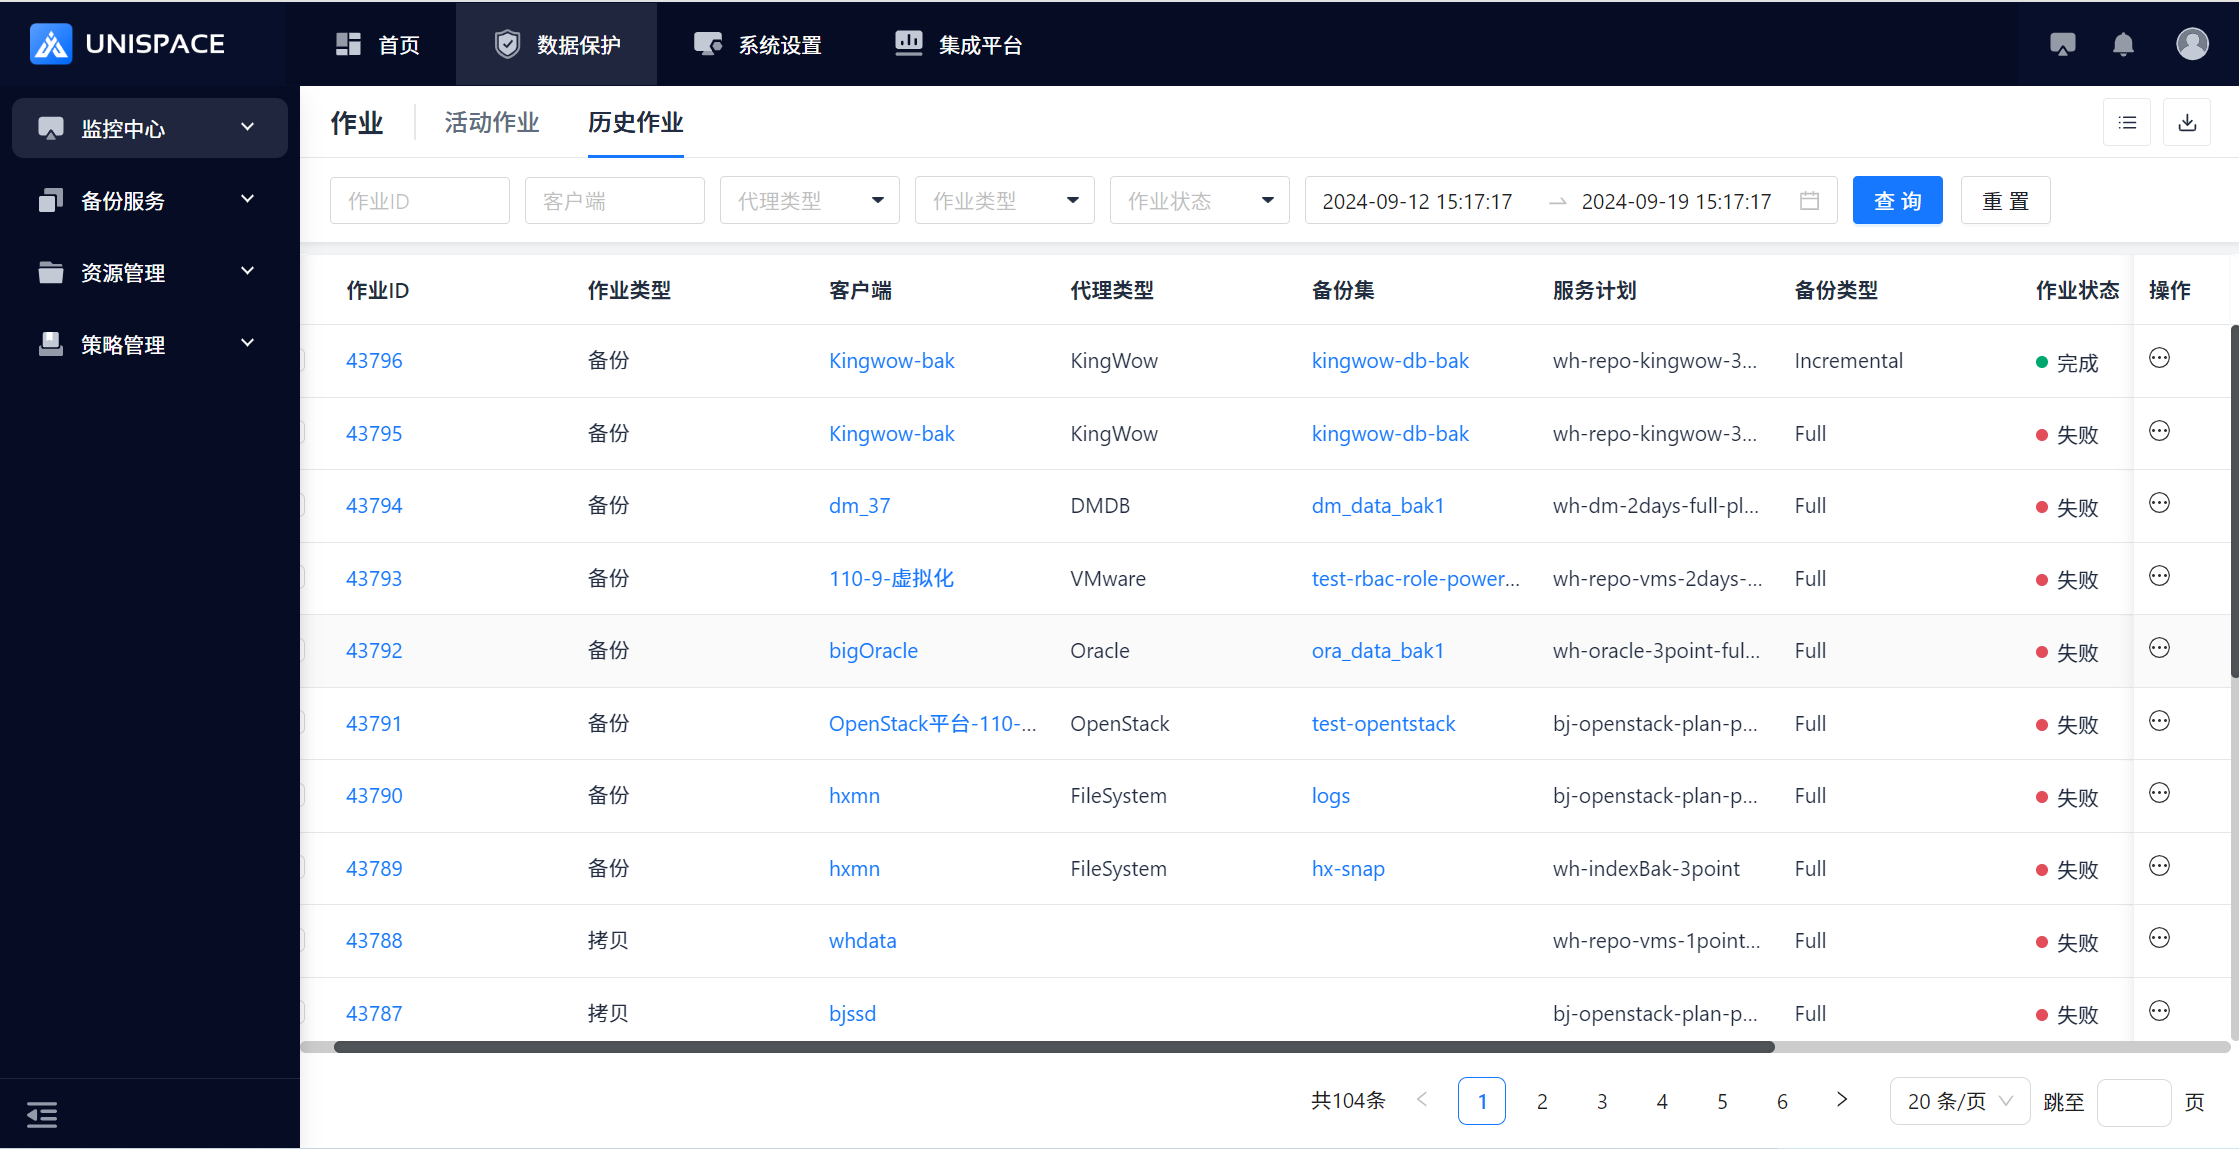
1.5 Kingwow Recovery
1.5.1 Kingwow Cross-Machine Recovery
Prerequisites
- The Kingwow backup set has been successfully backed up.
Steps
Step 1: Click Application - Operation - Recovery. Step 2: Query the recovery point based on the time range, select the job ID to be restored. Selecting an incremental backup will automatically include the most recent full backup. Click Next.
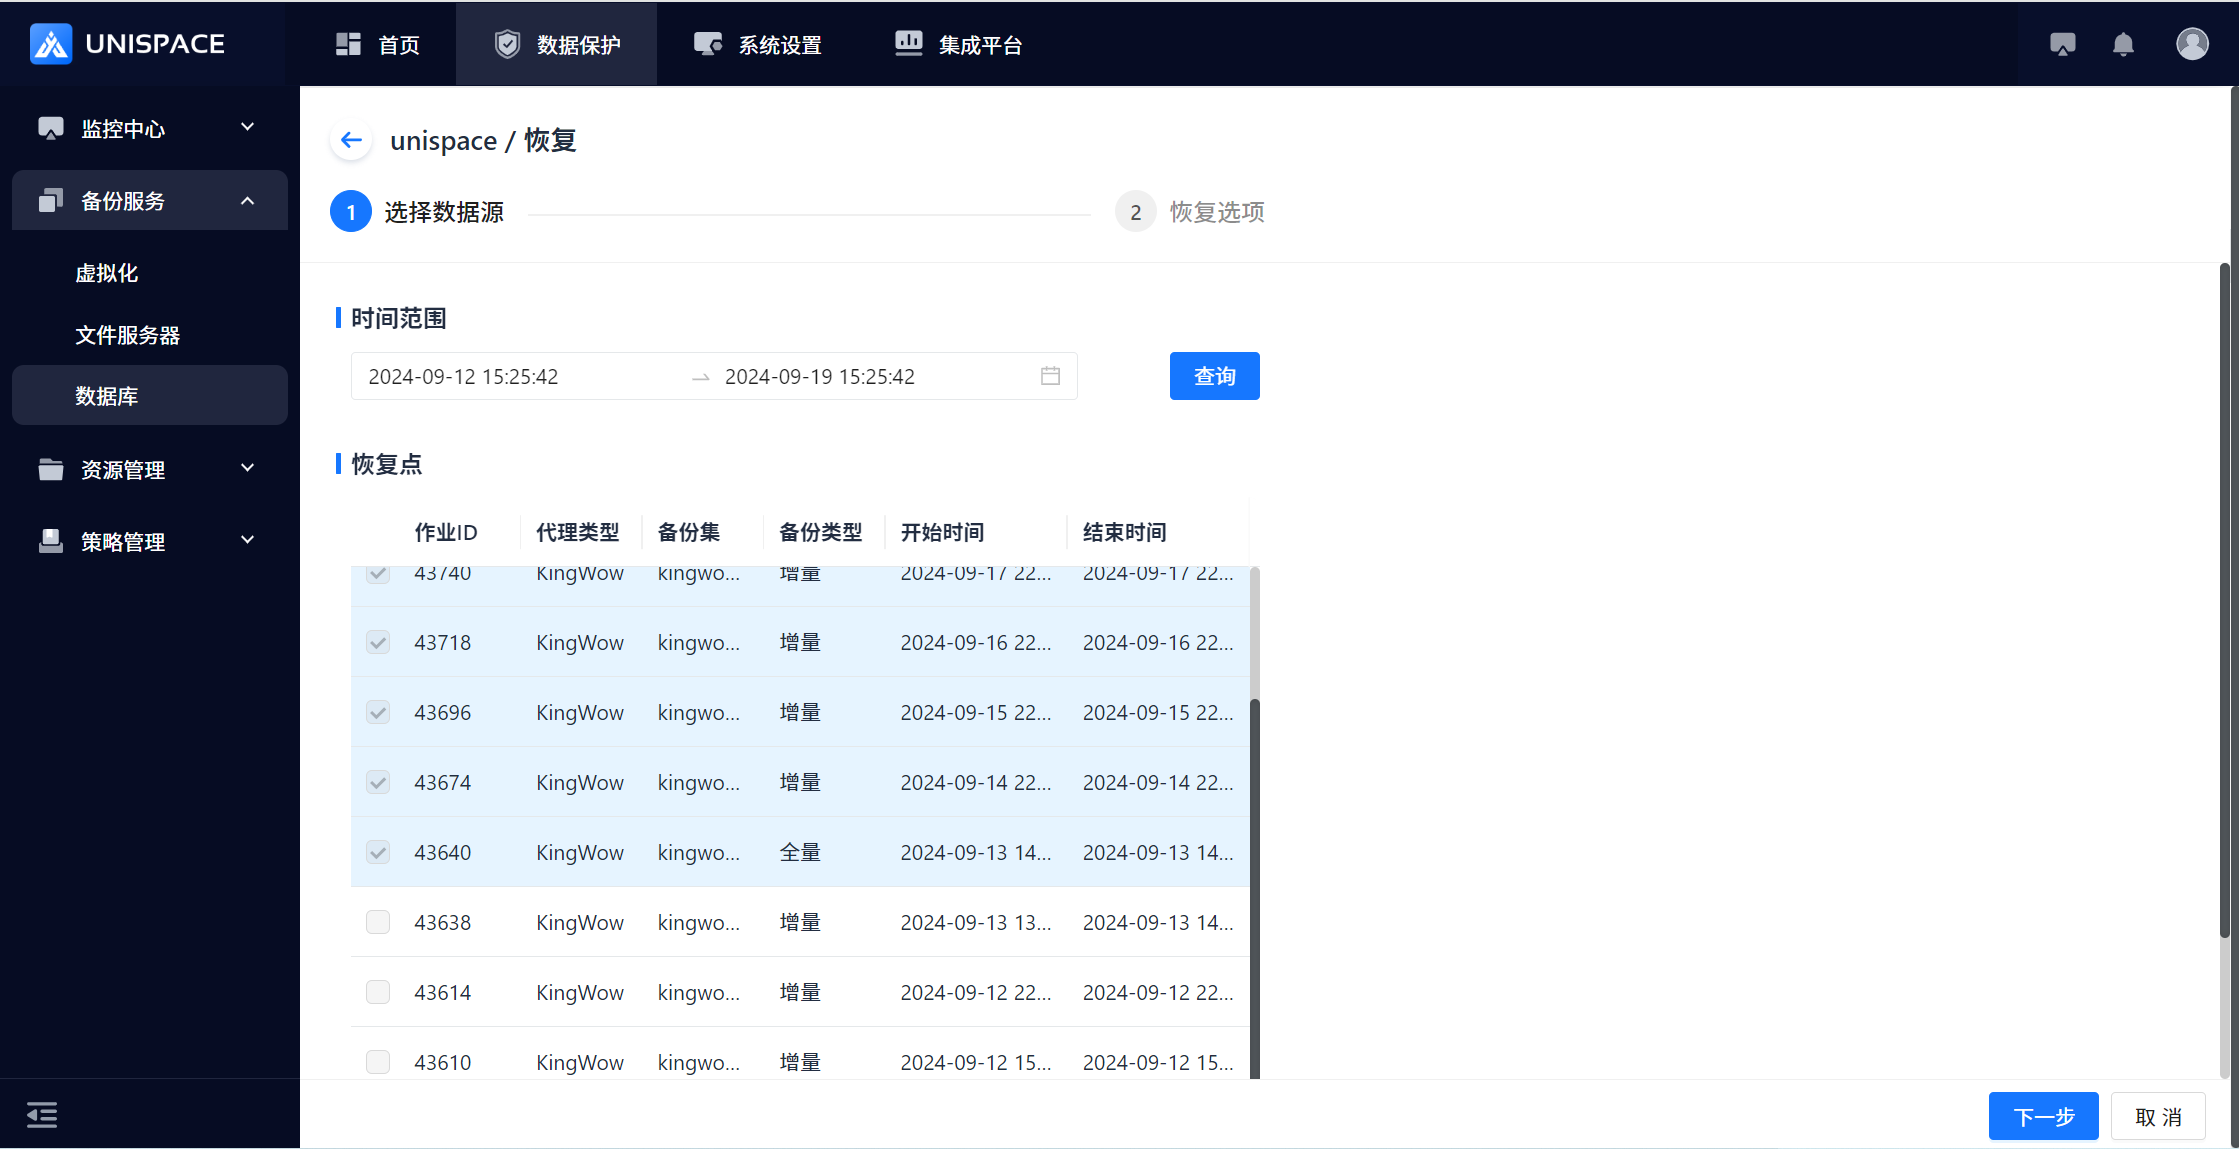 Step 3: Choose Cross-Machine Recovery as the recovery target. Select the target cluster. Choose the application name. Enter the number of recovery streams (should match the number of nodes). Leave recovery options as default and click OK.
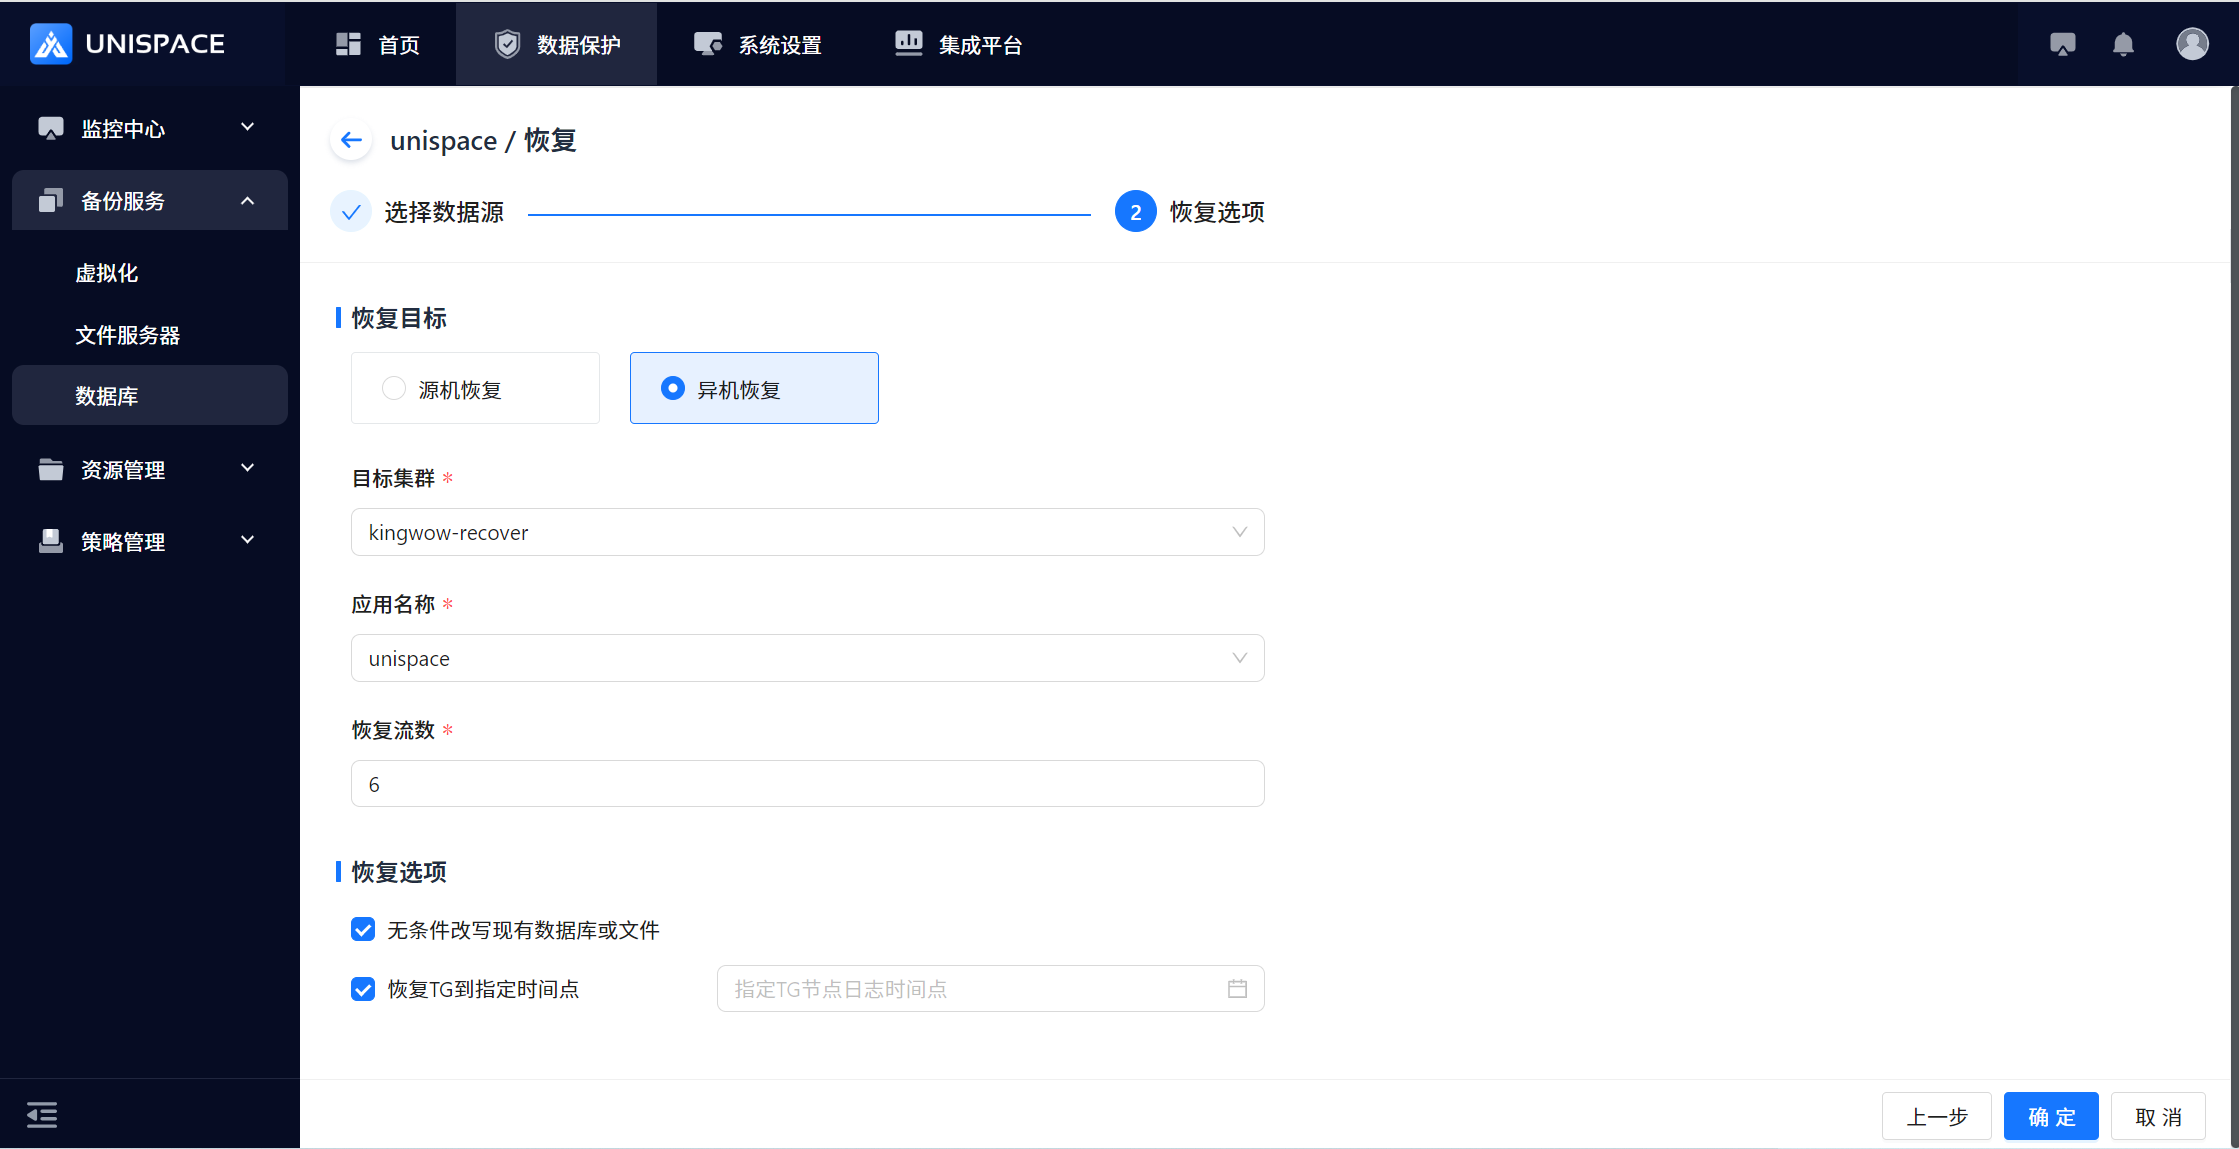
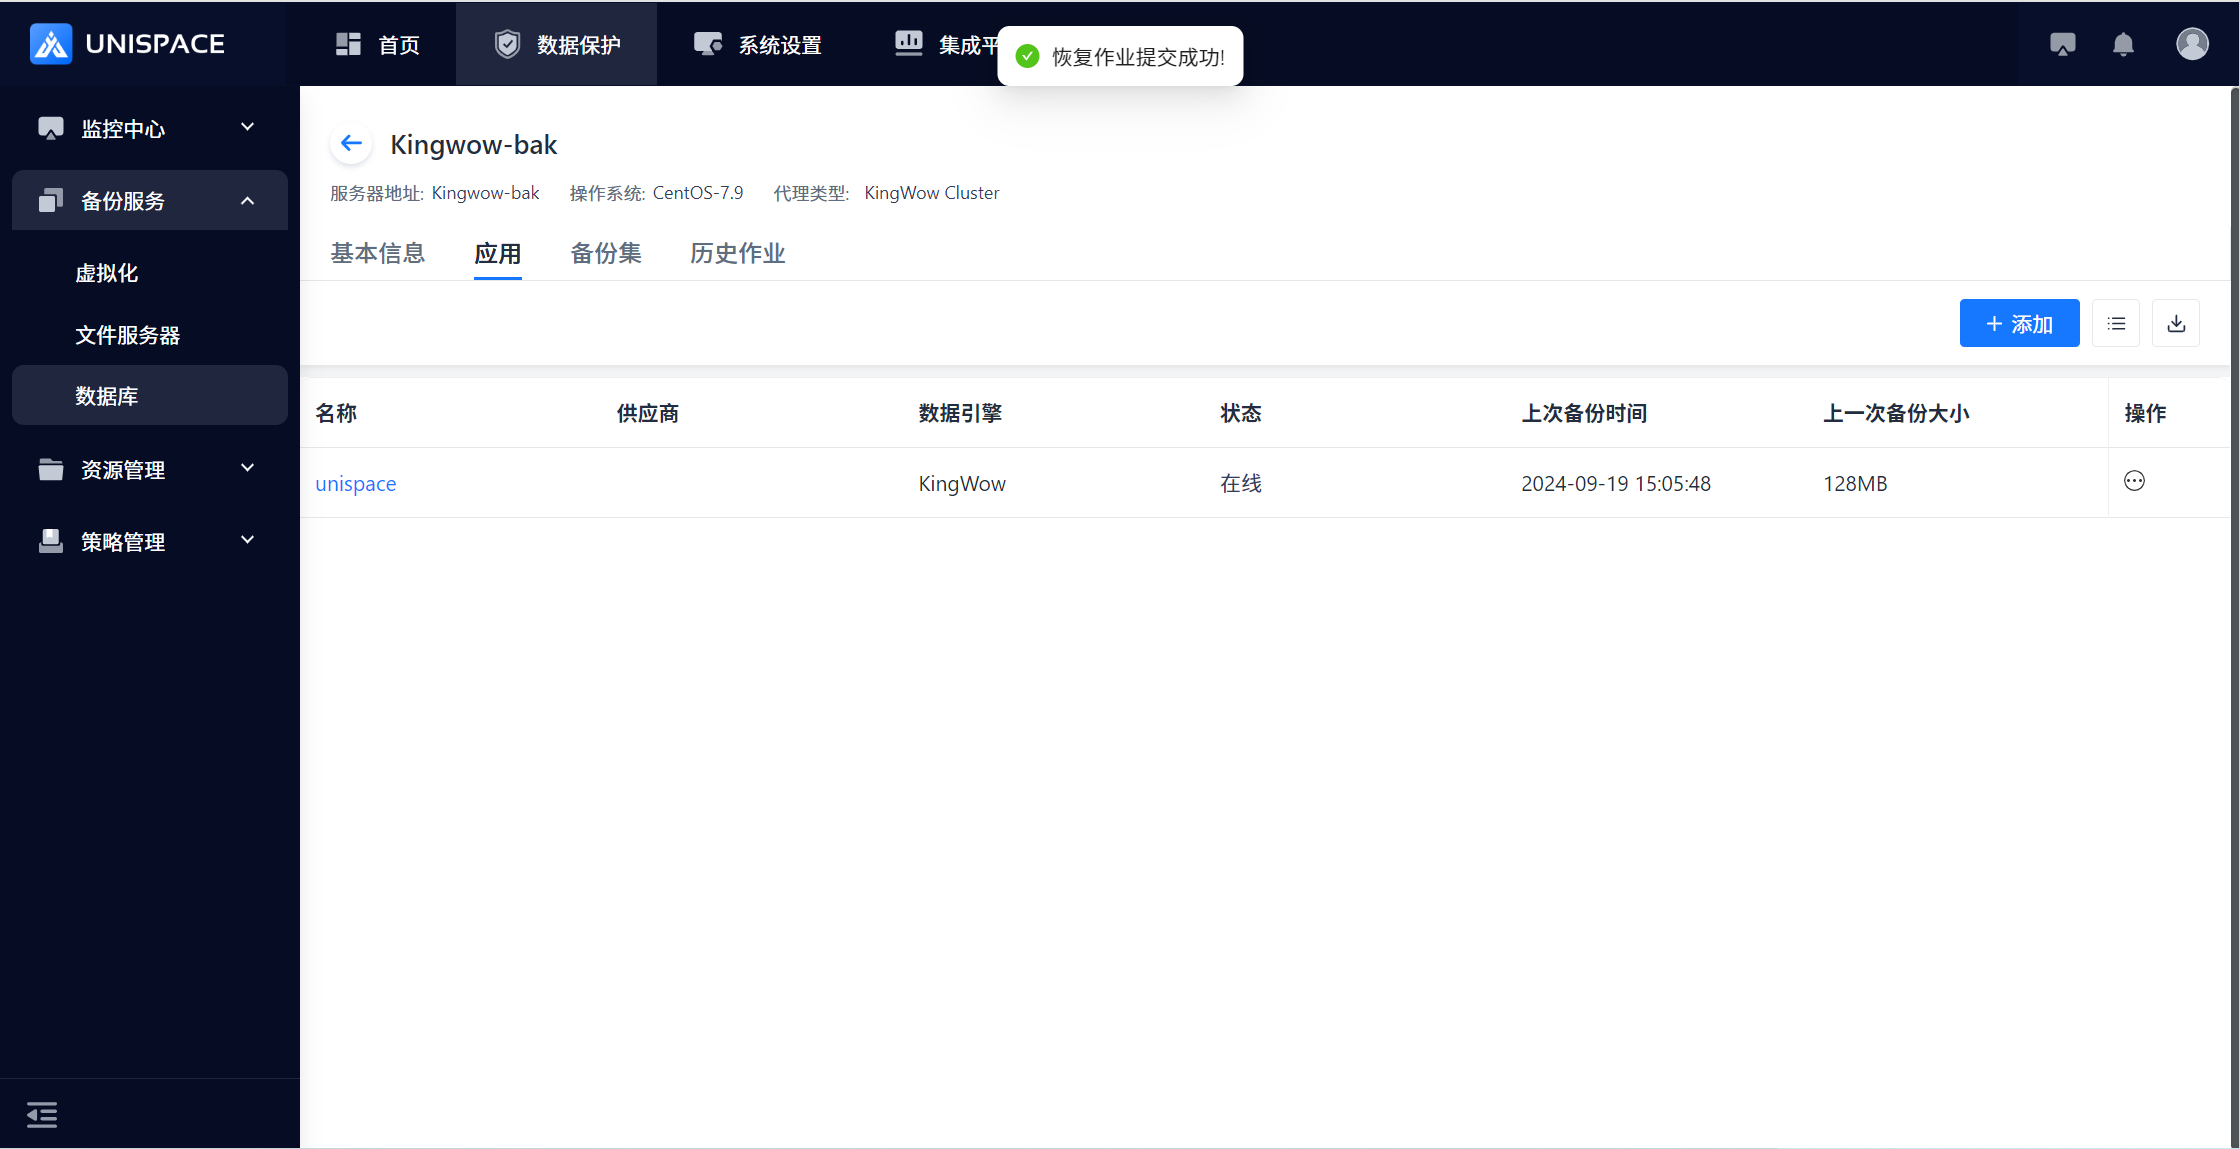 Step 4: Once the job starts successfully, go to Monitoring Center - Jobs - Active Jobs to view the running job.
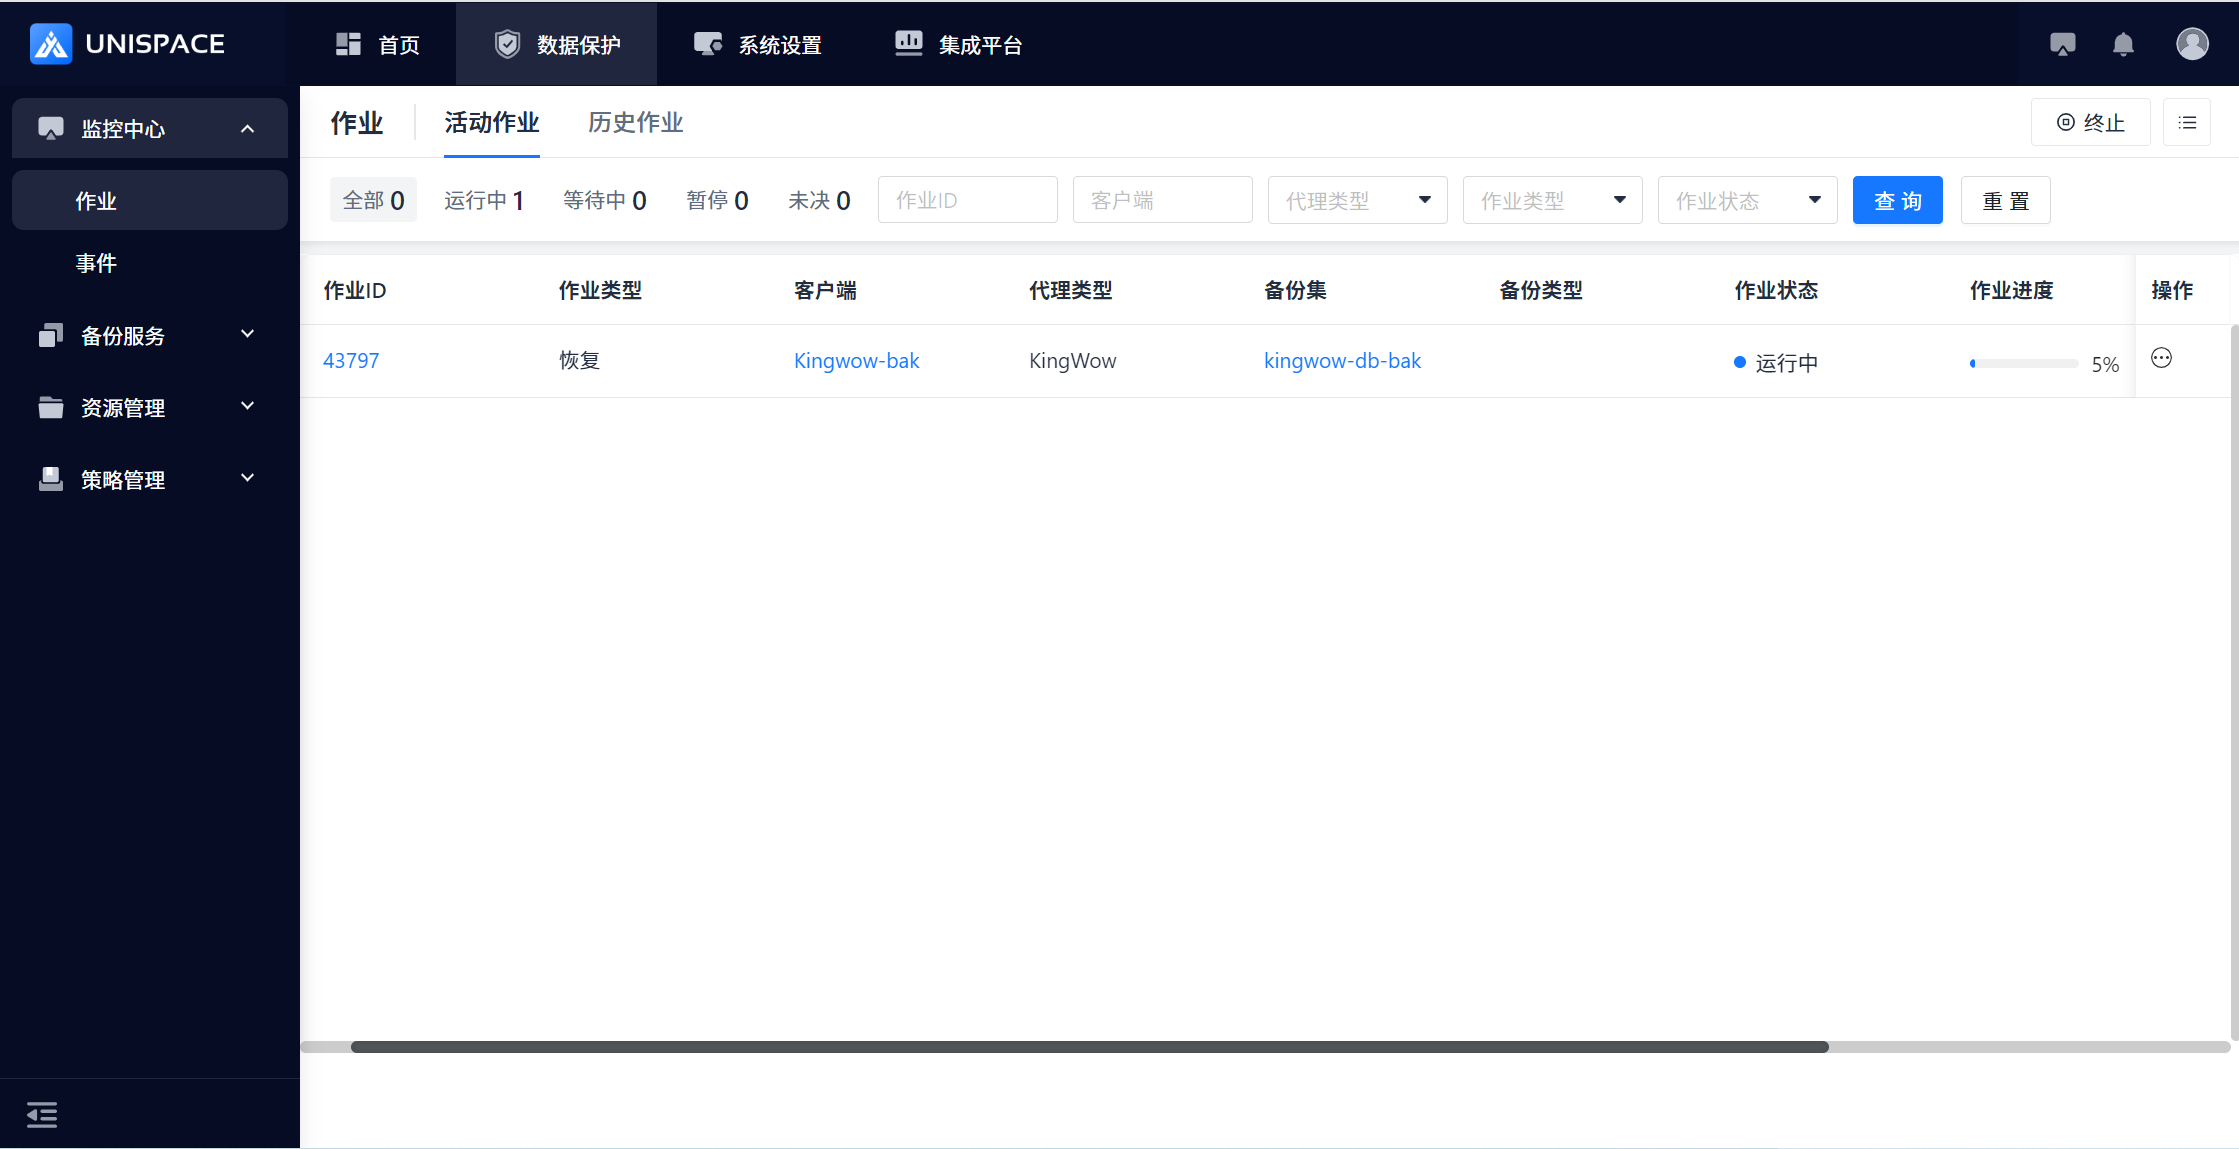 Step 5: After the job completes, go to Monitoring Center - Jobs - Job History to view the job and its status.