Agent--PostgreSQL
1.1 Create a New PG Instance
Prerequisites
- Created a new user.
- Created a new storage repository.
- Created a new service plan.
- Have an accessible and installed PG service.
Steps
Step 1: Click on the system menu Backup Service - Database list, select "Server Name" to enter the database instance page.
Step 2: Click Instance.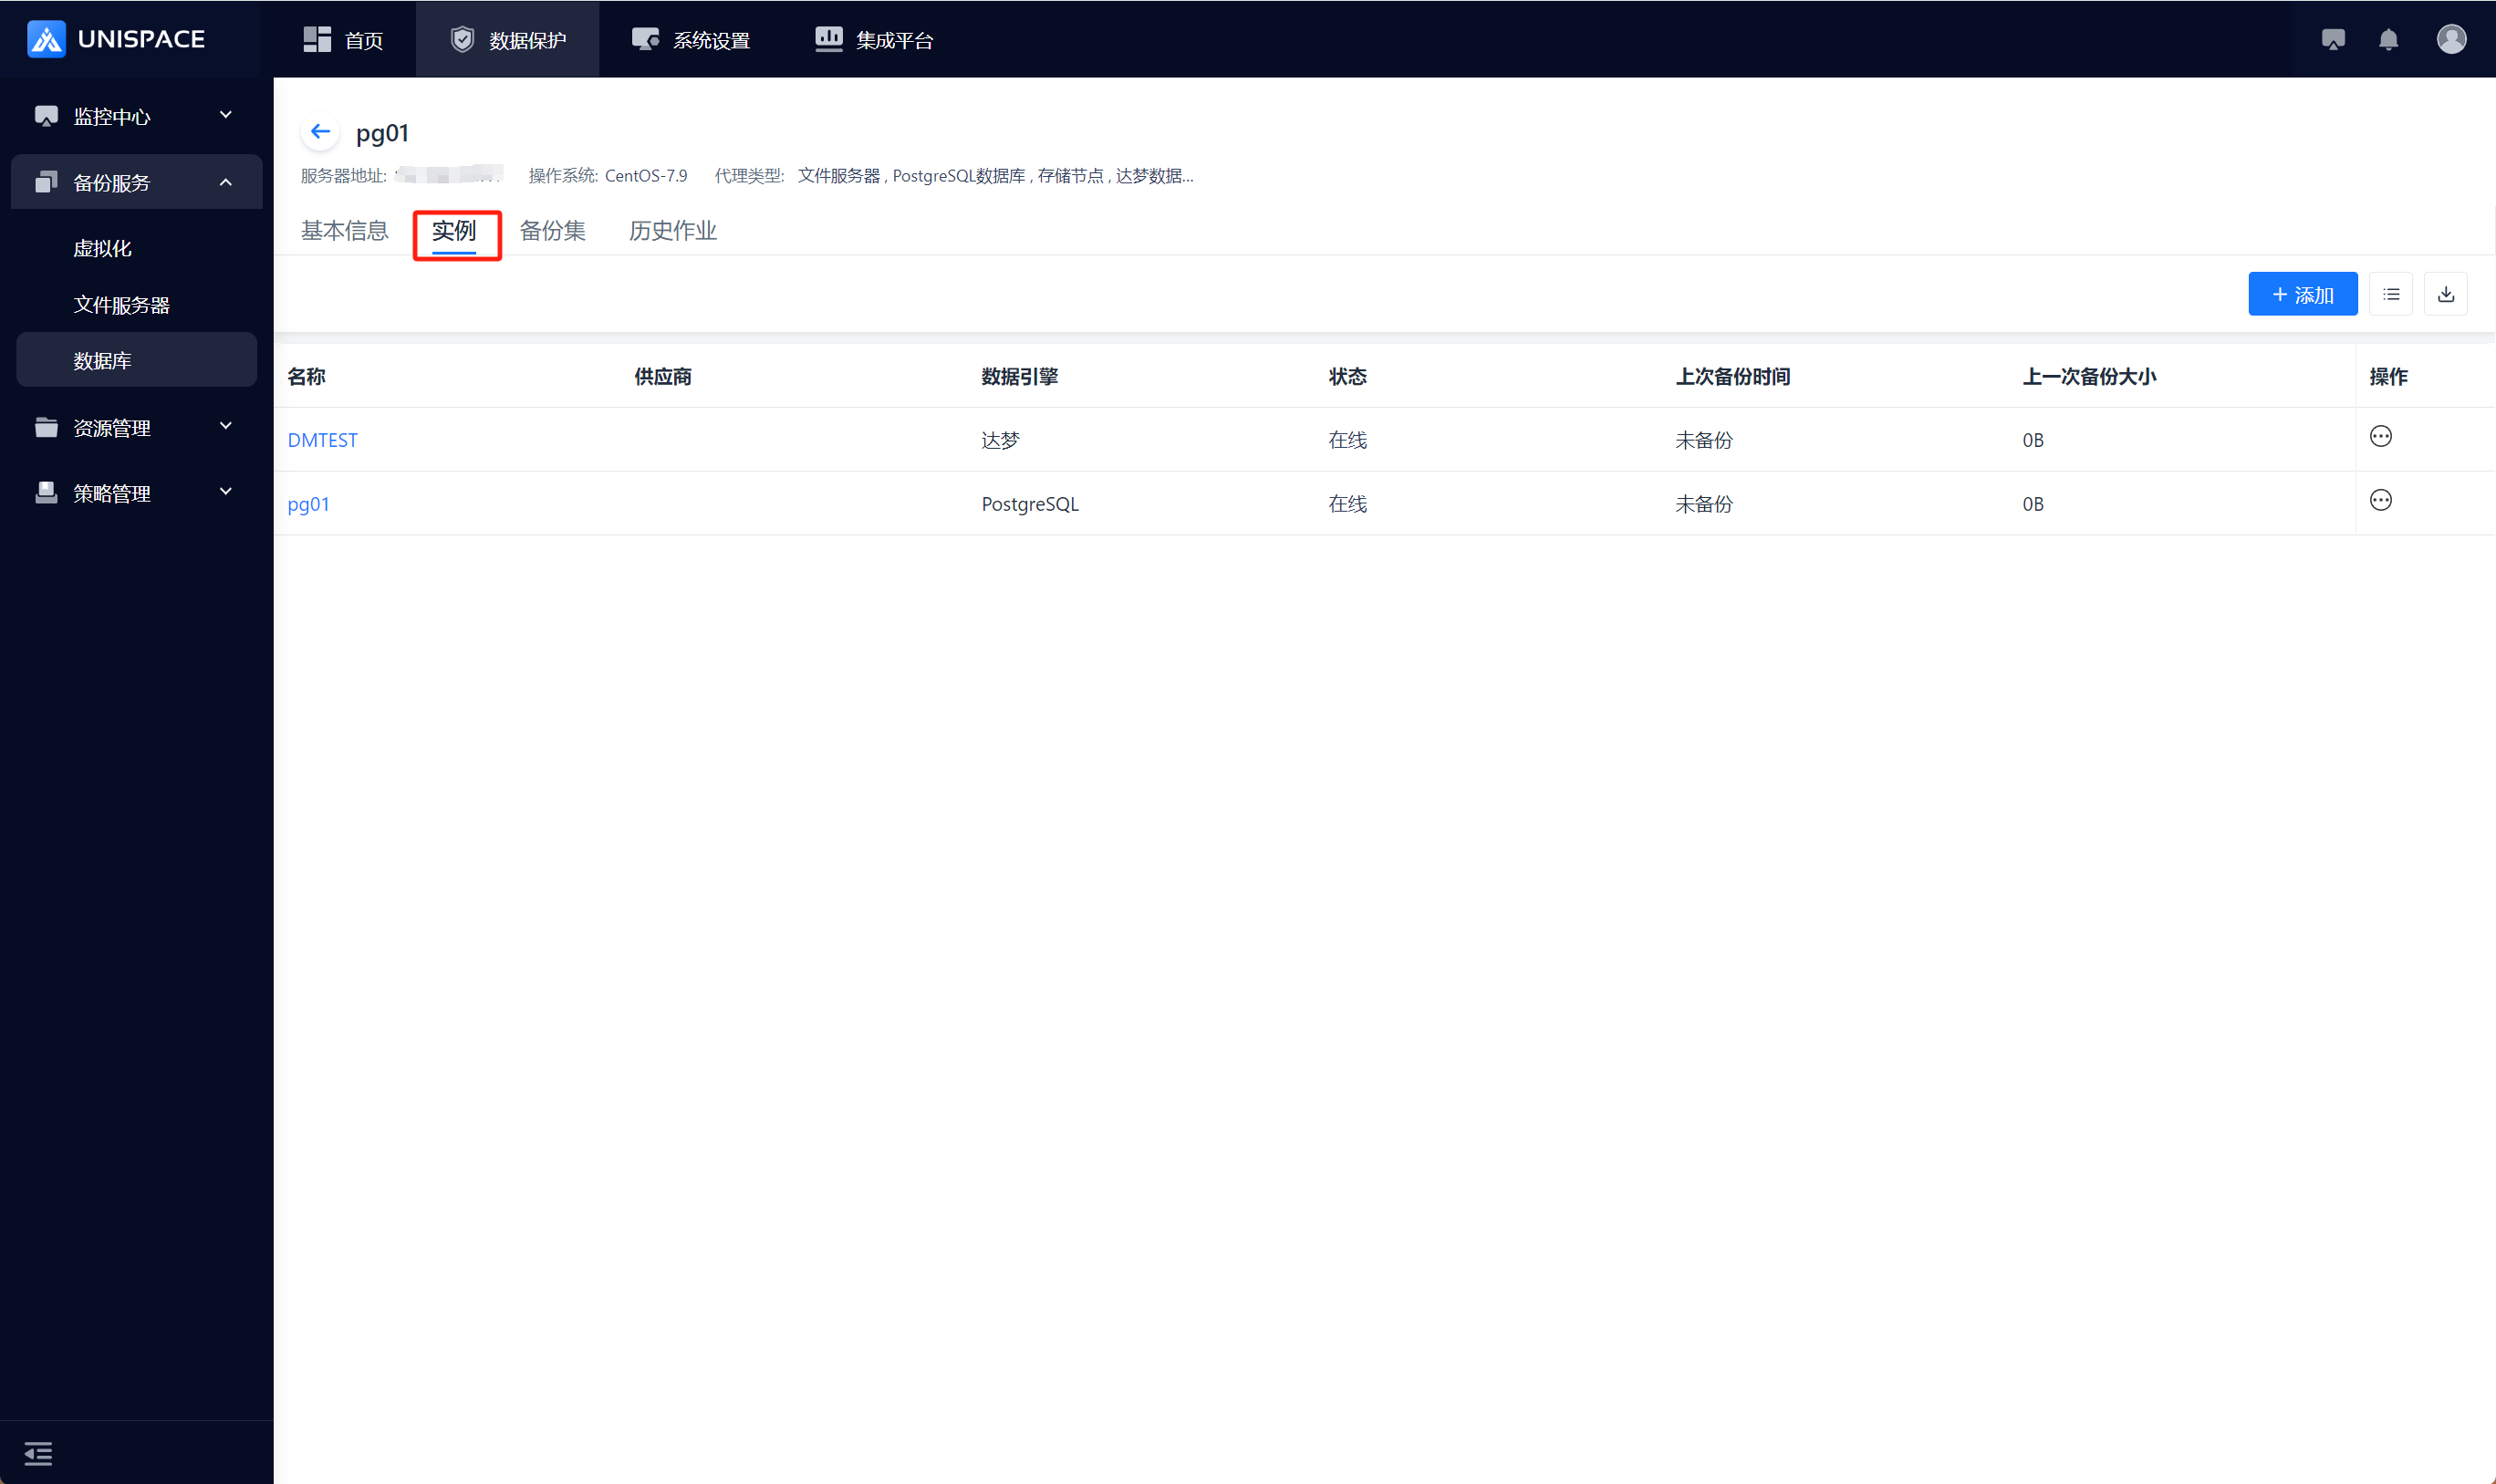
Step 3: Click the button in the upper right corner of Instance, and a pop-up window will appear: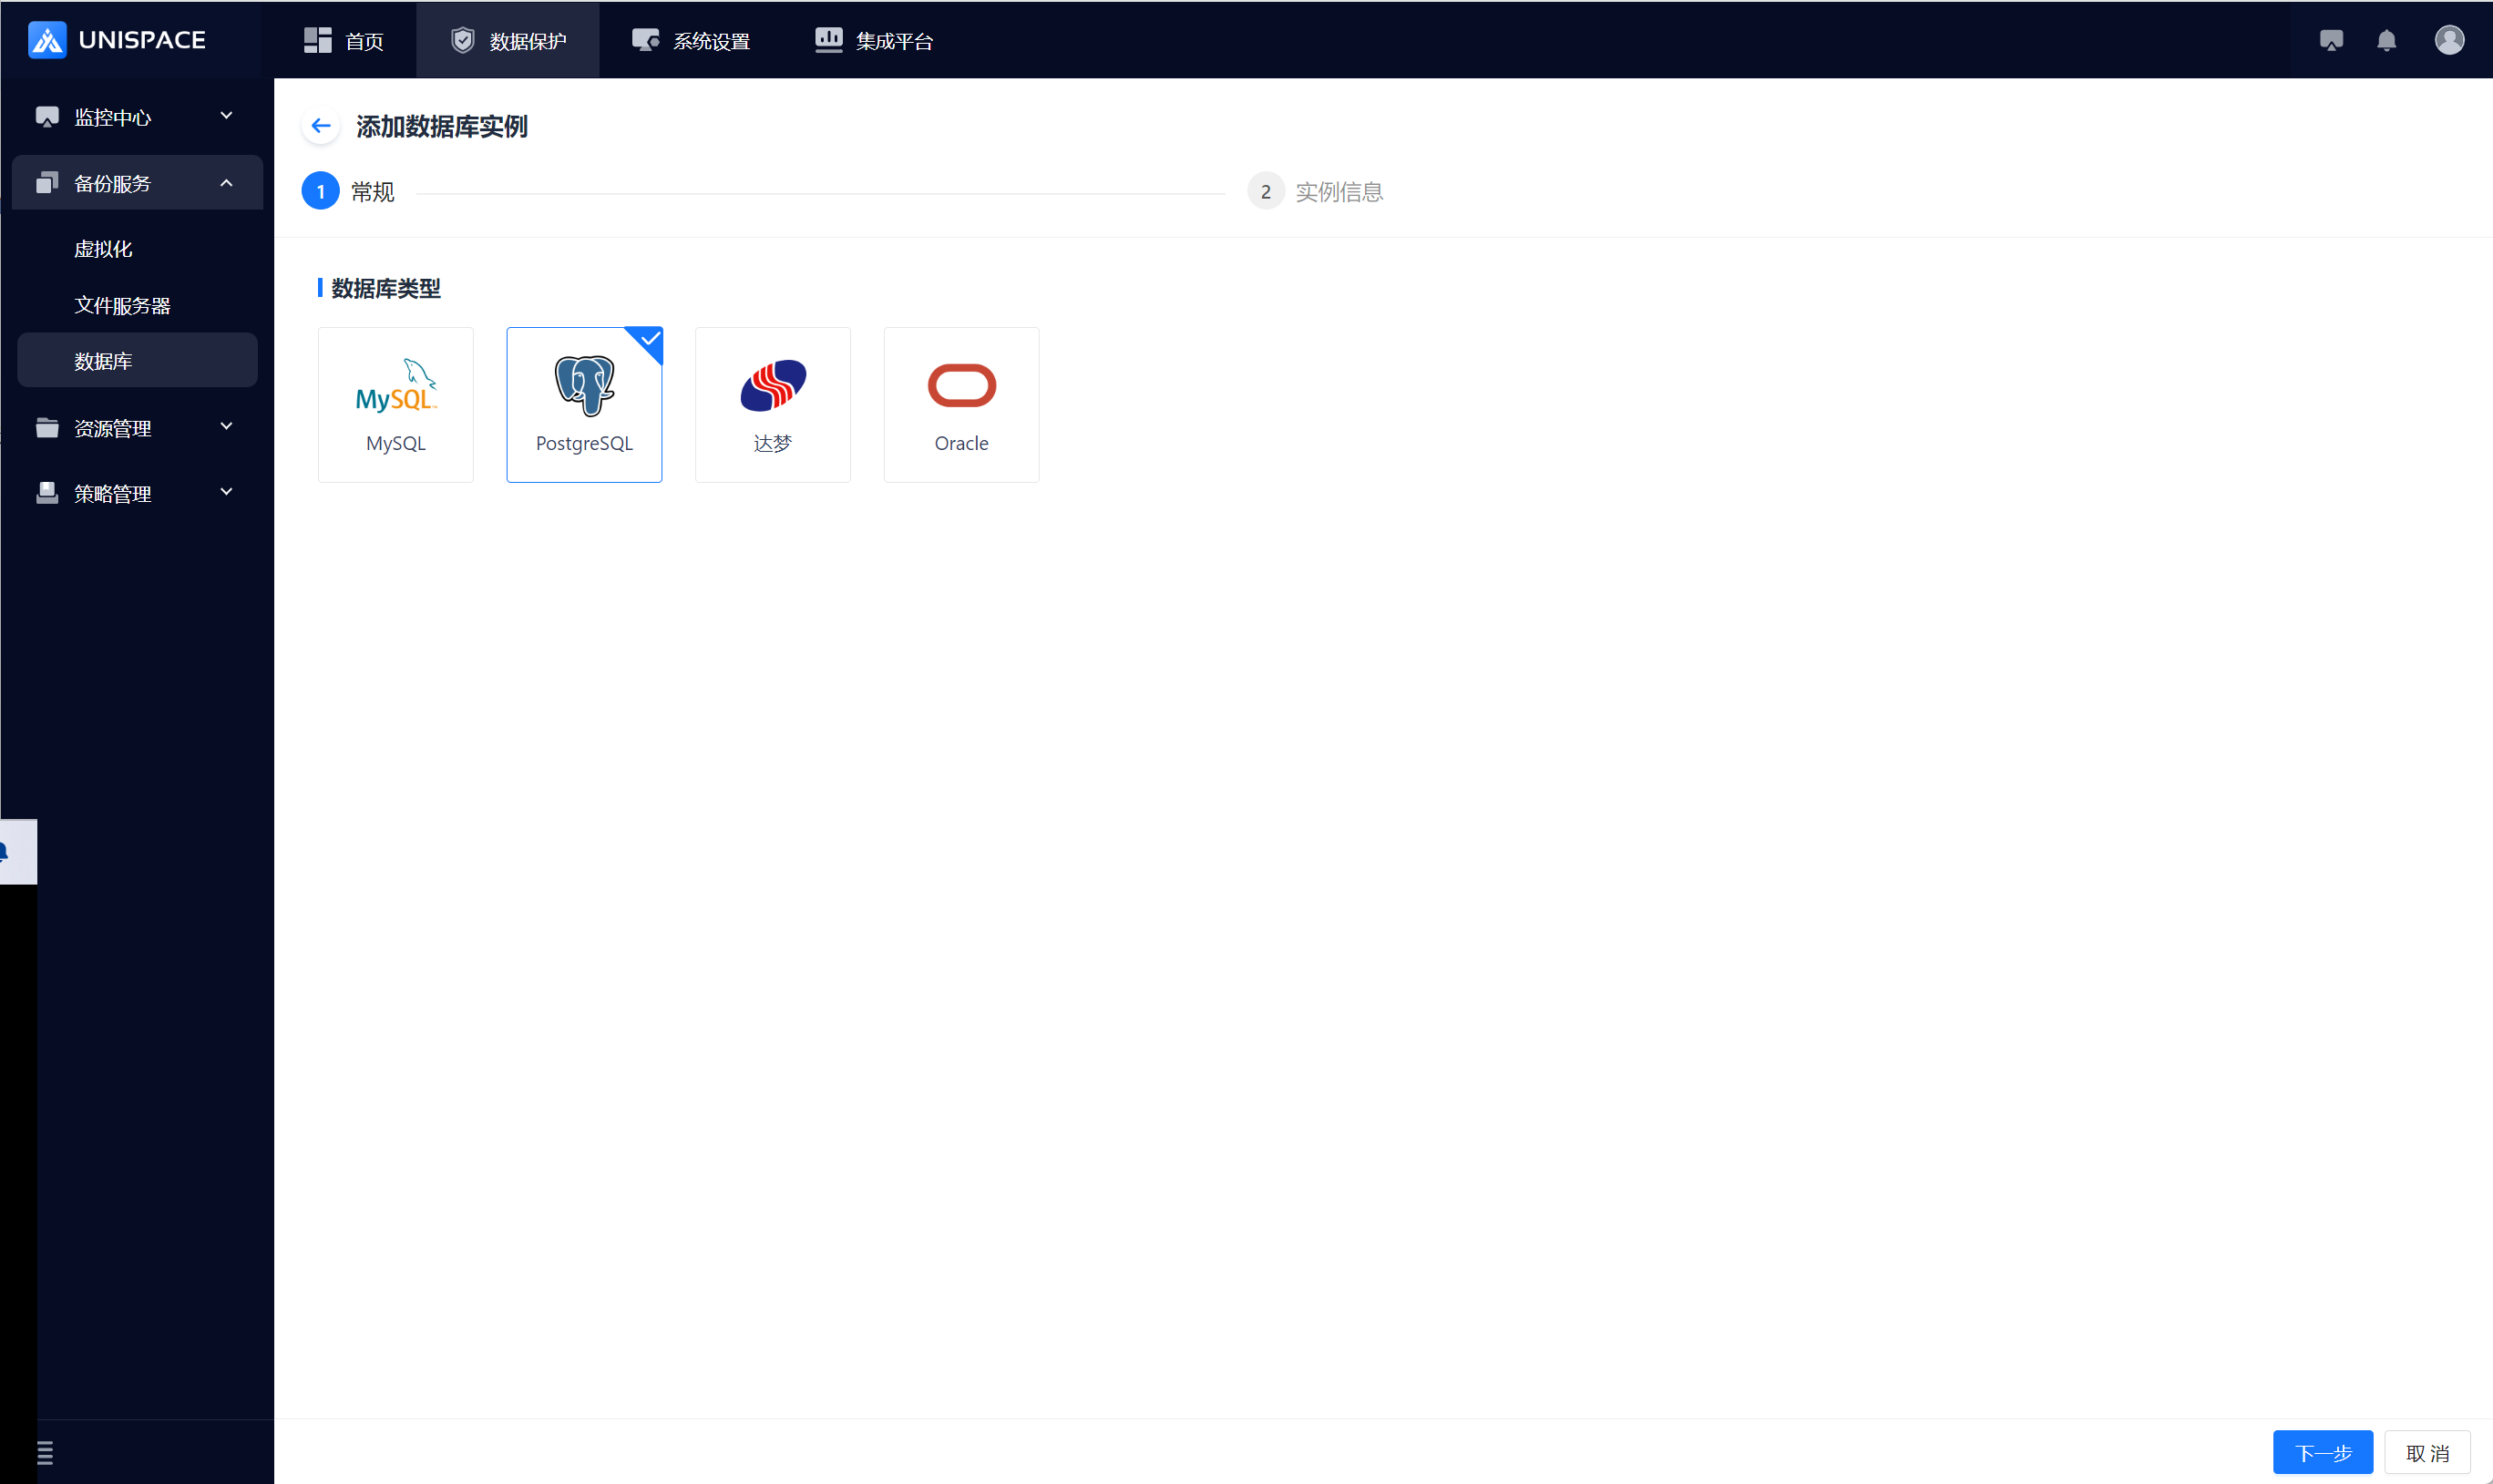
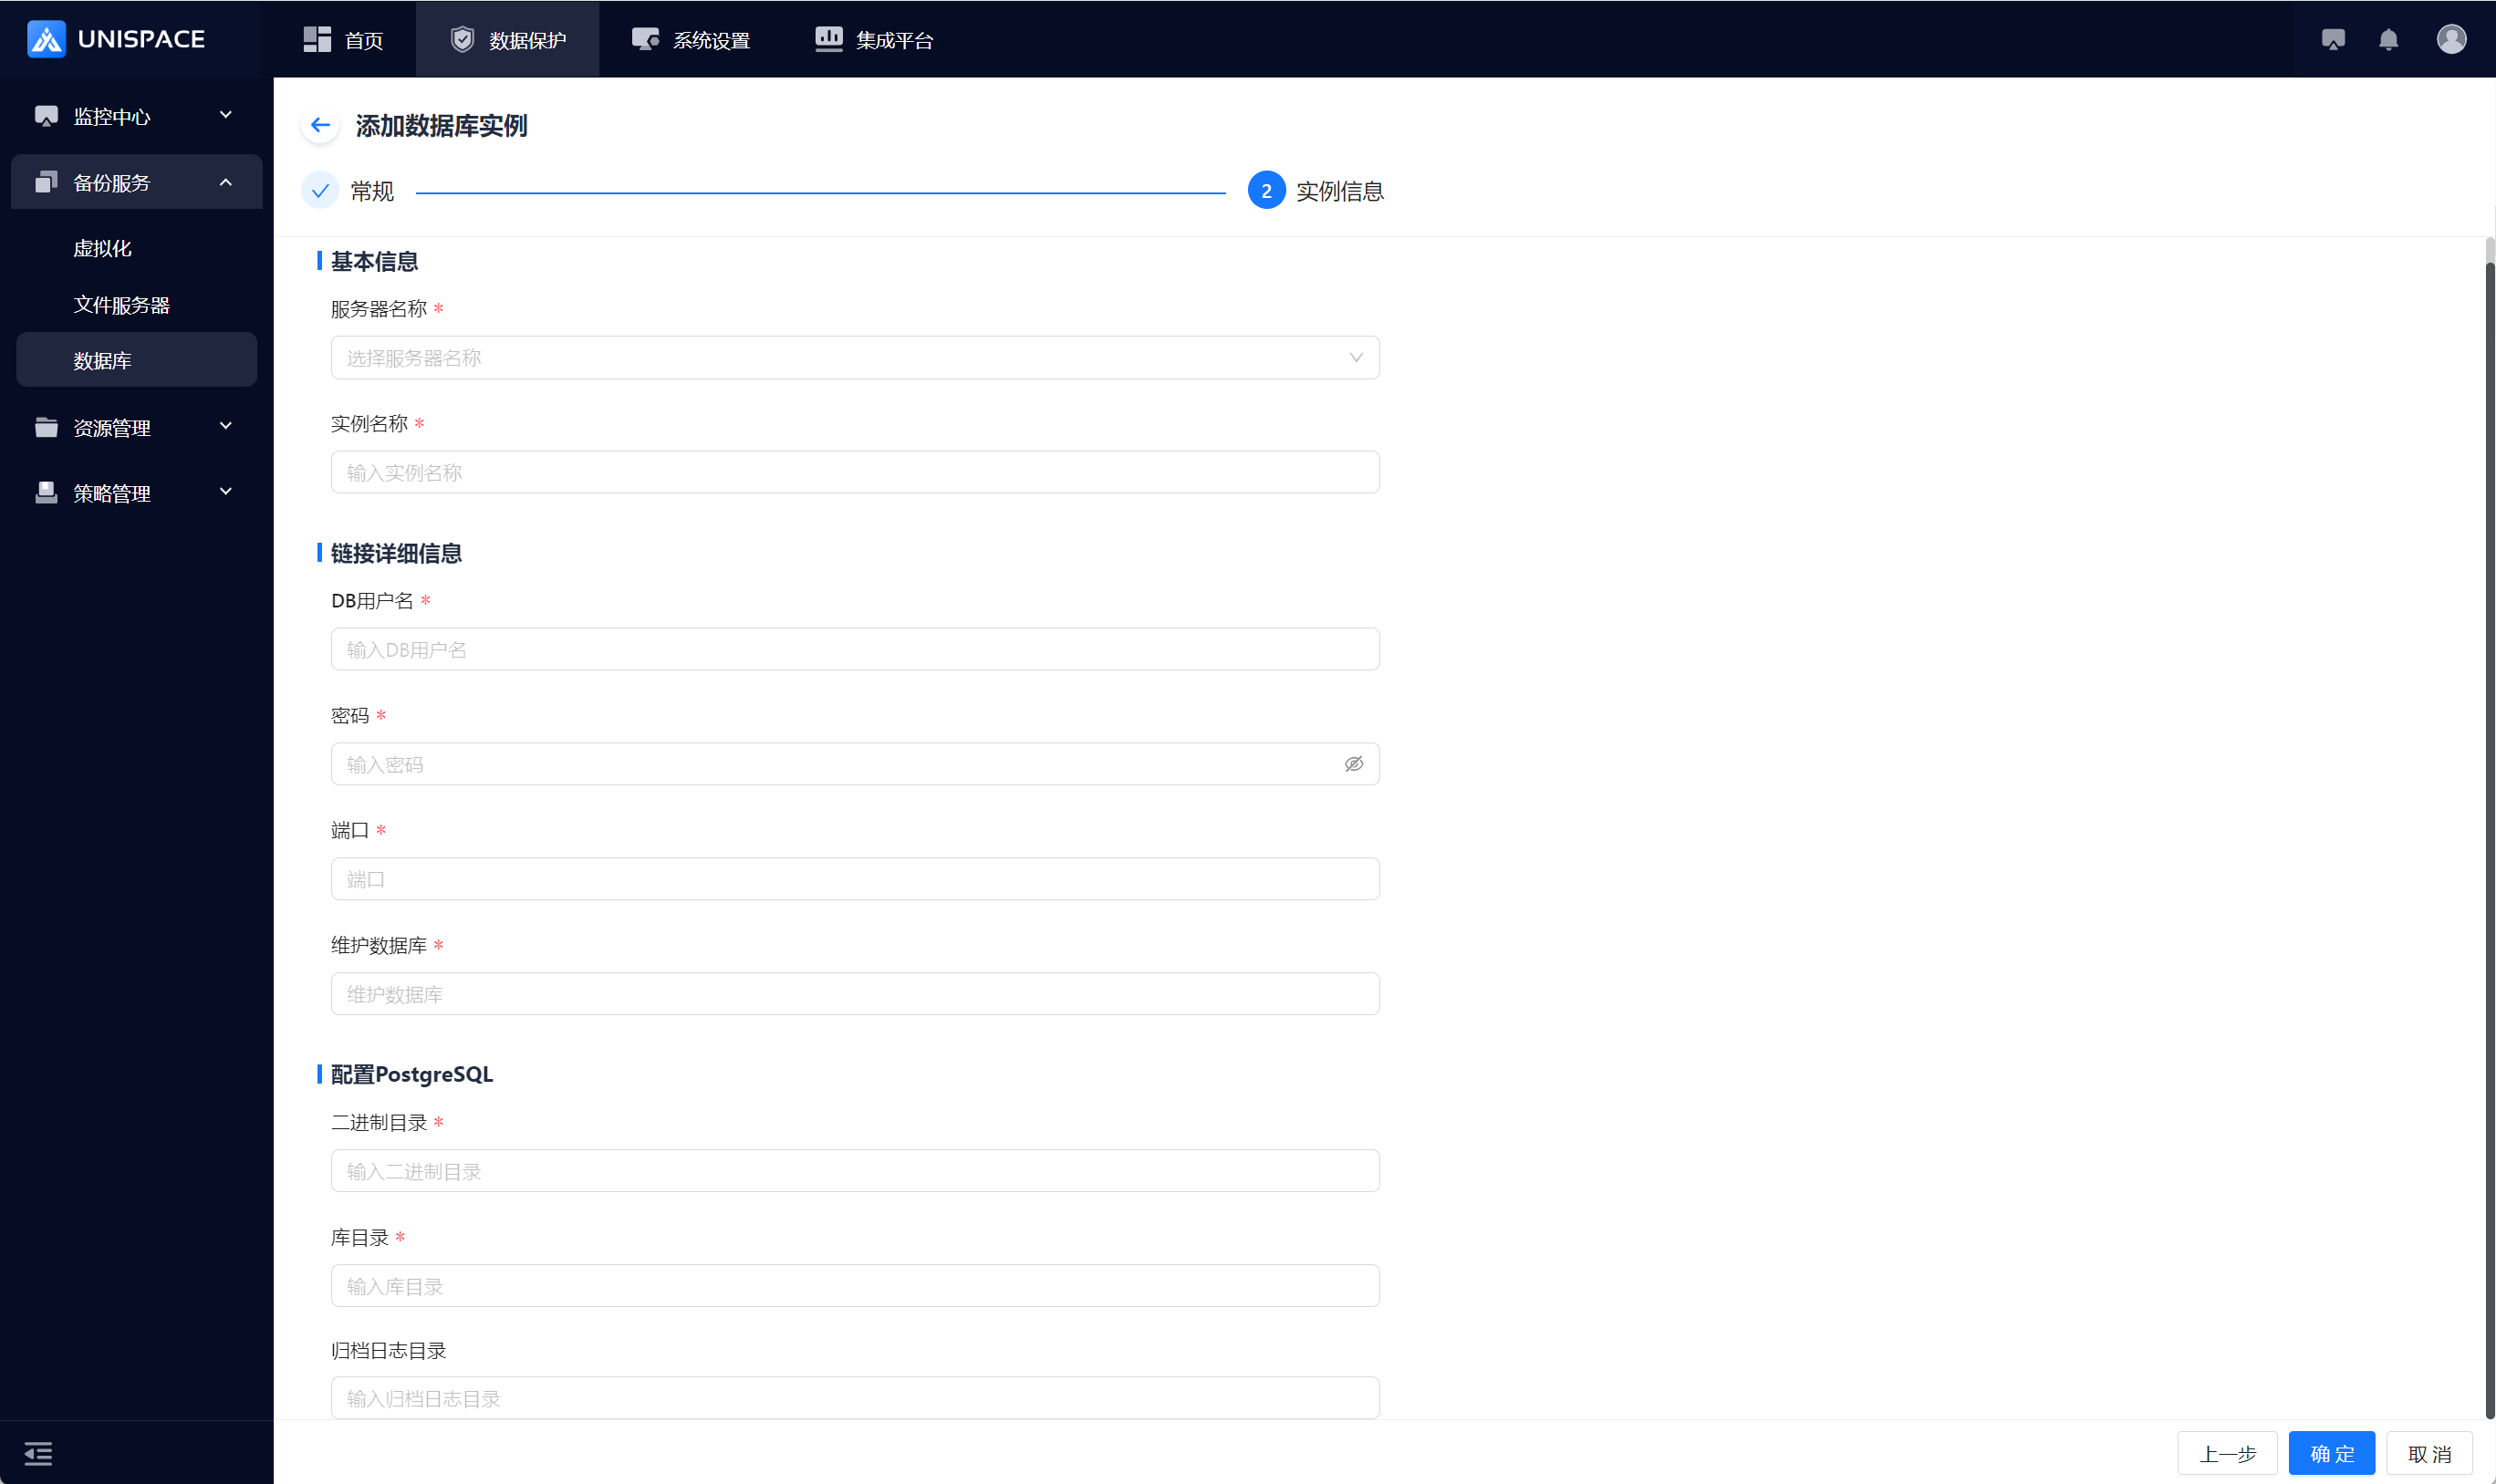
Step 4: Fill in the necessary parameters as shown below:
| Parameter Name | Parameter Description | Setting Principle |
|---|---|---|
| Database Type | Single selection, required, default is MySQL | Select PostgreSQL |
| Server Name | Single selection, required | Choose the server name where PG is located |
| Instance Name | Text input box, required, customizable | No length or special symbol restrictions |
| DB Username | Username input box, required | Enter PG username |
| Password | Password input box, required | Enter PG password |
| Port | Input box, required | Enter port number |
| Maintenance Database | Input box, required | Default value: postgres |
| Binary Directory | Input box, required | Enter the correct PG binary directory |
| Database Directory | Input box, required | Enter the correct PG database directory |
| Archive Log Directory | Input box | Enter the correct archive log directory |
Step 5: Click the OK button. A success message will appear.
1.2 Create a New PG Backup Object Set
Prerequisites
- A new PG instance has been created.
Steps
Step 1: Click on the system menu Backup Service - Database - Server Name under the list of data - Backup Set.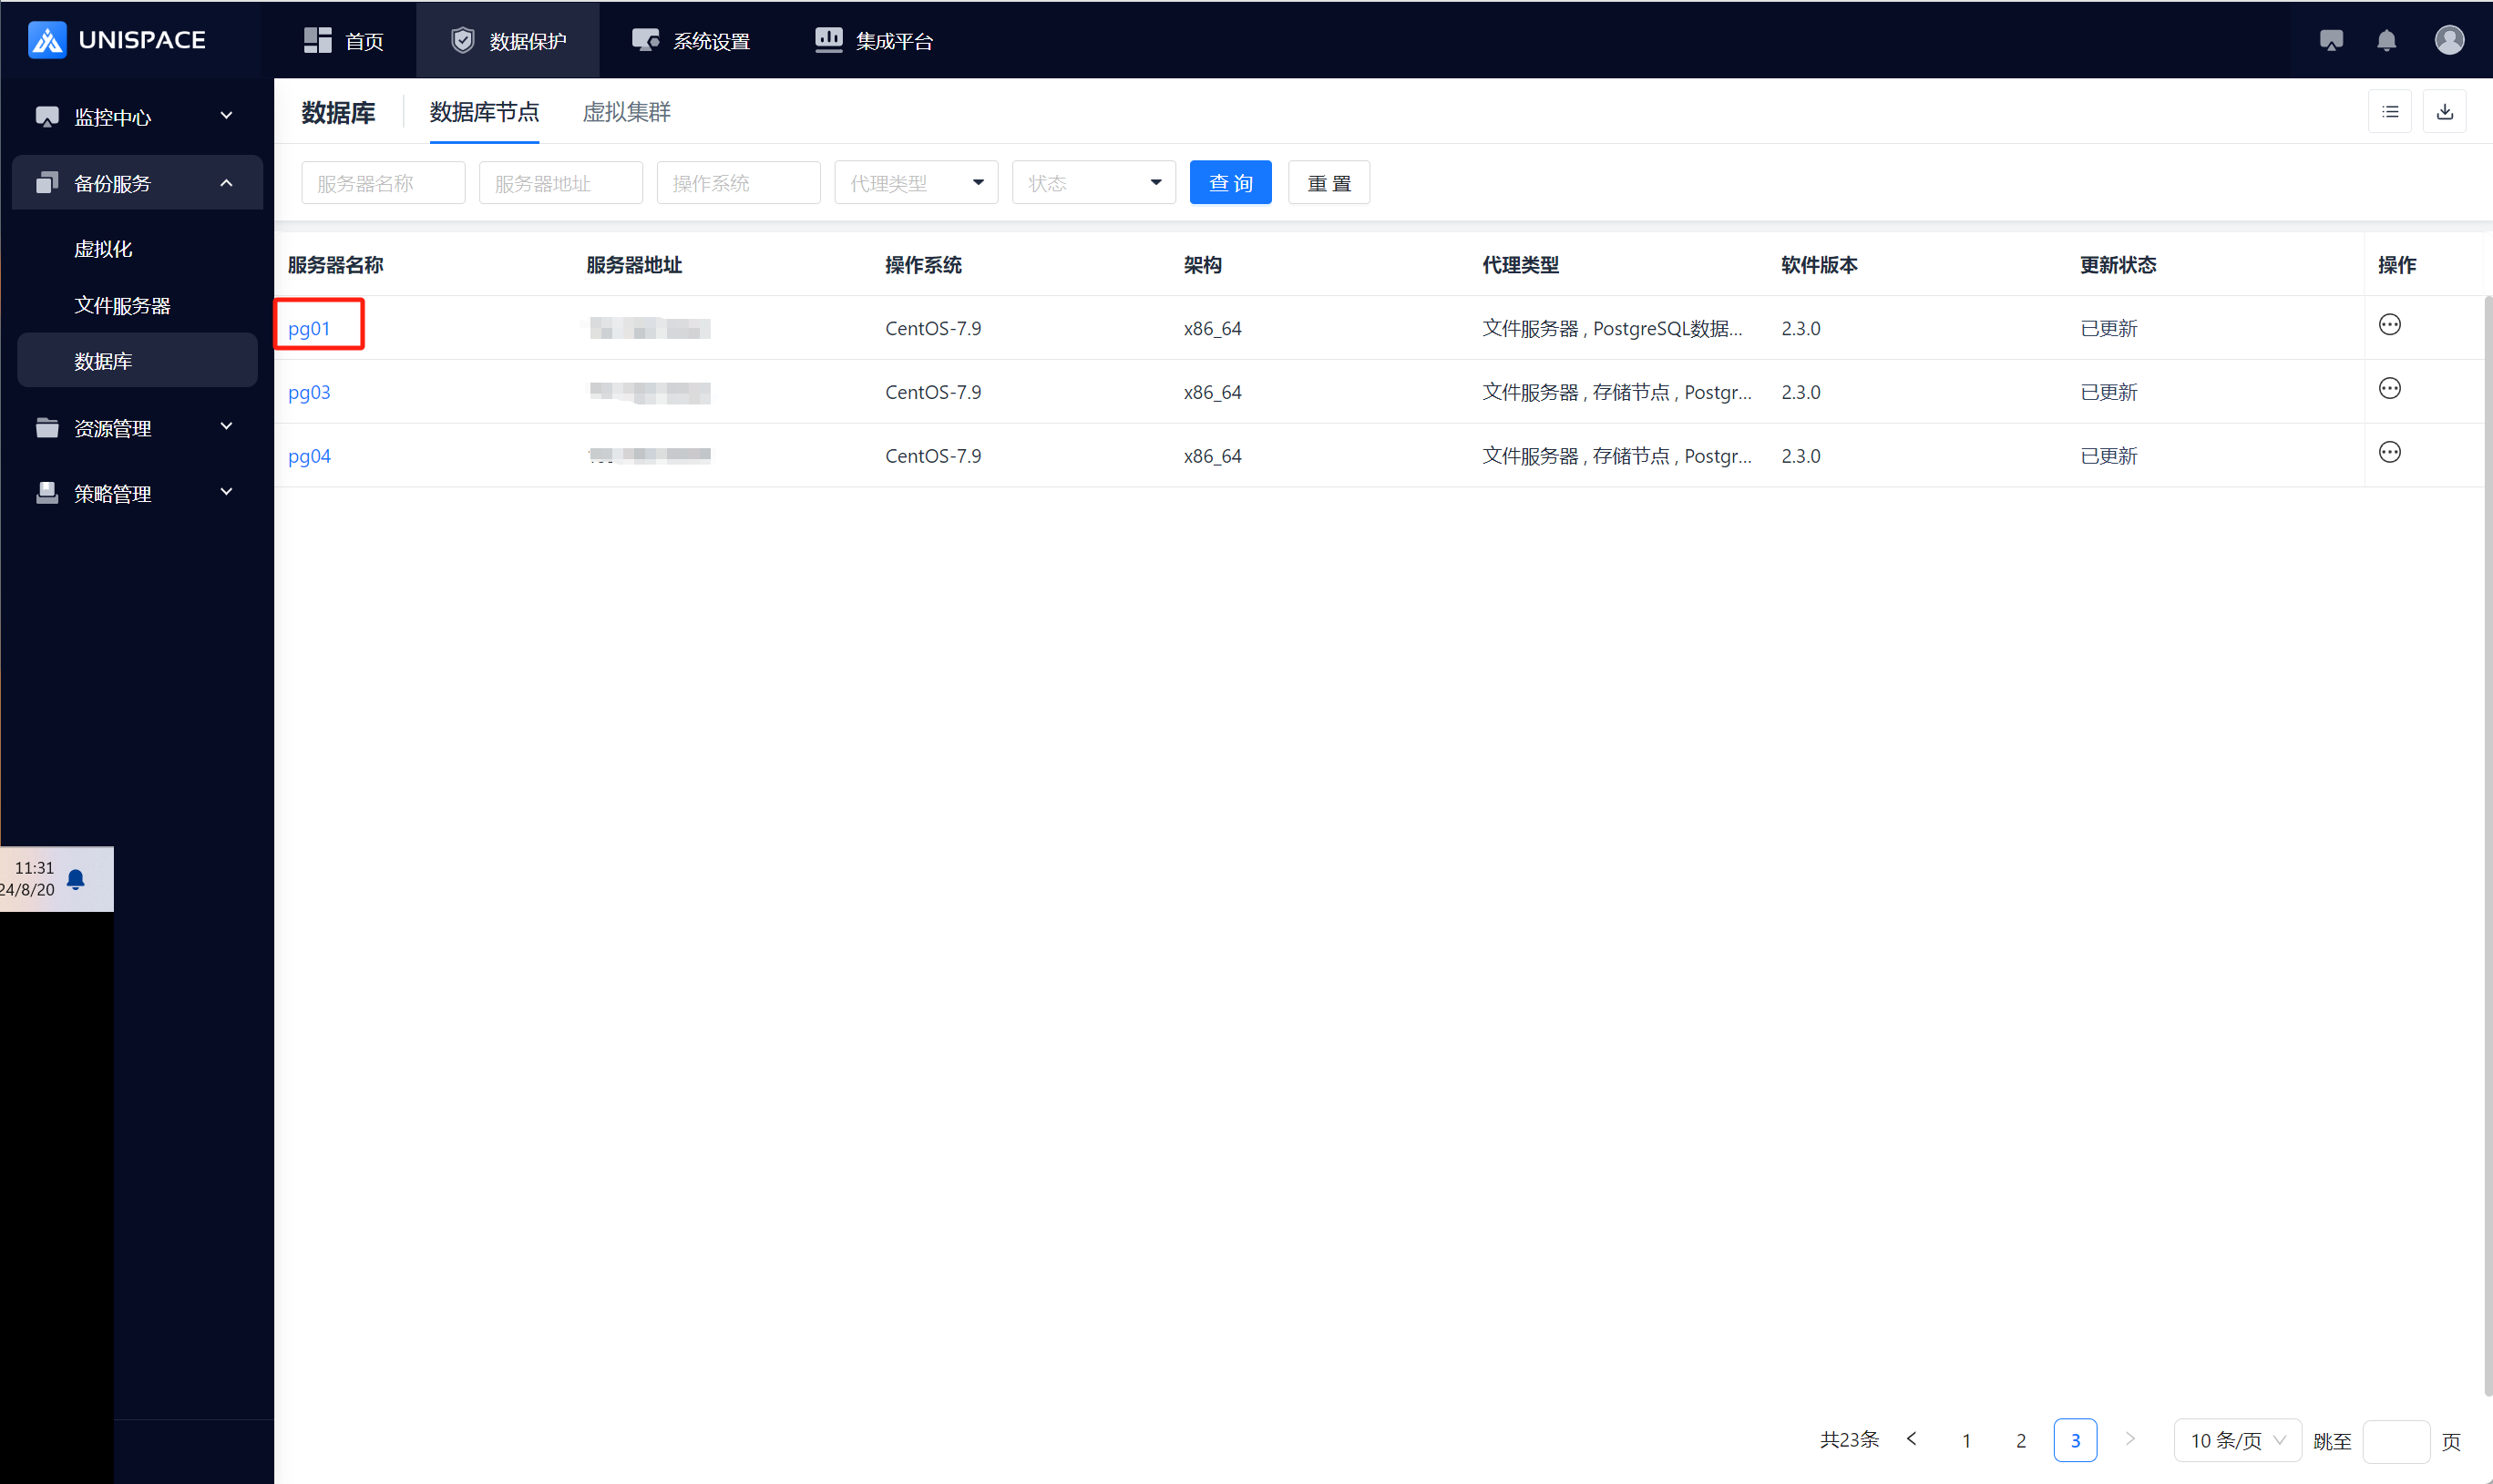
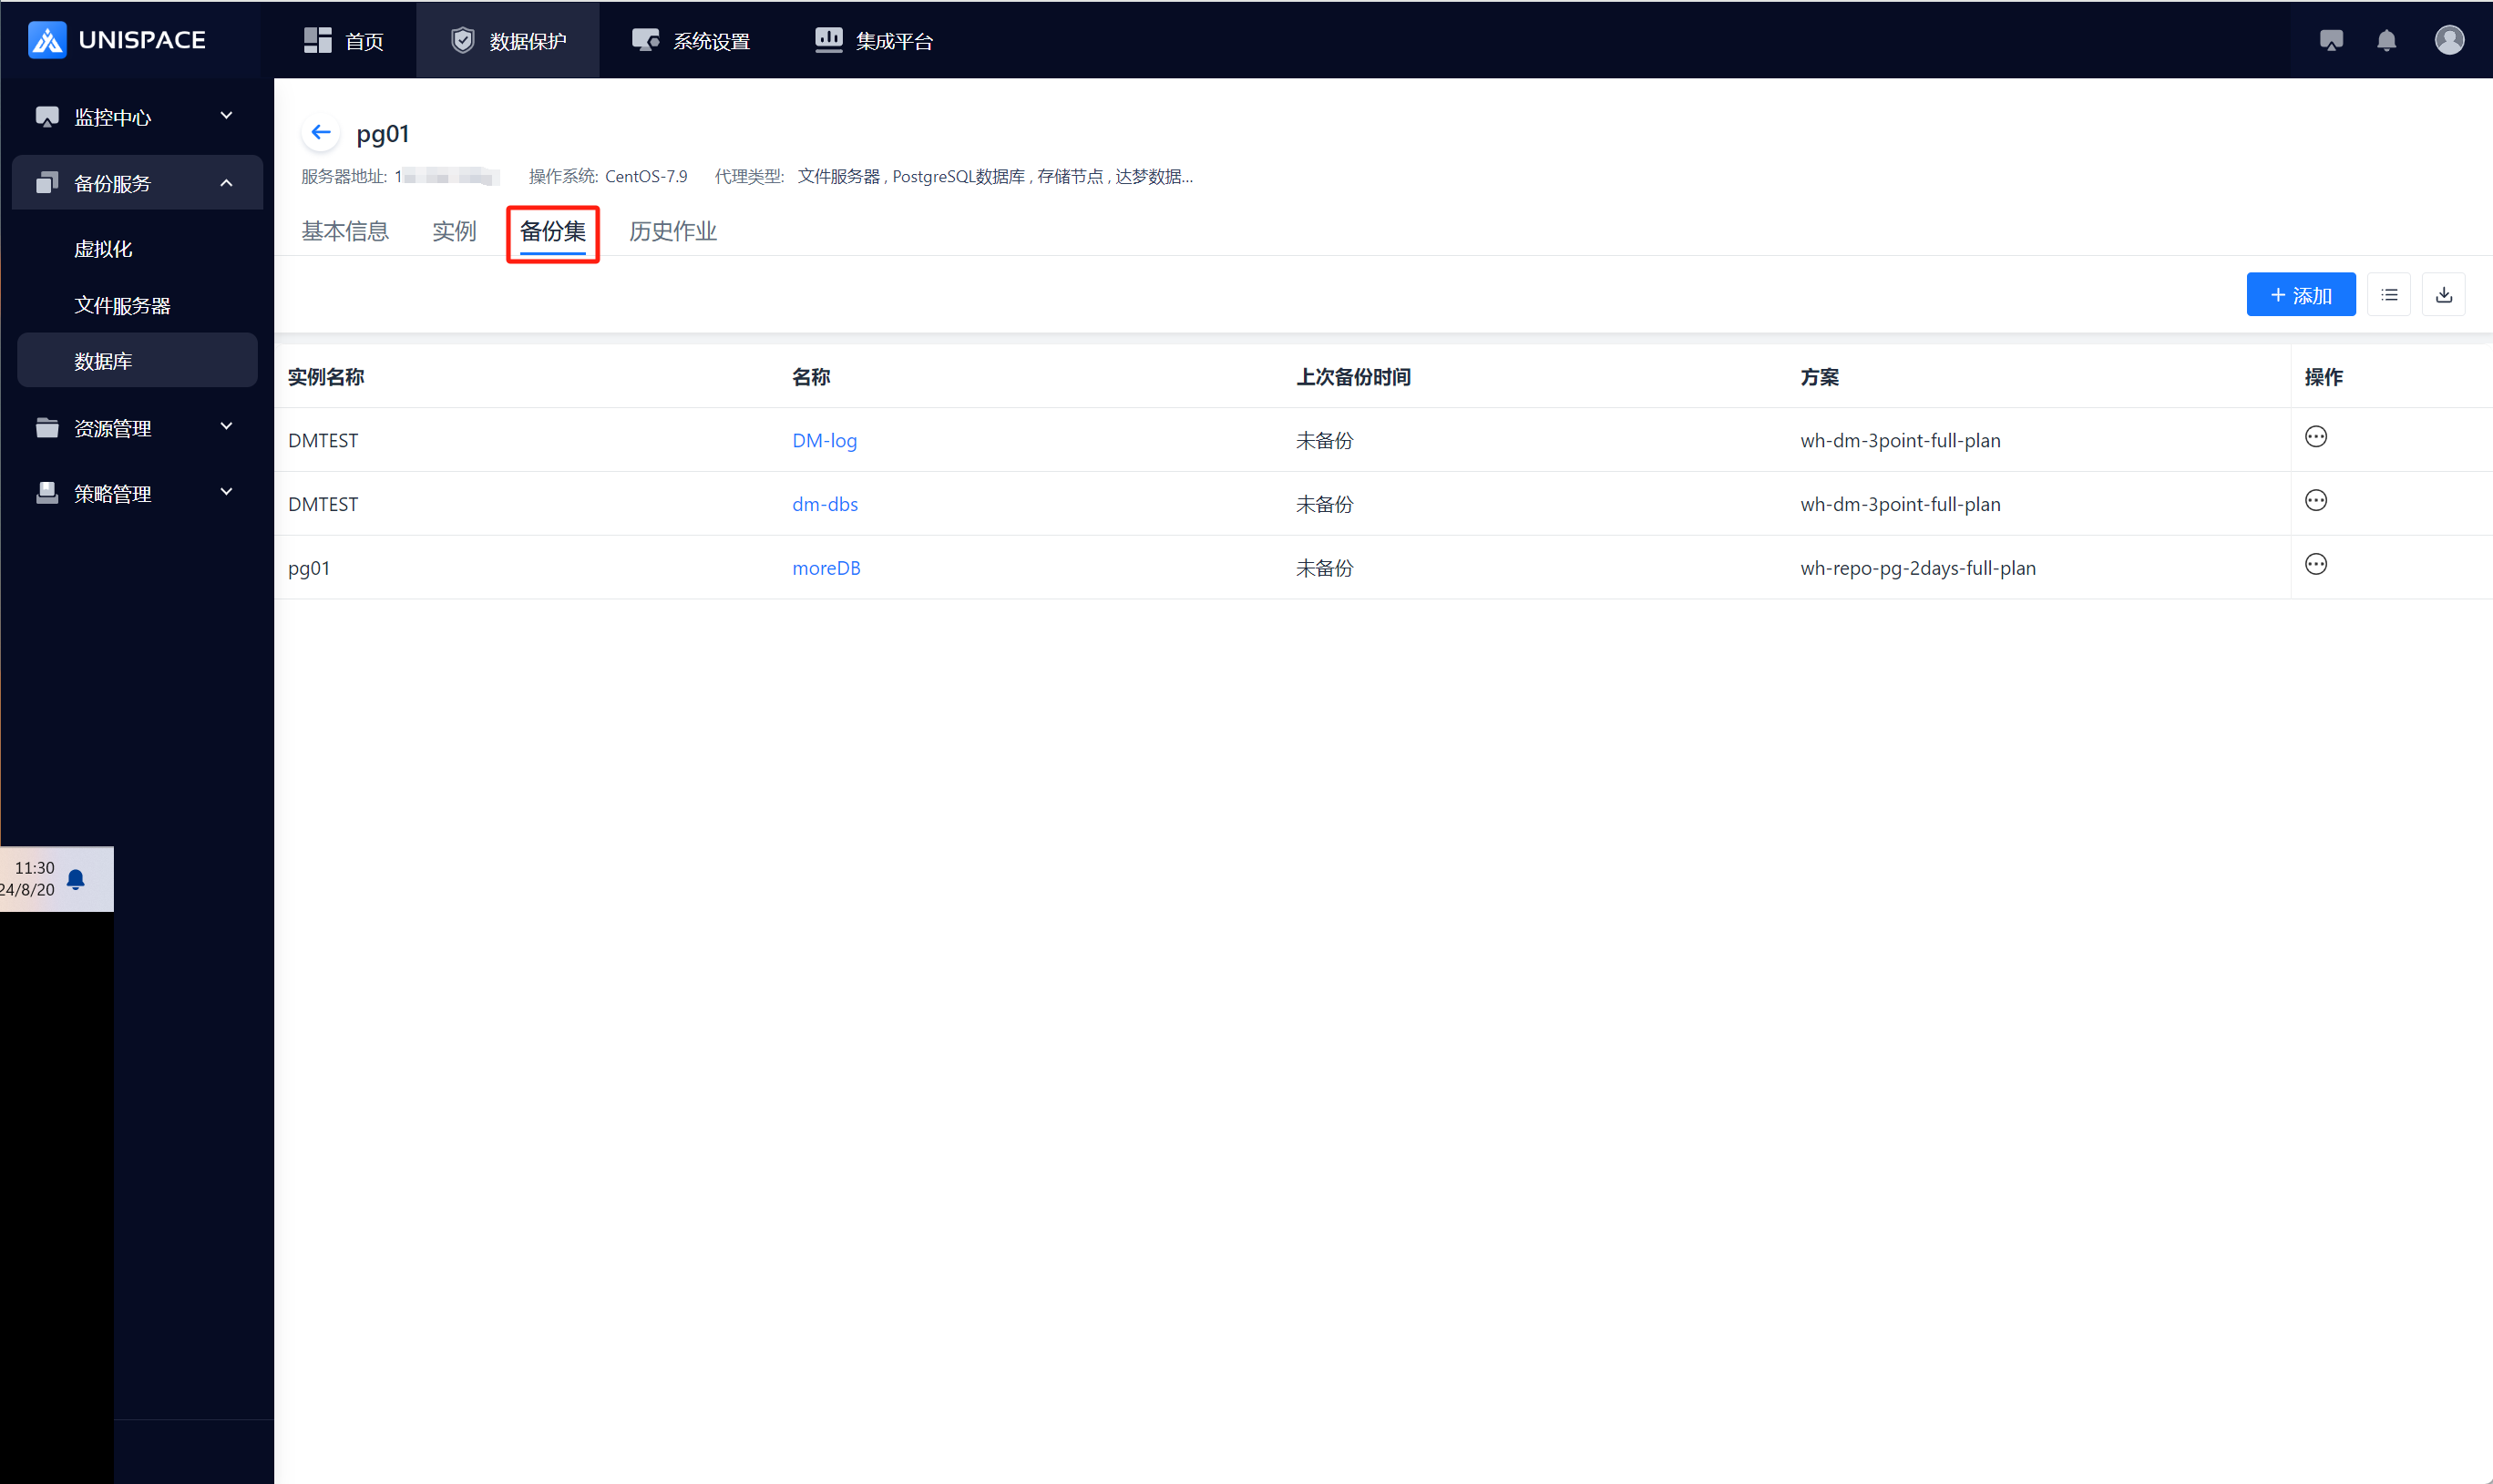
Step 2: Click the Add button in the upper right corner of Backup Set, and a pop-up window will appear: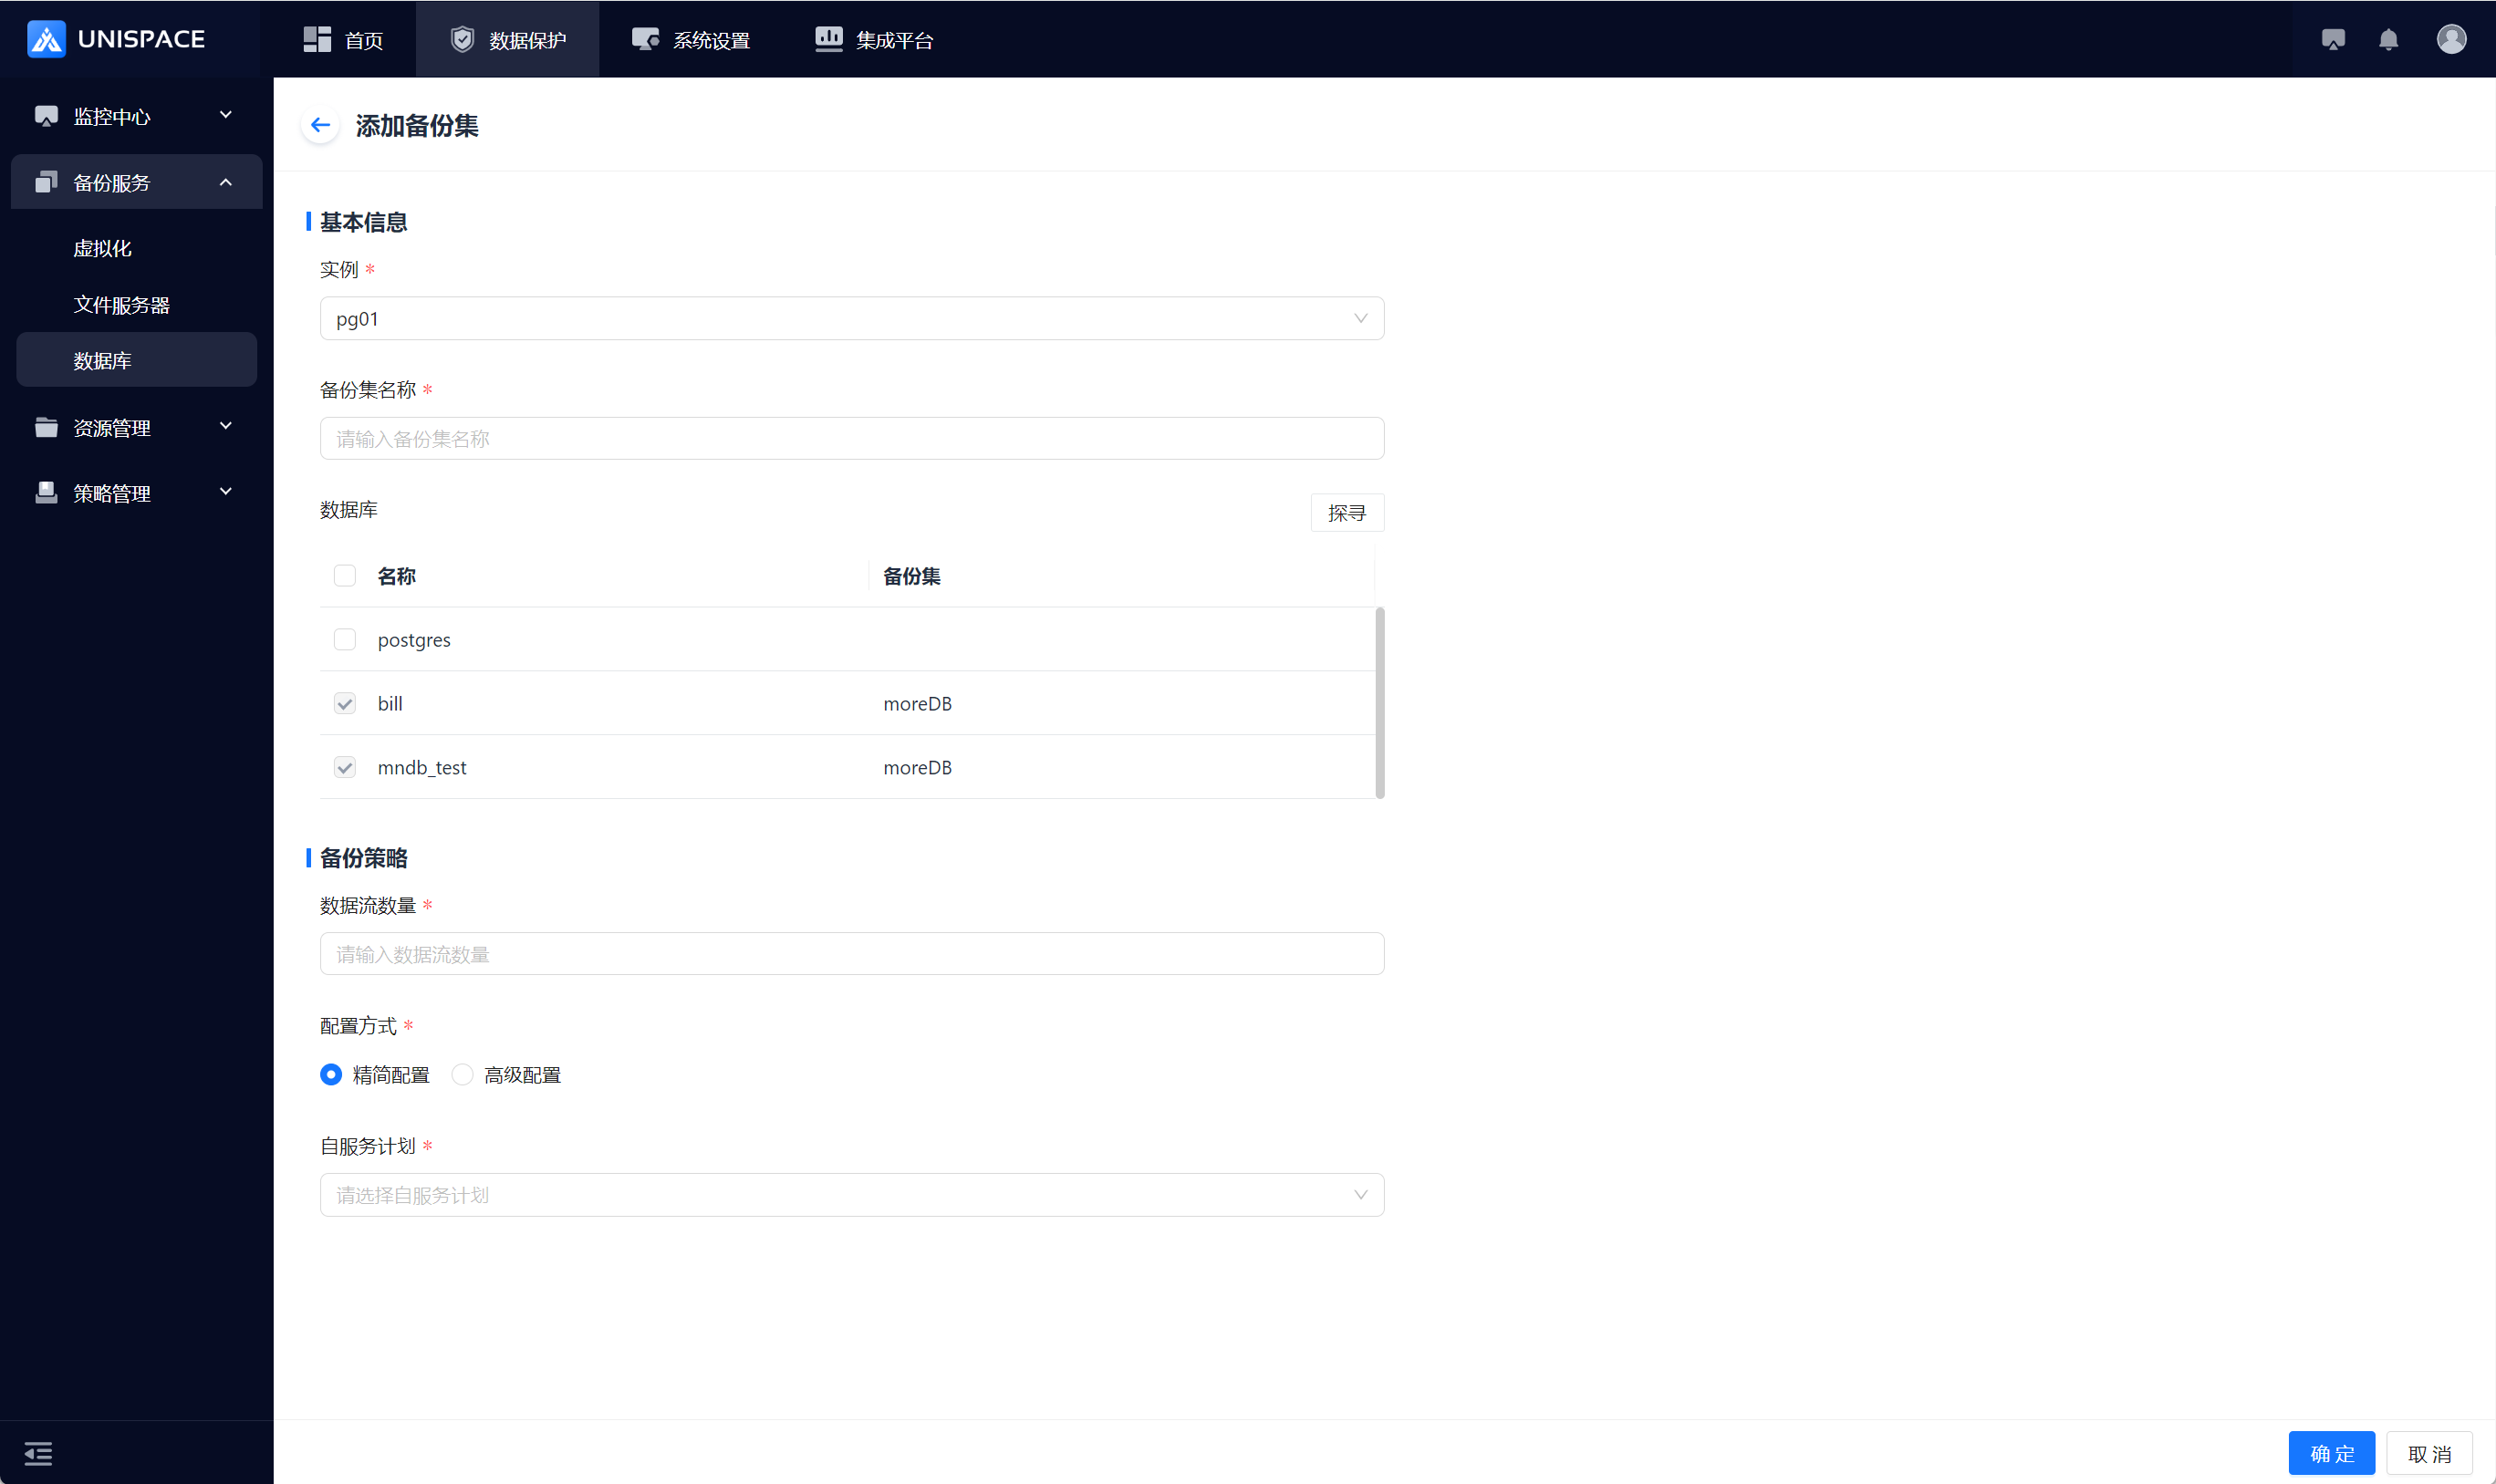
Step 3: Fill in the necessary parameters as shown below:
| Parameter Name | Parameter Description | Setting Principle |
|---|---|---|
| Instance | Single selection, required, can choose the current Oracle instance | Default: not selected |
| Backup Set Name | Text input box, required | No more than 50 characters, special symbols not allowed |
| Database | Default shows all databases | All databases except "postgres" are greyed out |
| Data Stream Count | Numeric type | The number will not exceed 200 |
| Configuration Mode | Single selection, required | Choose between Simple Configuration or Advanced Configuration |
| Self-Service Plan | Single selection, required | Select the appropriate plan |
Step 4: Click the OK button. A success message will appear.
1.3 PG Database Backup
Prerequisites
- A PG backup set has been configured.
Steps
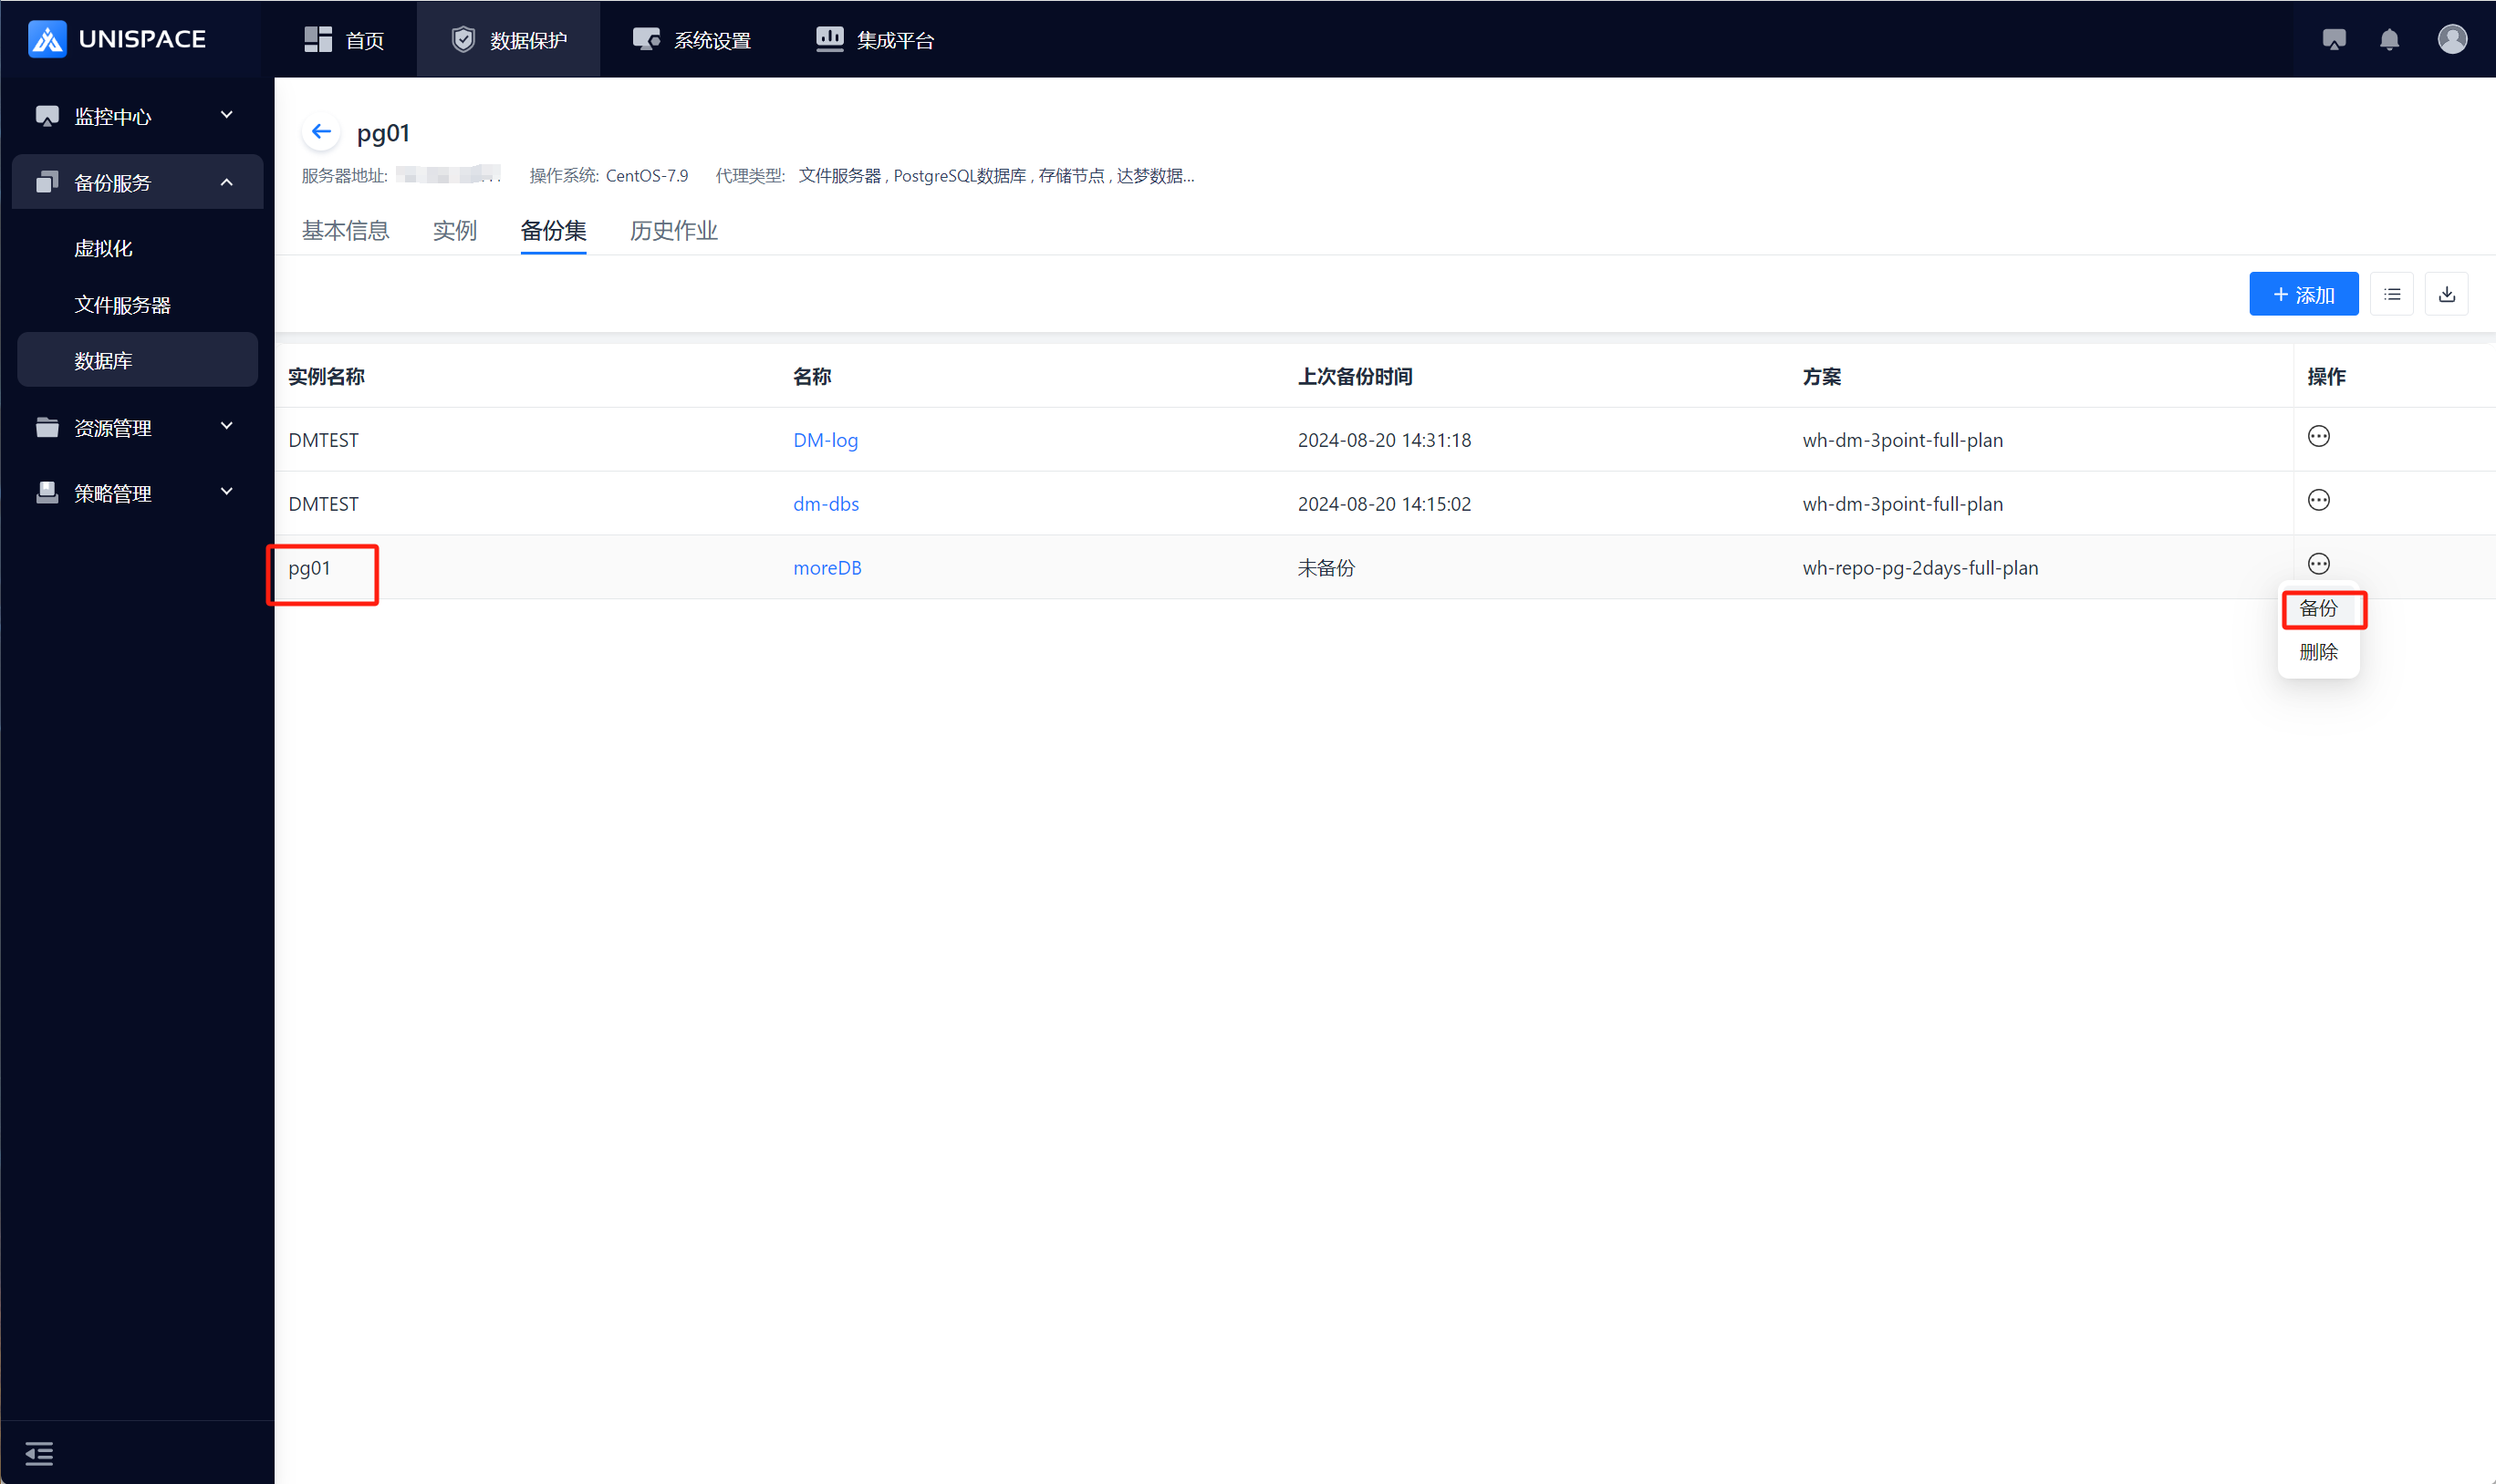
Step 1: Click on the system menu Backup Service - Database - Server Name list - Backup Set.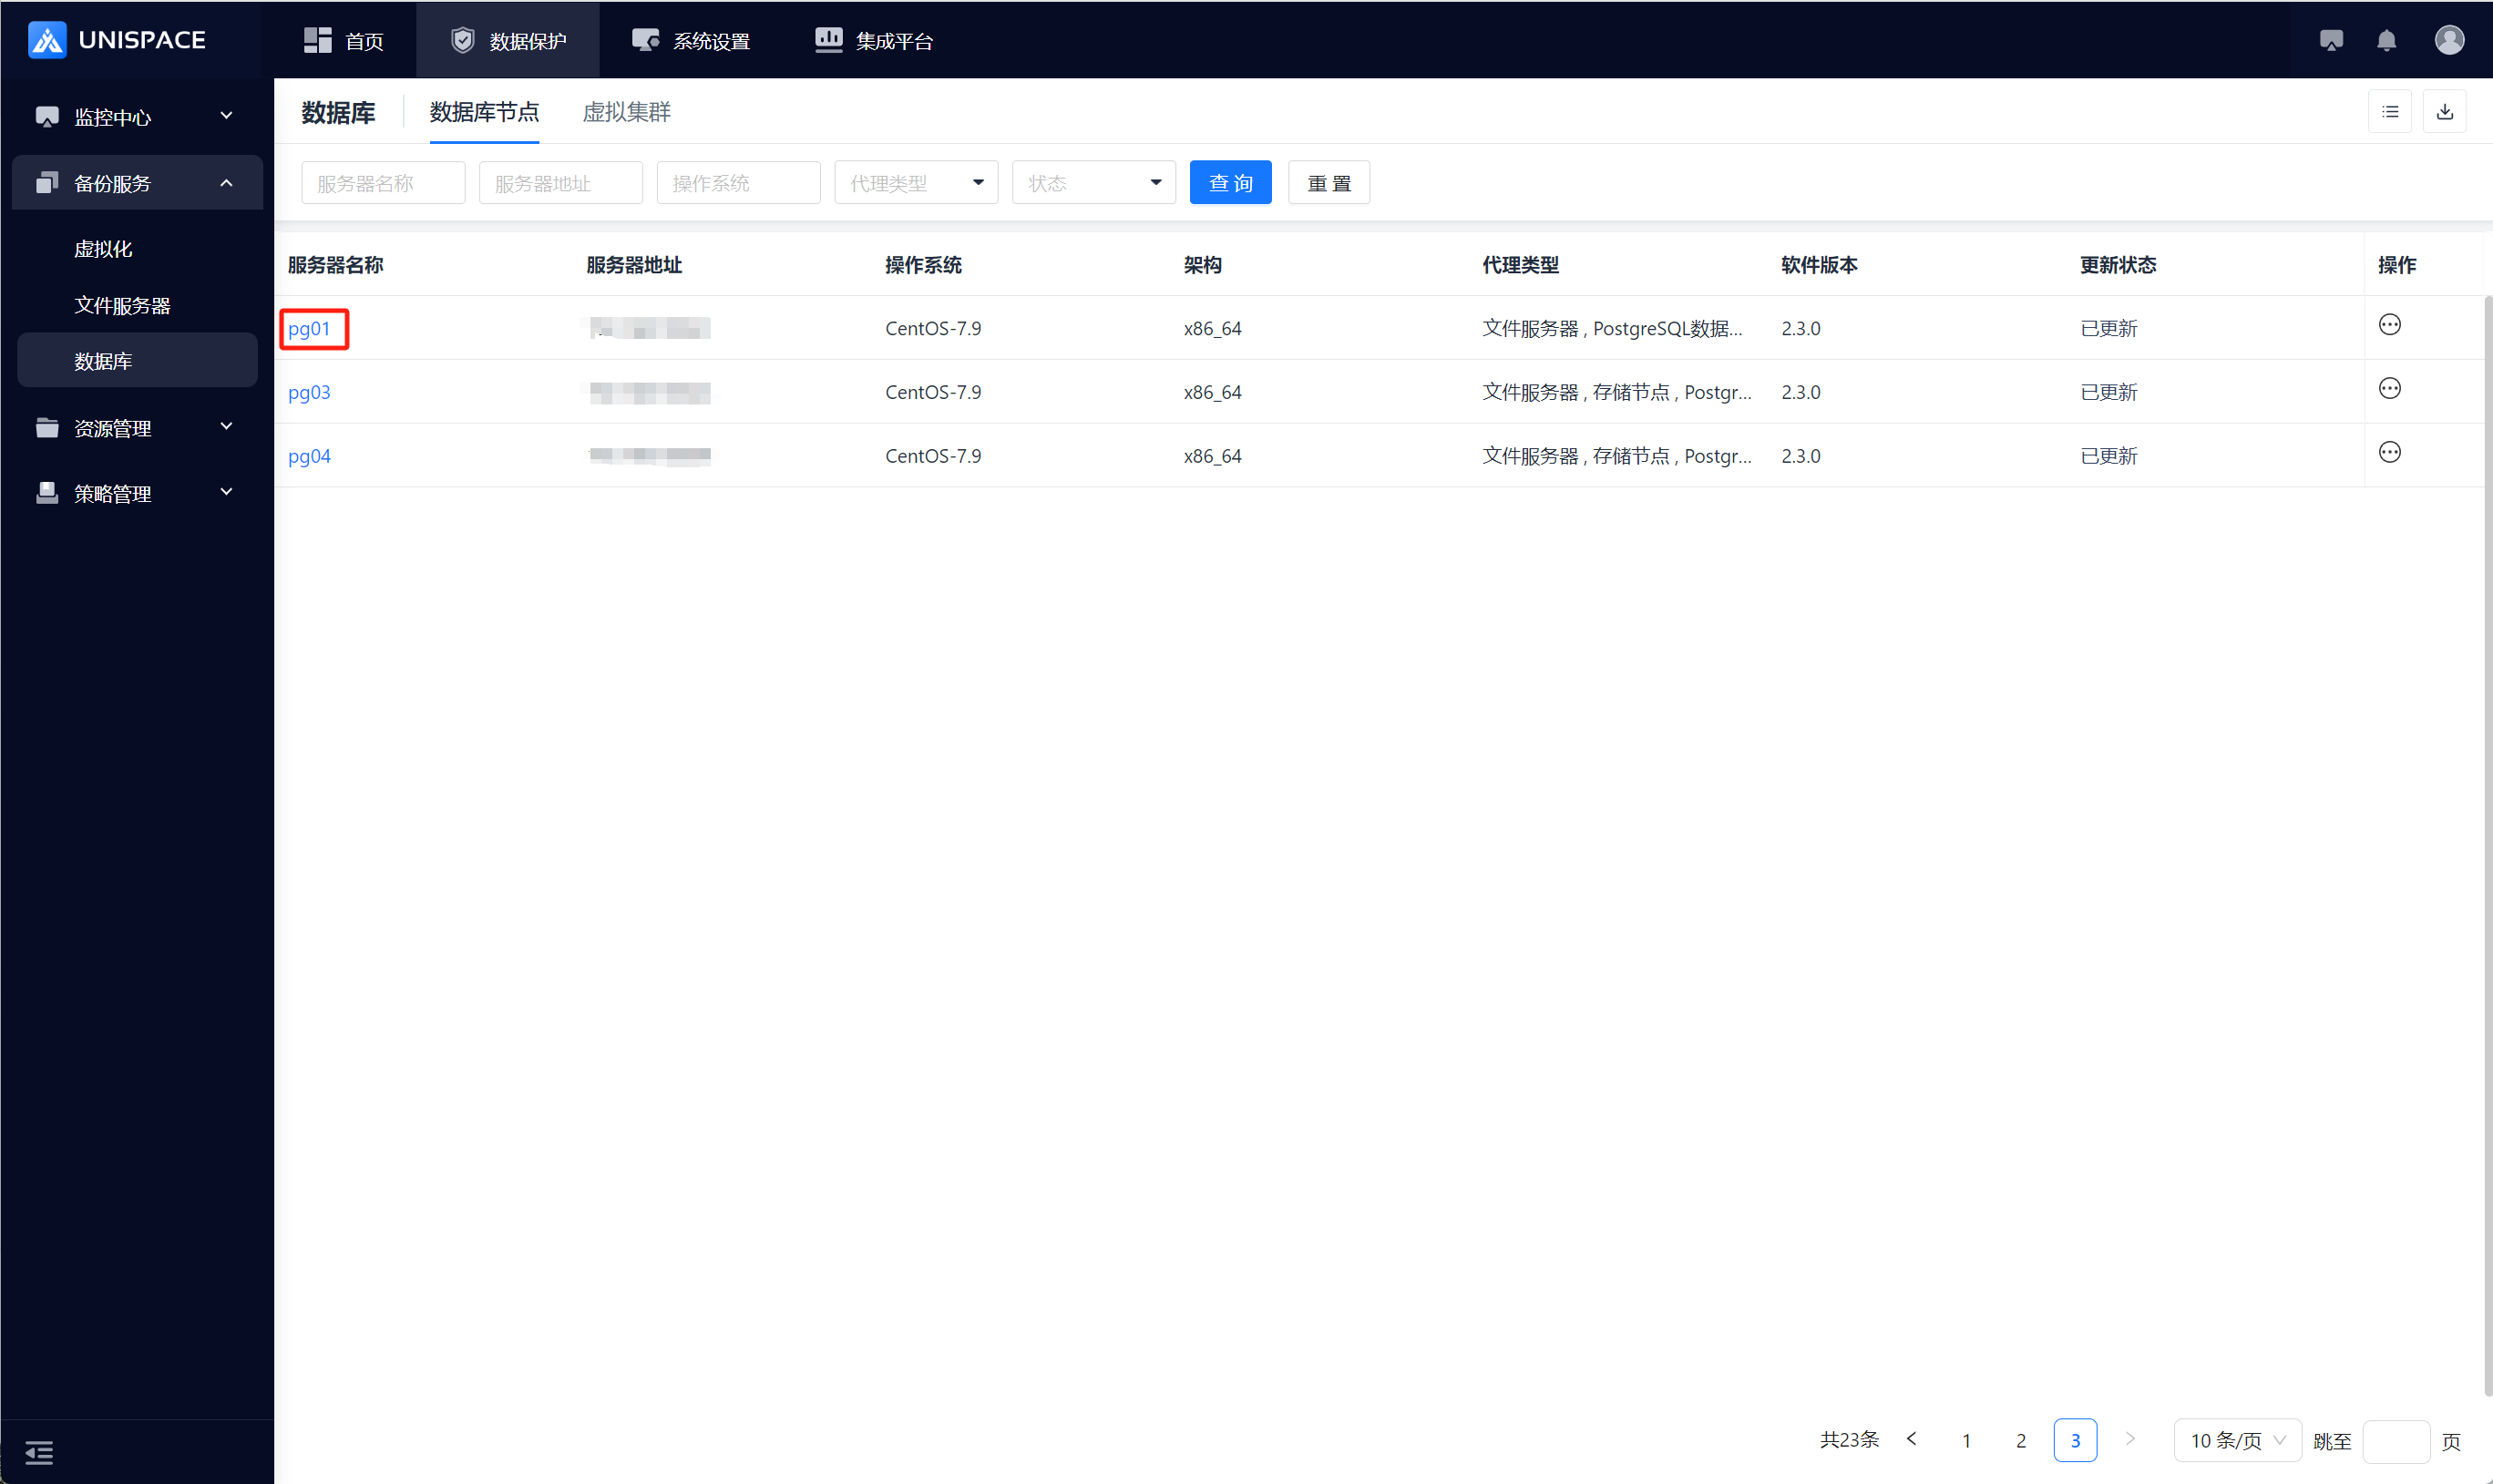
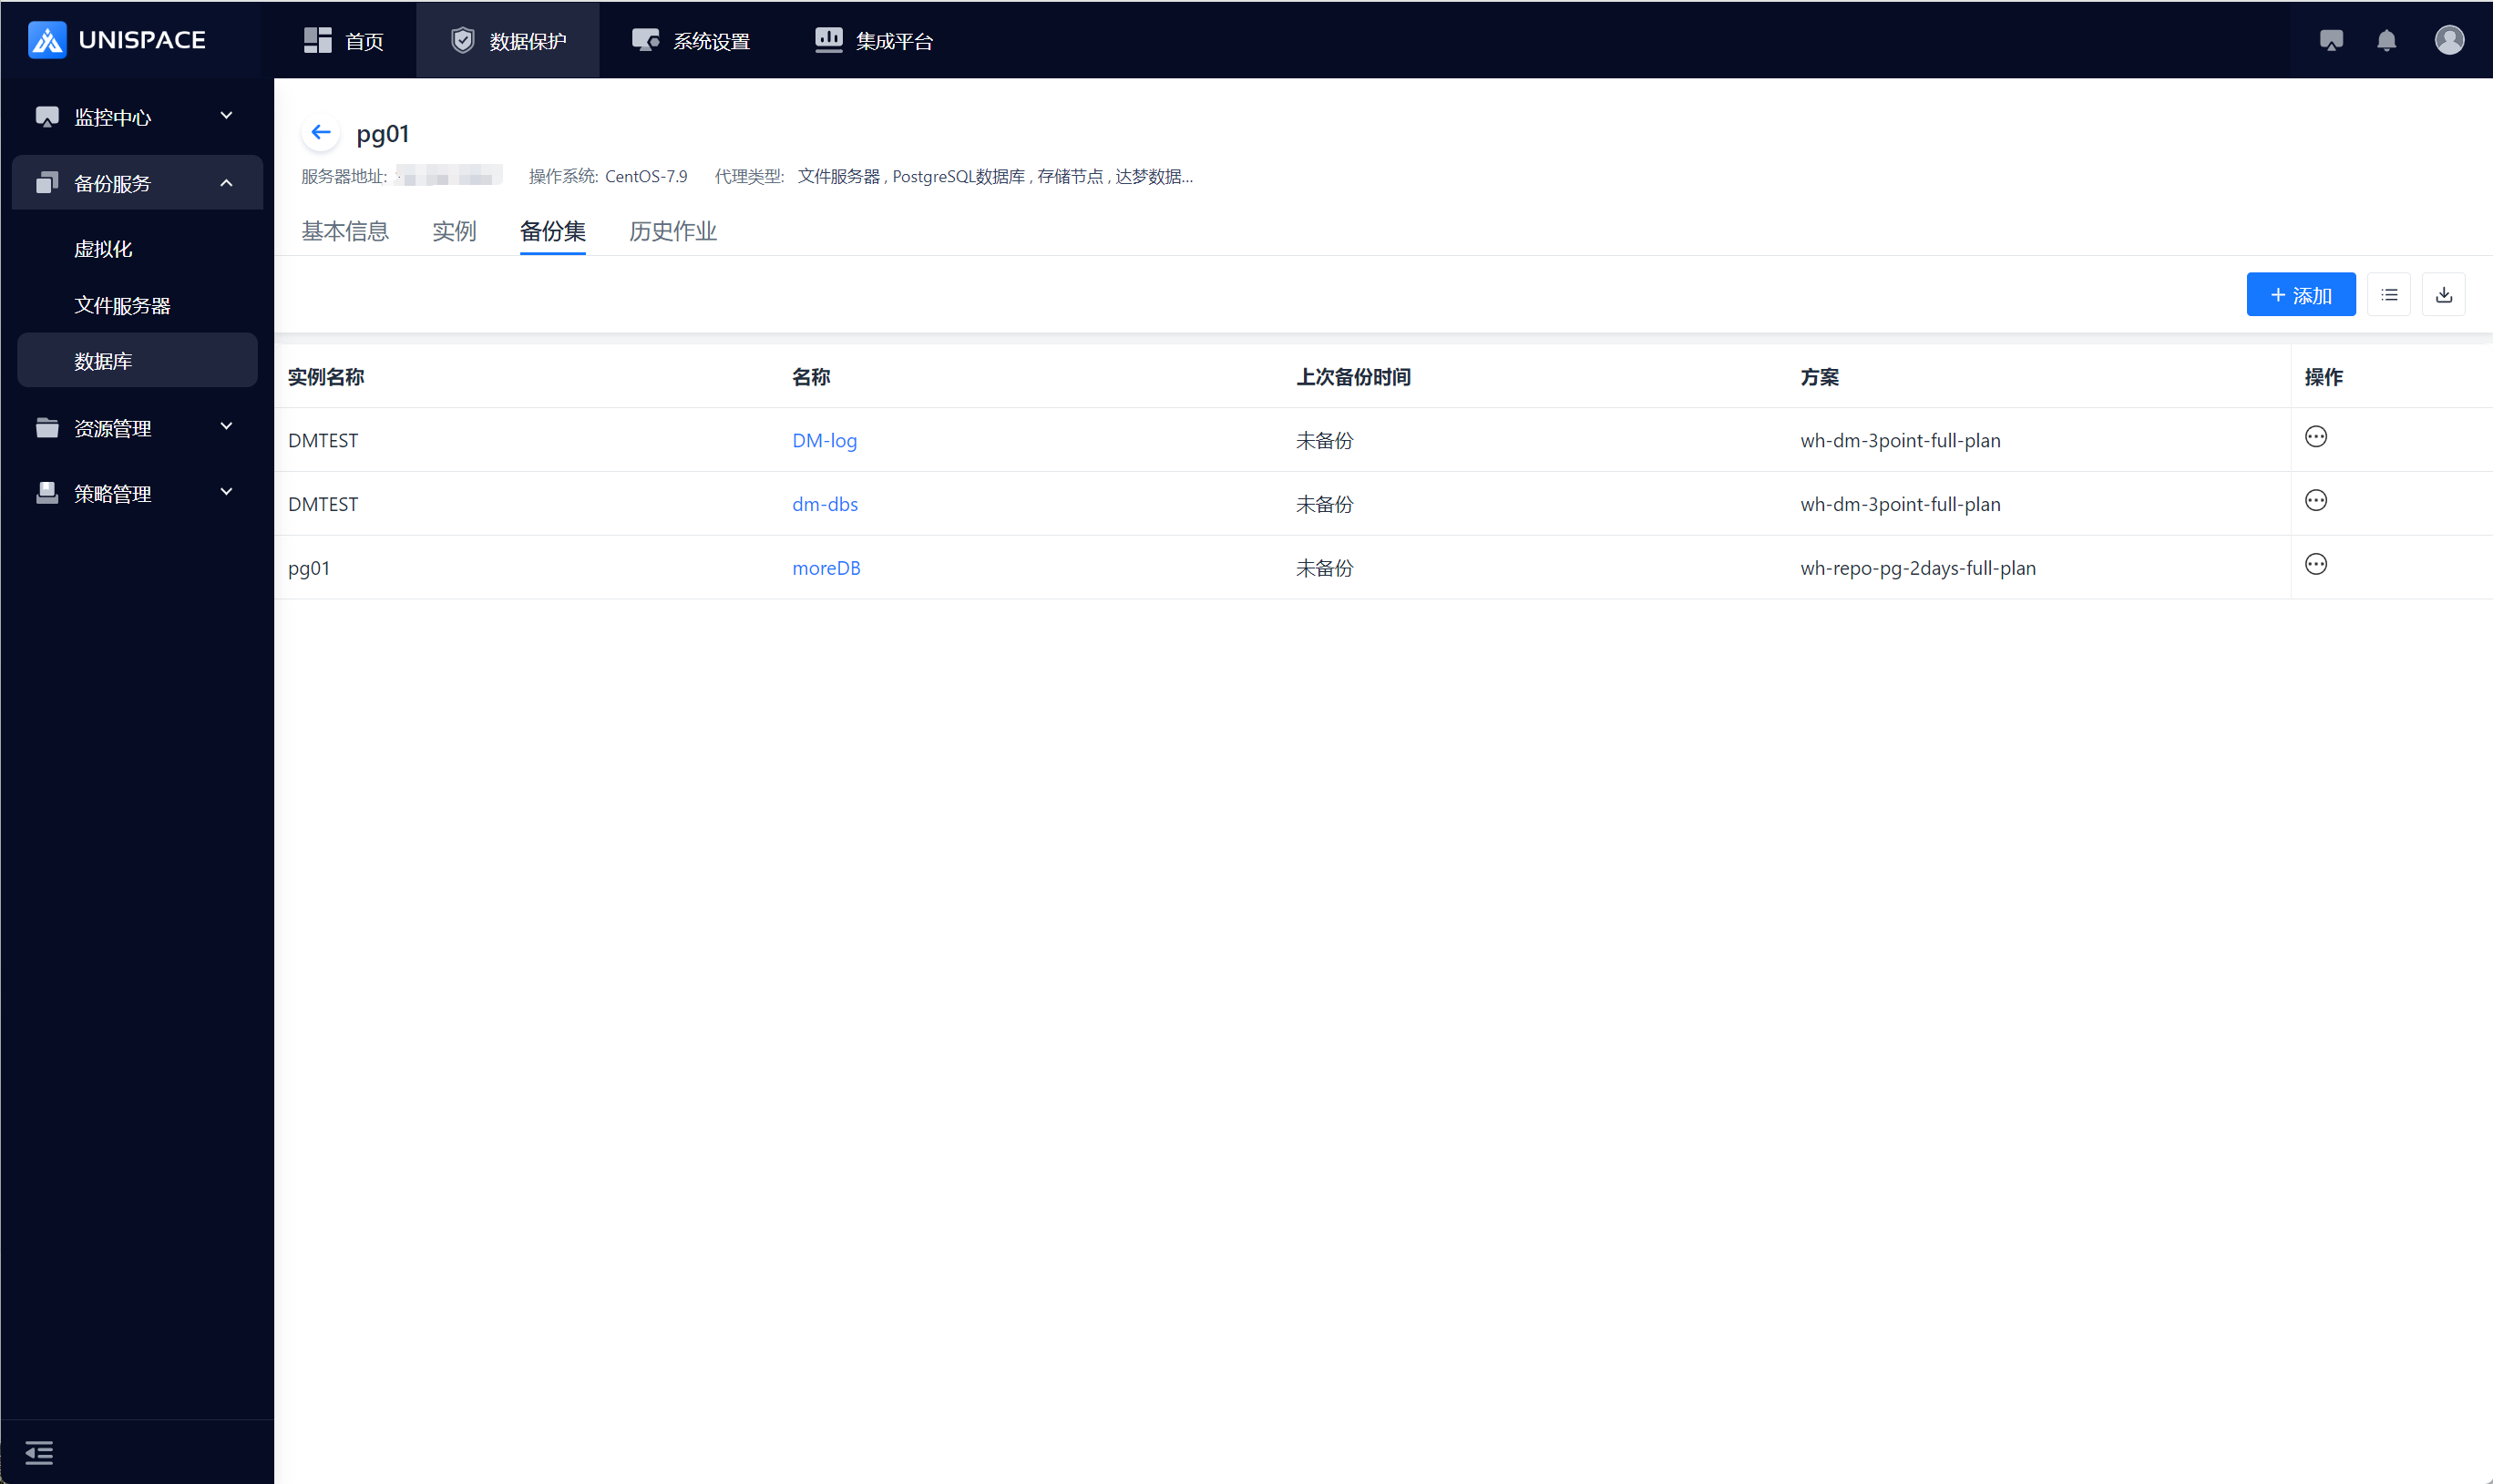
Step 2: Select the backup set, click Backup under the Operation column.
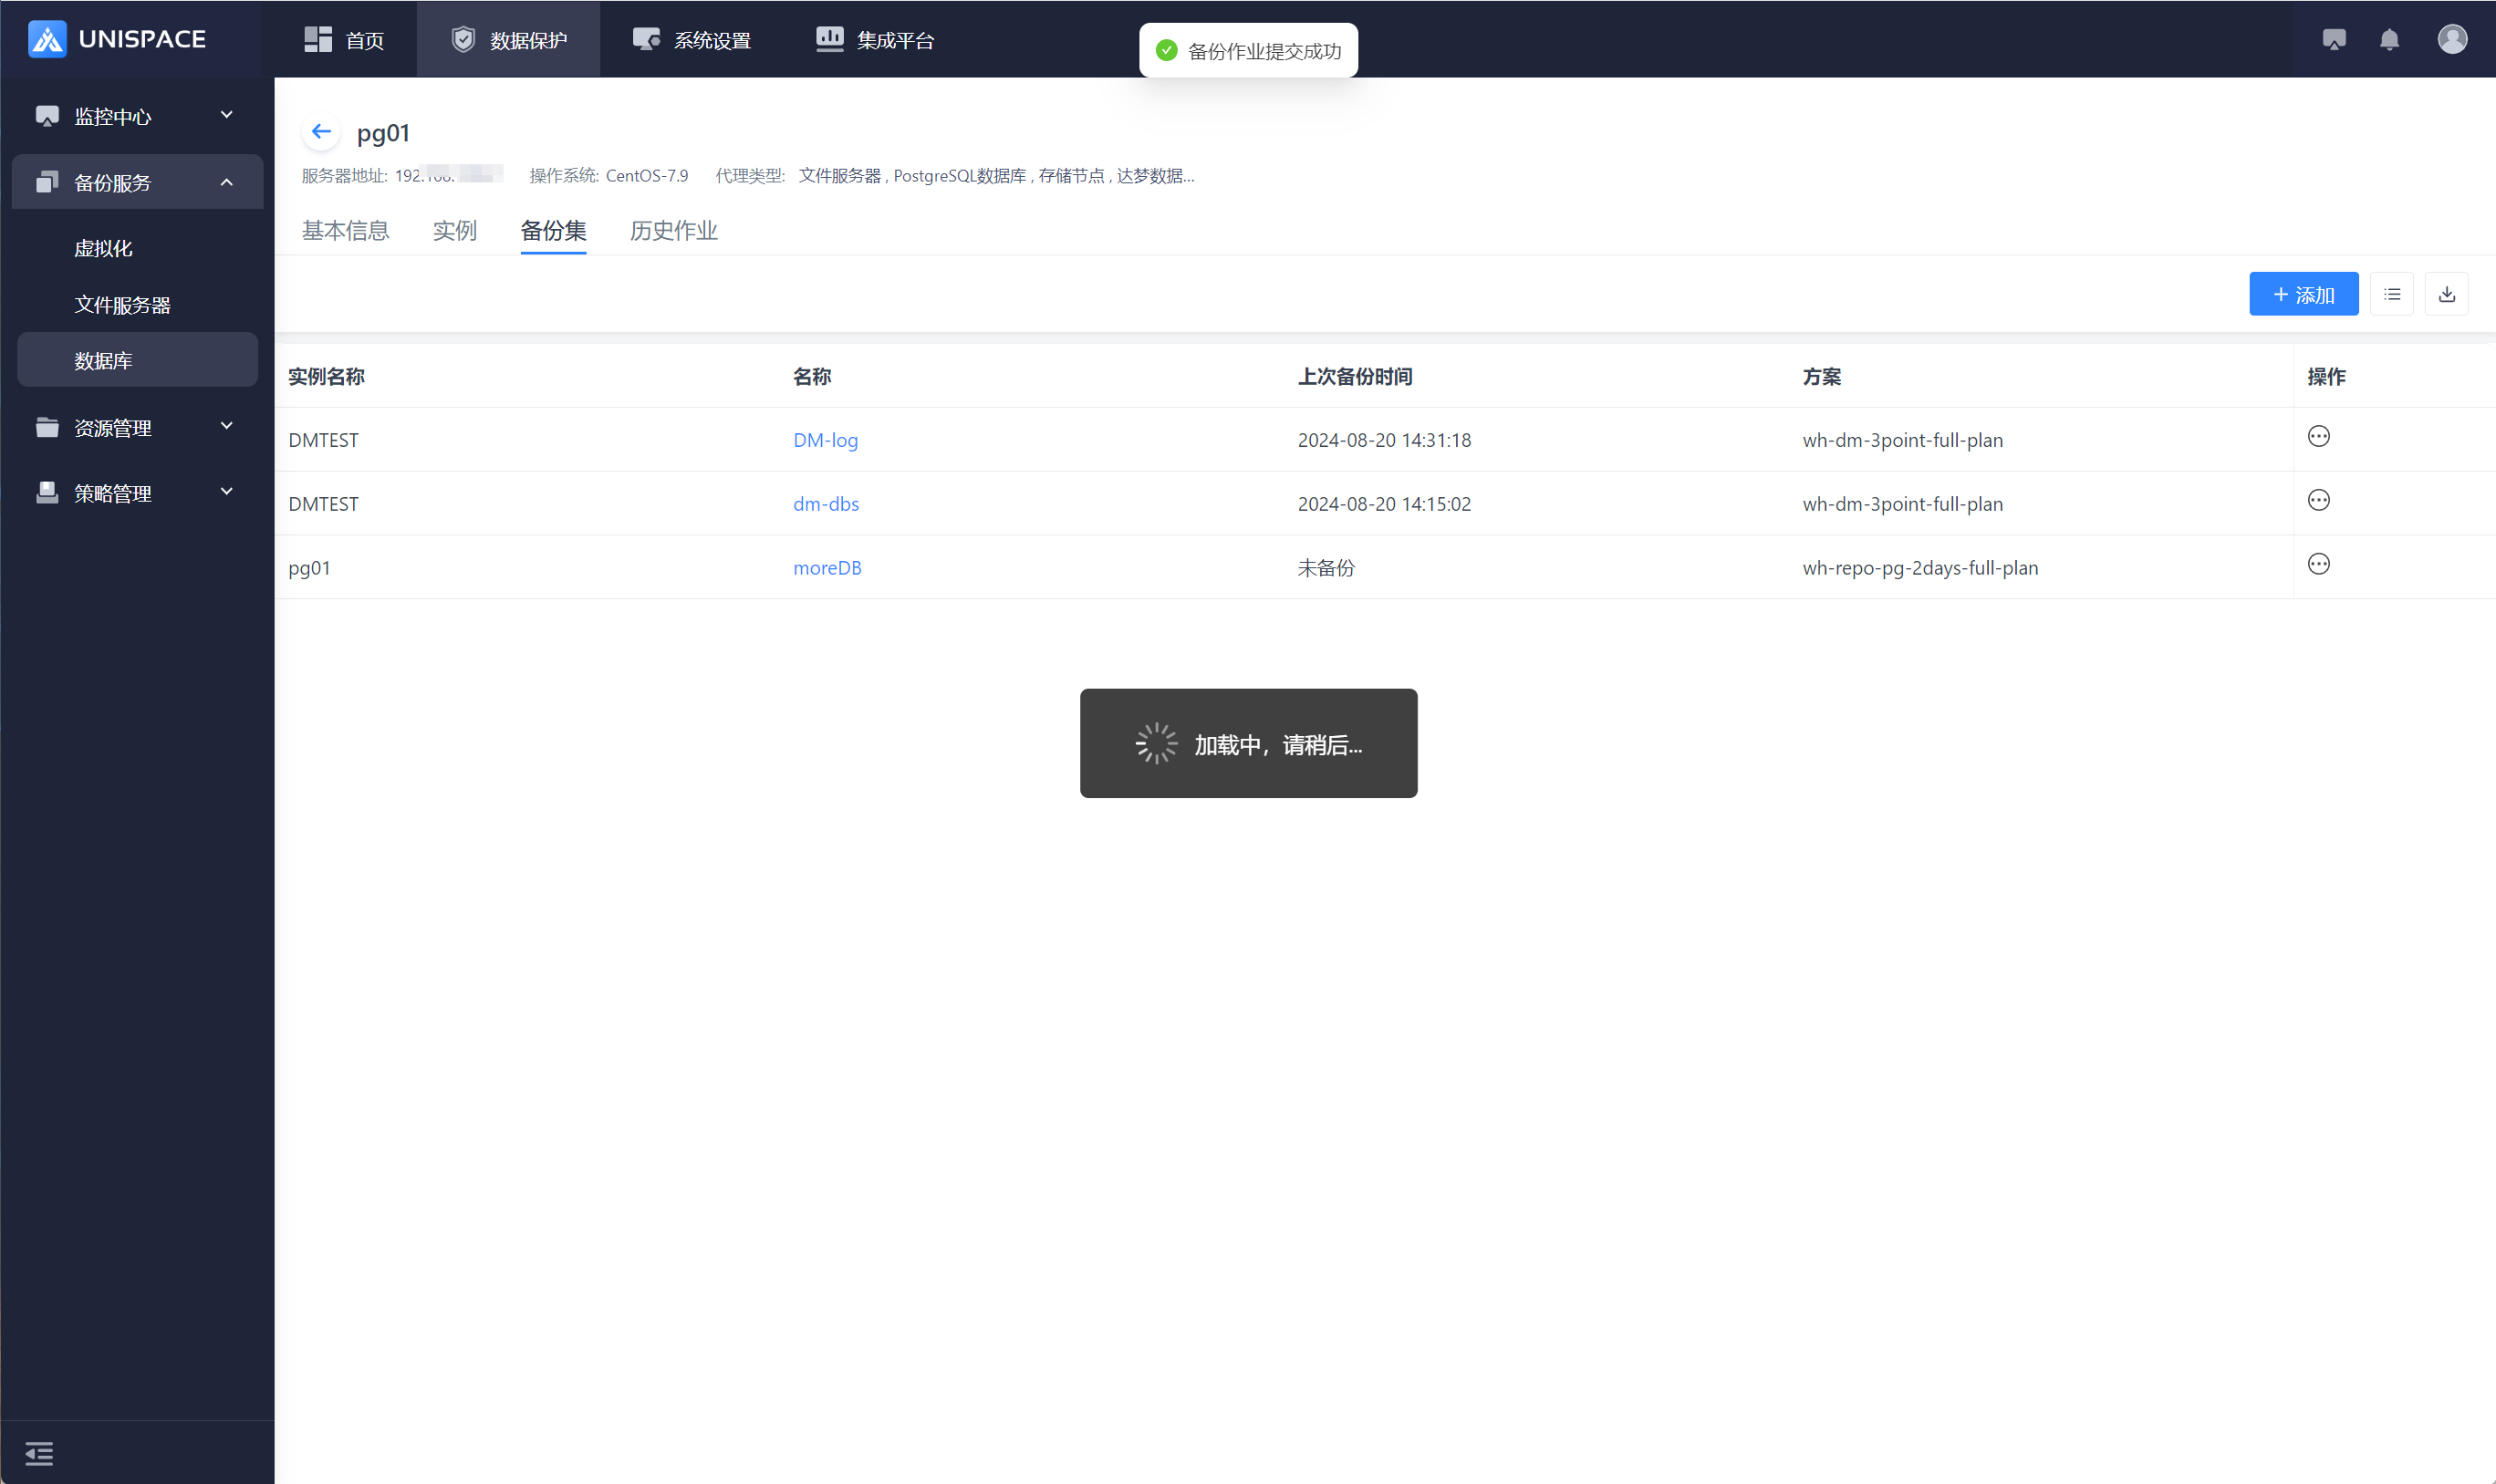
Step 3: Choose "Database" and click OK. The page will display "Backup job submitted successfully".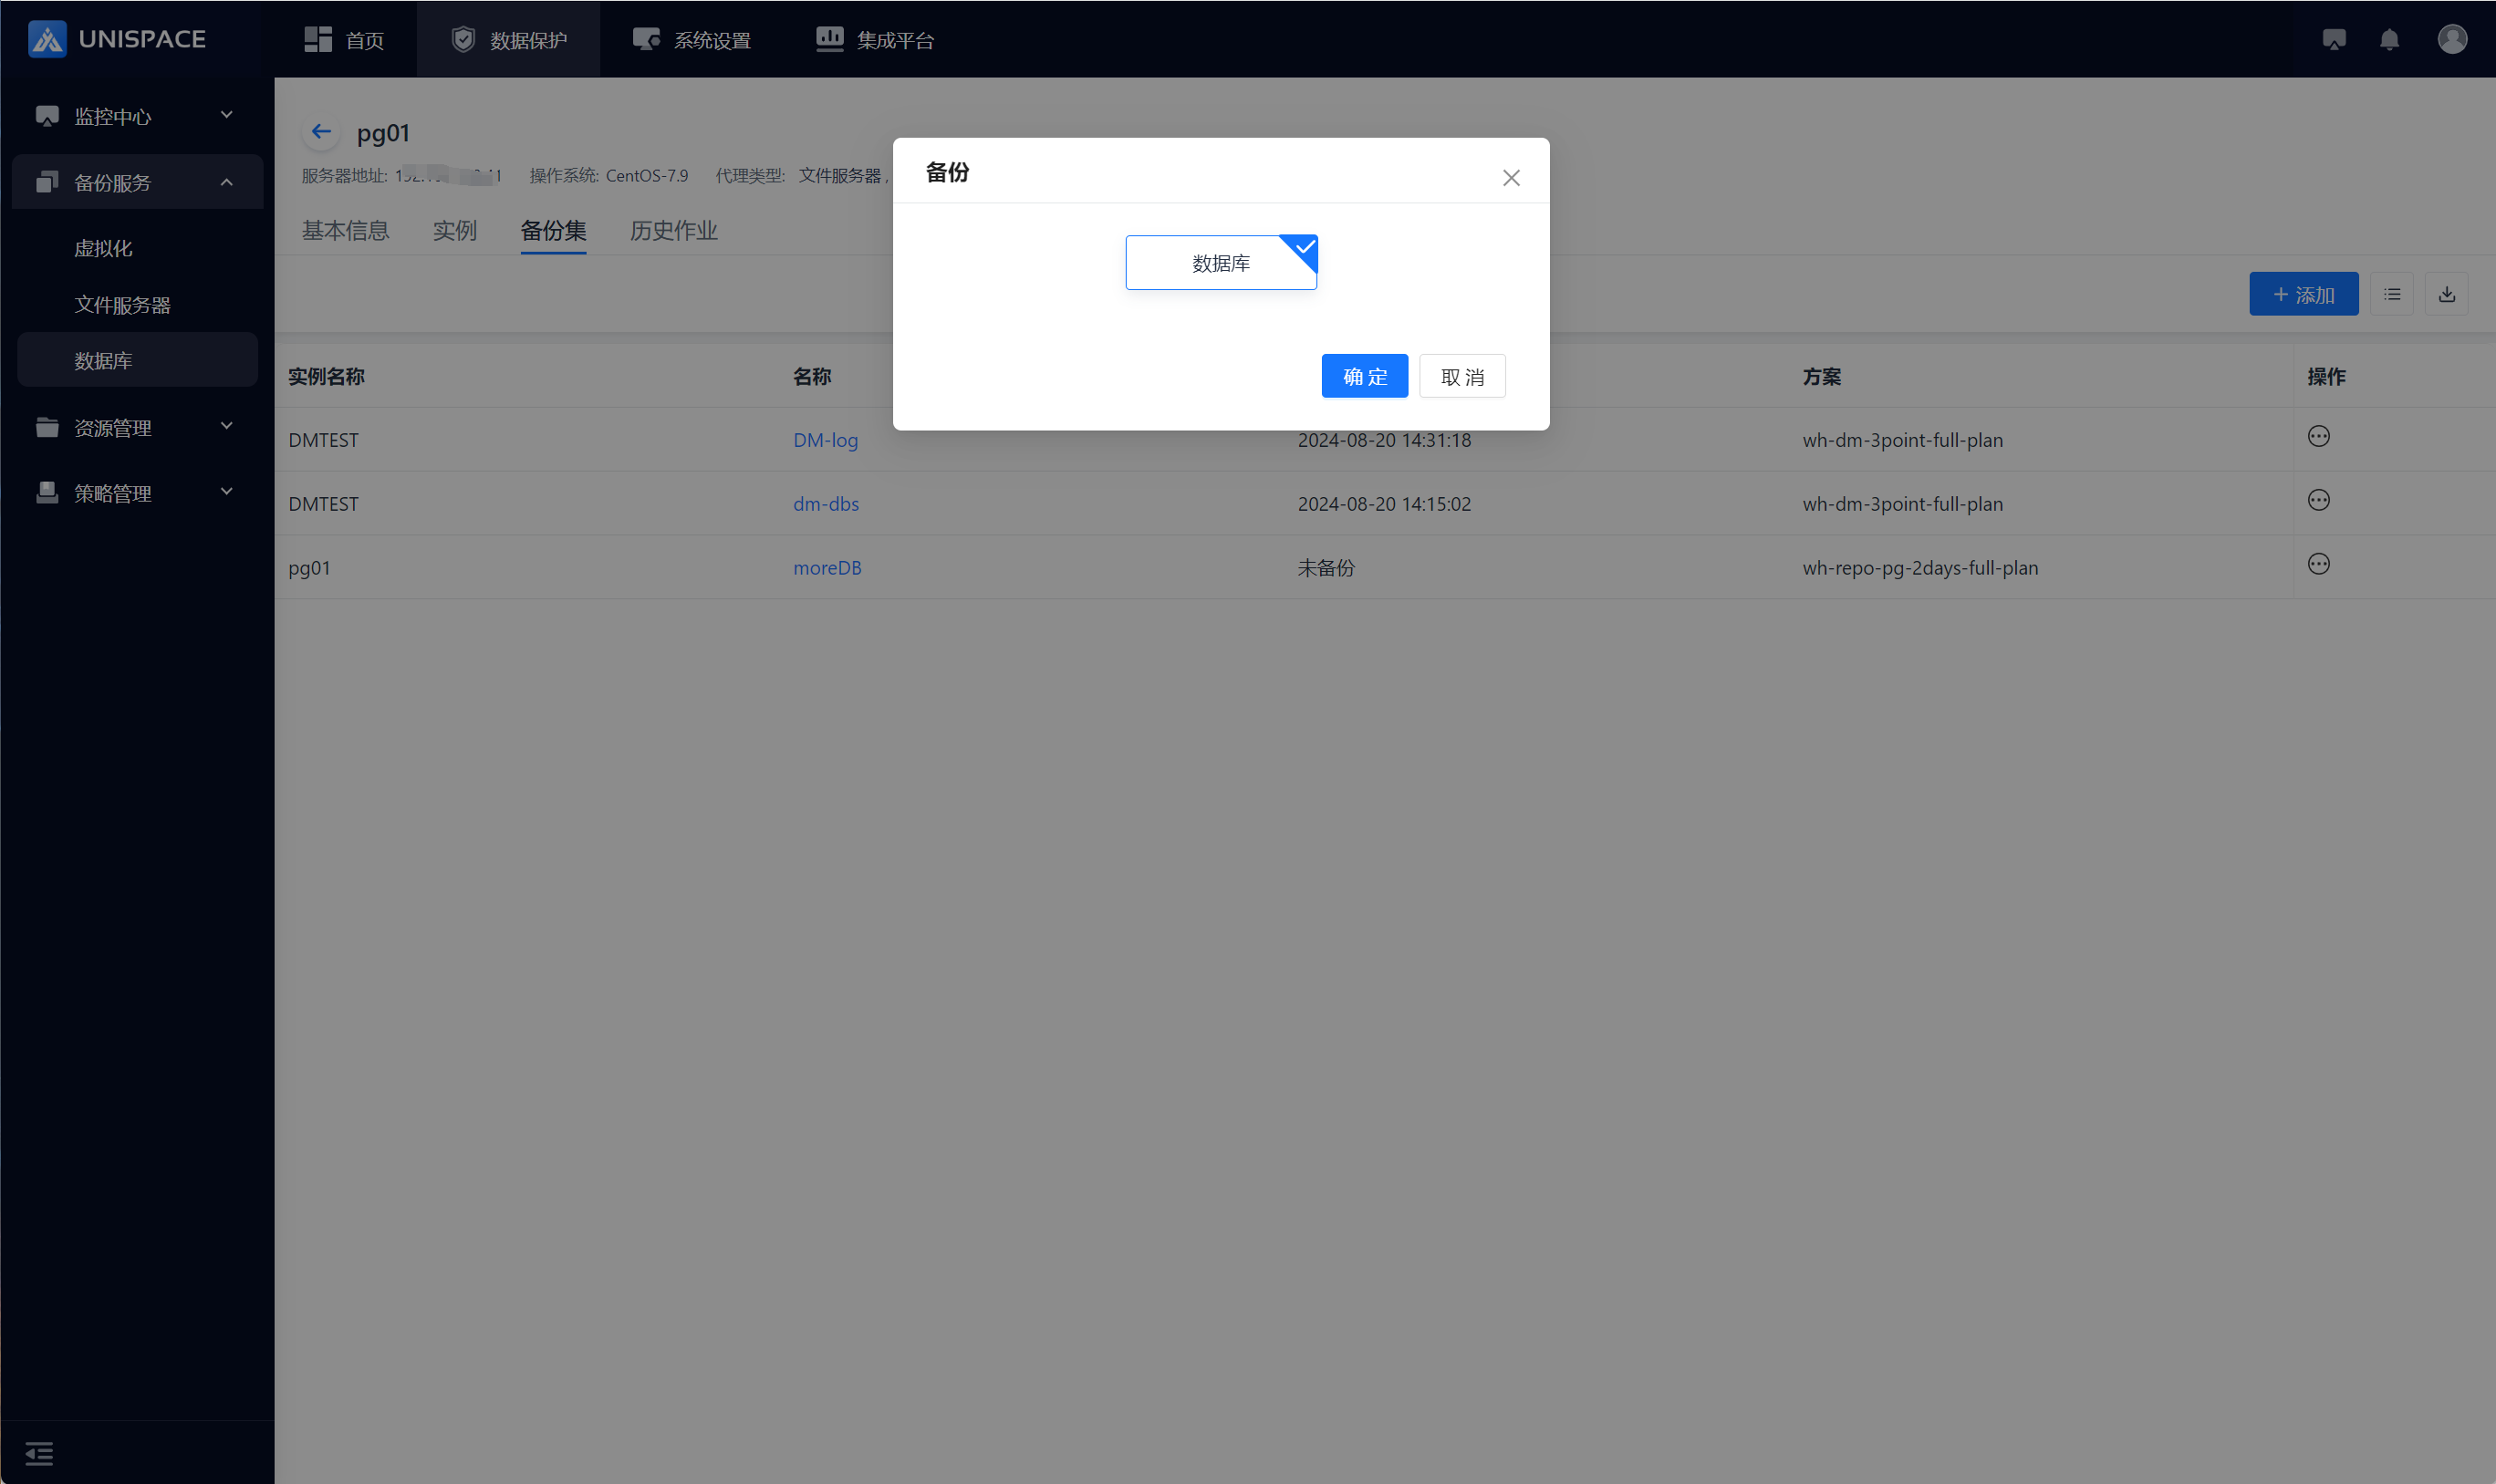
Step 4: Once the backup job starts successfully, go to Monitoring Center - Jobs - Active Jobs to view the backup set job.
Step 5: After the backup is completed, go to Monitoring Center - Jobs - Historical Jobs to check the backup set job, with the job status showing "Completed". 
1.4 PG Database Recovery
Prerequisites
- The PG database has been backed up.
- System databases are not supported for recovery.
Steps
Step 1: Click on the system menu Backup Service - Database - Server Name list - Backup Set.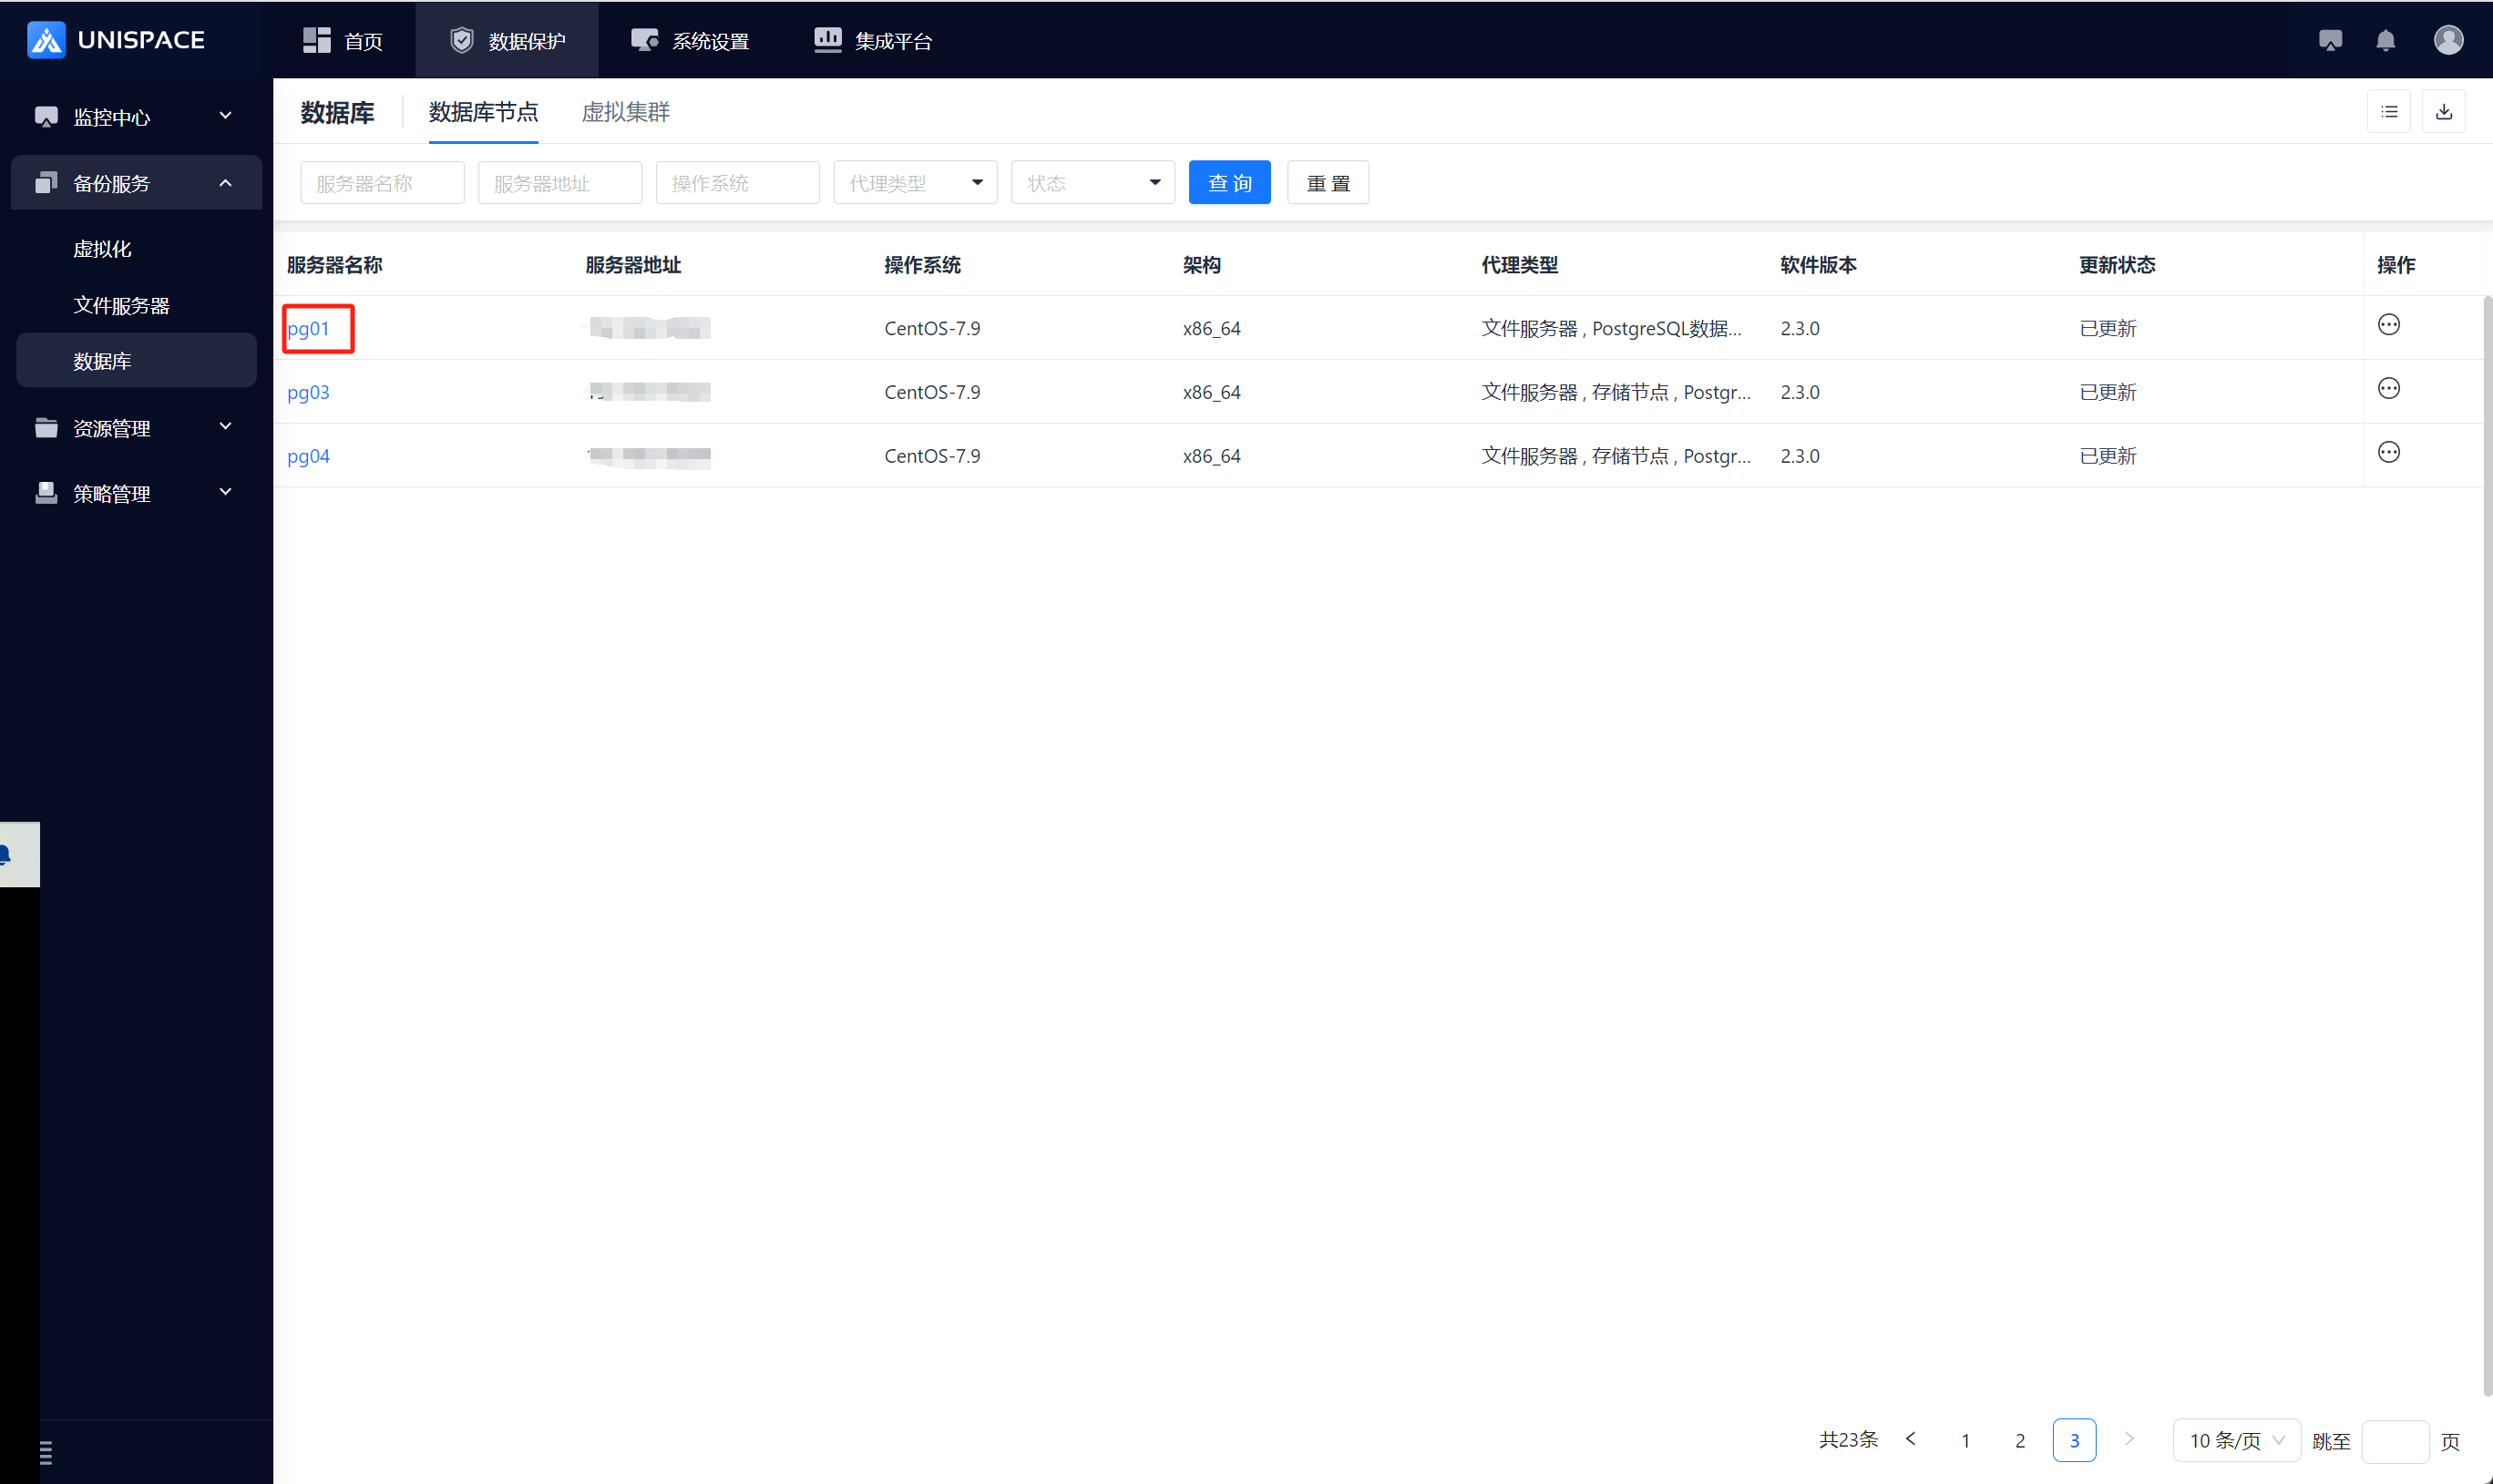
Step 2: Select Backup Set, click Restore under the Operation column.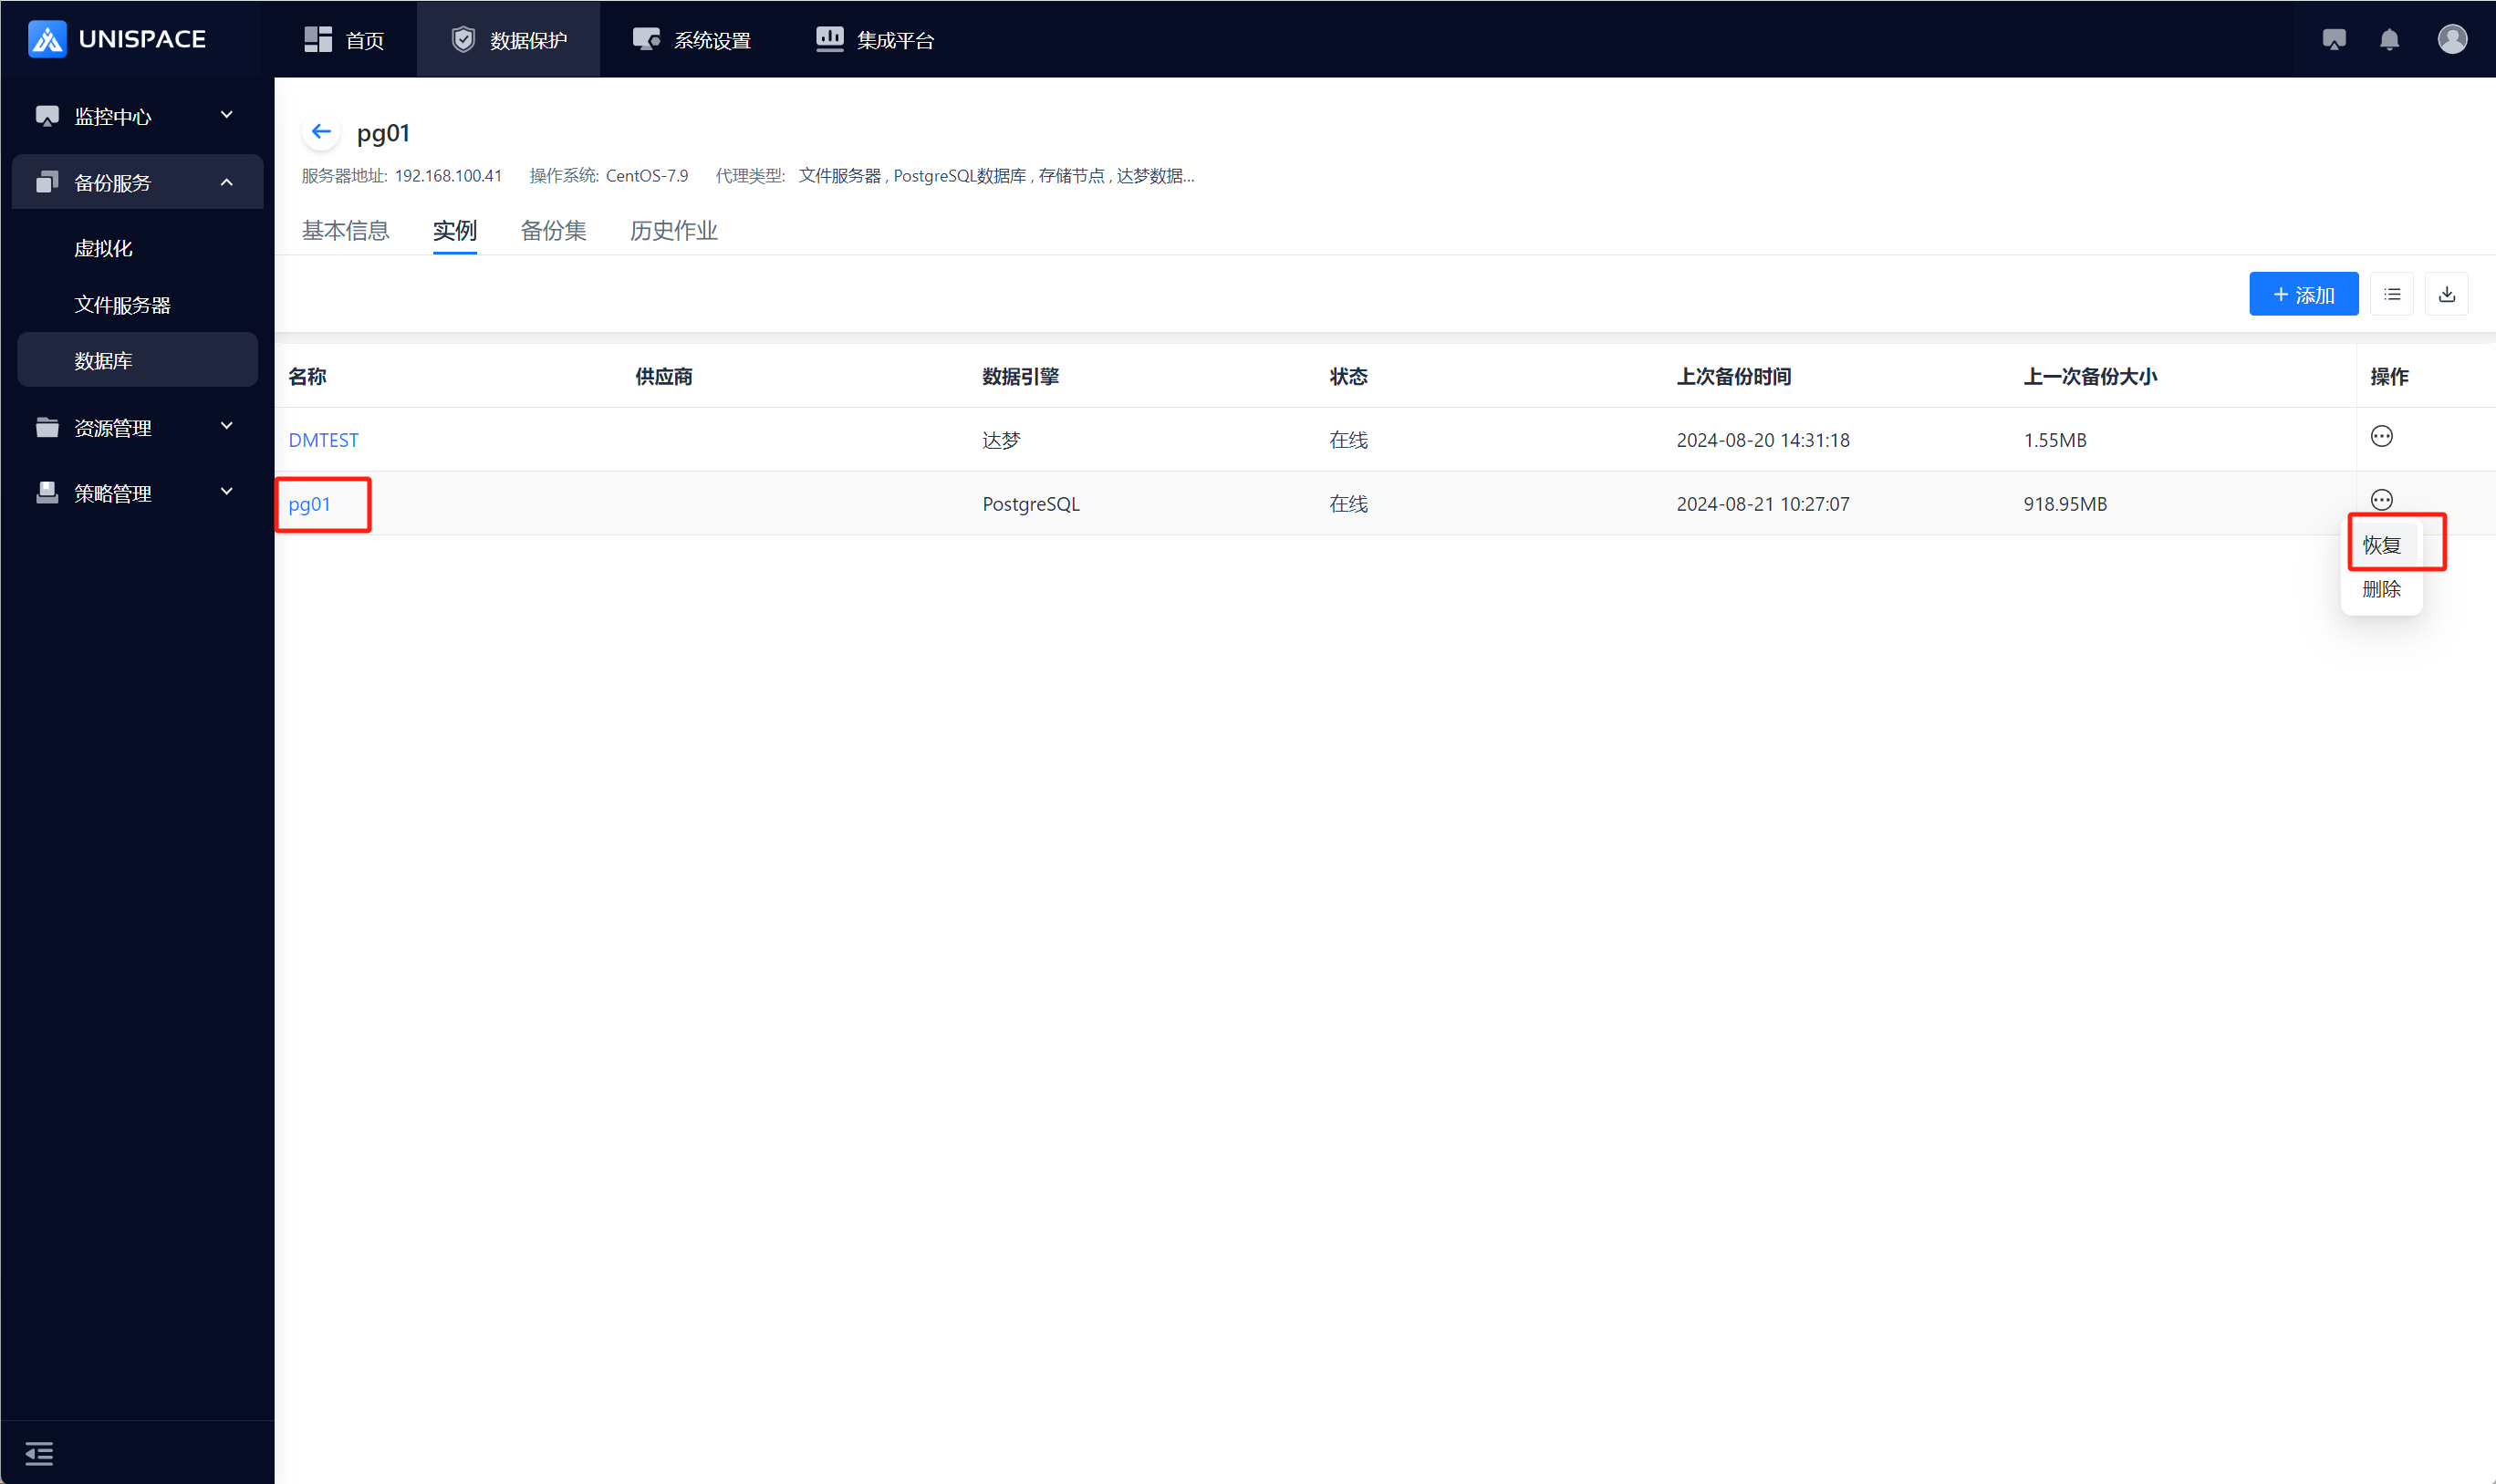
Step 3: A restore window will pop up. Select the recovery point based on "Recent Time" (last cycle recovery point) or a specific time range. Select the "Backup Set", choose "Database" and "Backup Time", and click Next.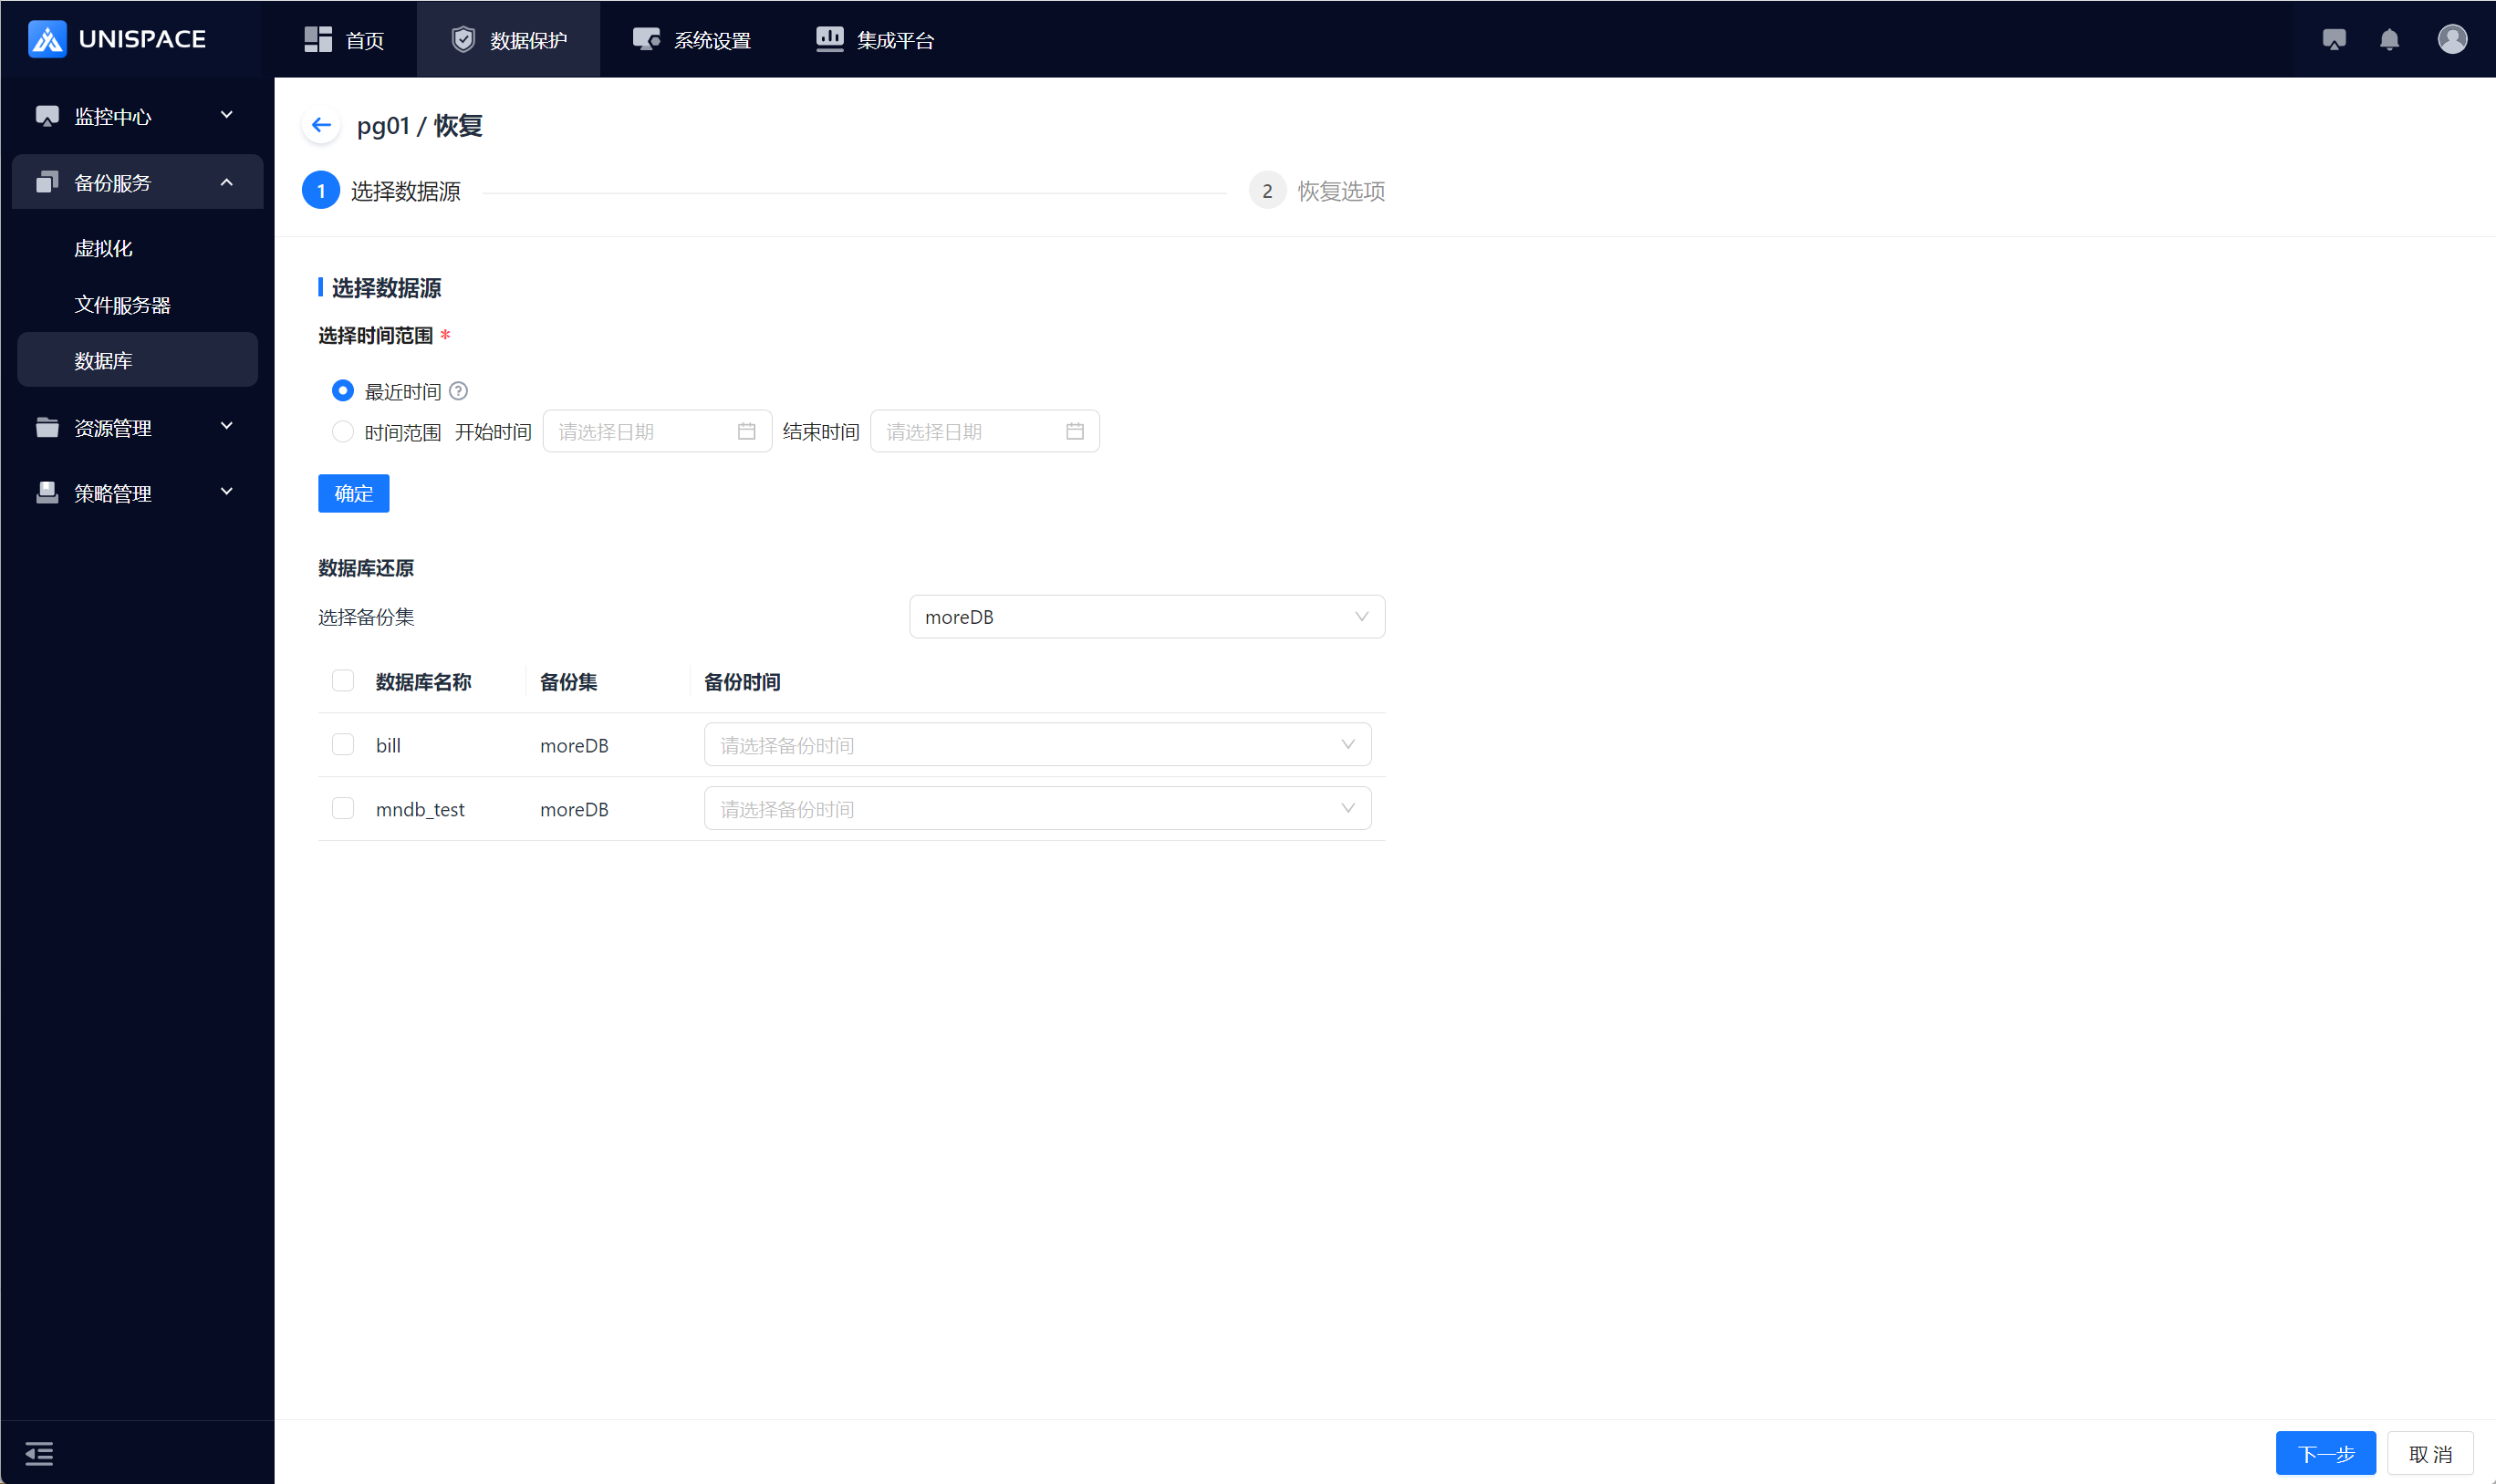
Step 4: Set recovery options and click OK.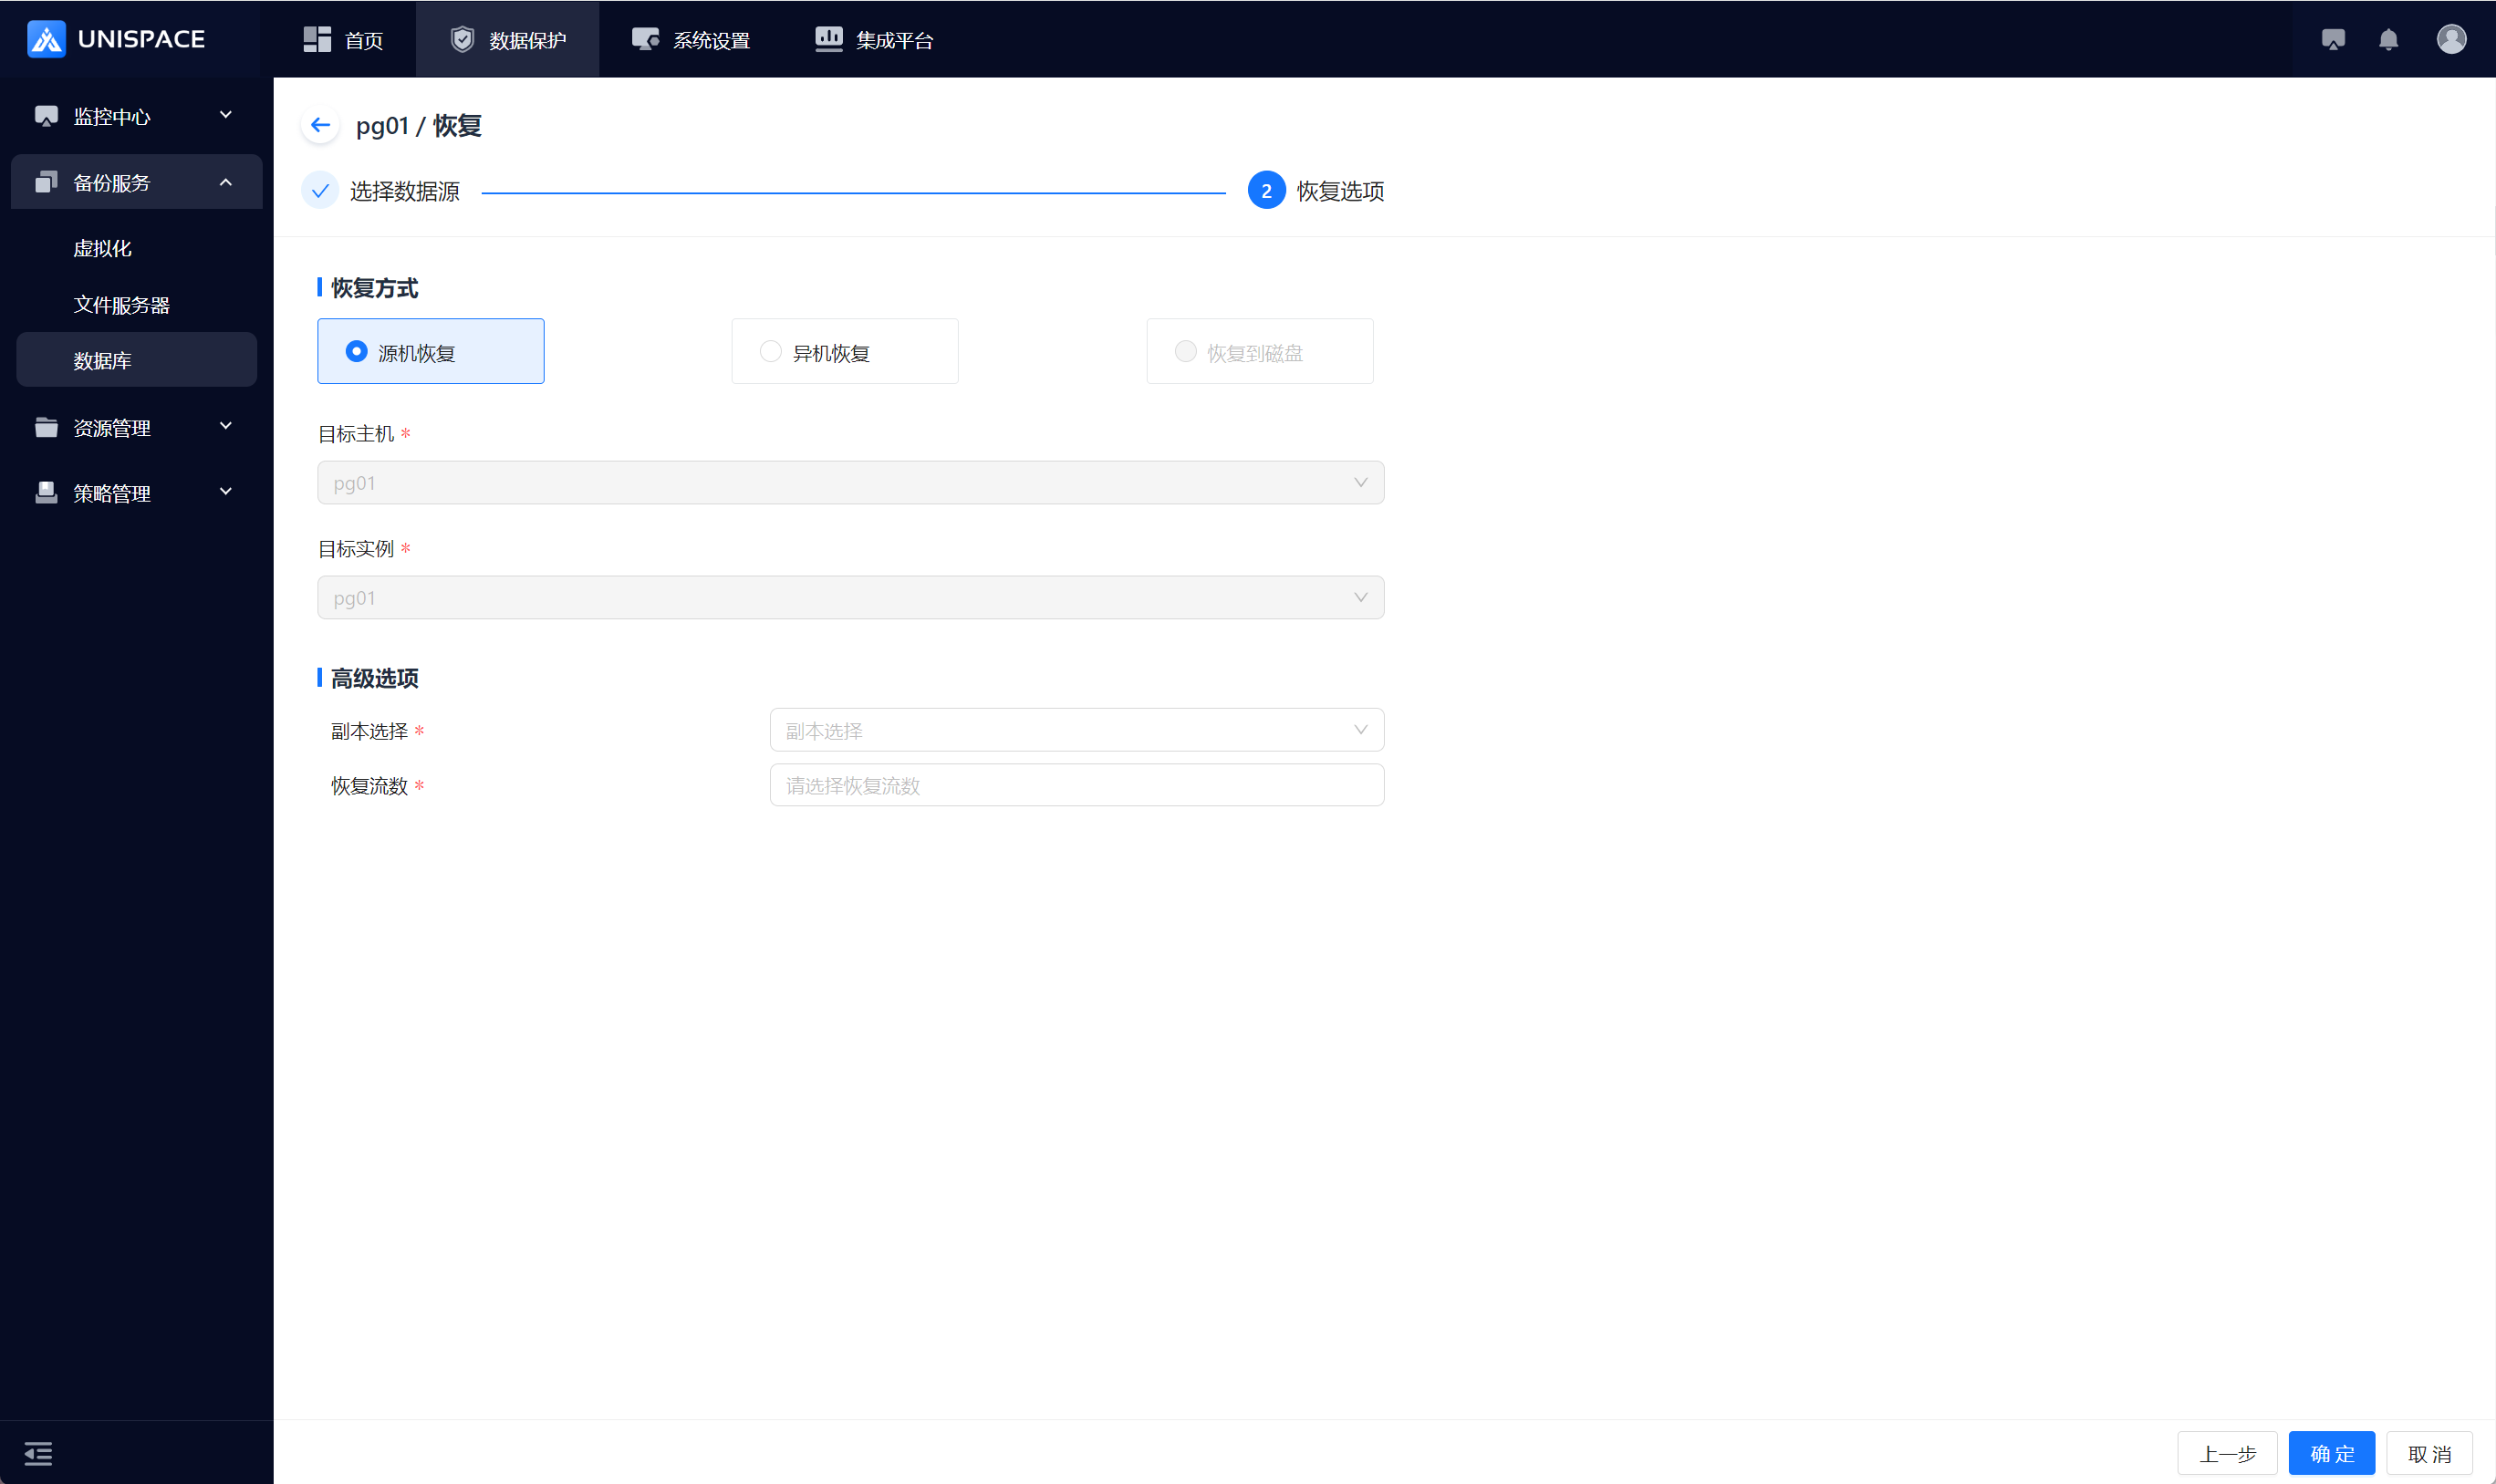
Step 5: Fill in the necessary parameters as shown below:
| Parameter Name | Parameter Description | Setting Principle |
|---|---|---|
| Recovery Option | Default is Source Machine Recovery | Choose Source Machine Recovery or Cross-Machine Recovery |
| Target Host | Default to Source Machine, greyed out | For Cross-Machine Recovery: select the appropriate target host |
| Target Instance | Default to Source Instance, greyed out | For Cross-Machine Recovery: select the created PG instance |
| Copy Selection | Single selection, required | Select the appropriate copy |
| Recovery Stream Count | Numeric type | Maximum value is 200 |
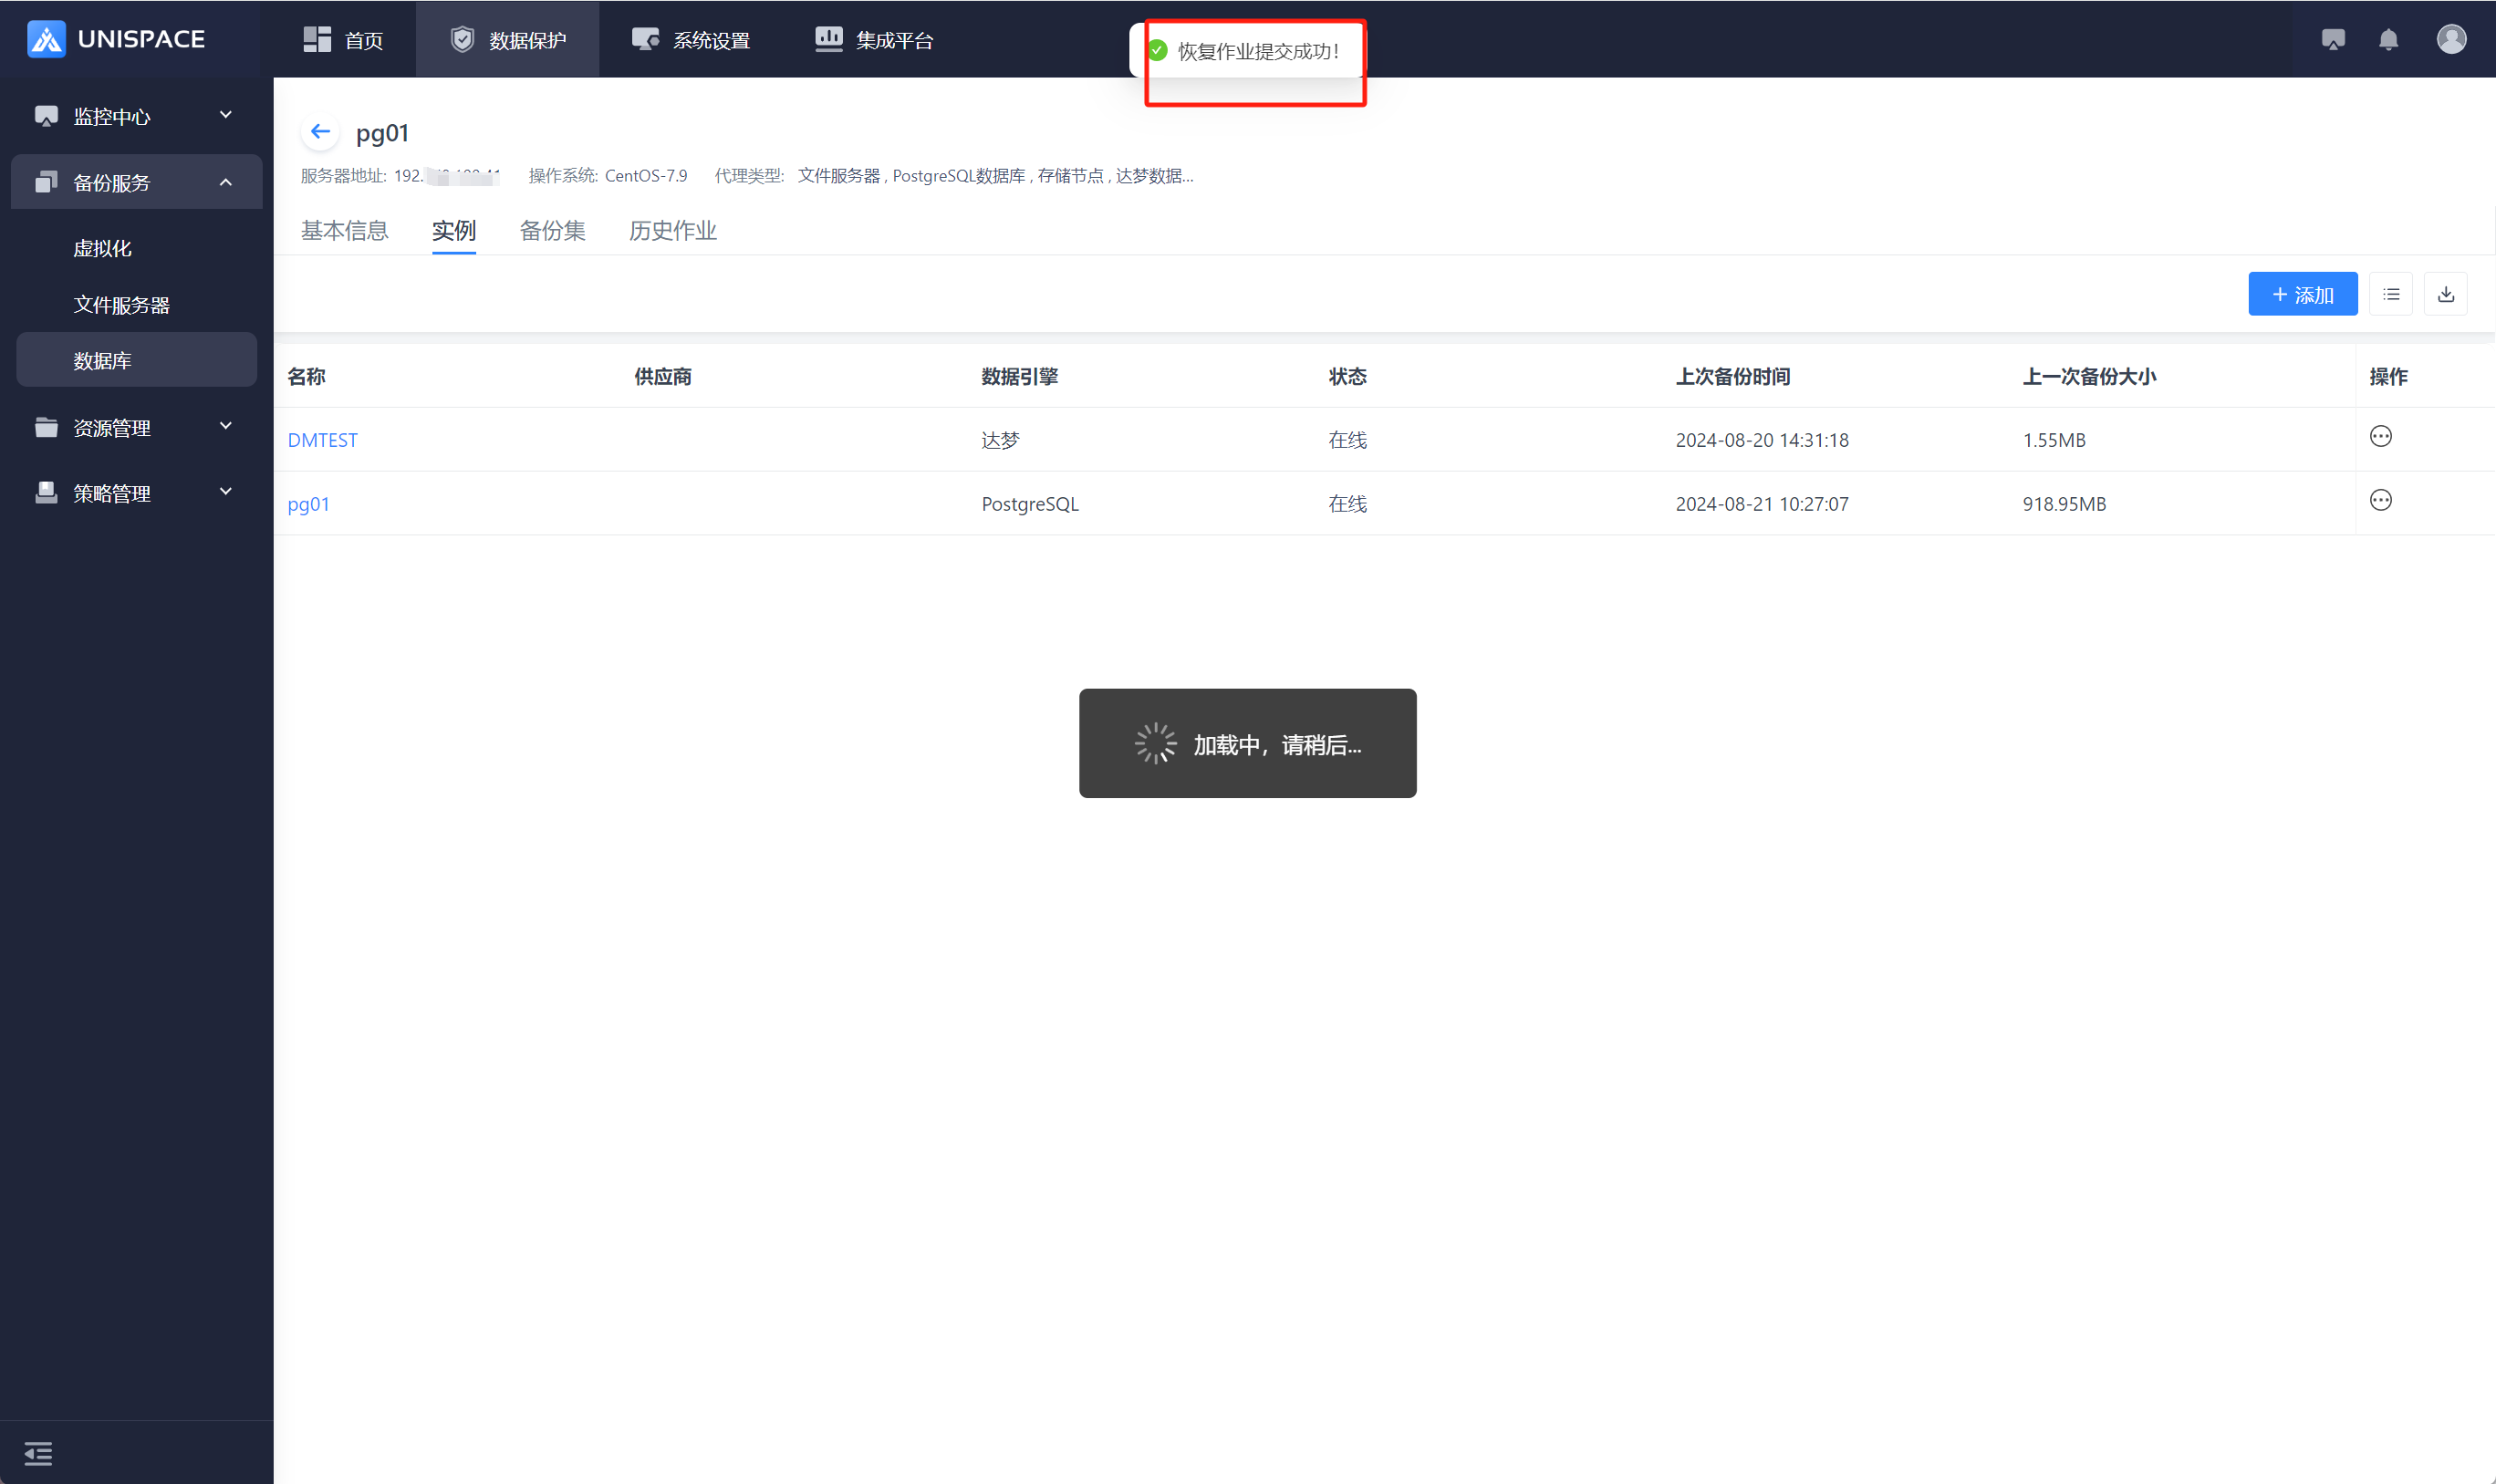
Step 6: Once the job starts successfully, go to Monitoring Center - Jobs - Active Jobs to view the job.
Step 7: After the job is completed, go to Monitoring Center - Jobs - Historical Jobs to check the job and its status.