Agent--OpenStack
1.1 Create OpenStack Virtualization Platform
Prerequisites
- Created a storage repository.
- Created a service plan.
Steps
Step 1: Click System Menu - Backup Service - Virtualization.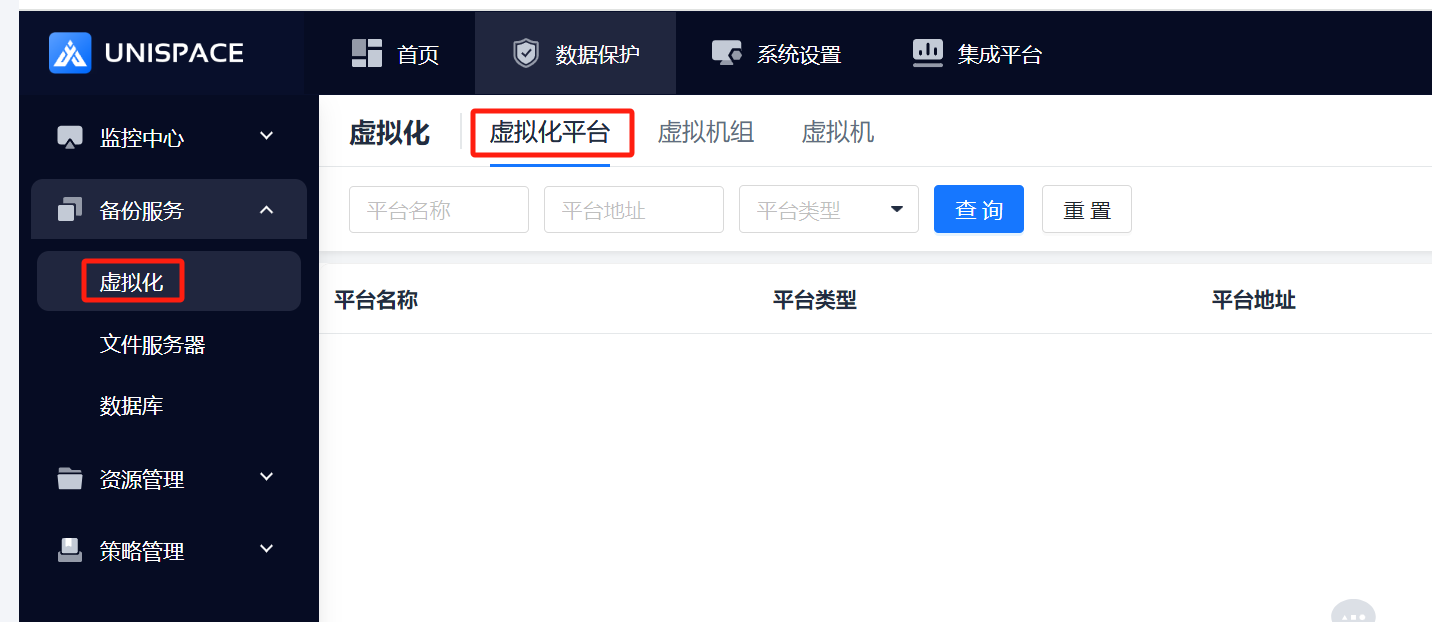
Step 2: Click the Add button of Virtualization Platform, and a pop-up window will appear.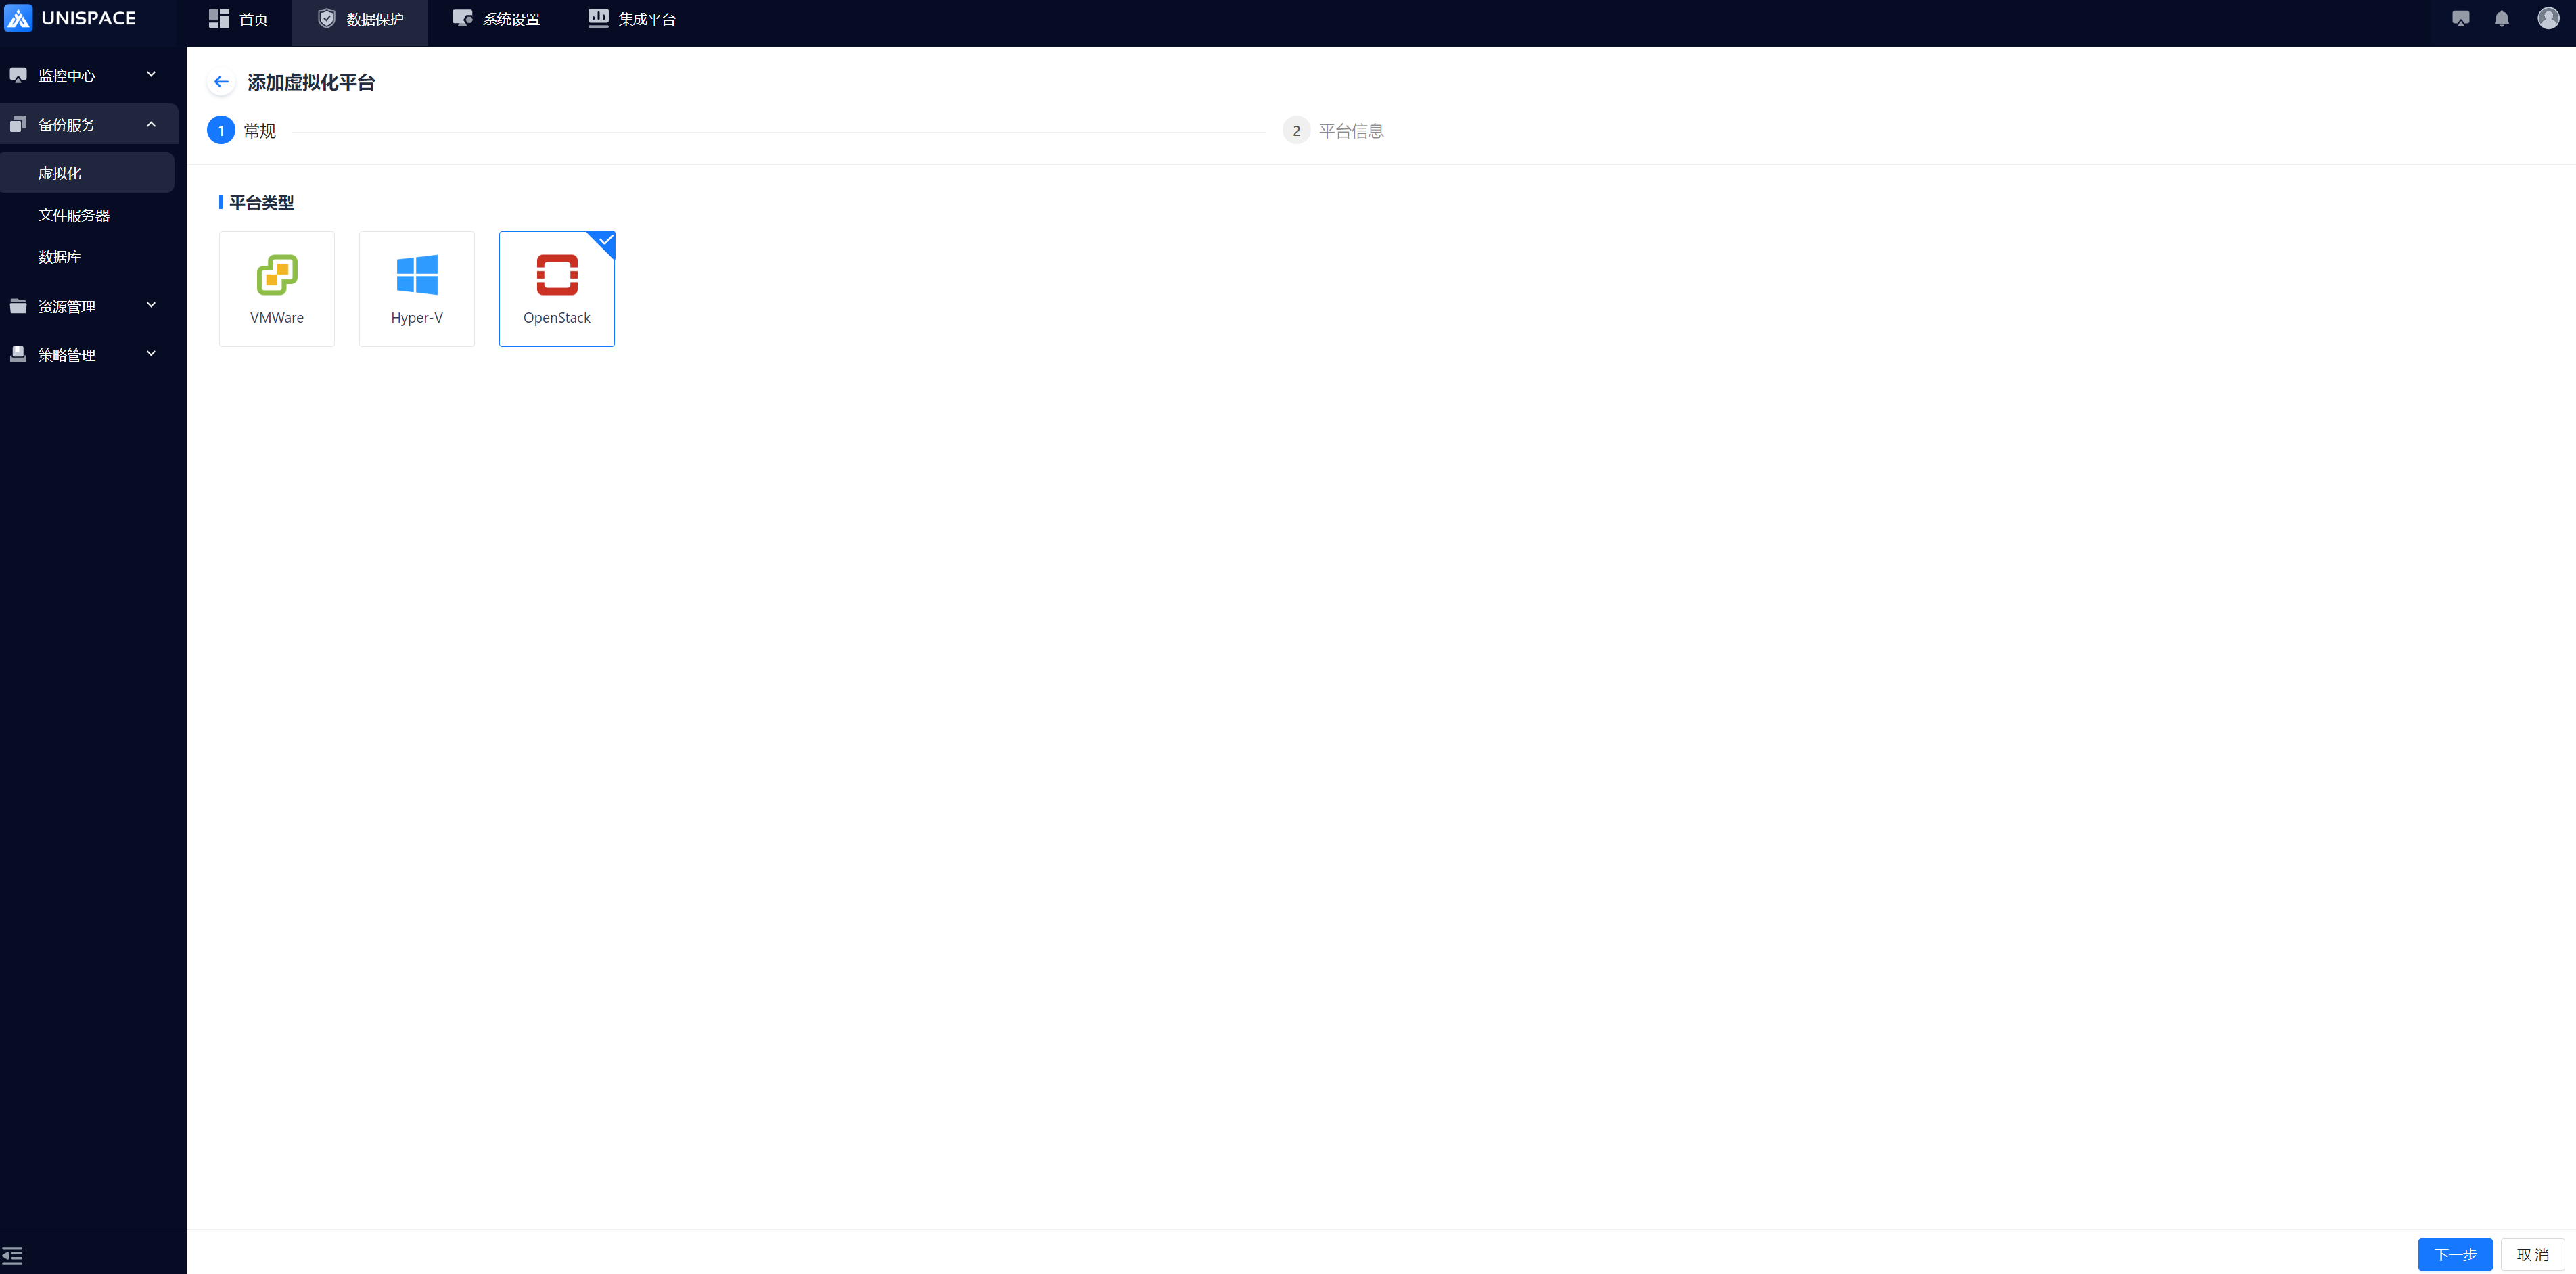 Step 3: Select the OpenStack icon and click Next to enter the Add Virtualization Platform page.
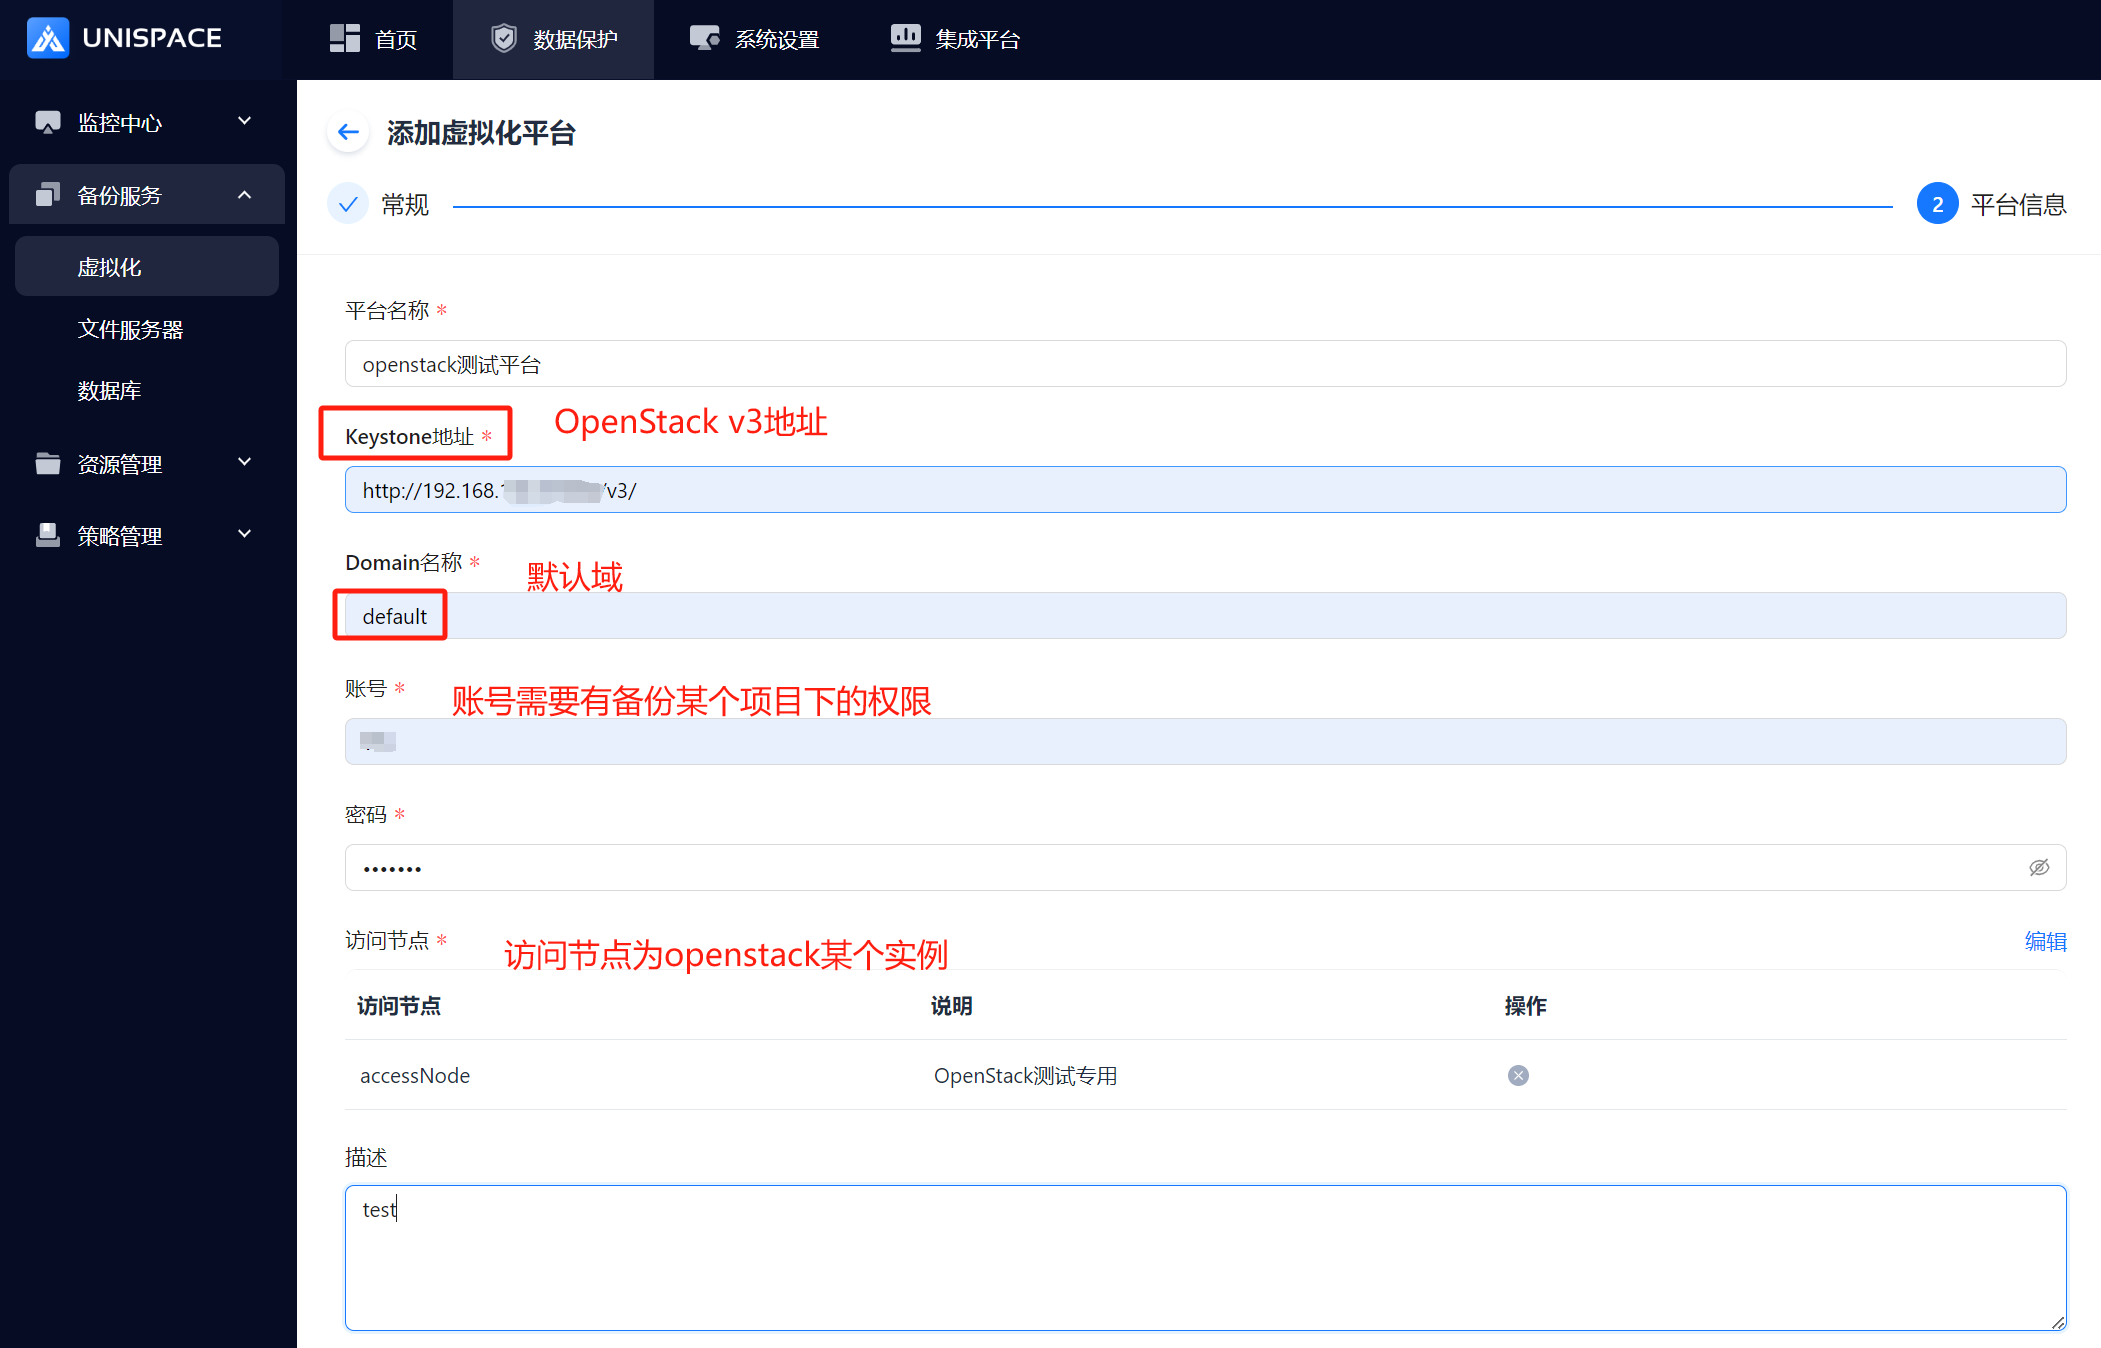 The Keystone address should be the corresponding address in OpenStack.
| Parameter Name | Description | Configuration Principle |
|---|---|---|
| Platform Name | Textbox, required | Special characters such as !#$%^&* are not allowed. |
| Keystone Address | Textbox, required | Enter the correct address. |
| Domain Name | Textbox, required | Enter the correct name. |
| Username | Textbox, required | Enter the correct username. |
| Password | Password field, required | Enter the correct password. |
| Access Node | Single selection, required | Select the appropriate access node. |
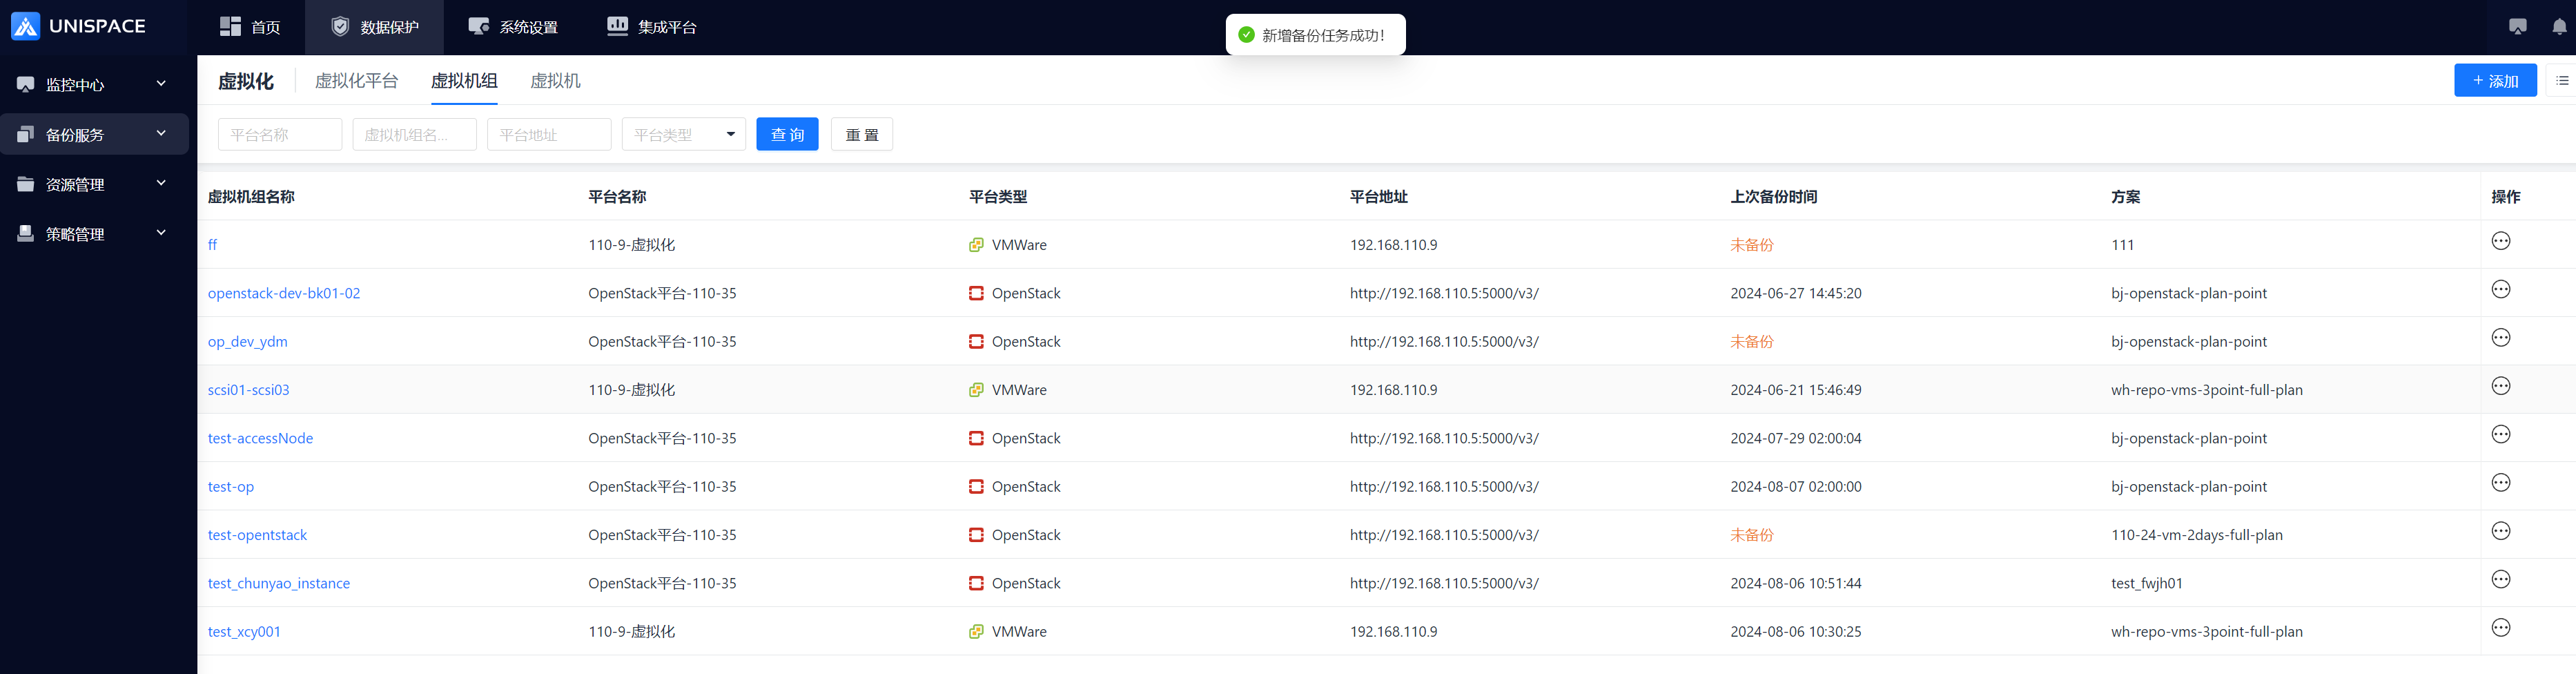
Step 4: After completing the form, click OK. A success message will appear.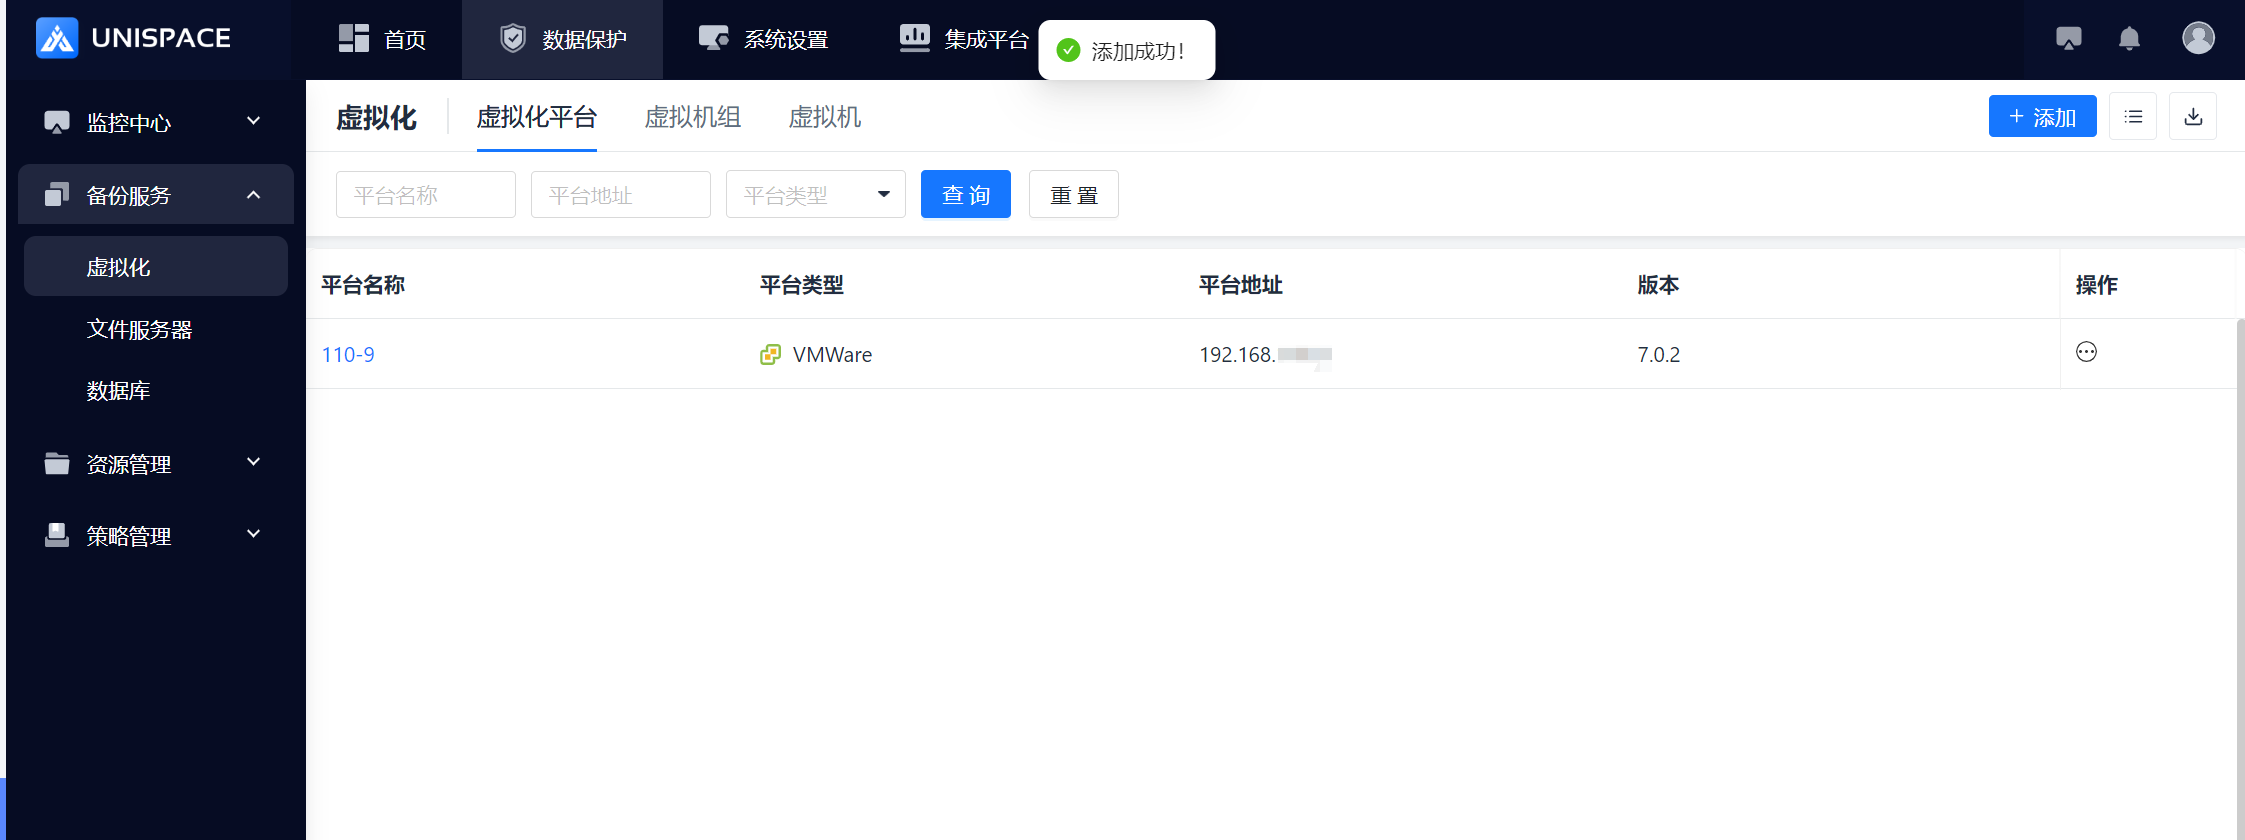
1.2 Create OpenStack Virtual Machine Group
Prerequisites
- The OpenStack virtualization platform has been created.
- If the virtual machine group specifies an access node, it must inherit the access node from the OpenStack virtualization platform.
Steps
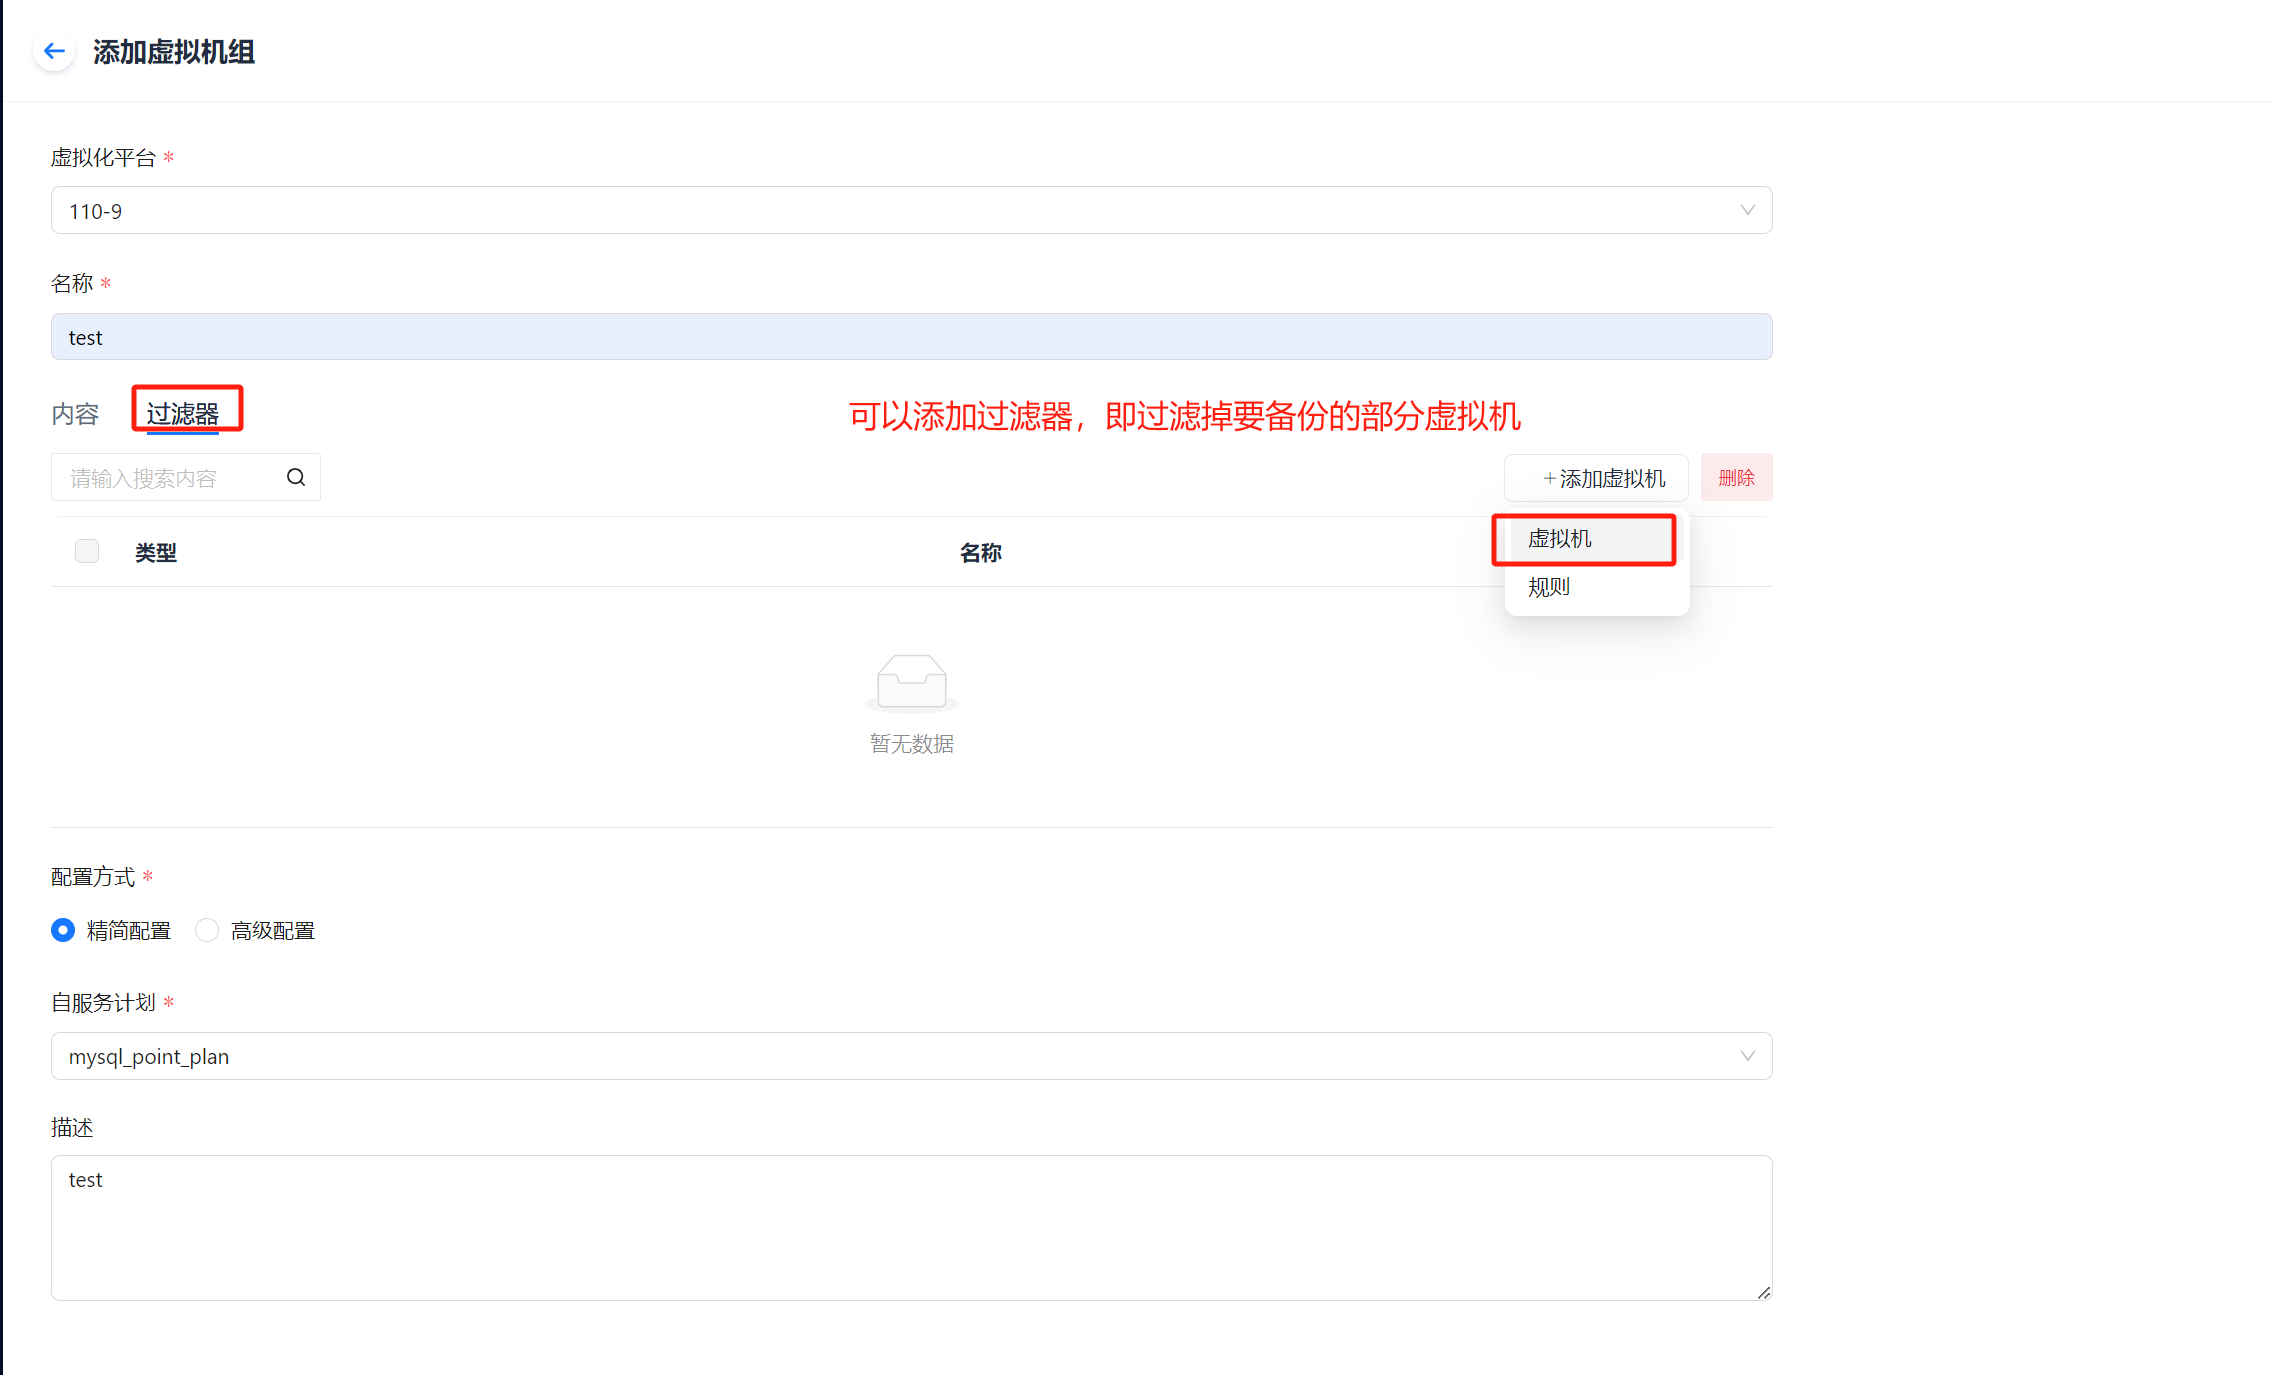
Step 1: Click the Add button Virtual Machine Group to open the Add Virtual Machine Group page.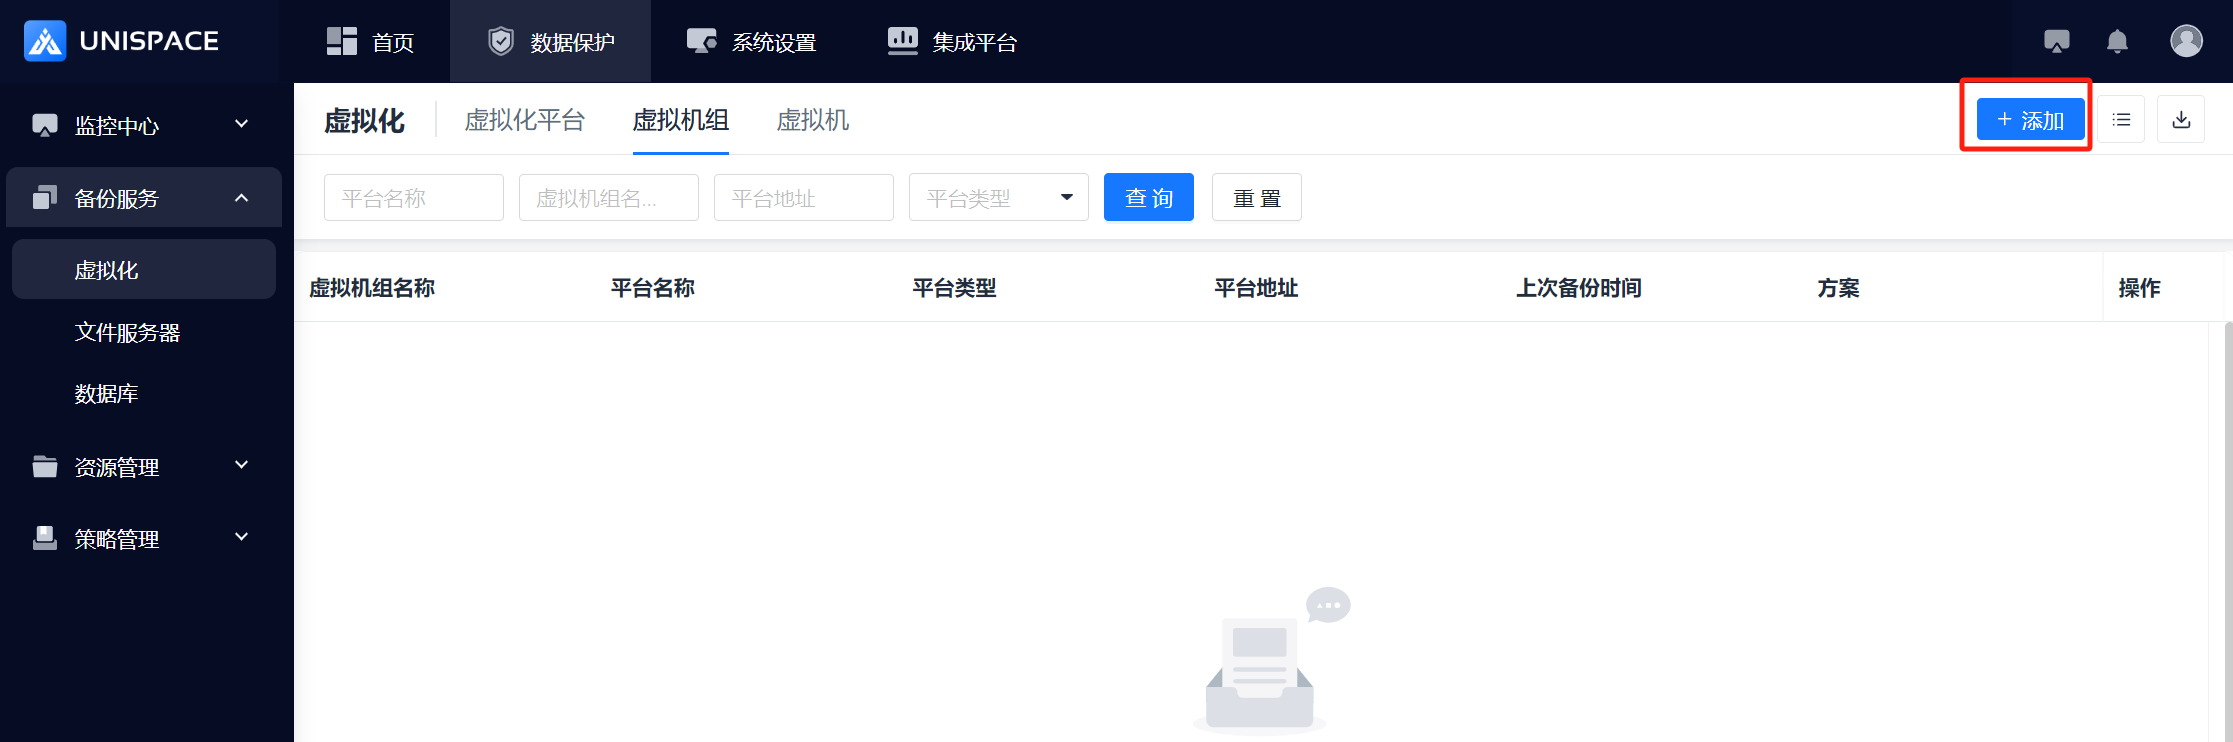

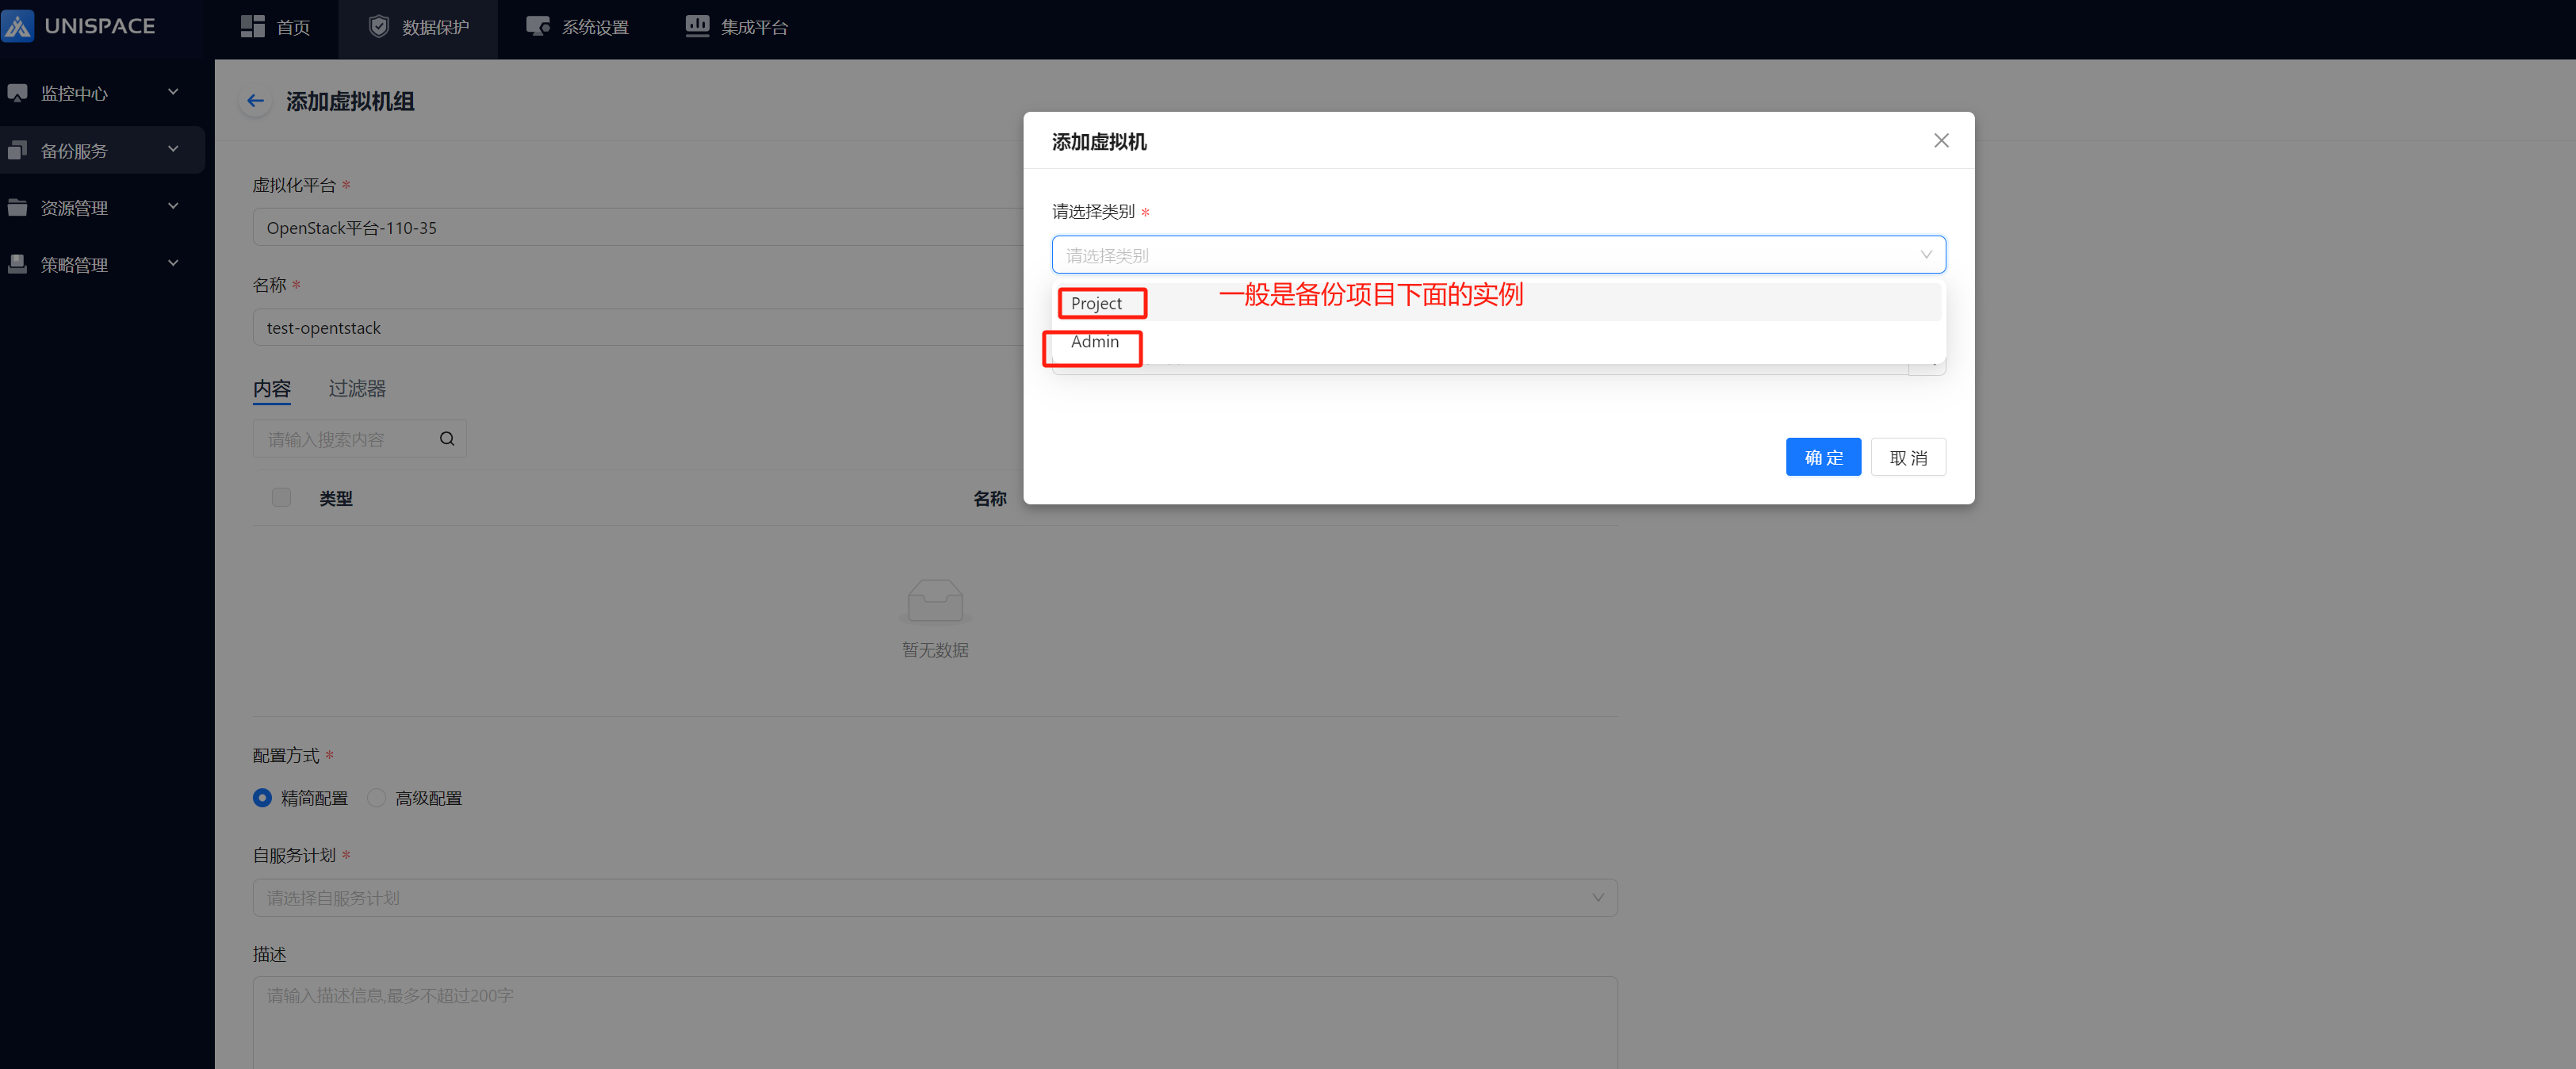
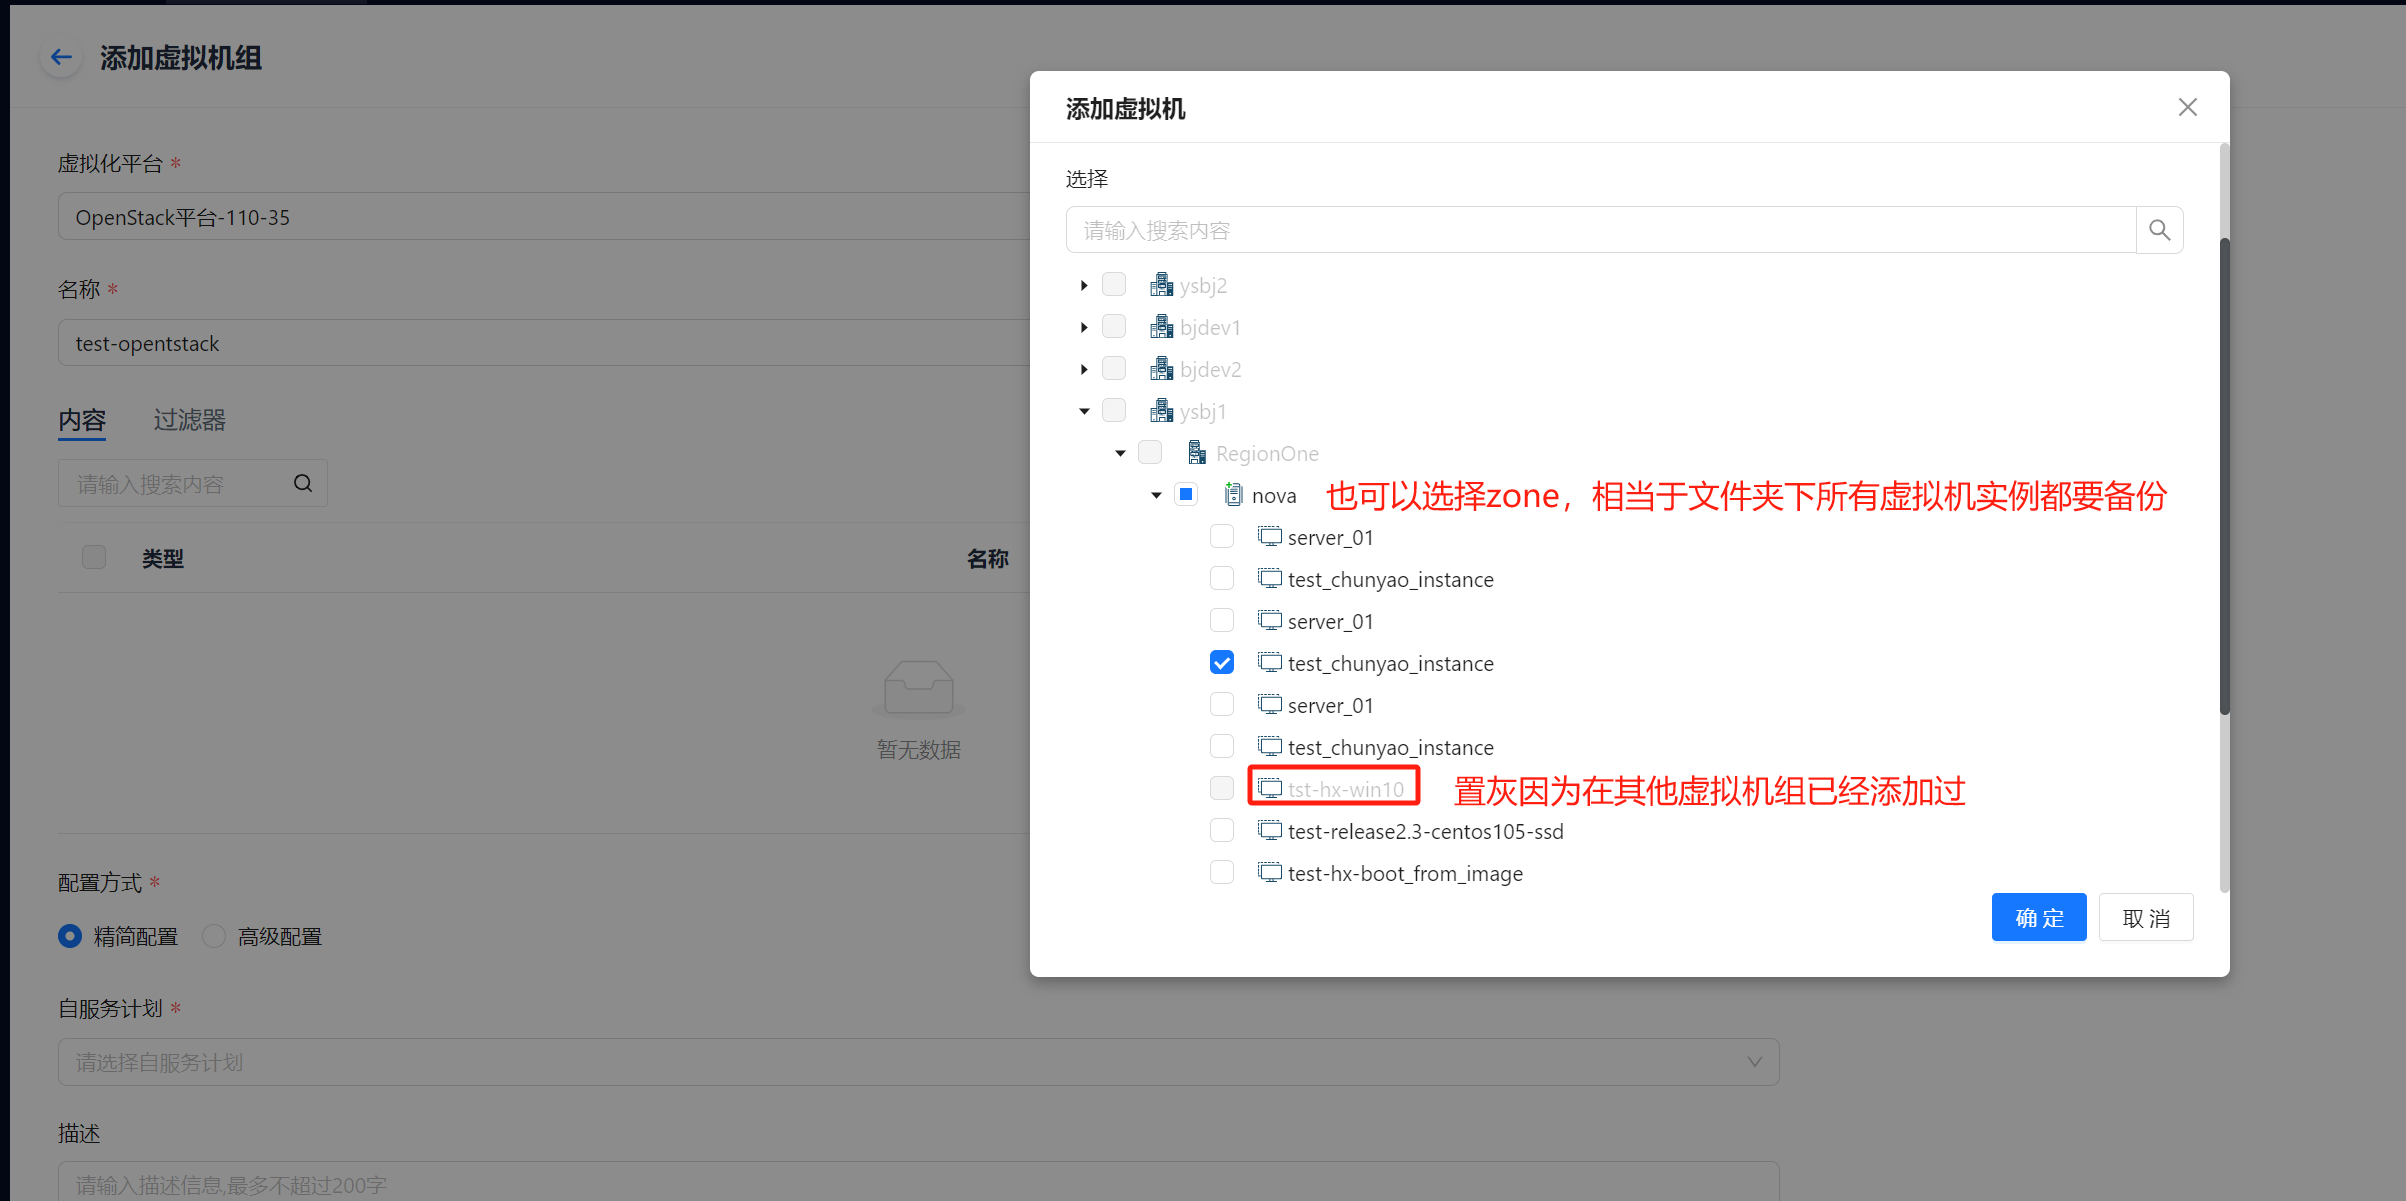
Step 2: Complete the parameters for adding the virtual machine group, including the VMs to be backed up and filters to exclude VMs that should not be backed up.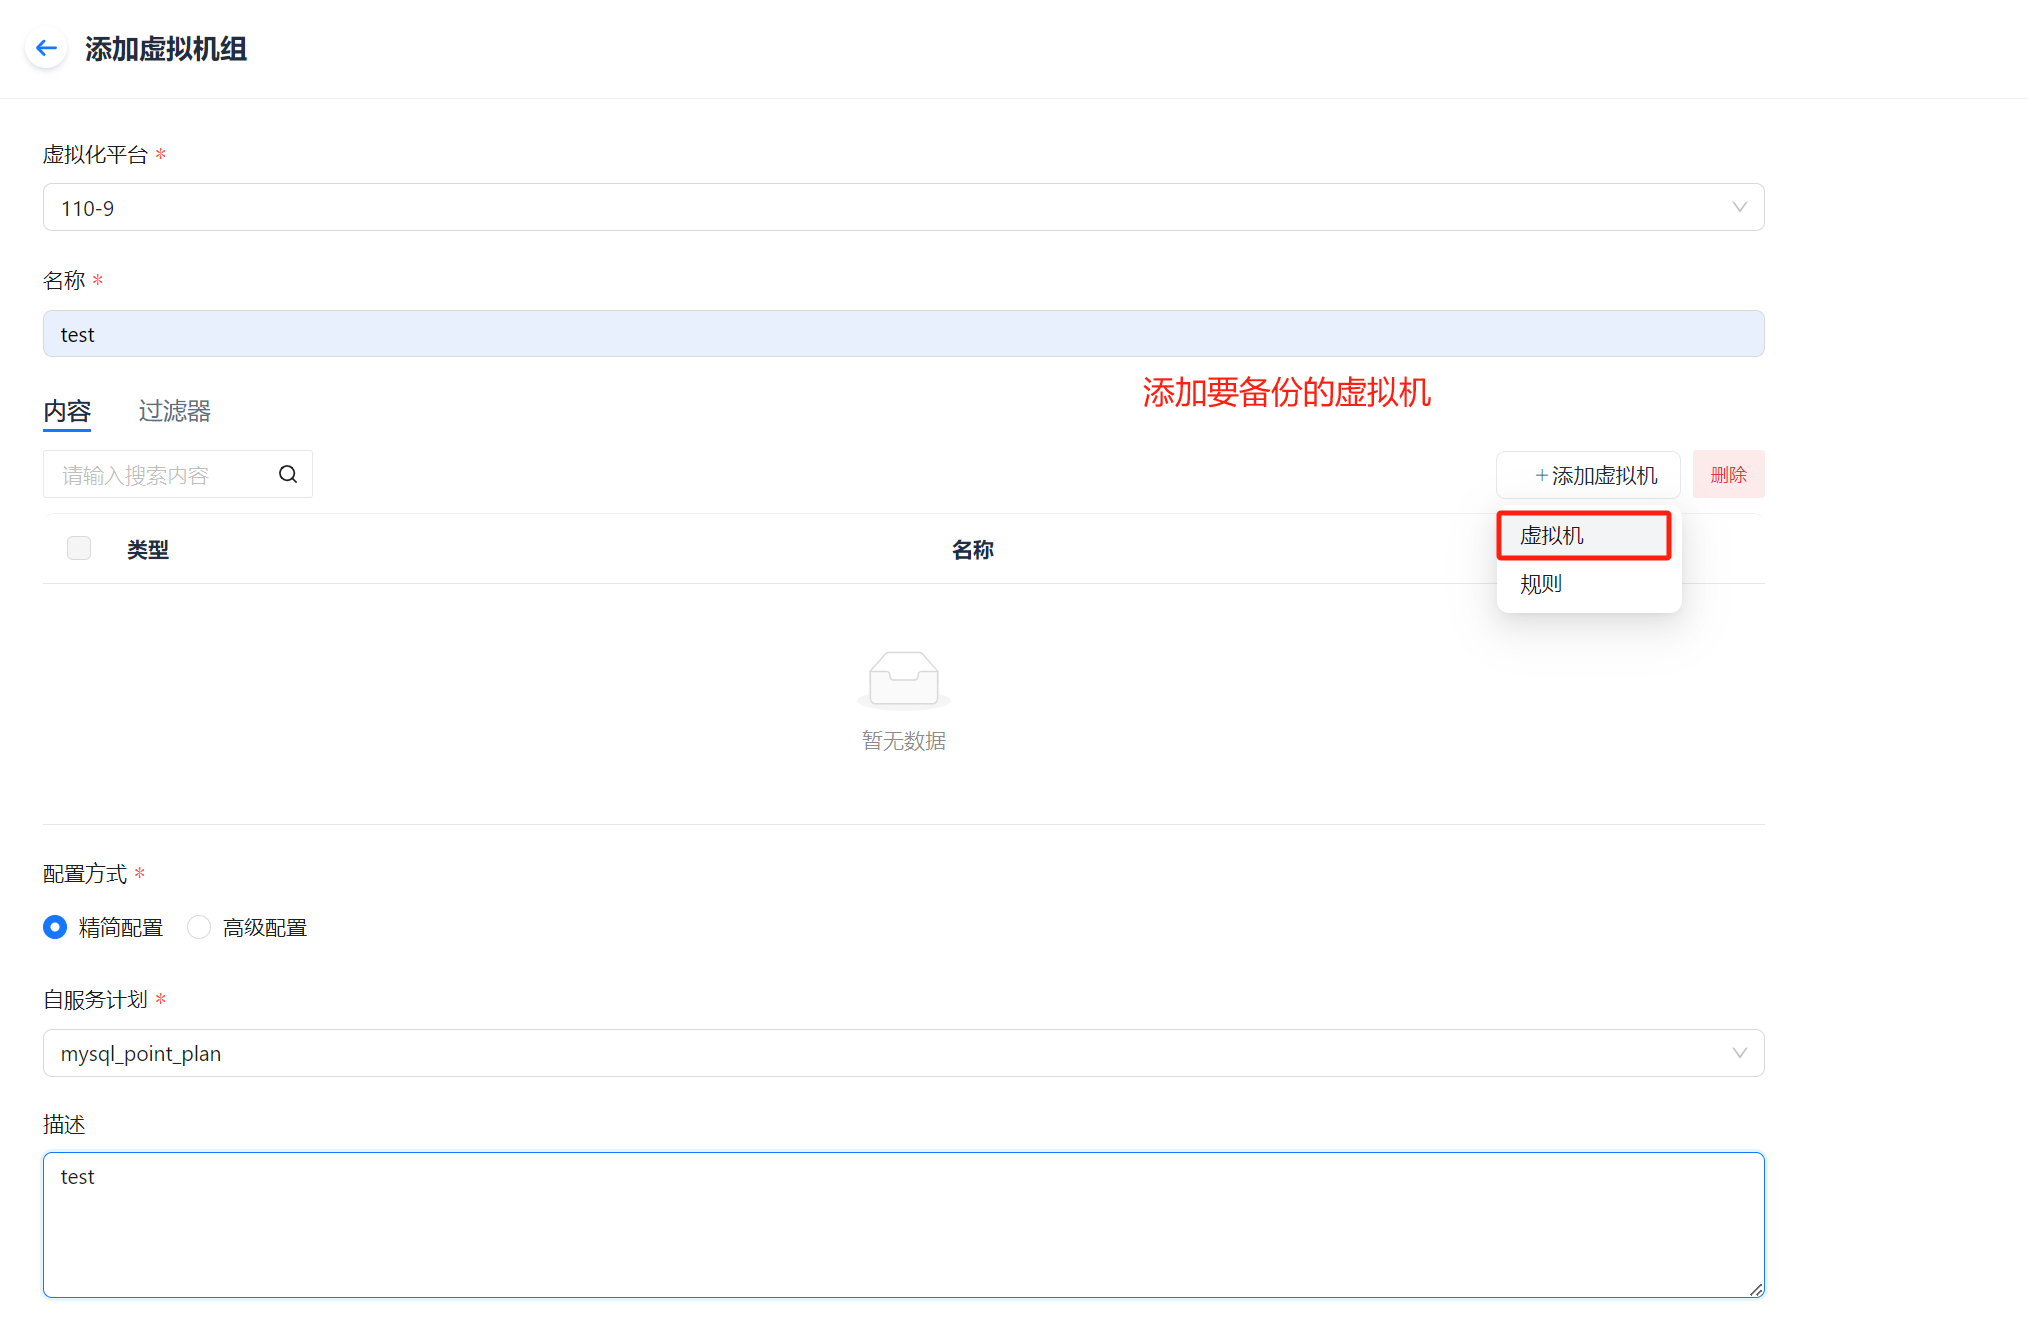

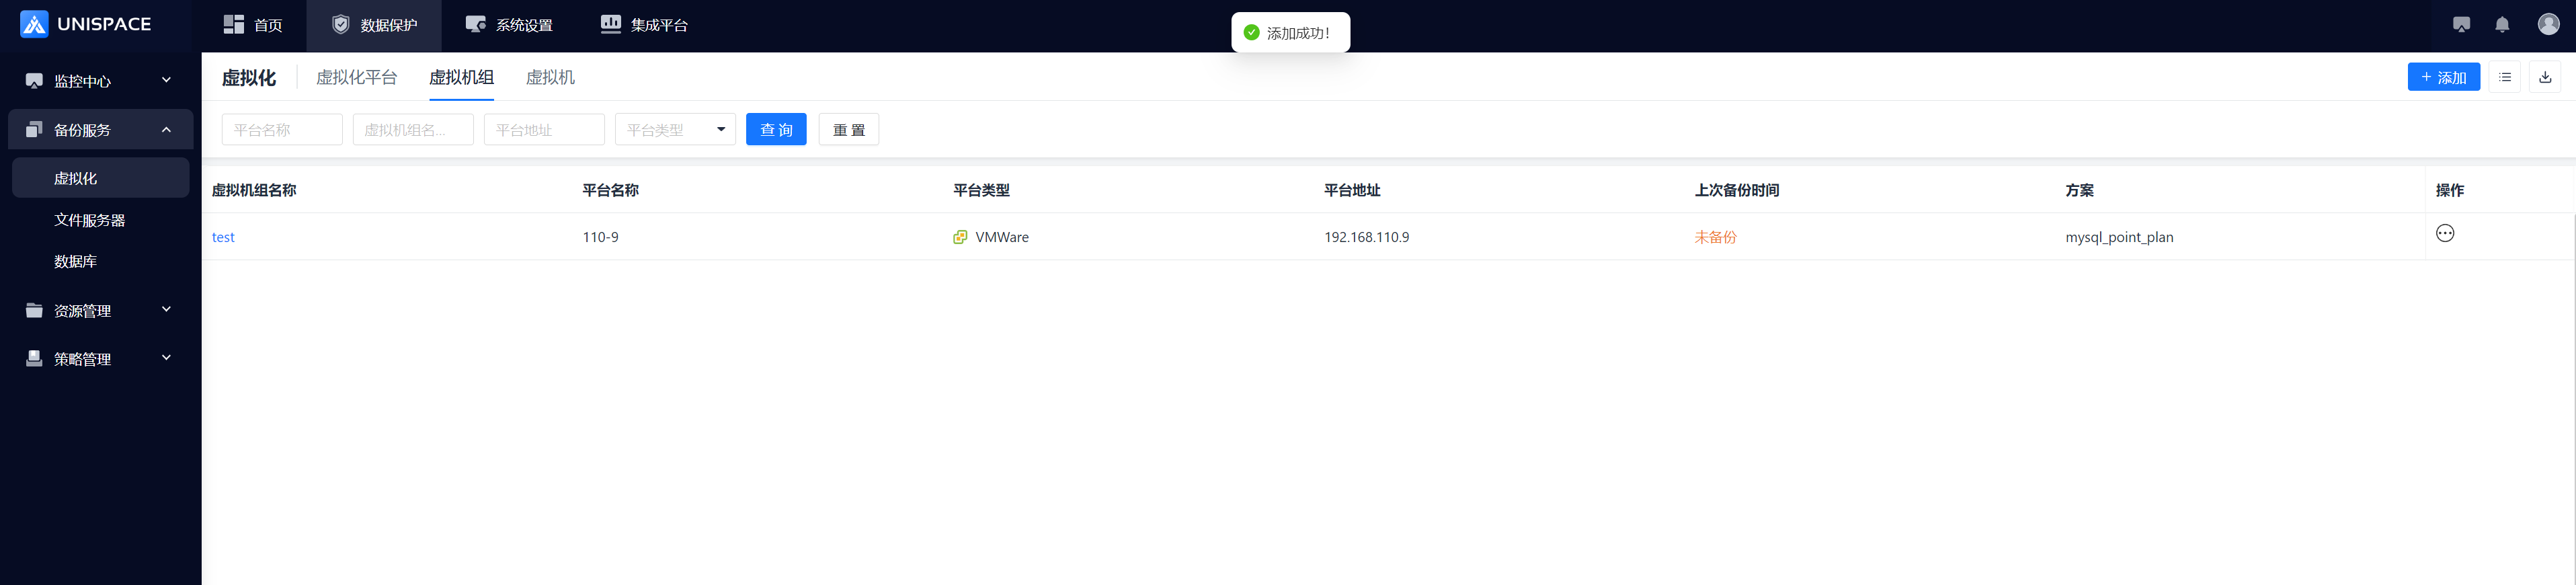
Step 3: Click OK to complete the creation. A success message will appear.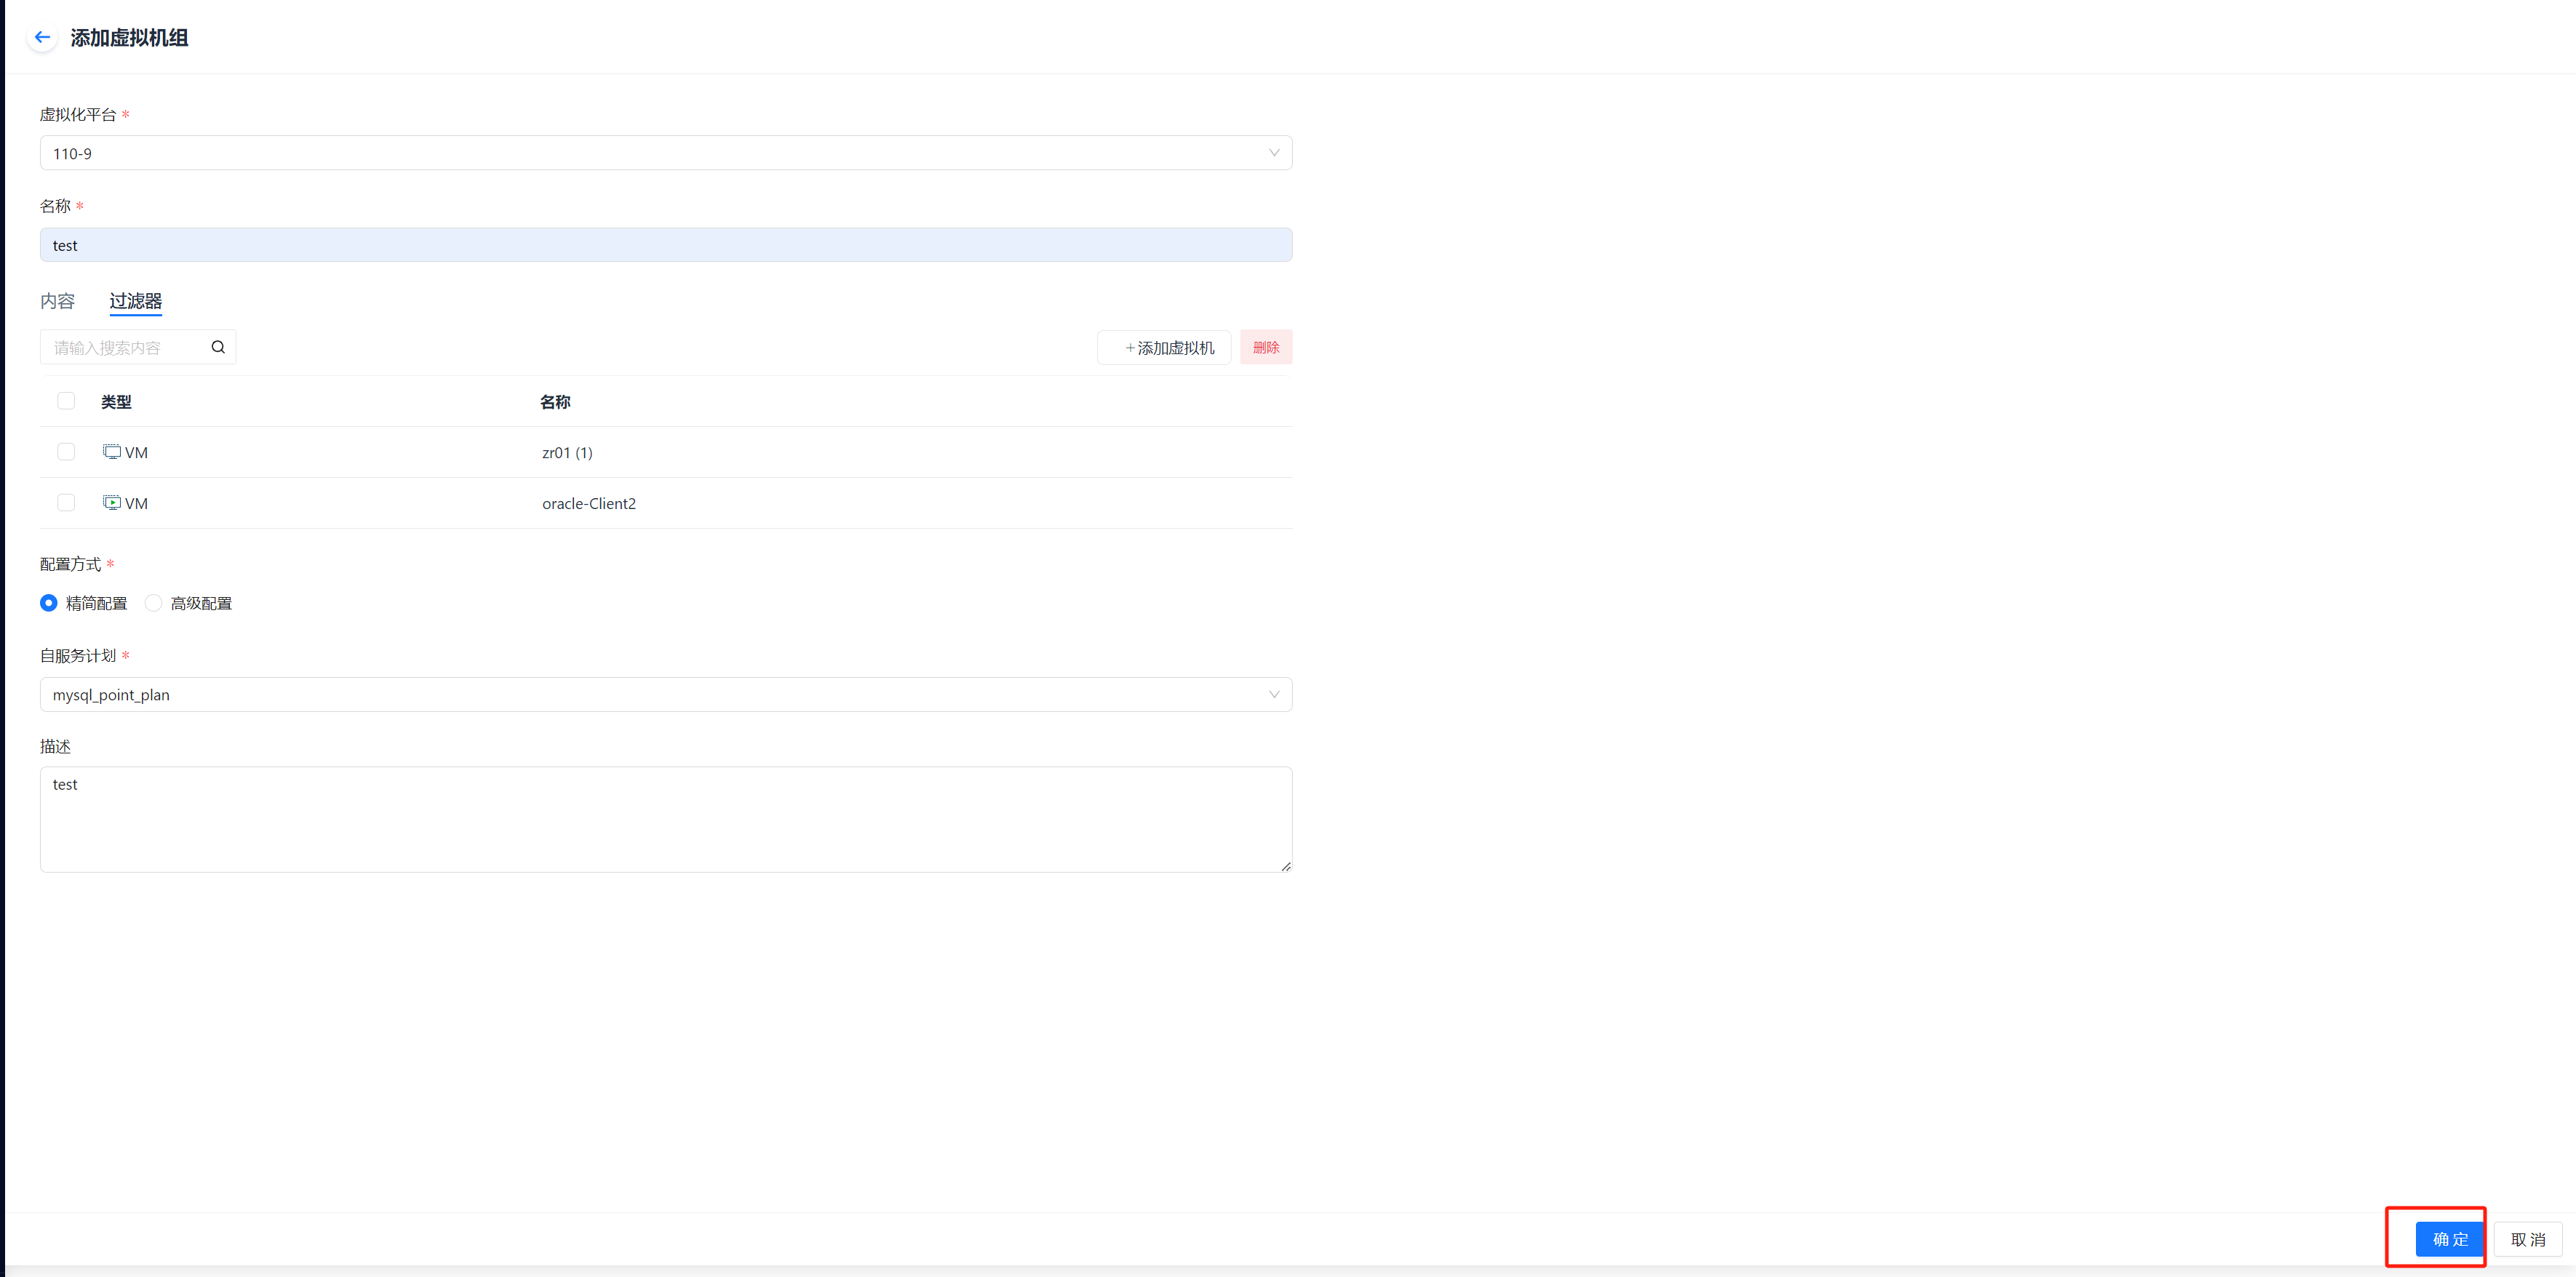
1.3 Filter Rules
Prerequisites
- The OpenStack virtualization platform has been created.
Steps
Step 1: Click Virtual Machine Group - Content - Filter - Add - Rule.
Step 2: The Add Rule window will appear, including "Add Instance Filter Rule" and "Add Disk Filter Rule".
Step 3: Configure the filtering rules based on the VM name, disk name, or disk type.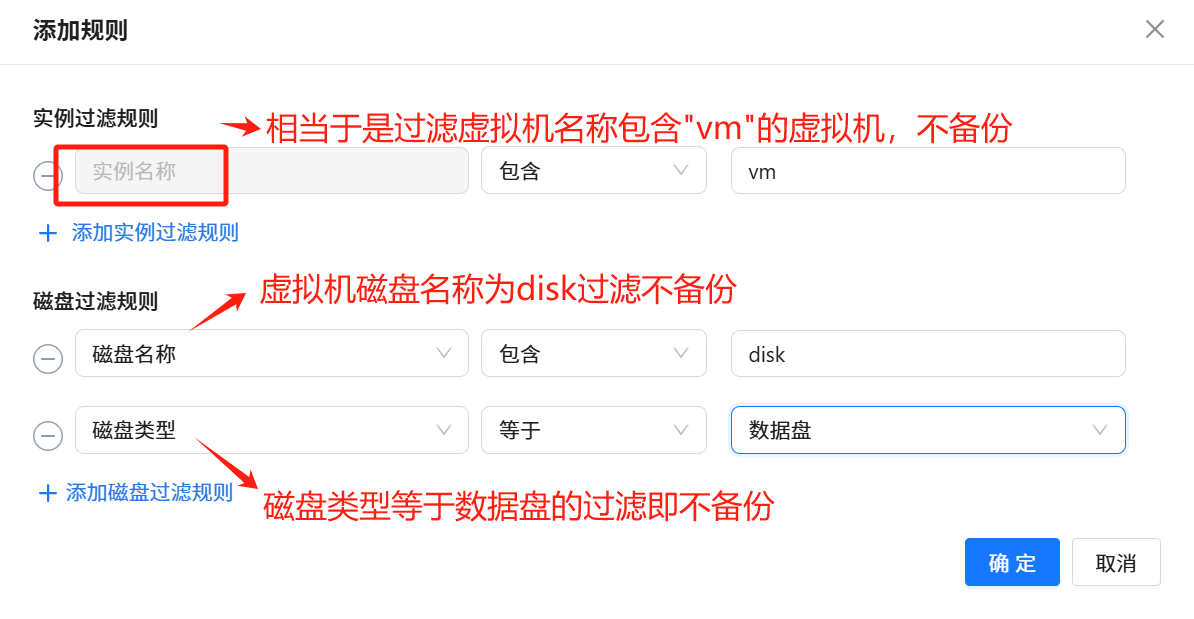
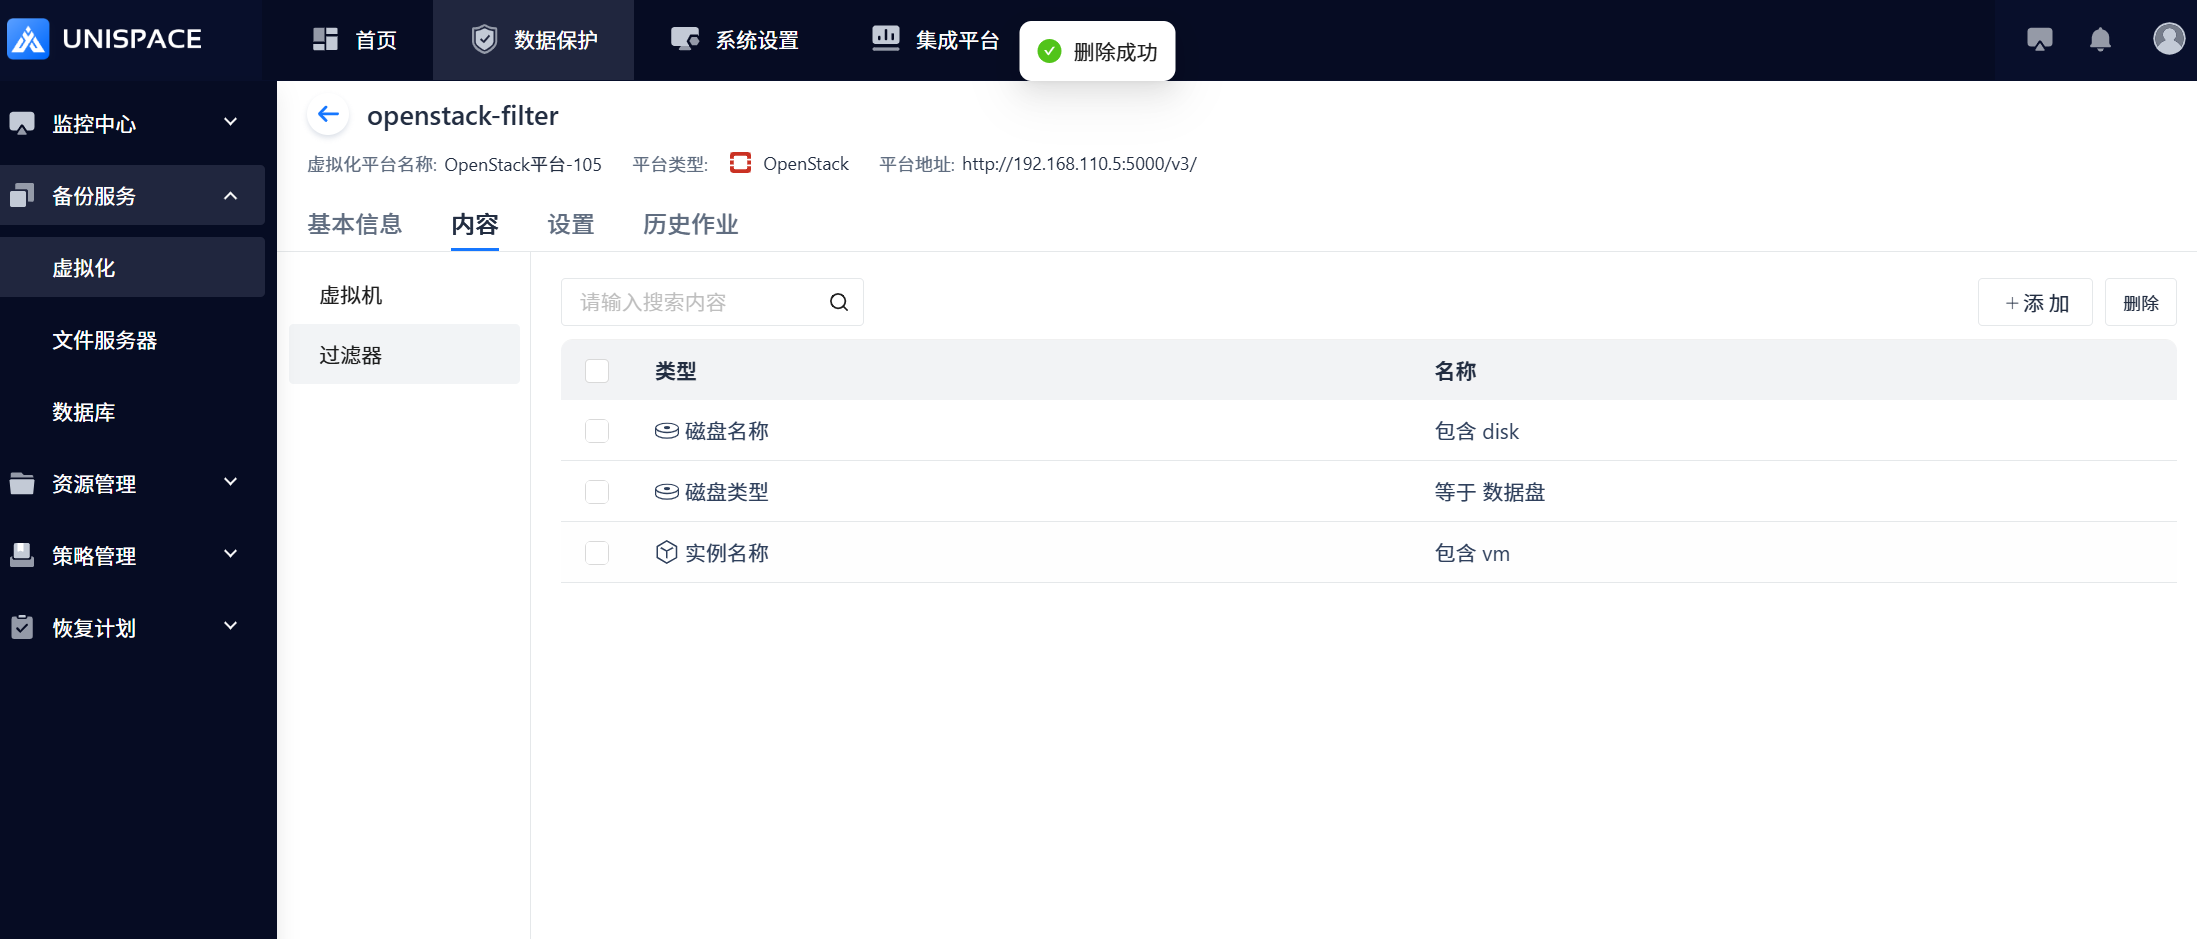
Step 4: To delete a rule, select it and click Delete.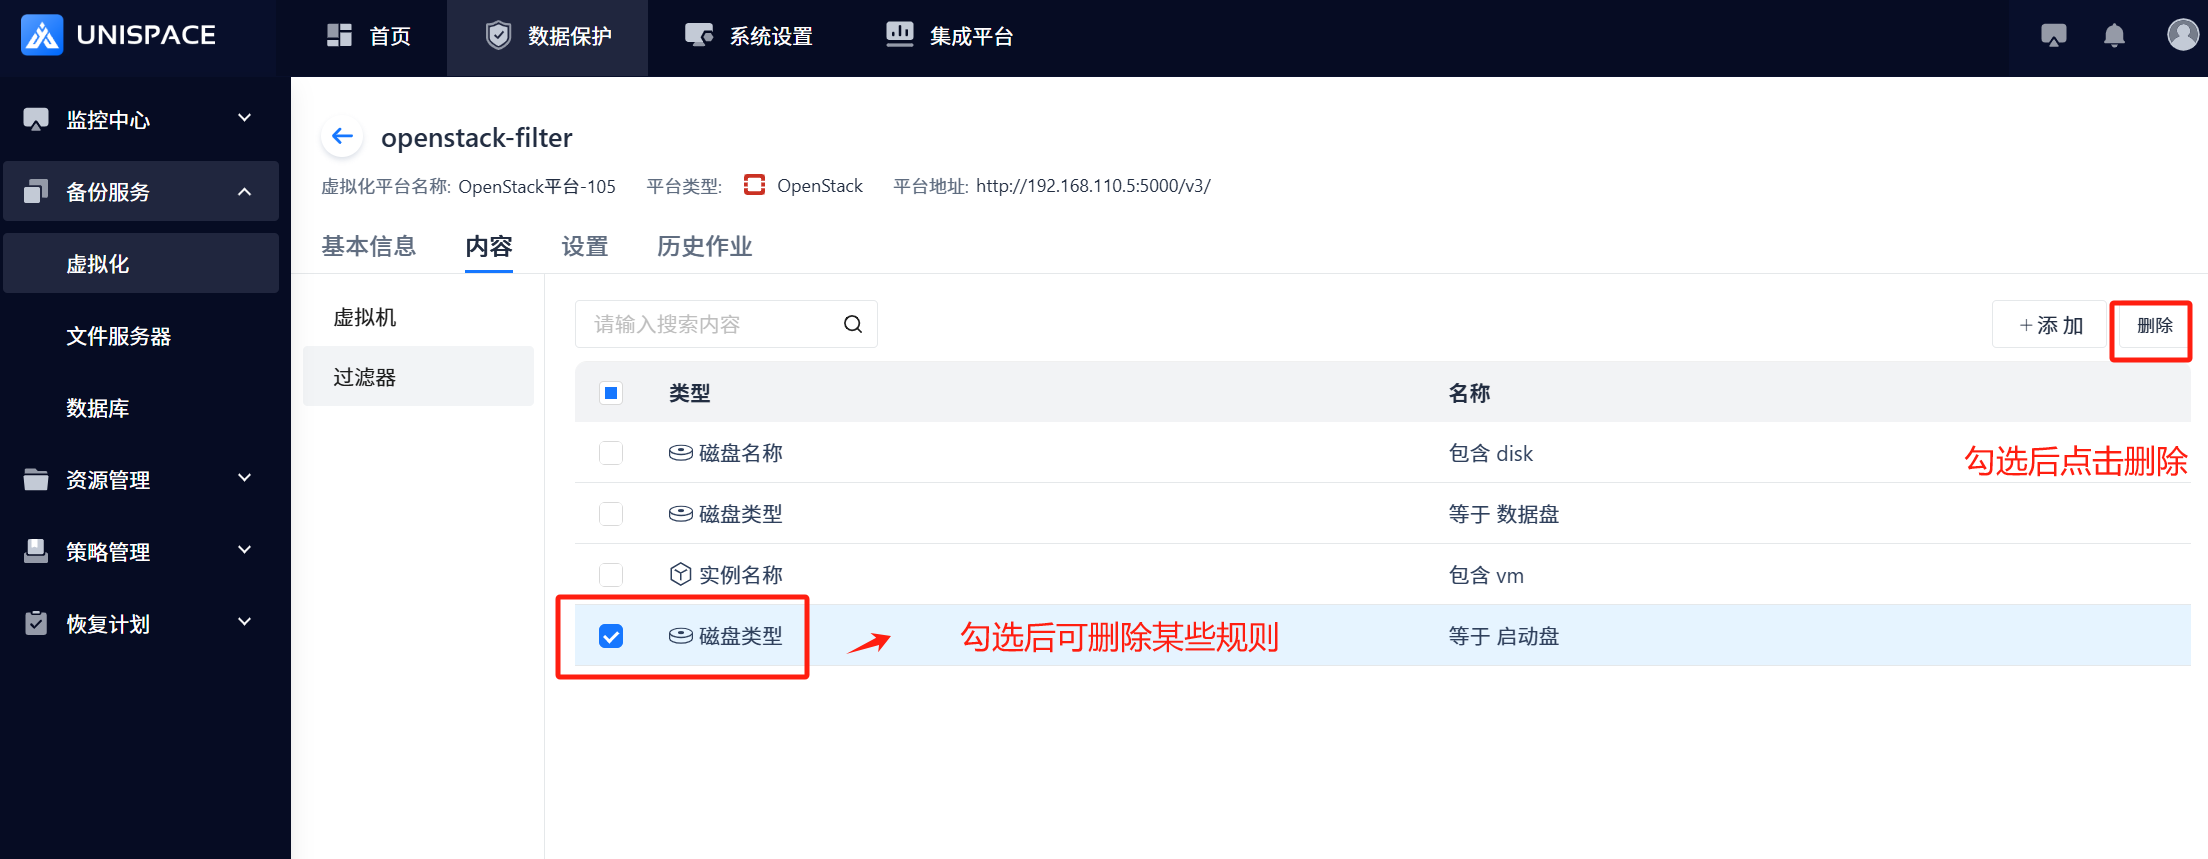
1.4 Backup of Virtual Machine Group
Prerequisites
- A virtual machine group has been created.
Steps
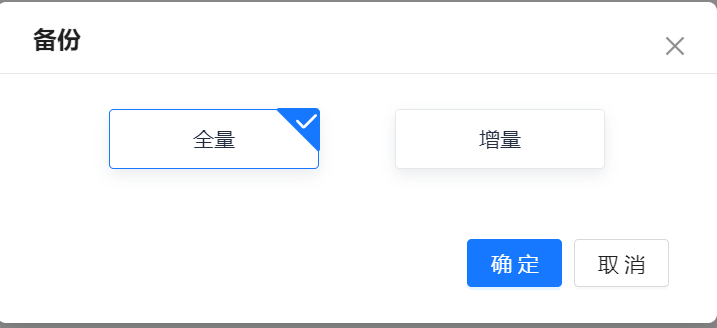
Step 1: Click Virtual Machine Group - Operation - Backup, select Full or Incremental backup, and click OK.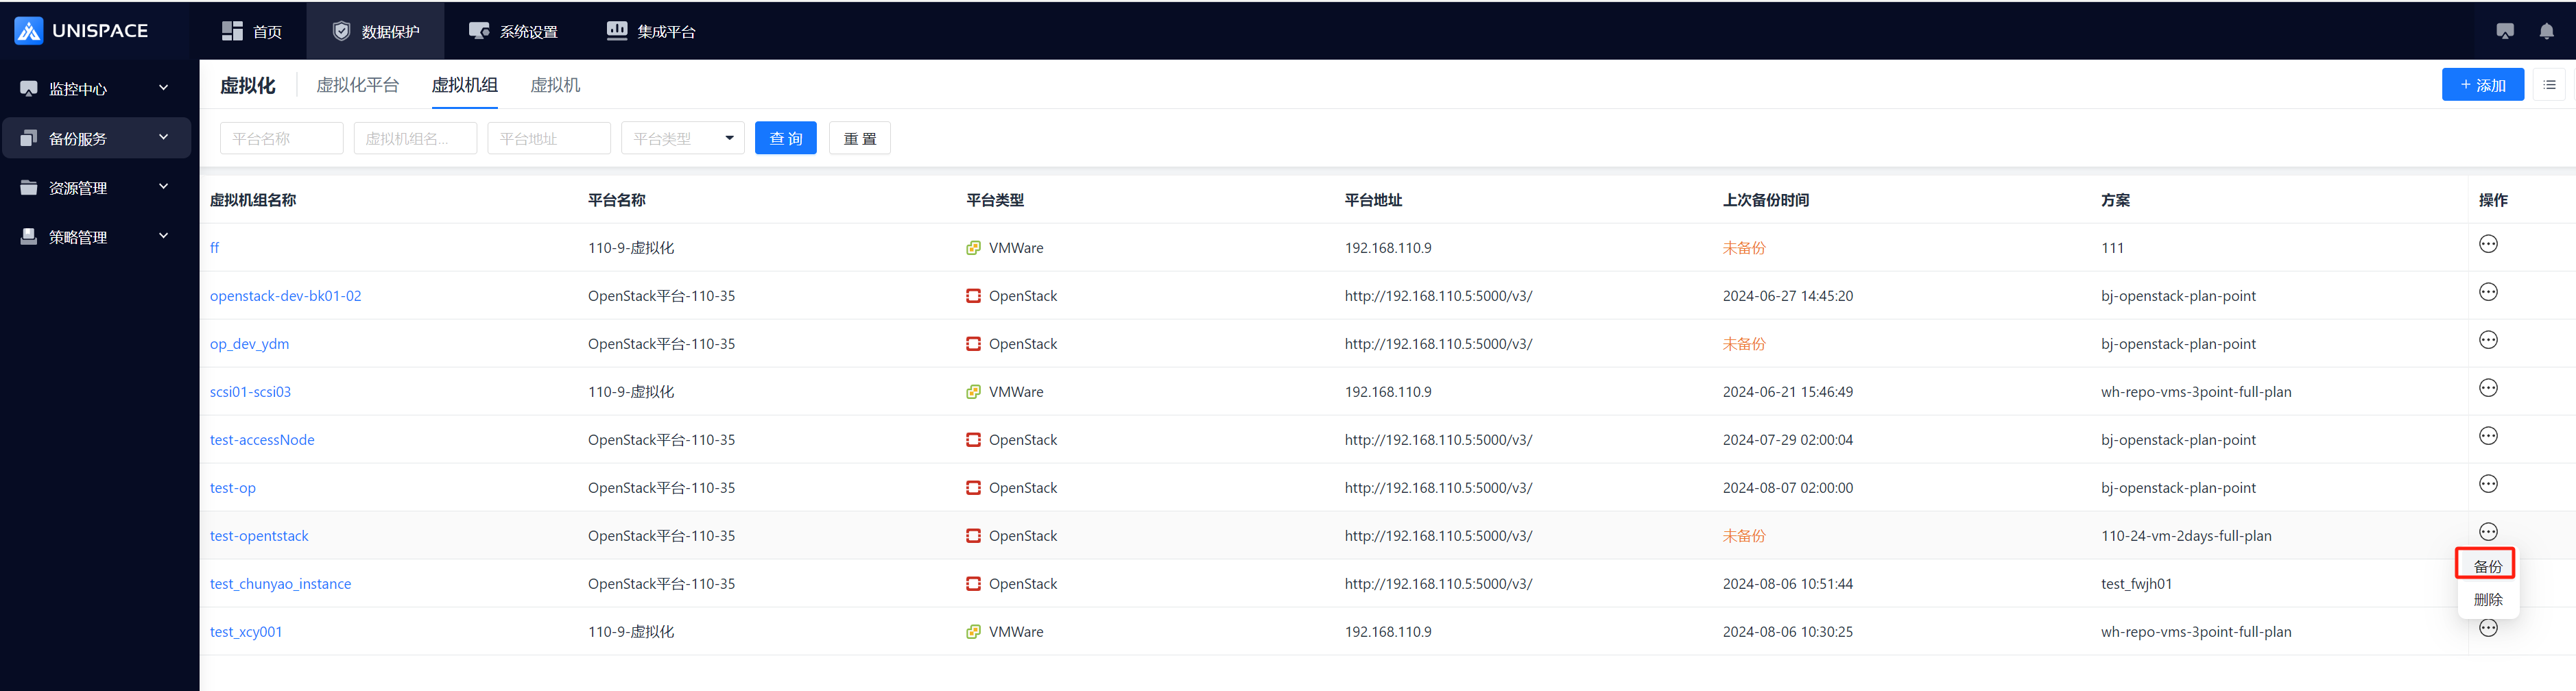
Step 2: Once the job starts successfully, go to Monitoring Center - Jobs - Active Jobs to view the progress.
Step 3: After the backup completes, navigate to Monitoring Center - Jobs - Job History to see the completed backup job and its status.
1.5 OpenStack Virtual Machine Recovery
Prerequisites
- A full or incremental backup has been performed for the OpenStack VM group.
Steps
Step 1: Click System Menu - Backup Service - Virtualization - Virtual Machine.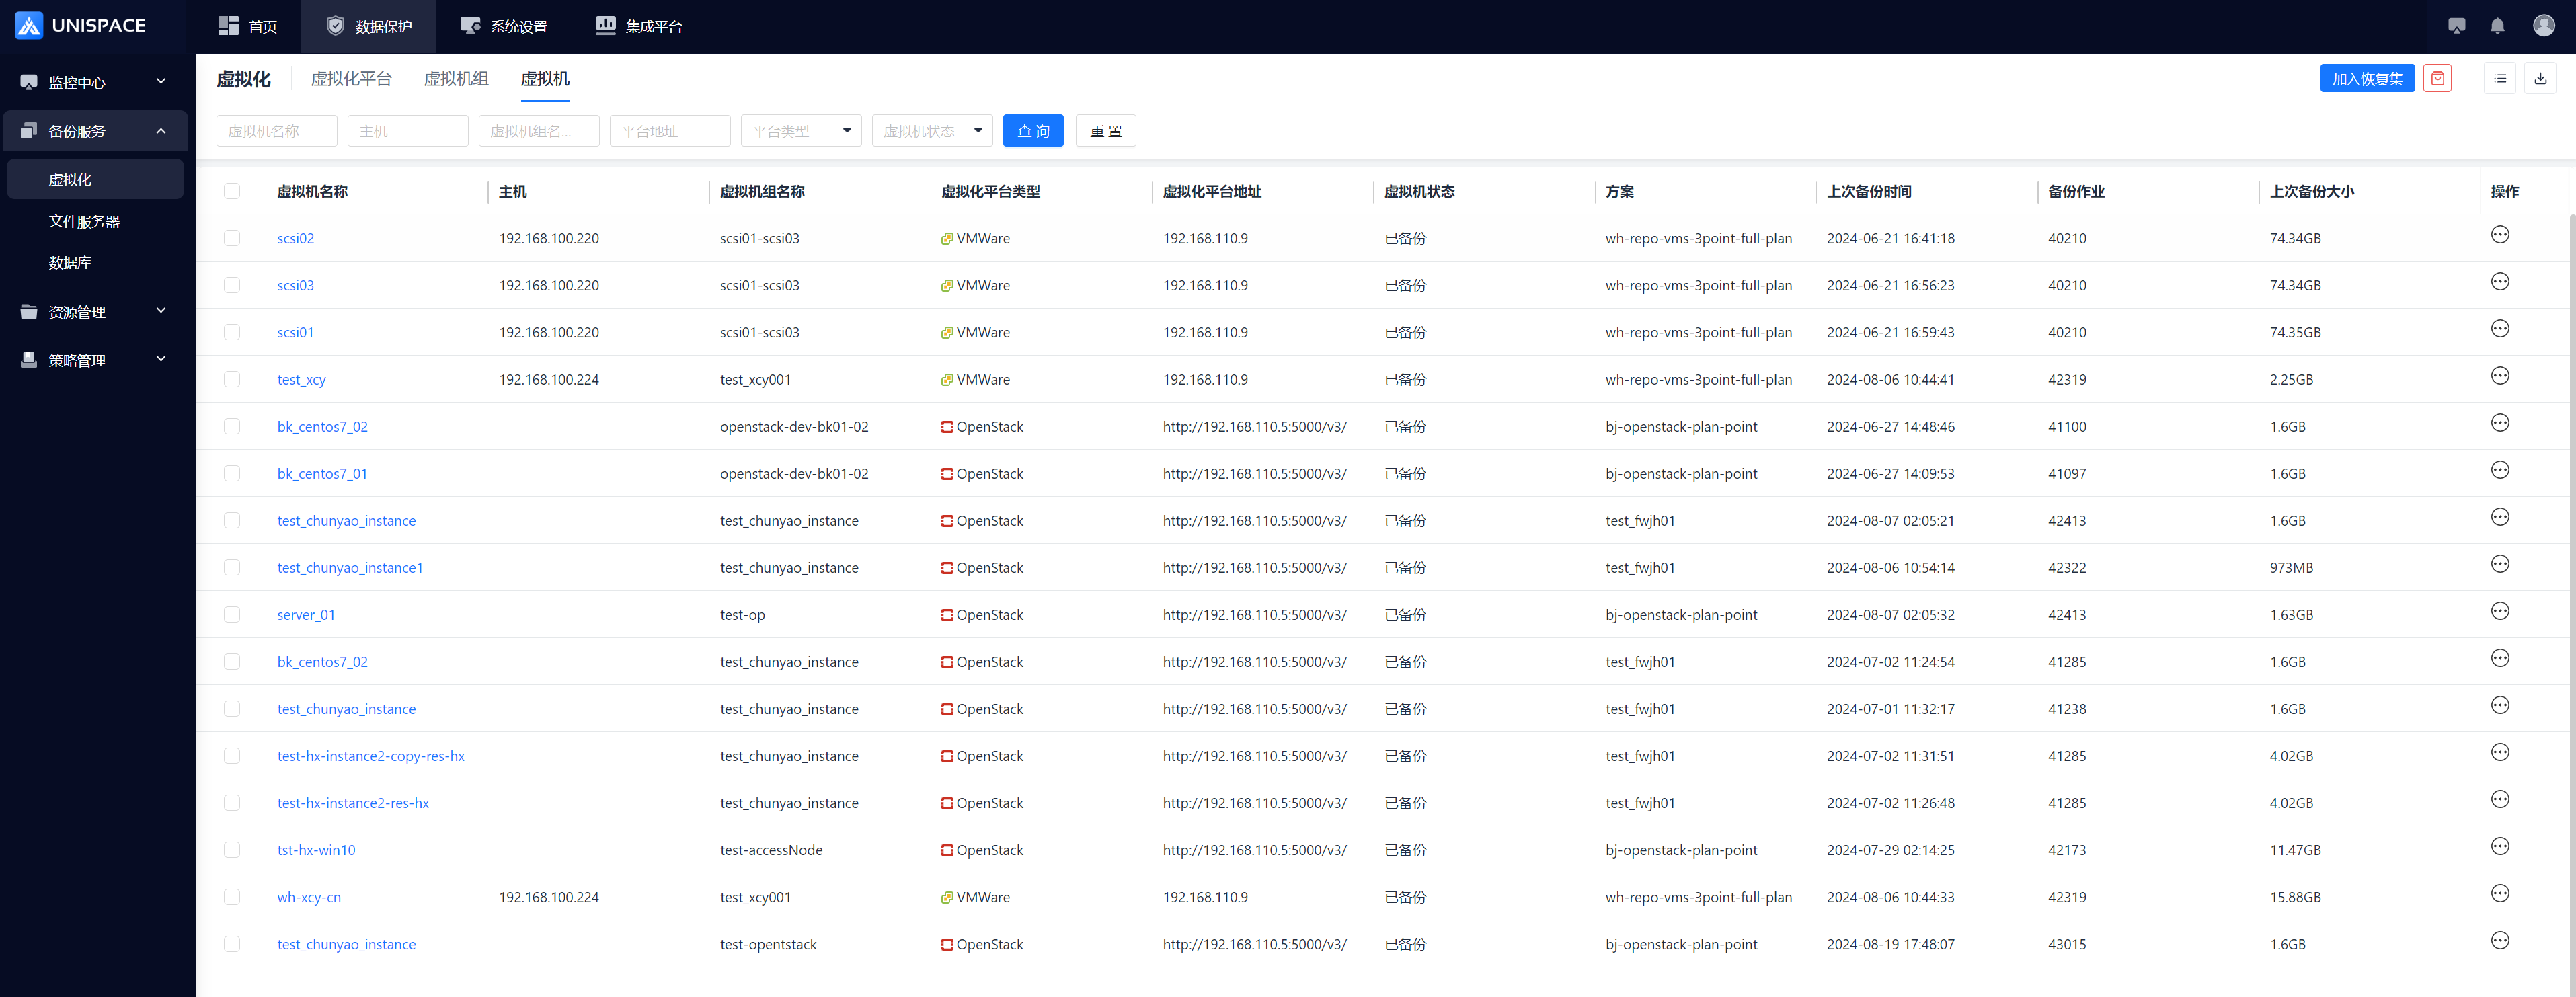
Step 2: Check the VMs to be restored from the Virtual Machine list, click Add to Recovery Set, and then click the adjacent logo.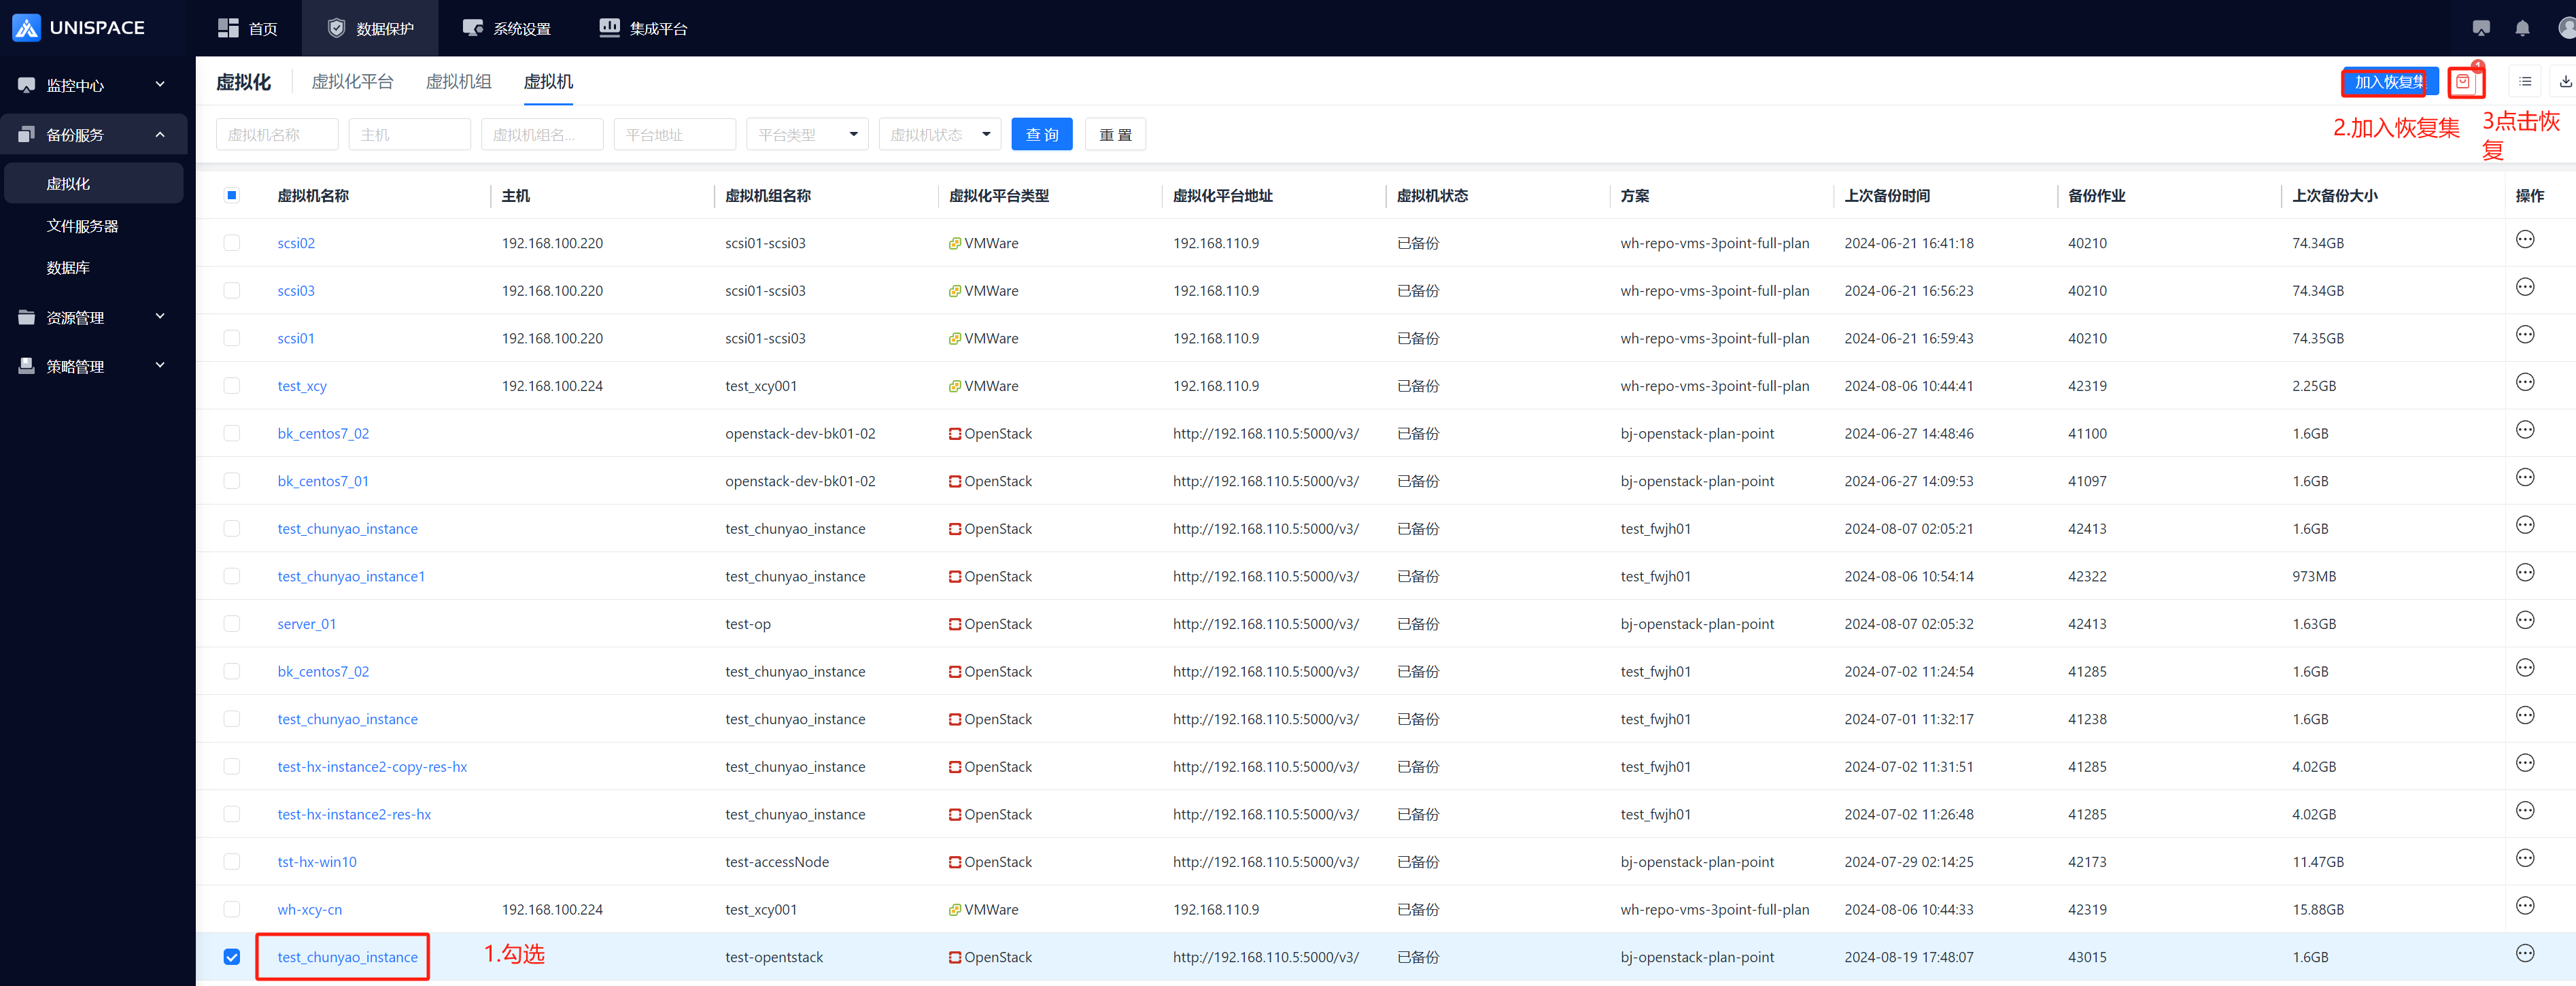
Step 3: A "Recovery Set" window will pop up. Query the recovery point based on the time range or the most recent recovery point, and click Confirm.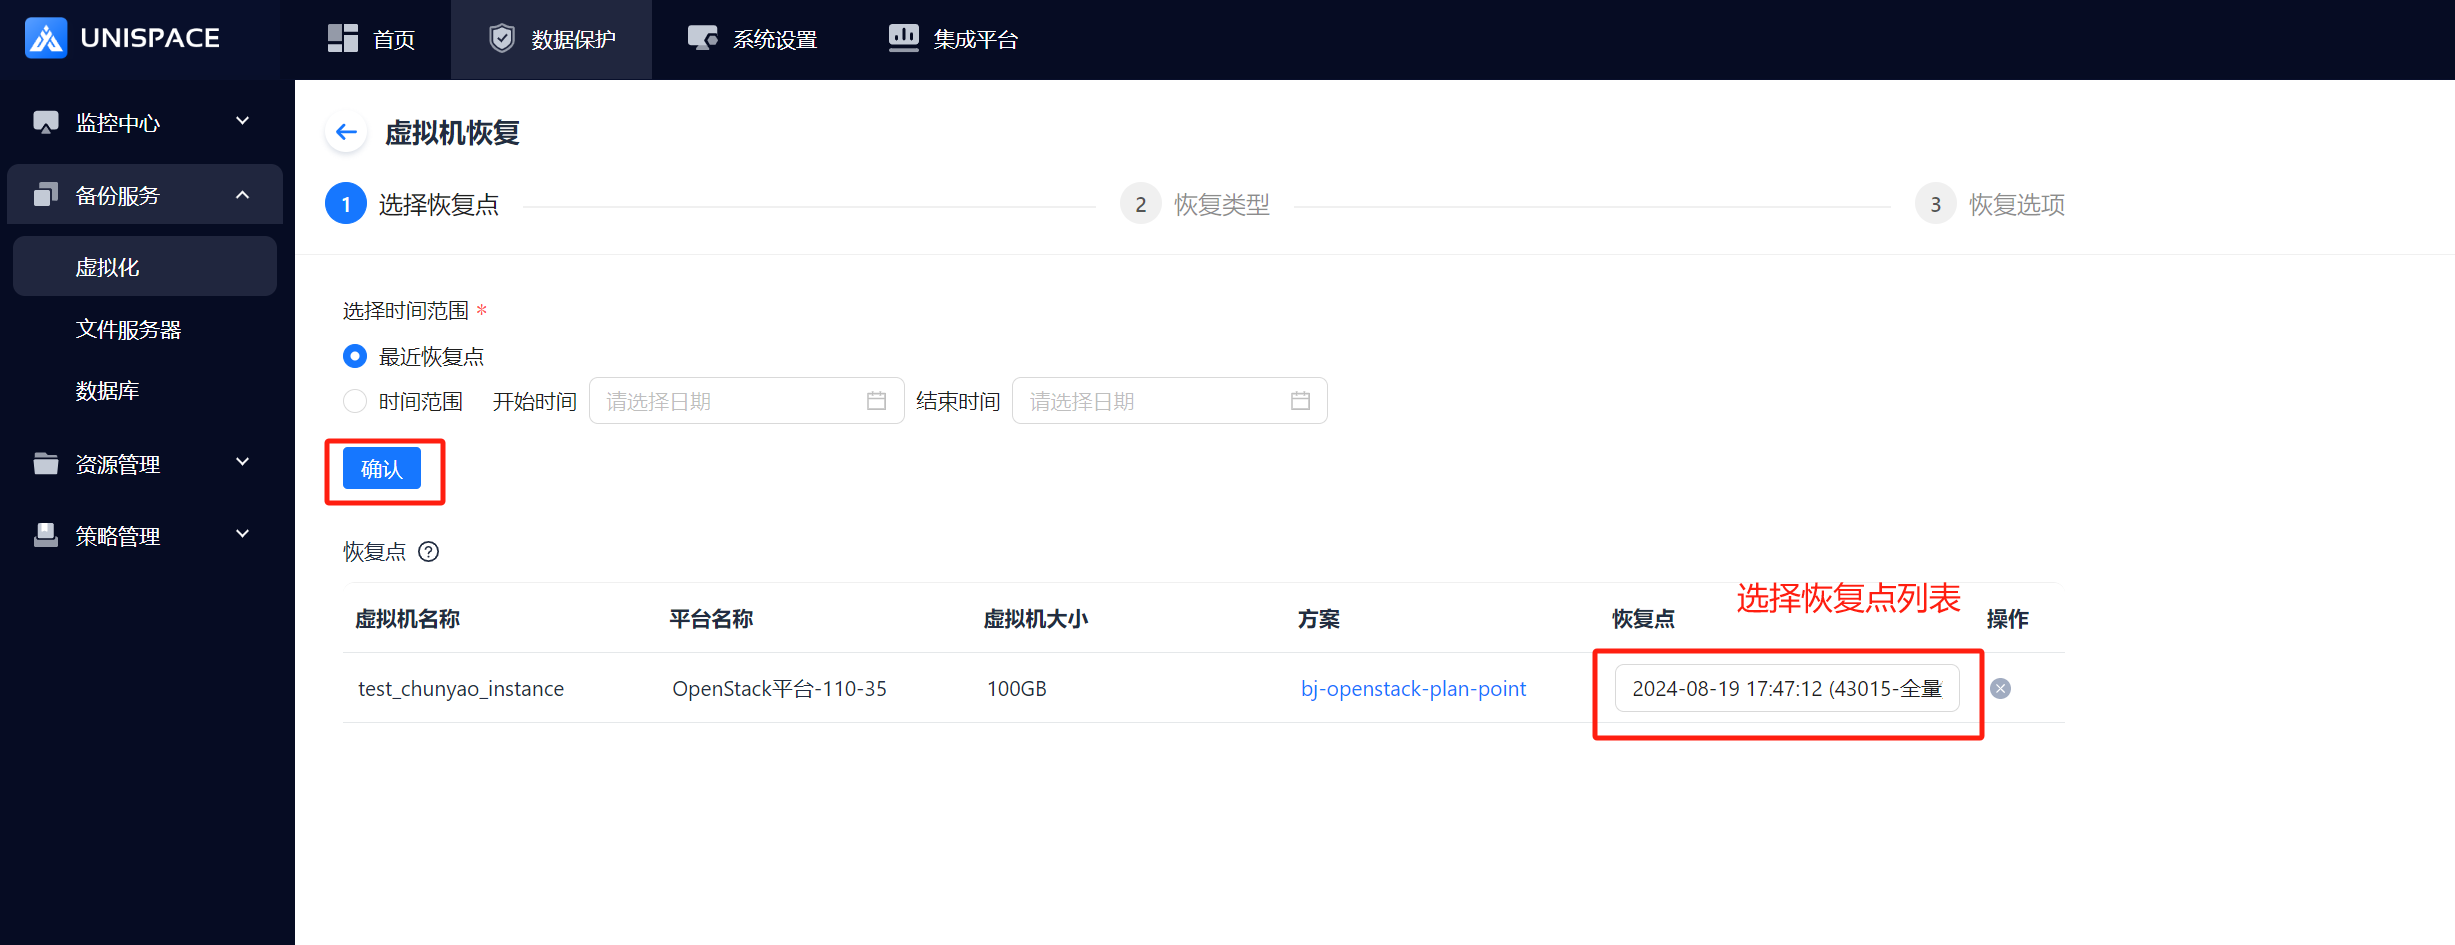
Step 4: Select the recovery point and the backup job ID to be restored, then click Next. Choose Full VM (client file recovery is not supported for now).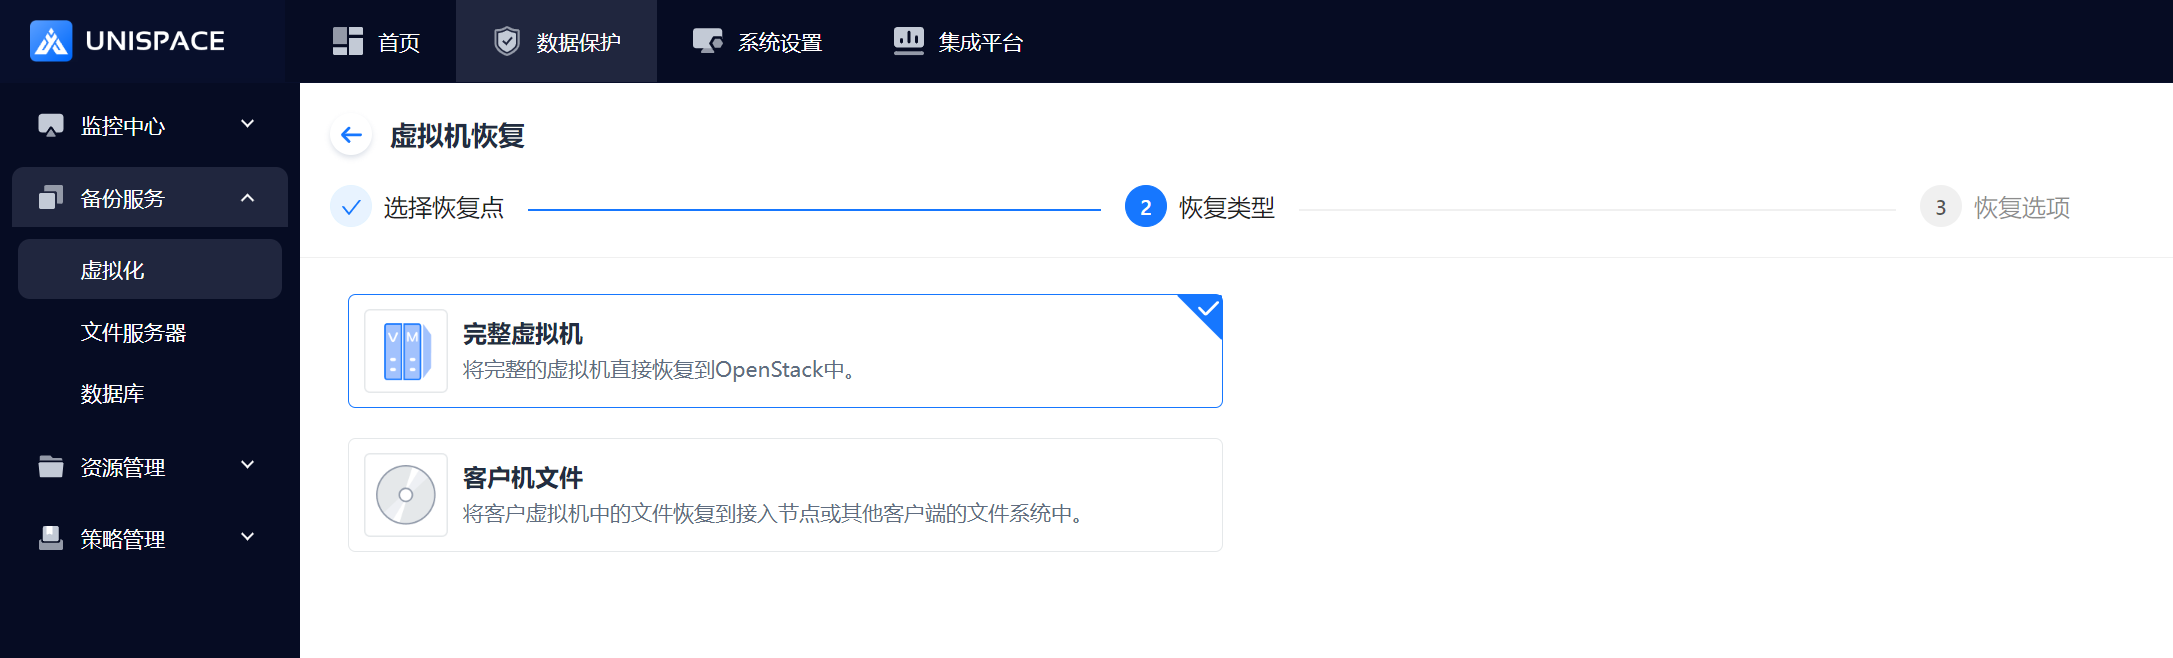
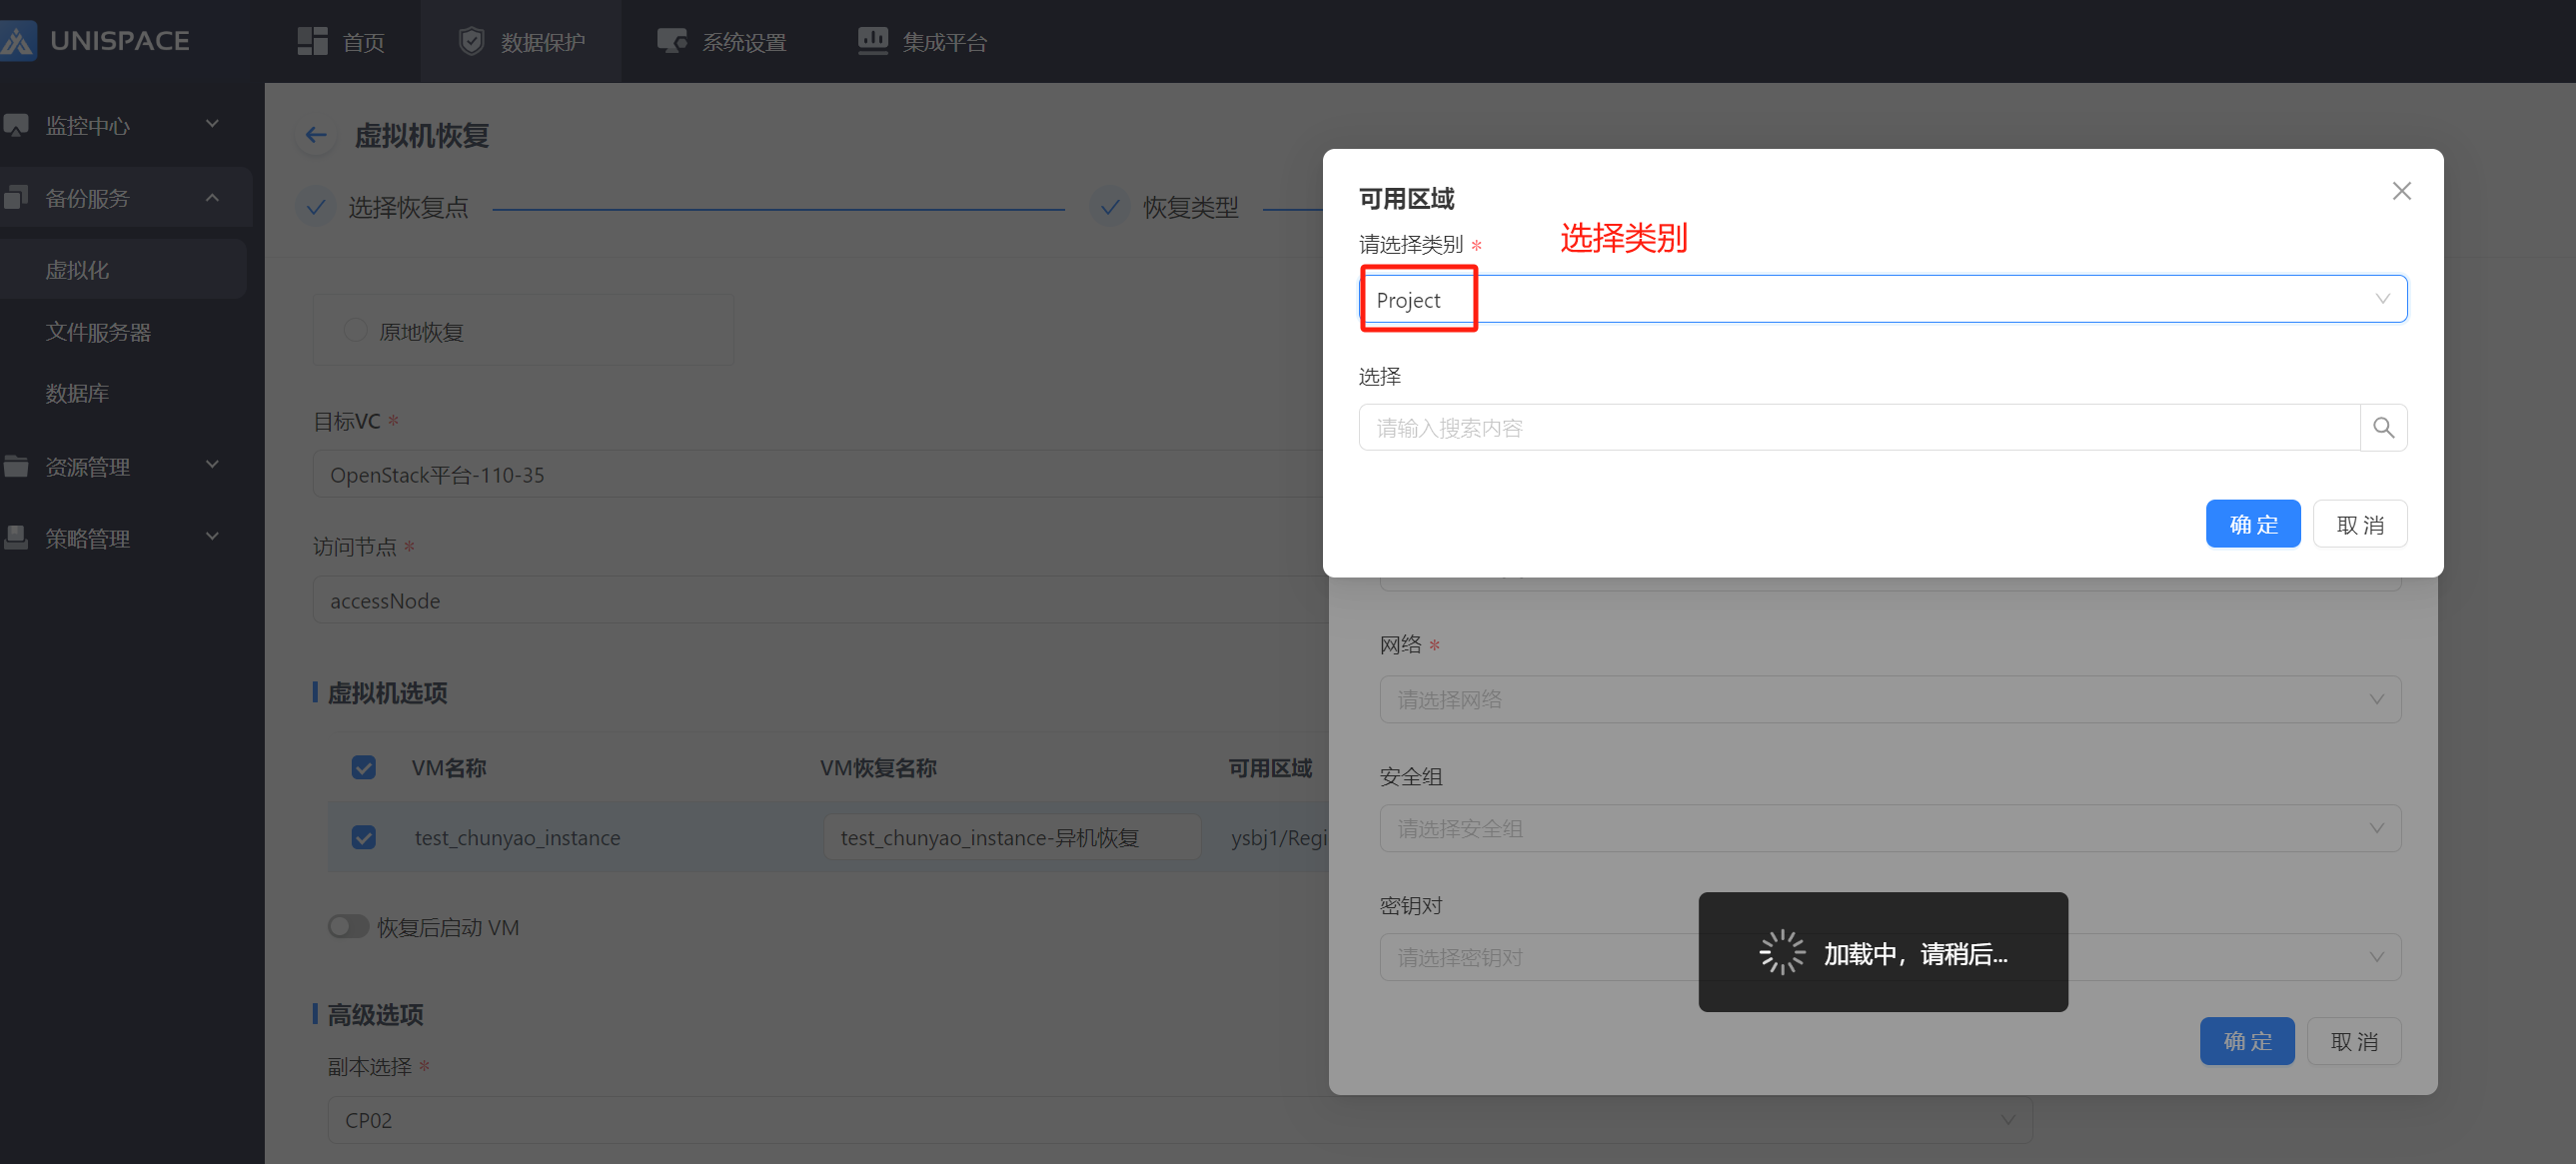
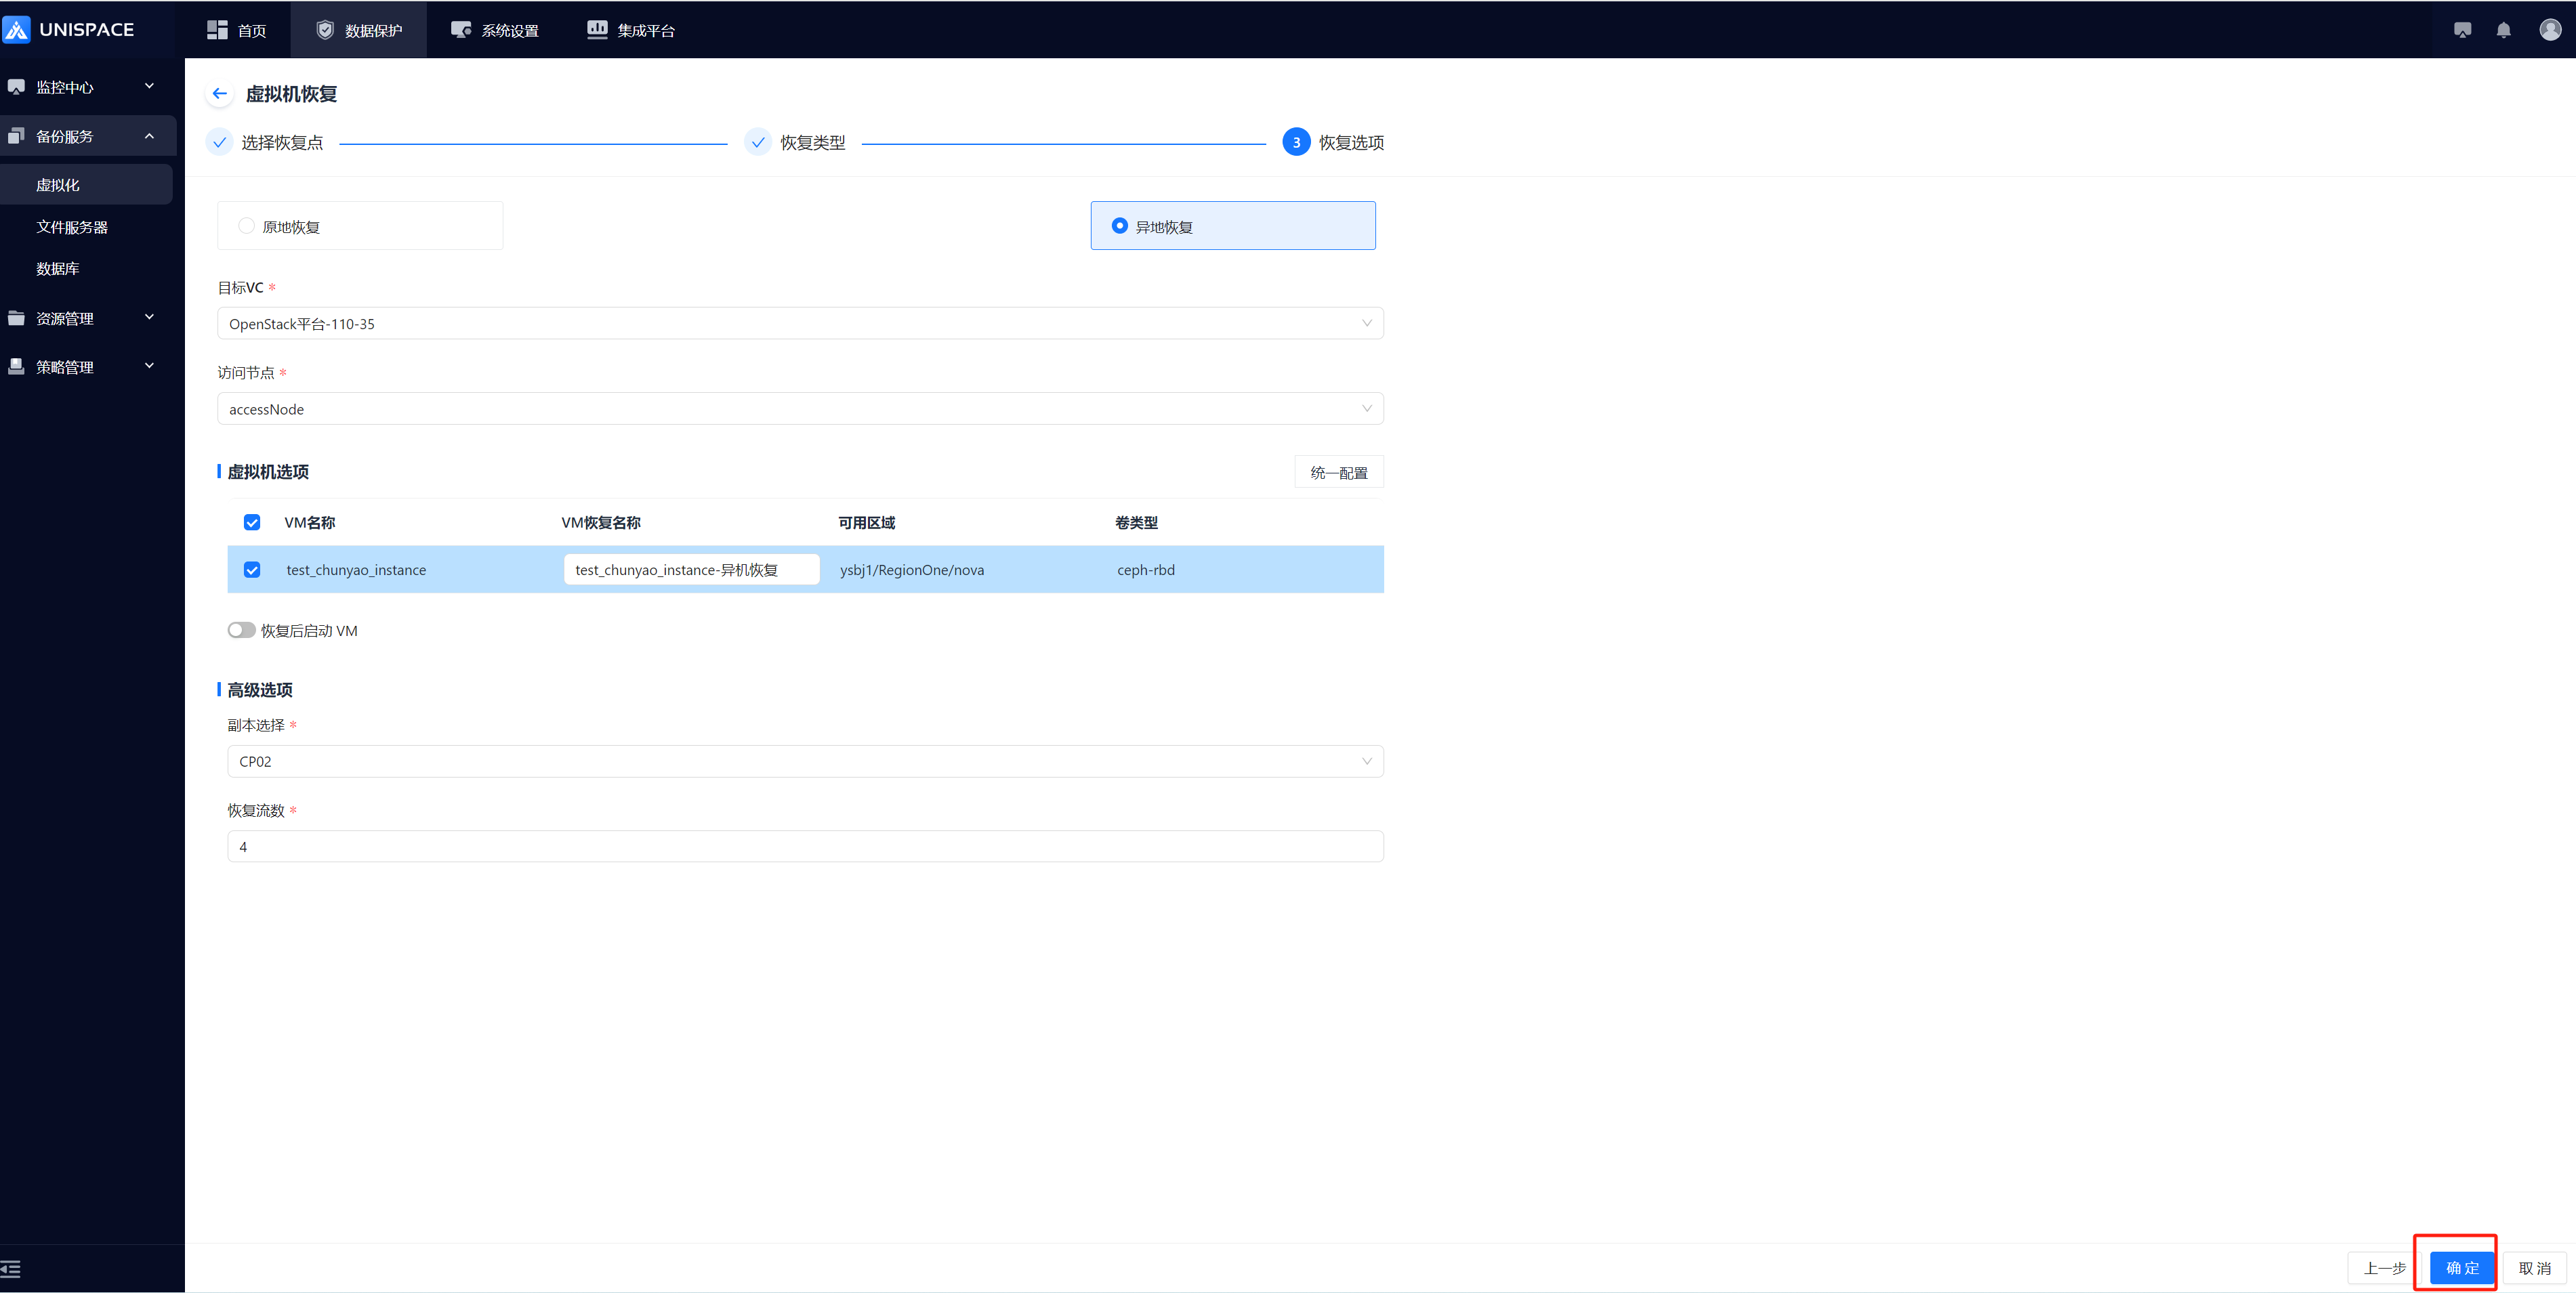
Step 5: Choose In-Place Recovery.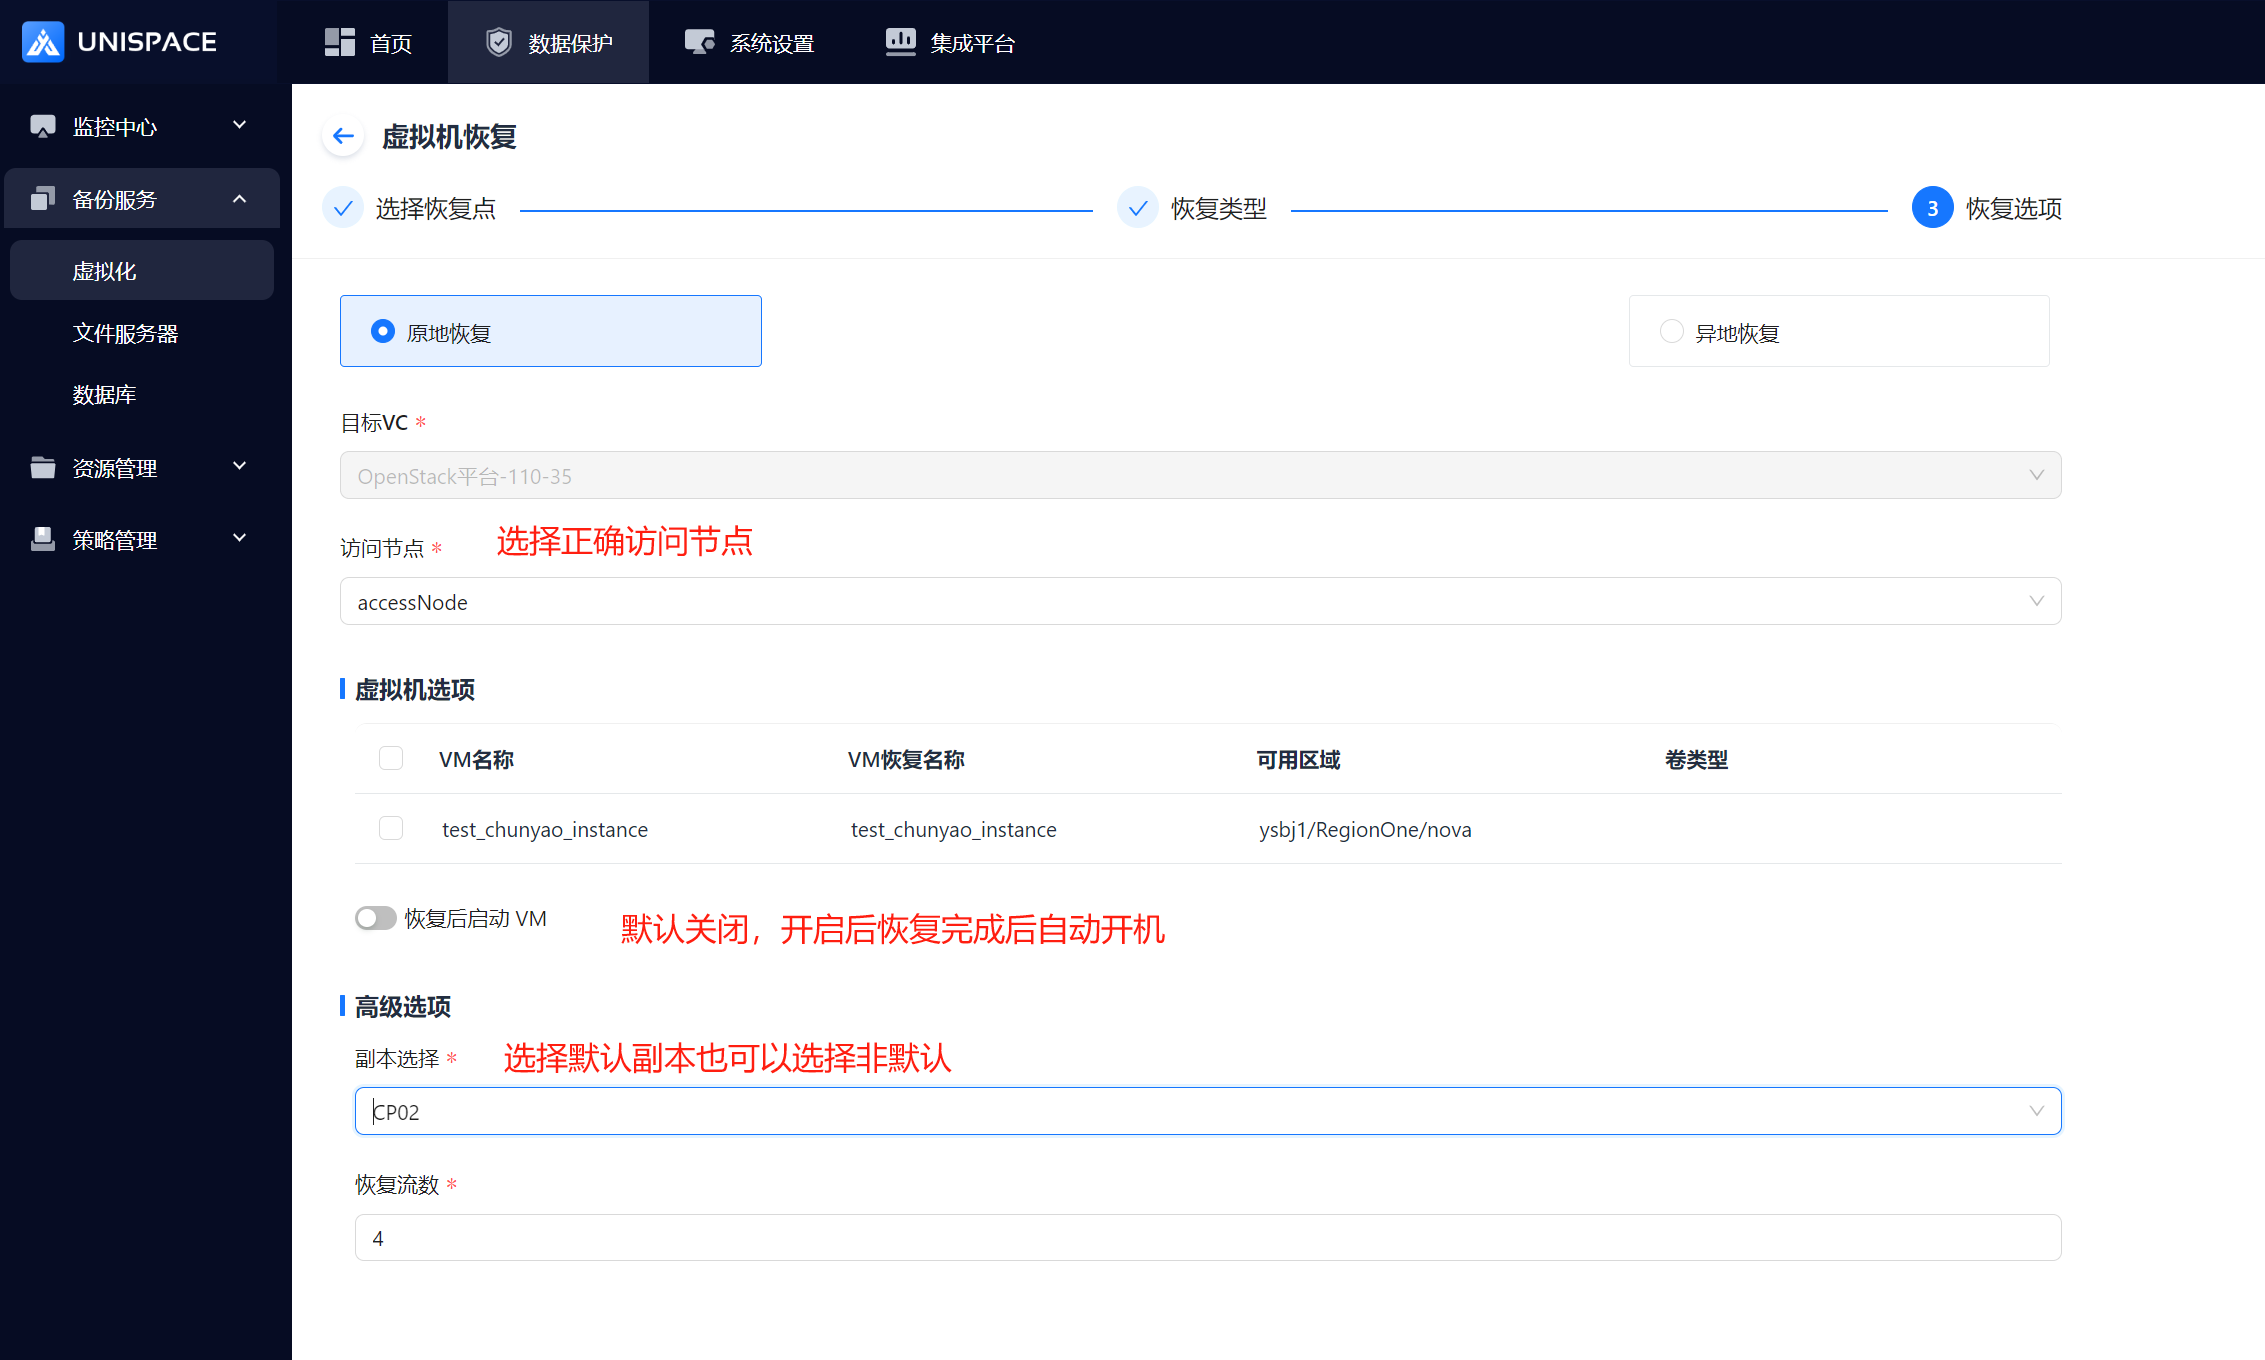
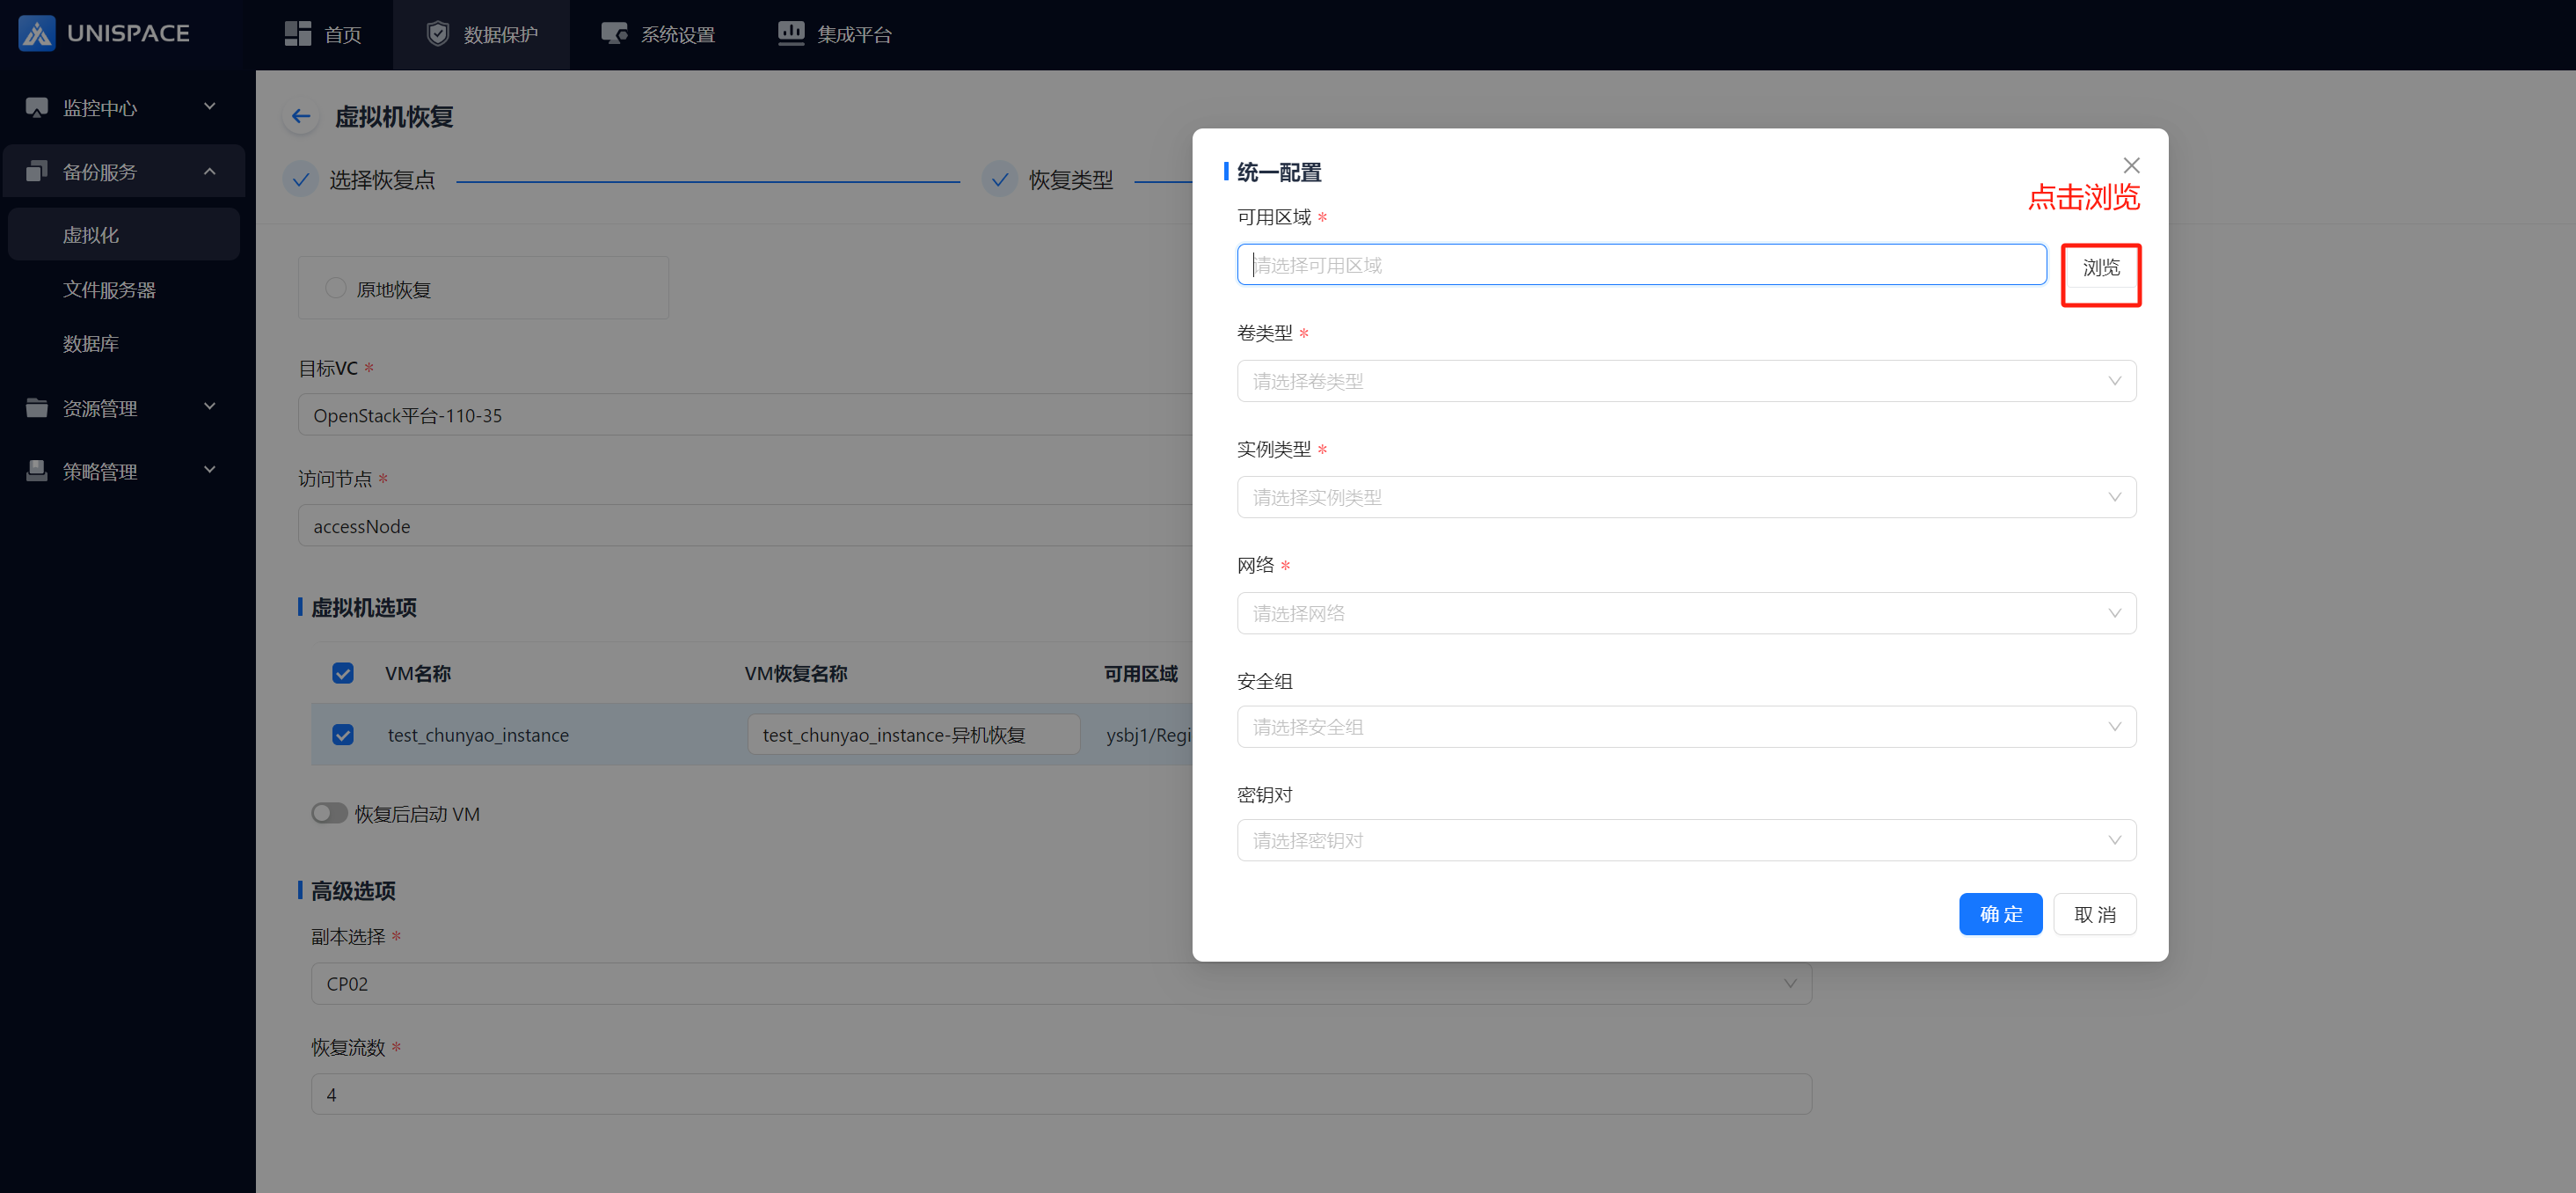
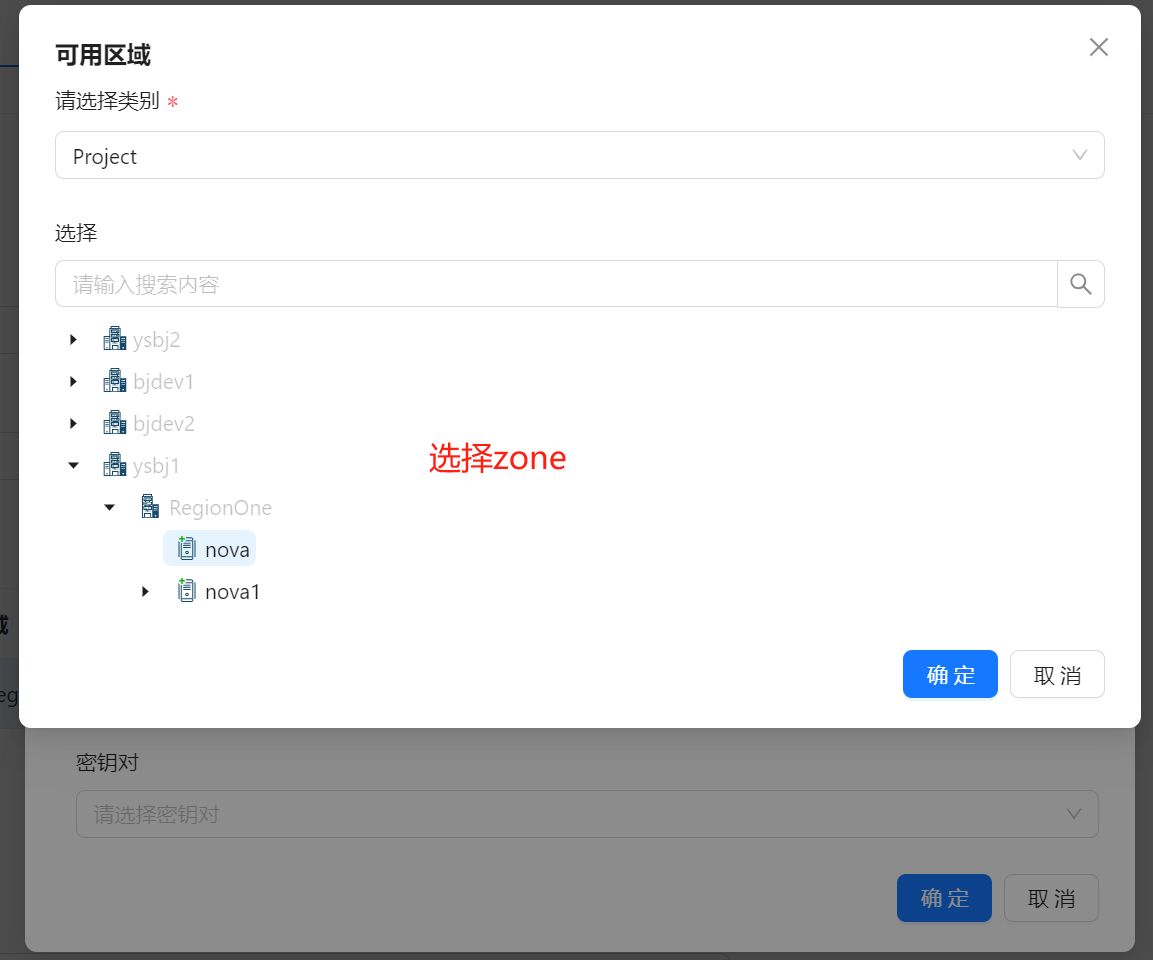
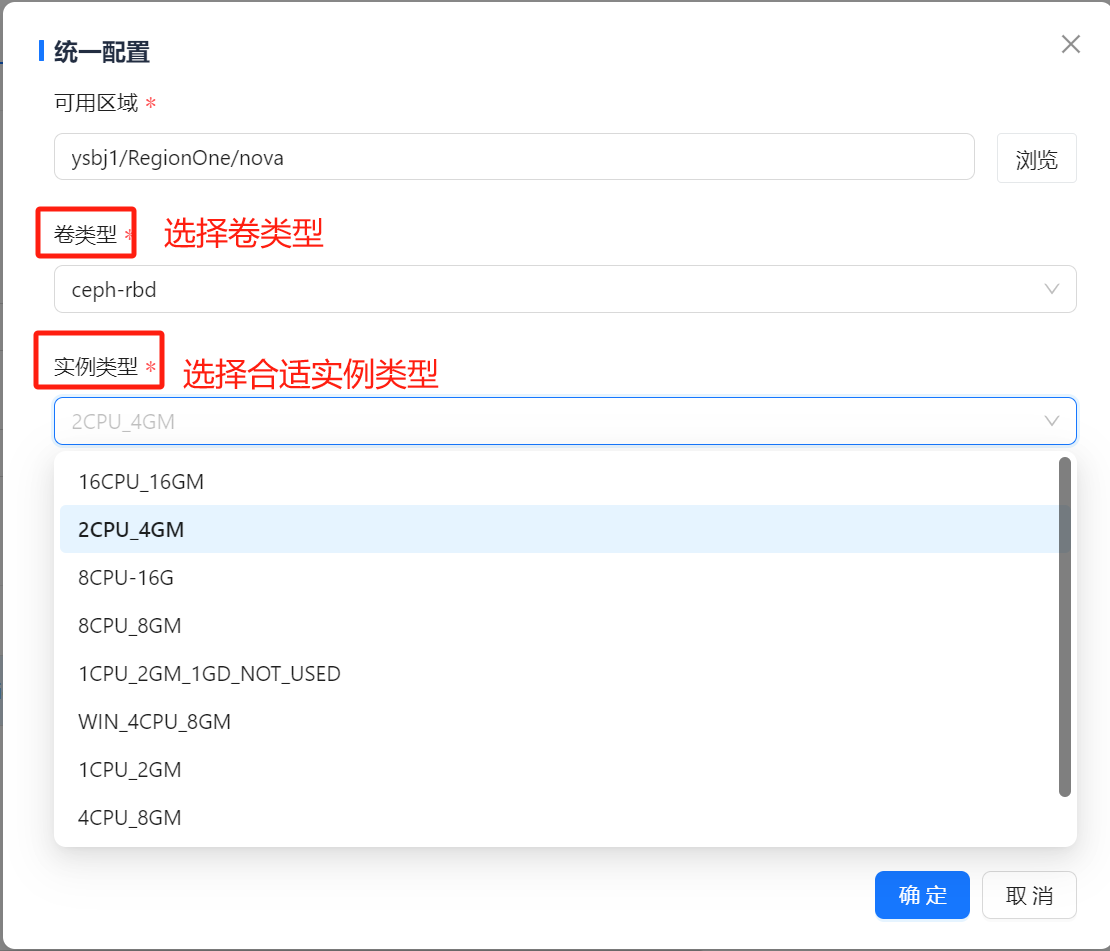
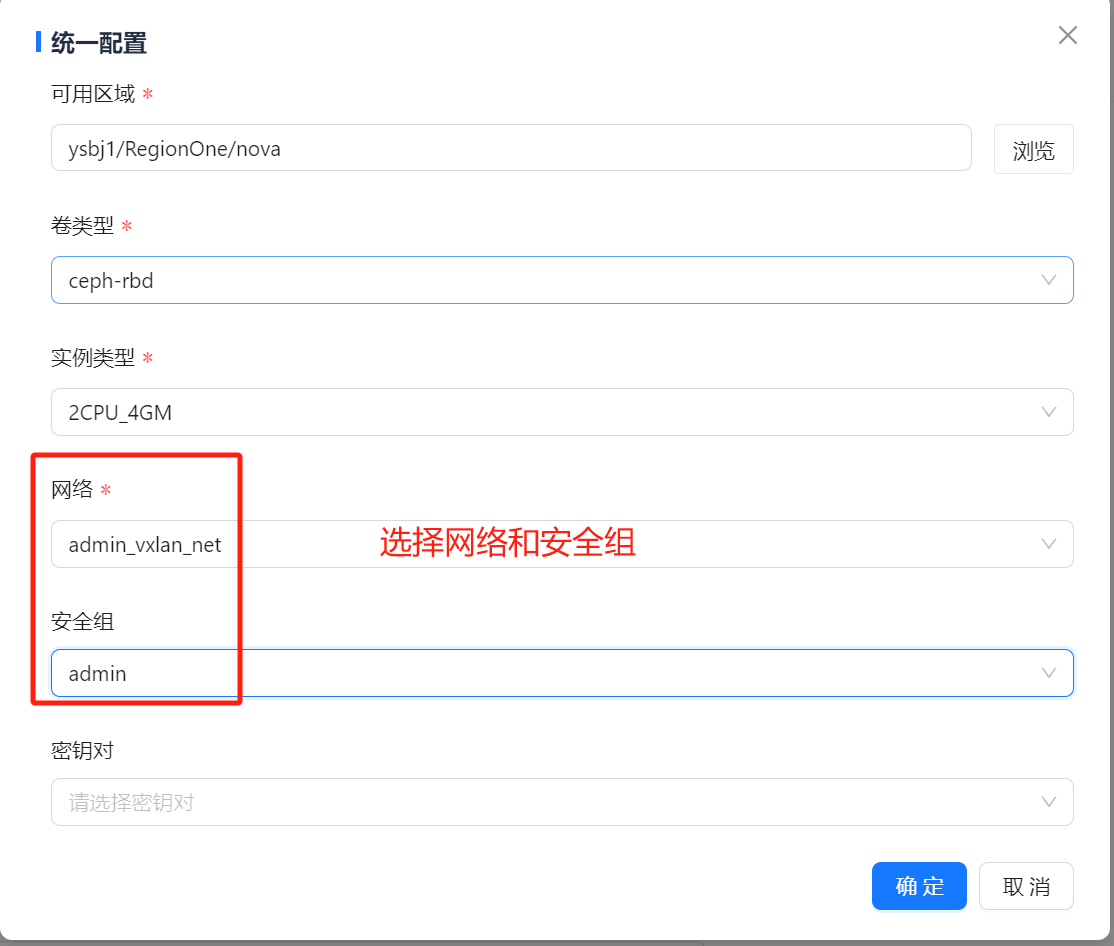
Step 6: Alternatively, choose Cross-Site Recovery, configure the settings, and click OK.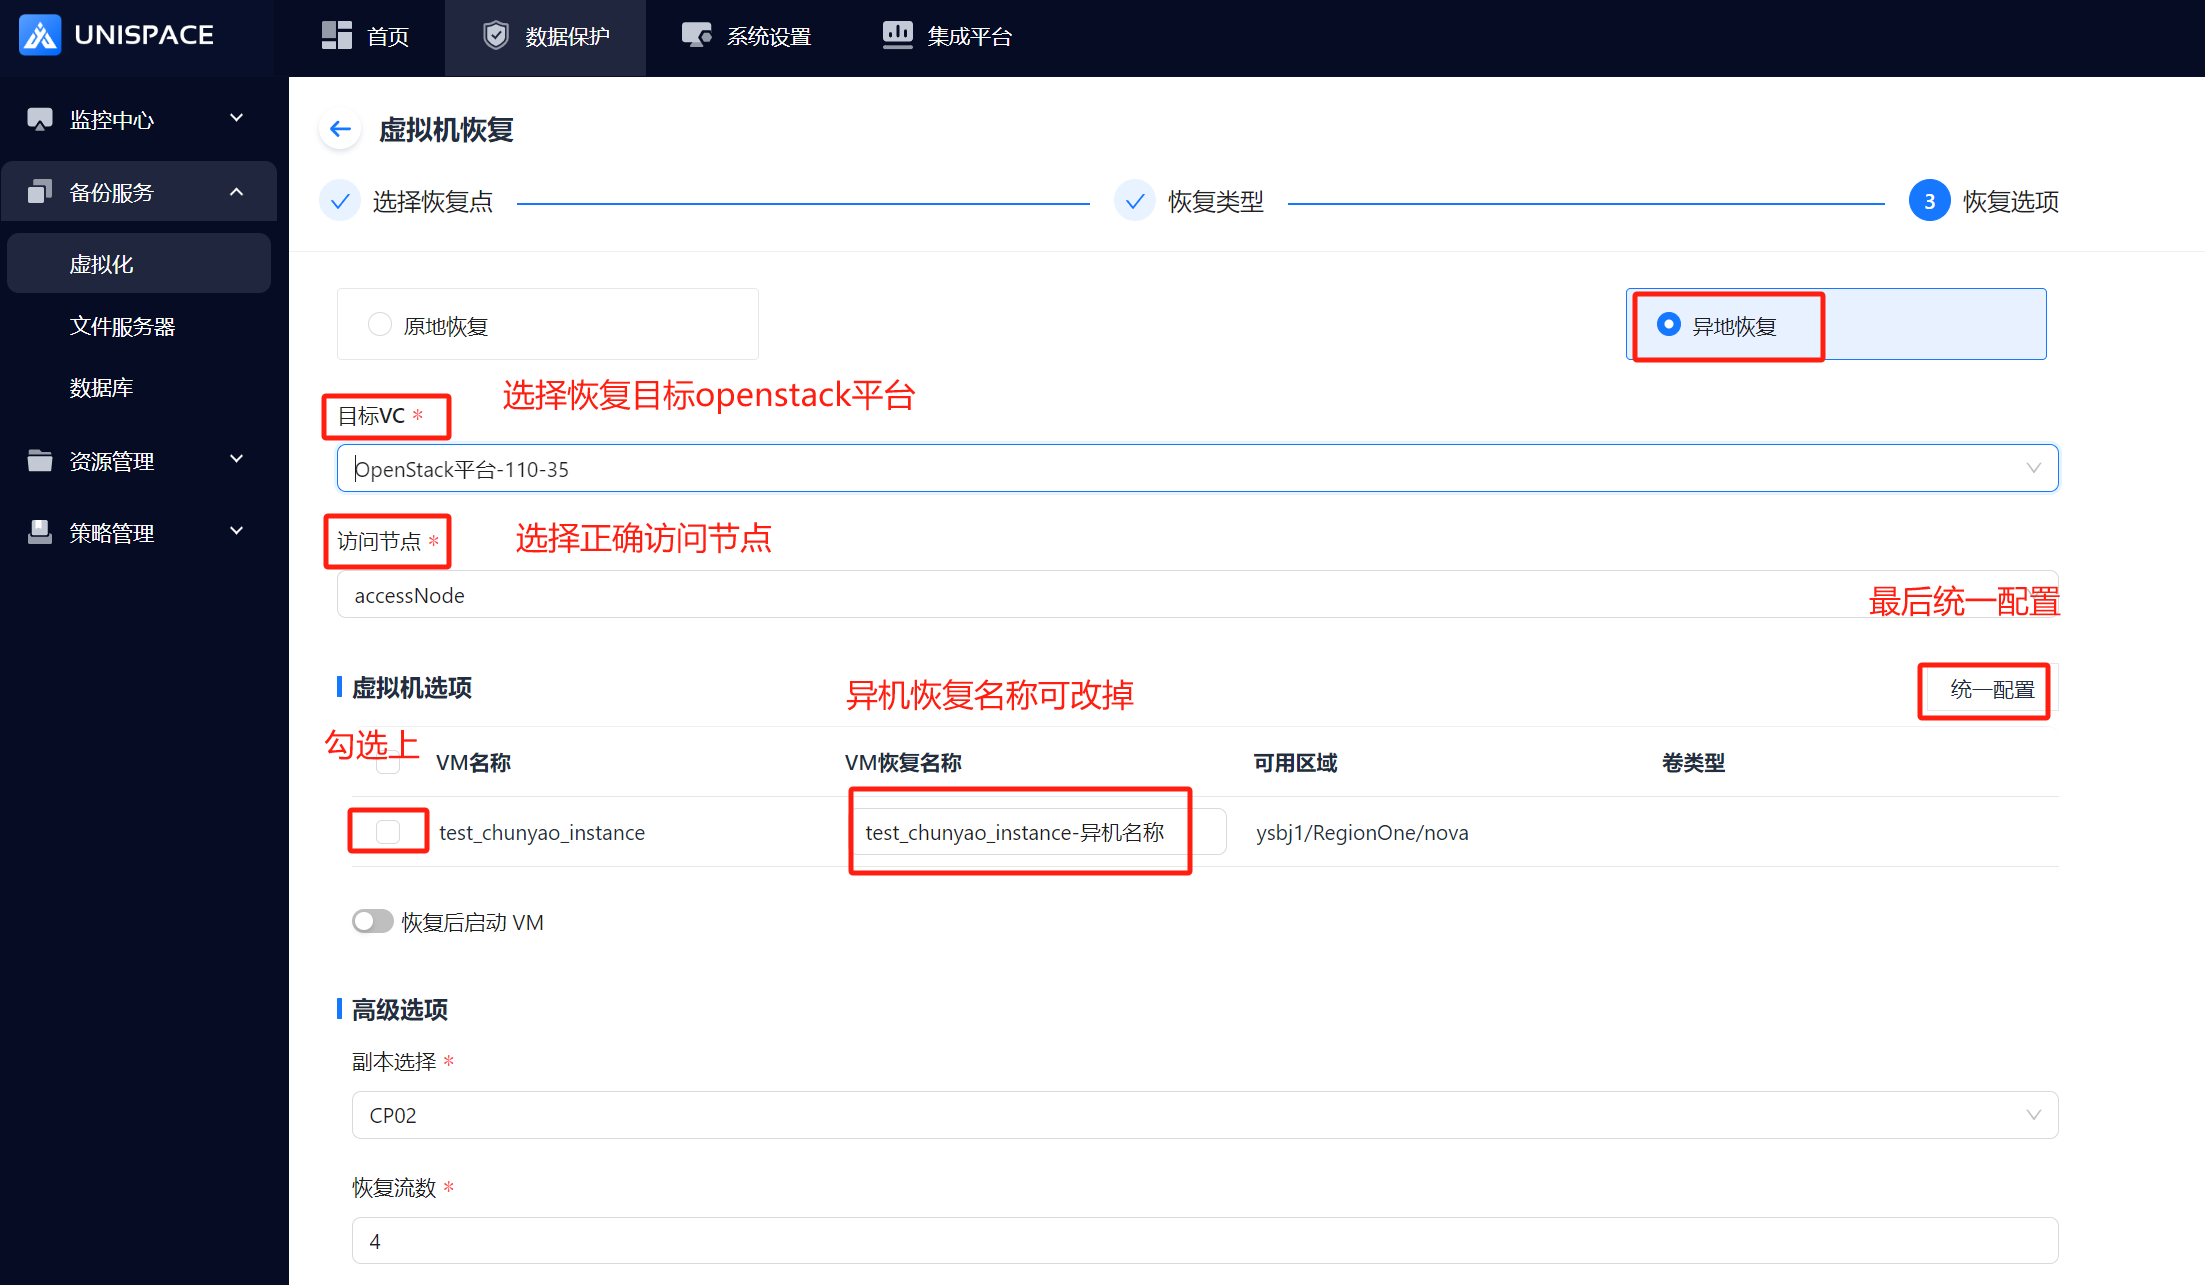
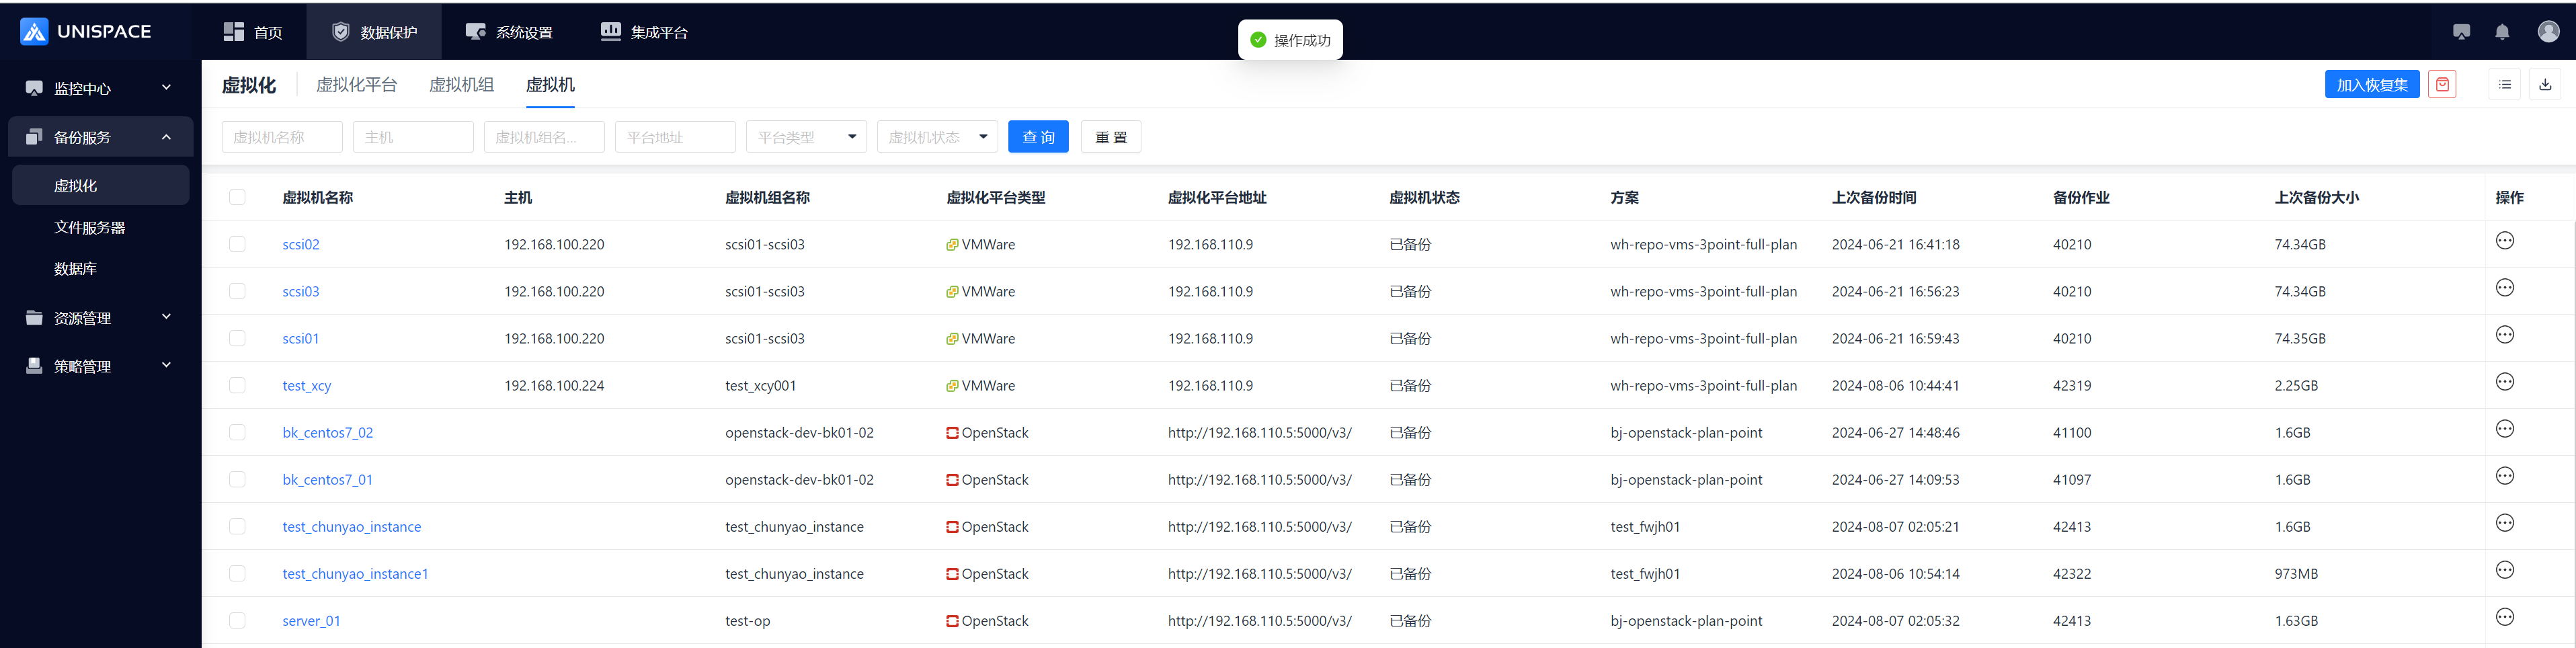
Step 7: Once the job starts successfully, go to Monitoring Center - Jobs - Active Jobs to view the progress.
Step 8: After the job completes, go to Monitoring Center - Jobs - Job History to view the job and its status.