Agent--SQLServer
1.1 Create SQL Server Instance
Prerequisites
- Created a new user.
- Created a new storage repository.
- Created a new service plan.
- Ensure that the SQL Server service is installed and accessible.Supported system versions: Windows Server 2019 and Windows Server 2022. Supported database versions: SQL Server 2019 and SQL Server 2022.
Steps
Step 1: Click the system menu Backup Services - Database list, select Server Name to enter the database instance page.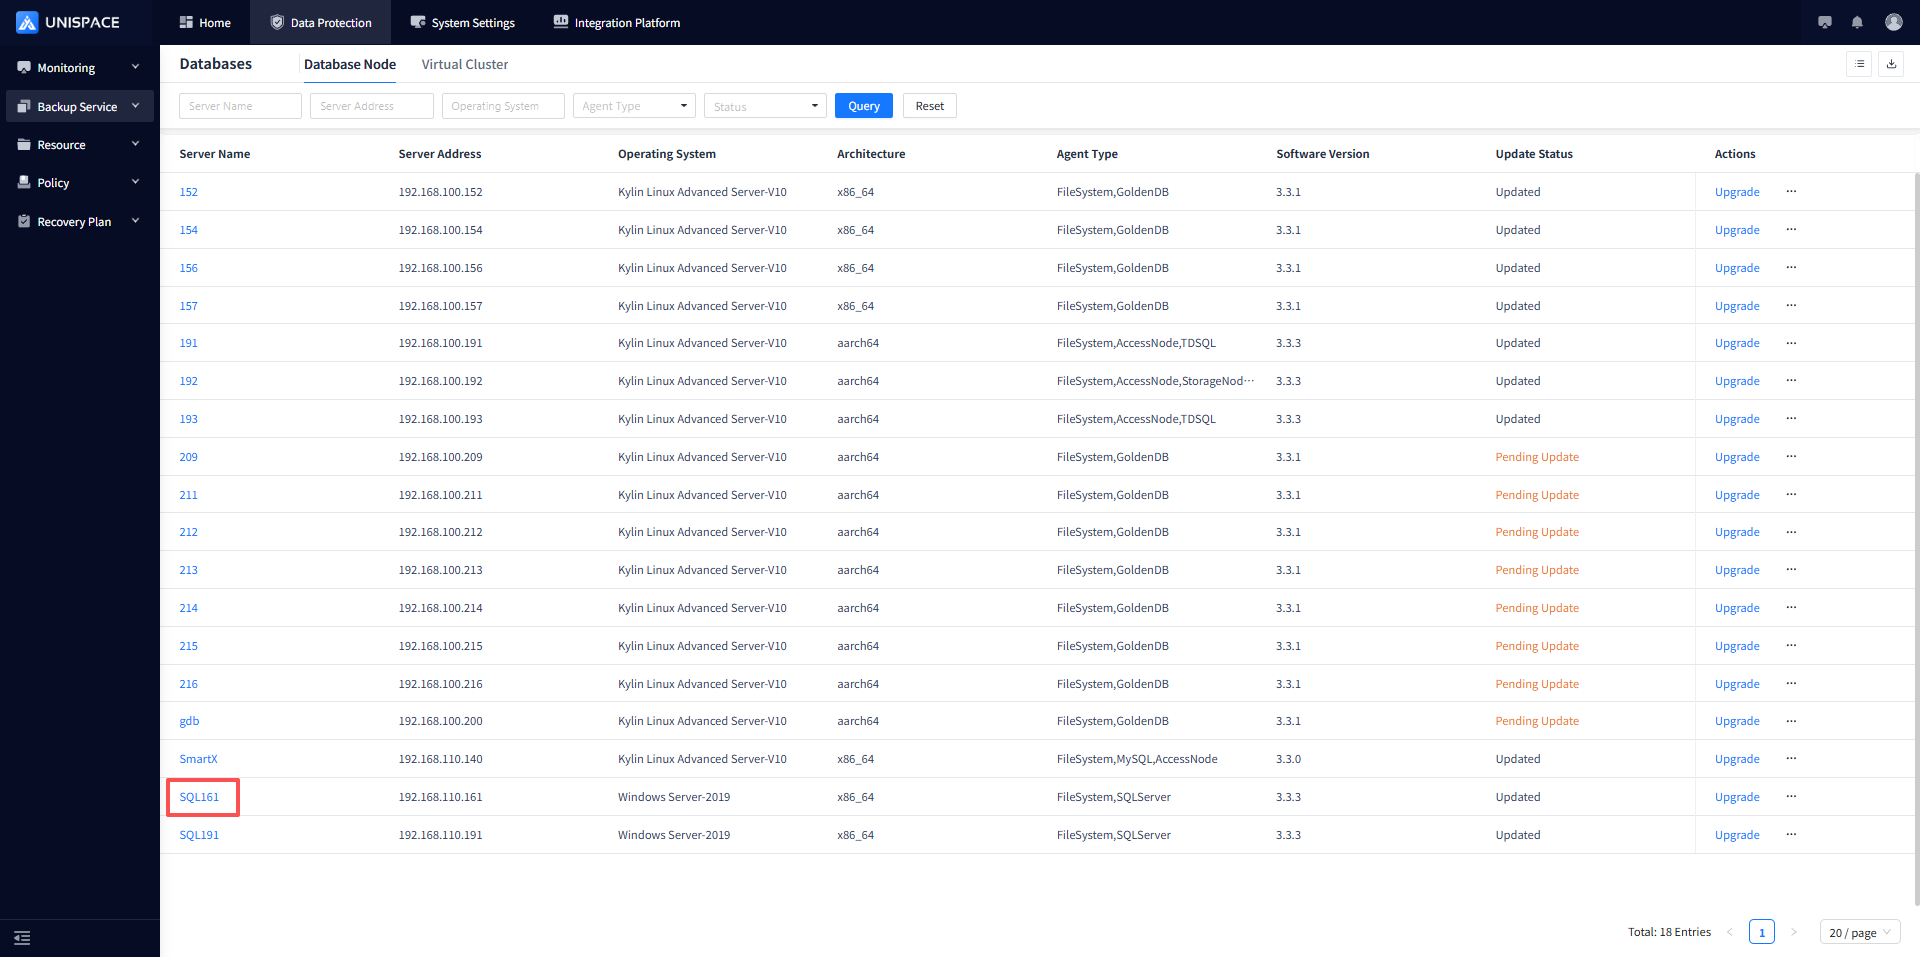

Step 2: Click the Add button at the top right of Instance, a pop-up window will appear.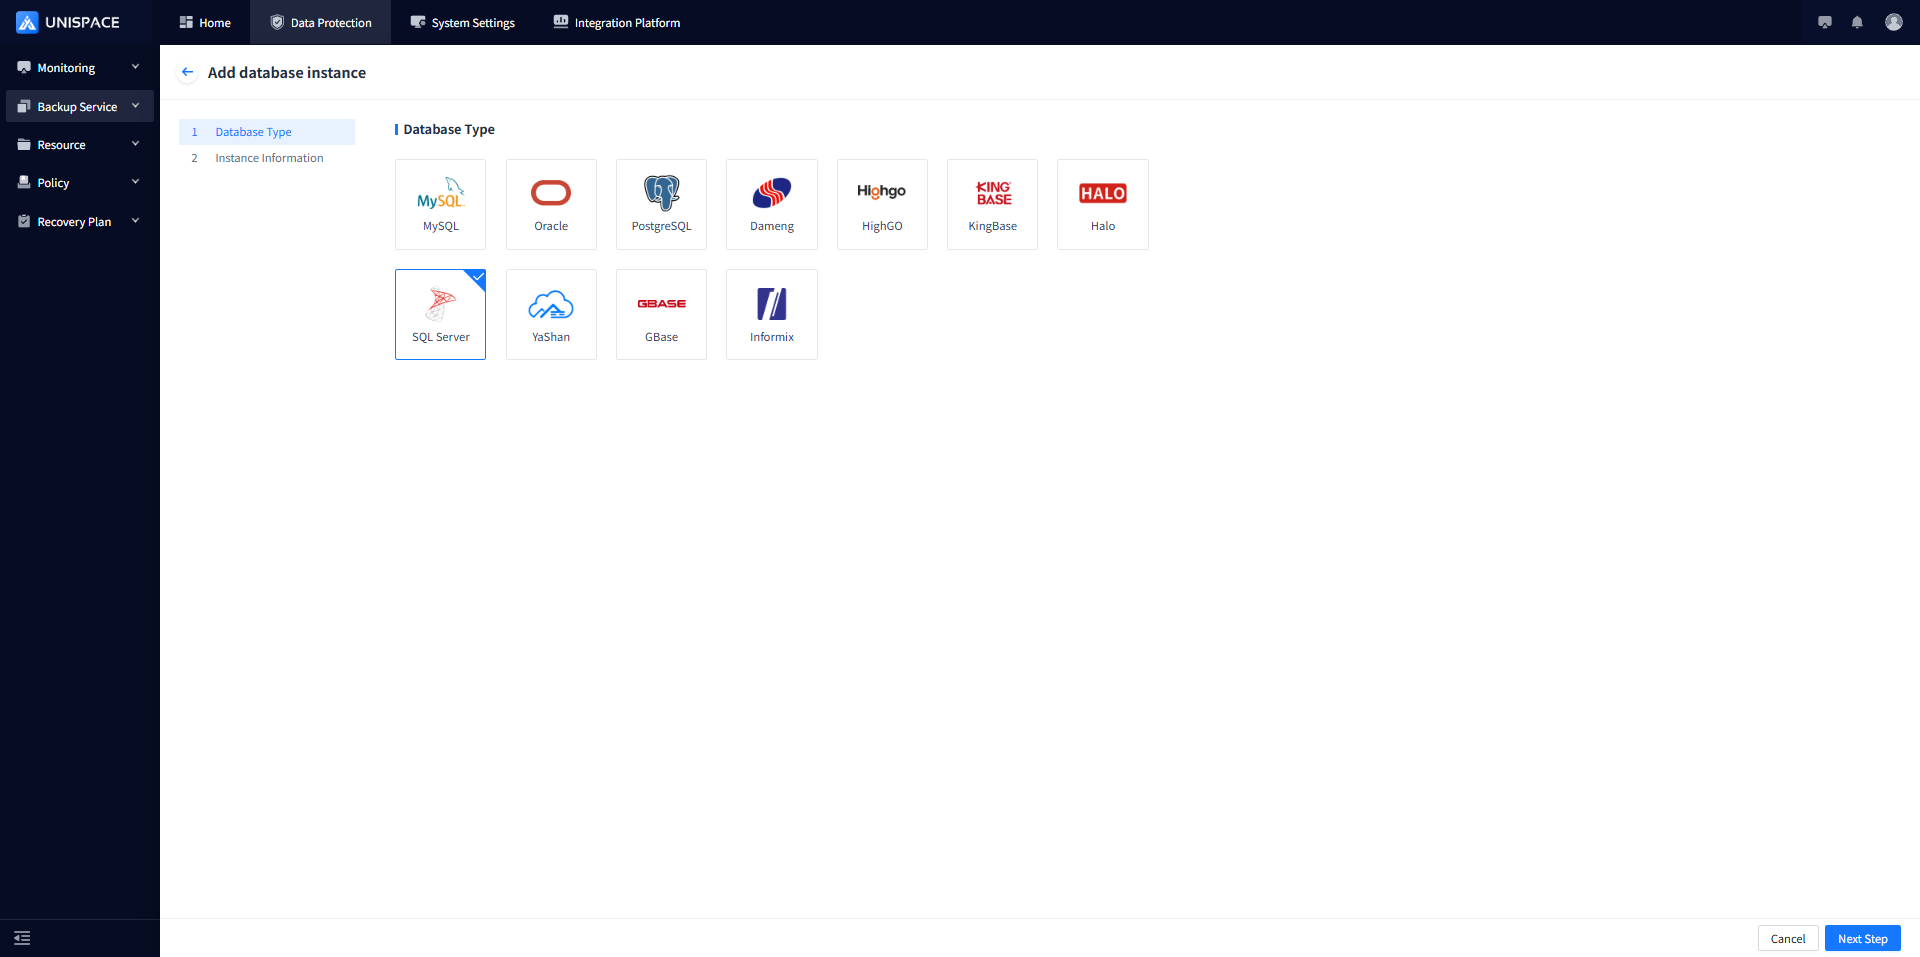
Step 3: Configure the instance information on the page and click Next Step.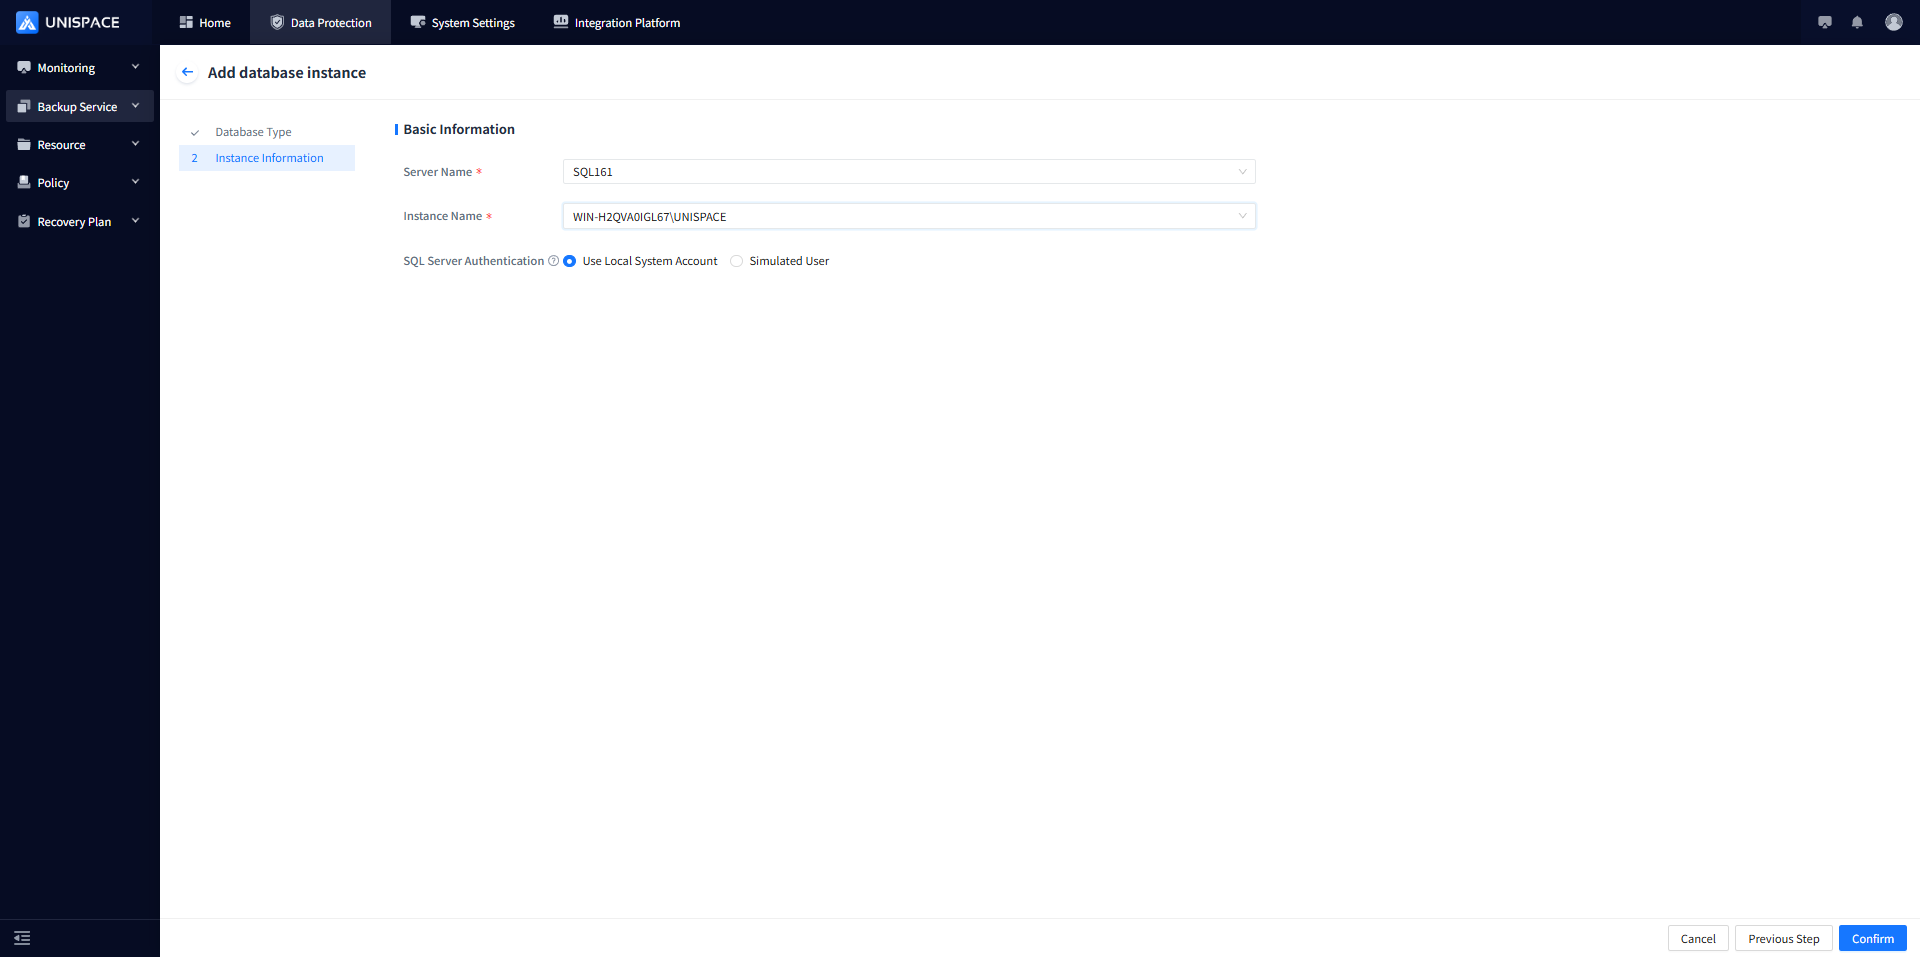
Fill in the necessary parameters, the relevant parameters are described in the following figure
| Parameter Type | Description | Configuration Rule |
|---|---|---|
| Database Type | Radio button, required, default is MySQL | Select SQL Server |
| Server Name | Radio button, required | Name of the client where the database resides |
| Instance Name | Radio button, required | Backup database instance |
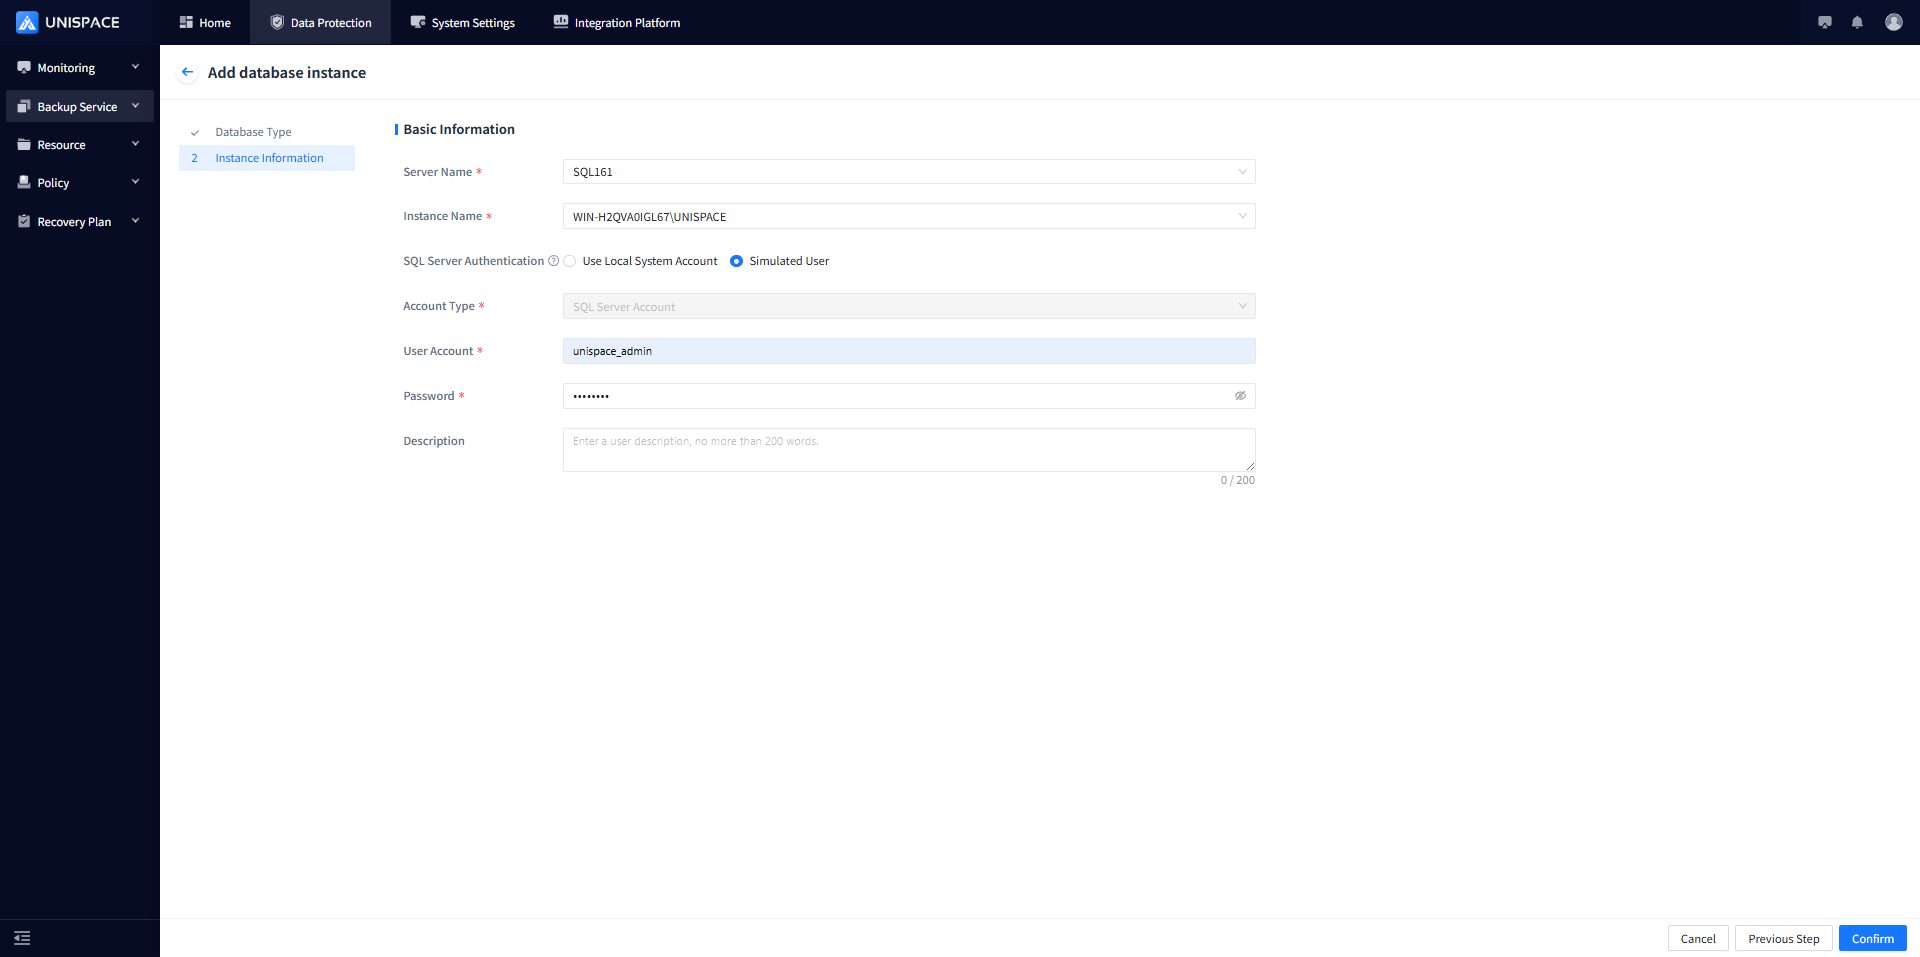
| SQL Server Authentication | Radio button, optional | Default is local system user, can select simulated user (database user) |
| User Account | Text box, required when using a simulated user | Enter the database user account |
| User Password | Text box, required when using a simulated user | Enter the password for the database account |
| Description | Text box, optional | Enter relevant information, up to 200 characters |
Step 4: After completing the form, click Confirm. A success message will appear.
1.2 Create a Backup Set
Prerequisites
- A SQL Server instance has been added.
Steps
Step 1: Click the system menu Backup Services - Database, find the added SQL Server instance under the Database Node.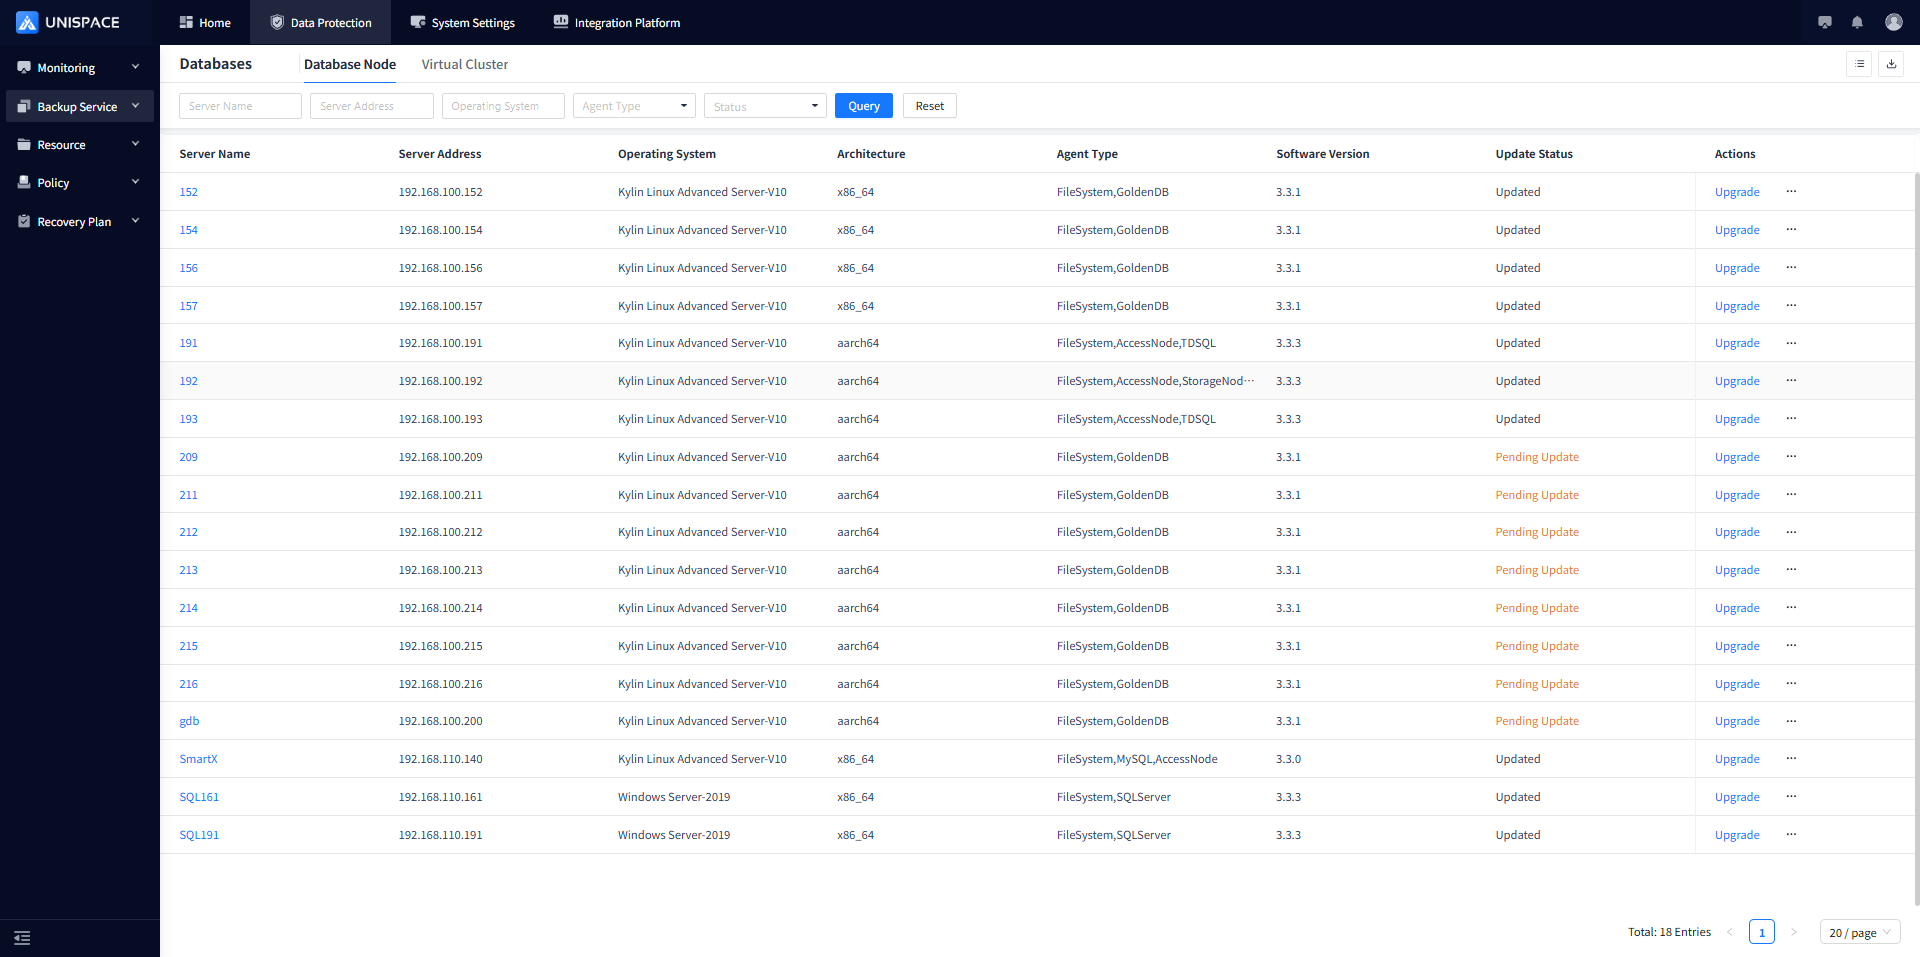
Step 2: Click the server name and then click Backup Set.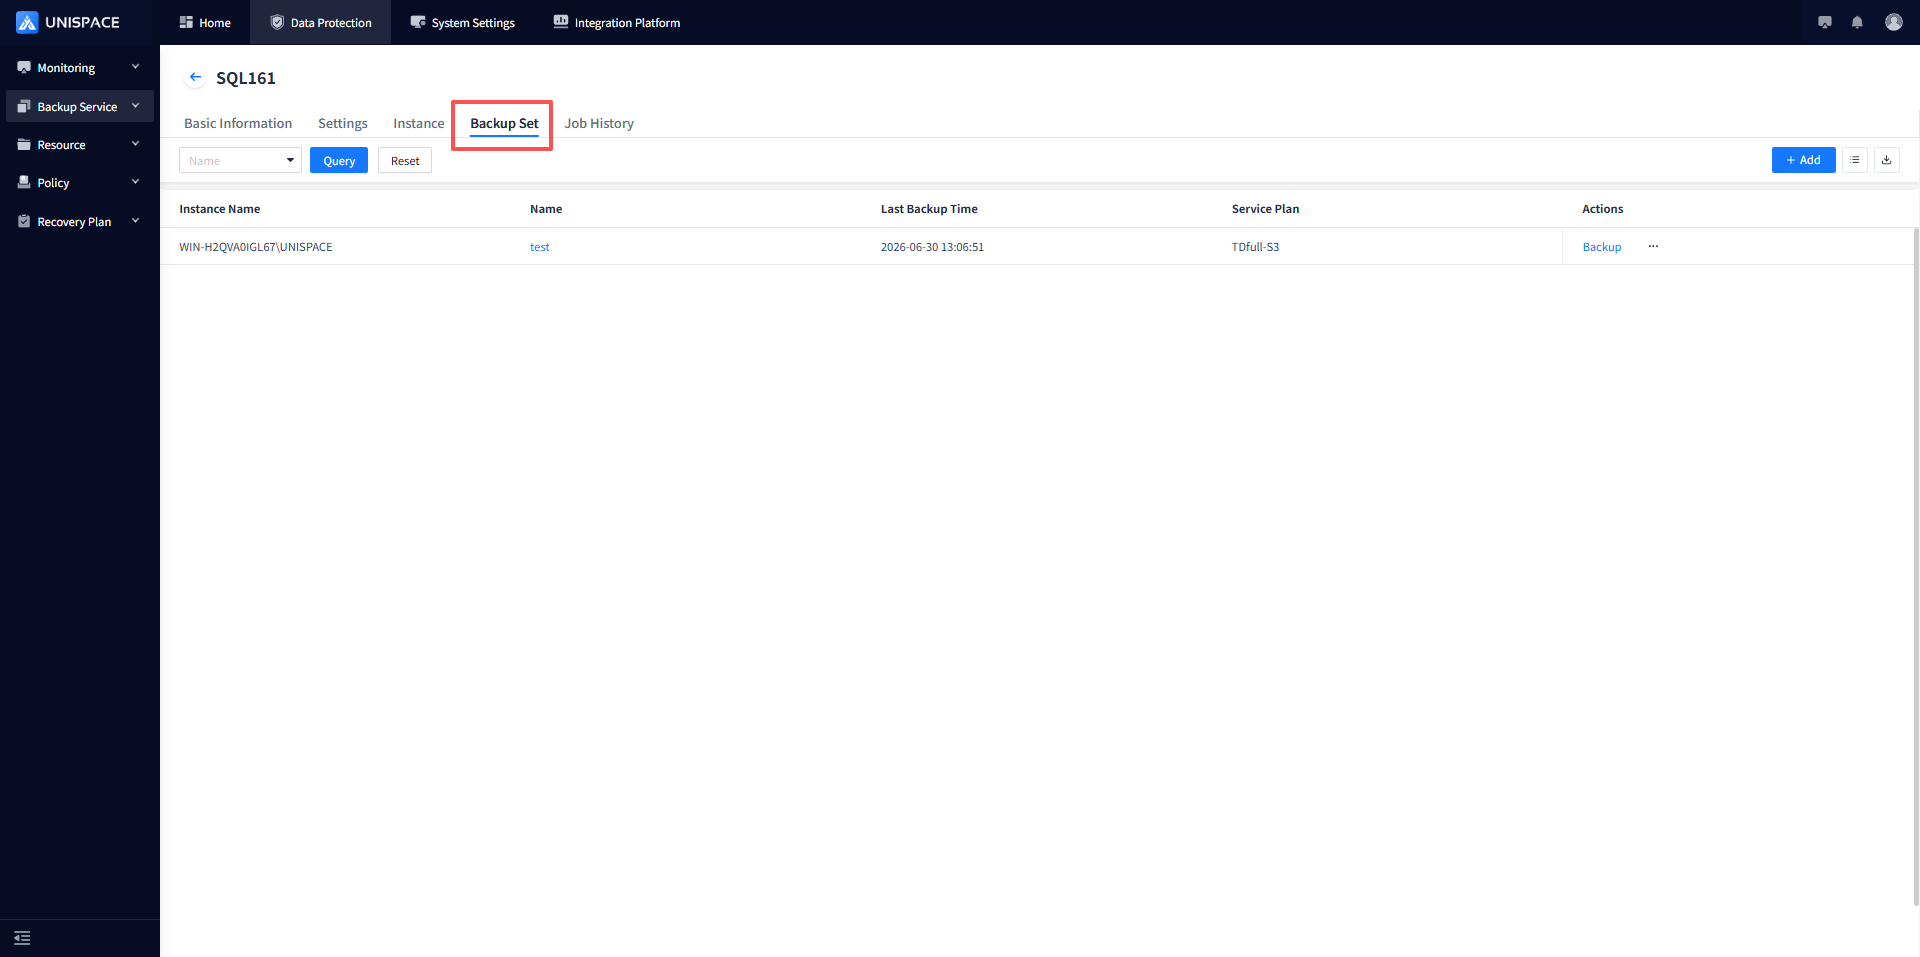
Step 3: Click Add to create a new backup set.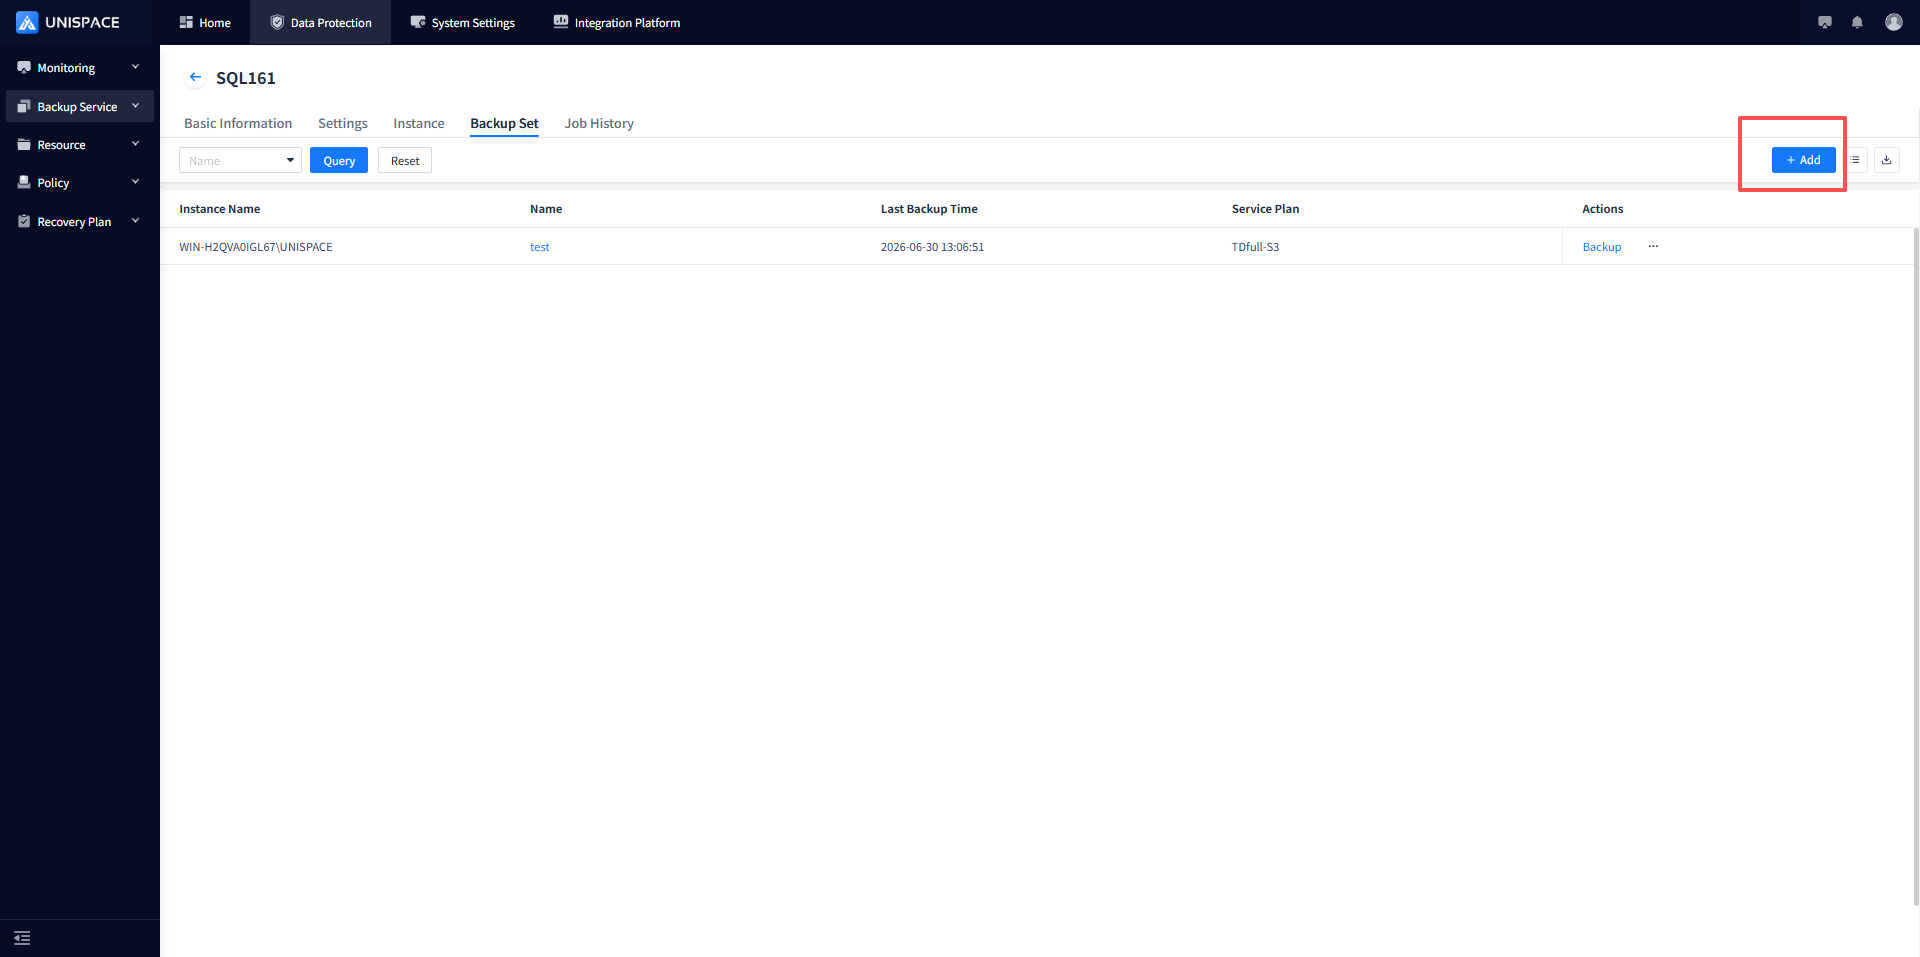
To add a new backup set, the relevant parameters are described in the following figure and table:
| Parameter Name | Description | Configuration Rule |
|---|---|---|
| Instance | Radio button, required | Select the current database instance to be backed up |
| Backup Set Name | Text box, required, custom | Cannot contain spaces or special characters (underscore _ allowed) |
| Data Stream Count | Text box, numeric | Number should not exceed 200 |
| Service Plan | Drop-down list, required | Select an appropriate service plan |
| Configuration Method | Radio button, required | Choose Simplified Configuration or Advanced Configuration, default is simplified |
| Plan | Radio button, required | Choose an appropriate plan |
| Replica Group | Radio button, required | Choose an appropriate replica group |
1.3 SQL Server Backup
Prerequisites
- A SQL Server backup set has been configured.
Steps
Step 1: Click the system menu Backup Services - Database - Server Name, select the Backup Set from the list.
Step 2: Select the backup set, click the Actions column, and choose Backup
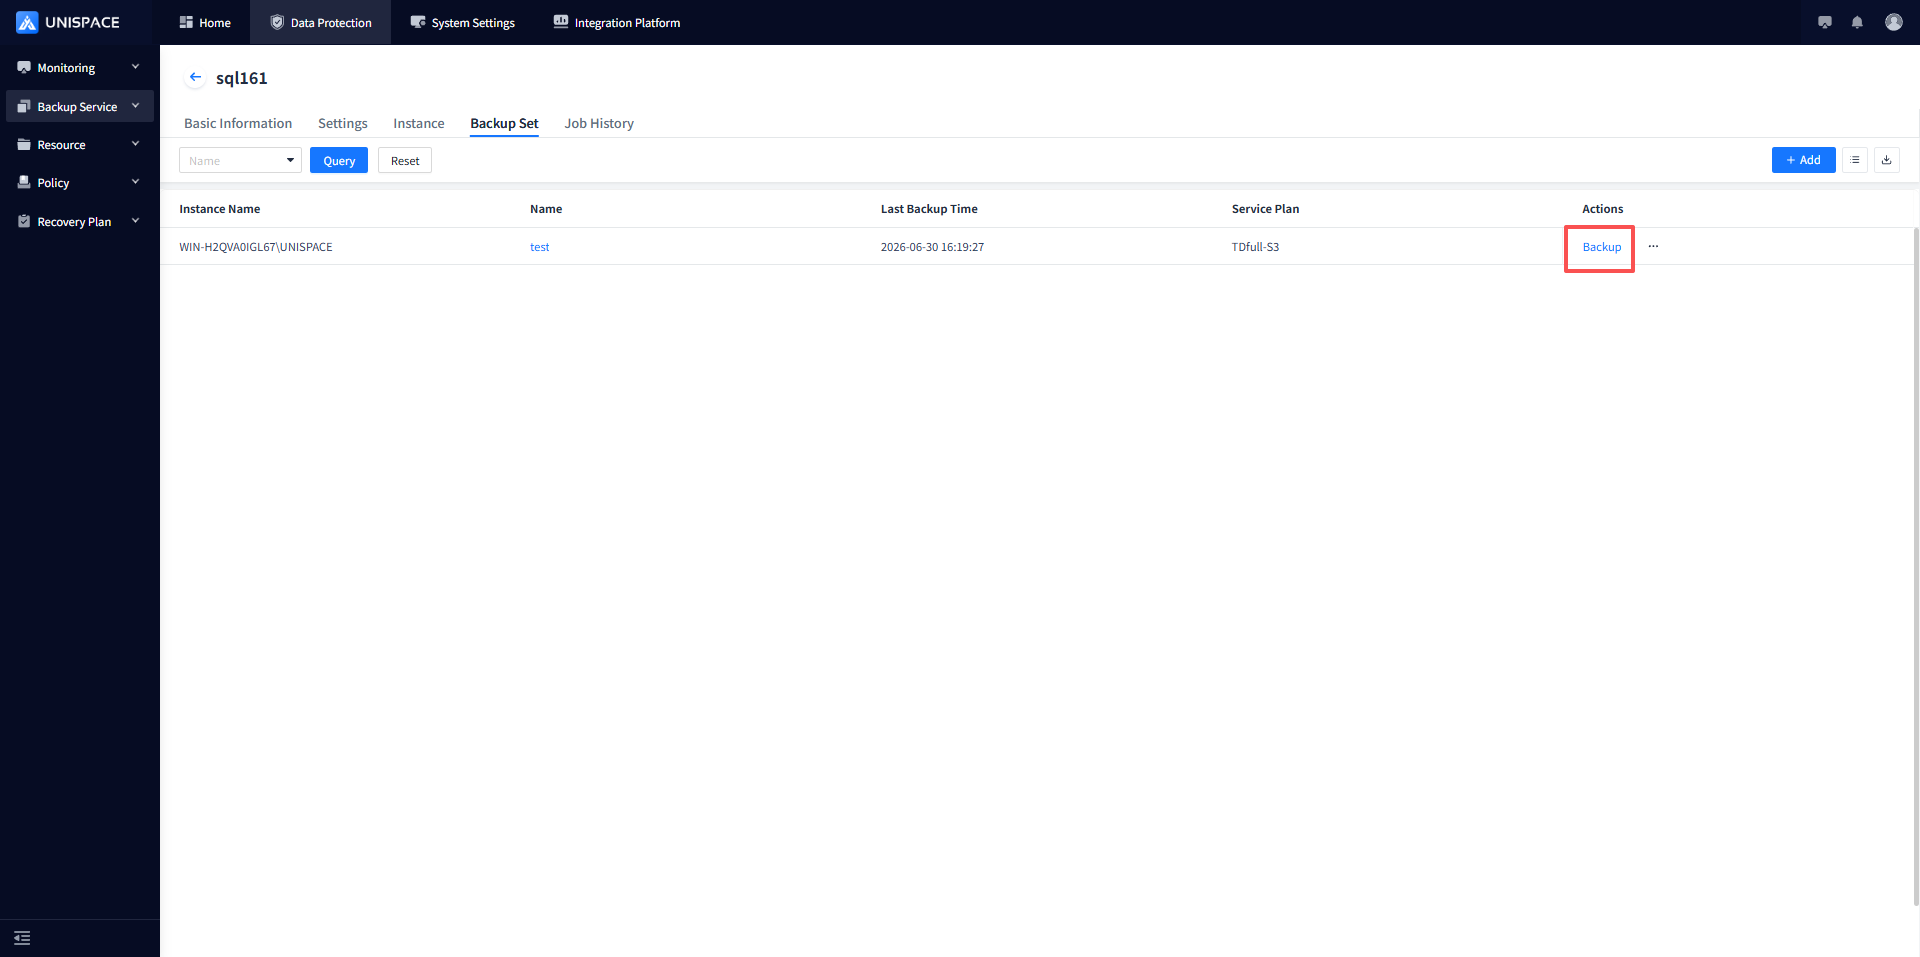
Step 3: Choose Full, Incremental, or Log, and click OK. A message "Backup job submitted successfully" will appear.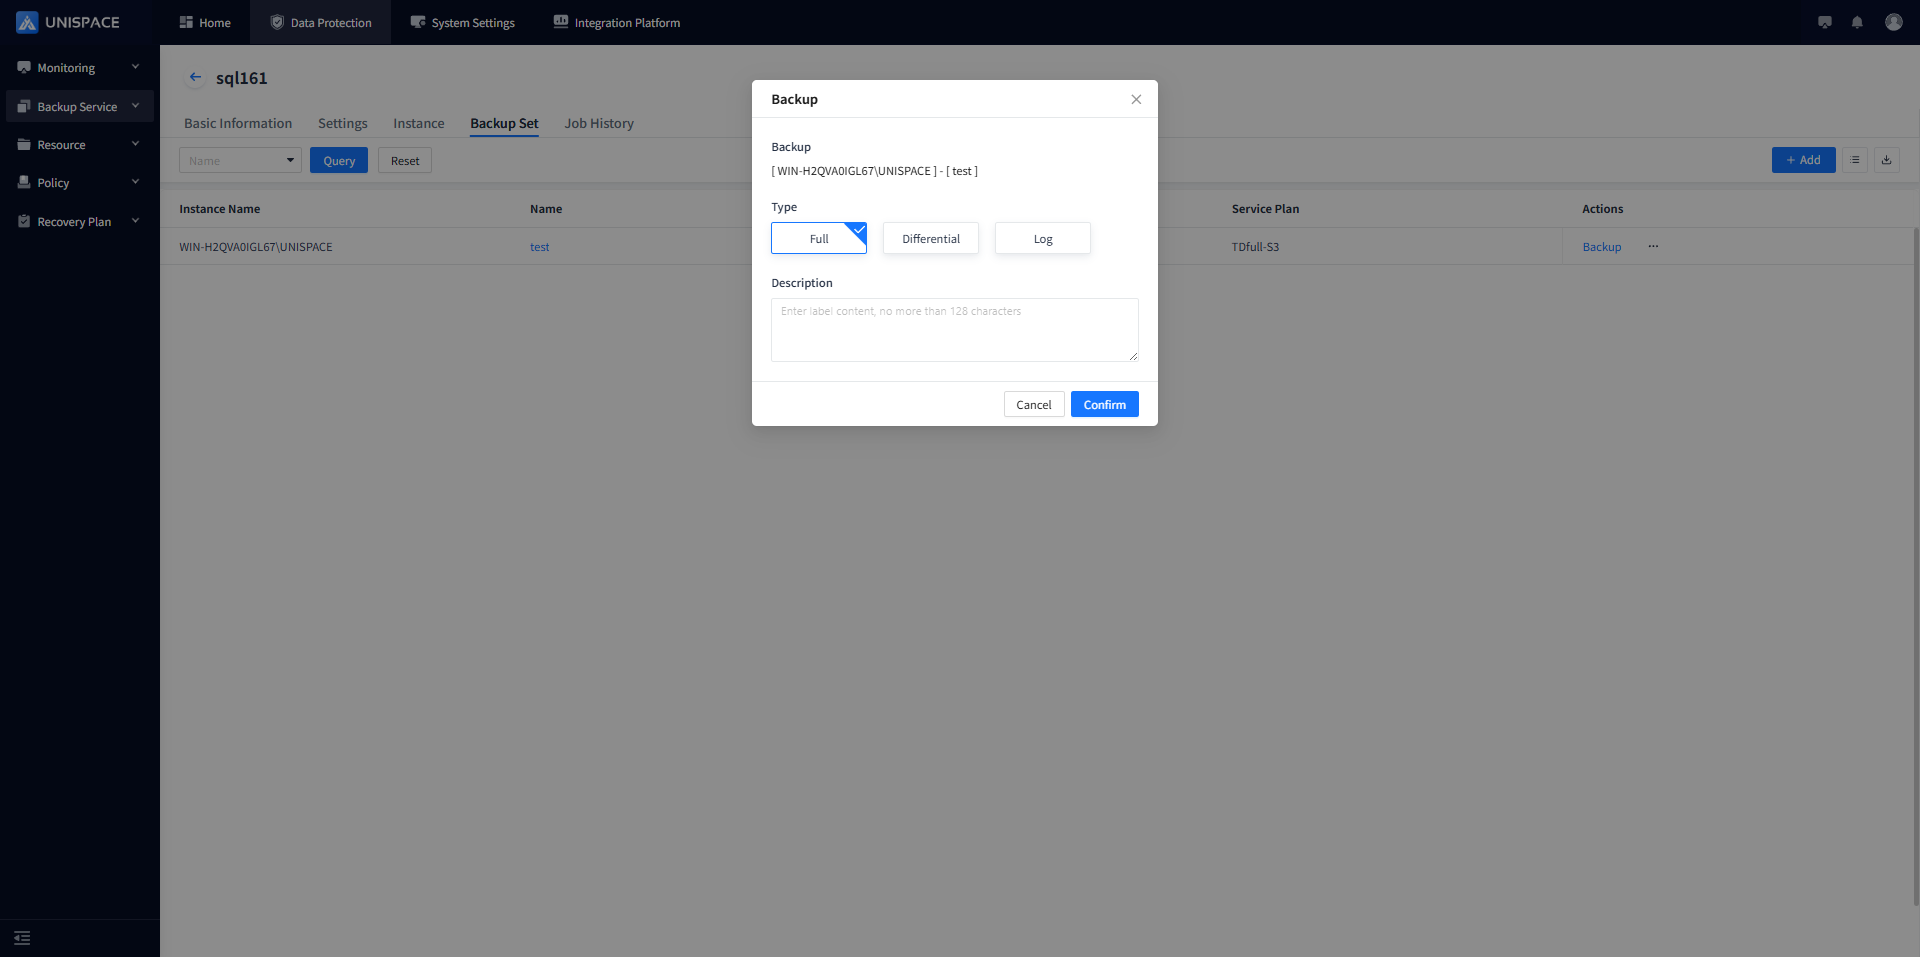
Launched successfully, monitoring center to view job progress.
1.4 SQL Server Restore
Prerequisites
- The SQL Server database has been backed up.
Steps
Step 1: Click the system menu Backup Services - Database - Server Name, select the Instance from the list.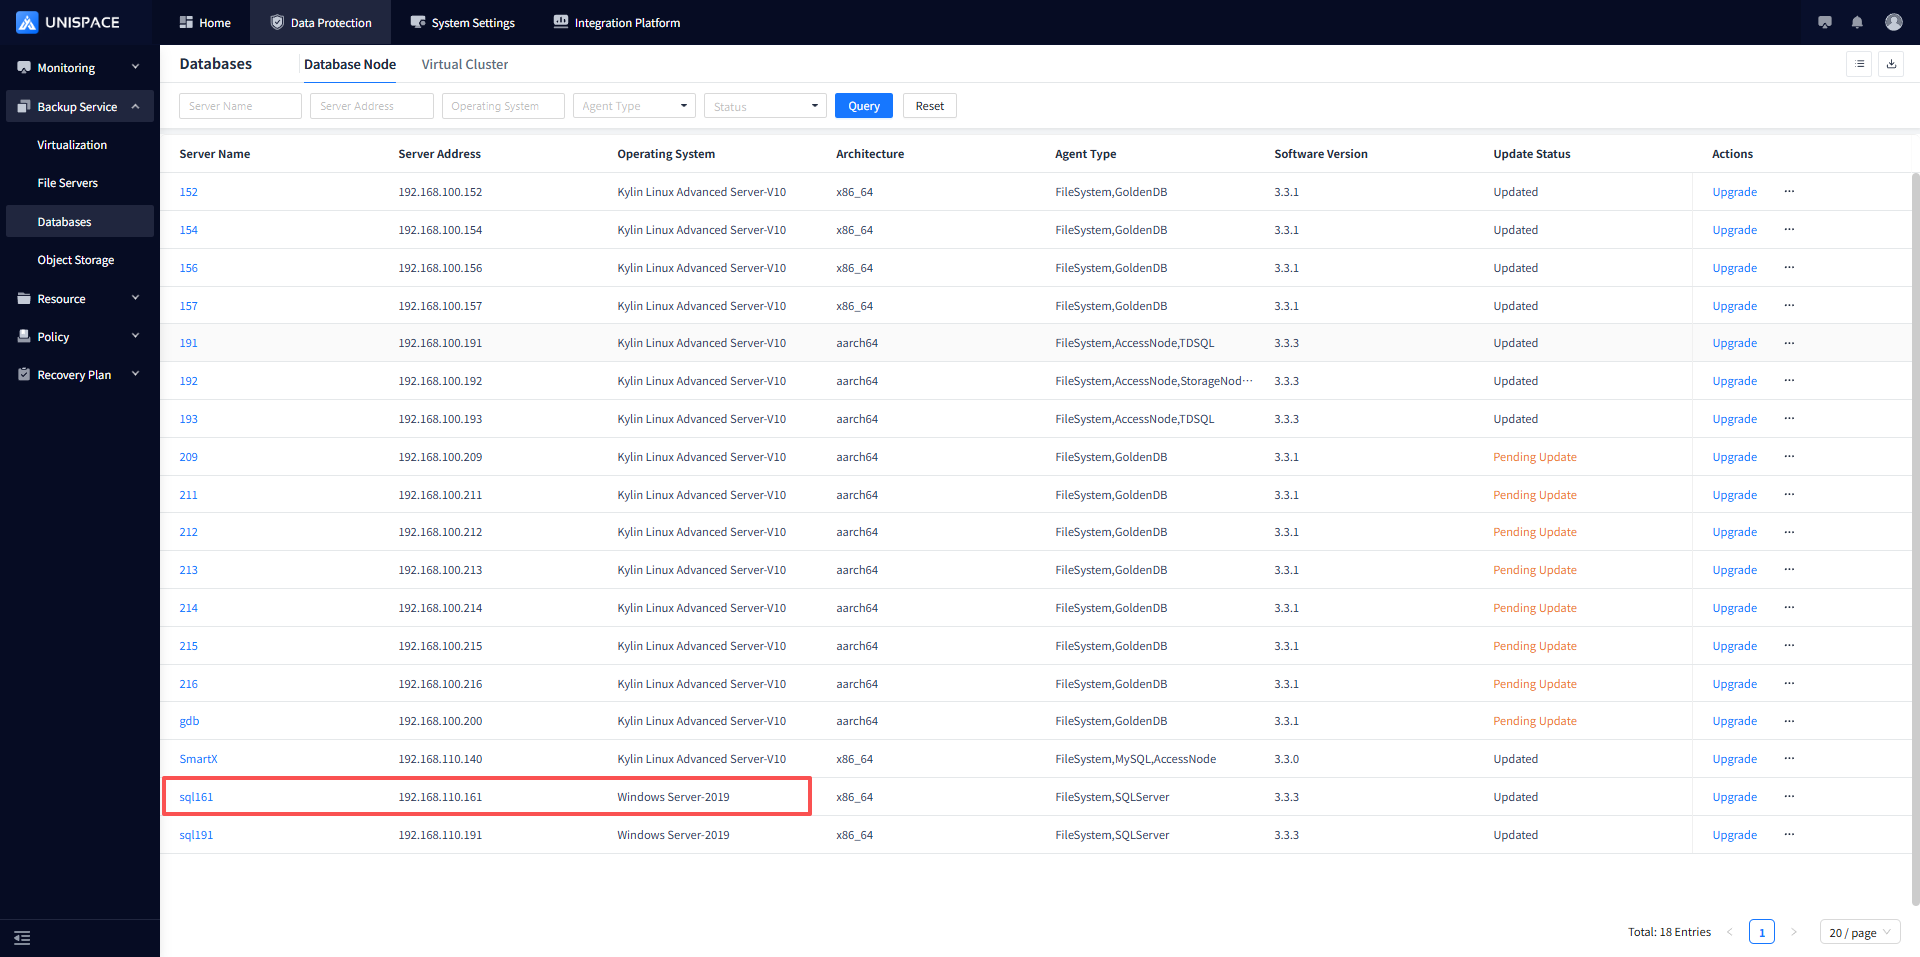
Step 2: Select Instance, click the Actions column, and choose Restore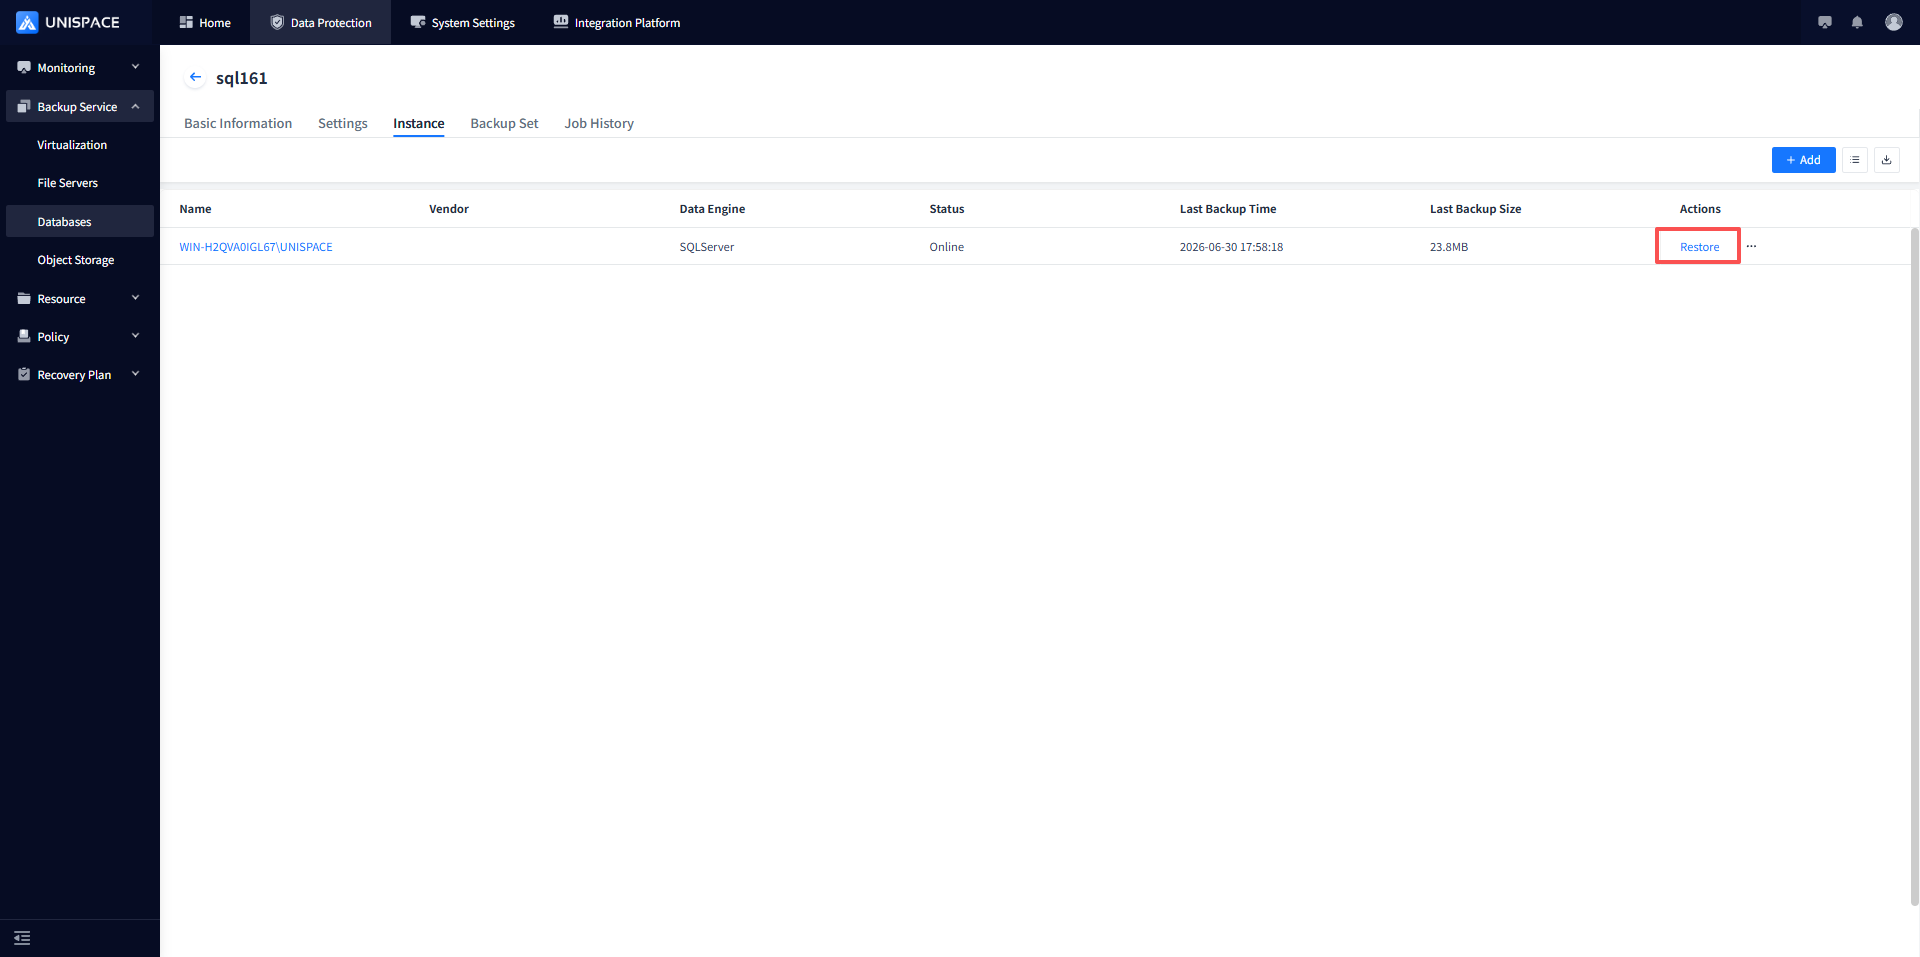
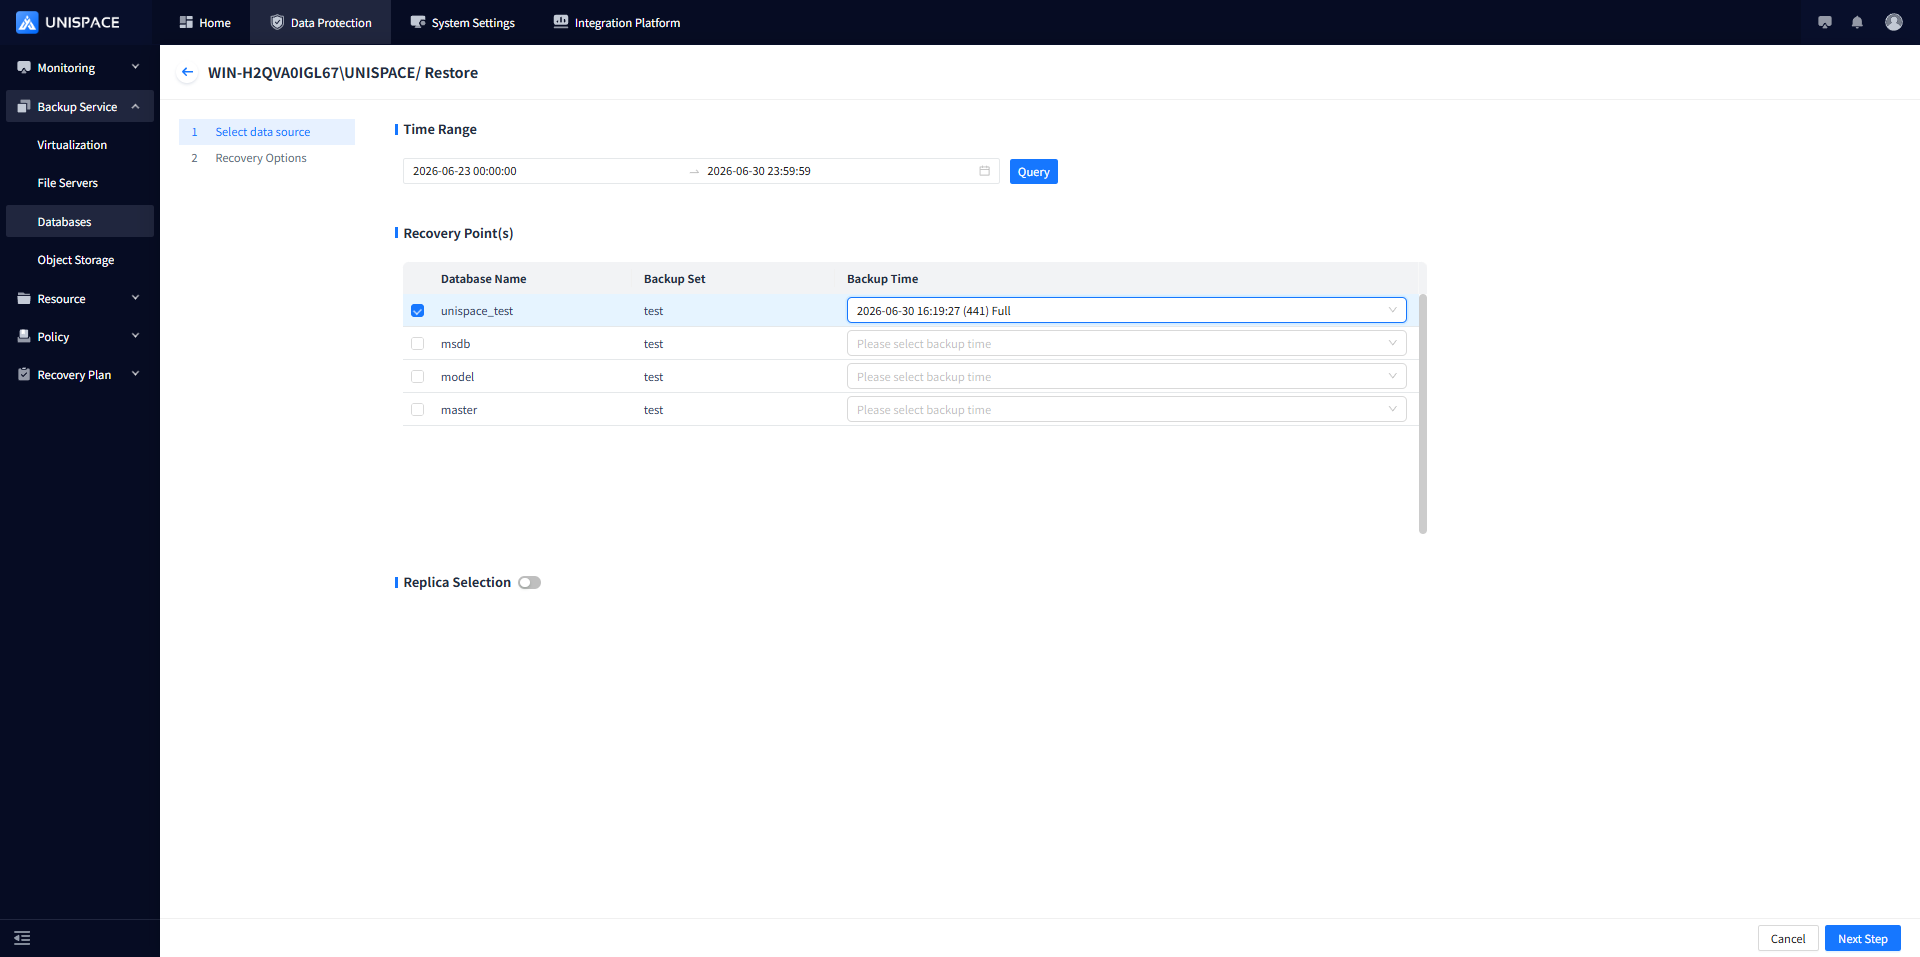
Step 3: Choose the same backup set for Full, Differential, or Log restore, then click Next.![]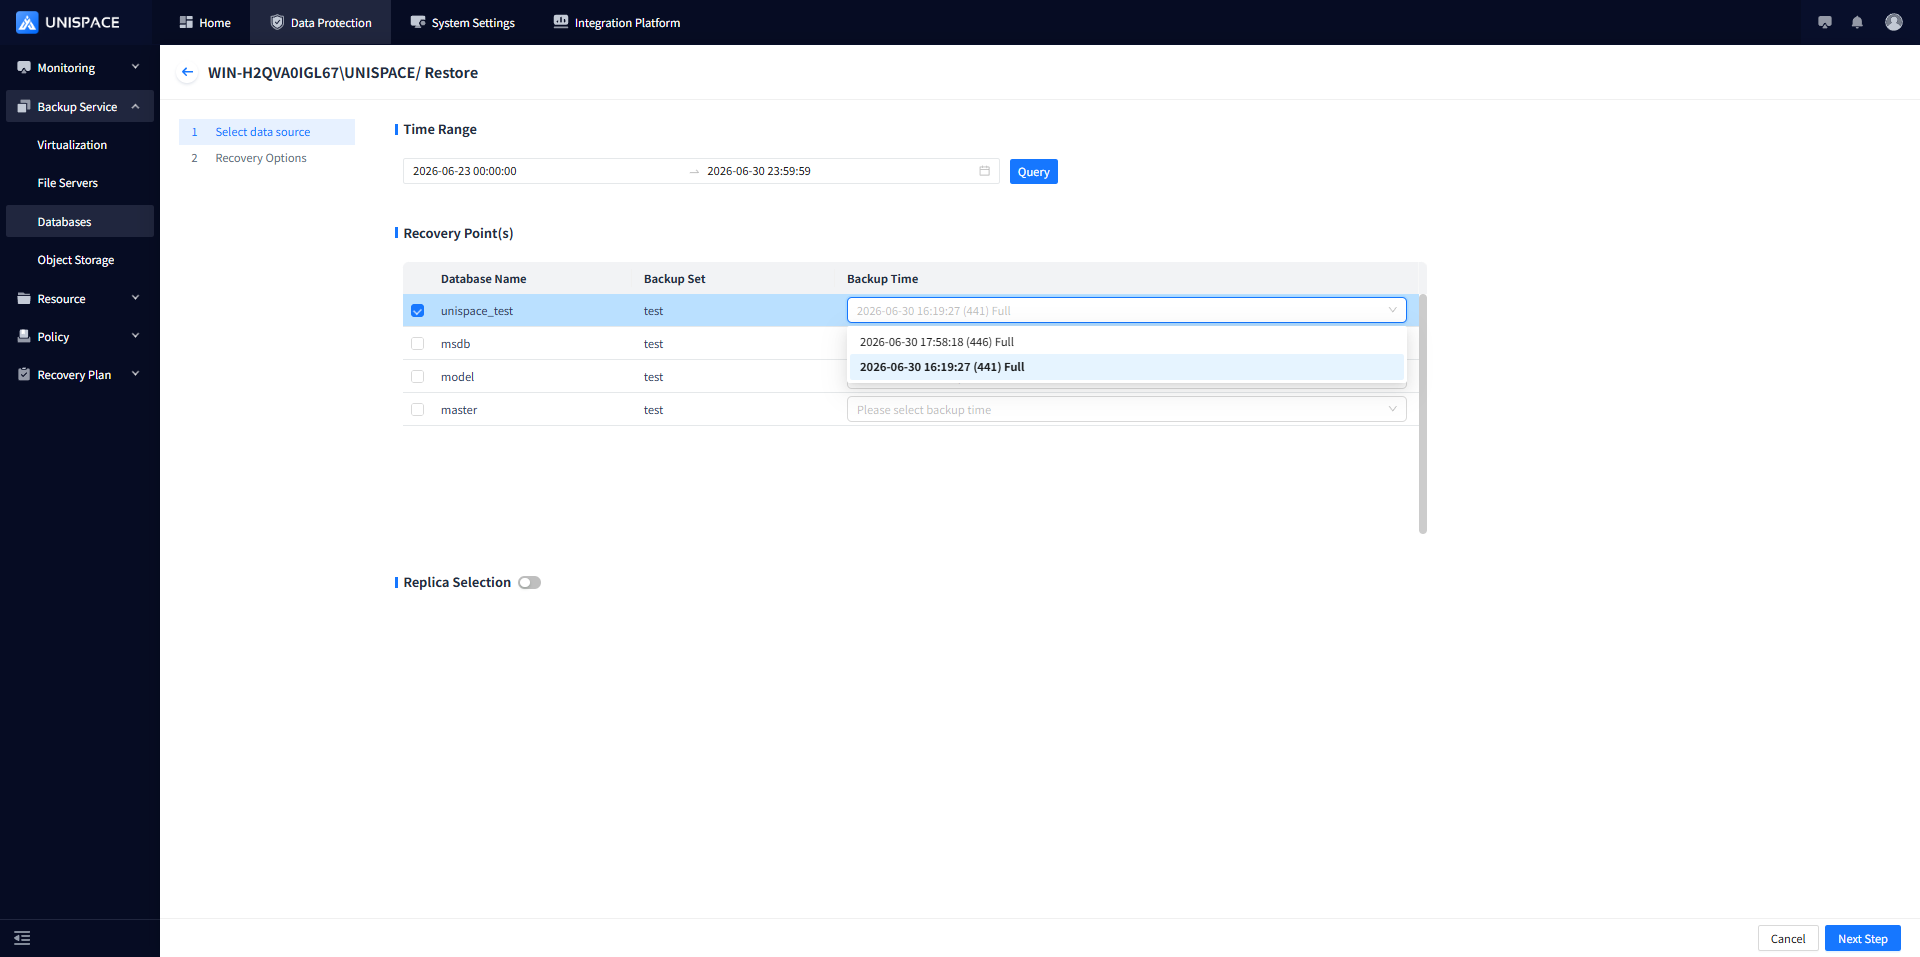
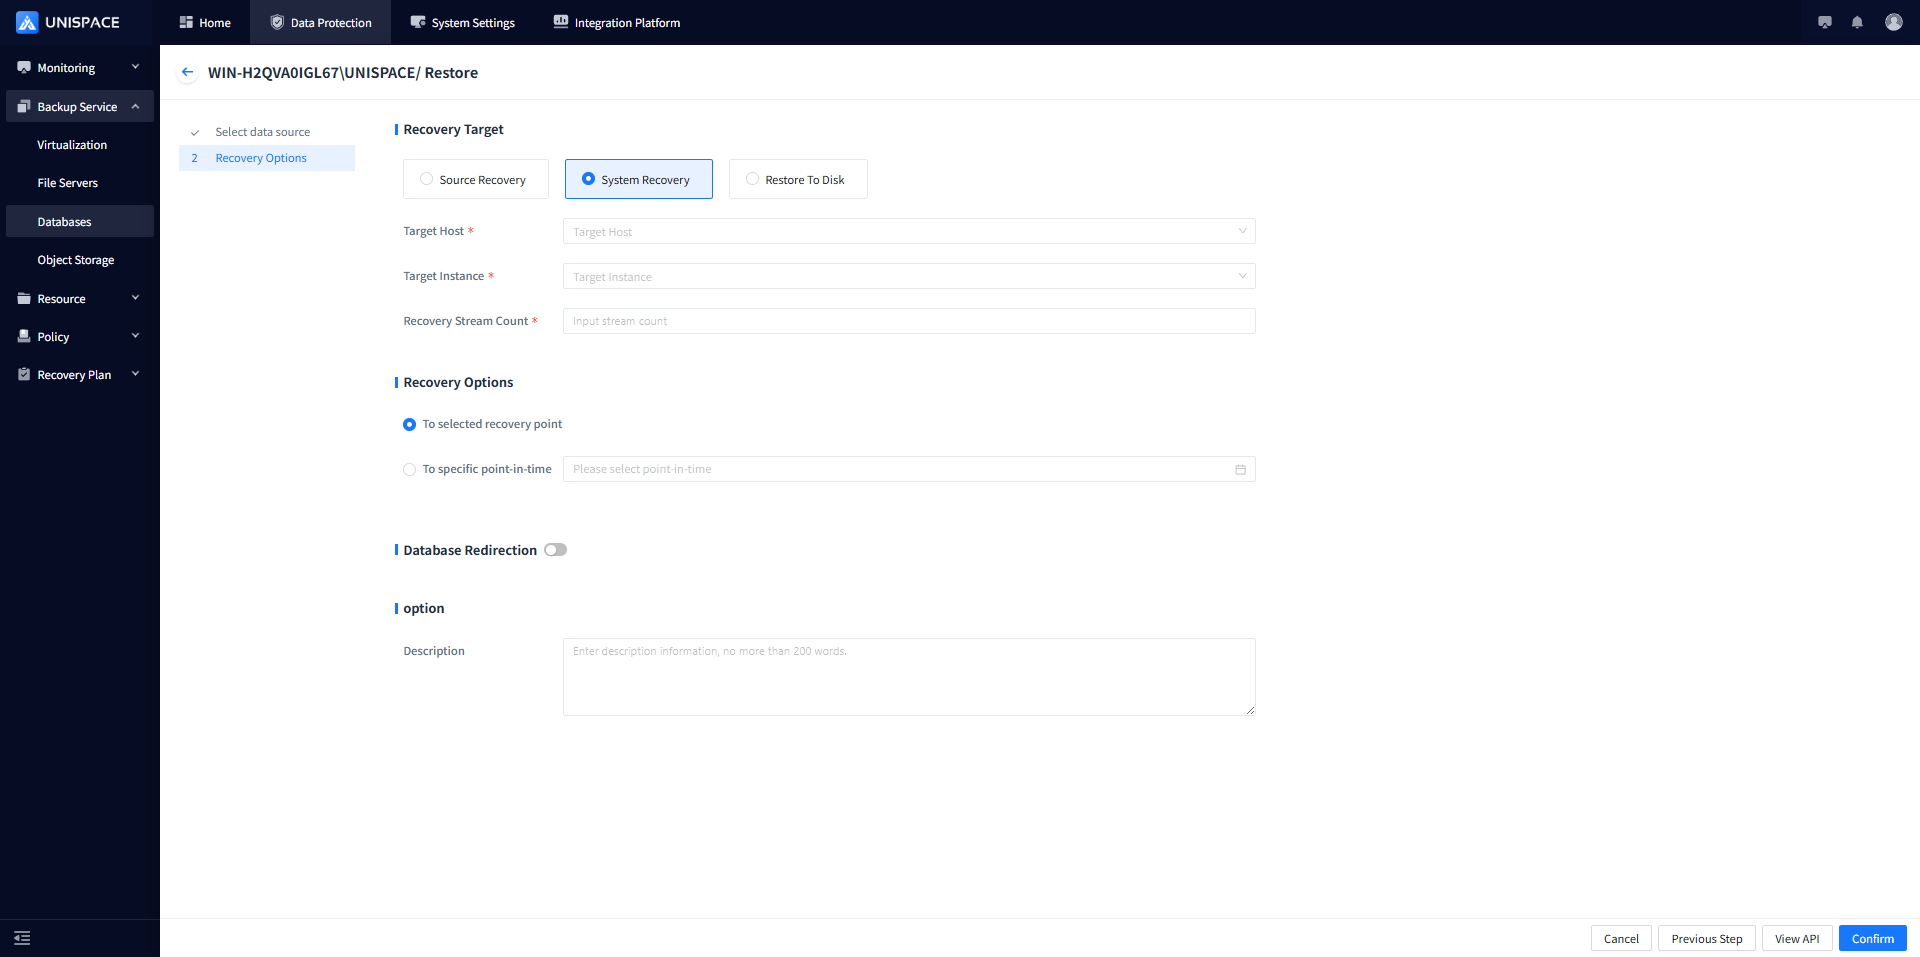
Step 4: Select and fill in the restore options as needed. The default is Alternate-Machine Restore. You can choose Source Machine Restore, Alternate-Machine Restore, or Restore to Disk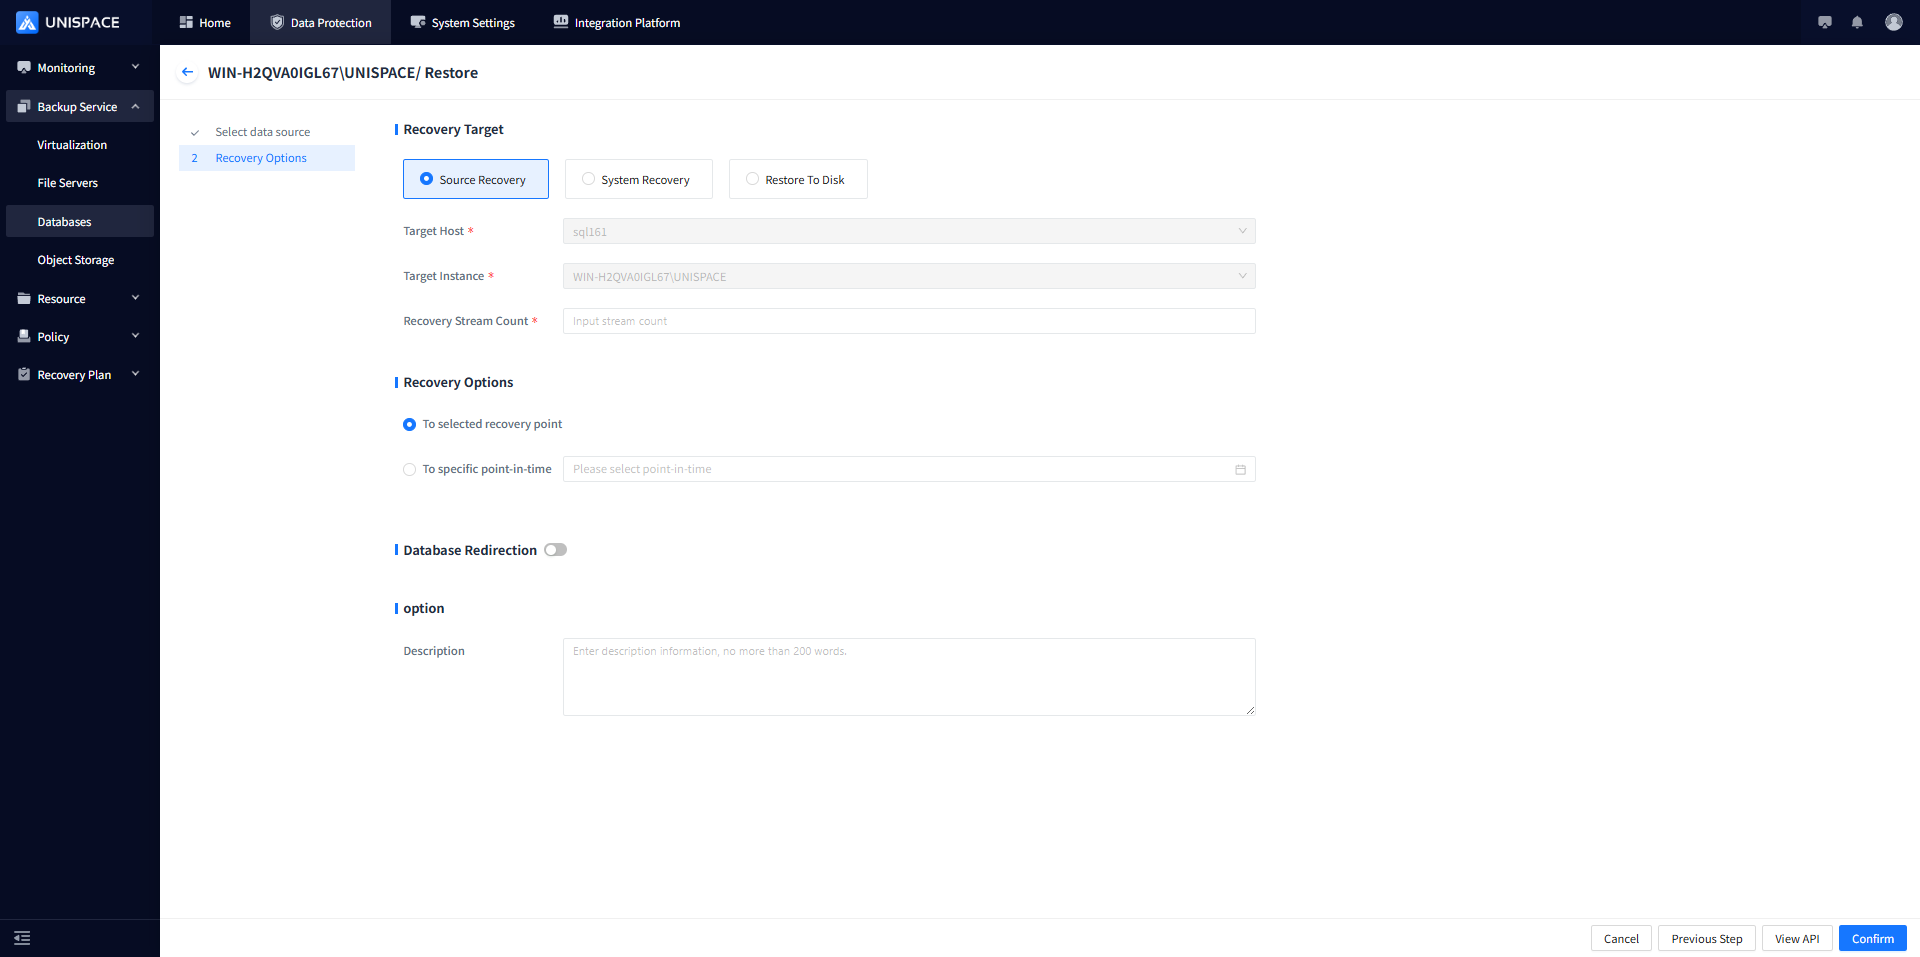
| Parameter Name | Description | Configuration Rule |
|---|---|---|
| Restore Target | Radio button, default is Off-Machine Restore | Choose Source Machine Restore, Off-Machine Restore, or Restore to Disk |
| Target Host | Radio button, default is empty | SQL Server client host registered in the management node |
| Target Instance | Radio button, default is empty | SQL Server instance on the client host |
| Restore Stream Count | Text box, required, default is empty | Number less than 200 |
| Restore Option | Radio button, default is End at Selected Time | Specify the end time of the database backup job or the exact point in time for log restoration |
| Database Redirection | Radio button, default is Disabled | Enter the redirection path, e.g., C:\TEST\ |
| Target Host (Restore to Disk) | Radio button, default is empty | Registered client host in the management node (including storage nodes), currently only supports Windows systems |
| Temporary Directory | Text box, required, default is empty | Enter the redirection path, e.g., C:\TEST\ |