Agent--Highgo
1.1 Create Highgo Virtual Cluster
Prerequisites
- Created a user.
- Created a storage repository.
- Created a service plan.
- A Highgo database has been registered.
Steps
Step 1: Click Backup Service - Database - Virtual Cluster from the system menu to enter the virtual cluster table page.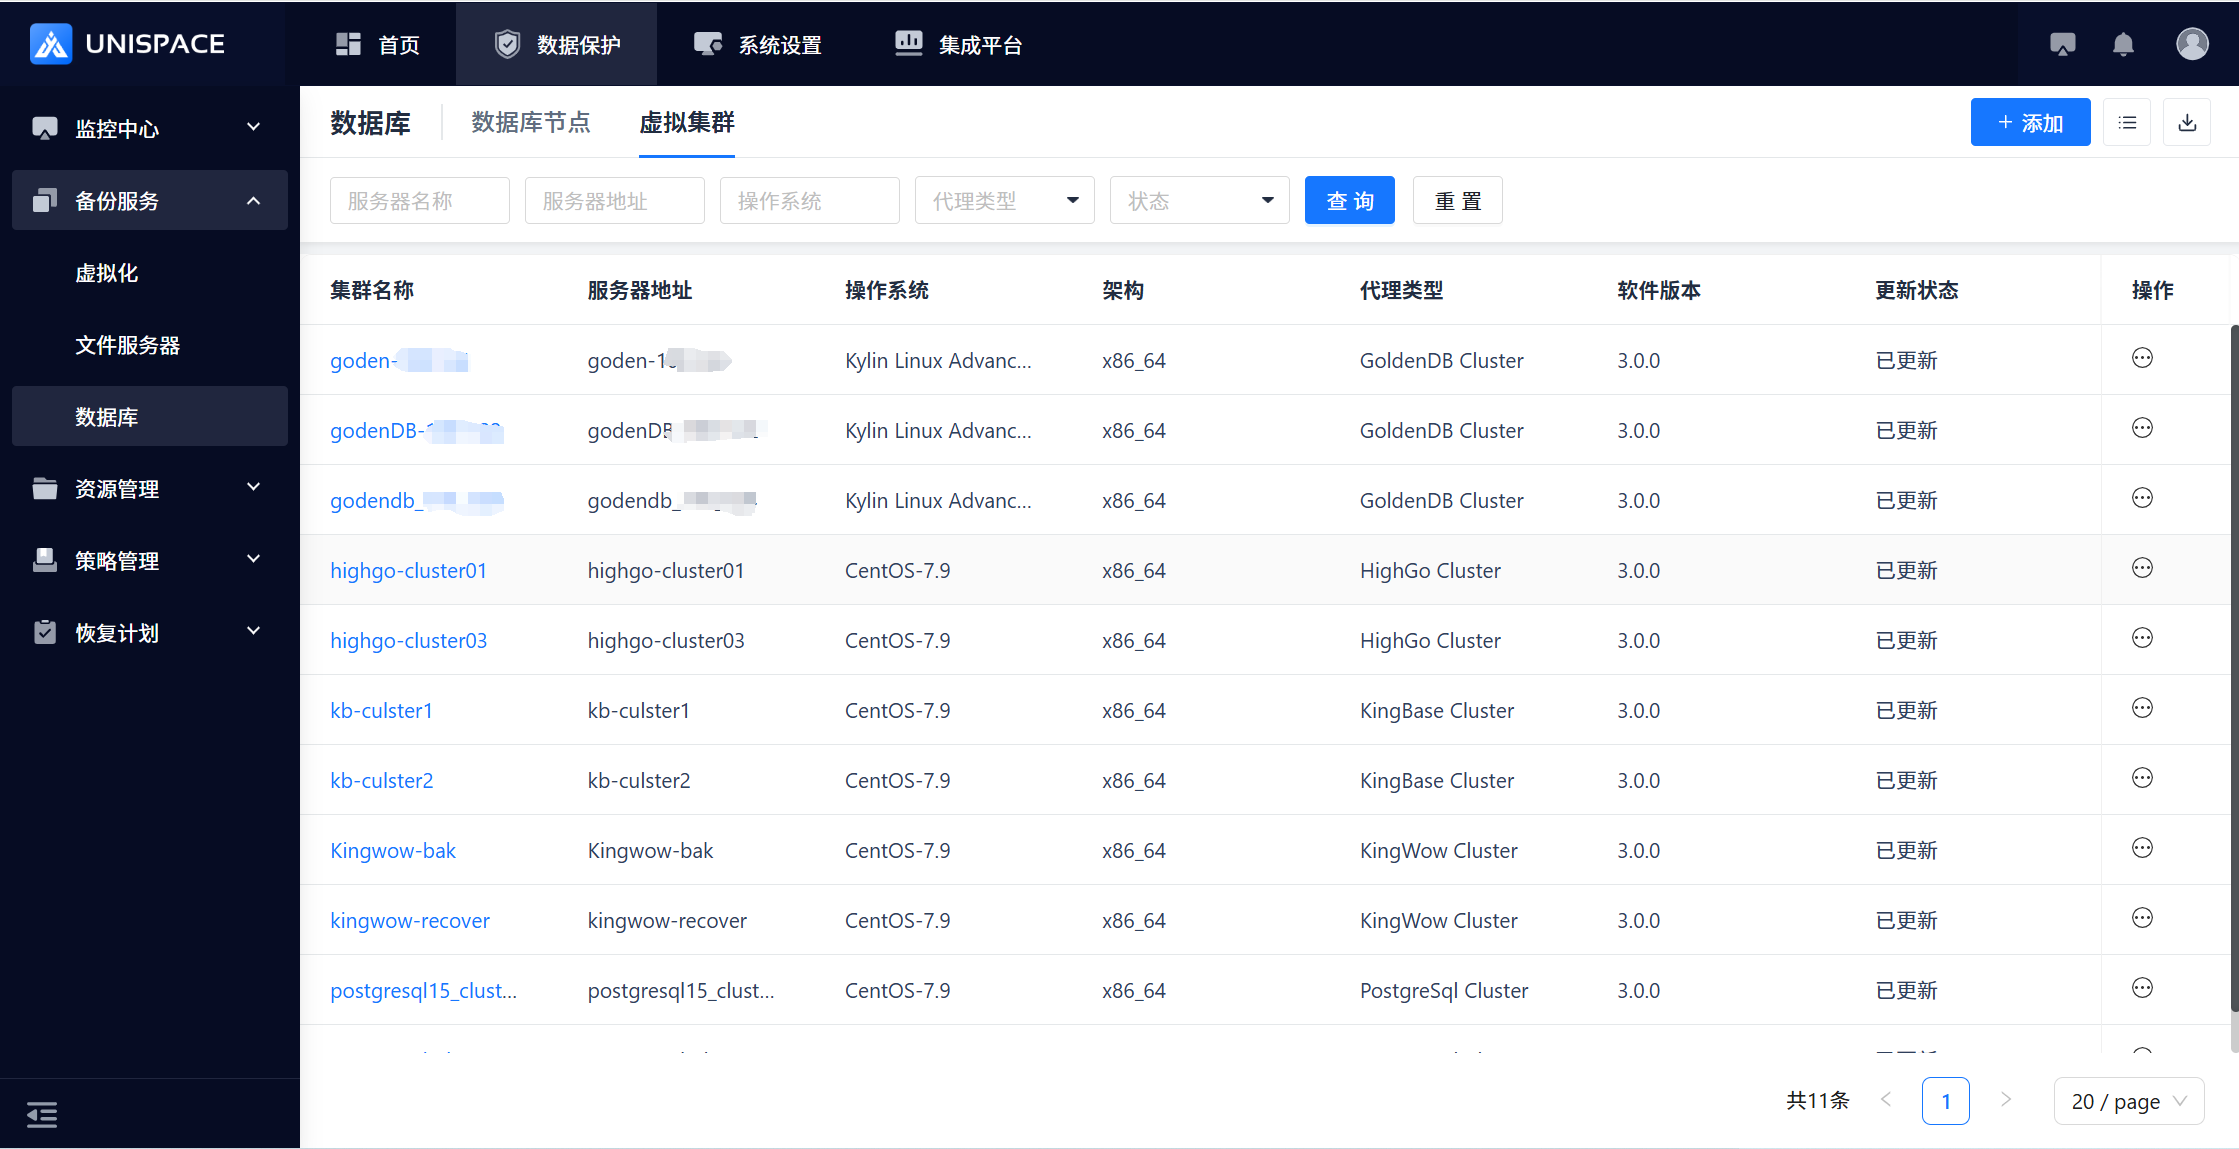 Step 2: Click the Add button in the top right corner of Virtual Cluster. A pop-up window will appear.
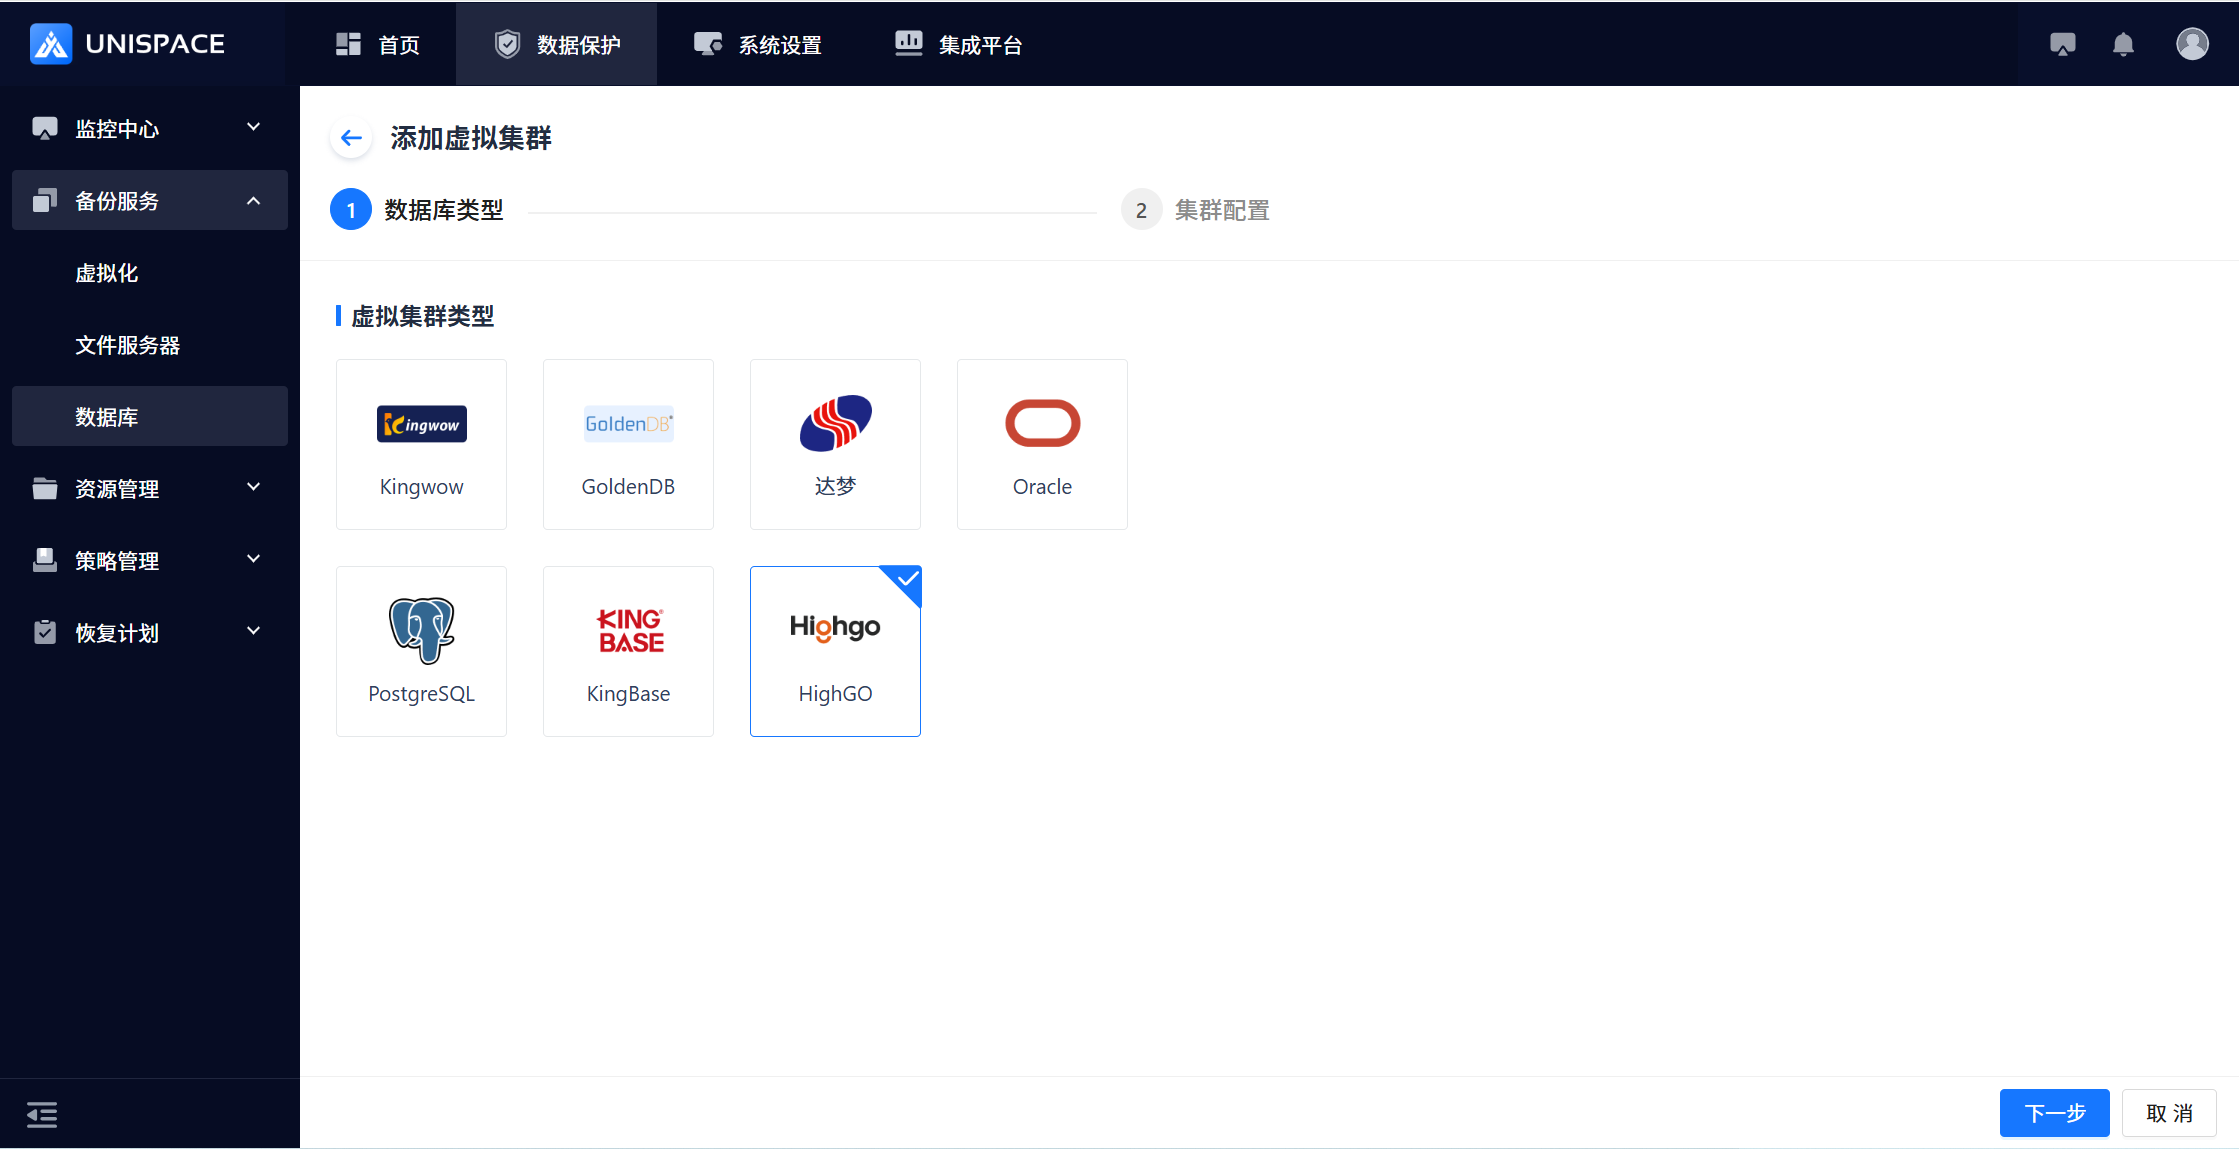 Step 3: After configuring the instance information, click Next, enter the cluster name, and click Add.
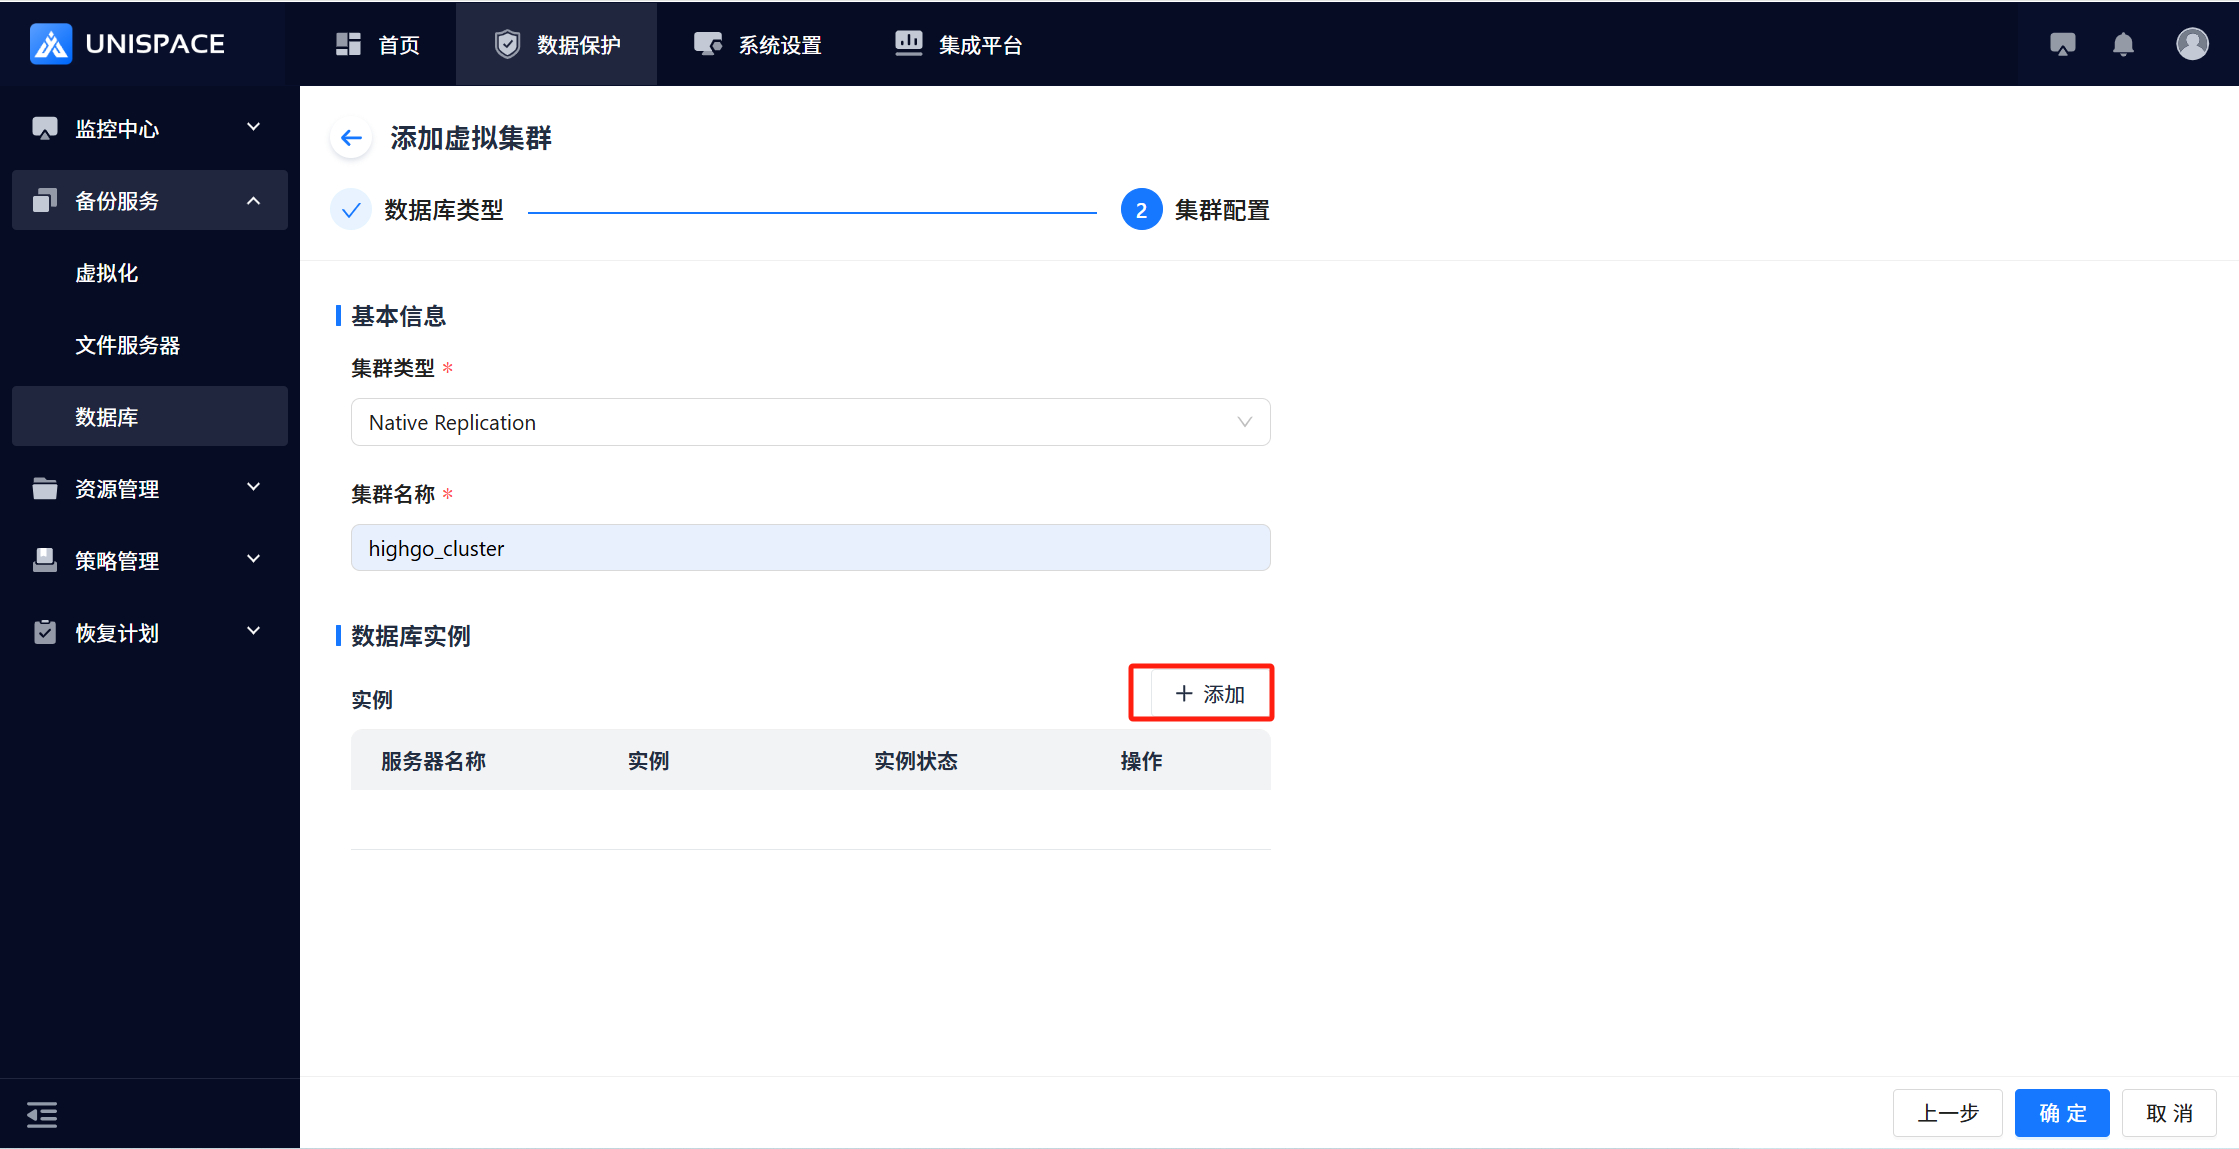 Step 4: On the Add Instance page, fill in the instance form.
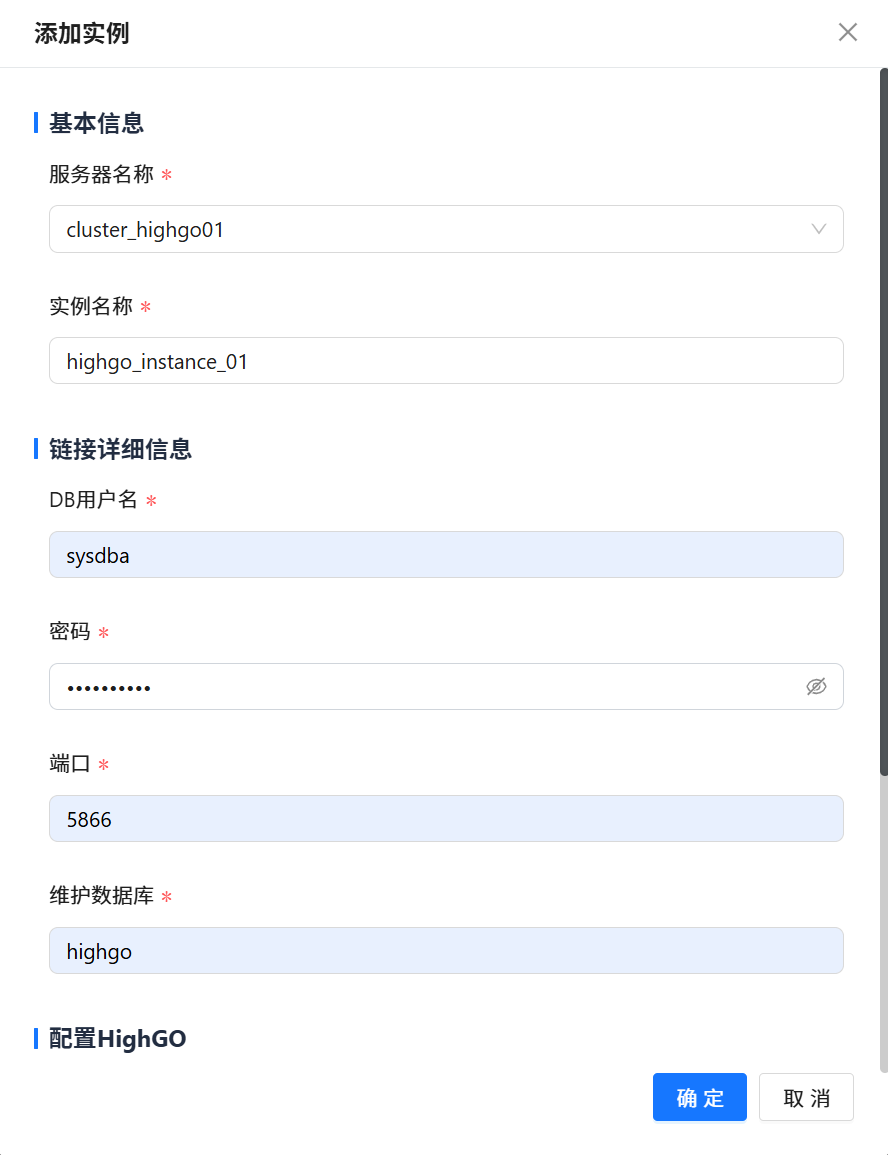
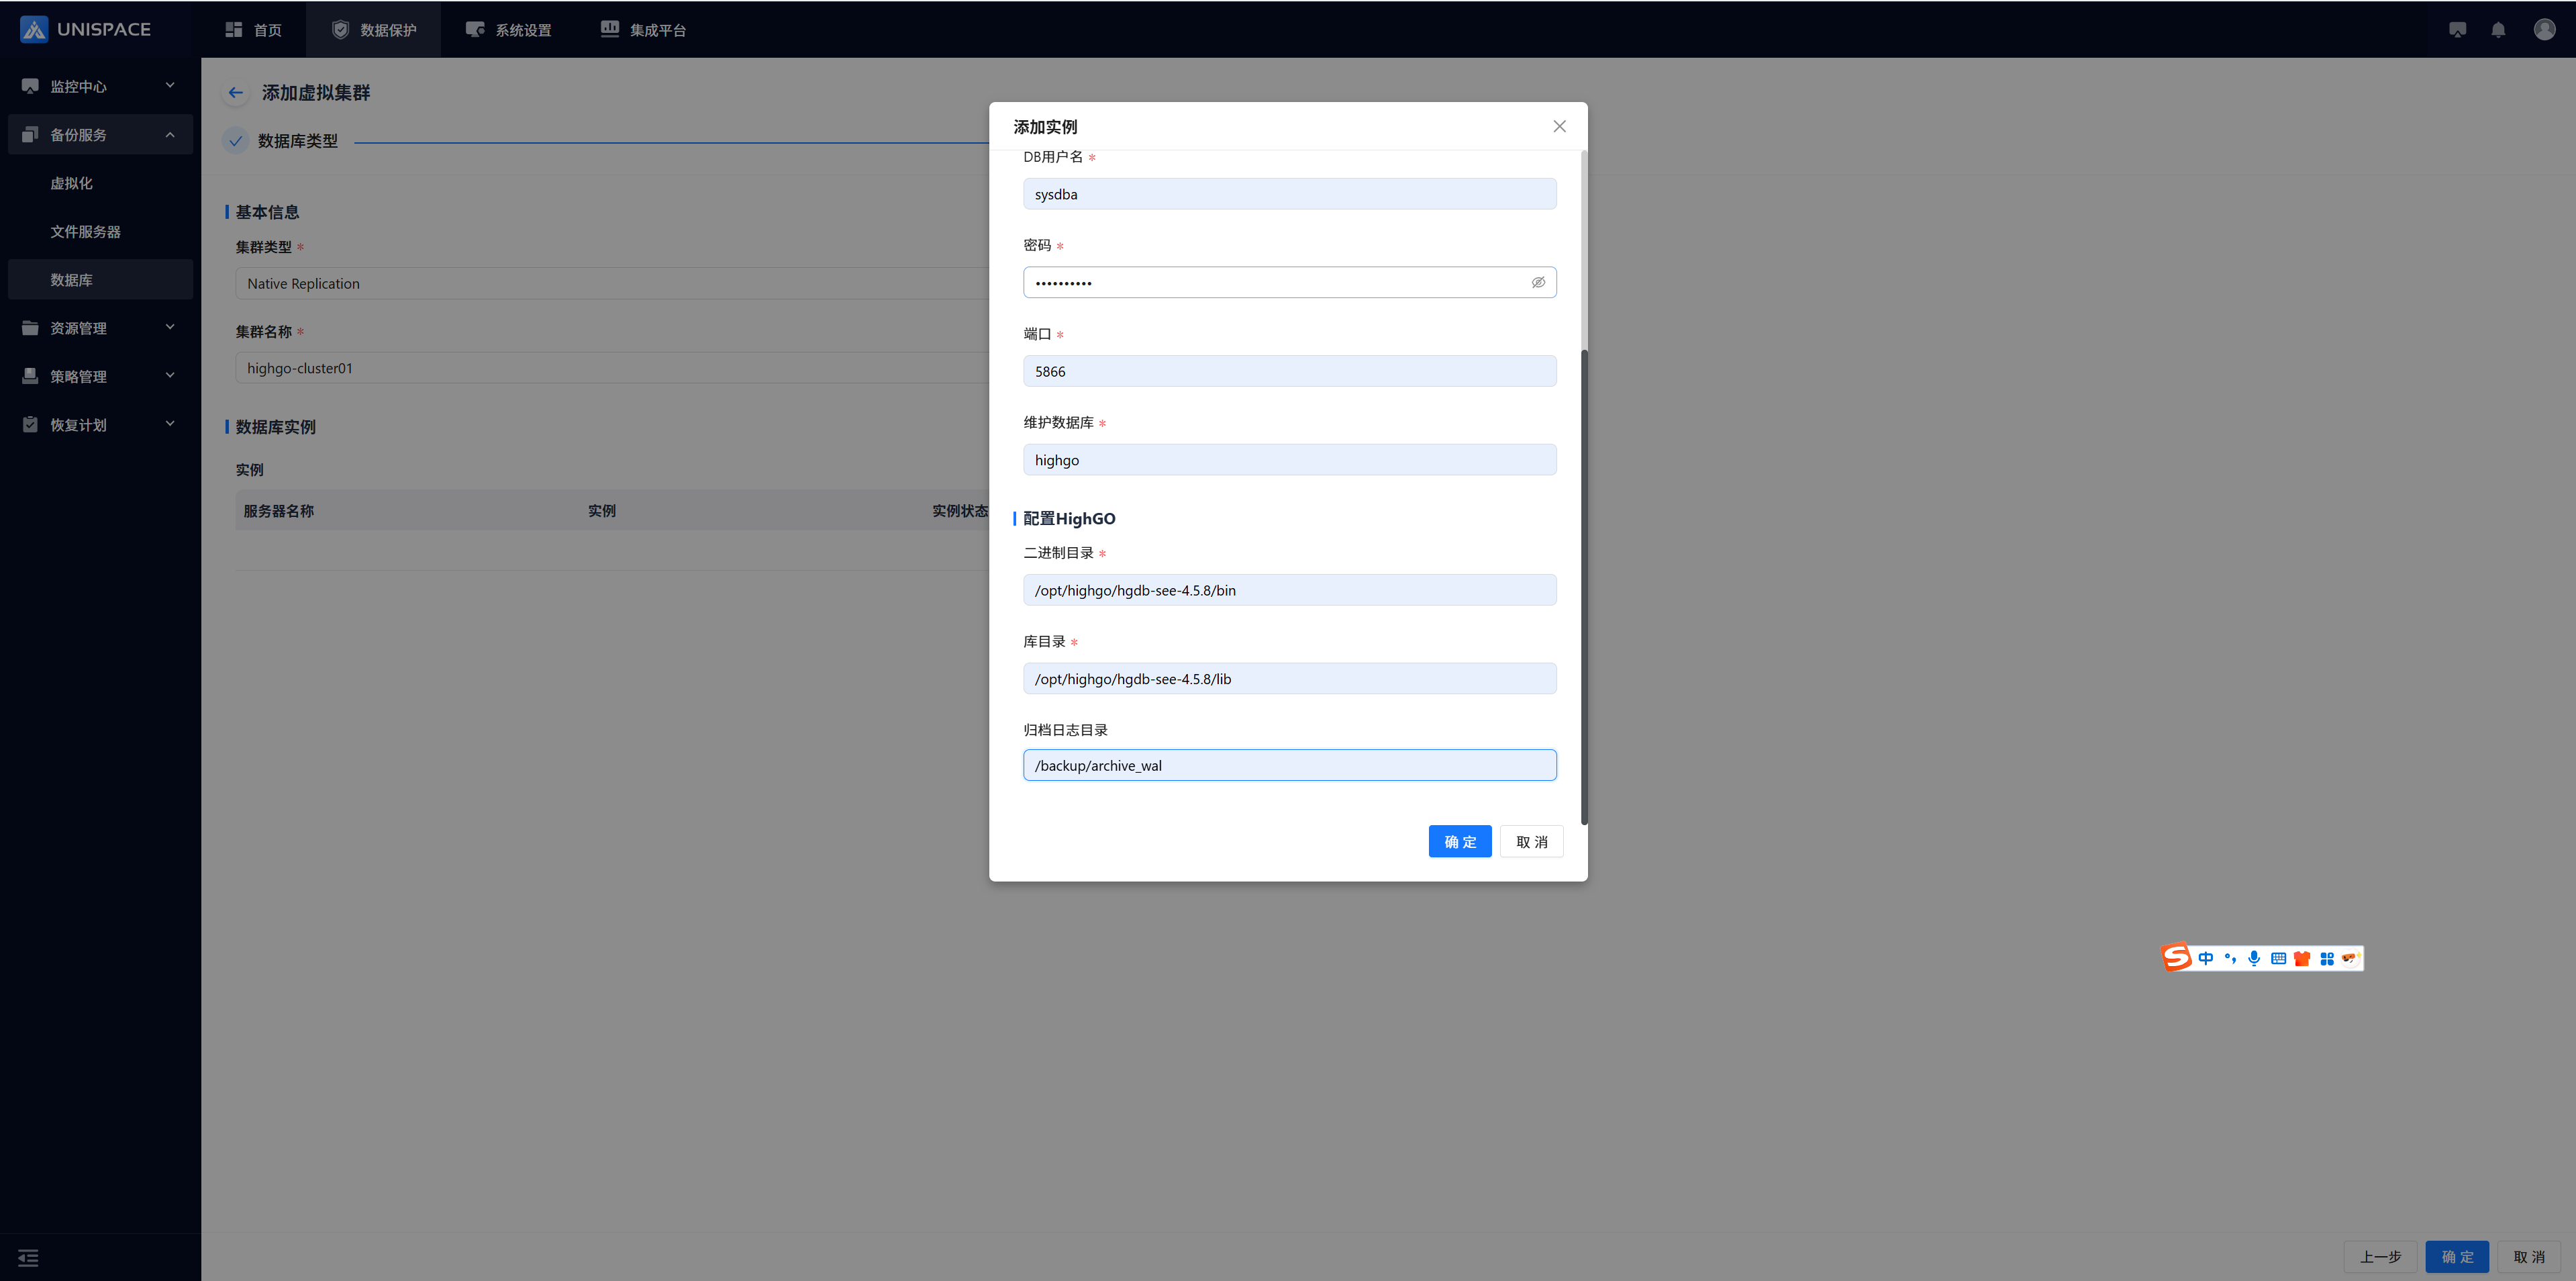 Fill in the instance form with the necessary parameters as follows:
| Parameter Name | Description | Configuration Principle |
|---|---|---|
| Server Name | Single choice dropdown, required | Select the registered name of the Highgo server |
| Instance Name | Text input box, required, customizable | No length or special character restrictions |
| DB Username | Text input box, required | Enter the Highgo username, e.g., sysdba |
| Password | Password field, required | Enter the Highgo password |
| Port | Input box, required | Default port number: 5866 |
| Maintenance DB | Input box, required | Default value: highgo |
| Binary Directory | Input box, required | Enter the correct Highgo binary directory |
| Database Directory | Input box, required | Enter the correct Highgo database directory |
| Archive Log Dir | Path input box | Customize the archive log directory |
Step 5: Click OK. After successfully adding the instance, you can add other instances if needed. Finally, click OK to close the success page.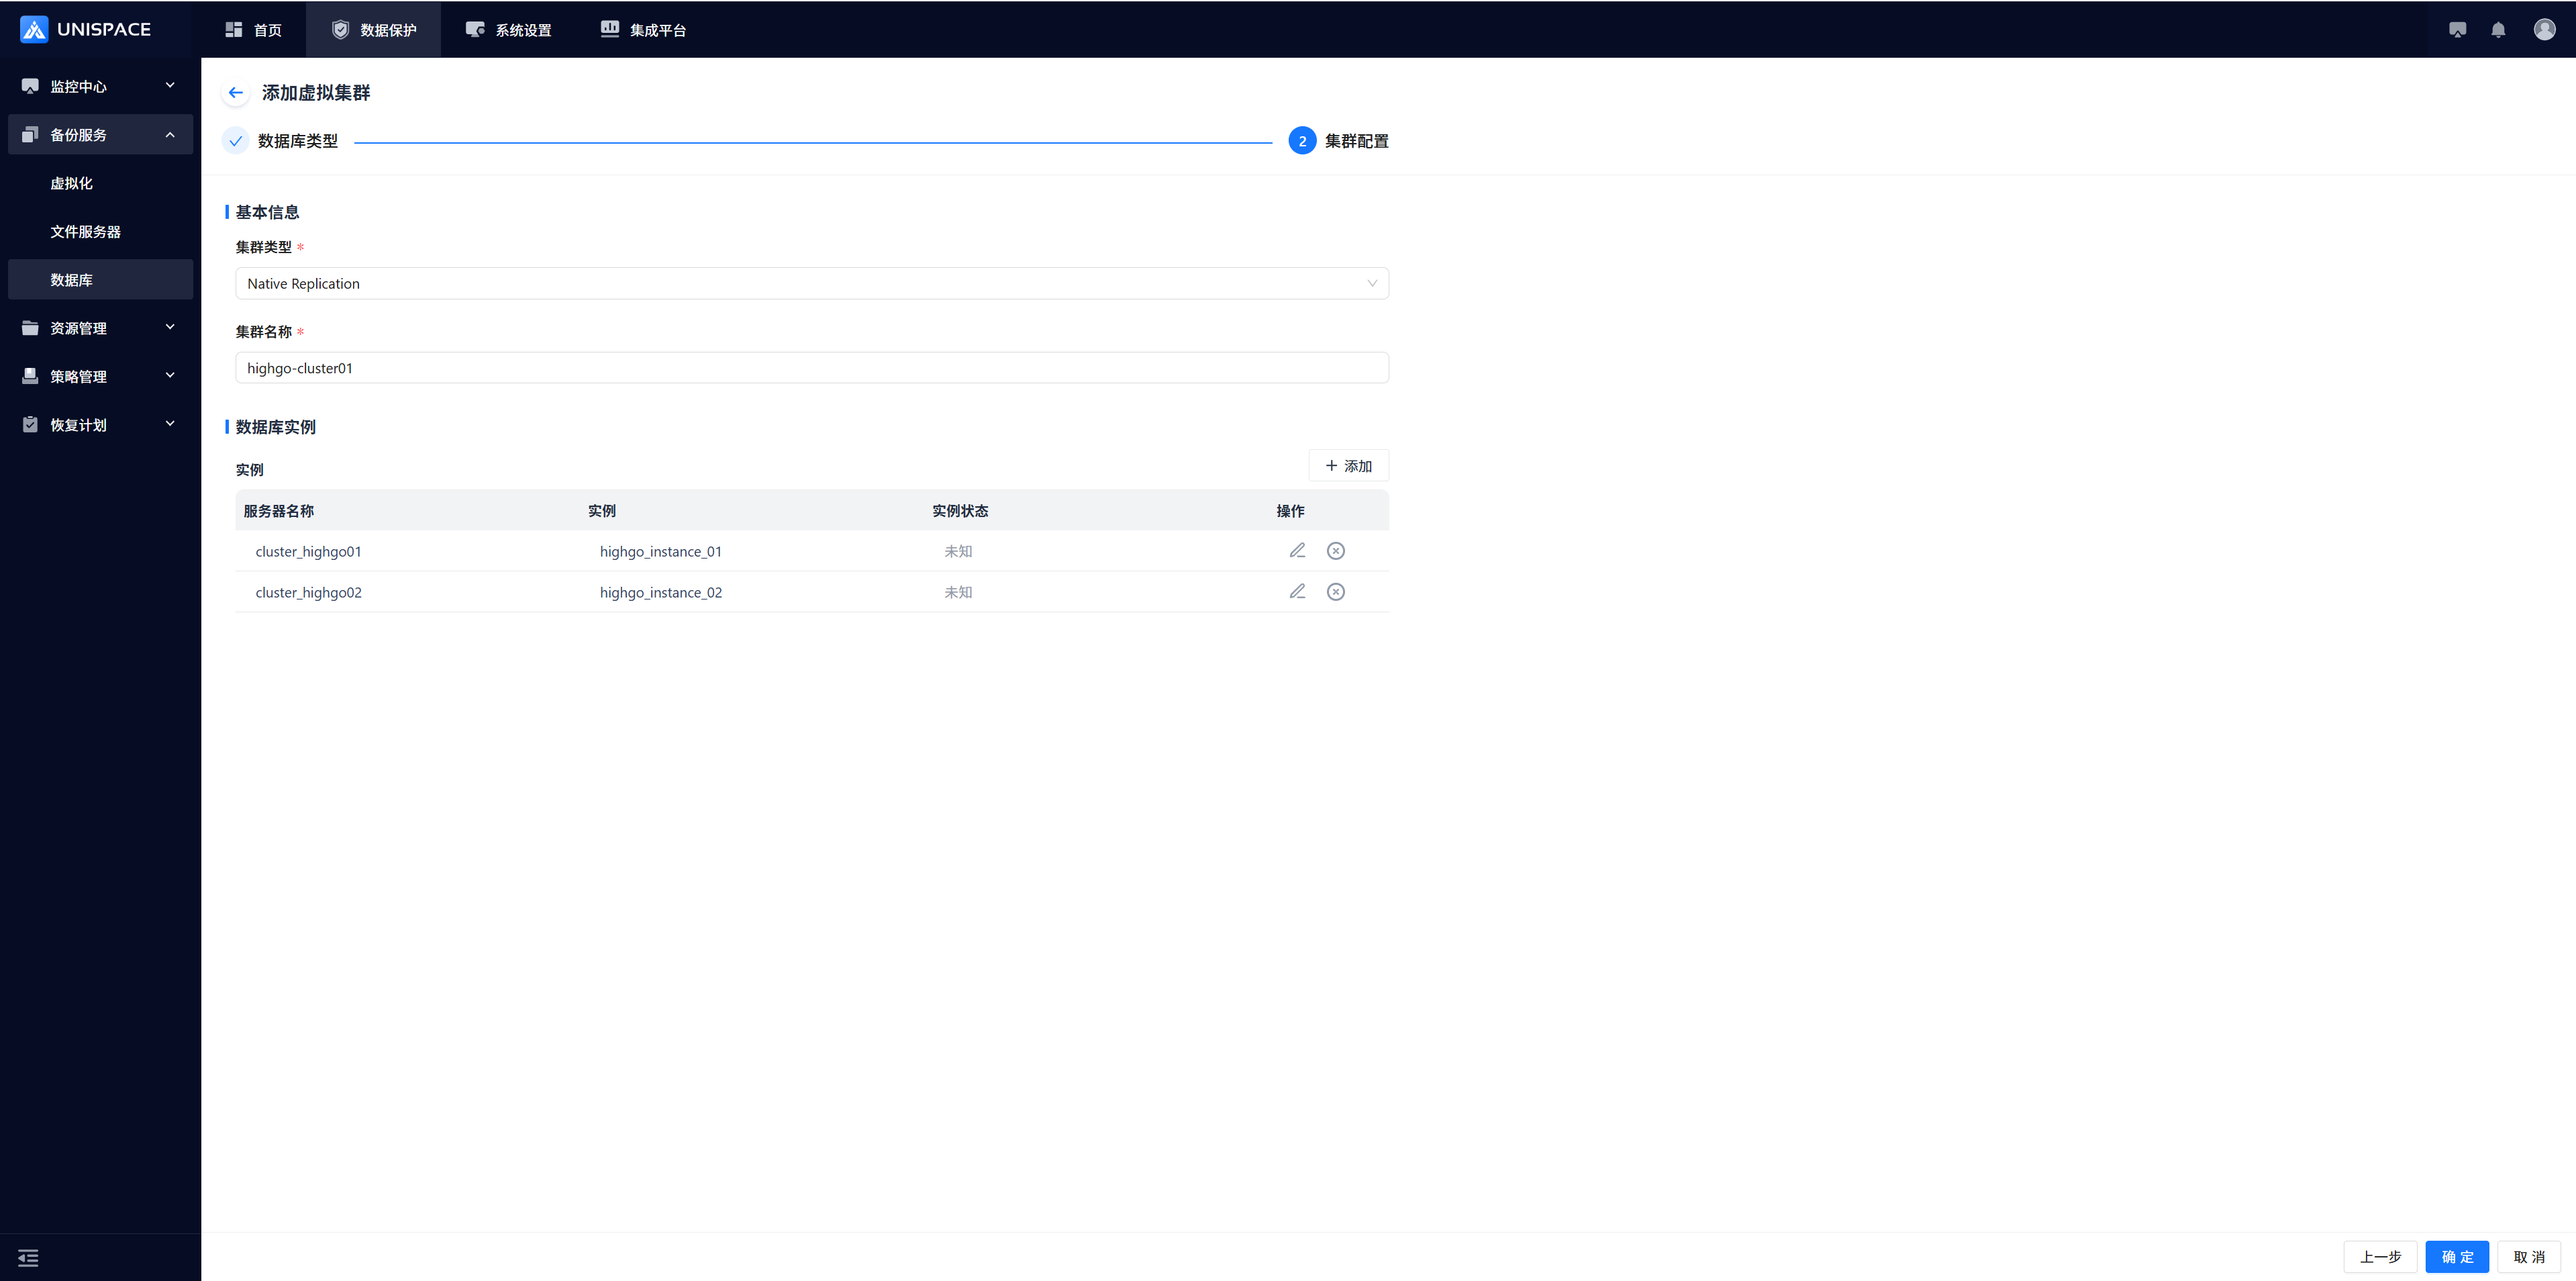
1.2 Create Highgo Backup Object Set
Prerequisites
- A virtual cluster instance has been created.
Steps
Step 1: Click Backup Service - Database - Virtual Cluster - Backup Set from the system menu.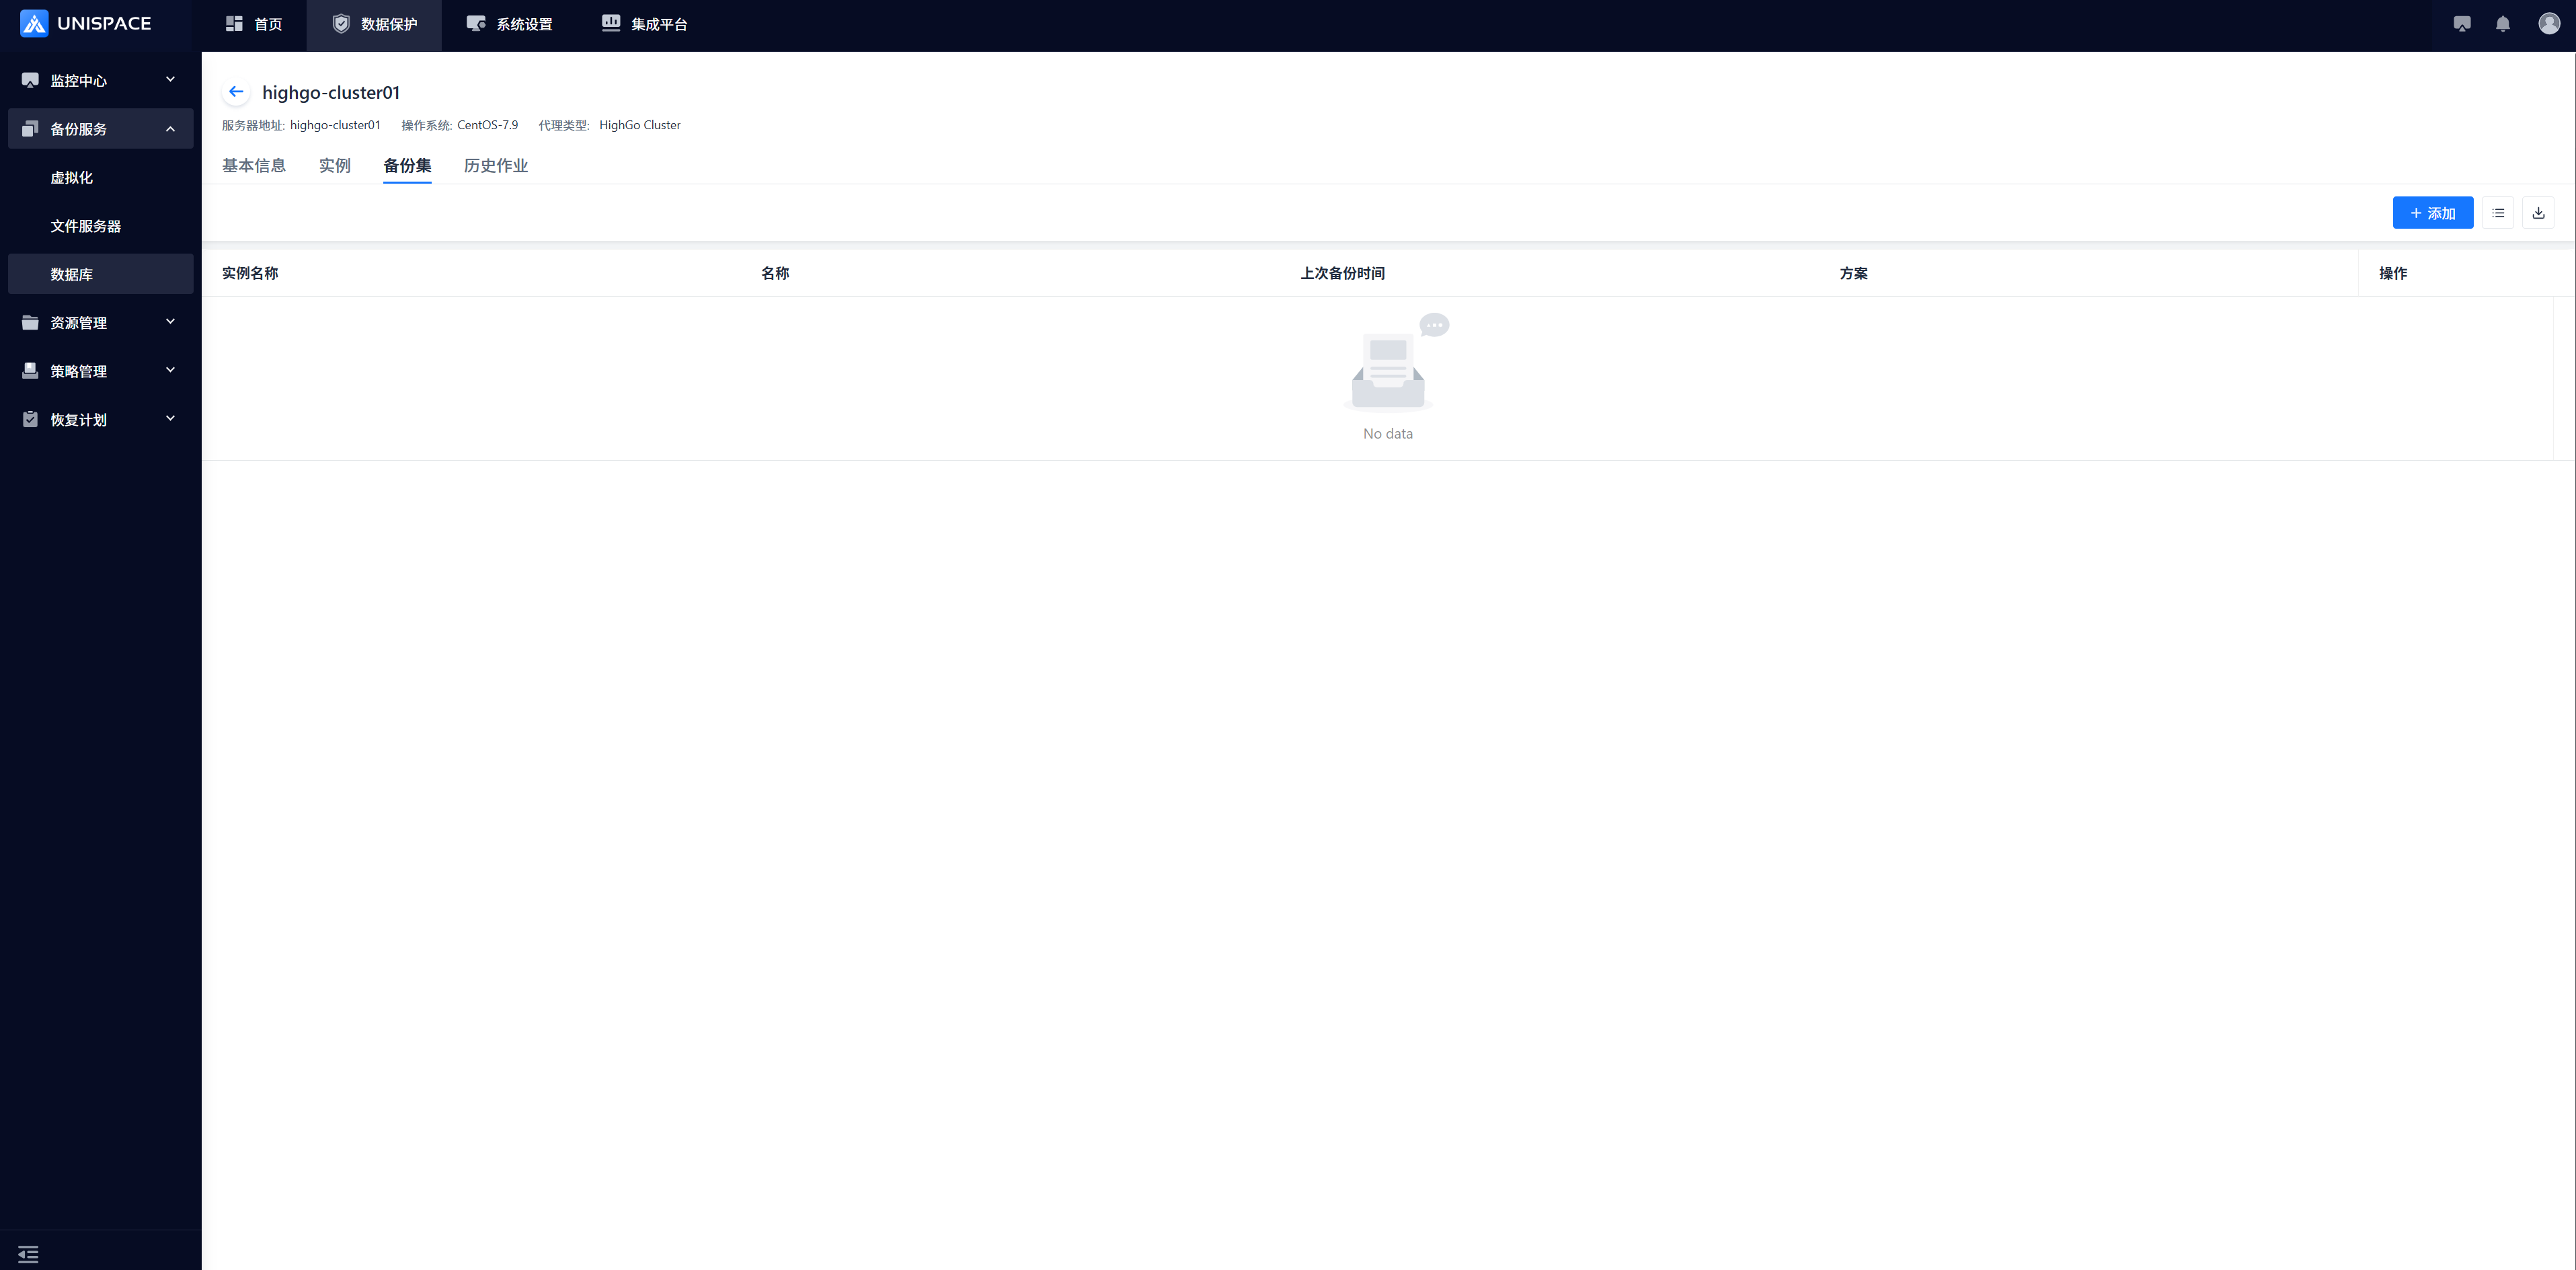
 Step 2: Click the Add button in the top right corner of Backup Set. A pop-up window will appear. Fill in the necessary parameters as follows:
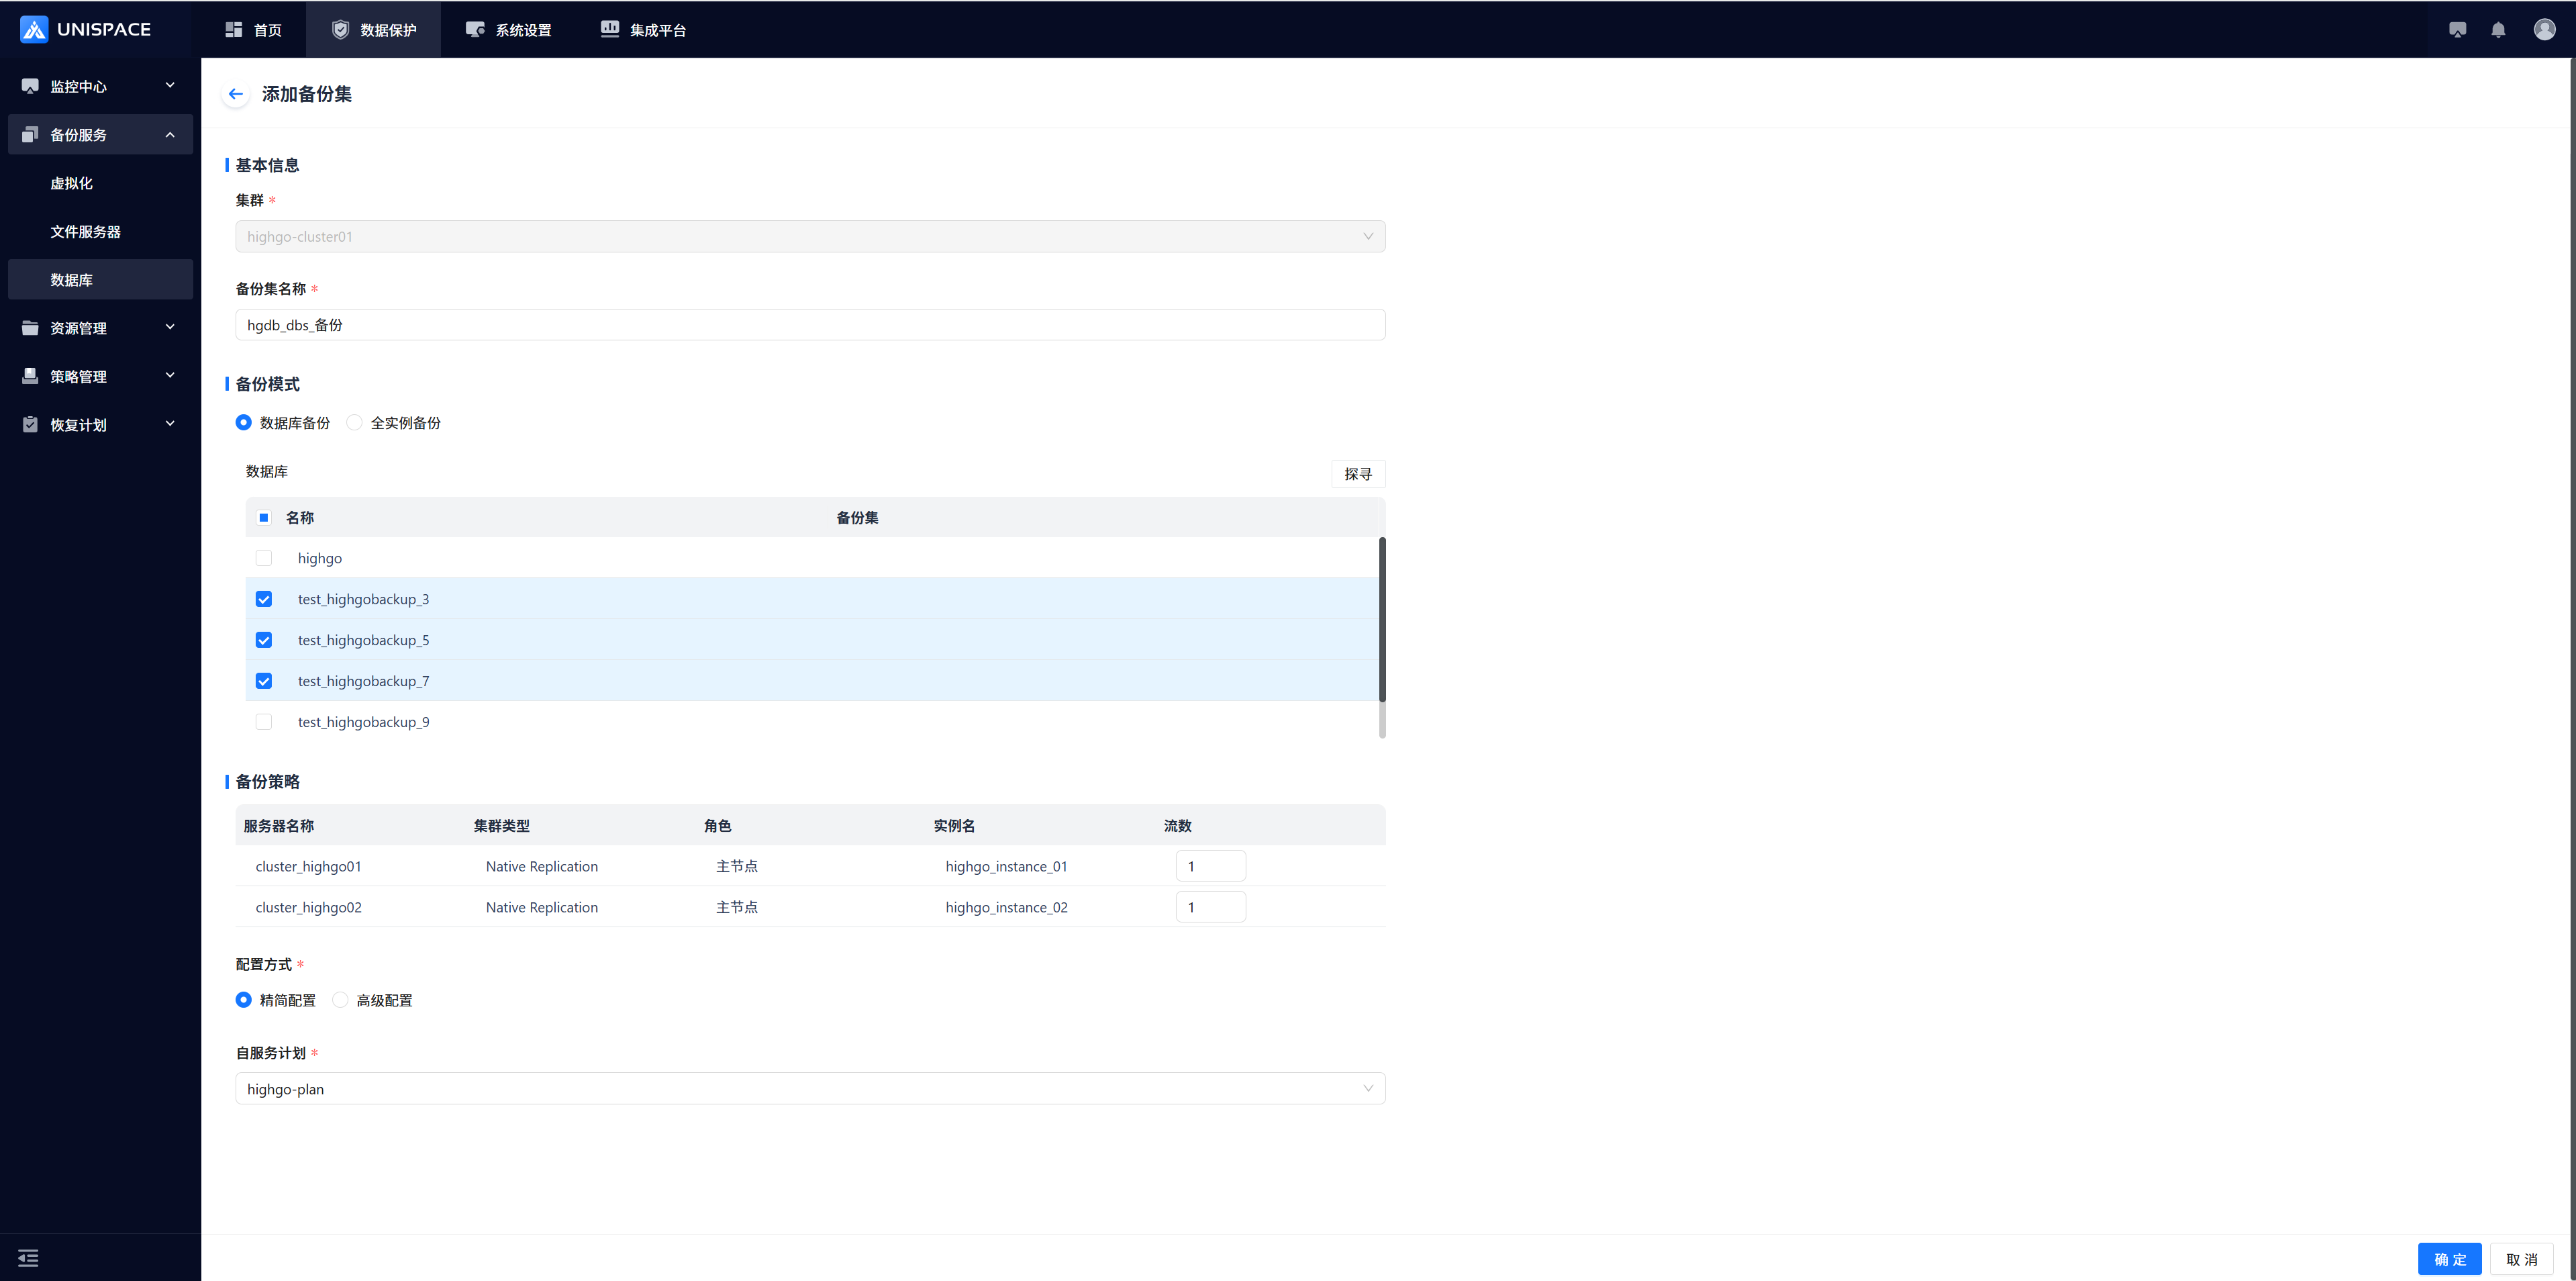
| Parameter Name | Description | Configuration Principle |
|---|---|---|
| Cluster | Default selected cluster, cannot be changed | The previously added Highgo instance |
| Backup Set Name | Text input box, required | Up to 50 characters, no special characters |
| Backup Mode | Database Backup or Full Instance Backup | Database Backup: Select one or more databases (do not select system databases like highgo) |
| Backup Strategy | Number of streams | Default is 1 (recommended to use the default) |
| Configuration | Single choice, required | Choose Simple Configuration or Advanced Configuration |
| Service Plan | Single choice, required | Select an appropriate plan |
Step 3: Click OK. The system will display a success message.
1.3 Highgo Cluster Database Backup
Prerequisites
- A Highgo backup set has been configured.
Steps
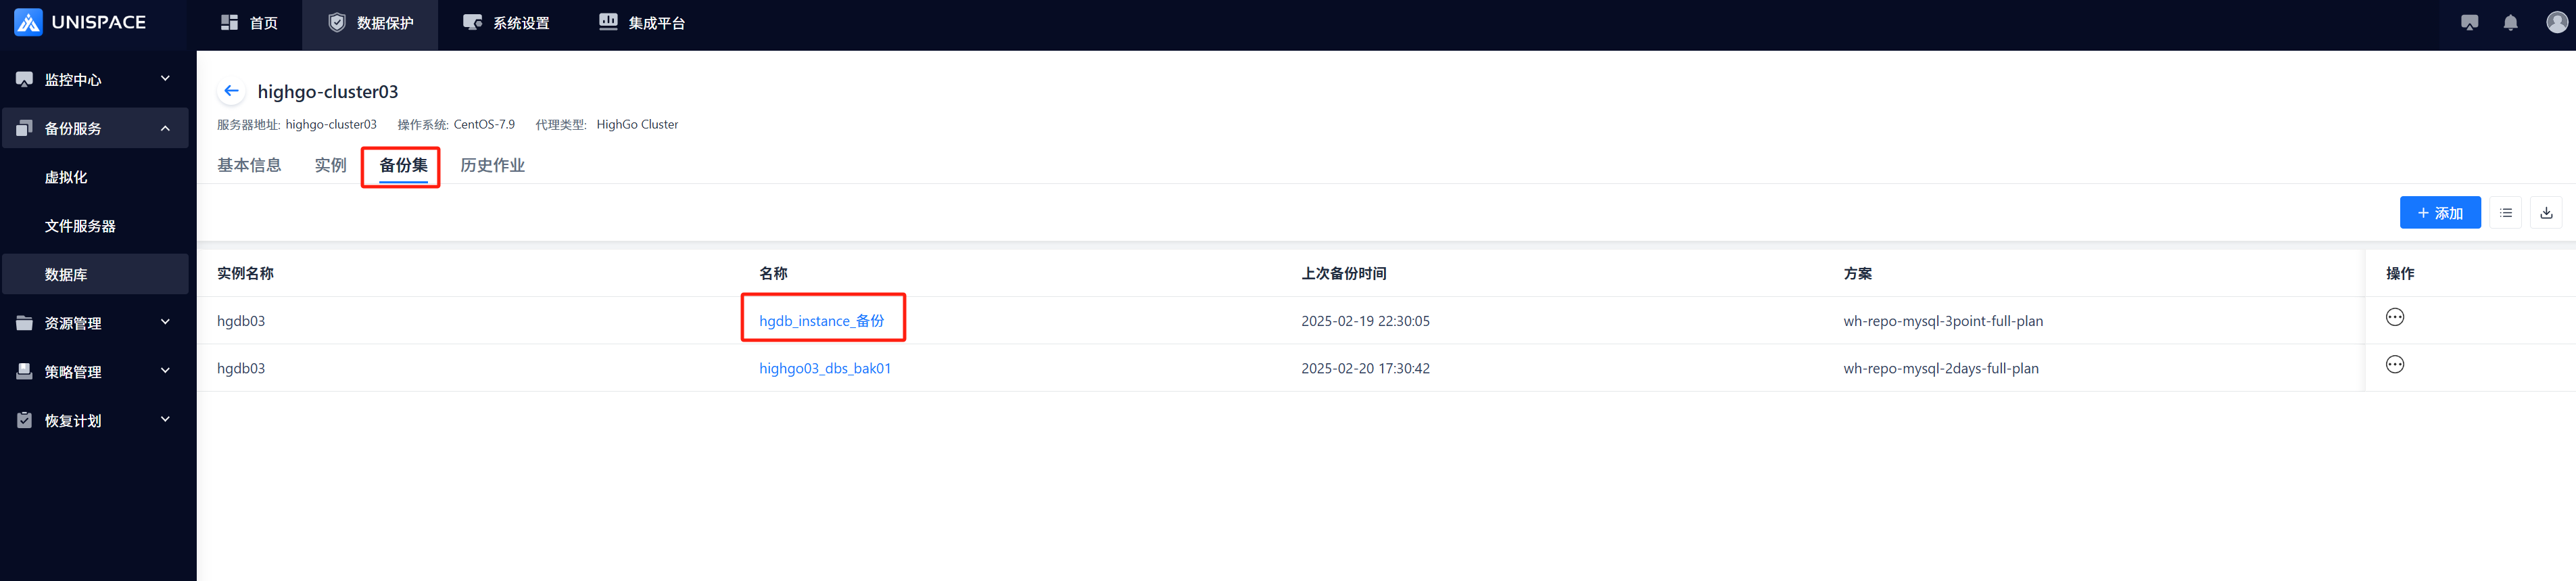
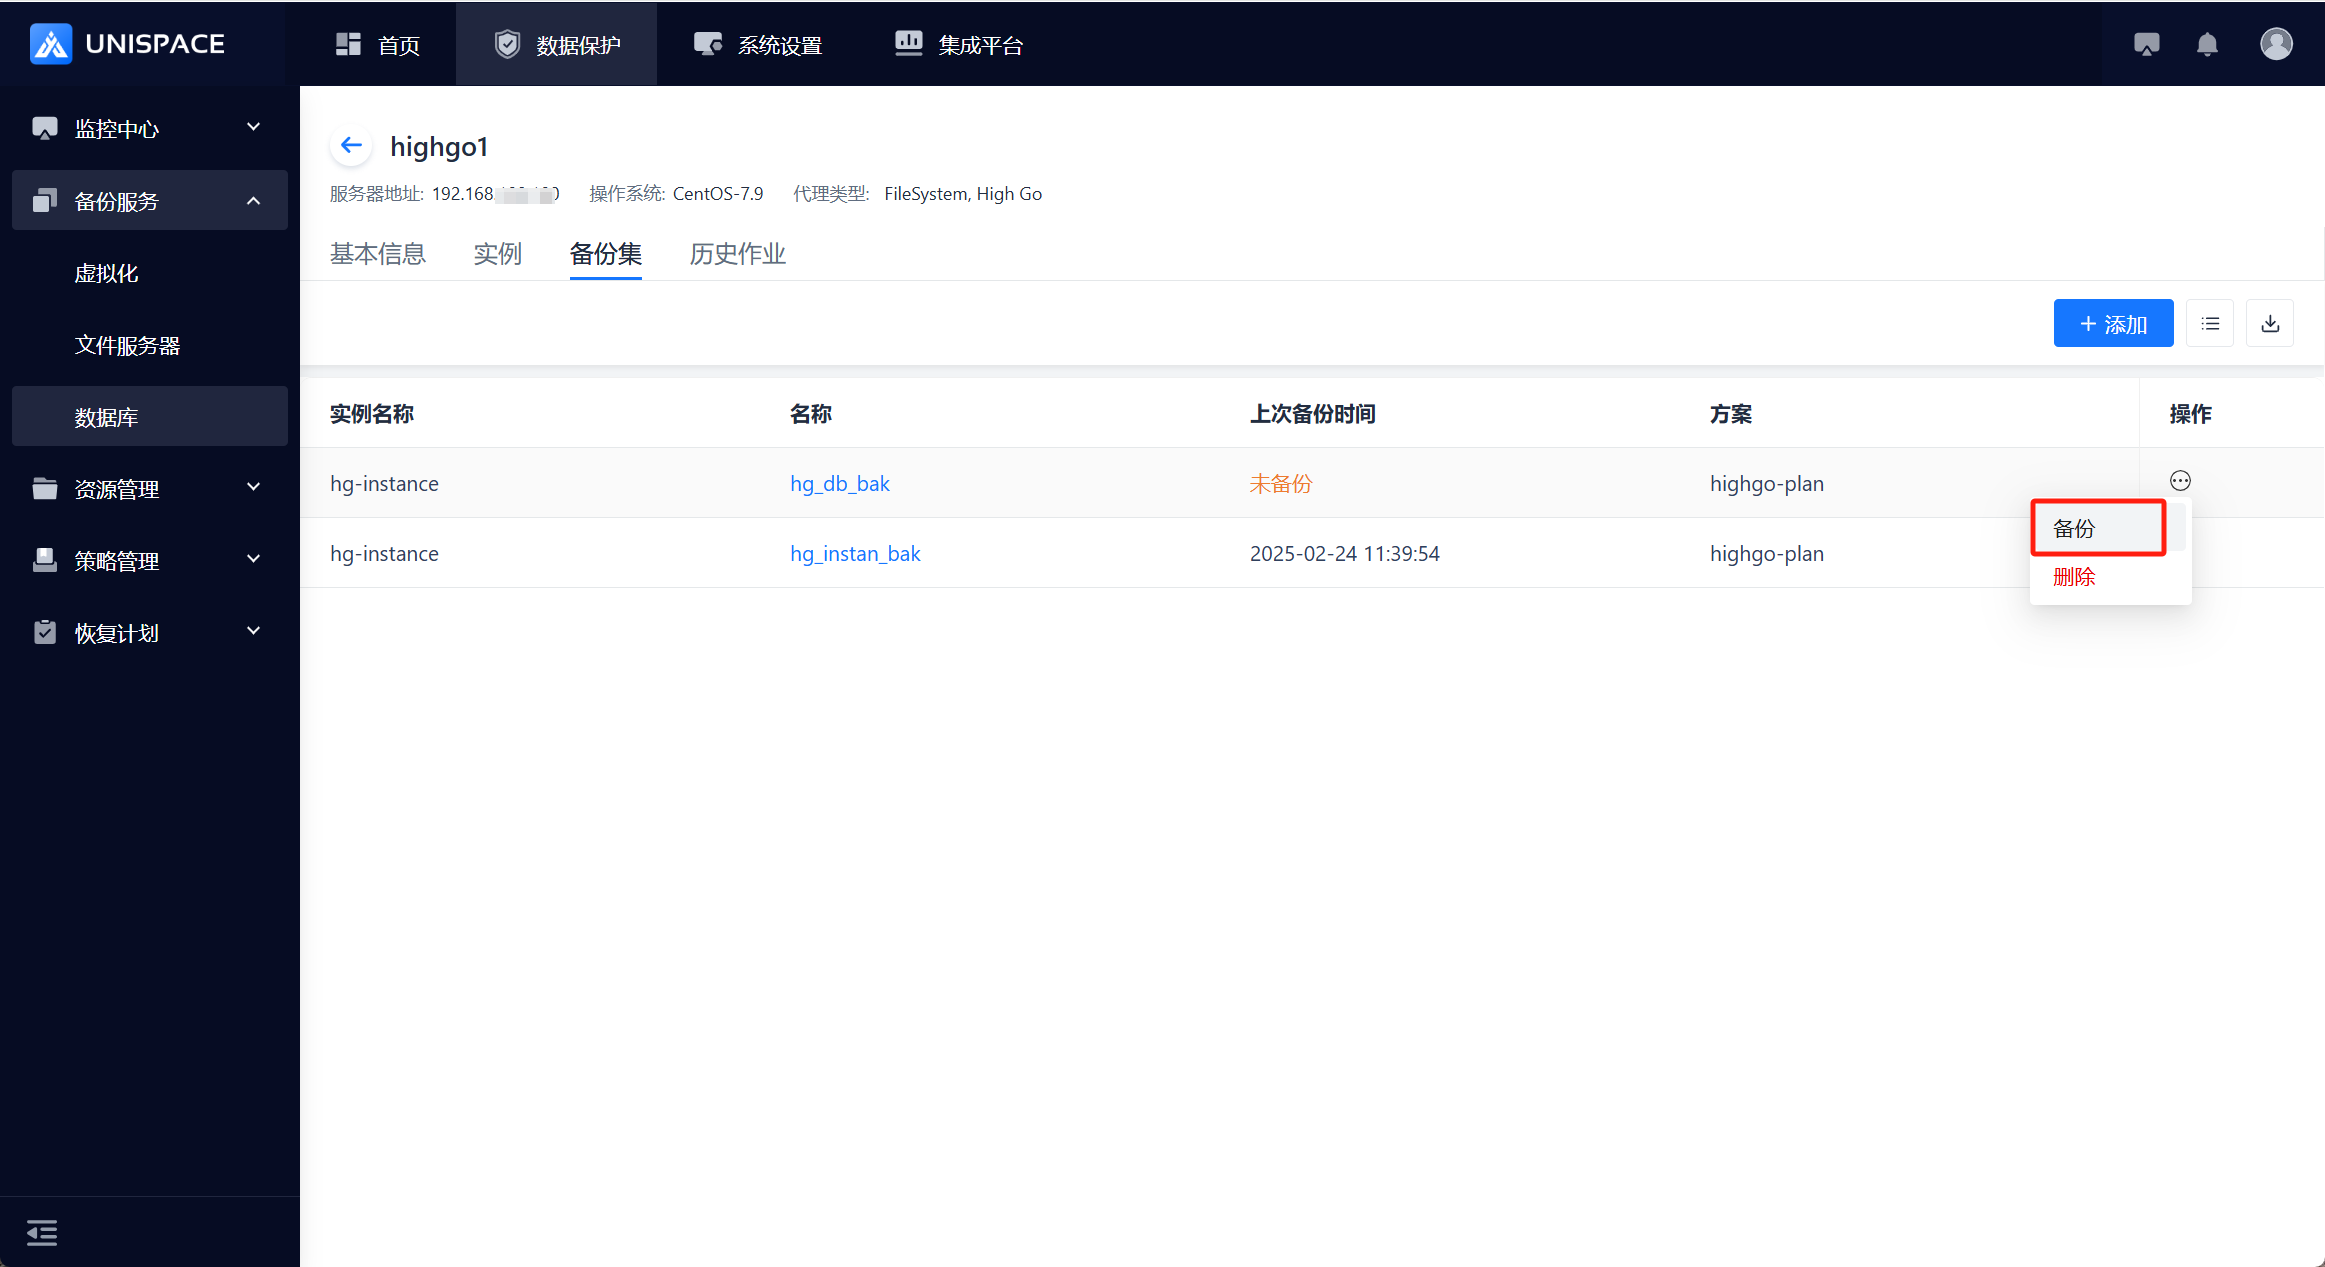
Step 1: Click Backup Service - Database - Virtual Cluster - Backup Set from the system menu.
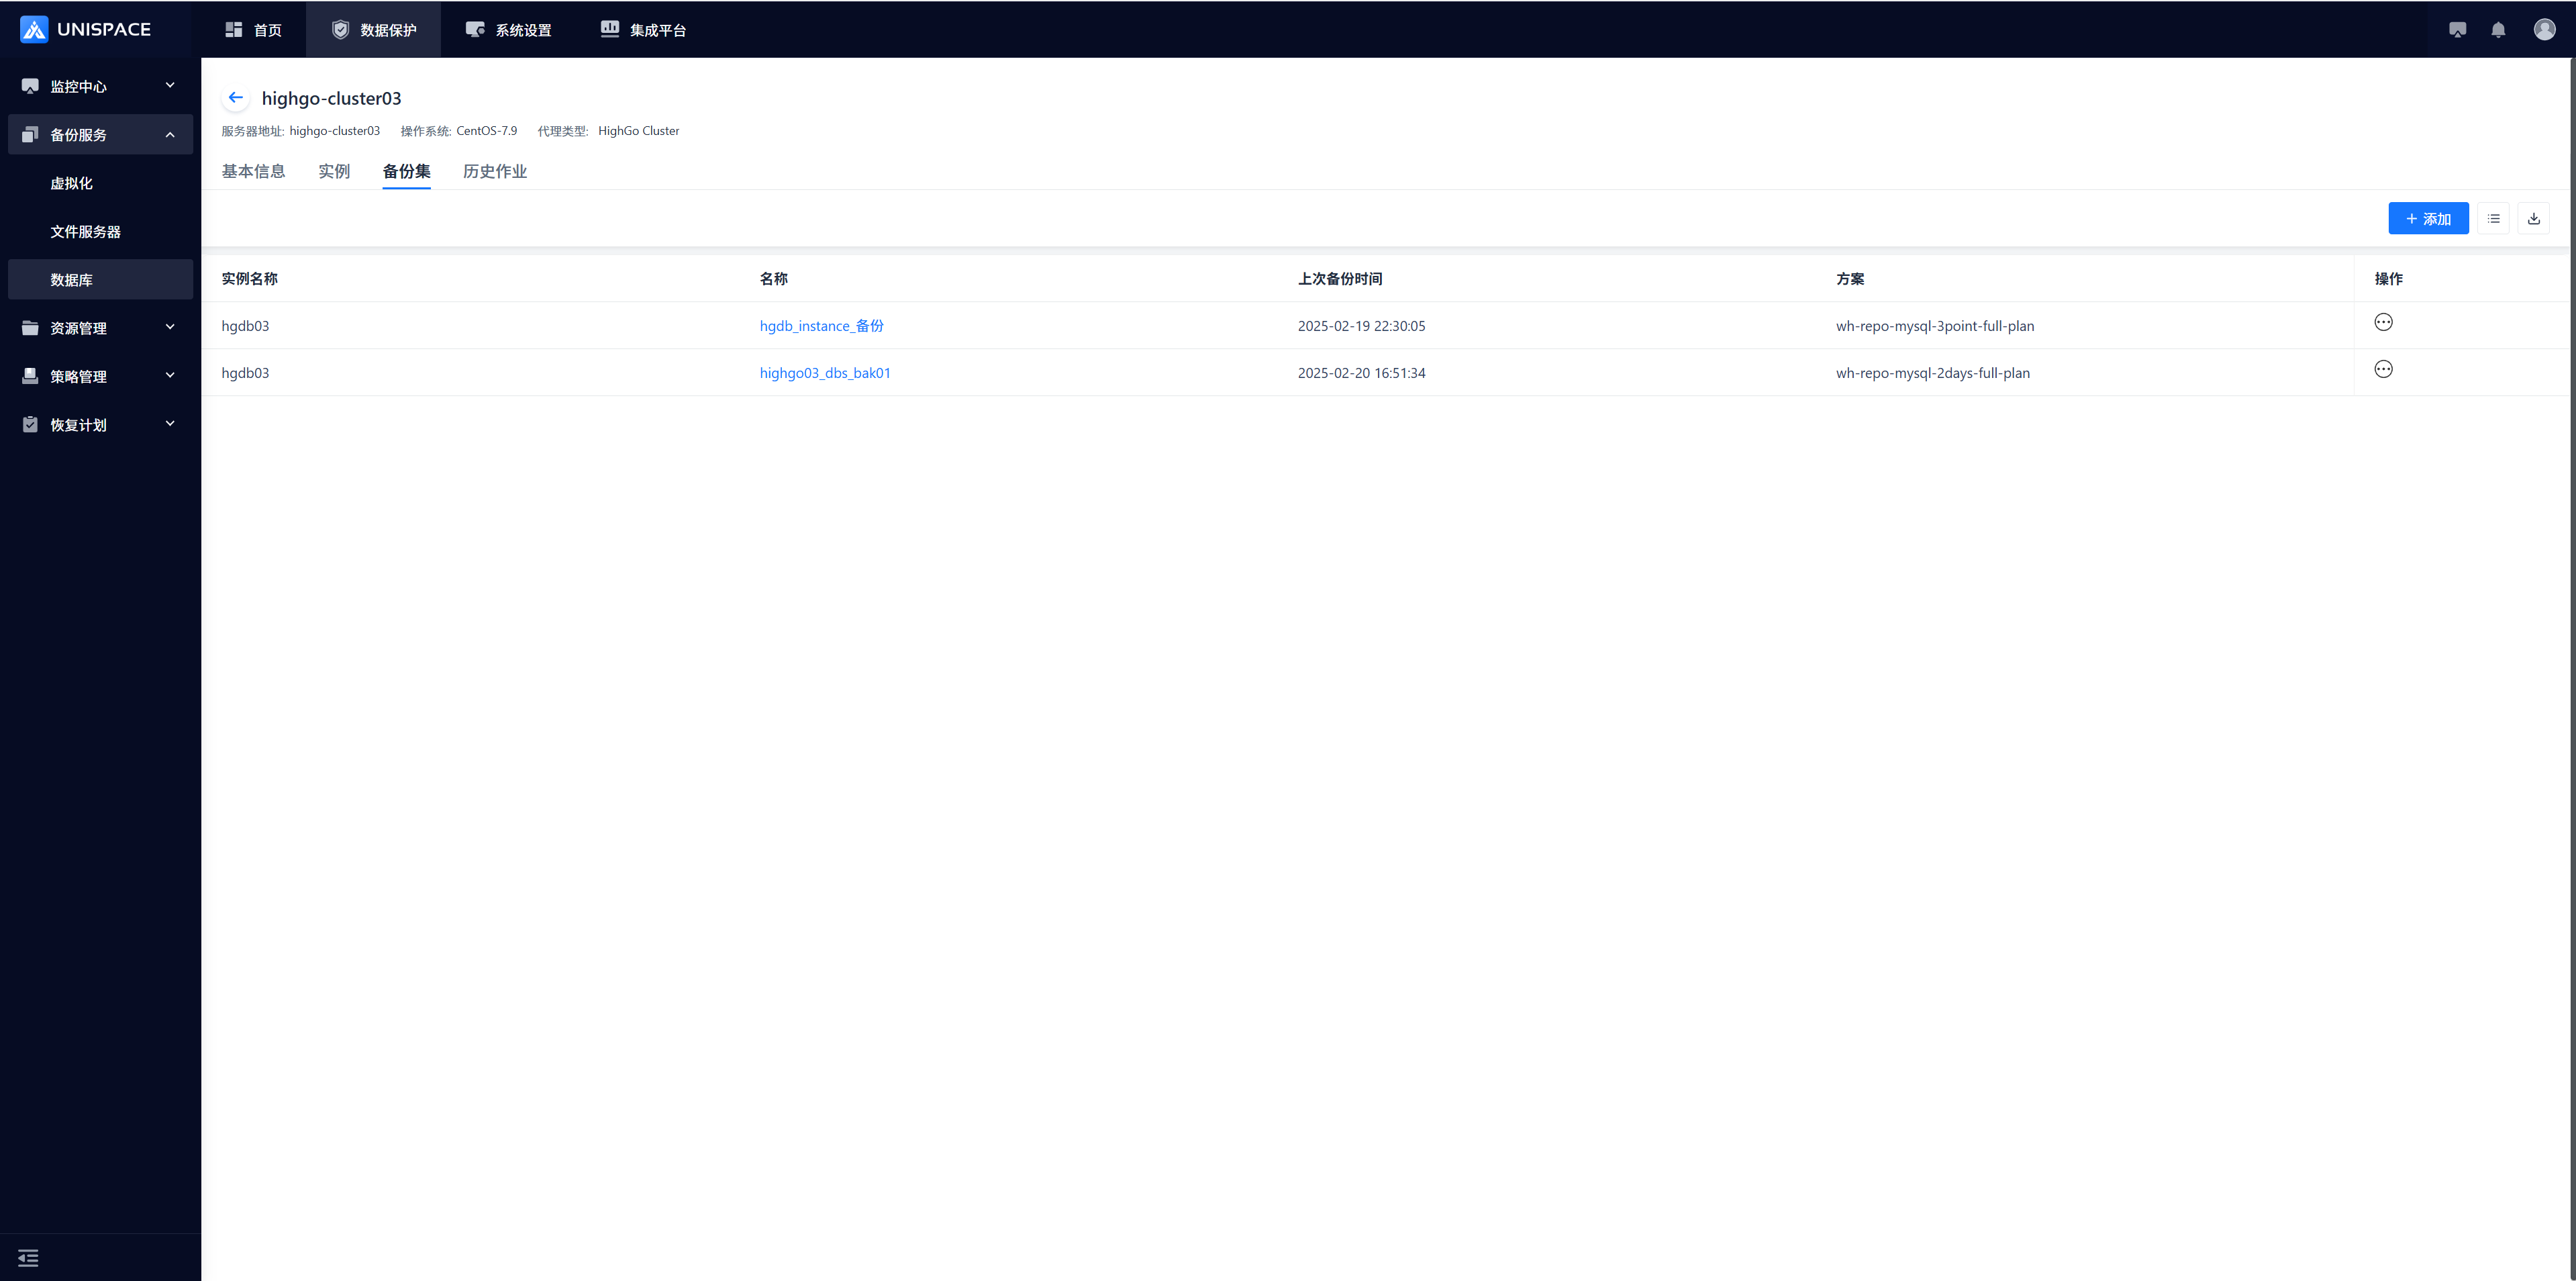 Step 2: Click Backup Set - Operation - Backup from the database backup set.
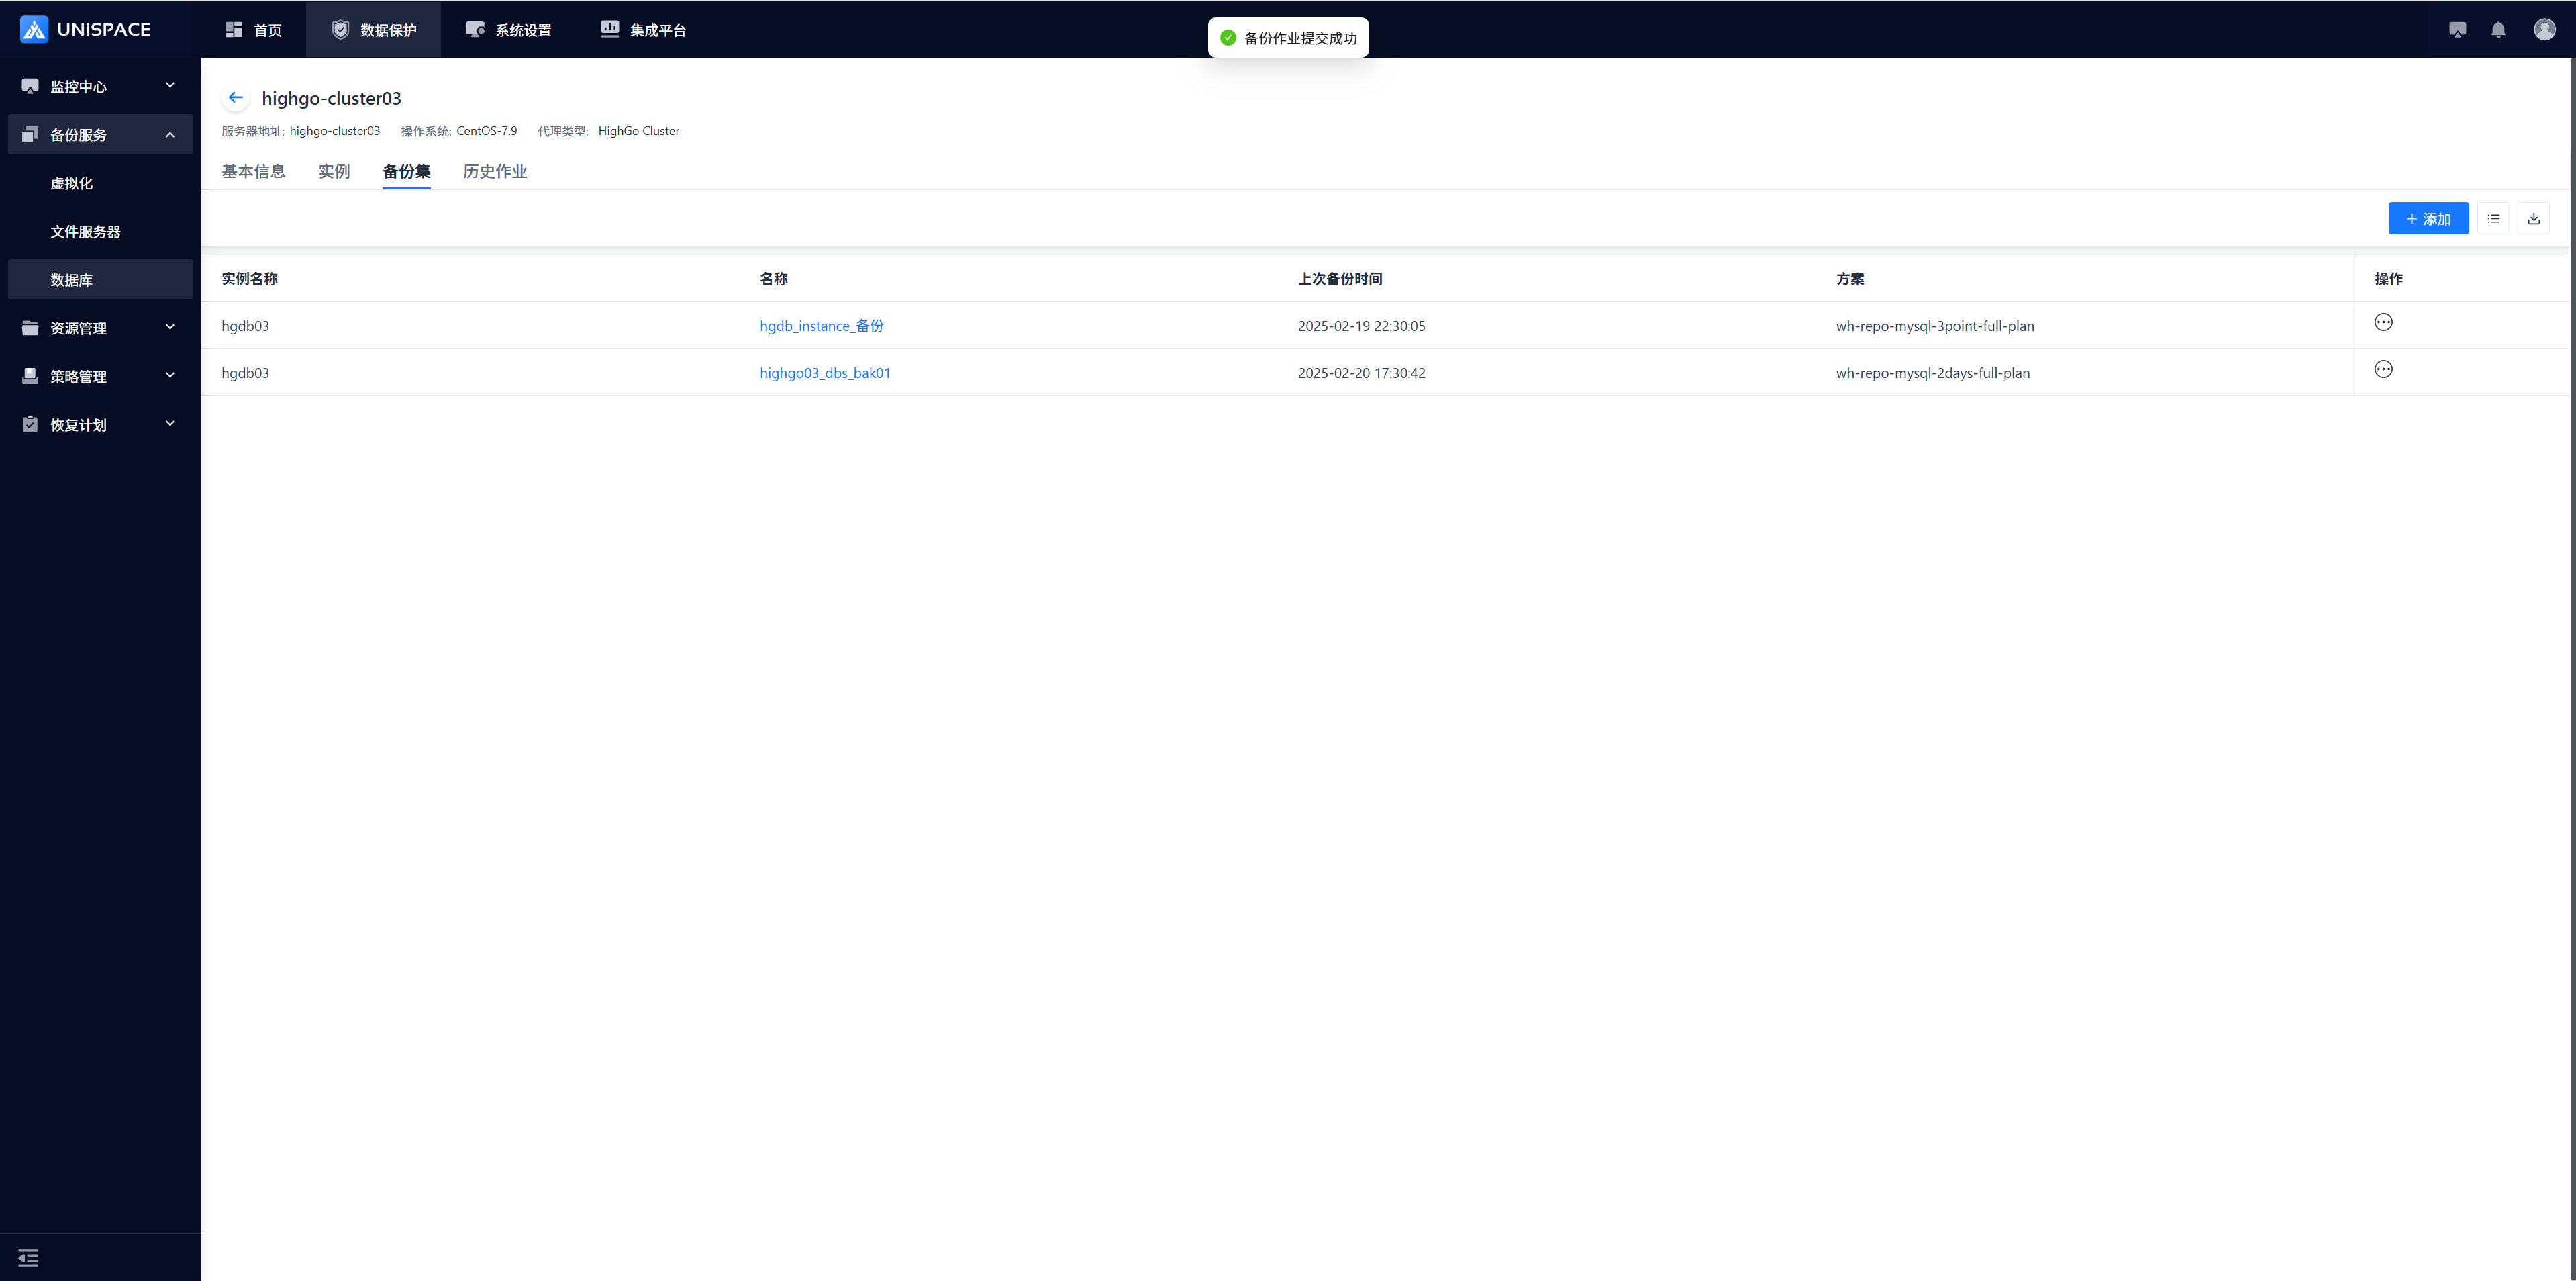
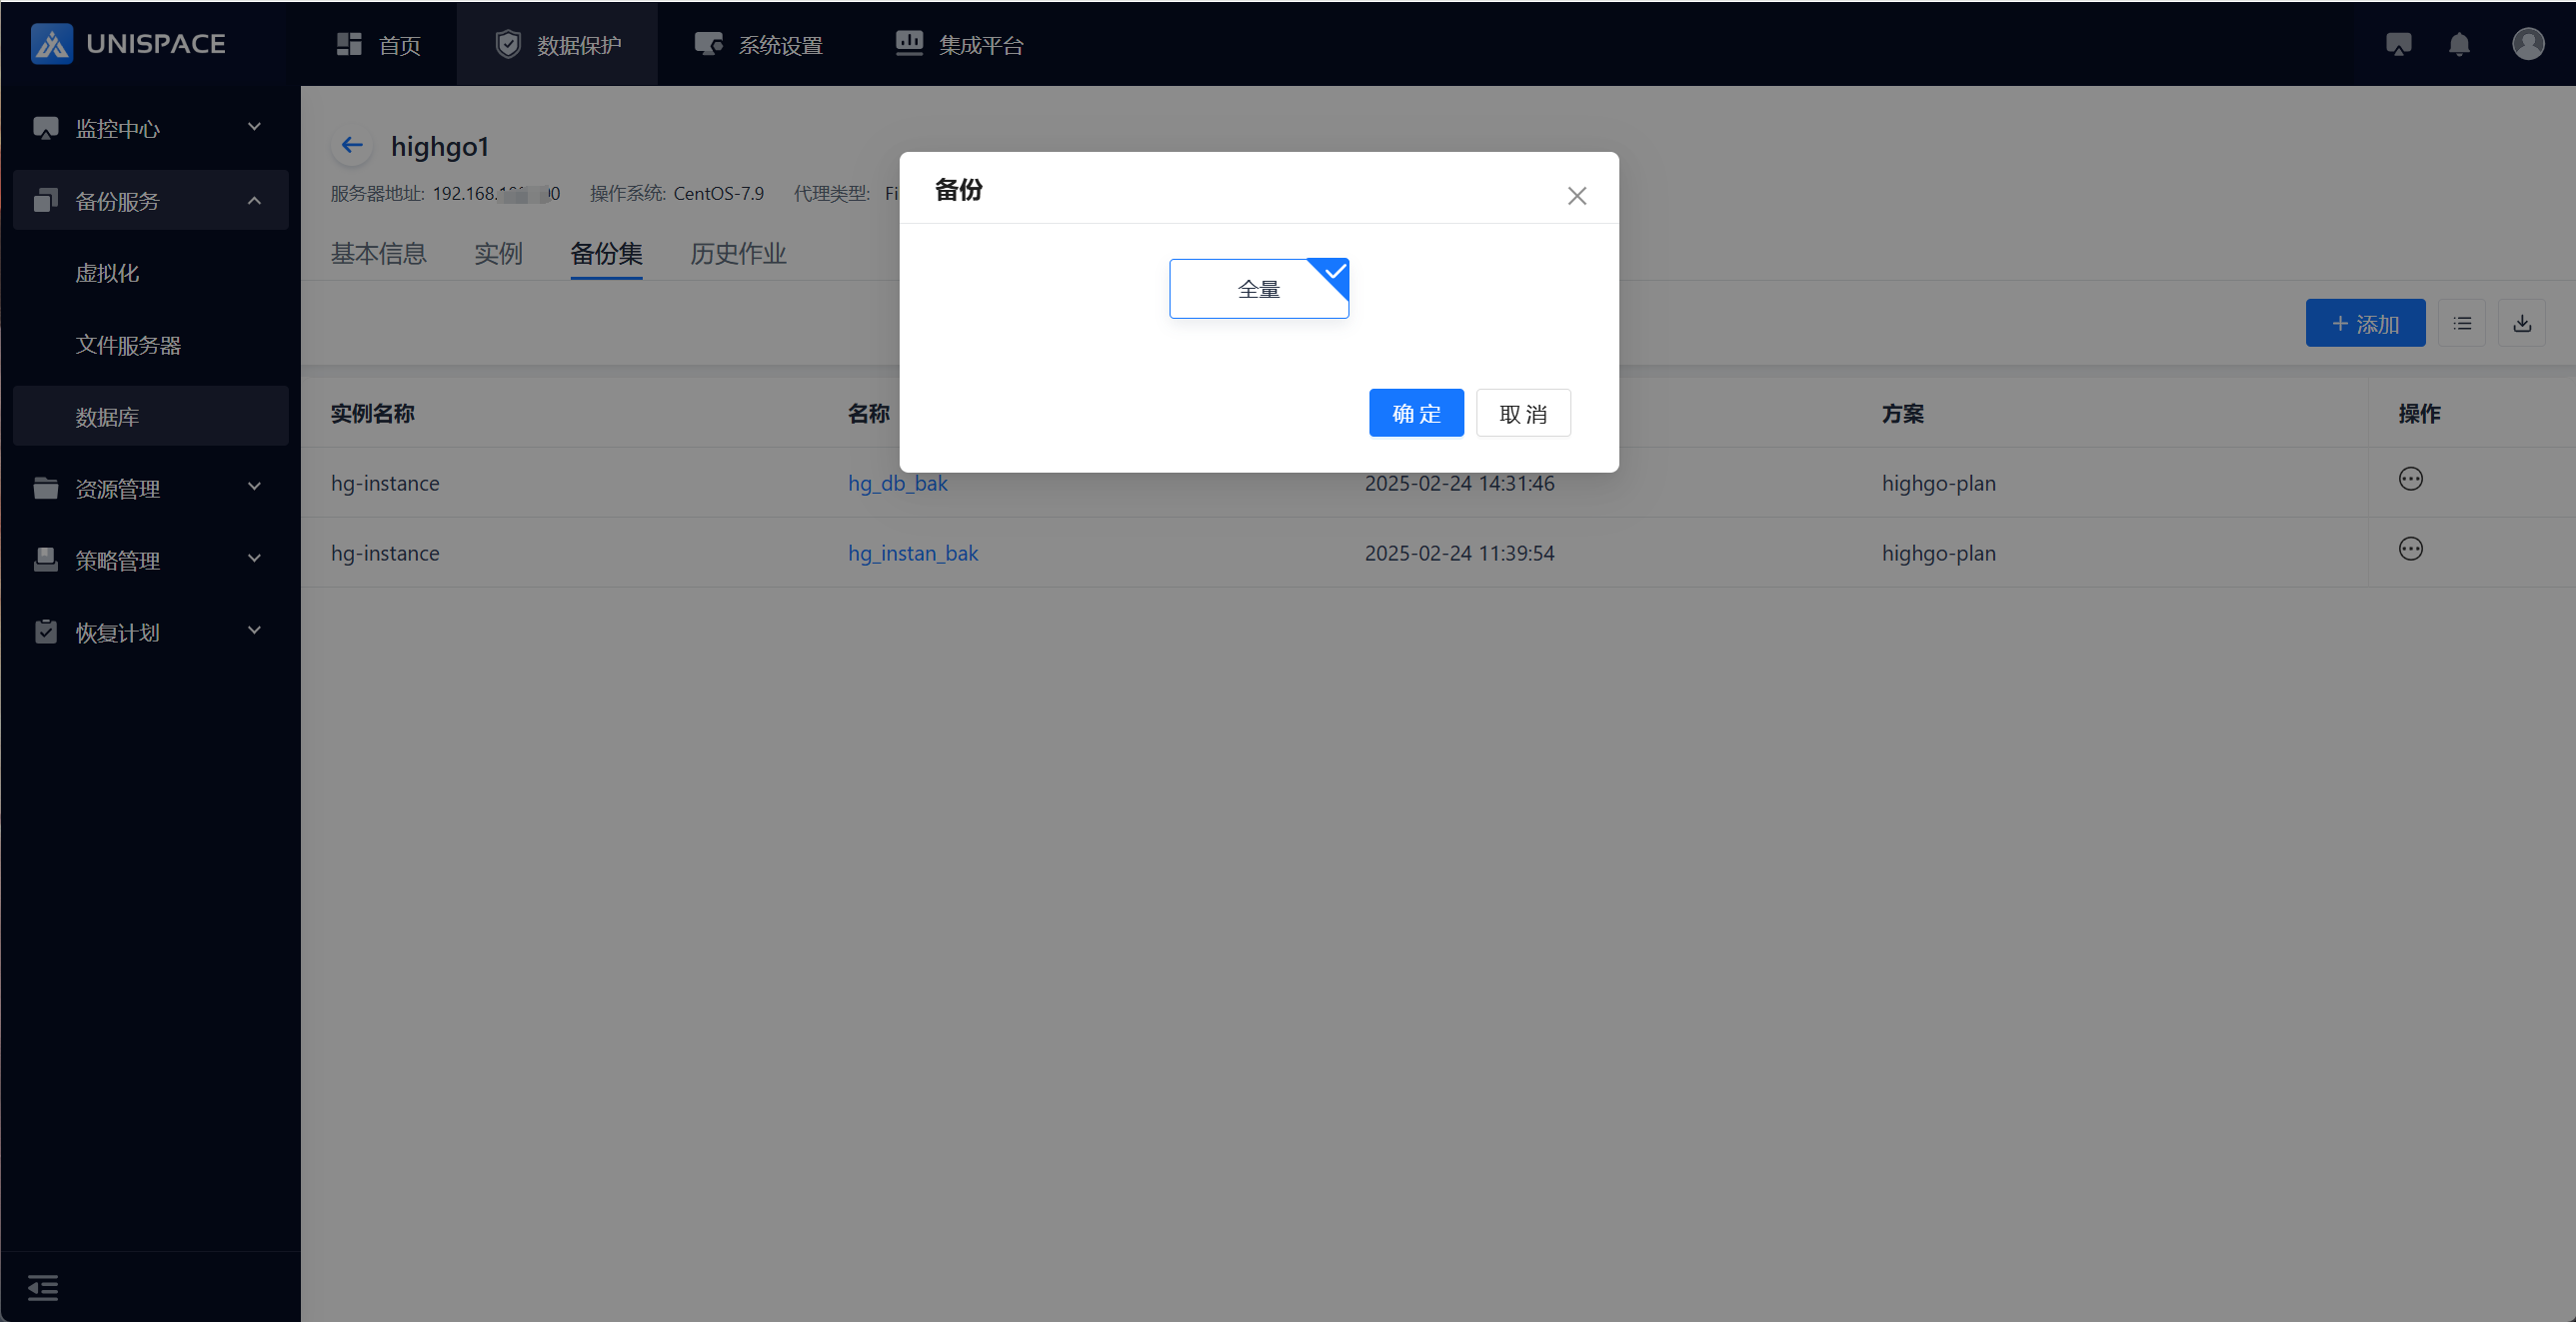
 Step 3: Select "Database" and click OK. A message "Backup job submitted successfully" will appear.
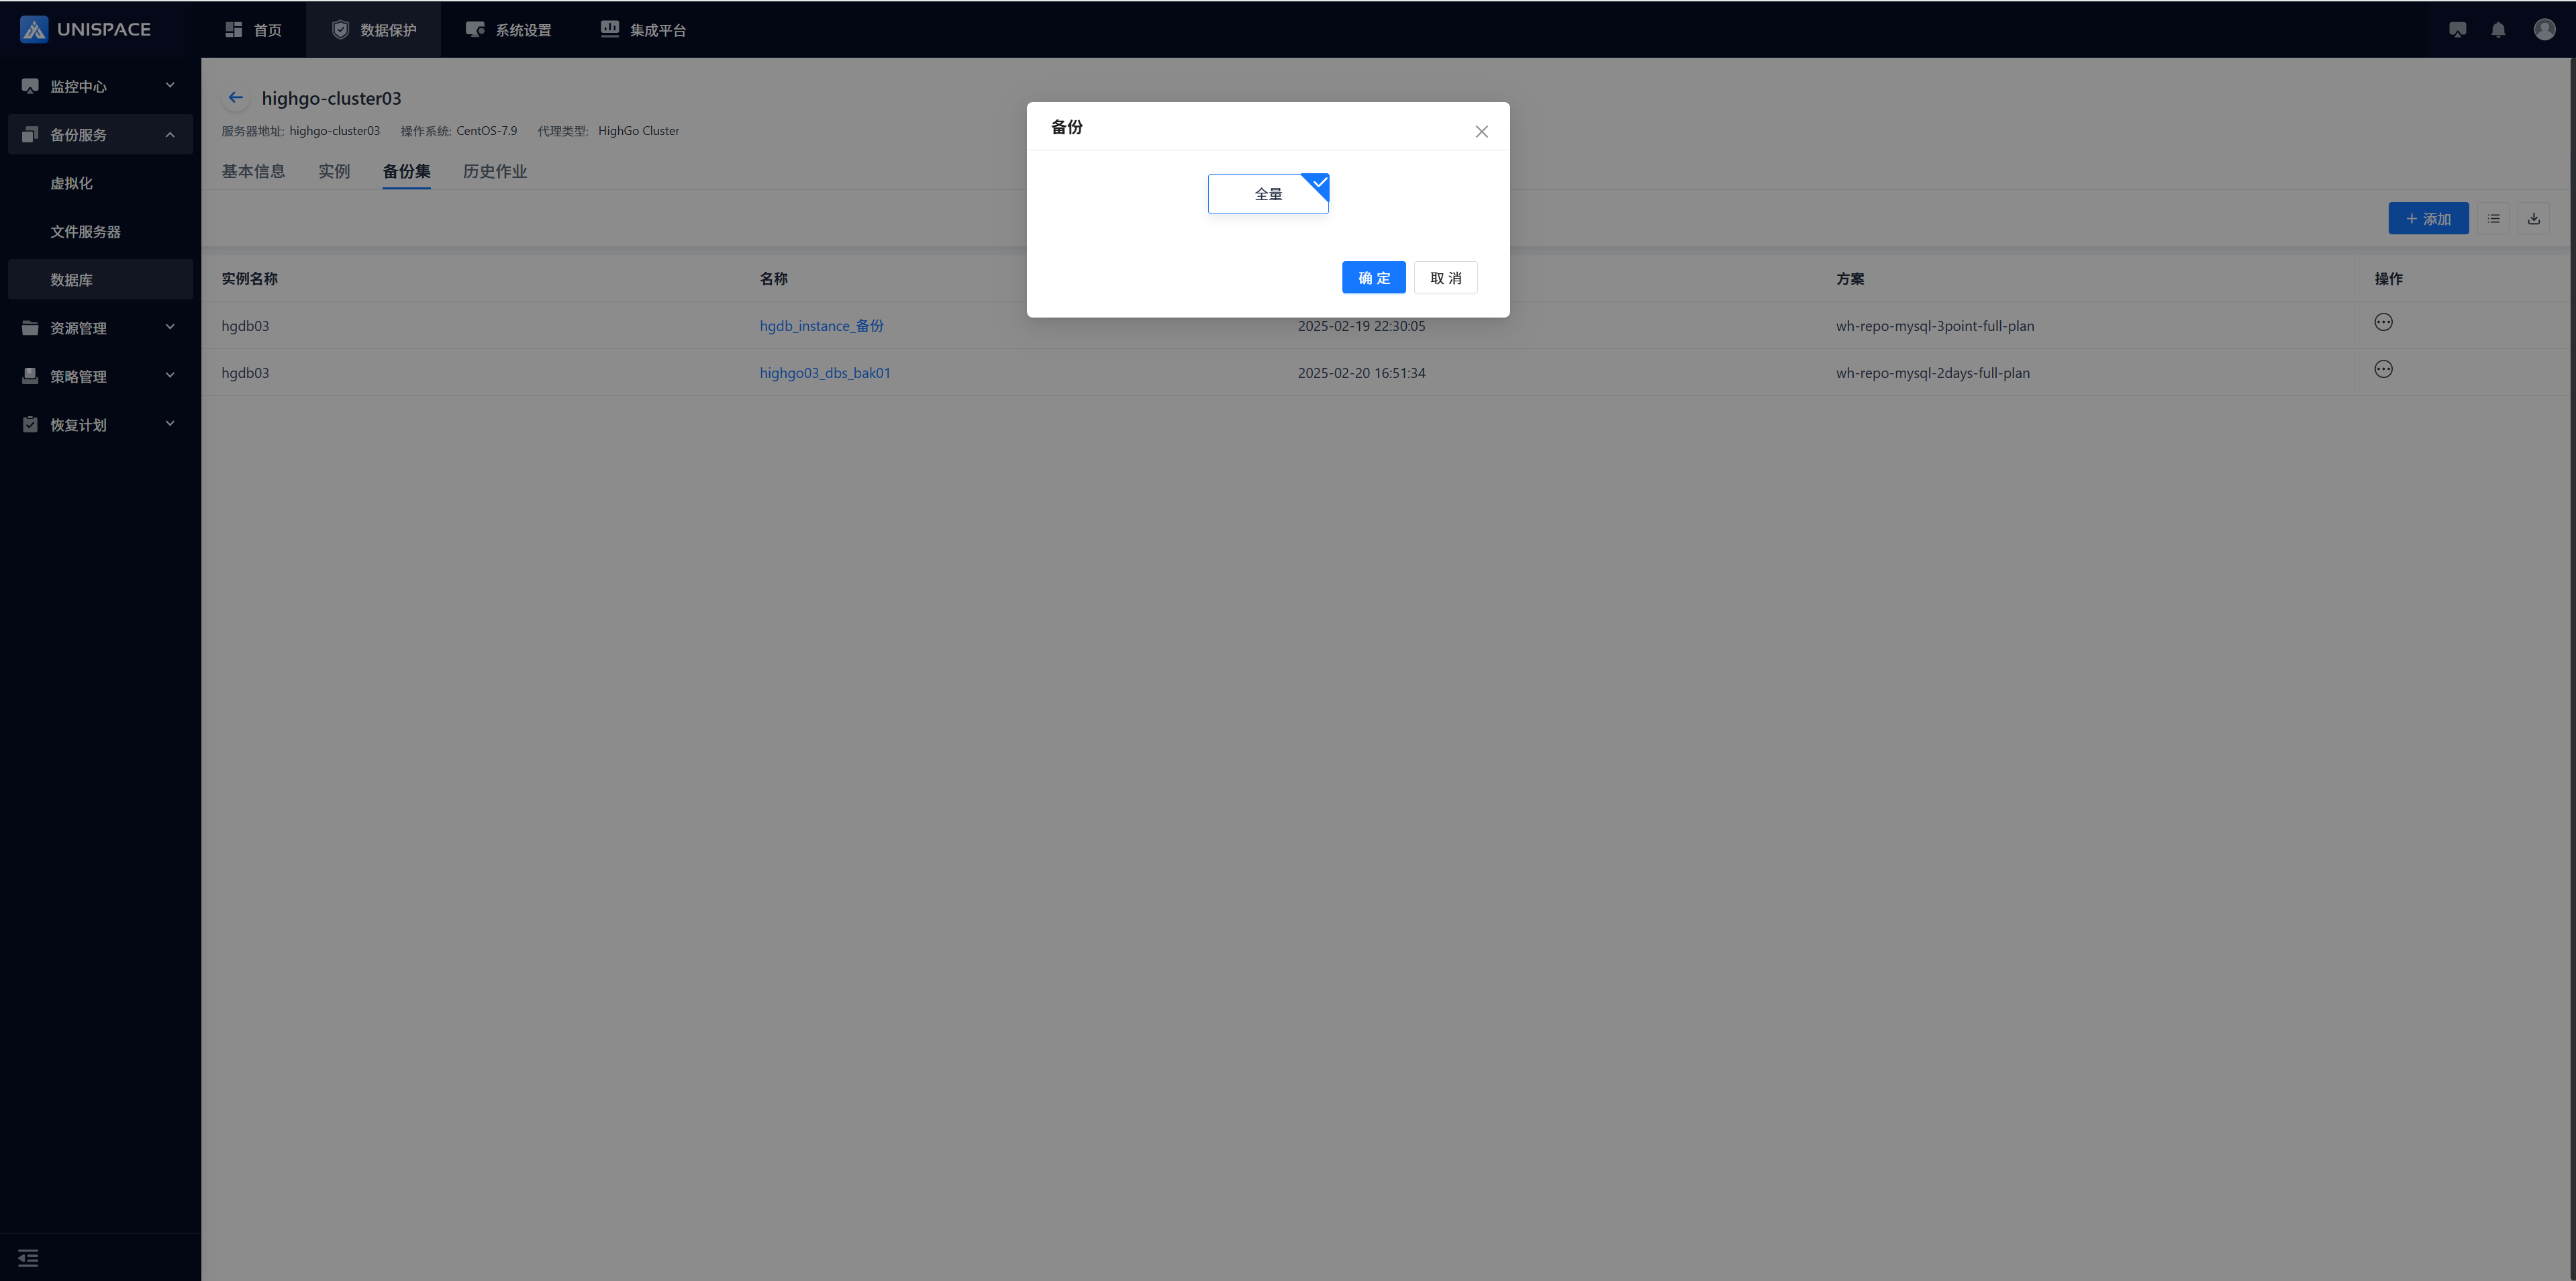
 Step 4: After the backup job starts successfully, go to Monitoring Center - Jobs - Active Jobs to view the backup set job.
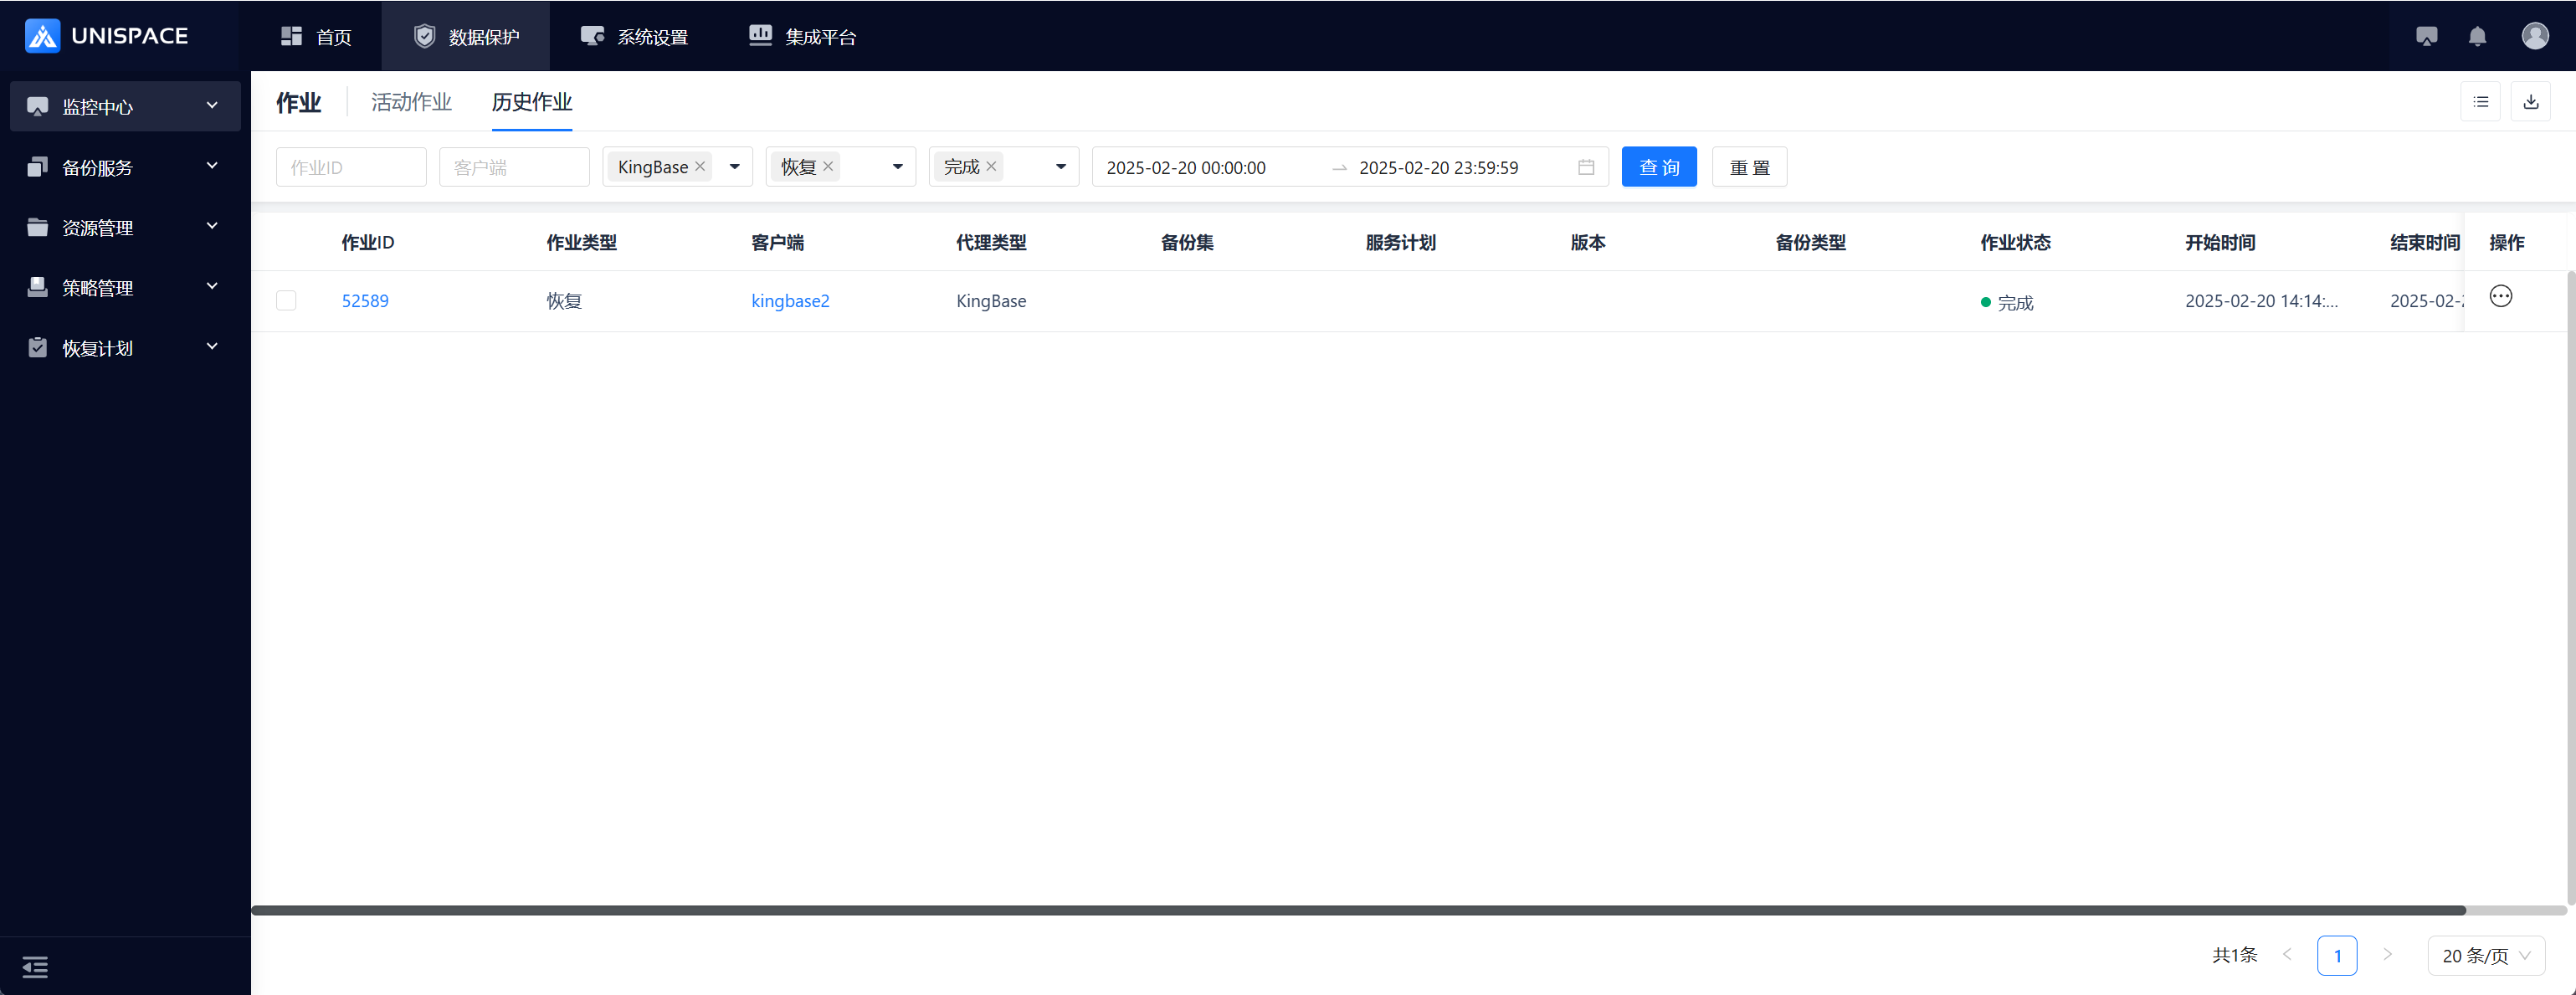
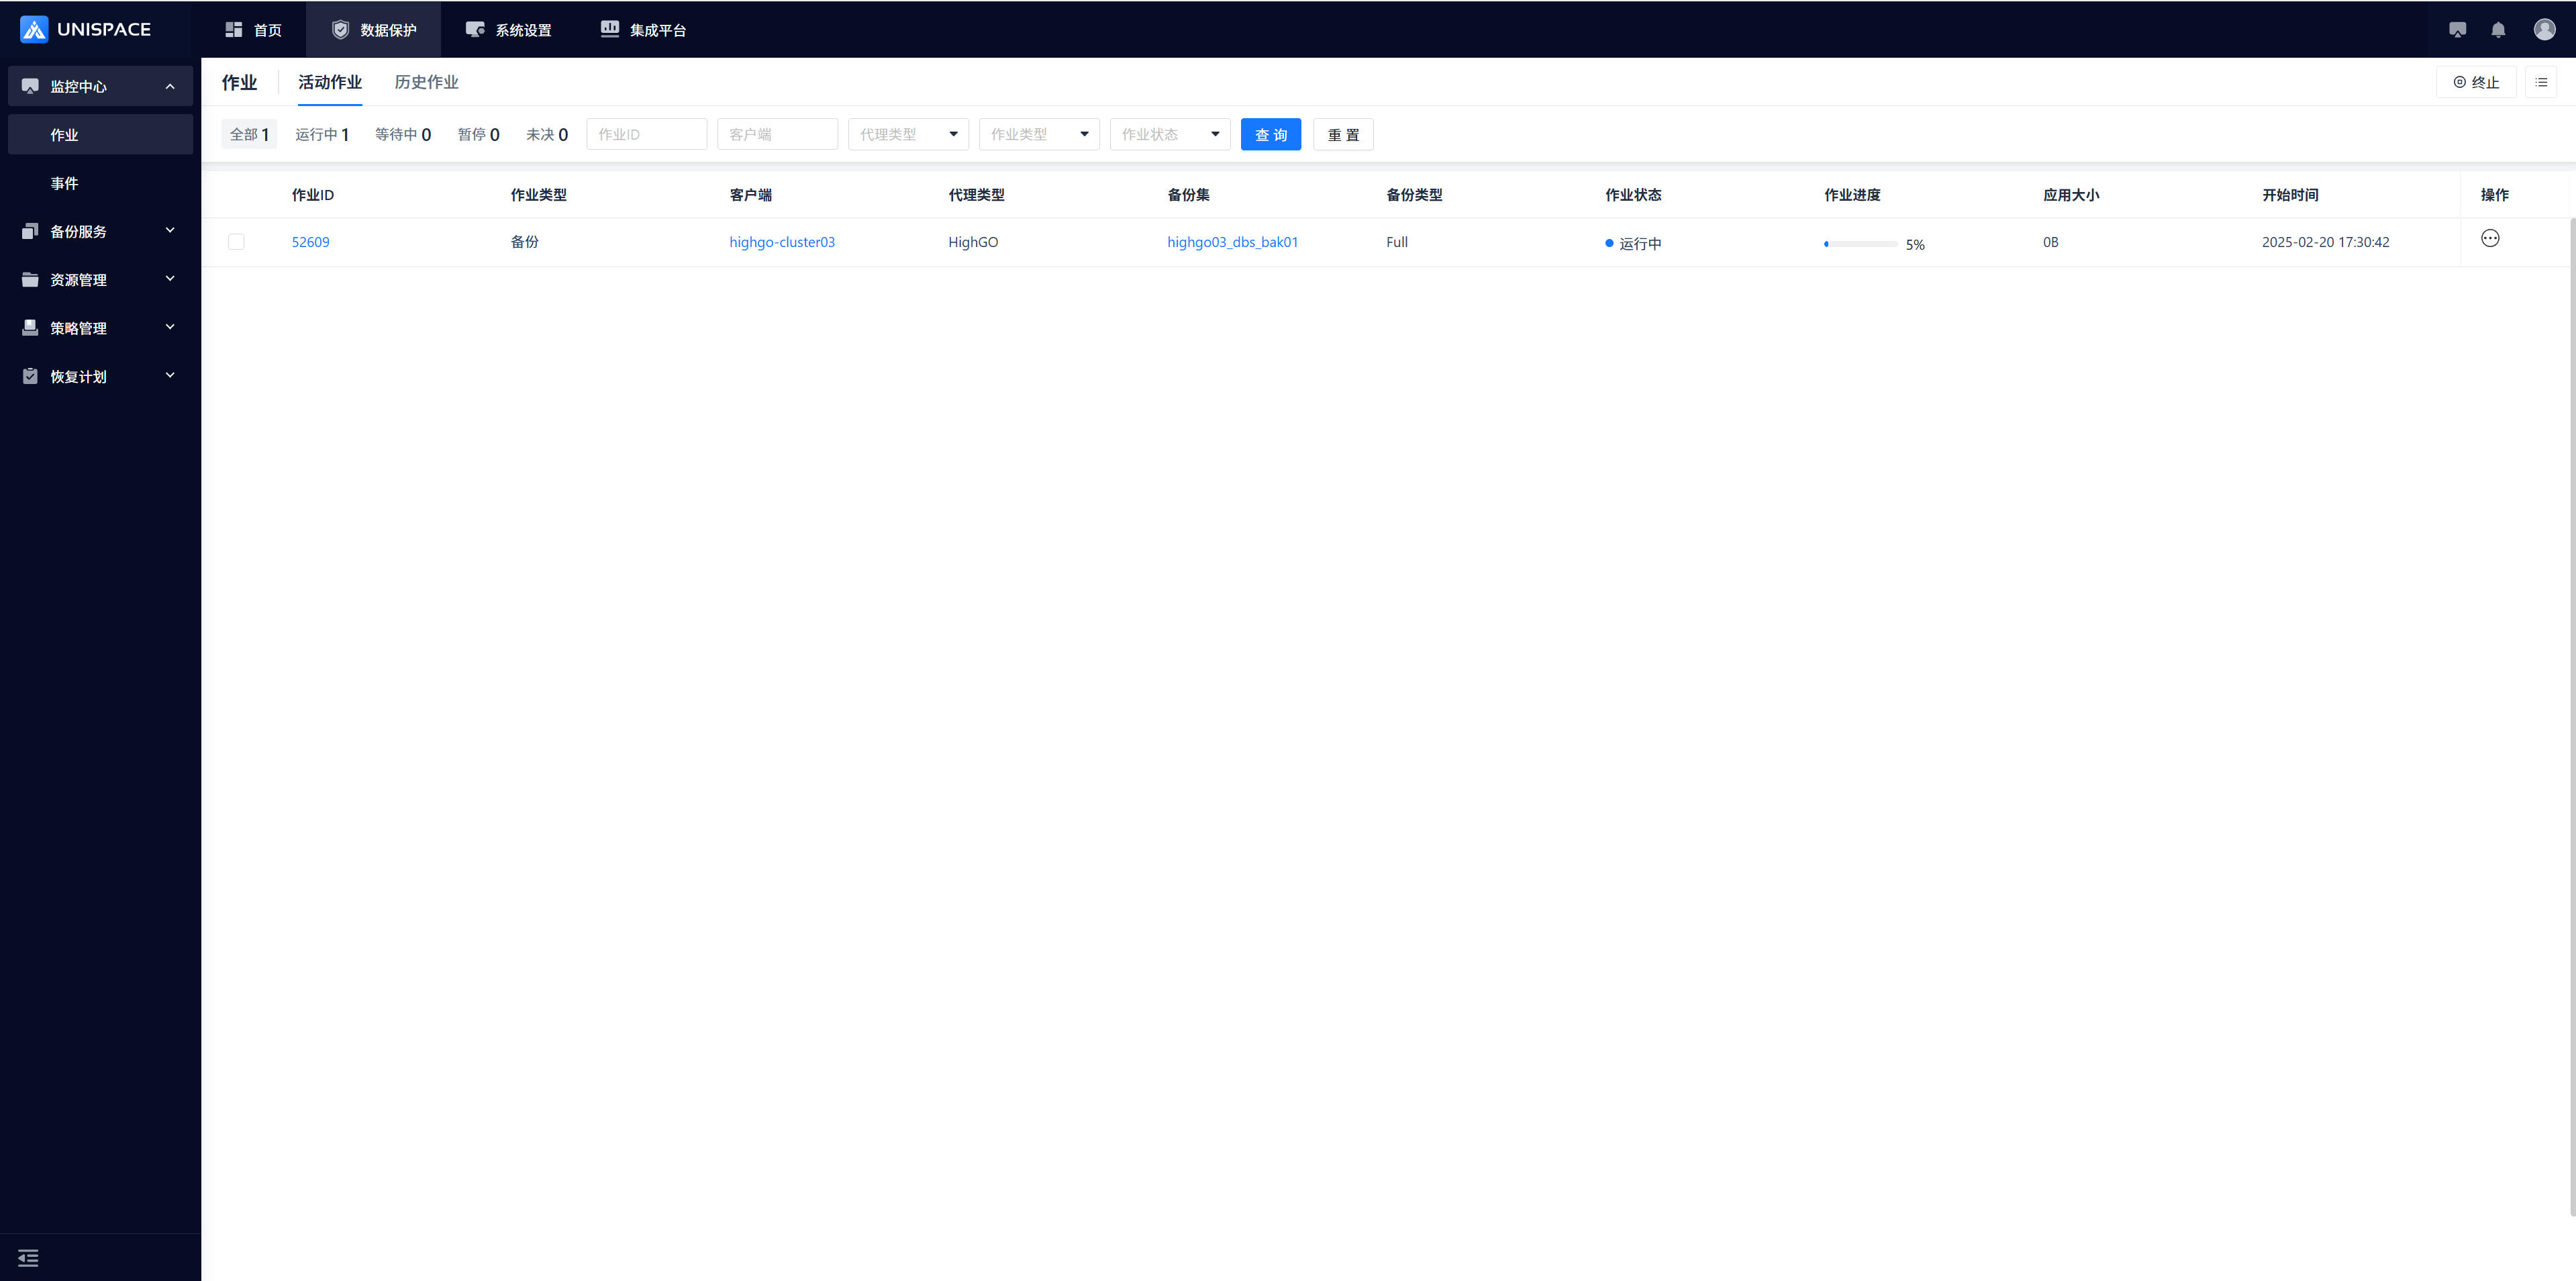 Step 5: After the backup completes, go to Monitoring Center - Jobs - Job History to view the job. The status should be "Completed".
1.4 Highgo Cluster Full Instance and Log Backup
Prerequisites
- Highgo instance and backup set have been created.
Steps
Step 1: Click Backup Service - Database - Virtual Cluster - Server Name - Backup Set from the system menu.
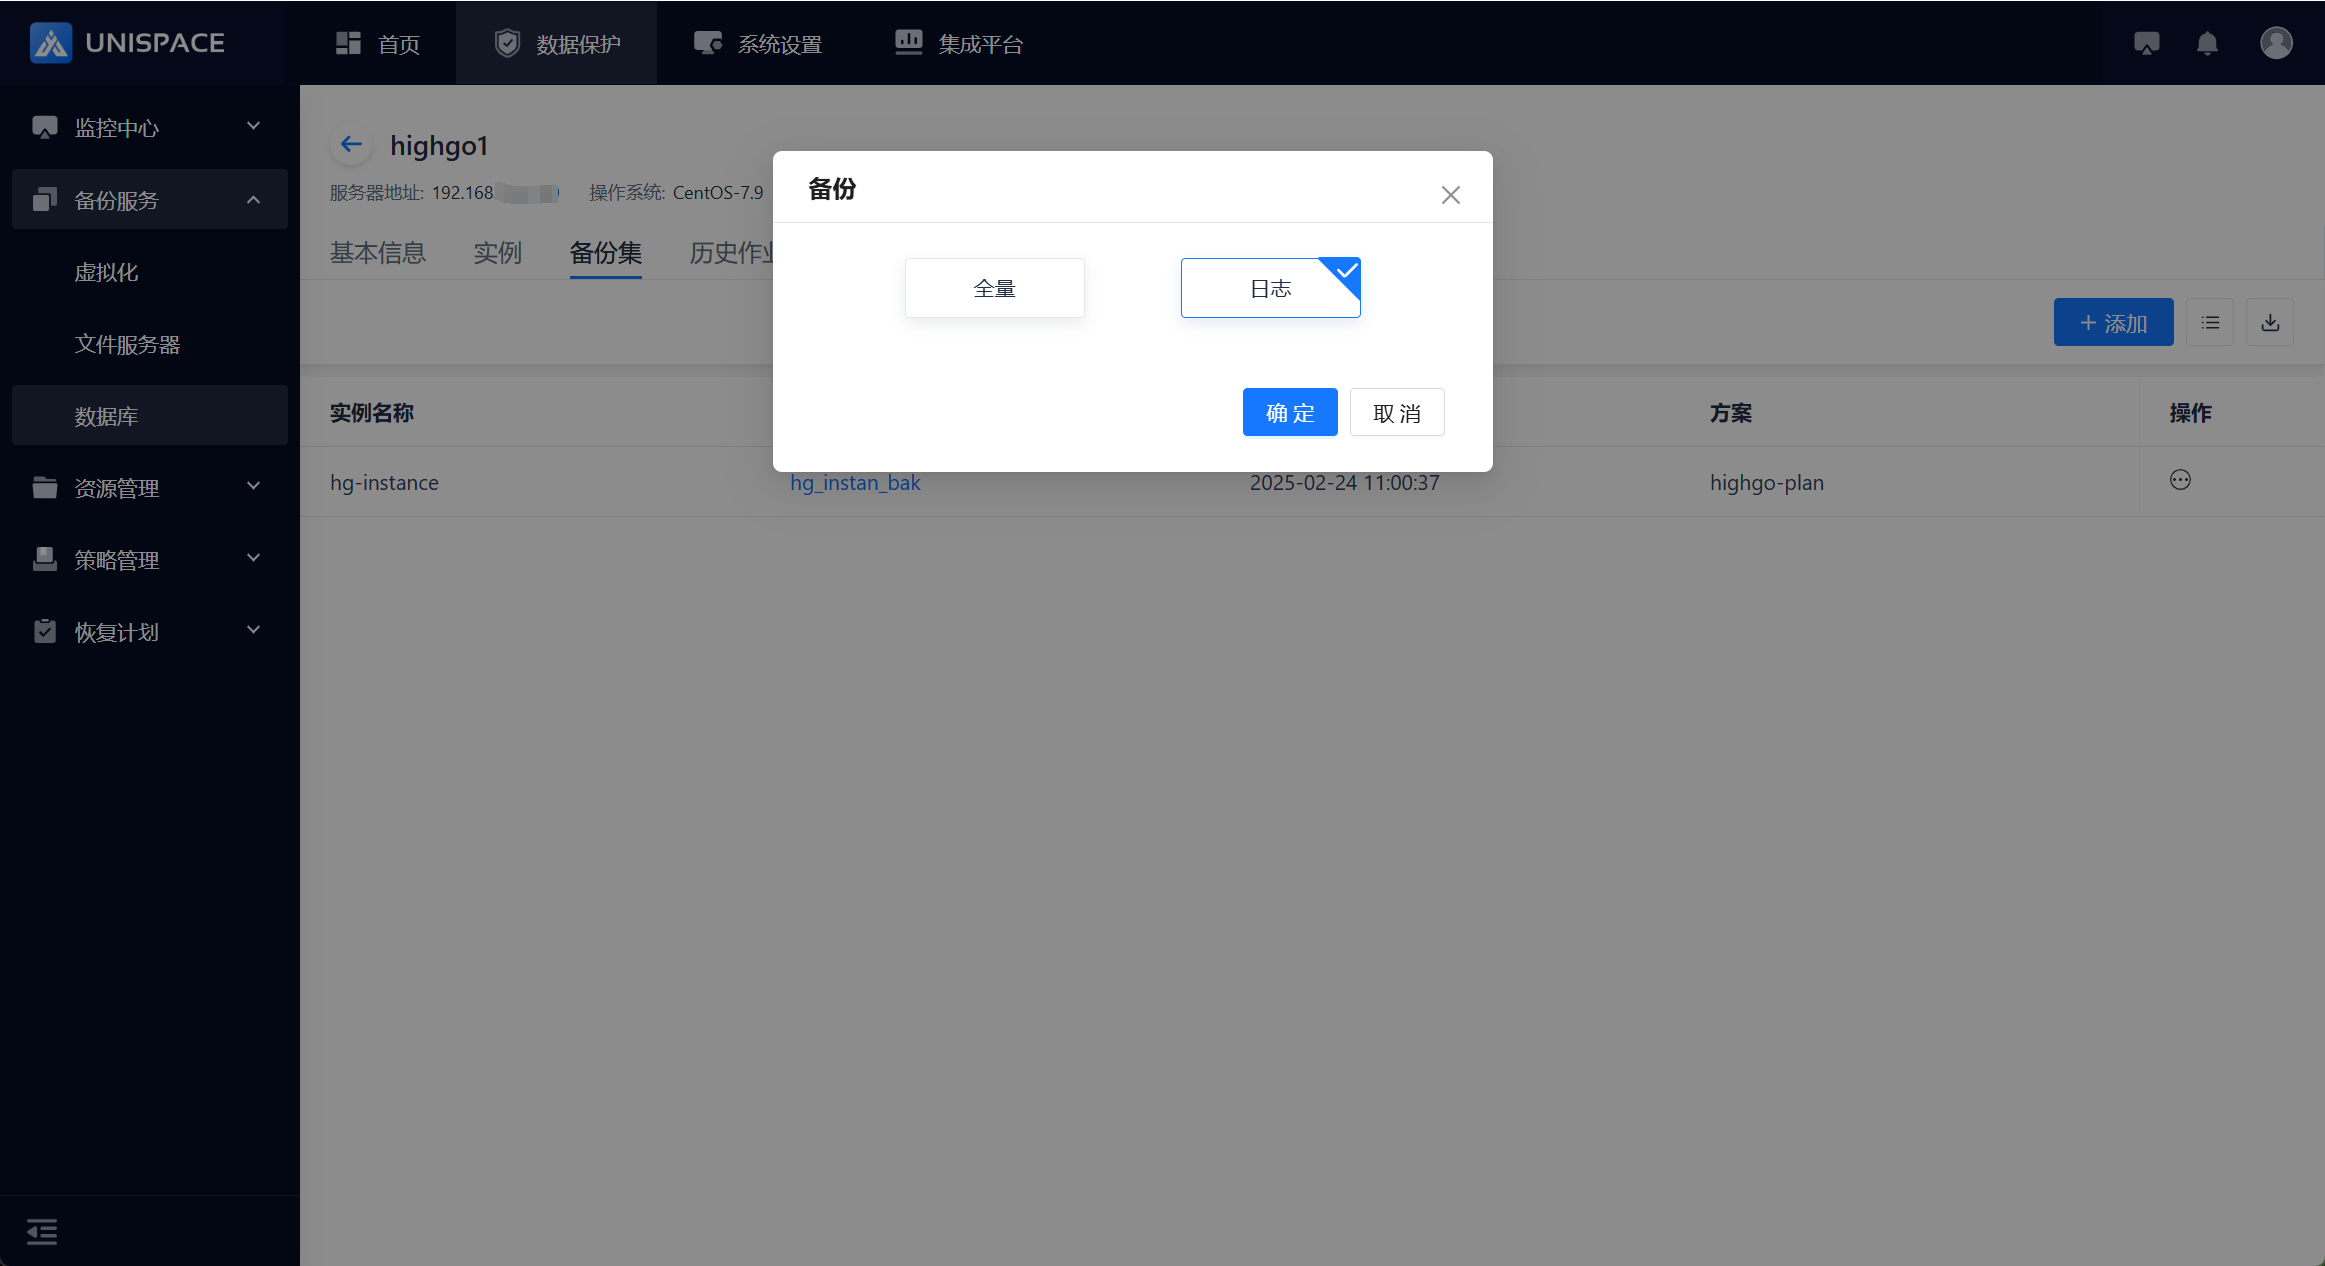
 Step 2: Click Backup Set → Operation → Backup from the instance backup set.
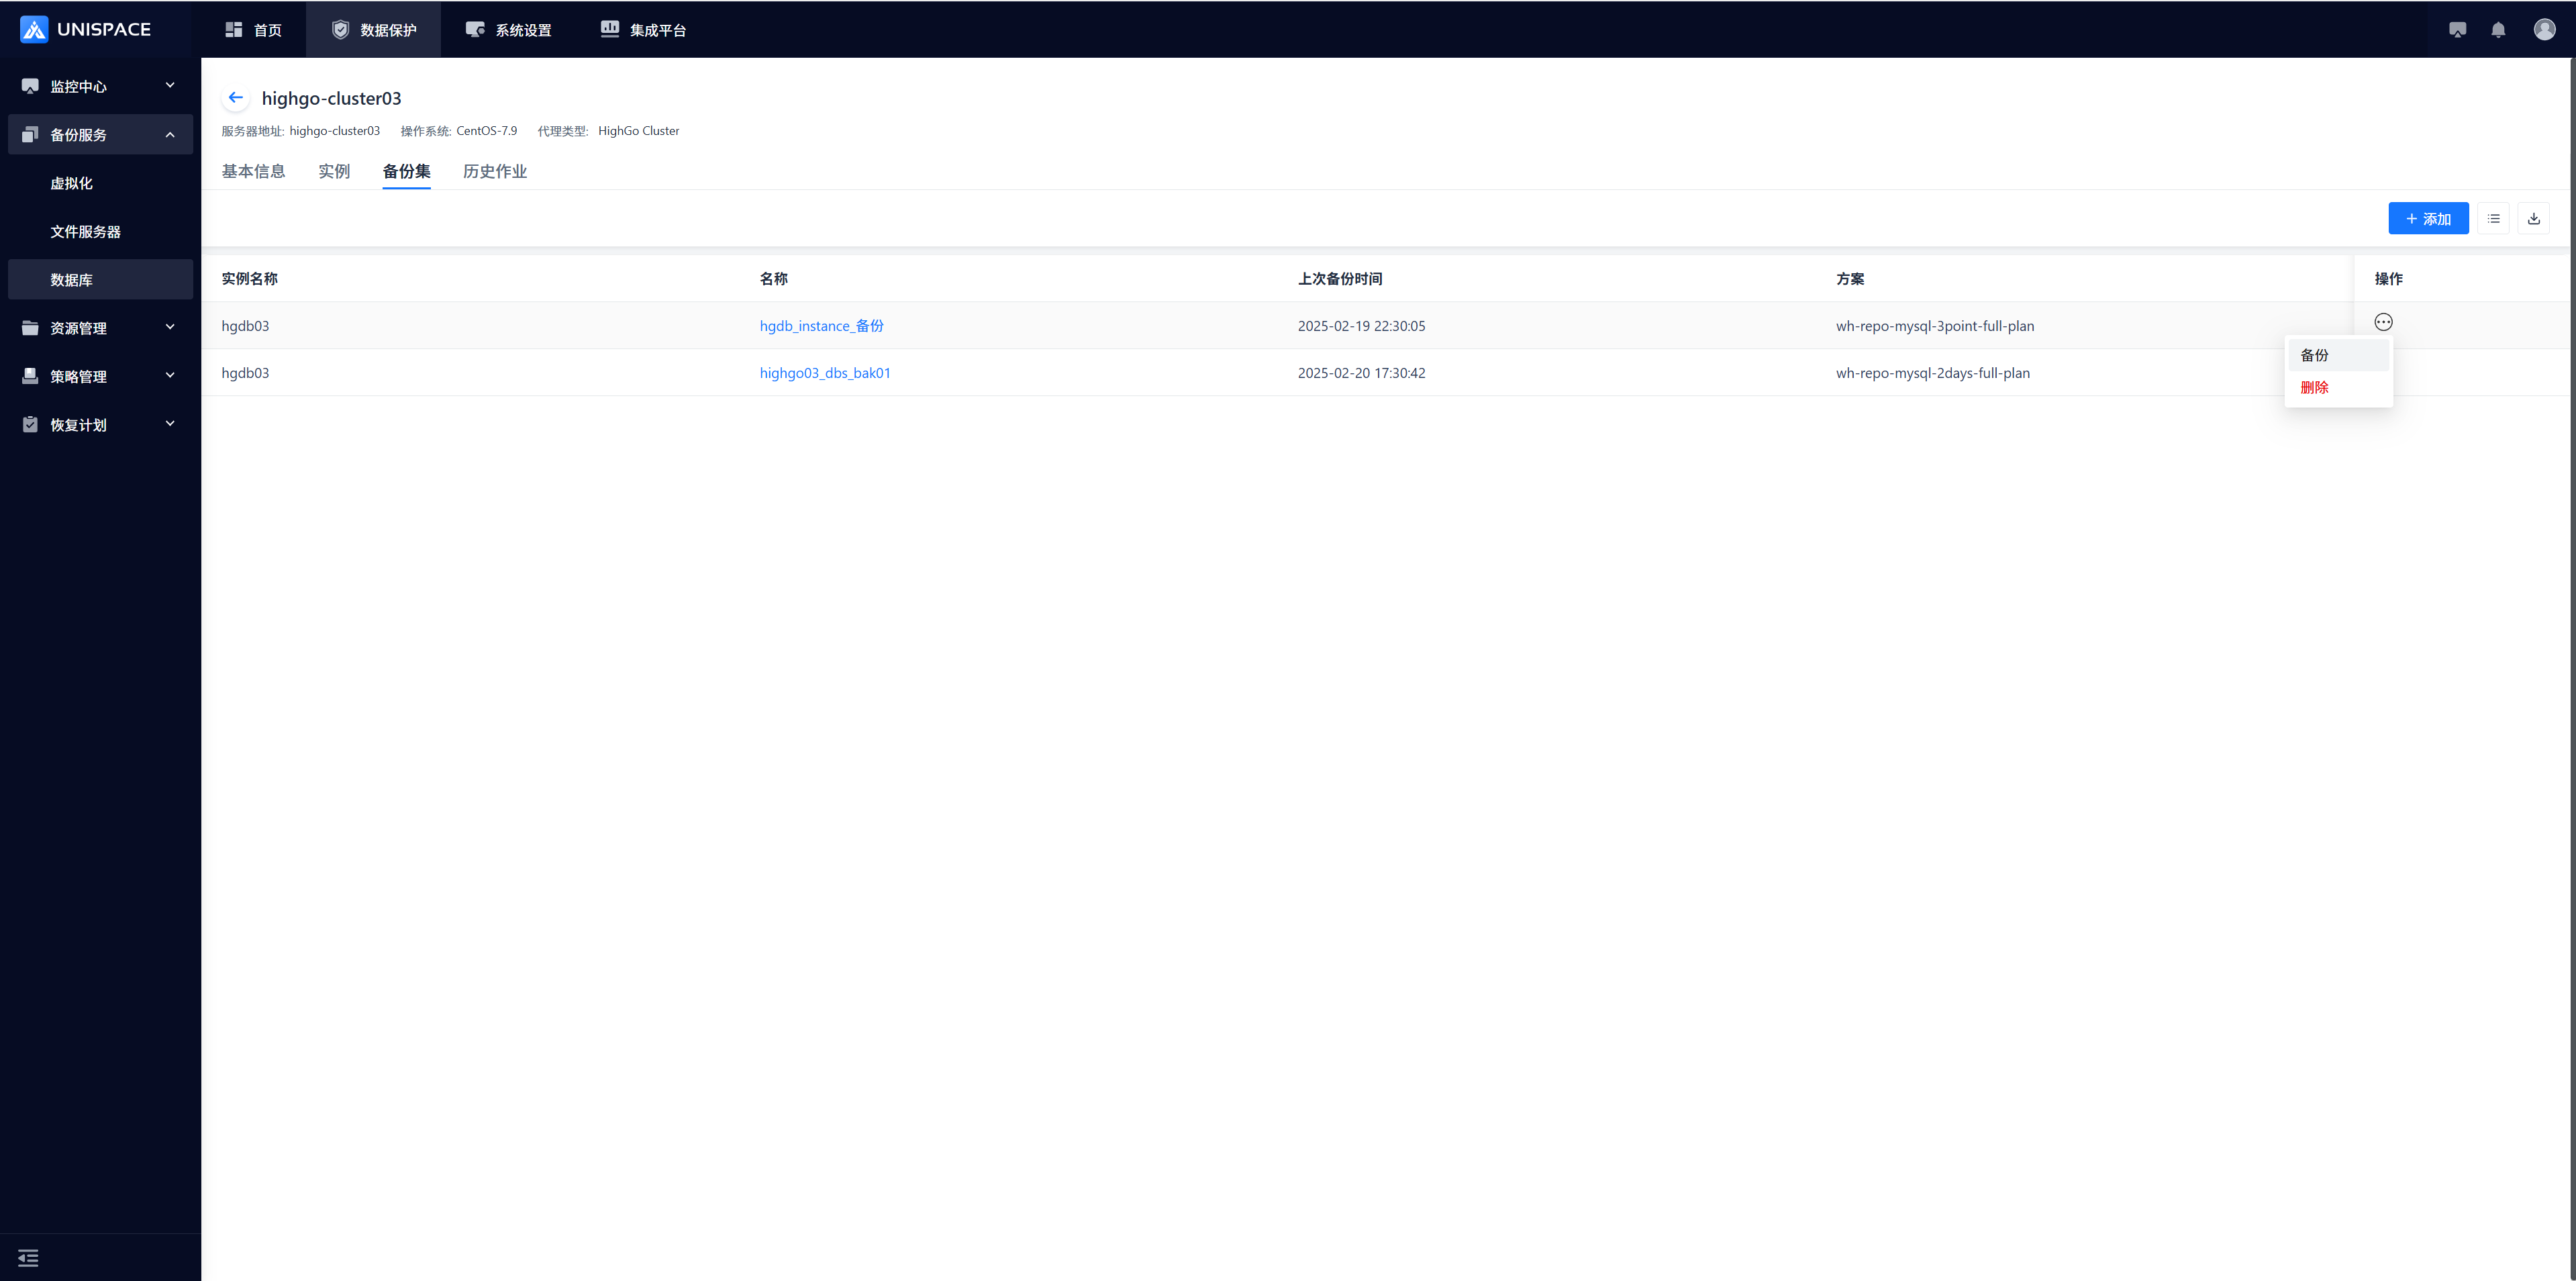 Step 3: Choose "Full" or "Log" and click OK. A message "Backup job submitted successfully" will appear.
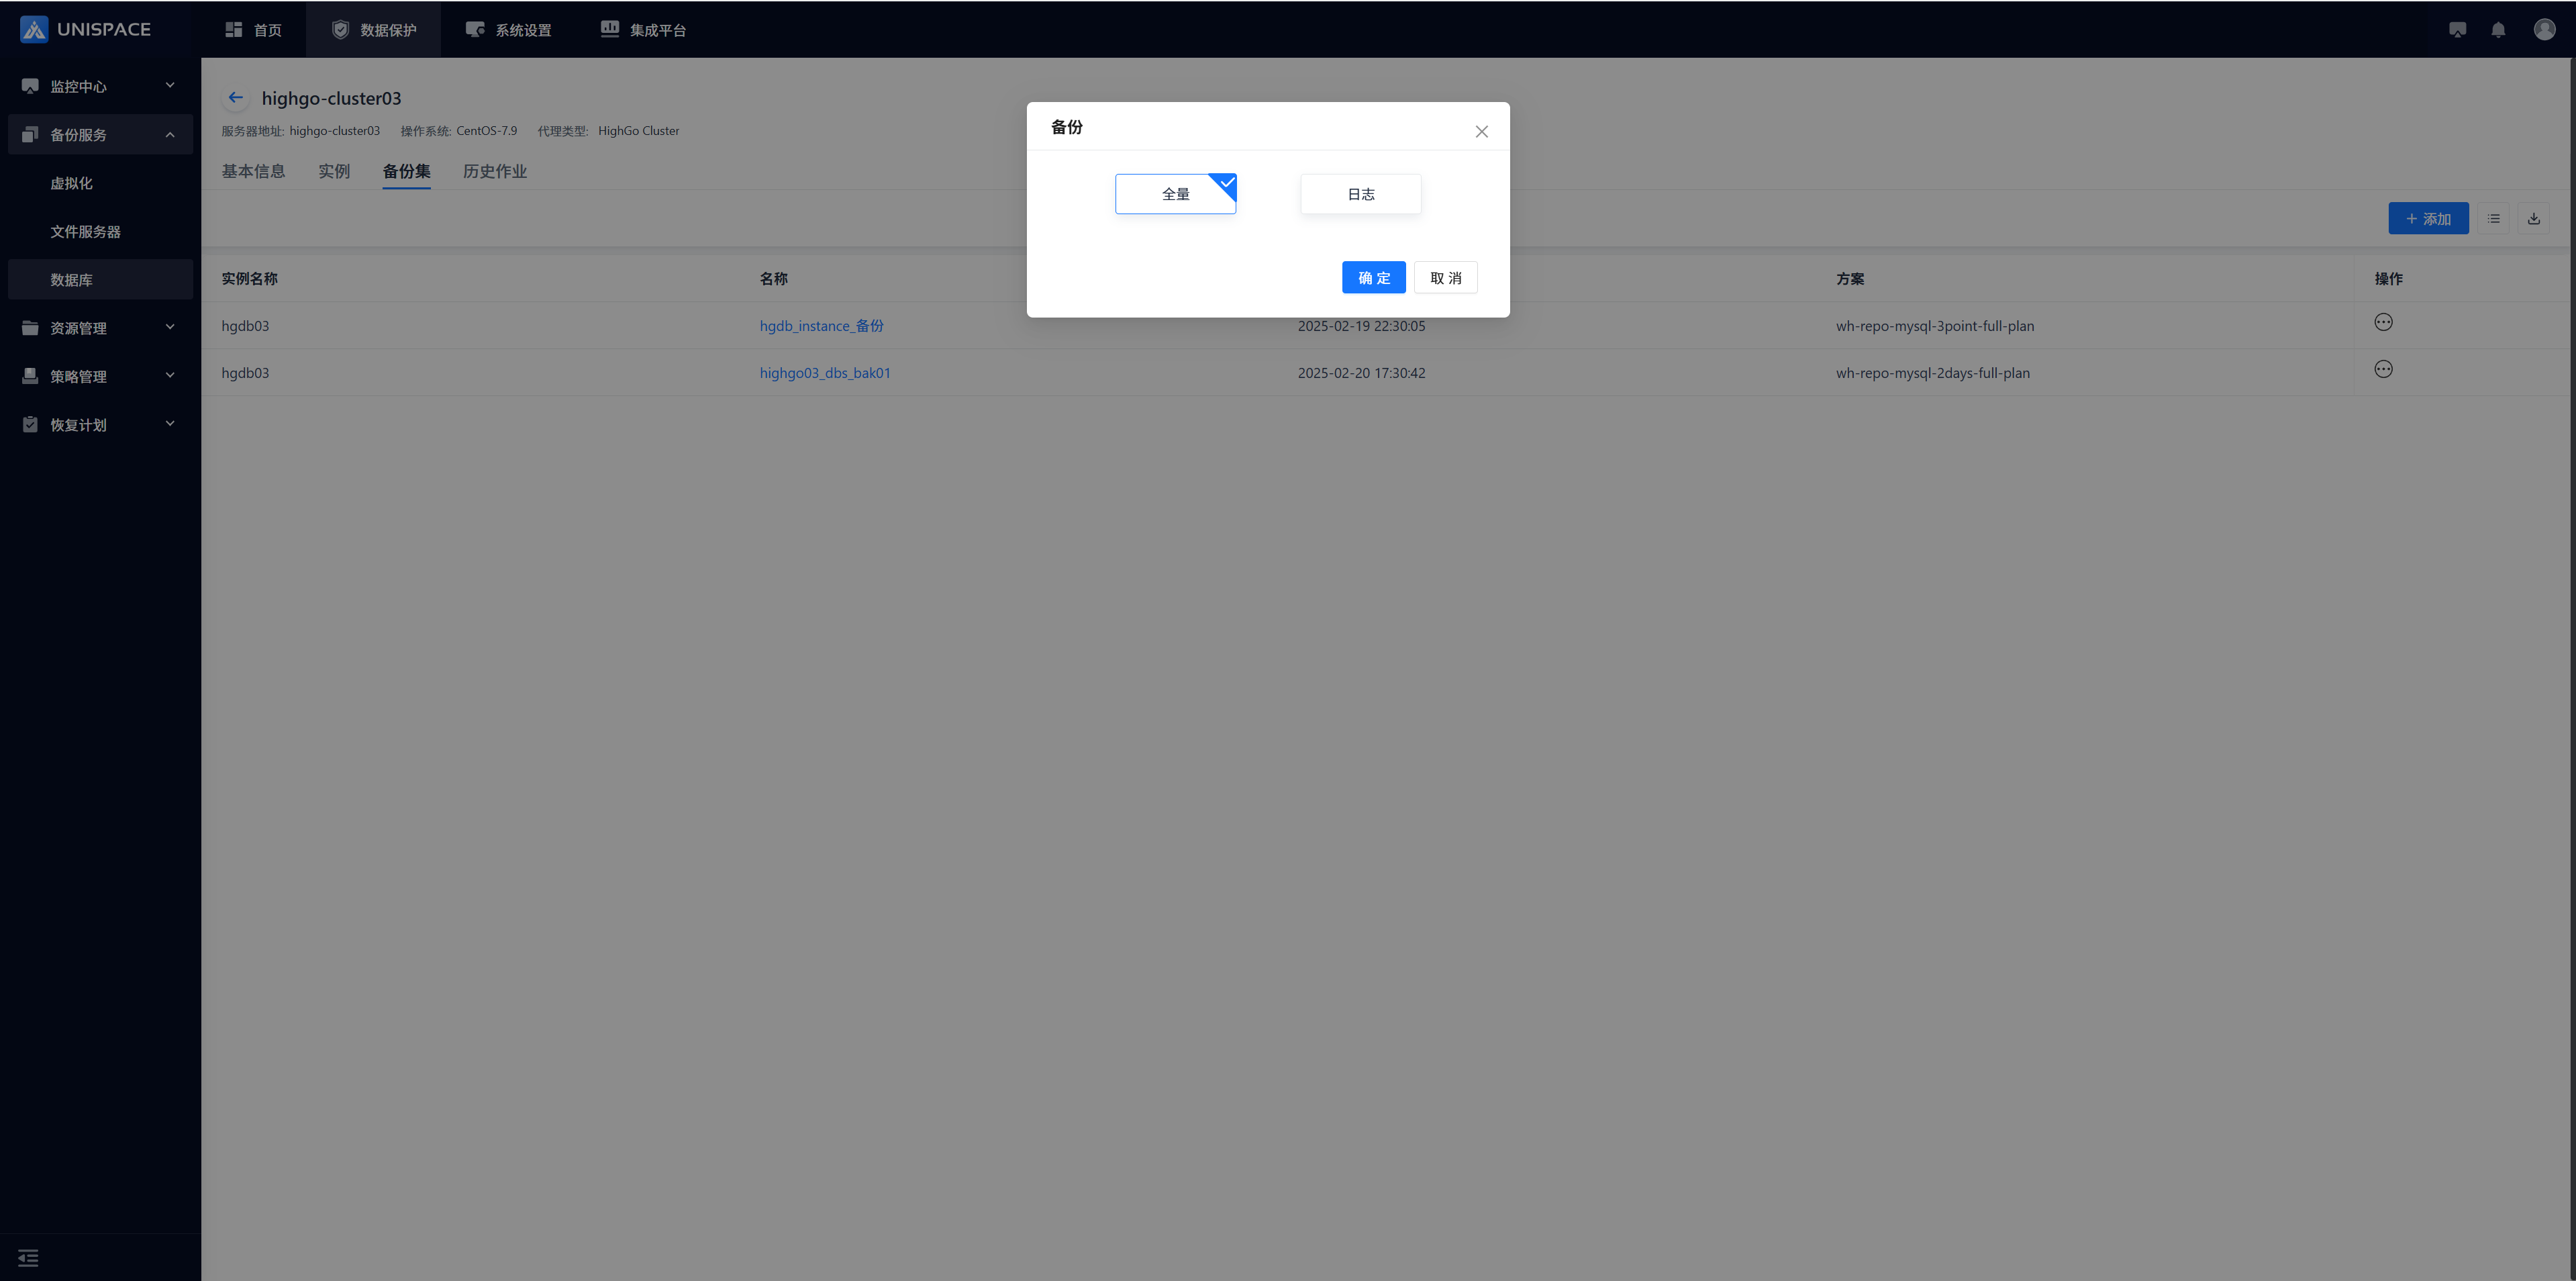
 Step 4: After the job starts successfully, go to Monitoring Center - Jobs - Active Jobs to view the backup set job.
 Step 5: After the backup completes, go to Monitoring Center - Jobs - Job History to view the job. The status should be "Completed".
1.5 Highgo Database Recovery
Prerequisites
- A backup of the Highgo cluster database has been completed.
Steps
Step 1: Click Backup Service - Database - Virtual Cluster from the system menu. 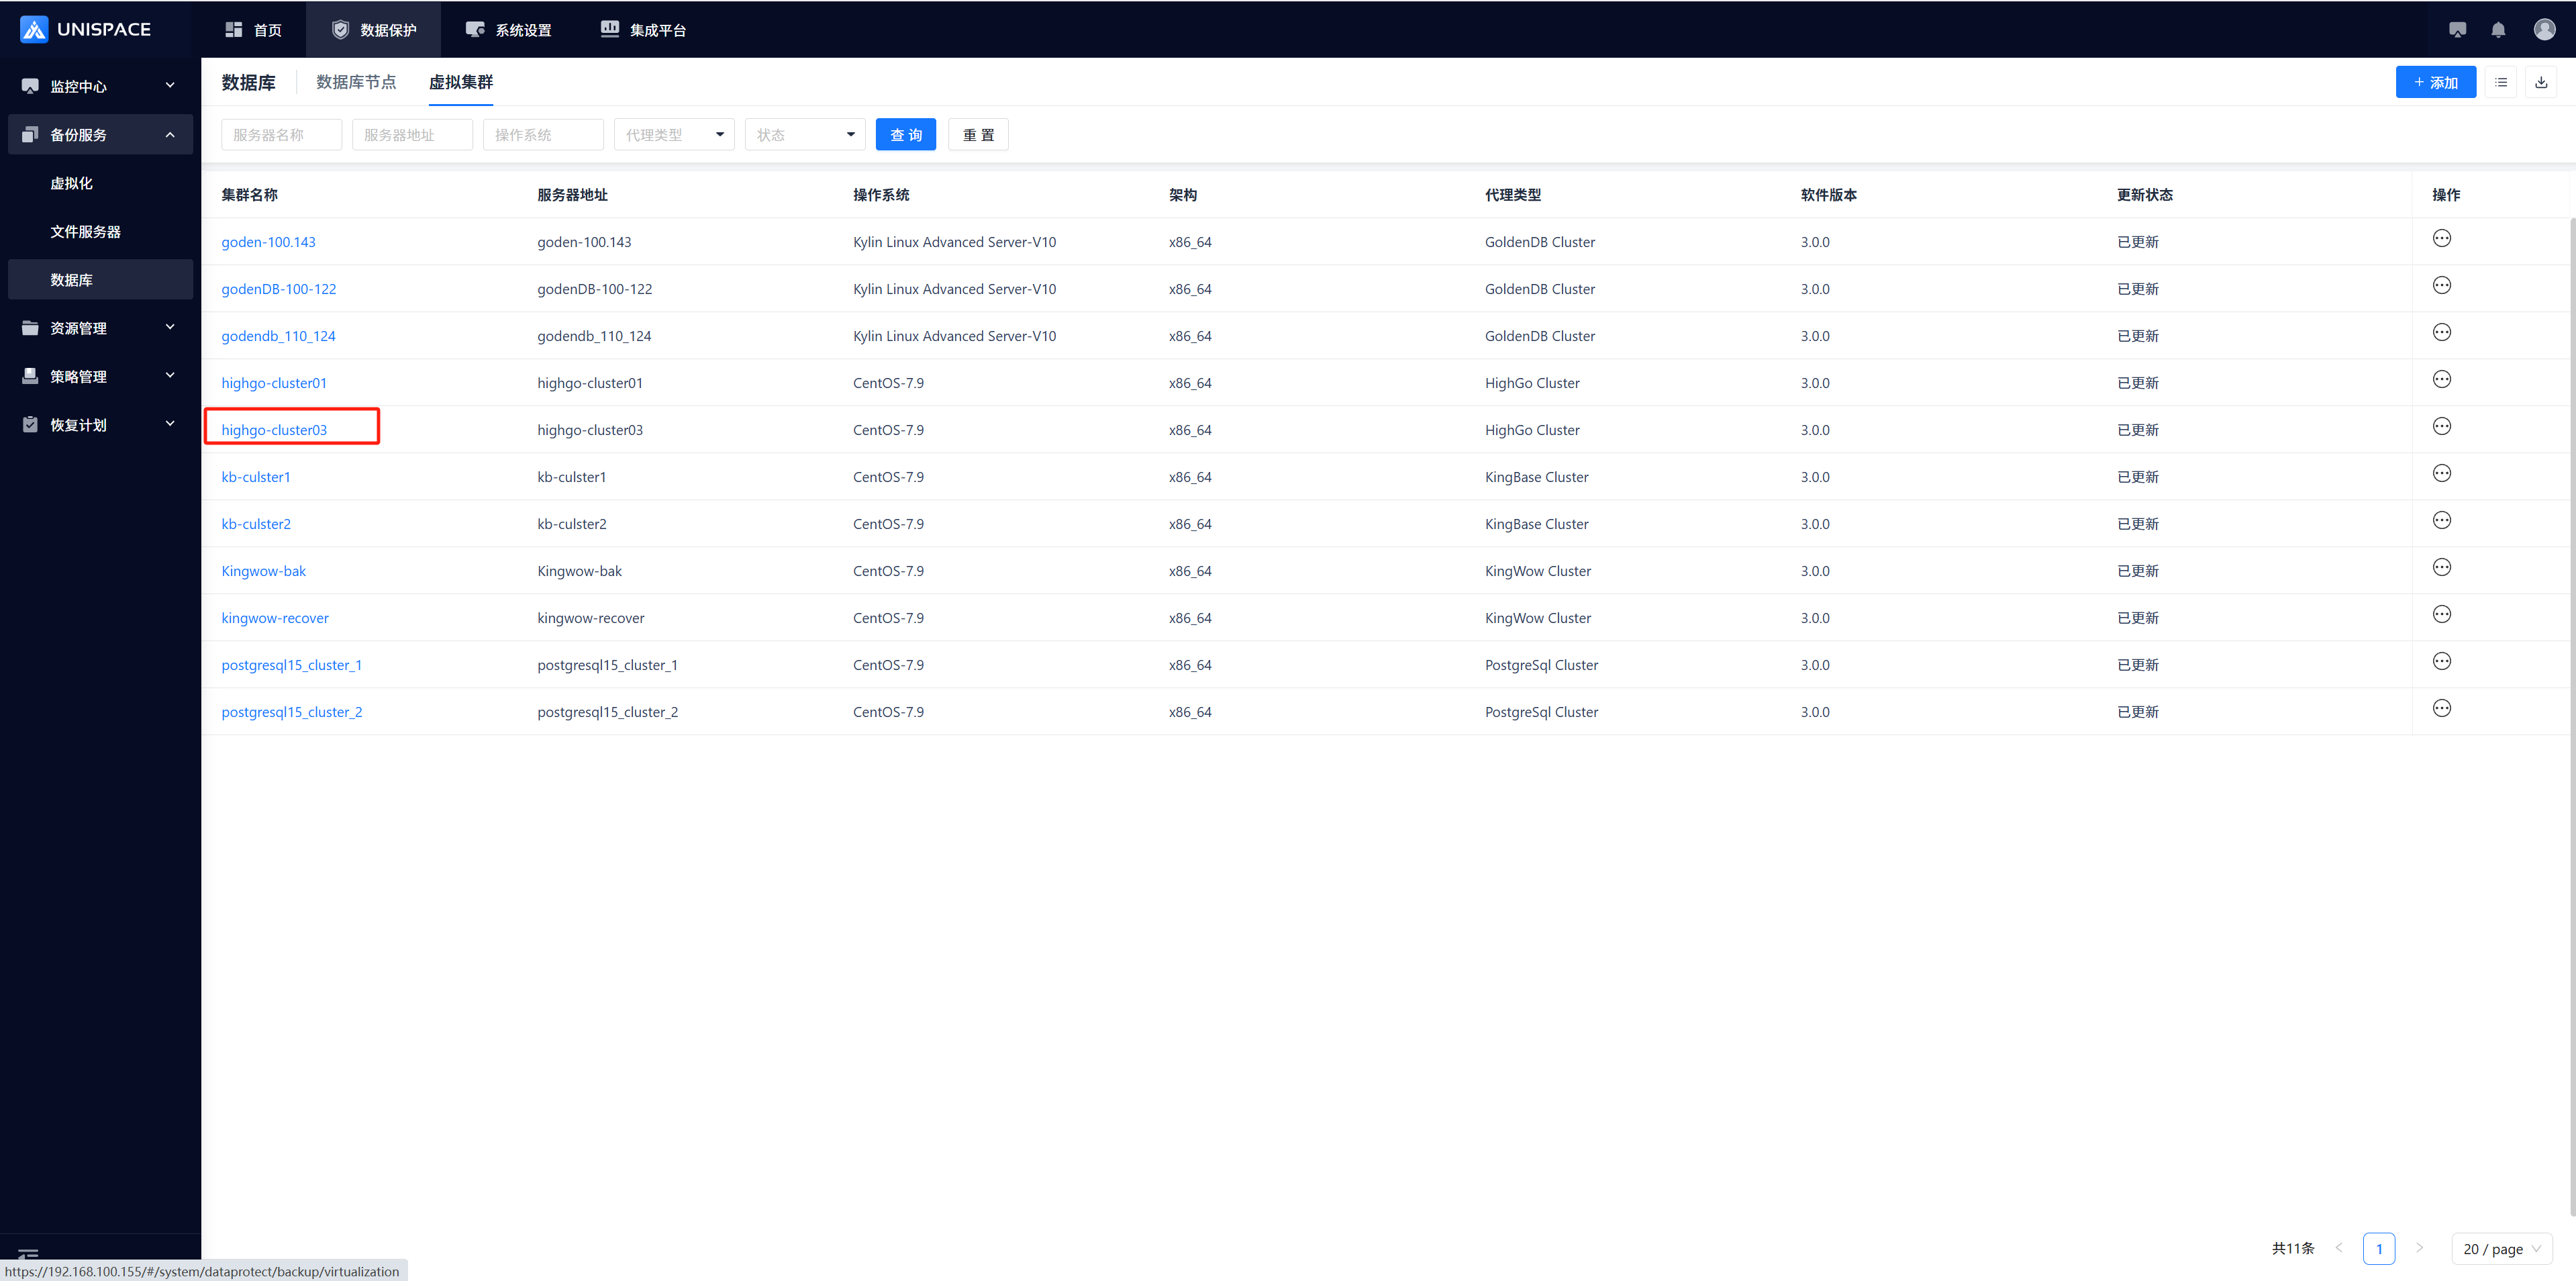 Step 2: Click Database - Virtual Cluster - Server Name - Operation - Restore.
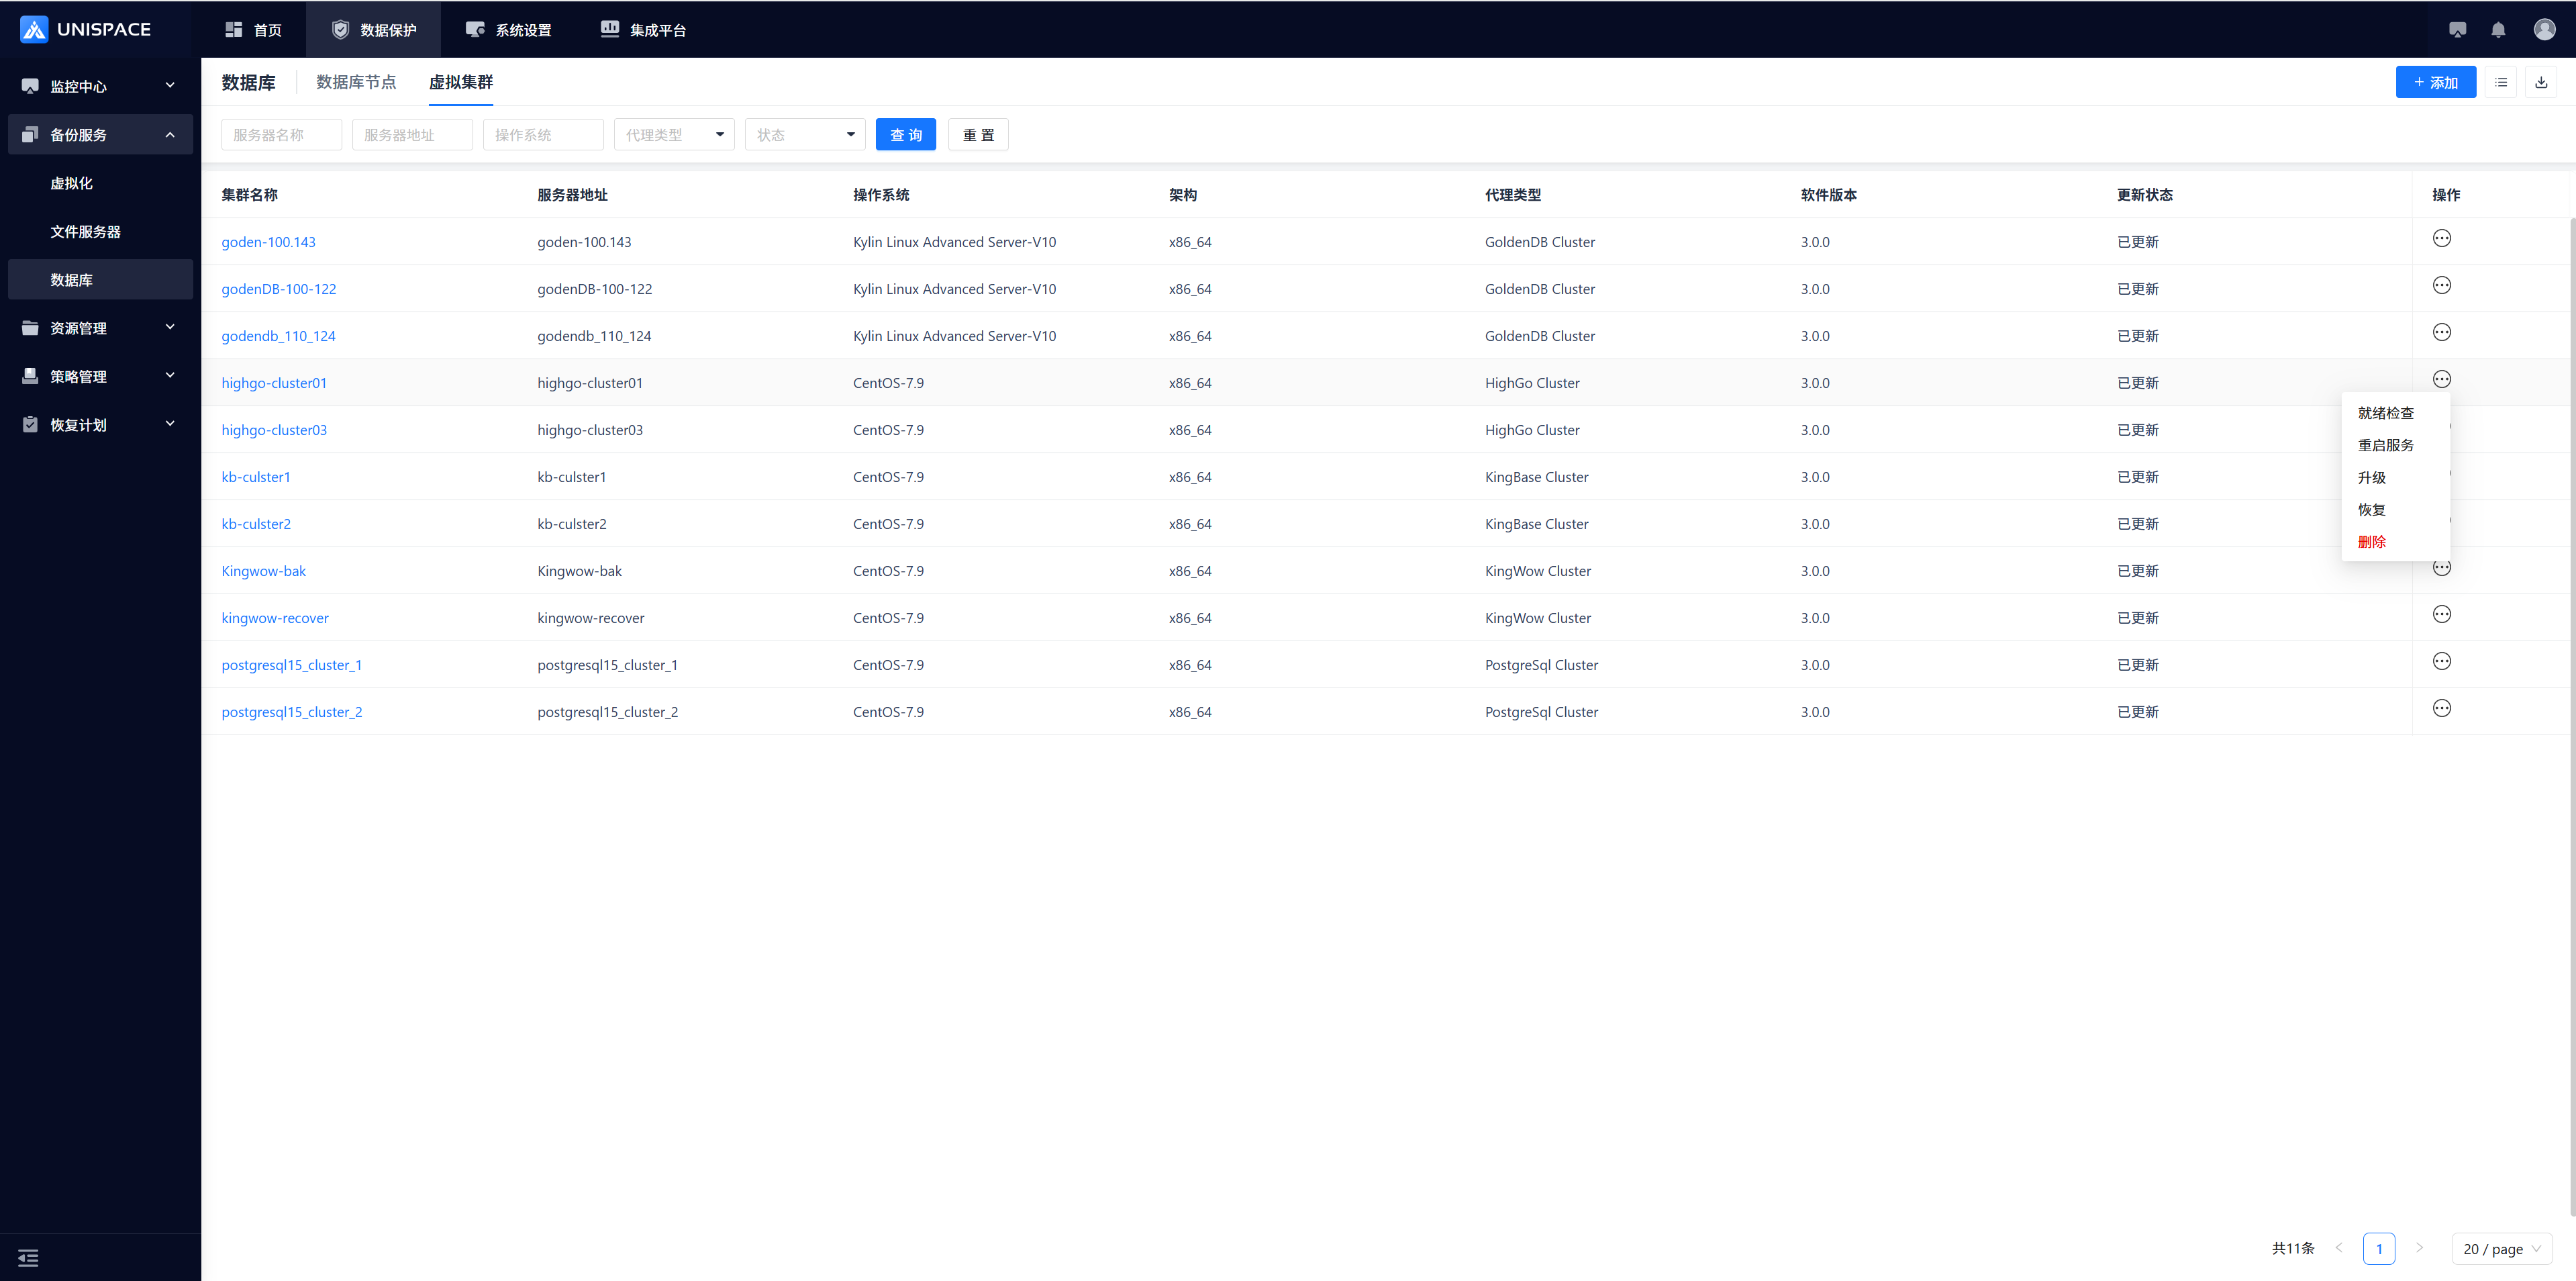 Step 3: Select "Database" as the restore type and click Next.
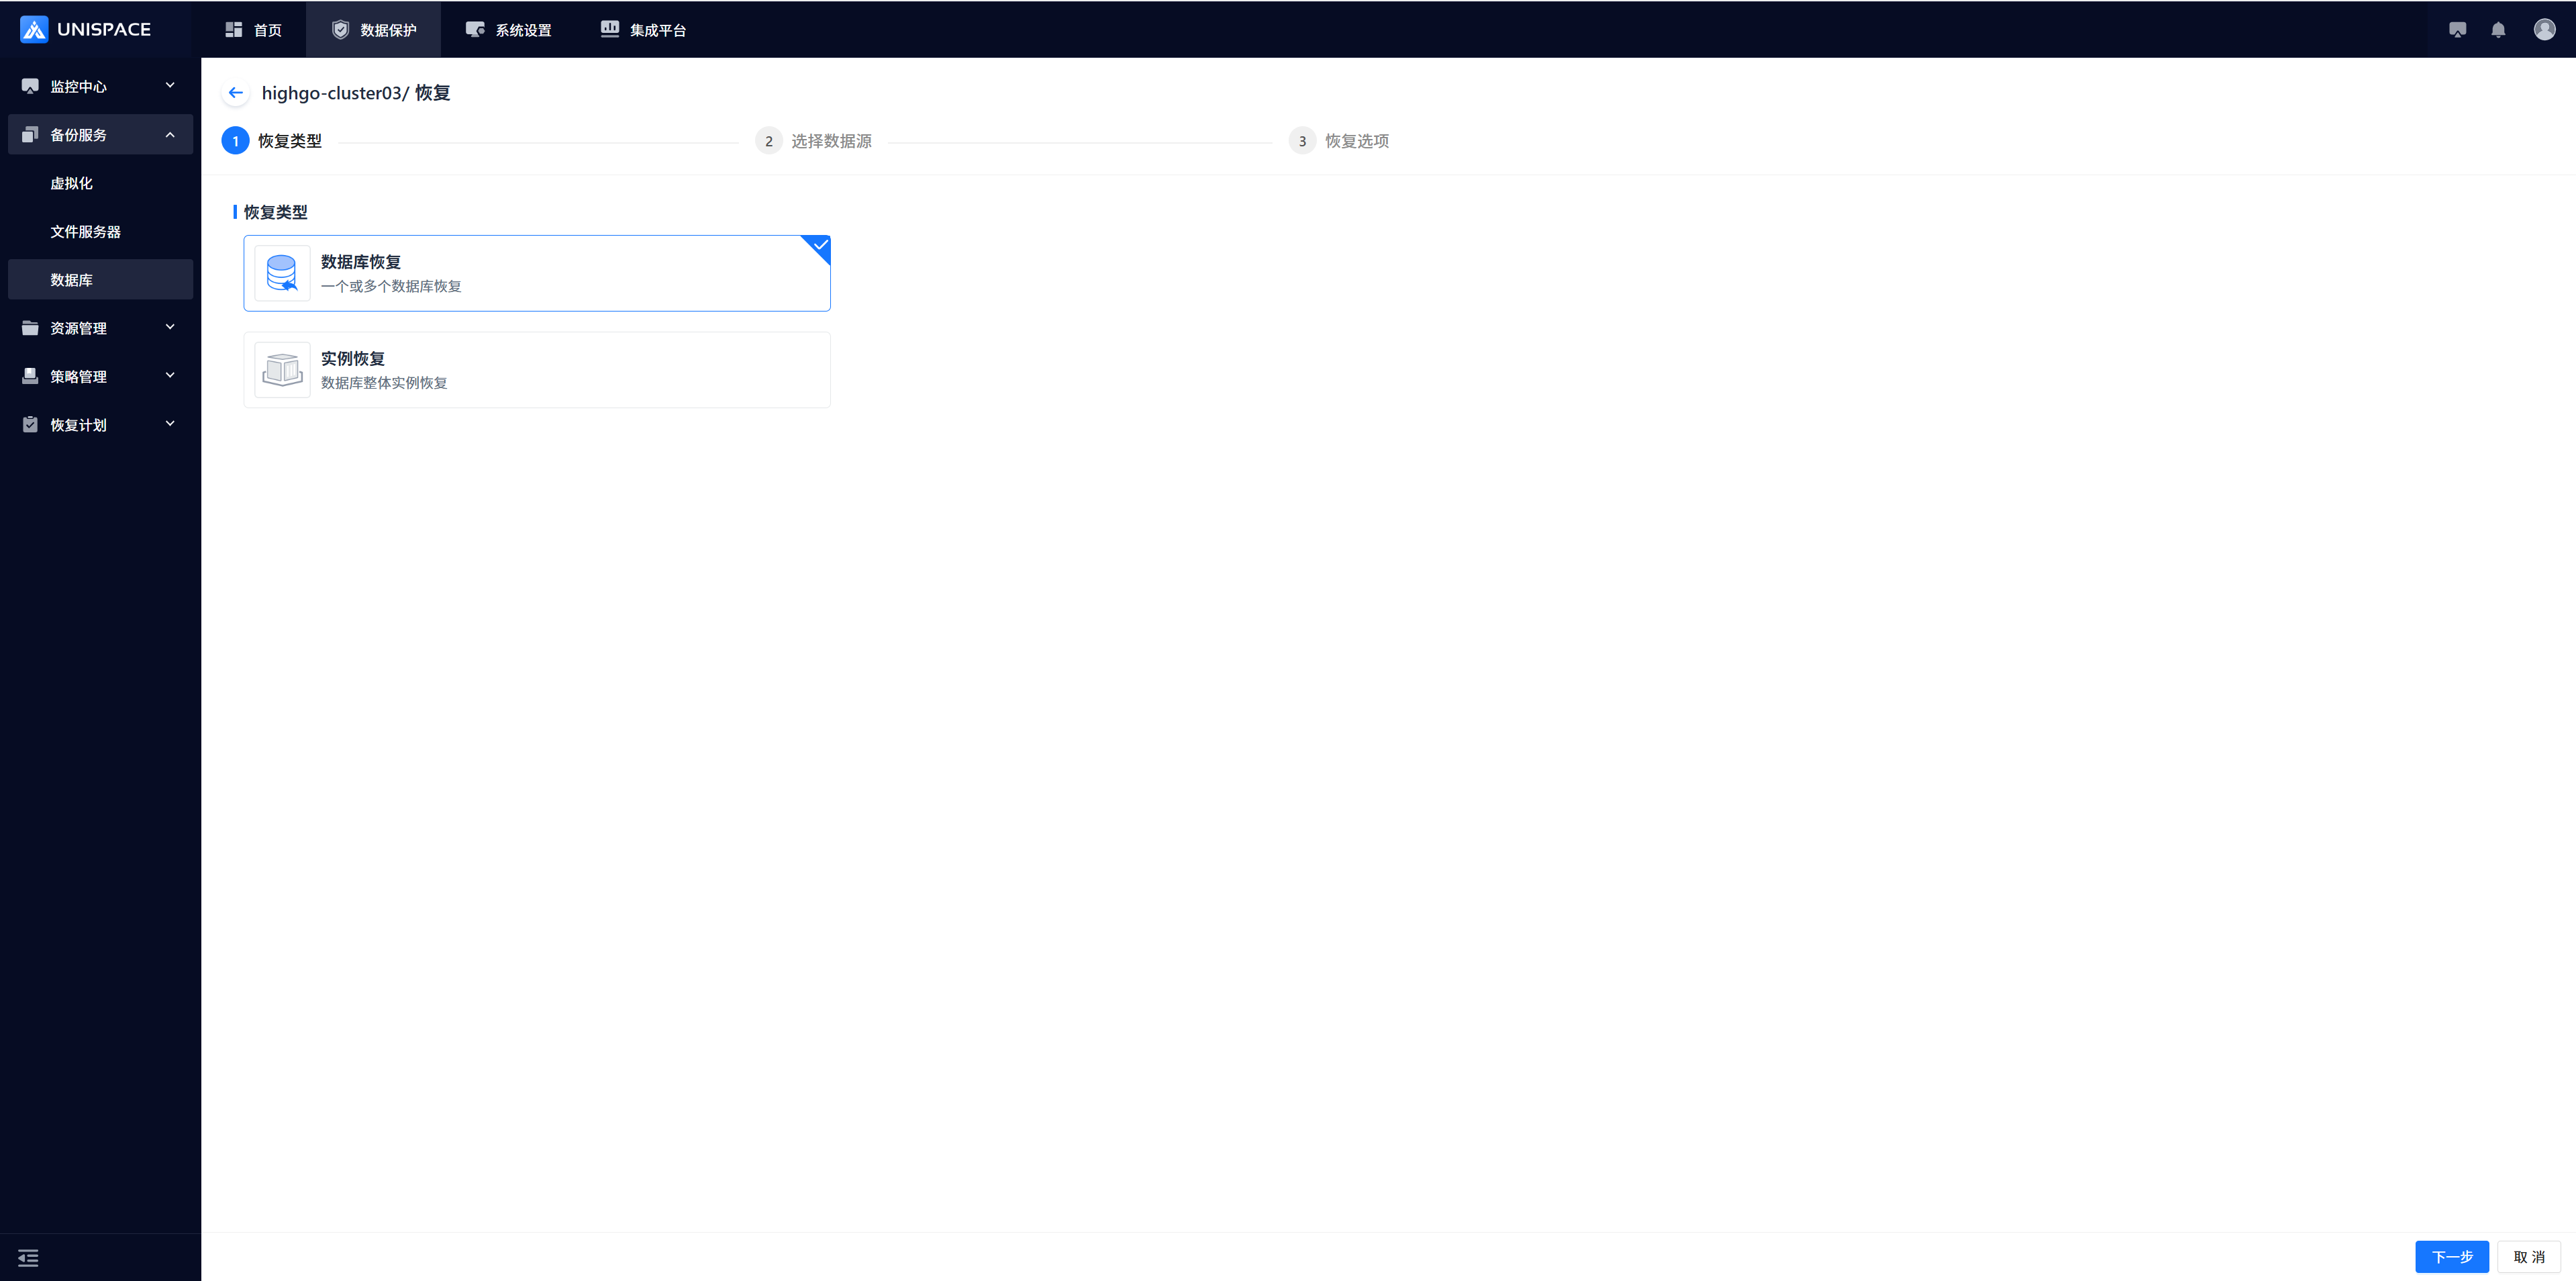 Step 4: Select a restore point based on the most recent time or a specified time range. Choose the Restore Point and its Job ID, then click Next.
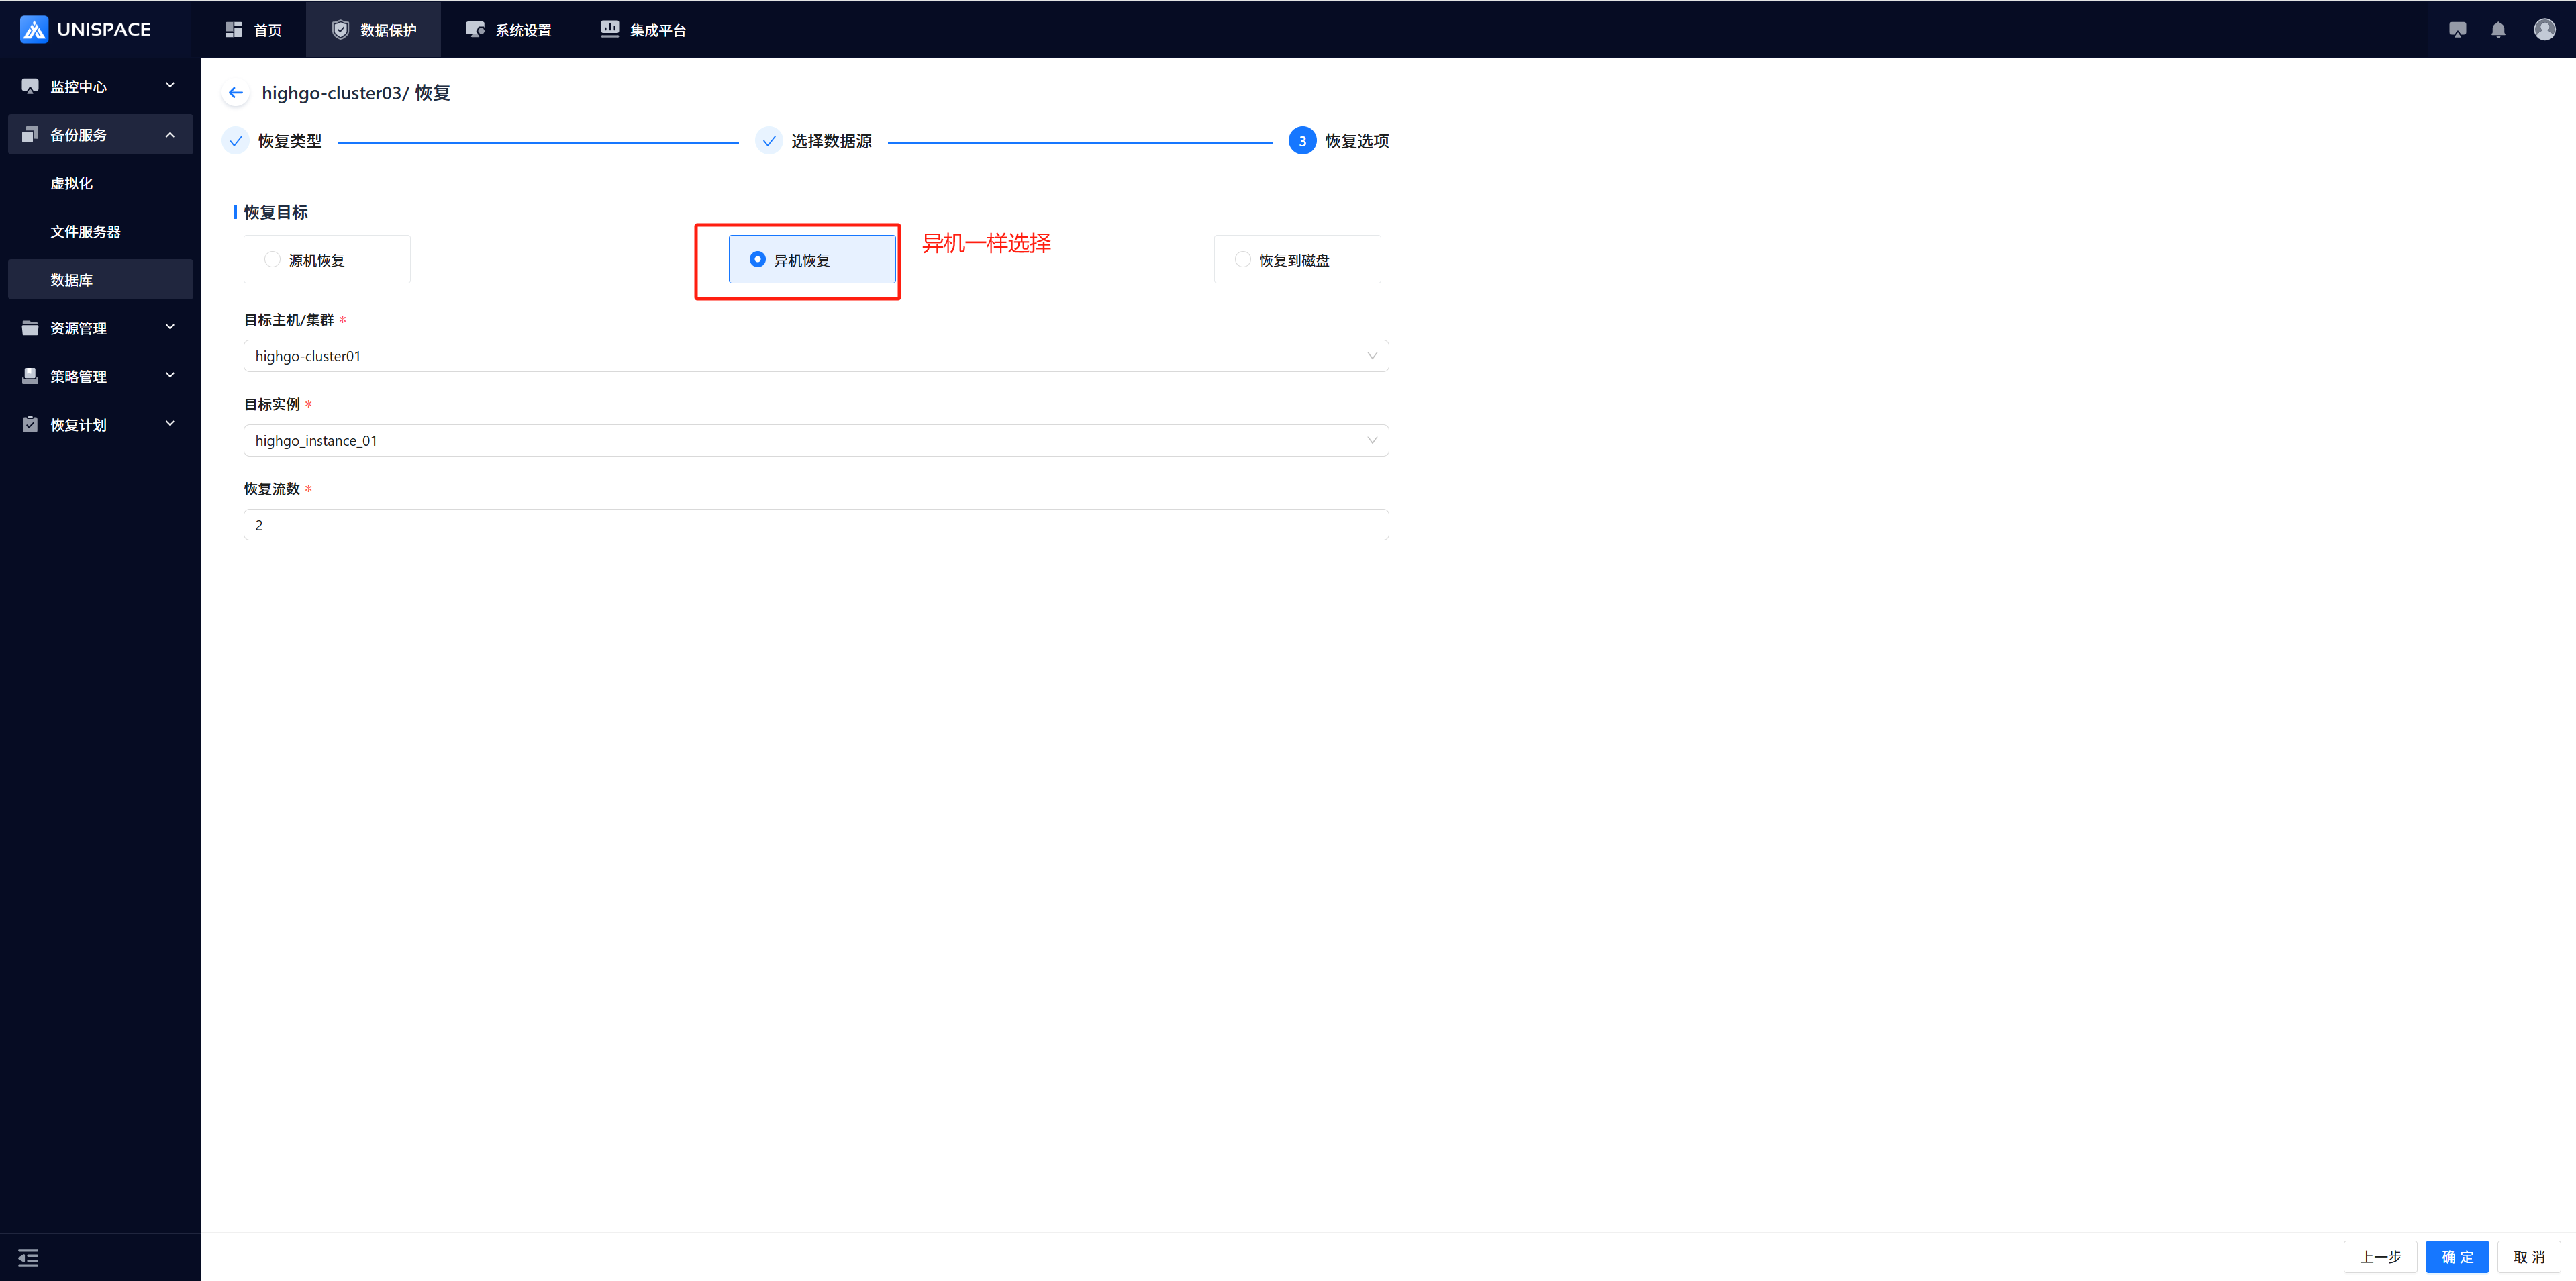
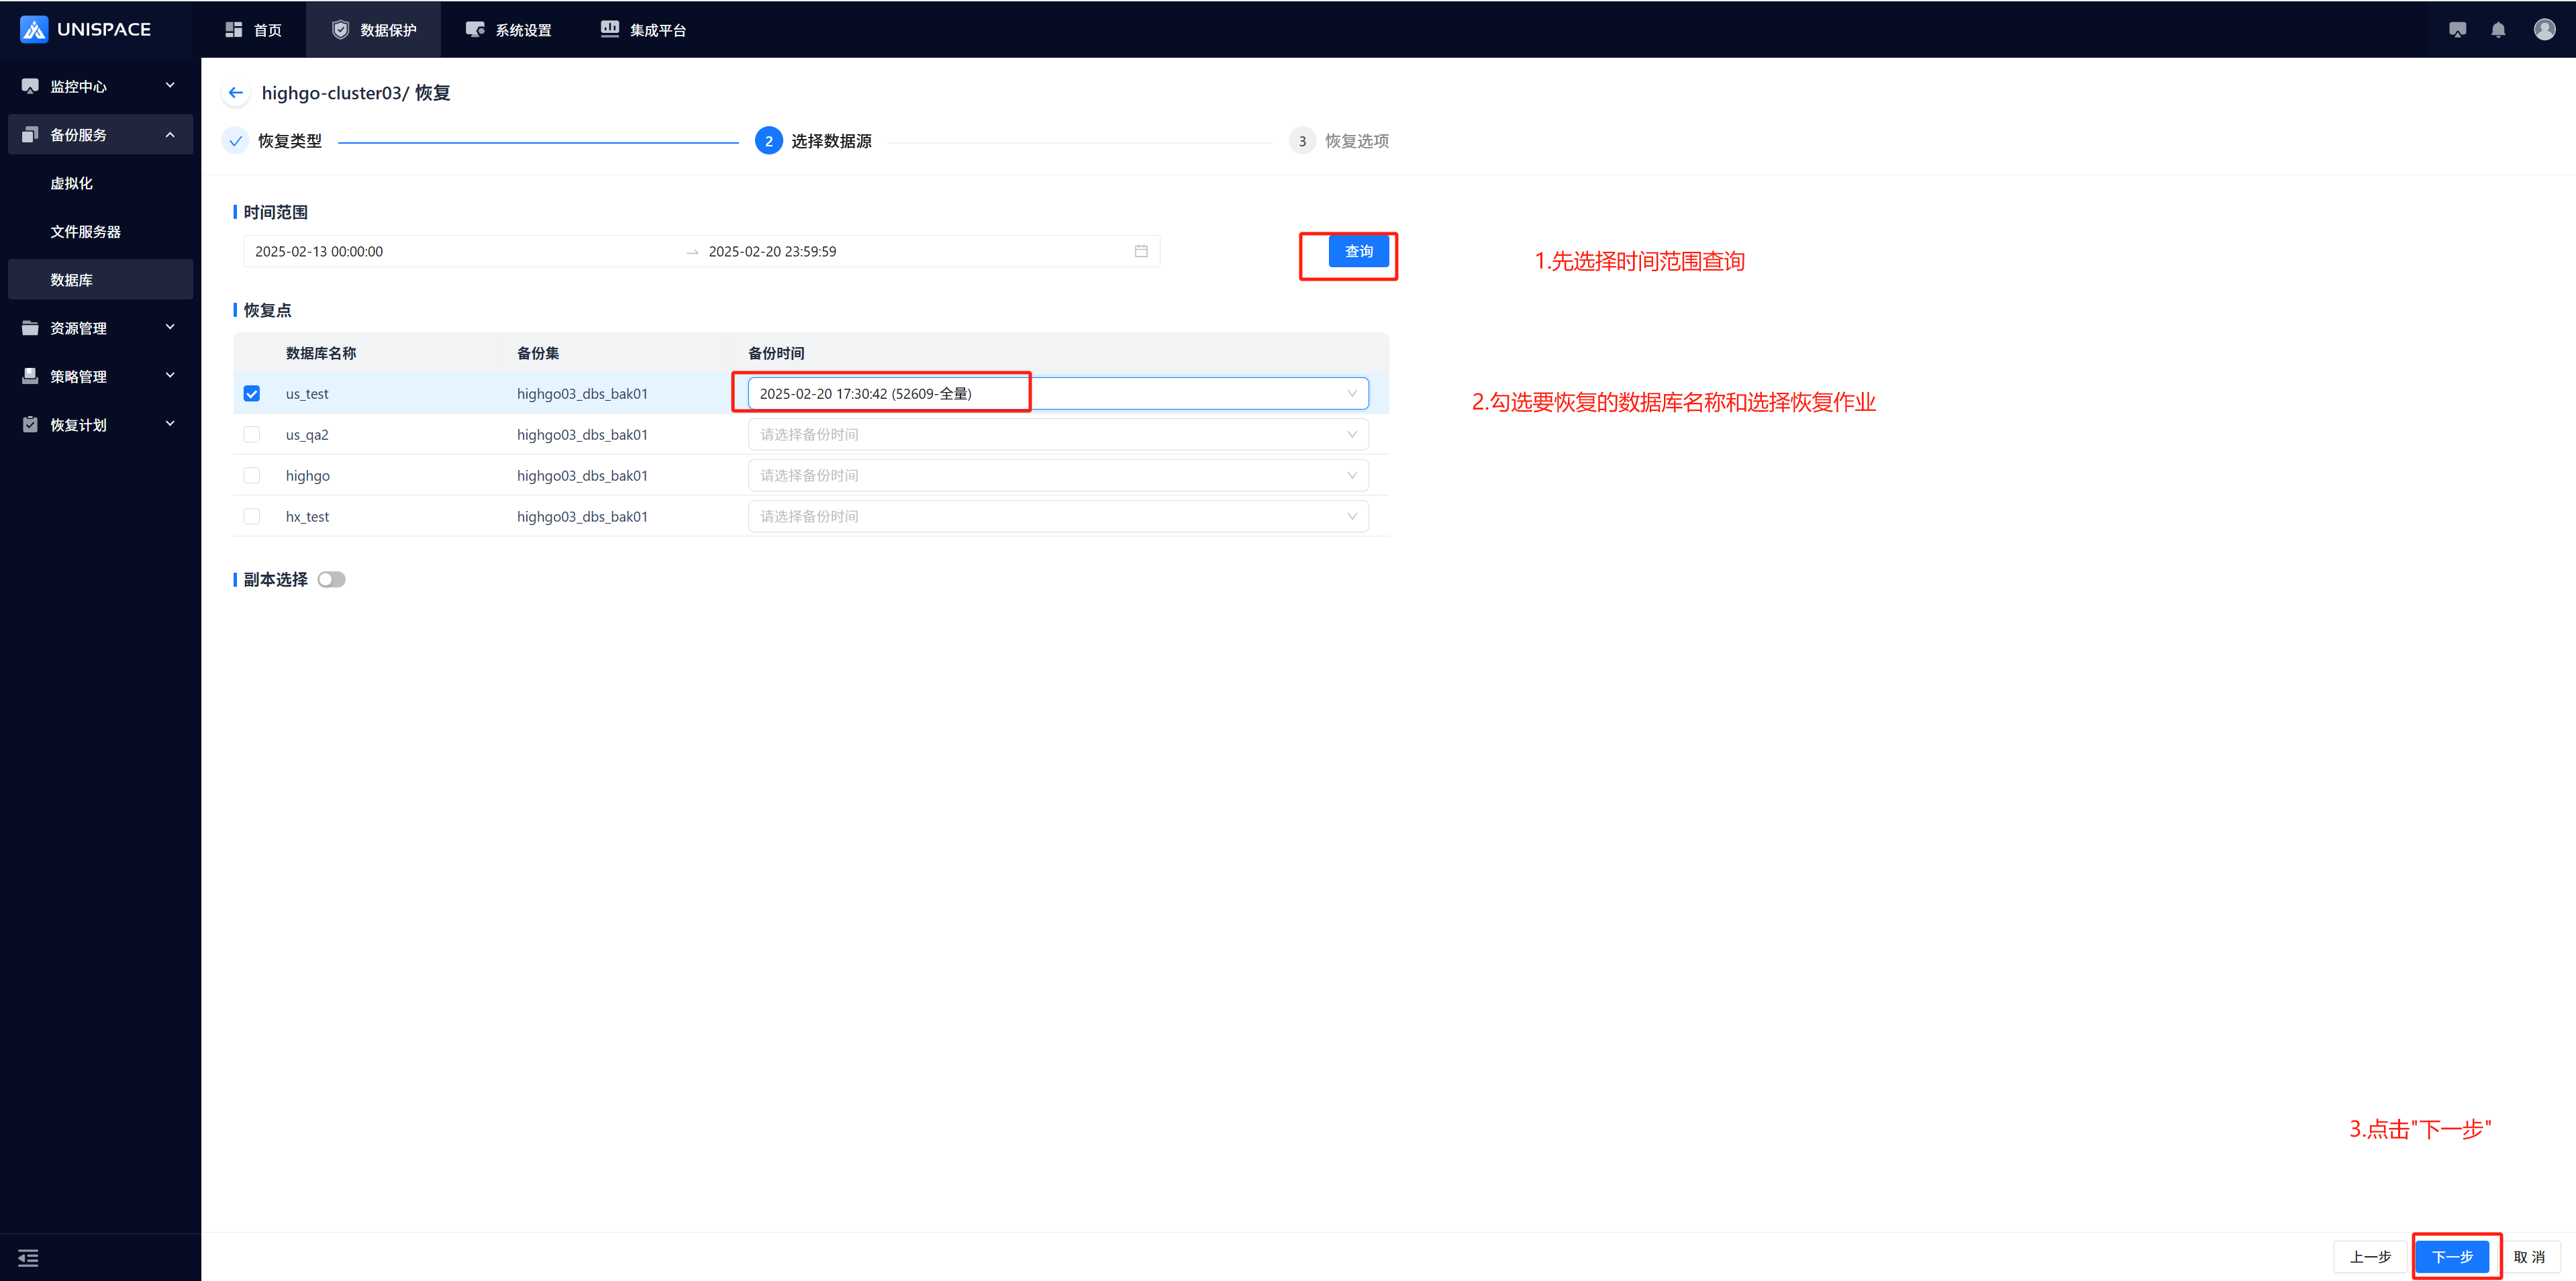 Step 5: Select "Source Machine Recovery", choose the target host and instance, specify the temporary directory, and click OK.
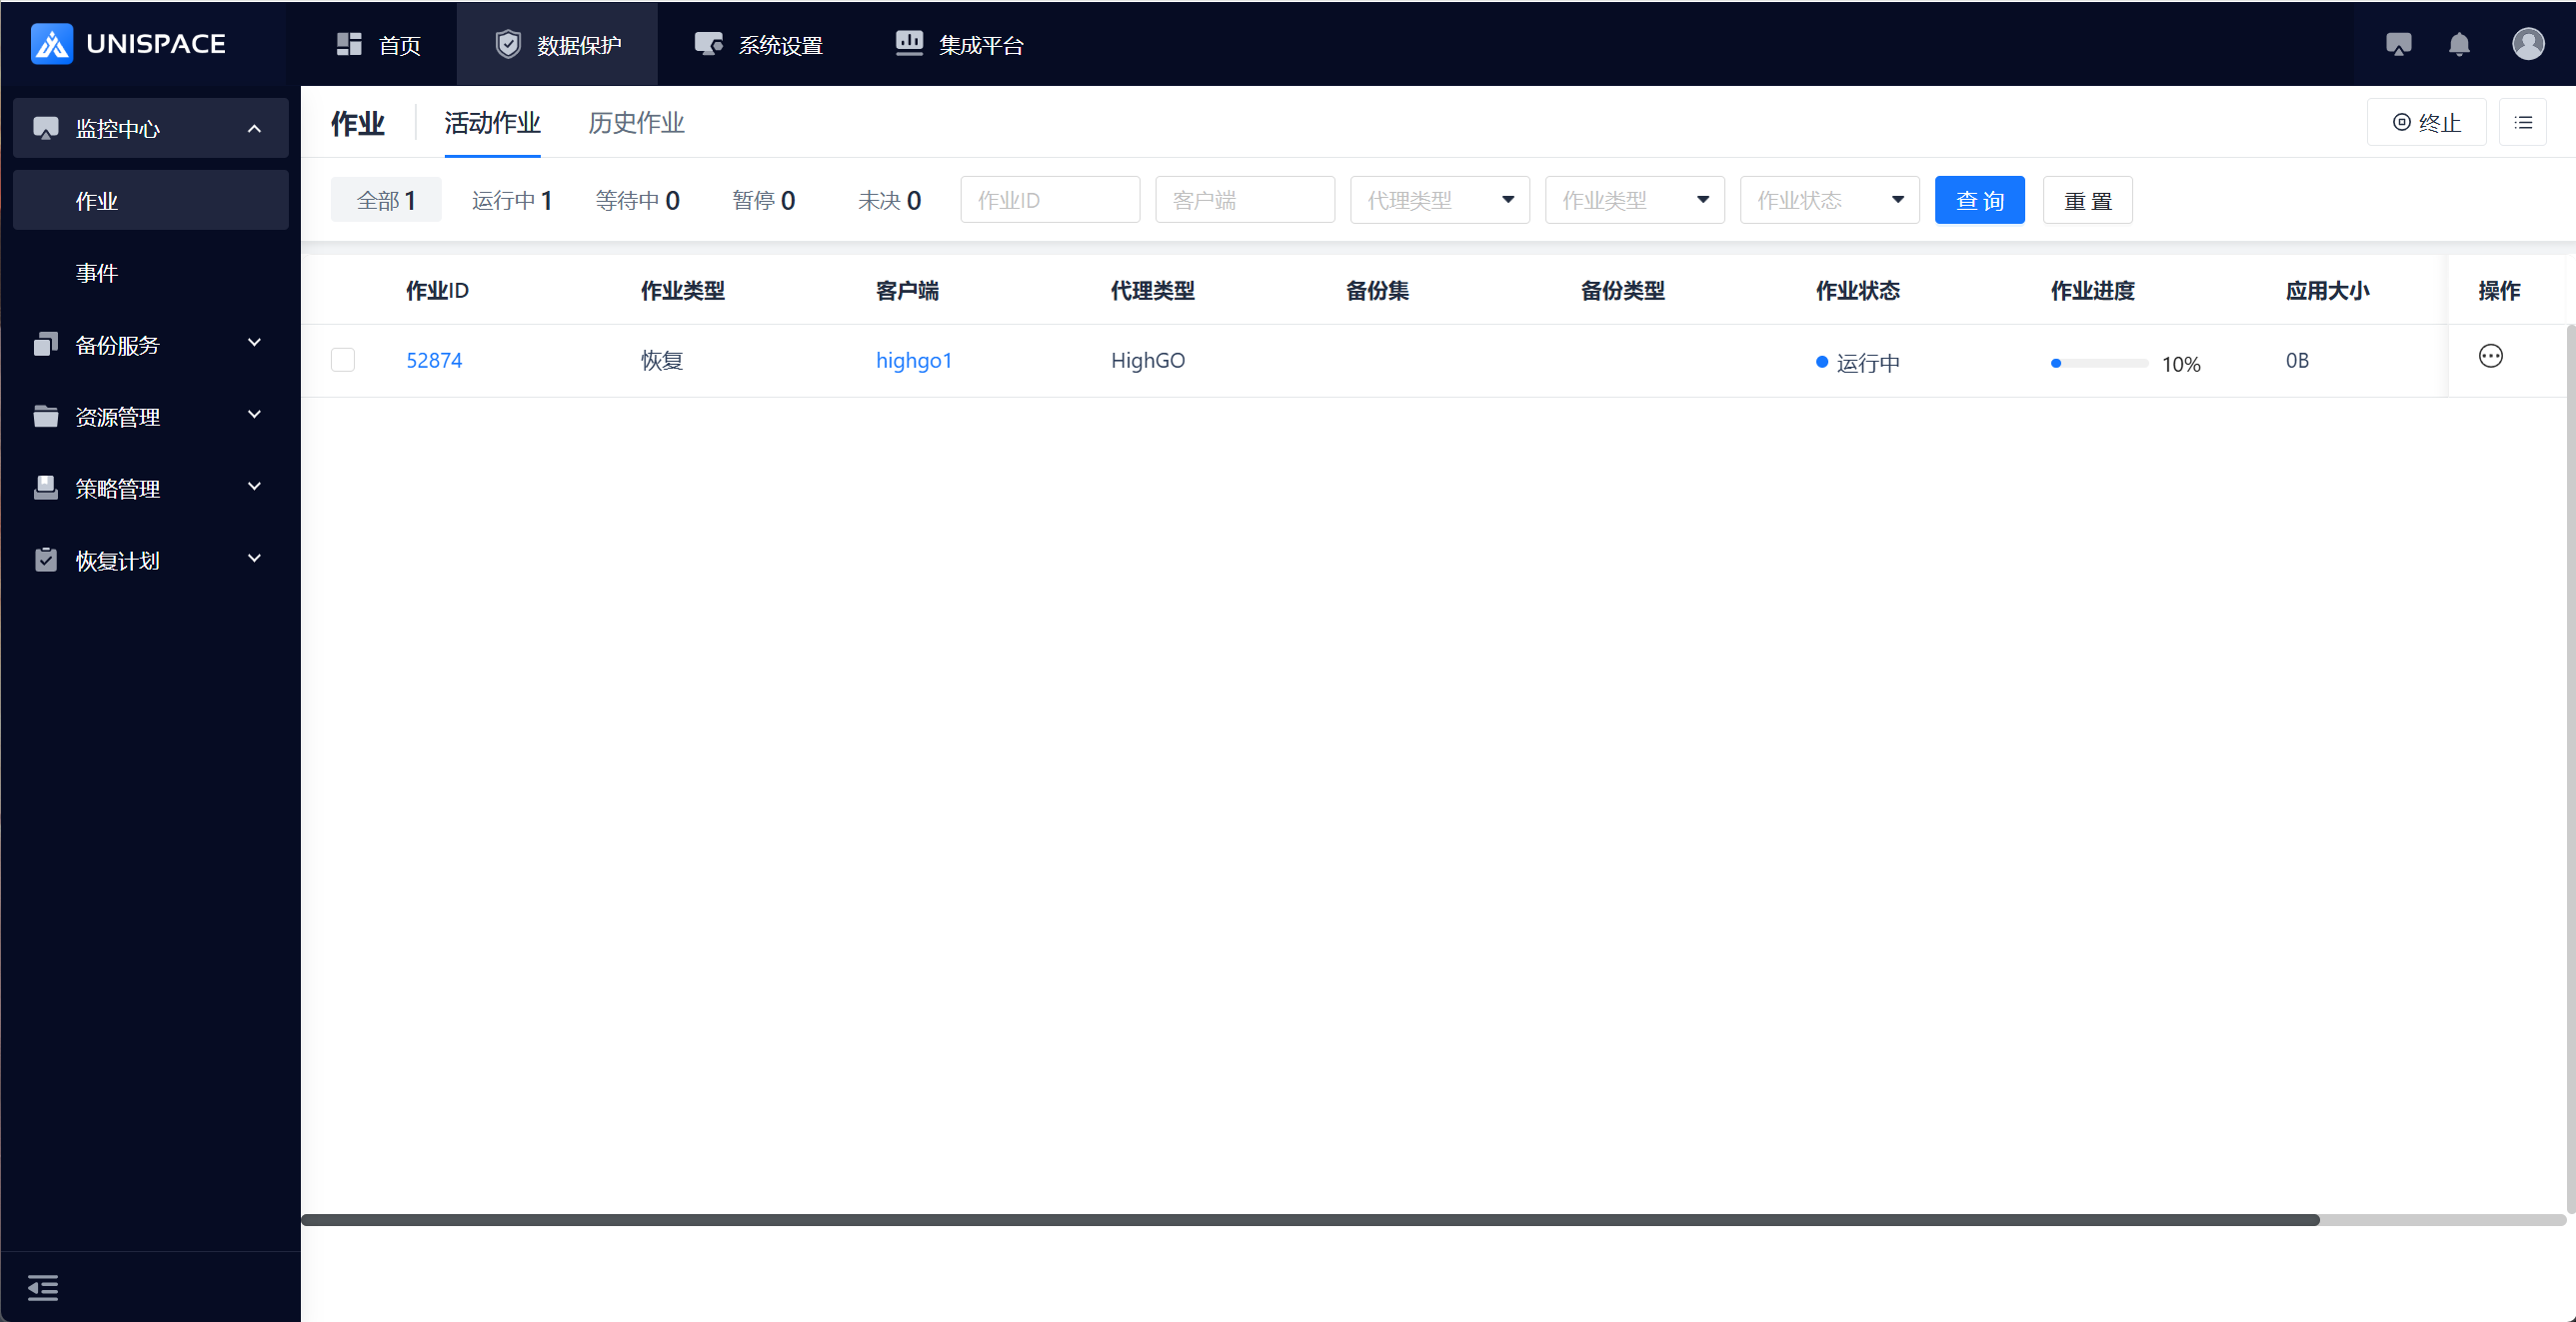
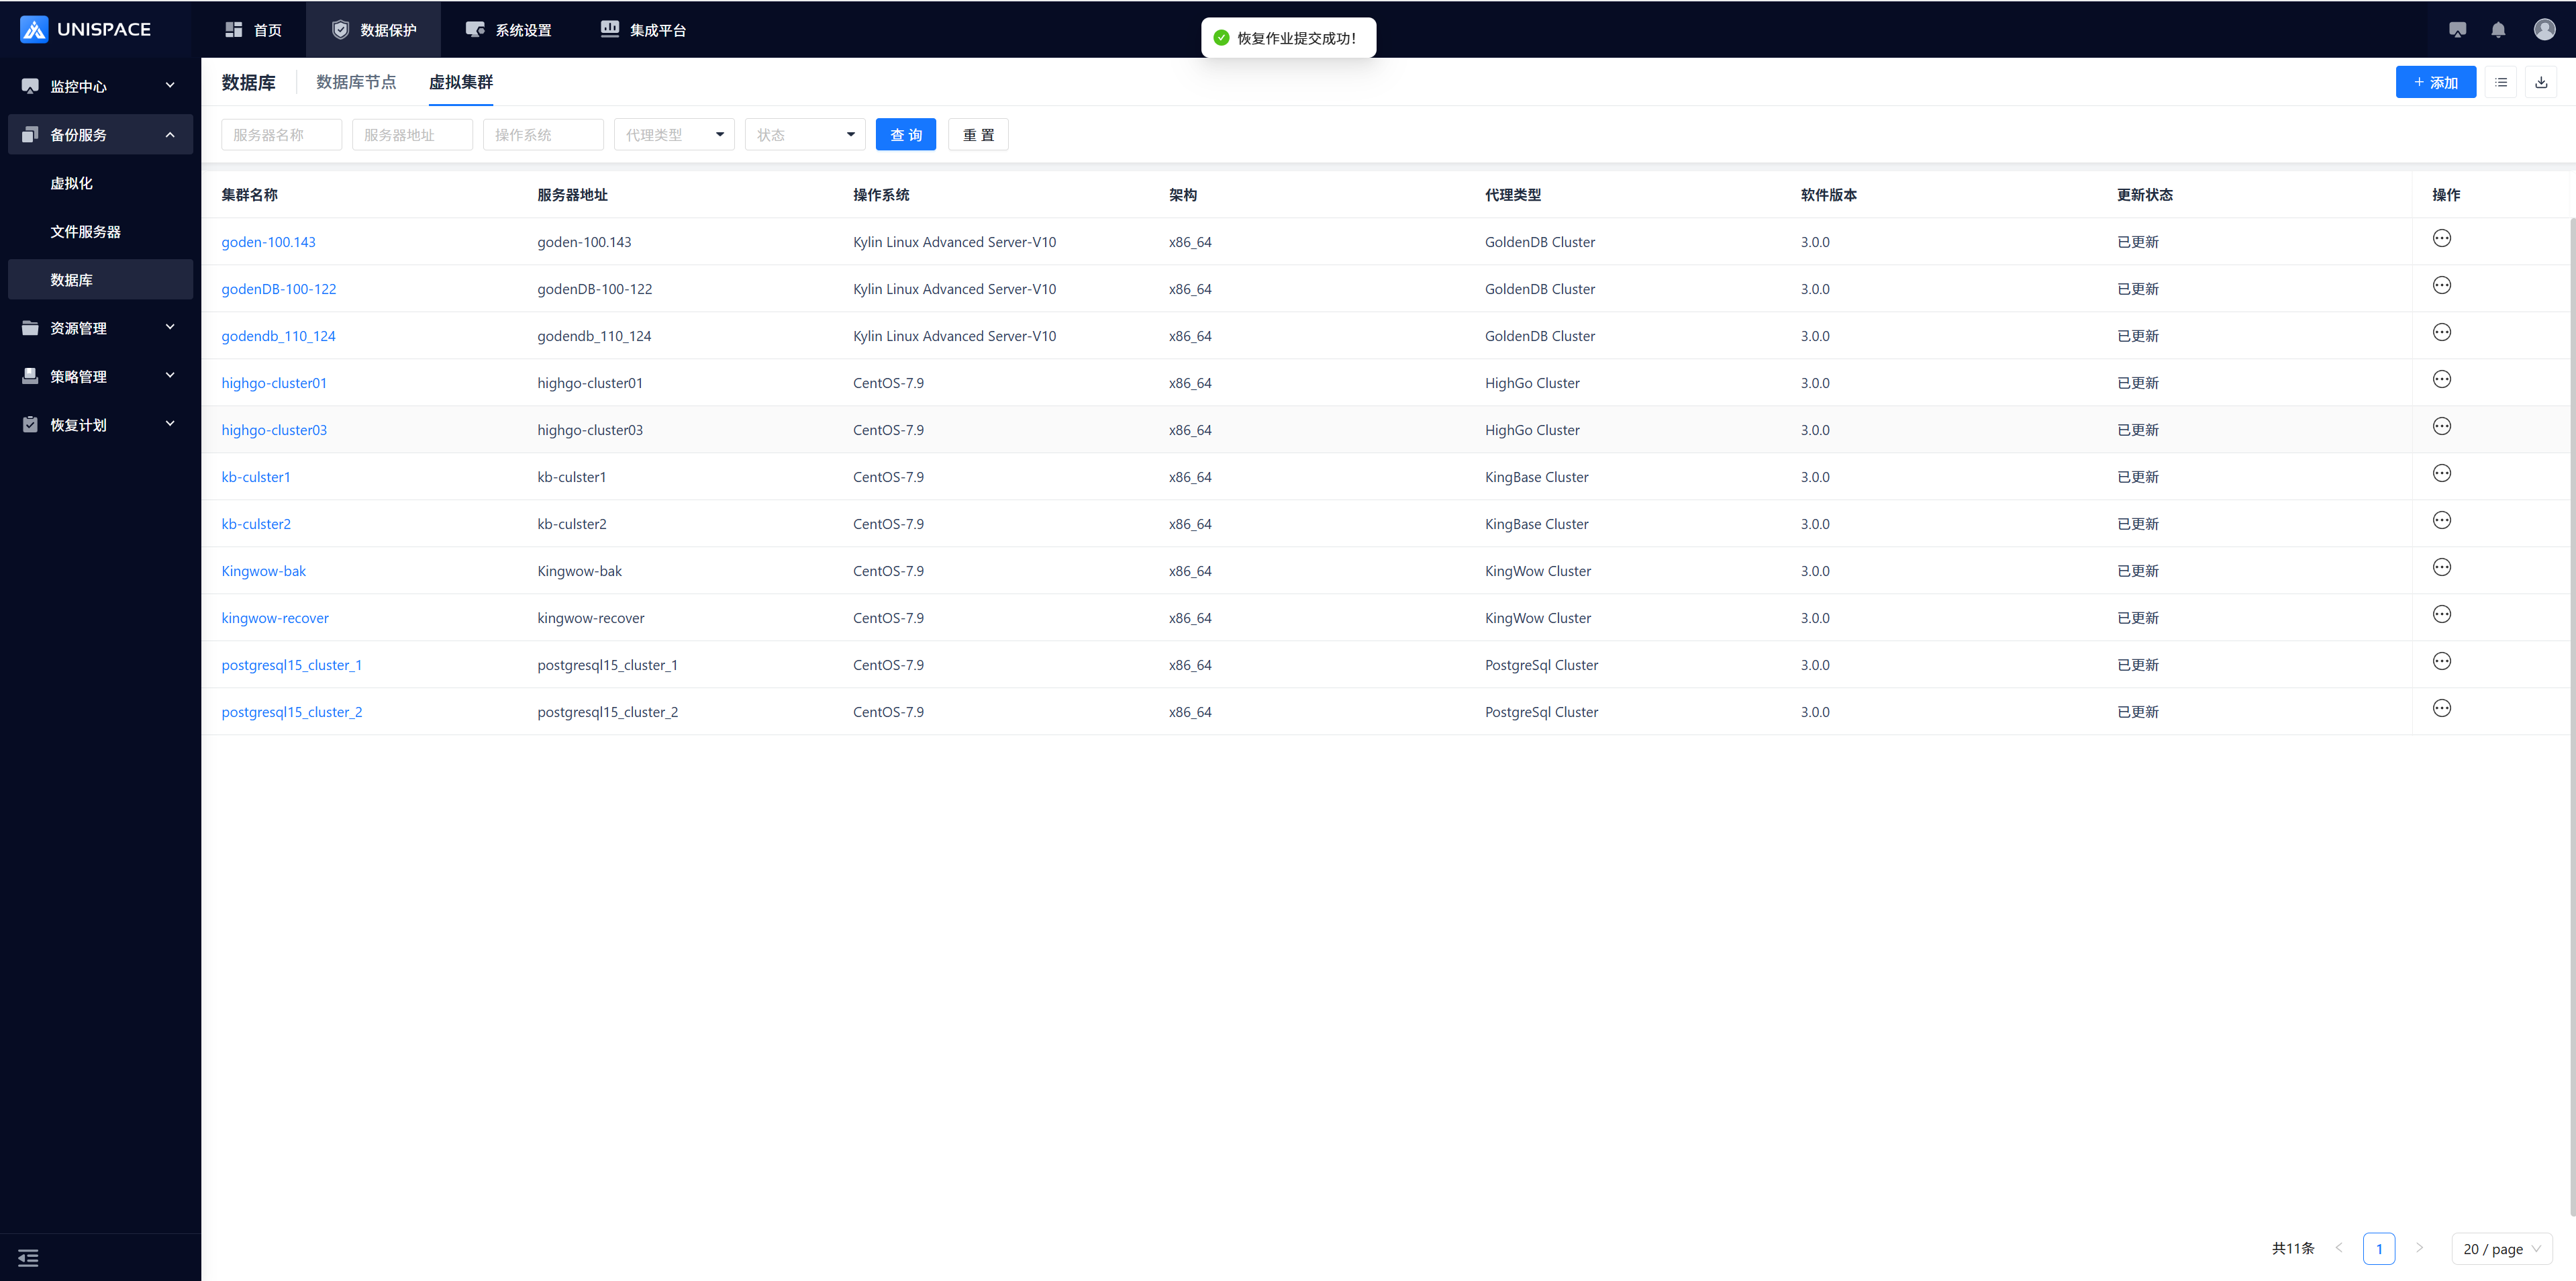 Step 6: Once the job starts, check the job status under Monitoring Center - Jobs - Active Jobs.
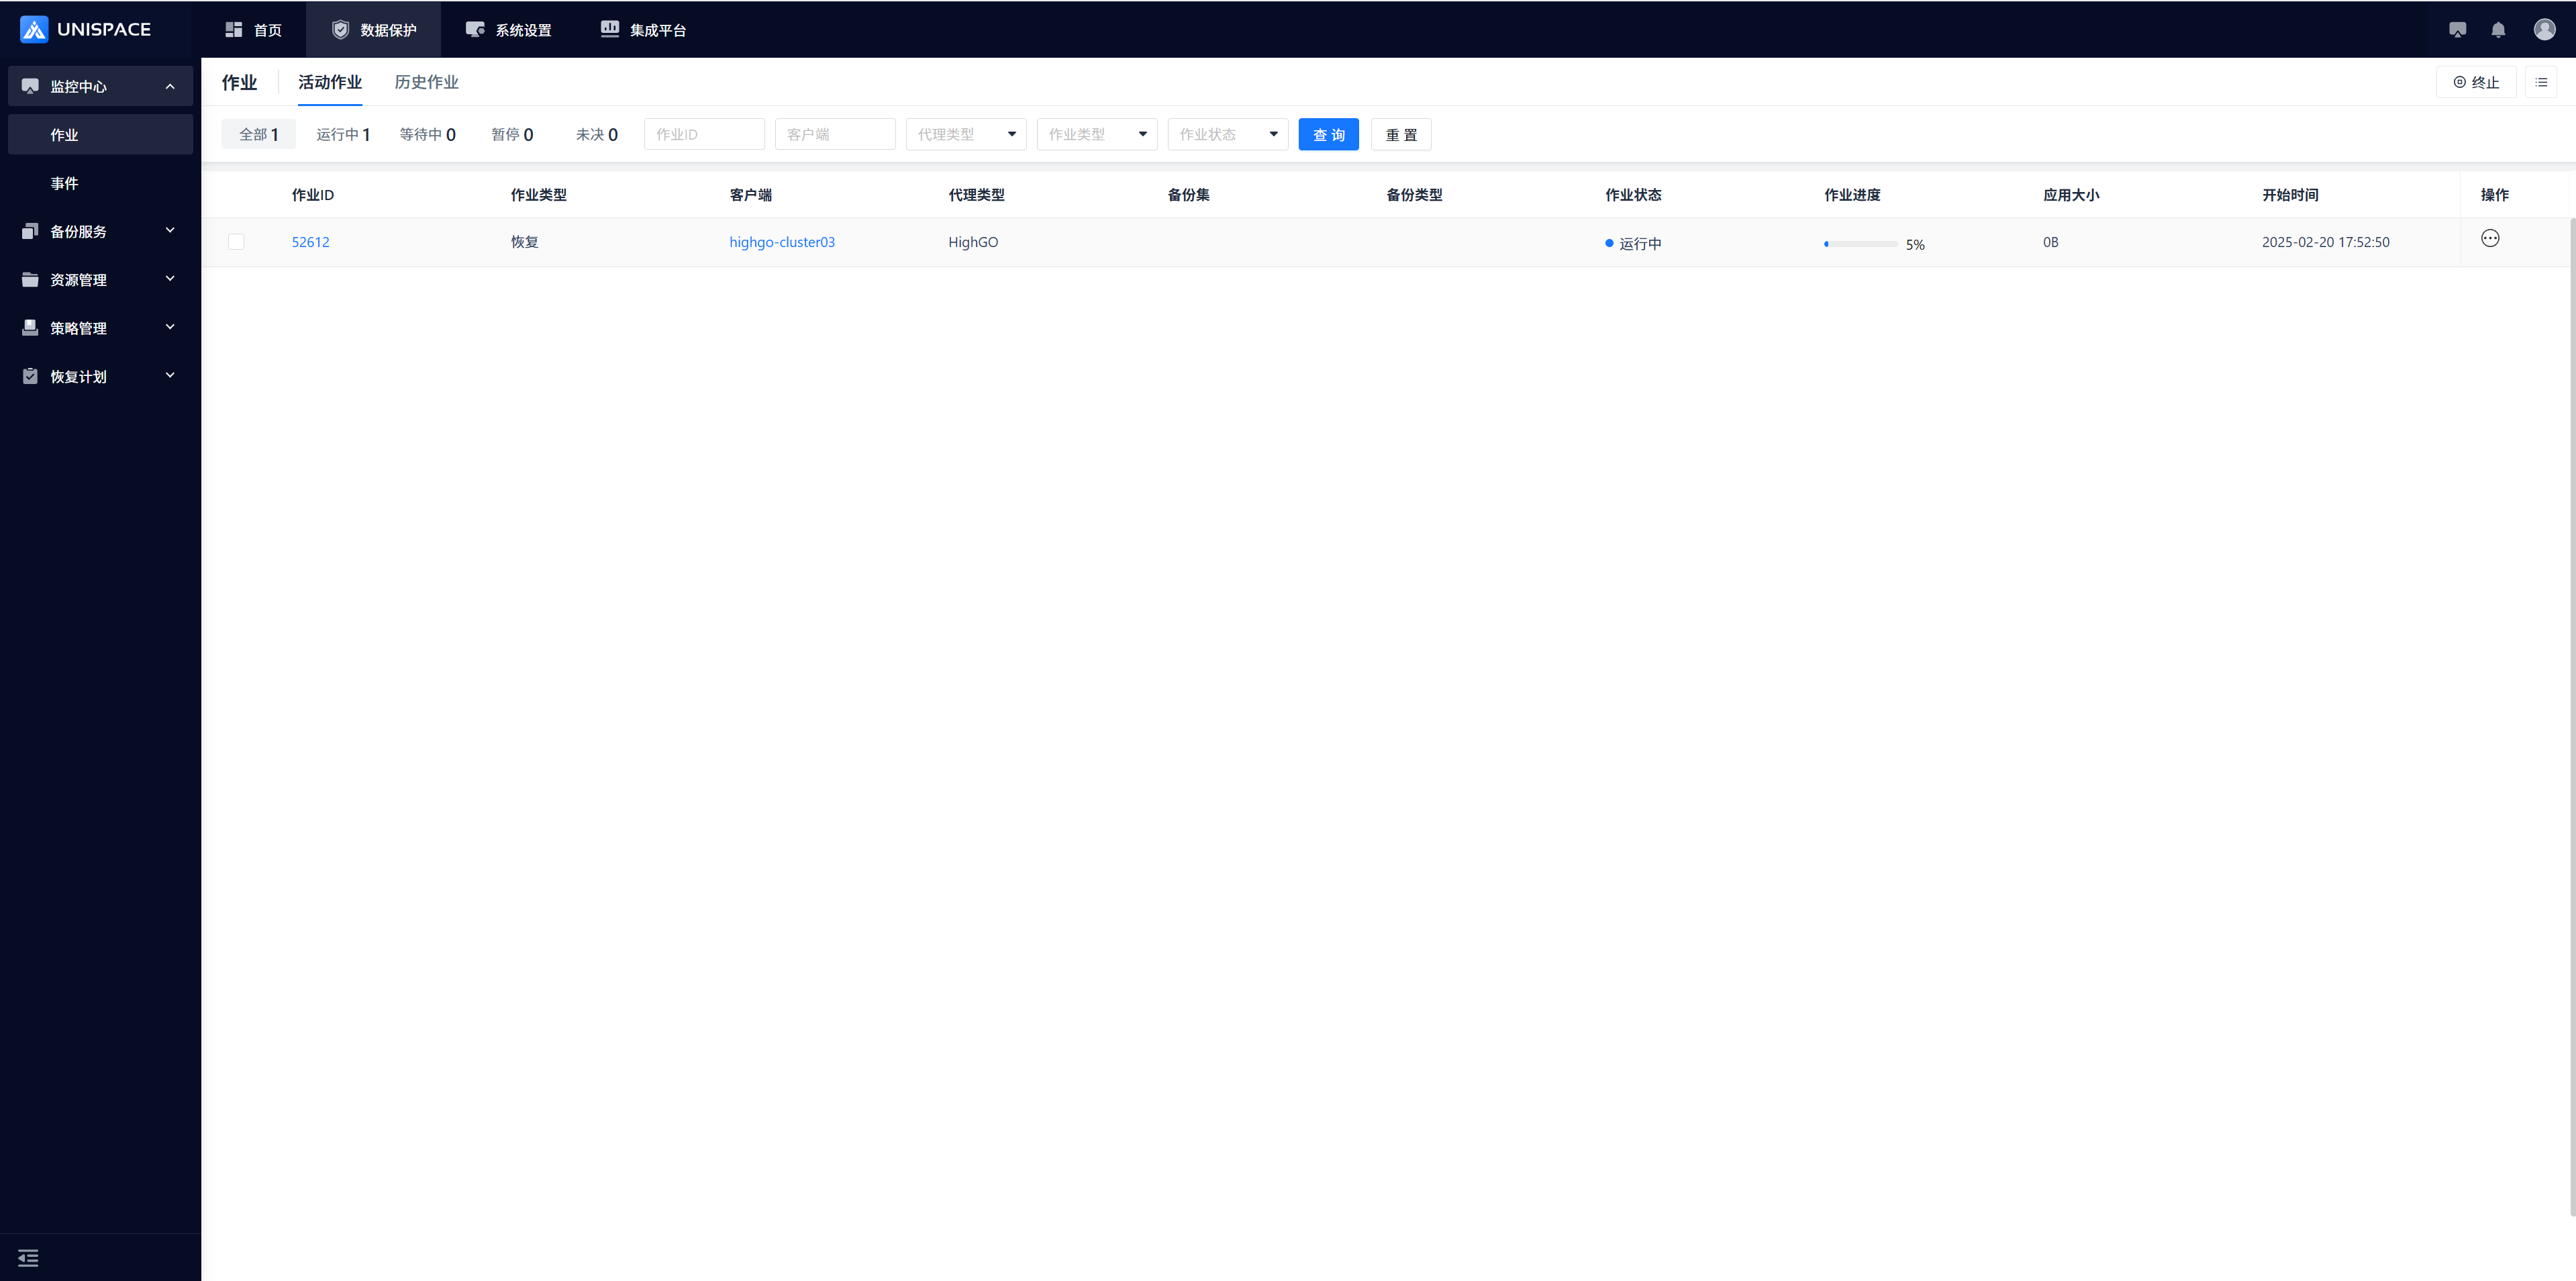 Step 6: After the job completes, go to Monitoring Center - Jobs - Job History to view the completed job.
1.6 Highgo Cluster Recovery to Disk
Prerequisites
- A backup of Highgo data or instance backup set has been completed.
Steps
Step 1: Click Backup Service - Database - Virtual Cluster from the system menu. Step 2: Click Database - Virtual Cluster - Server Name - Operation - Restore.
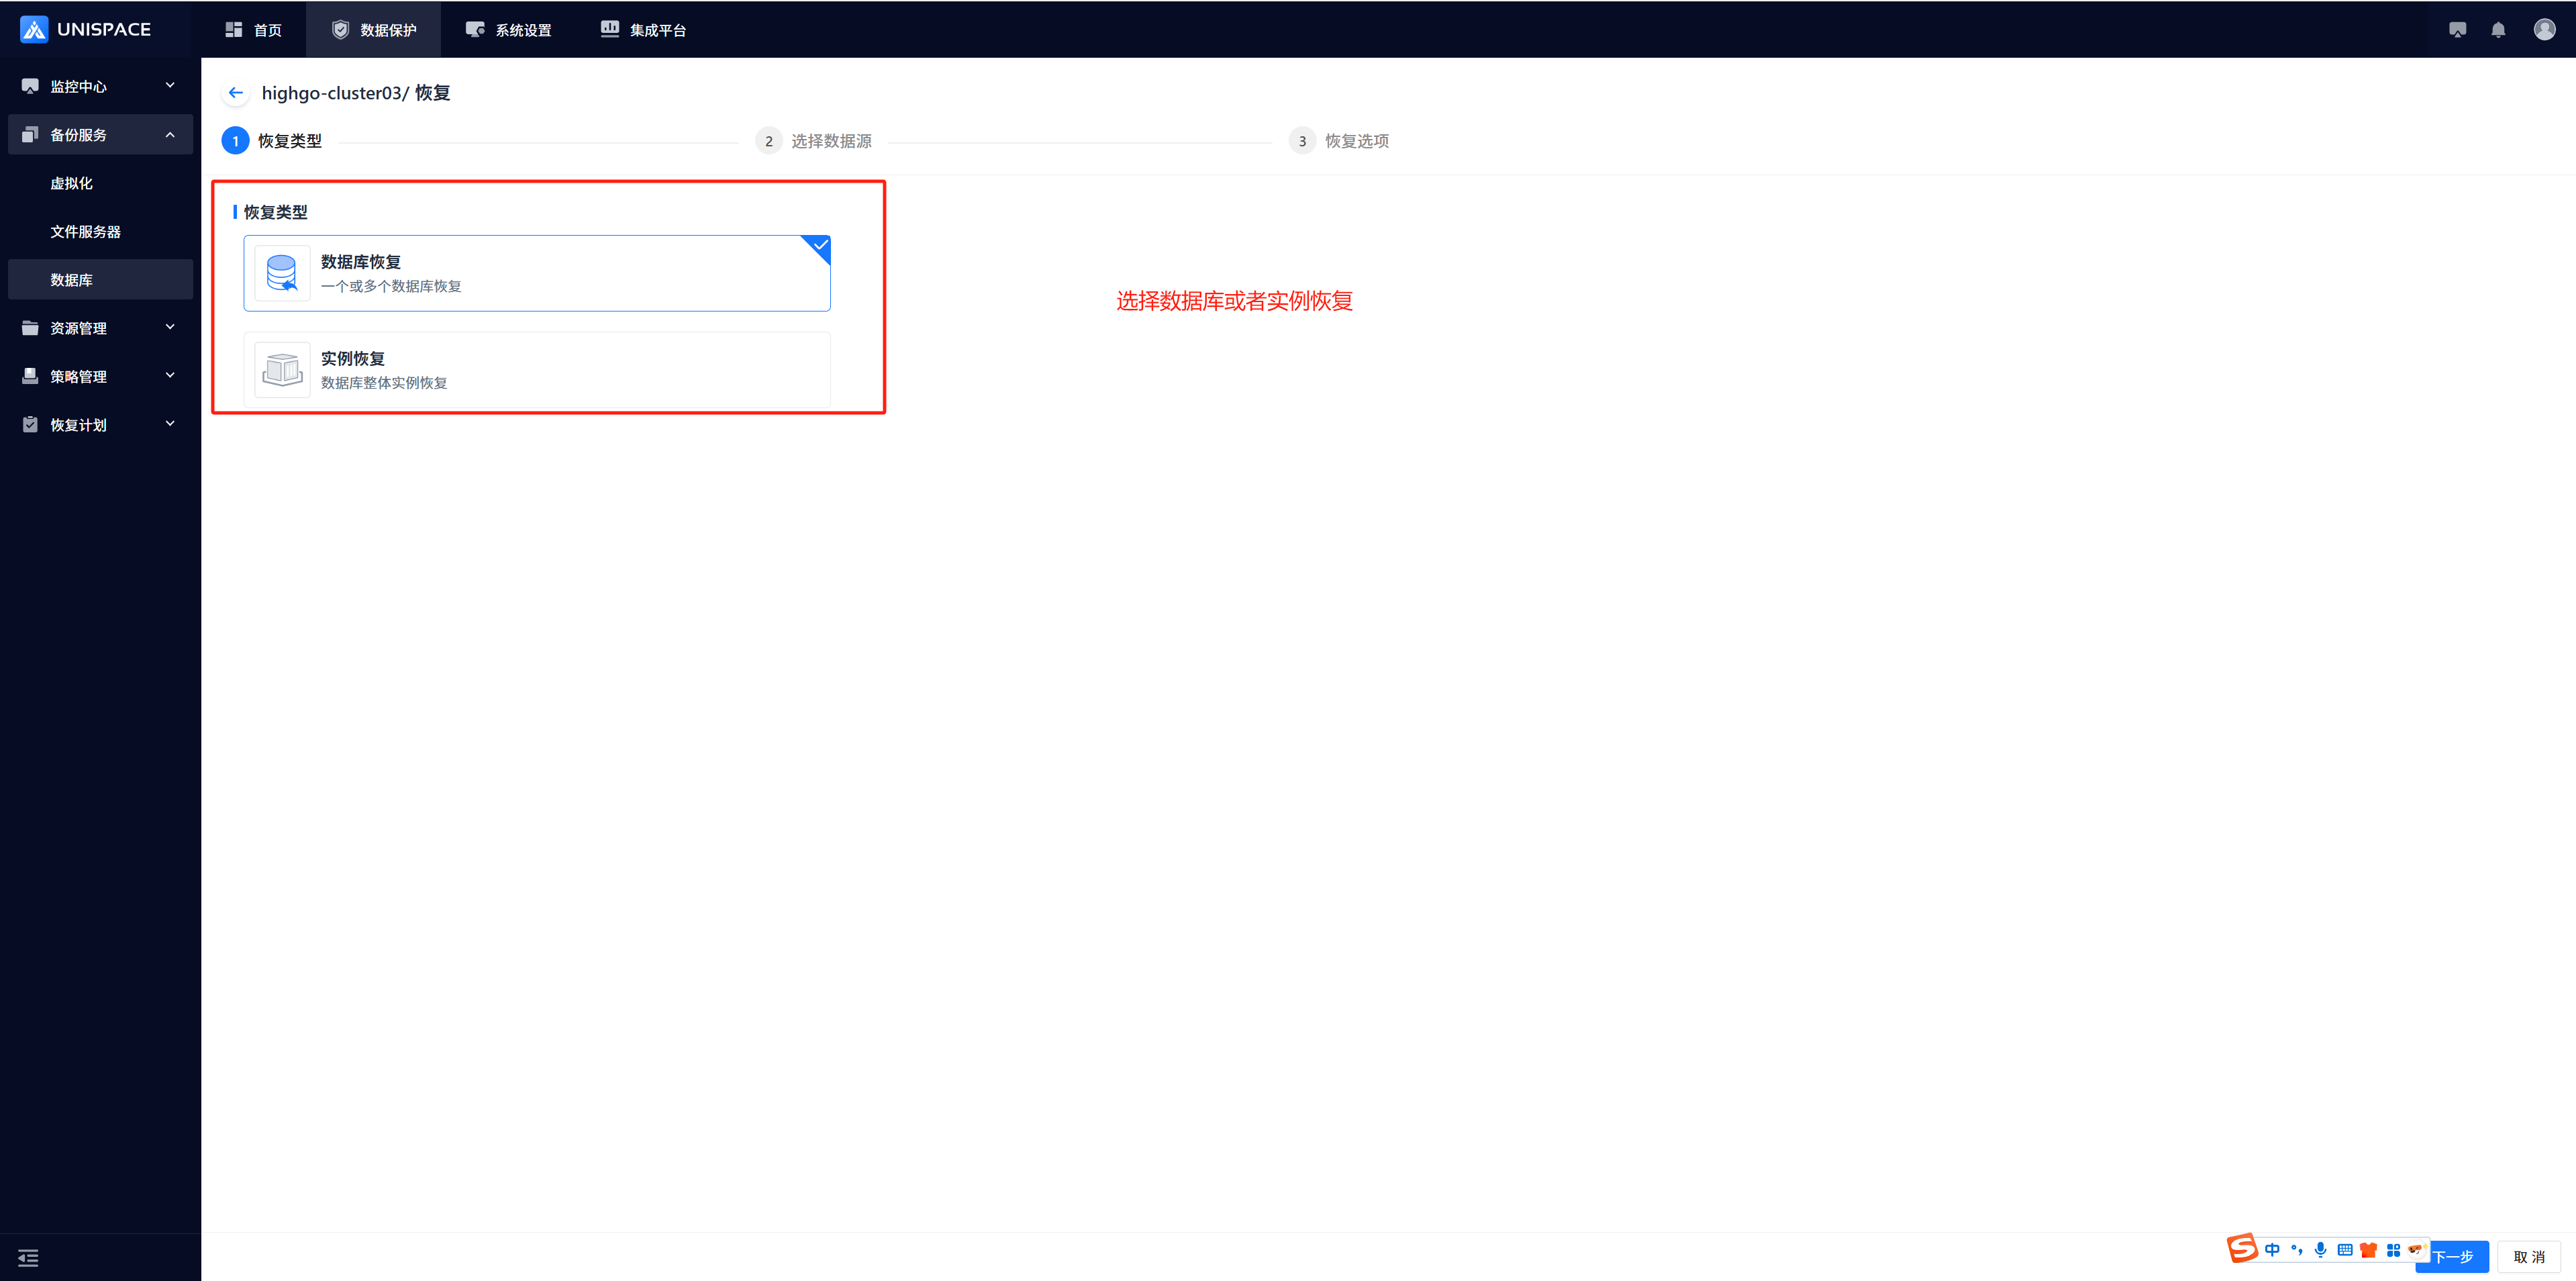 Step 3: Fill in the necessary information in the restore window and click Next.
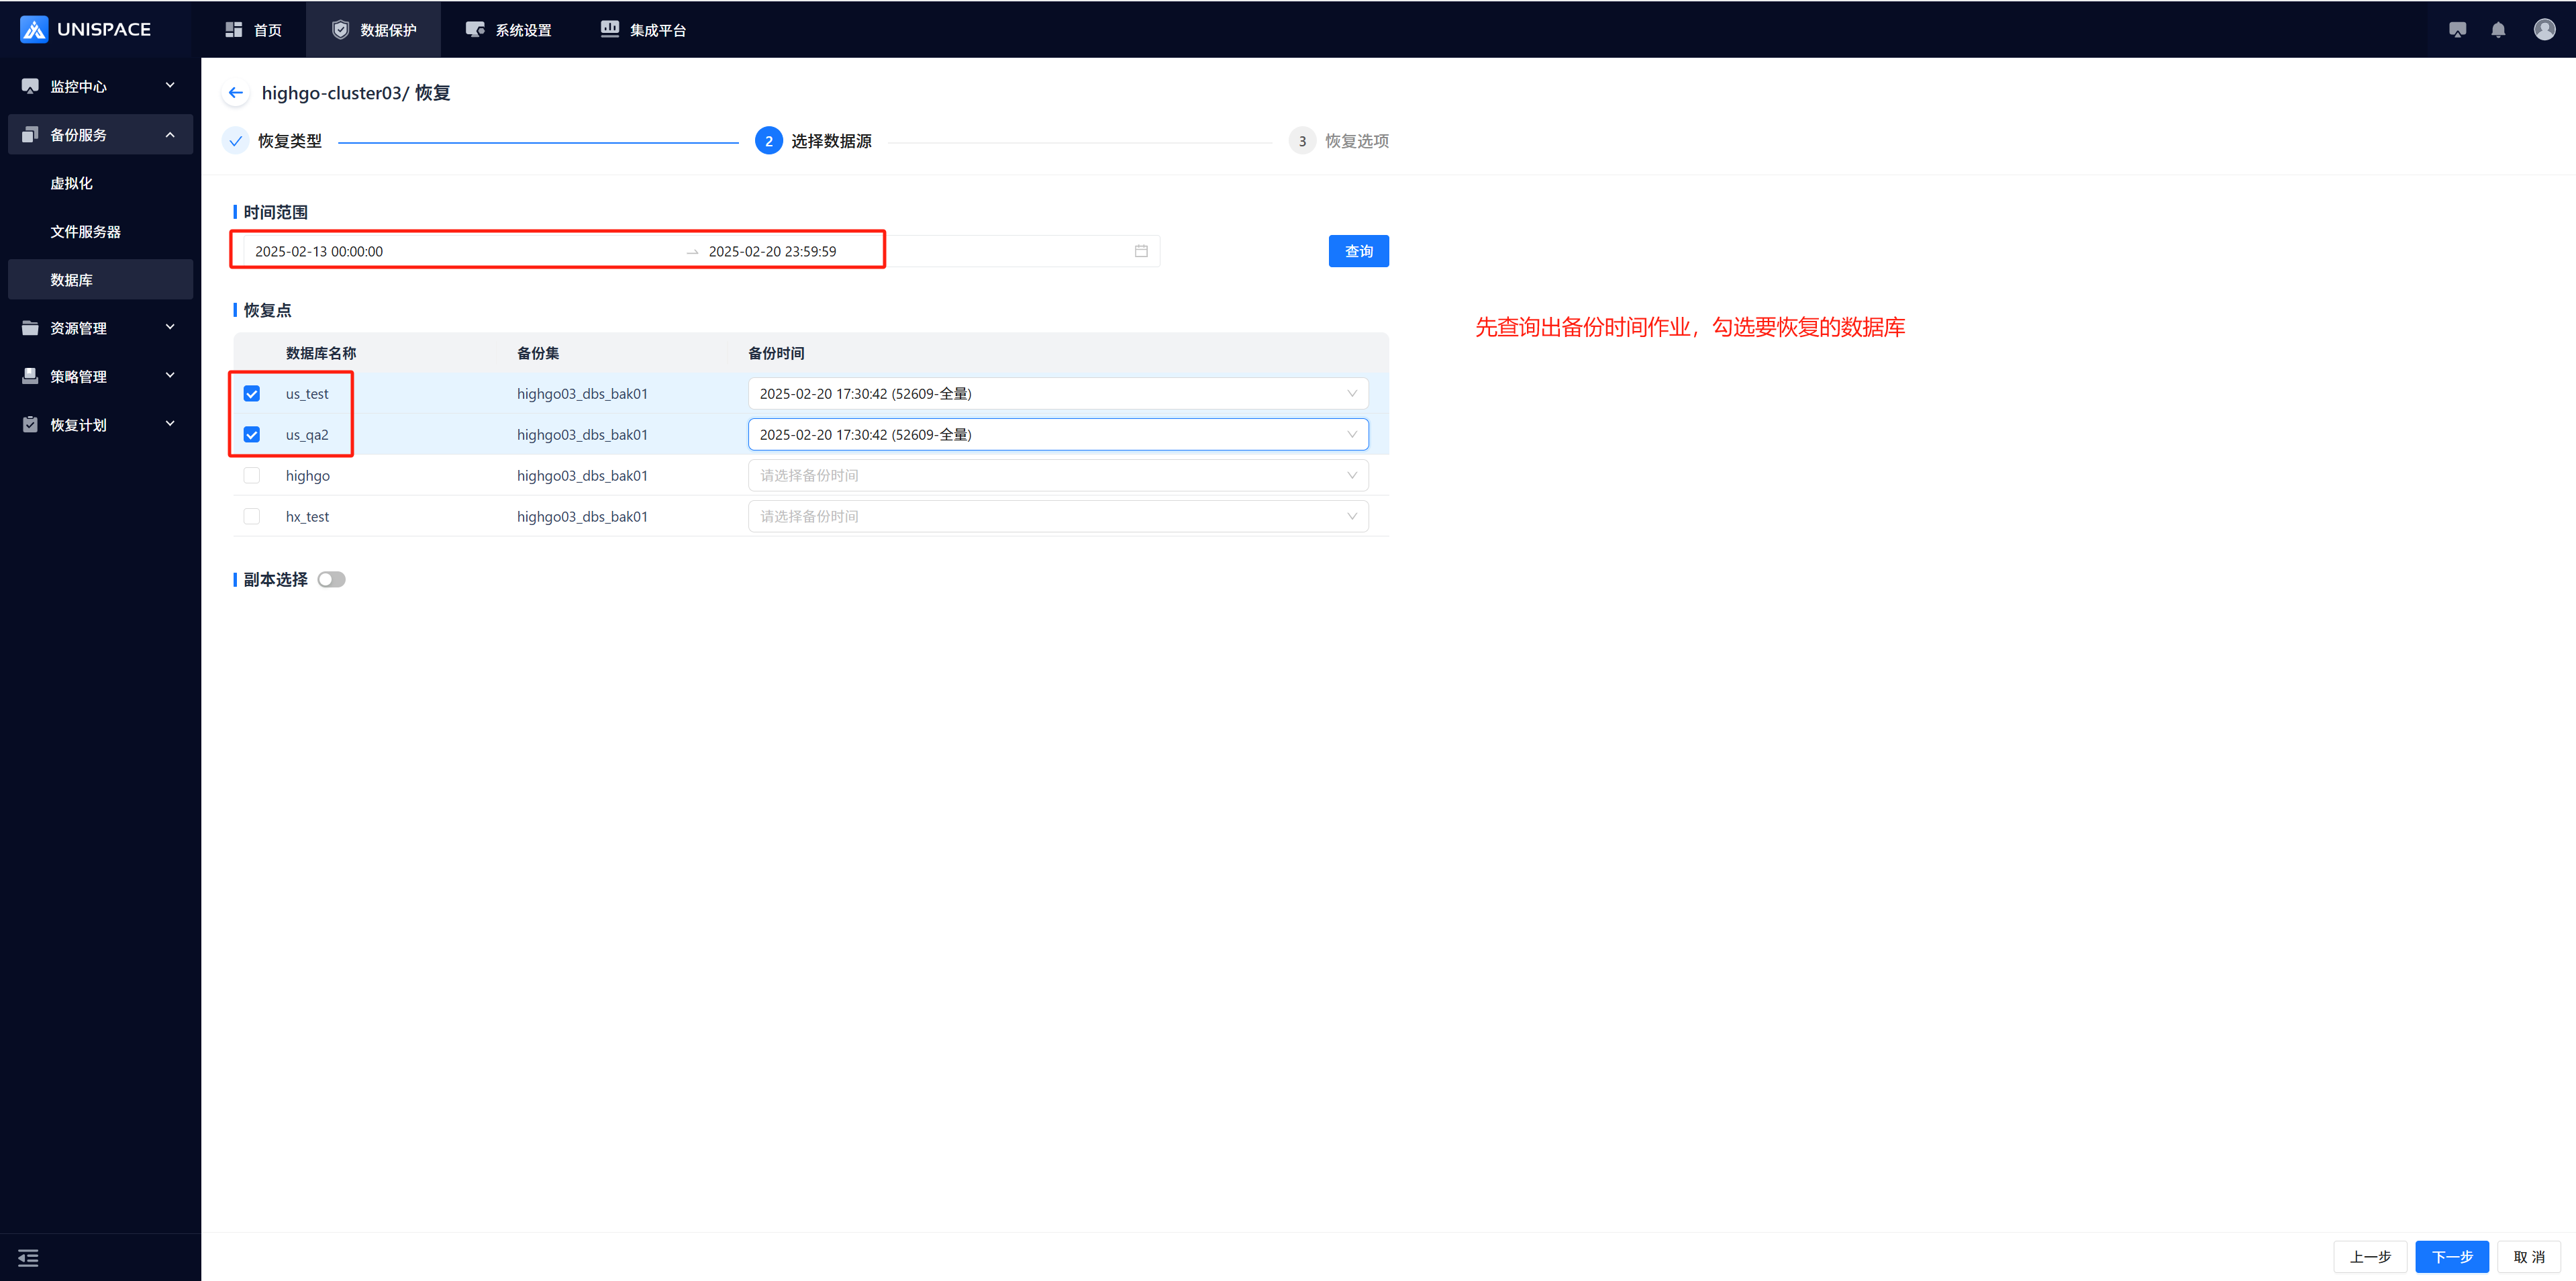 Step 4: Configure the restore options and click OK.
 Step 5: Once the job starts, check the job status under Monitoring Center - Jobs - Active Jobs.
 Step 6: After the job completes, go to Monitoring Center - Jobs - Job History to view the completed job. The status should be "Completed".
1.7 Highgo Full Instance Recovery
Prerequisites
- A full instance backup set for Highgo has been created.
Steps
Step 1: Click on the system menu Backup Service - Database - Virtual Cluster. Step 2: Click Database - Server Name under the list, then Virtual Cluster - Actions - Restore.
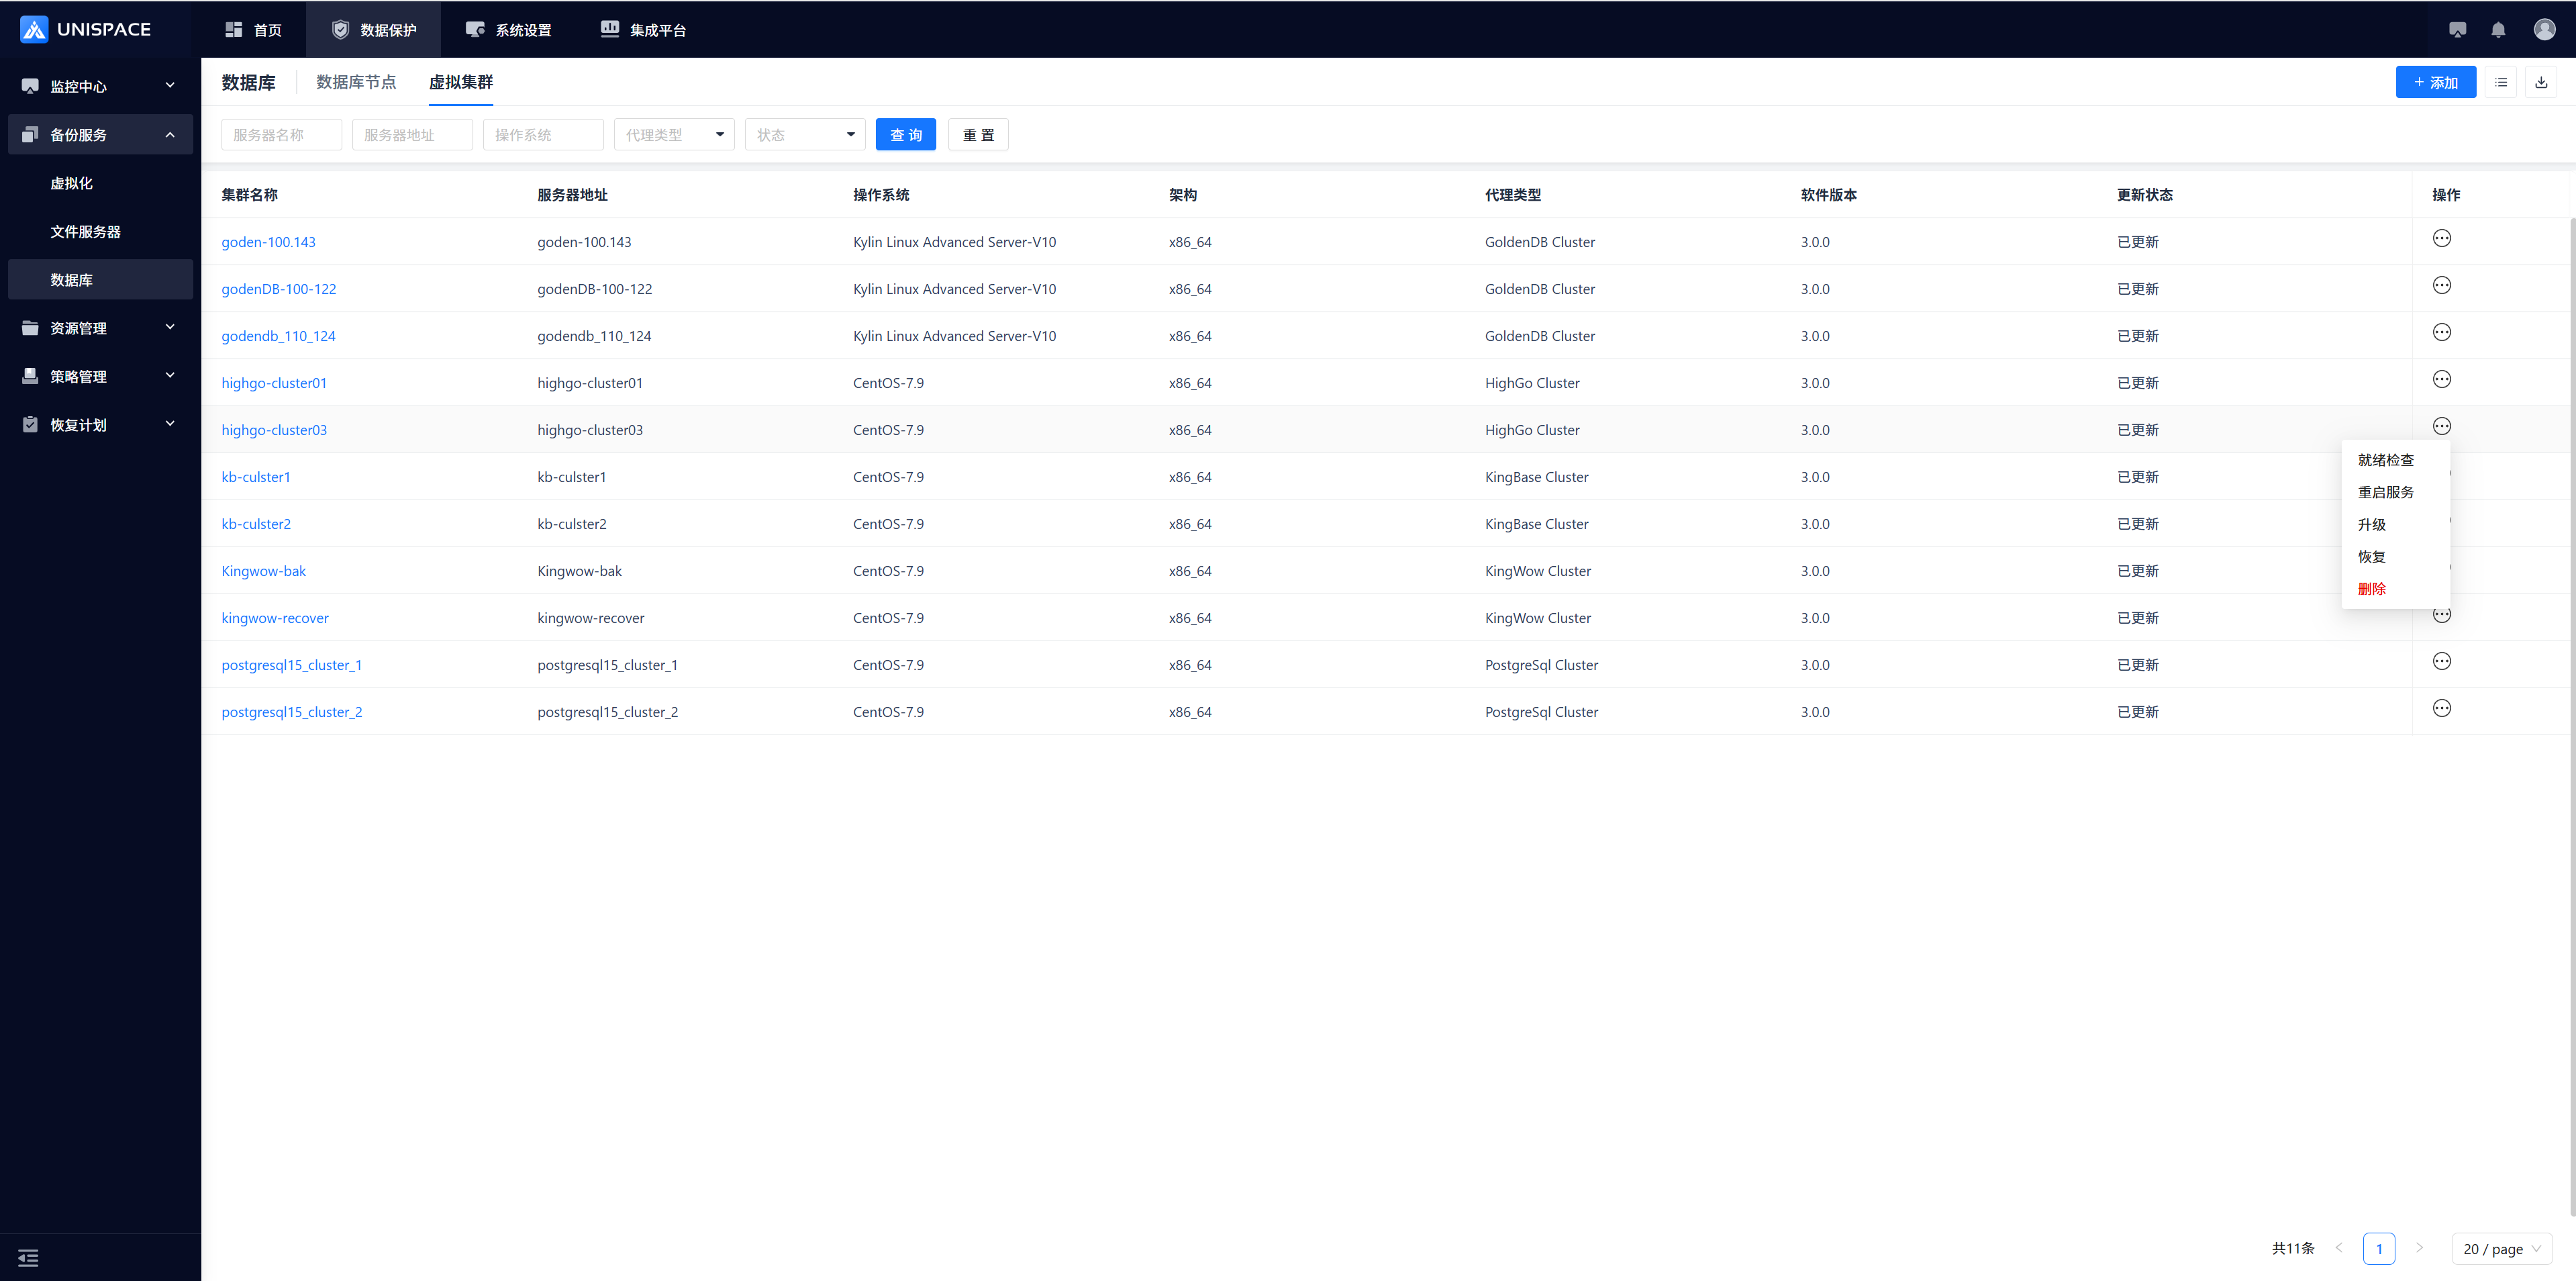 Step 3: A restore window will pop up. Select "Instance Restore" and click Next.
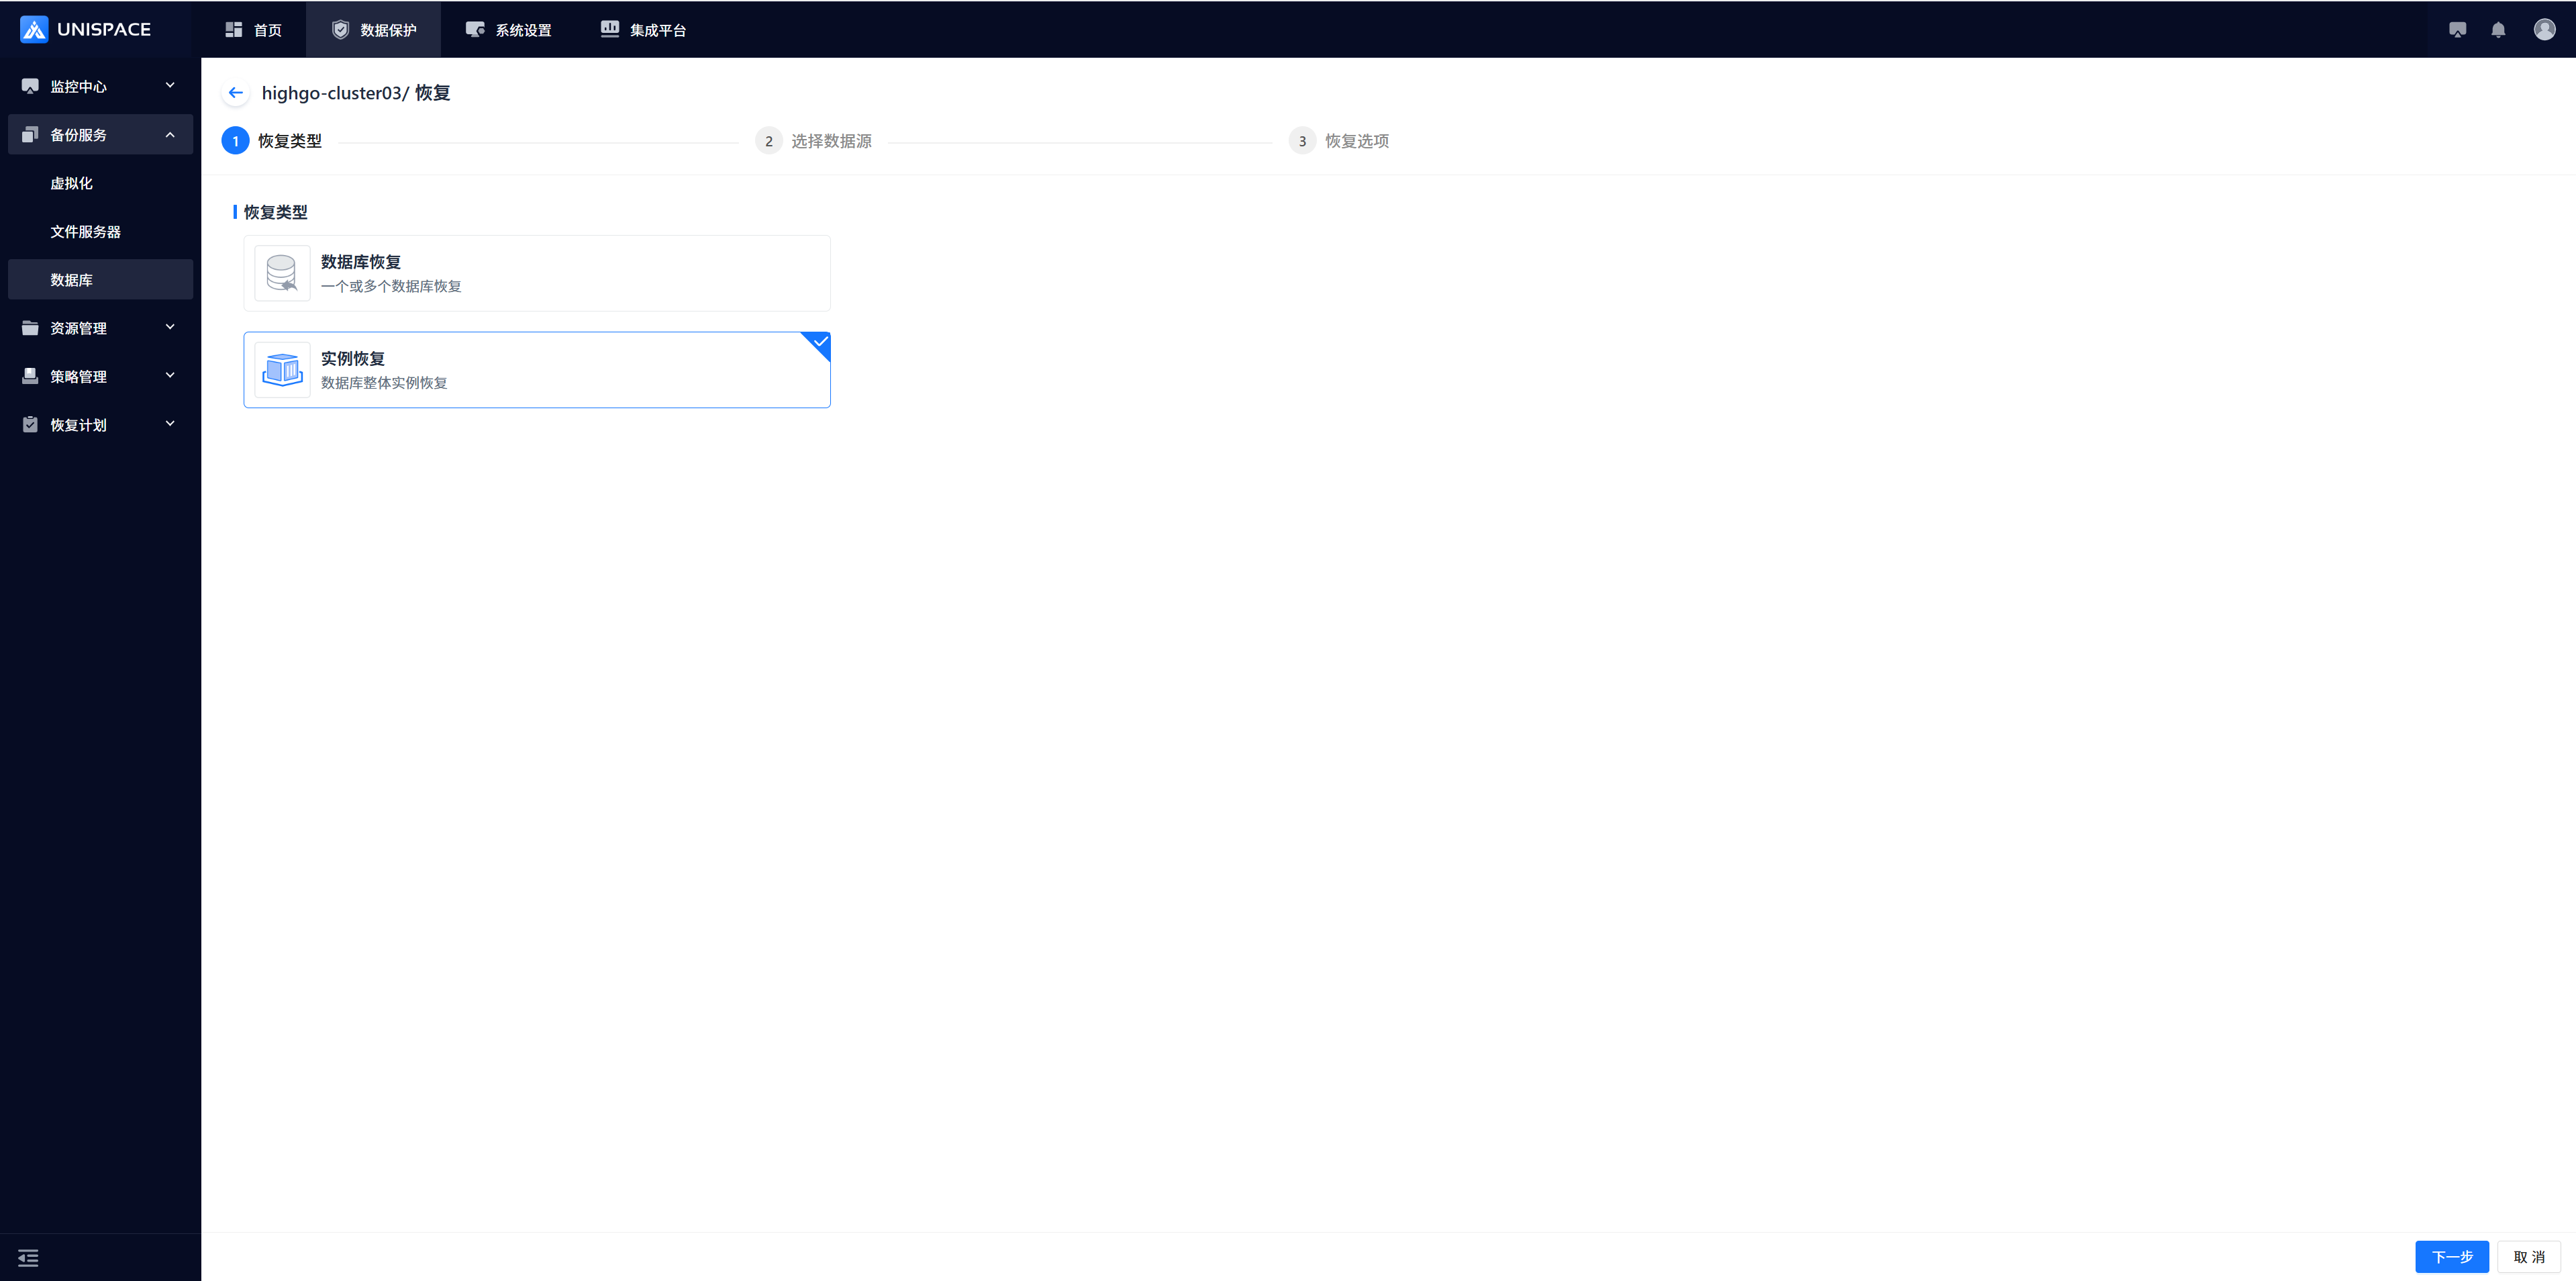 Choose a restore point. You can select "Recent Time" (restore points from the last cycle) or search for a restore point within a specific time range. Select the Job ID of the chosen restore point and click Next.
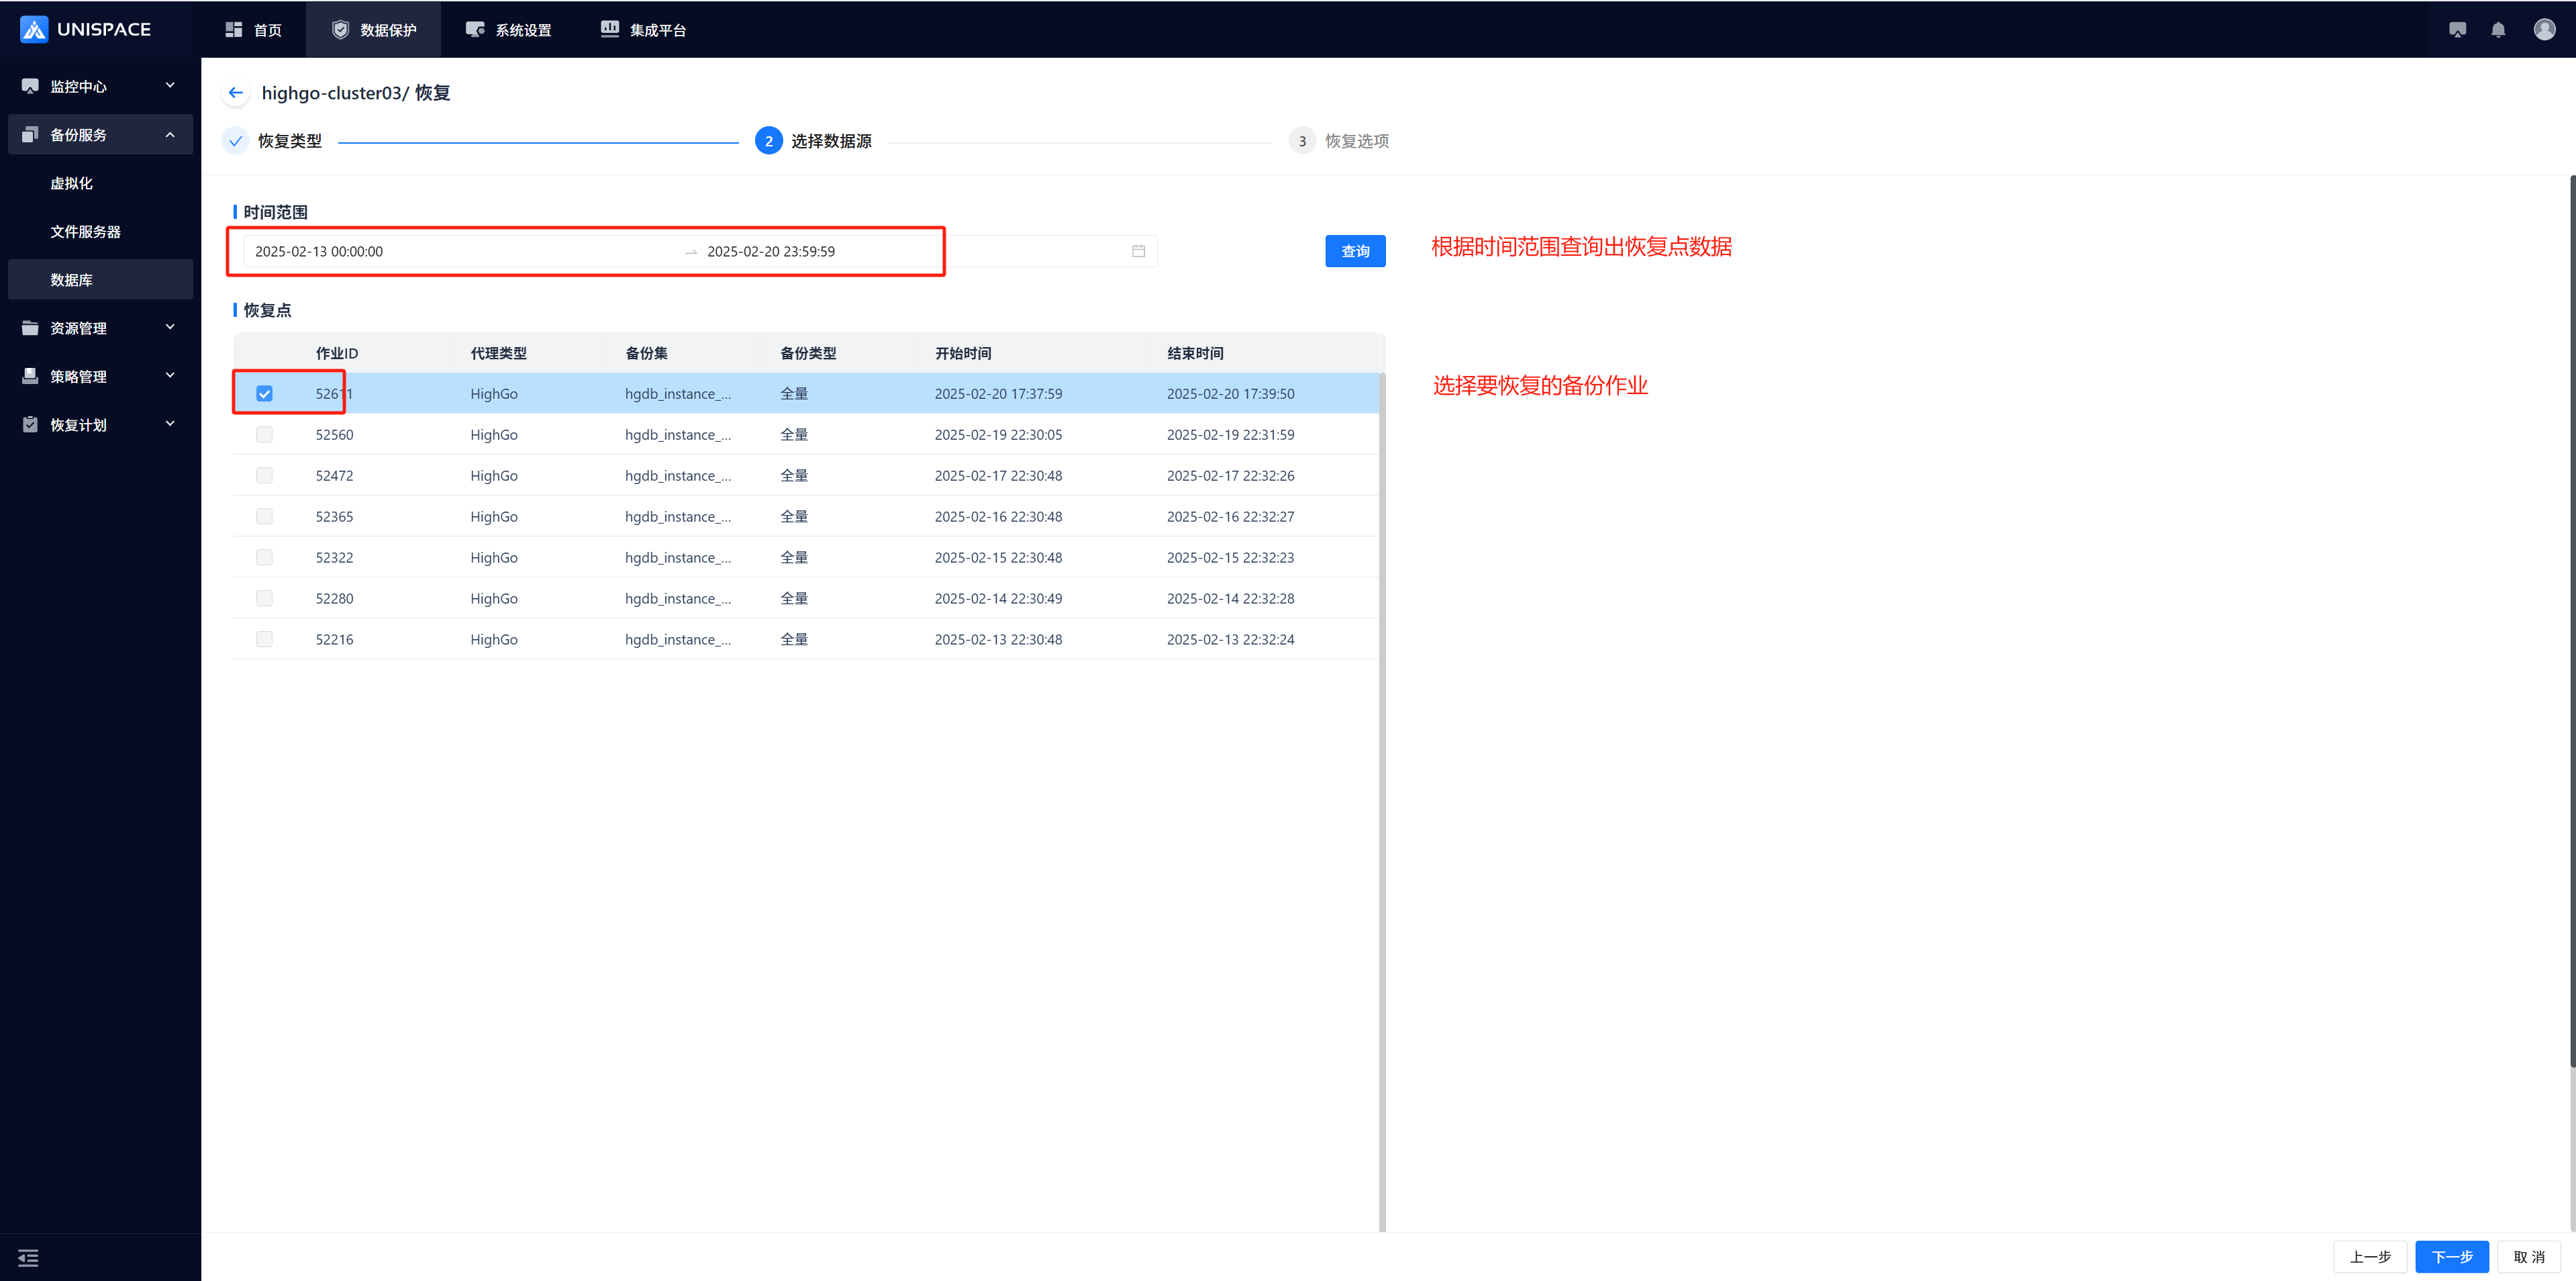 Step 4: Fill out the restore options form and click OK.
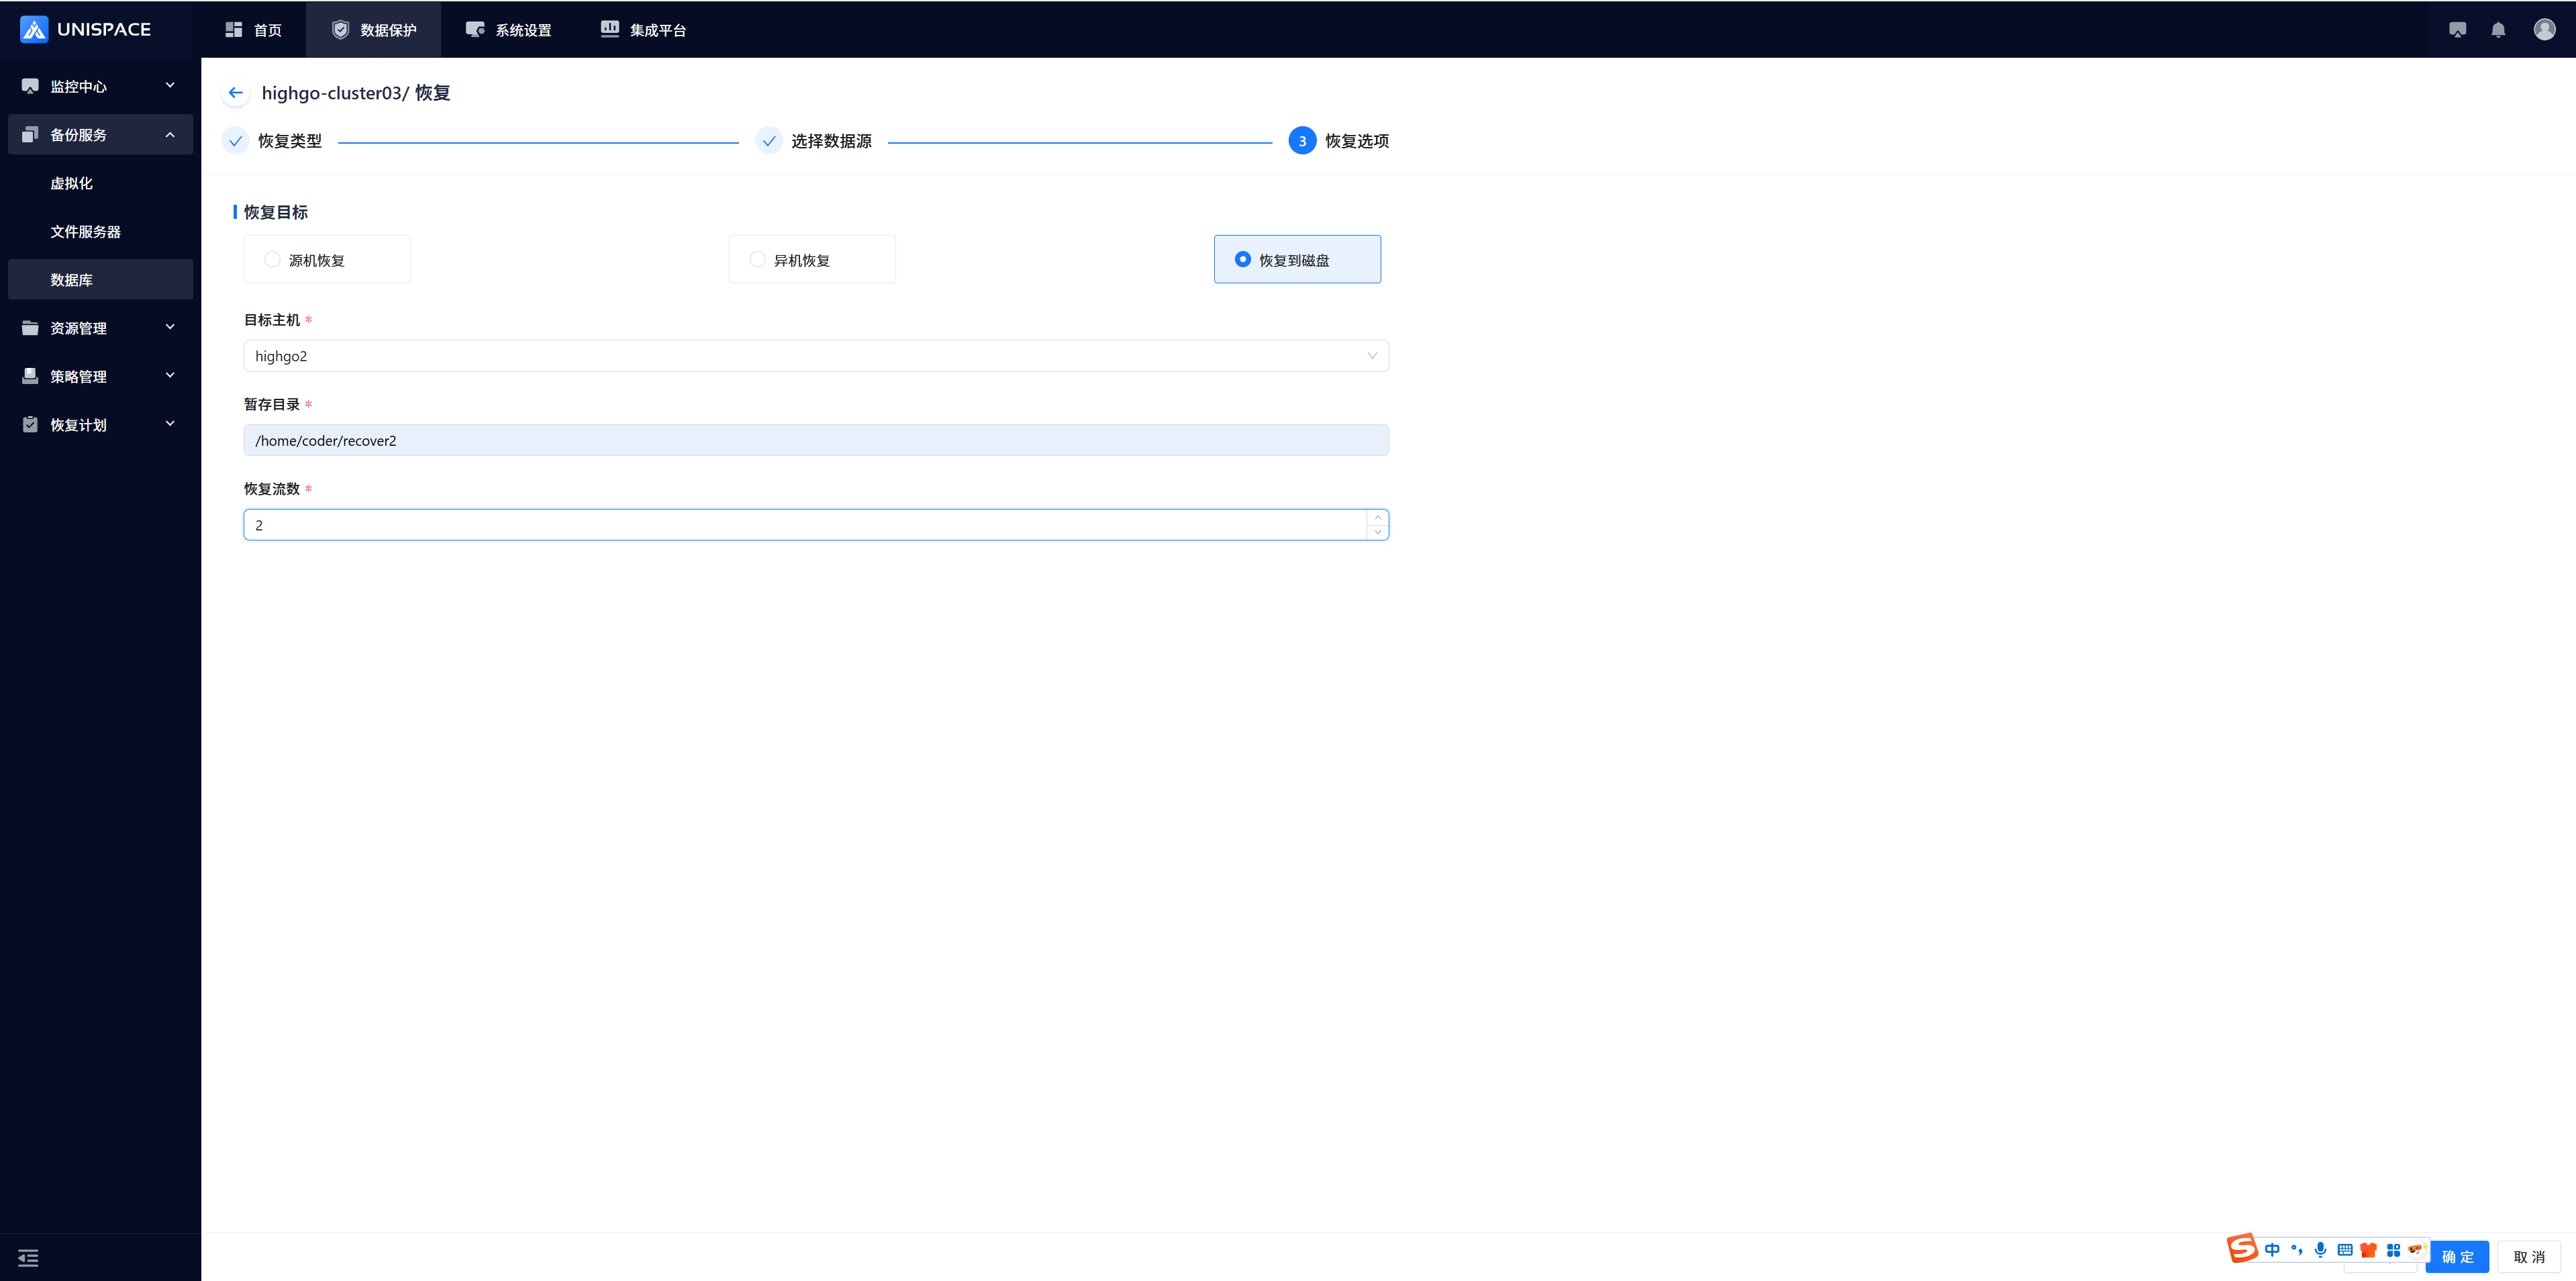 Step 5: Once the job starts successfully, go to Monitoring Center - Jobs - Active Jobs to view the job.
 Step 6: After the job finishes, go to Monitoring Center - Jobs - Job History to see the job and its status.
2.1 Create Highgo Instance (Standalone)
Prerequisites
- Created a user.
- Created a storage repository.
- Created a service plan.
- Have an accessible Highgo service installed.
Steps
Step 1: Click the system menu Backup Service - Database list and select the "Server Name" to enter the database instance page.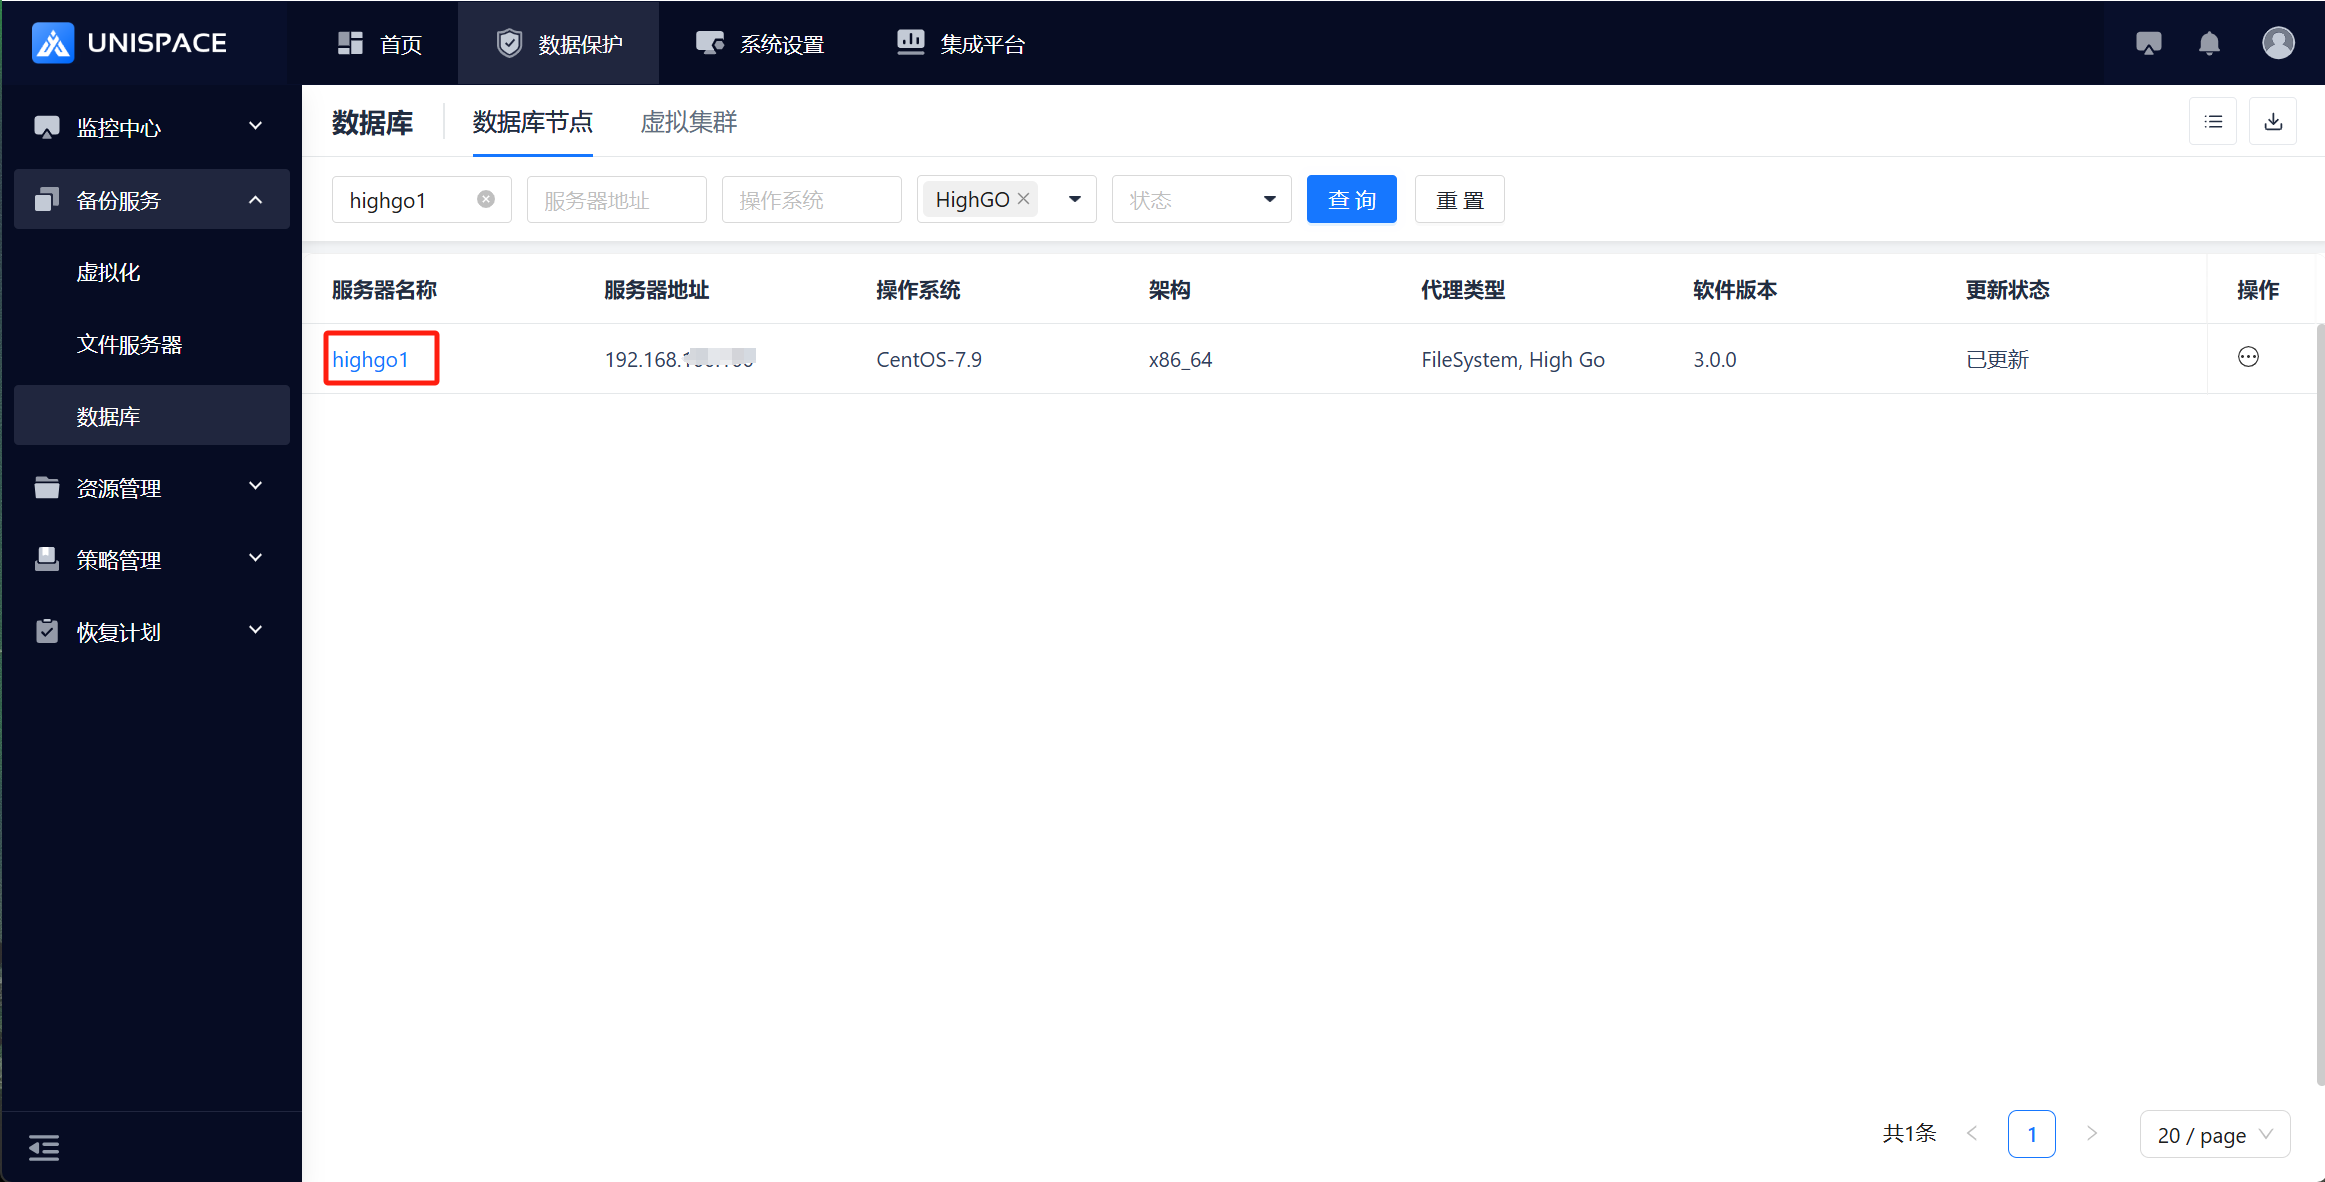 Step 2: Click Instance.
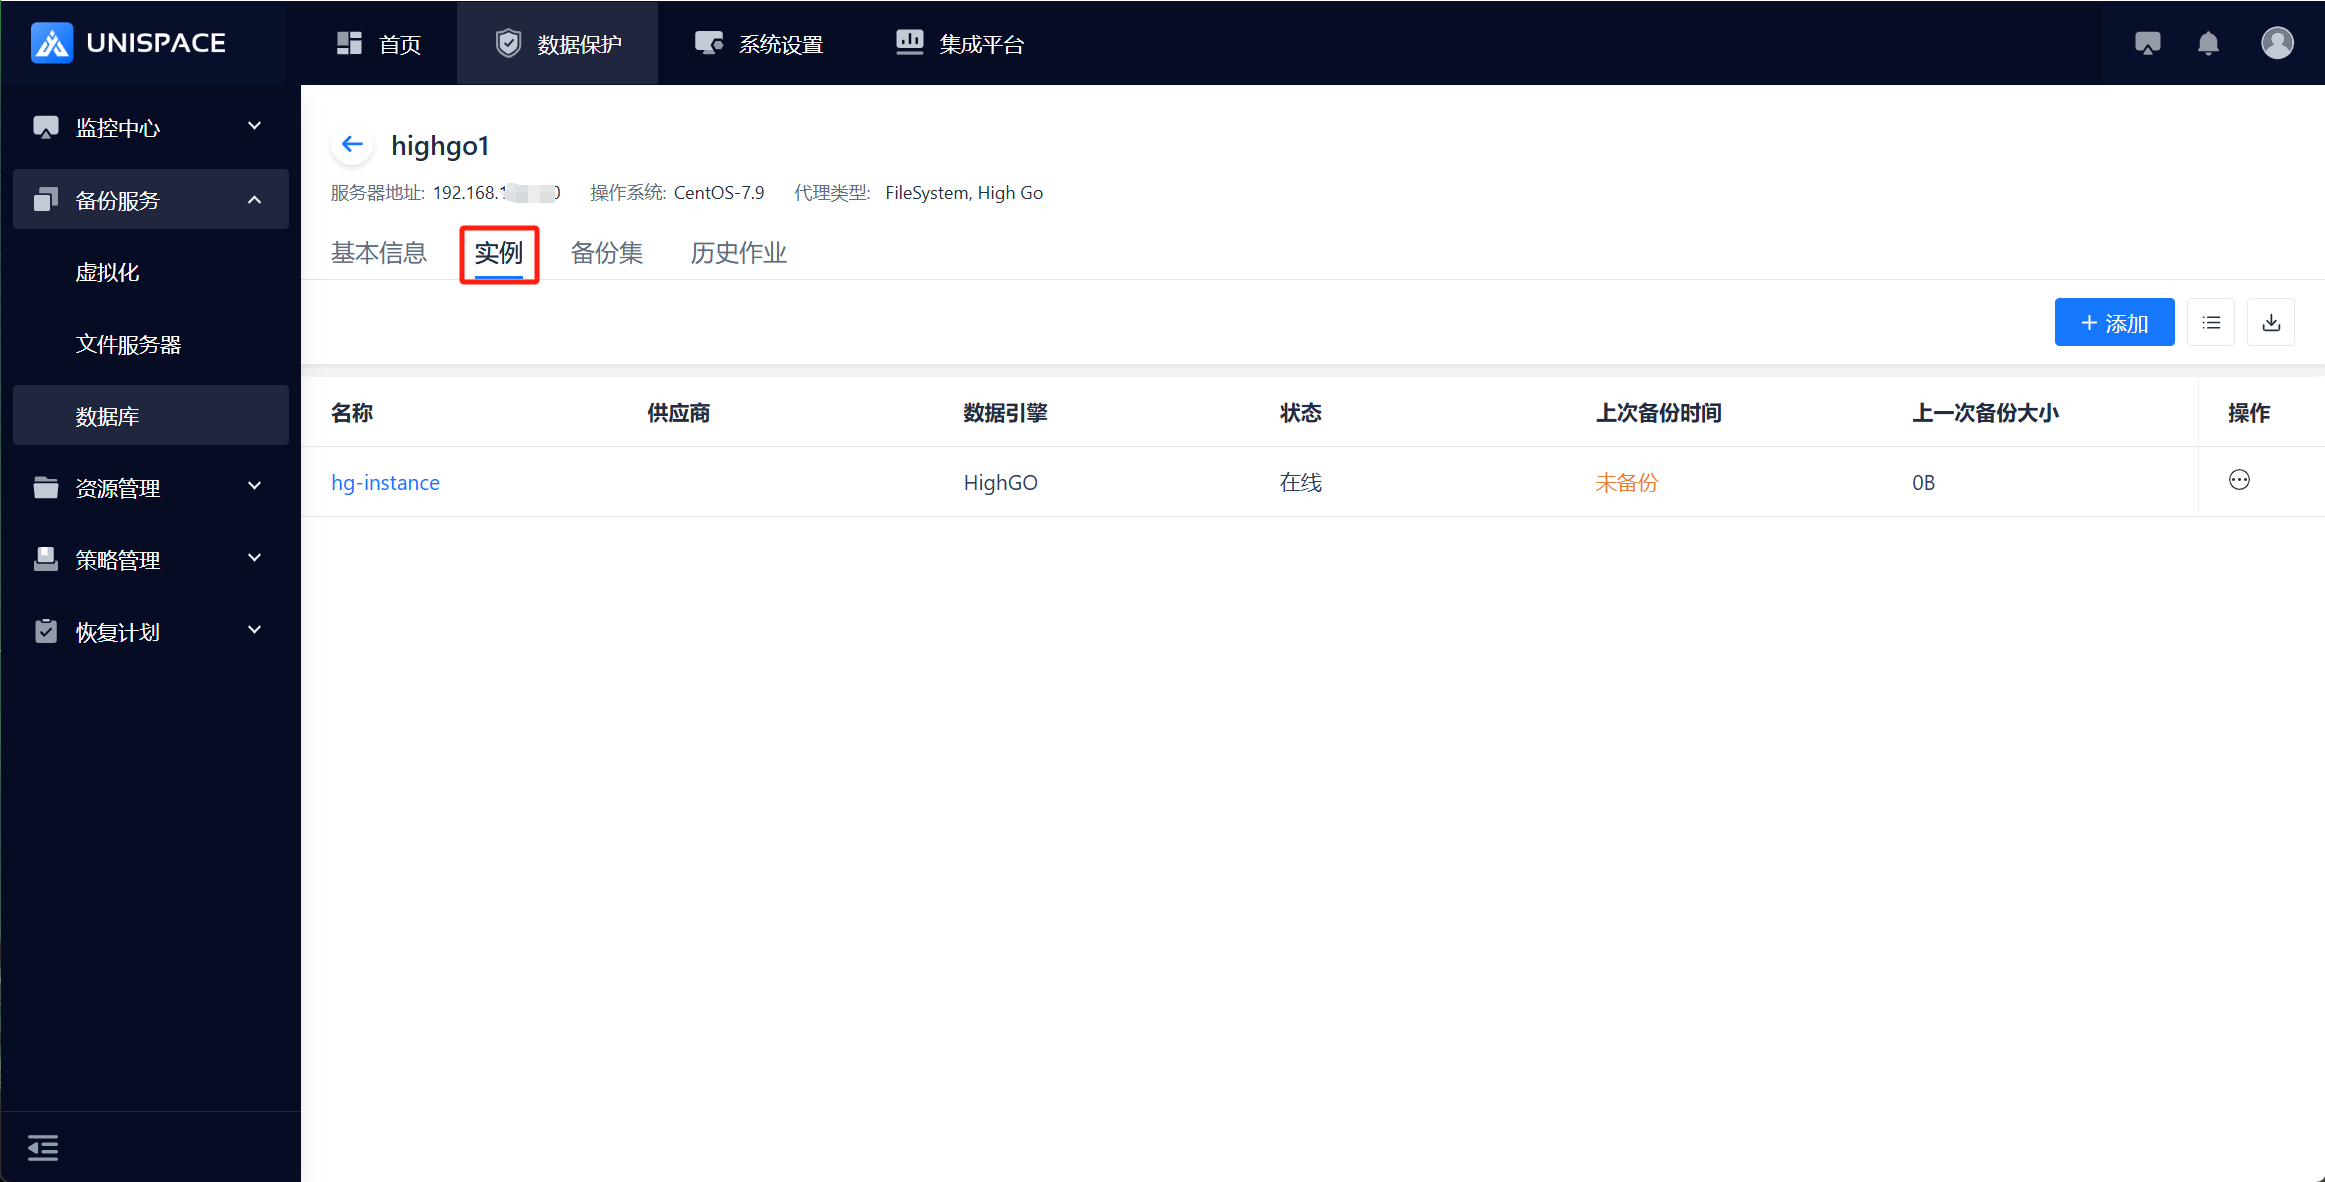 Step 3: Click the Add button in the top right corner of Instance to open the following popup:
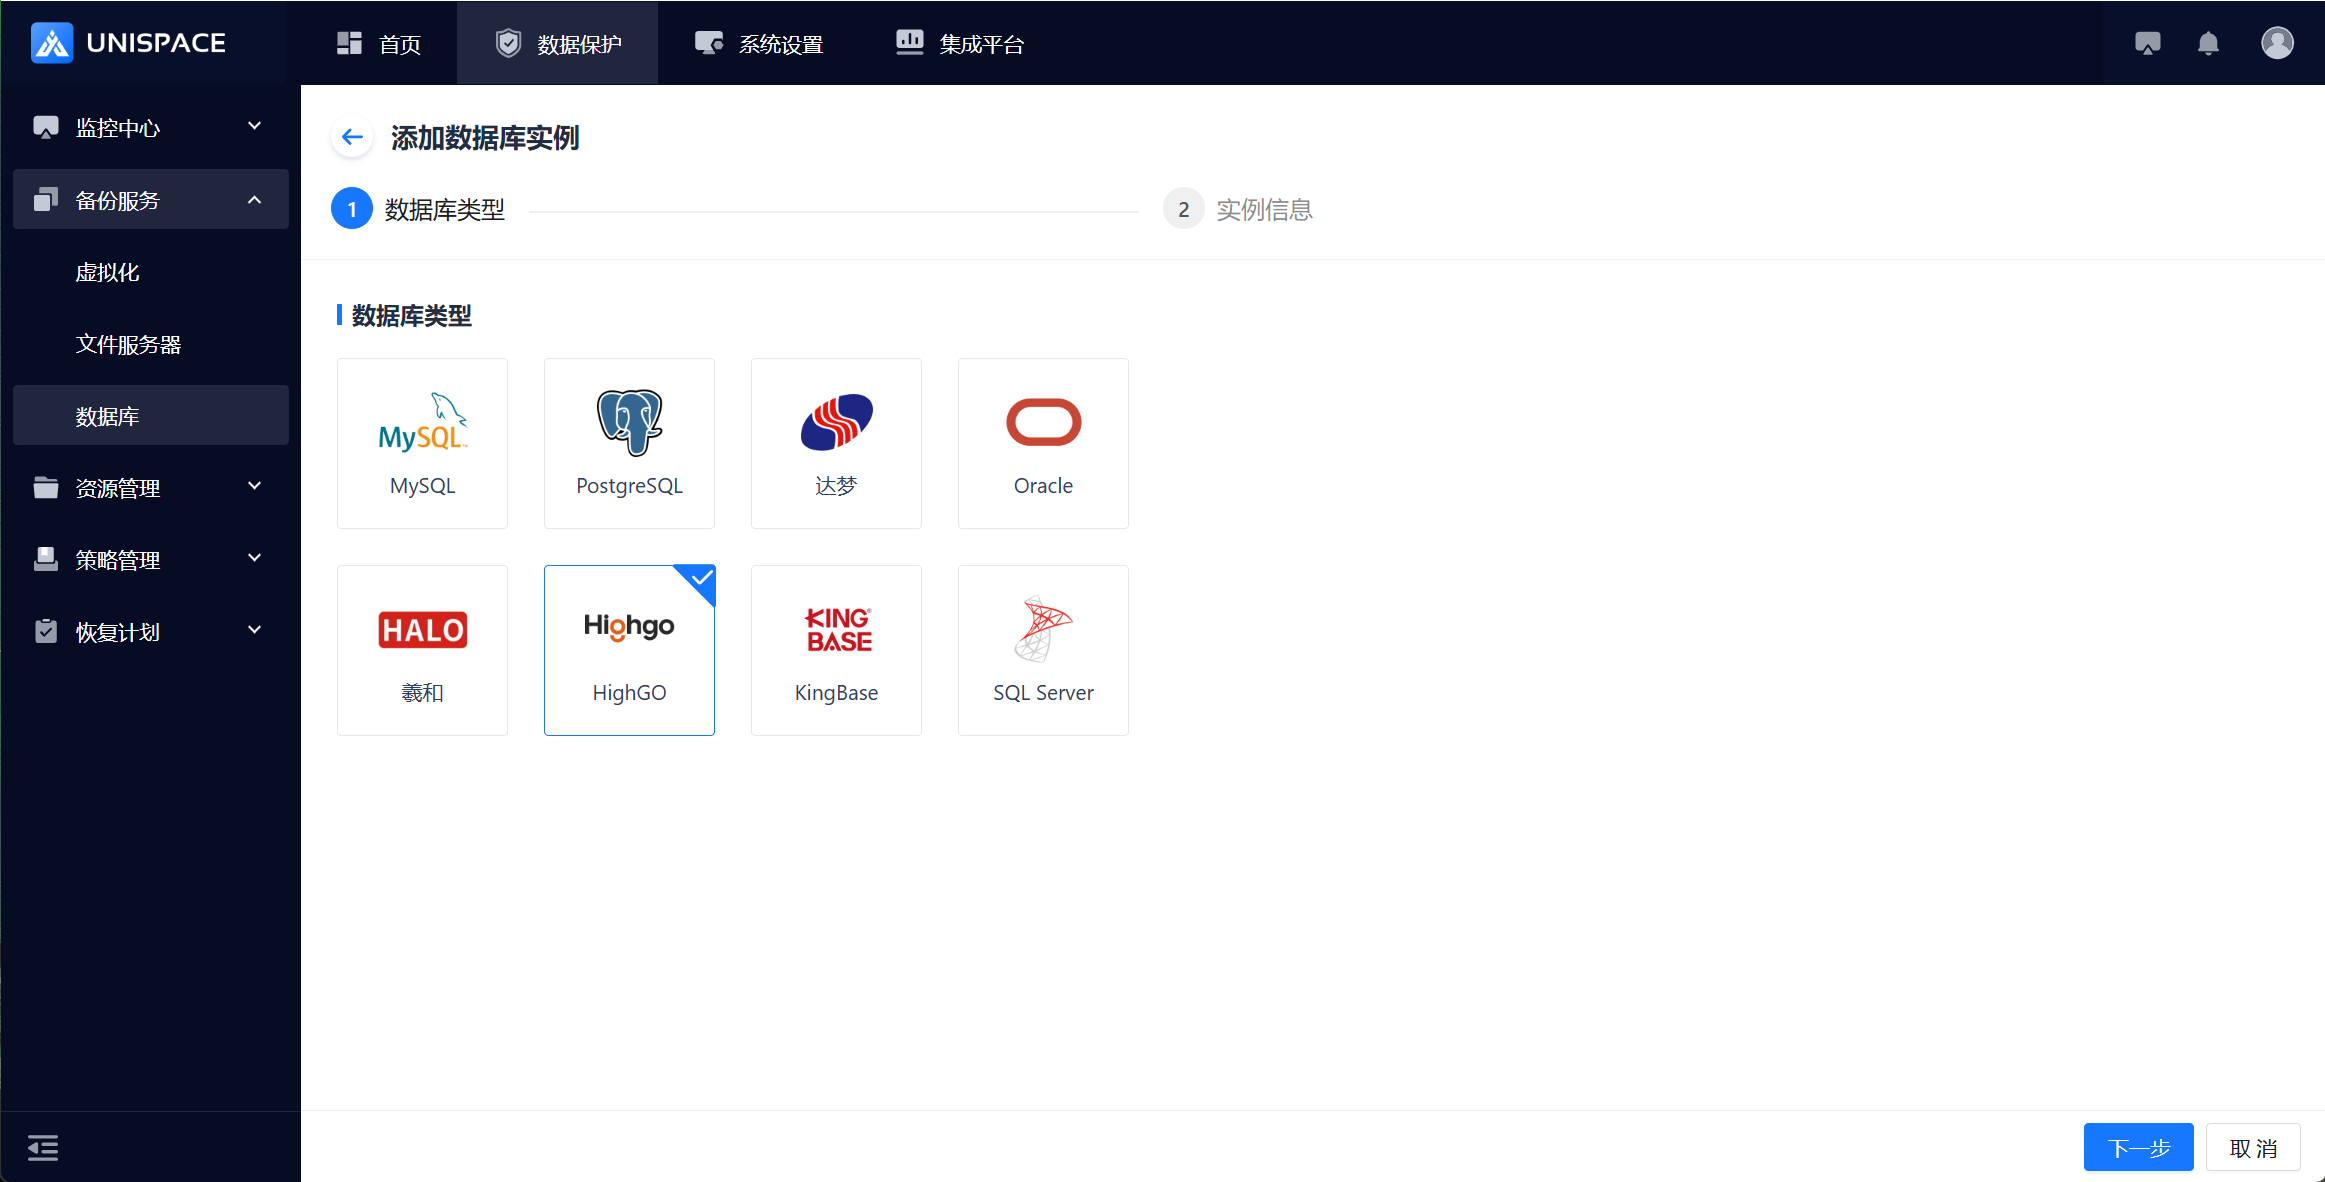
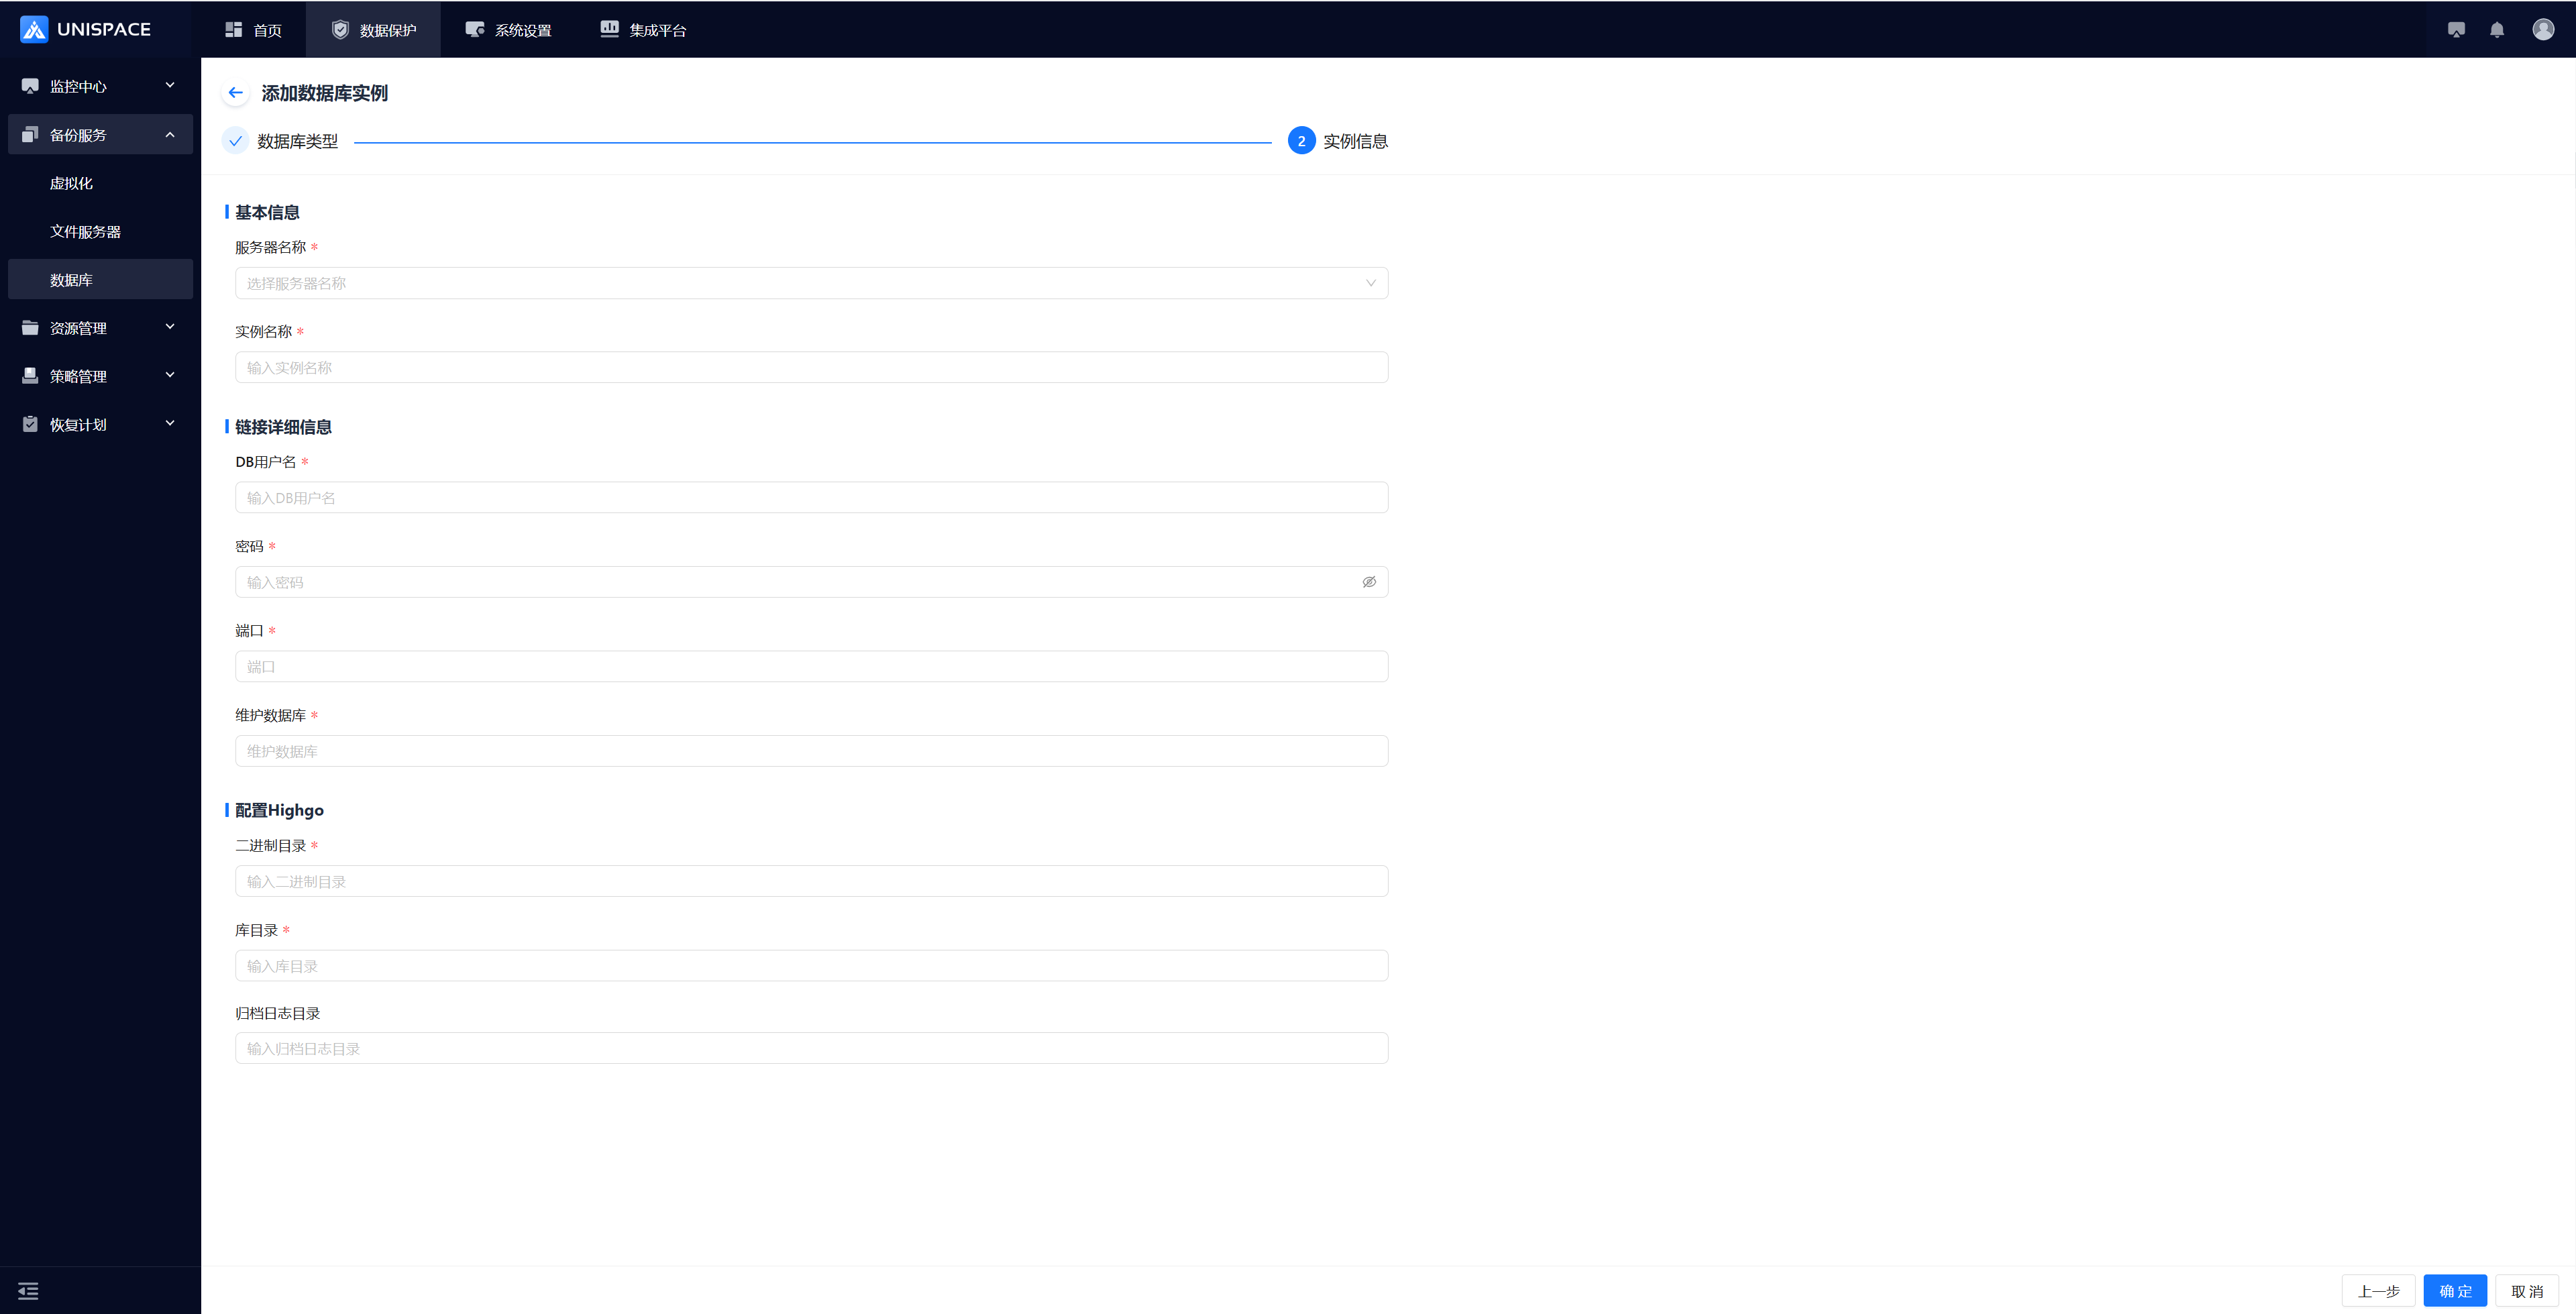 Step 4: Fill in the required parameters as shown below:
| Parameter Name | Description | Setting Principle |
|---|---|---|
| Server Name | Drop-down list, required | Select the server name where Highgo is installed |
| Instance Name | Text input, required, customizable | No length or special character limit temporarily |
| DB Username | Username input, required | Enter the Highgo username |
| Password | Password input, required | Enter the Highgo password |
| Port | Input box, required | Default port number: 5866 |
| Maintenance DB | Input box, required | Default: Highgo |
| Binary Directory | Input box, required | Enter the correct Highgo binary directory |
| Database Directory | Input box, required | Enter the correct Highgo database directory |
| Archive Log Directory | Path format input, optional | Customizable |
Step 5: After filling in the parameters, click OK. A message will appear indicating that the addition was successful.
2.2 Create Highgo Backup Object Set
Prerequisites
- A Highgo instance has been created
Steps
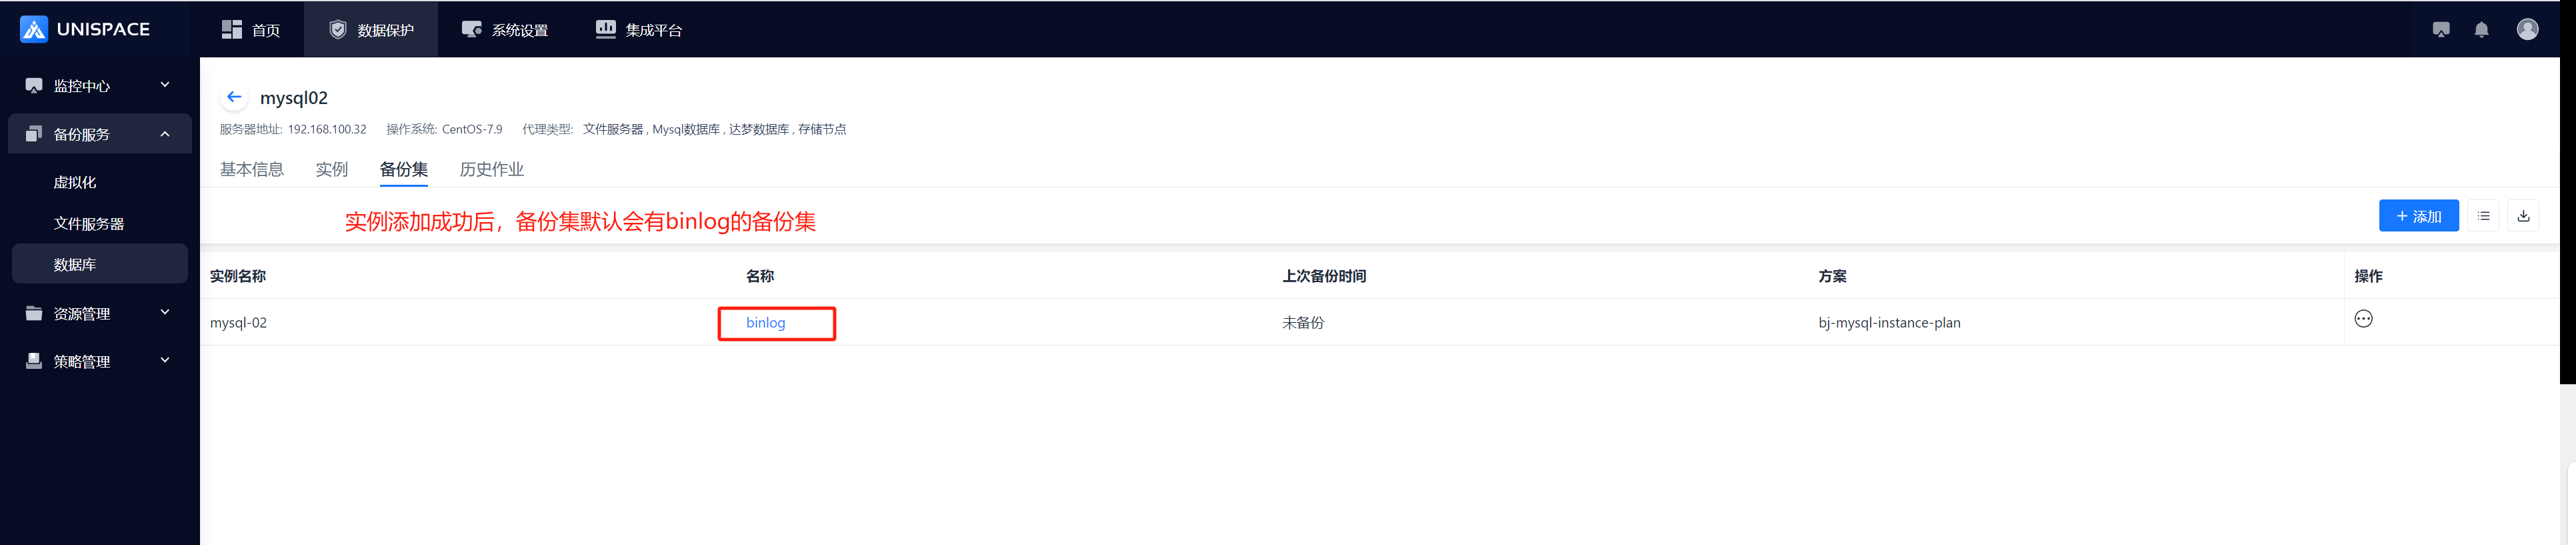
Step 1: Click the system menu Backup Service - Database - Server Name to enter the Backup Set list. Step 2: Click the Add button in the top right corner of Backup Set to open the popup:
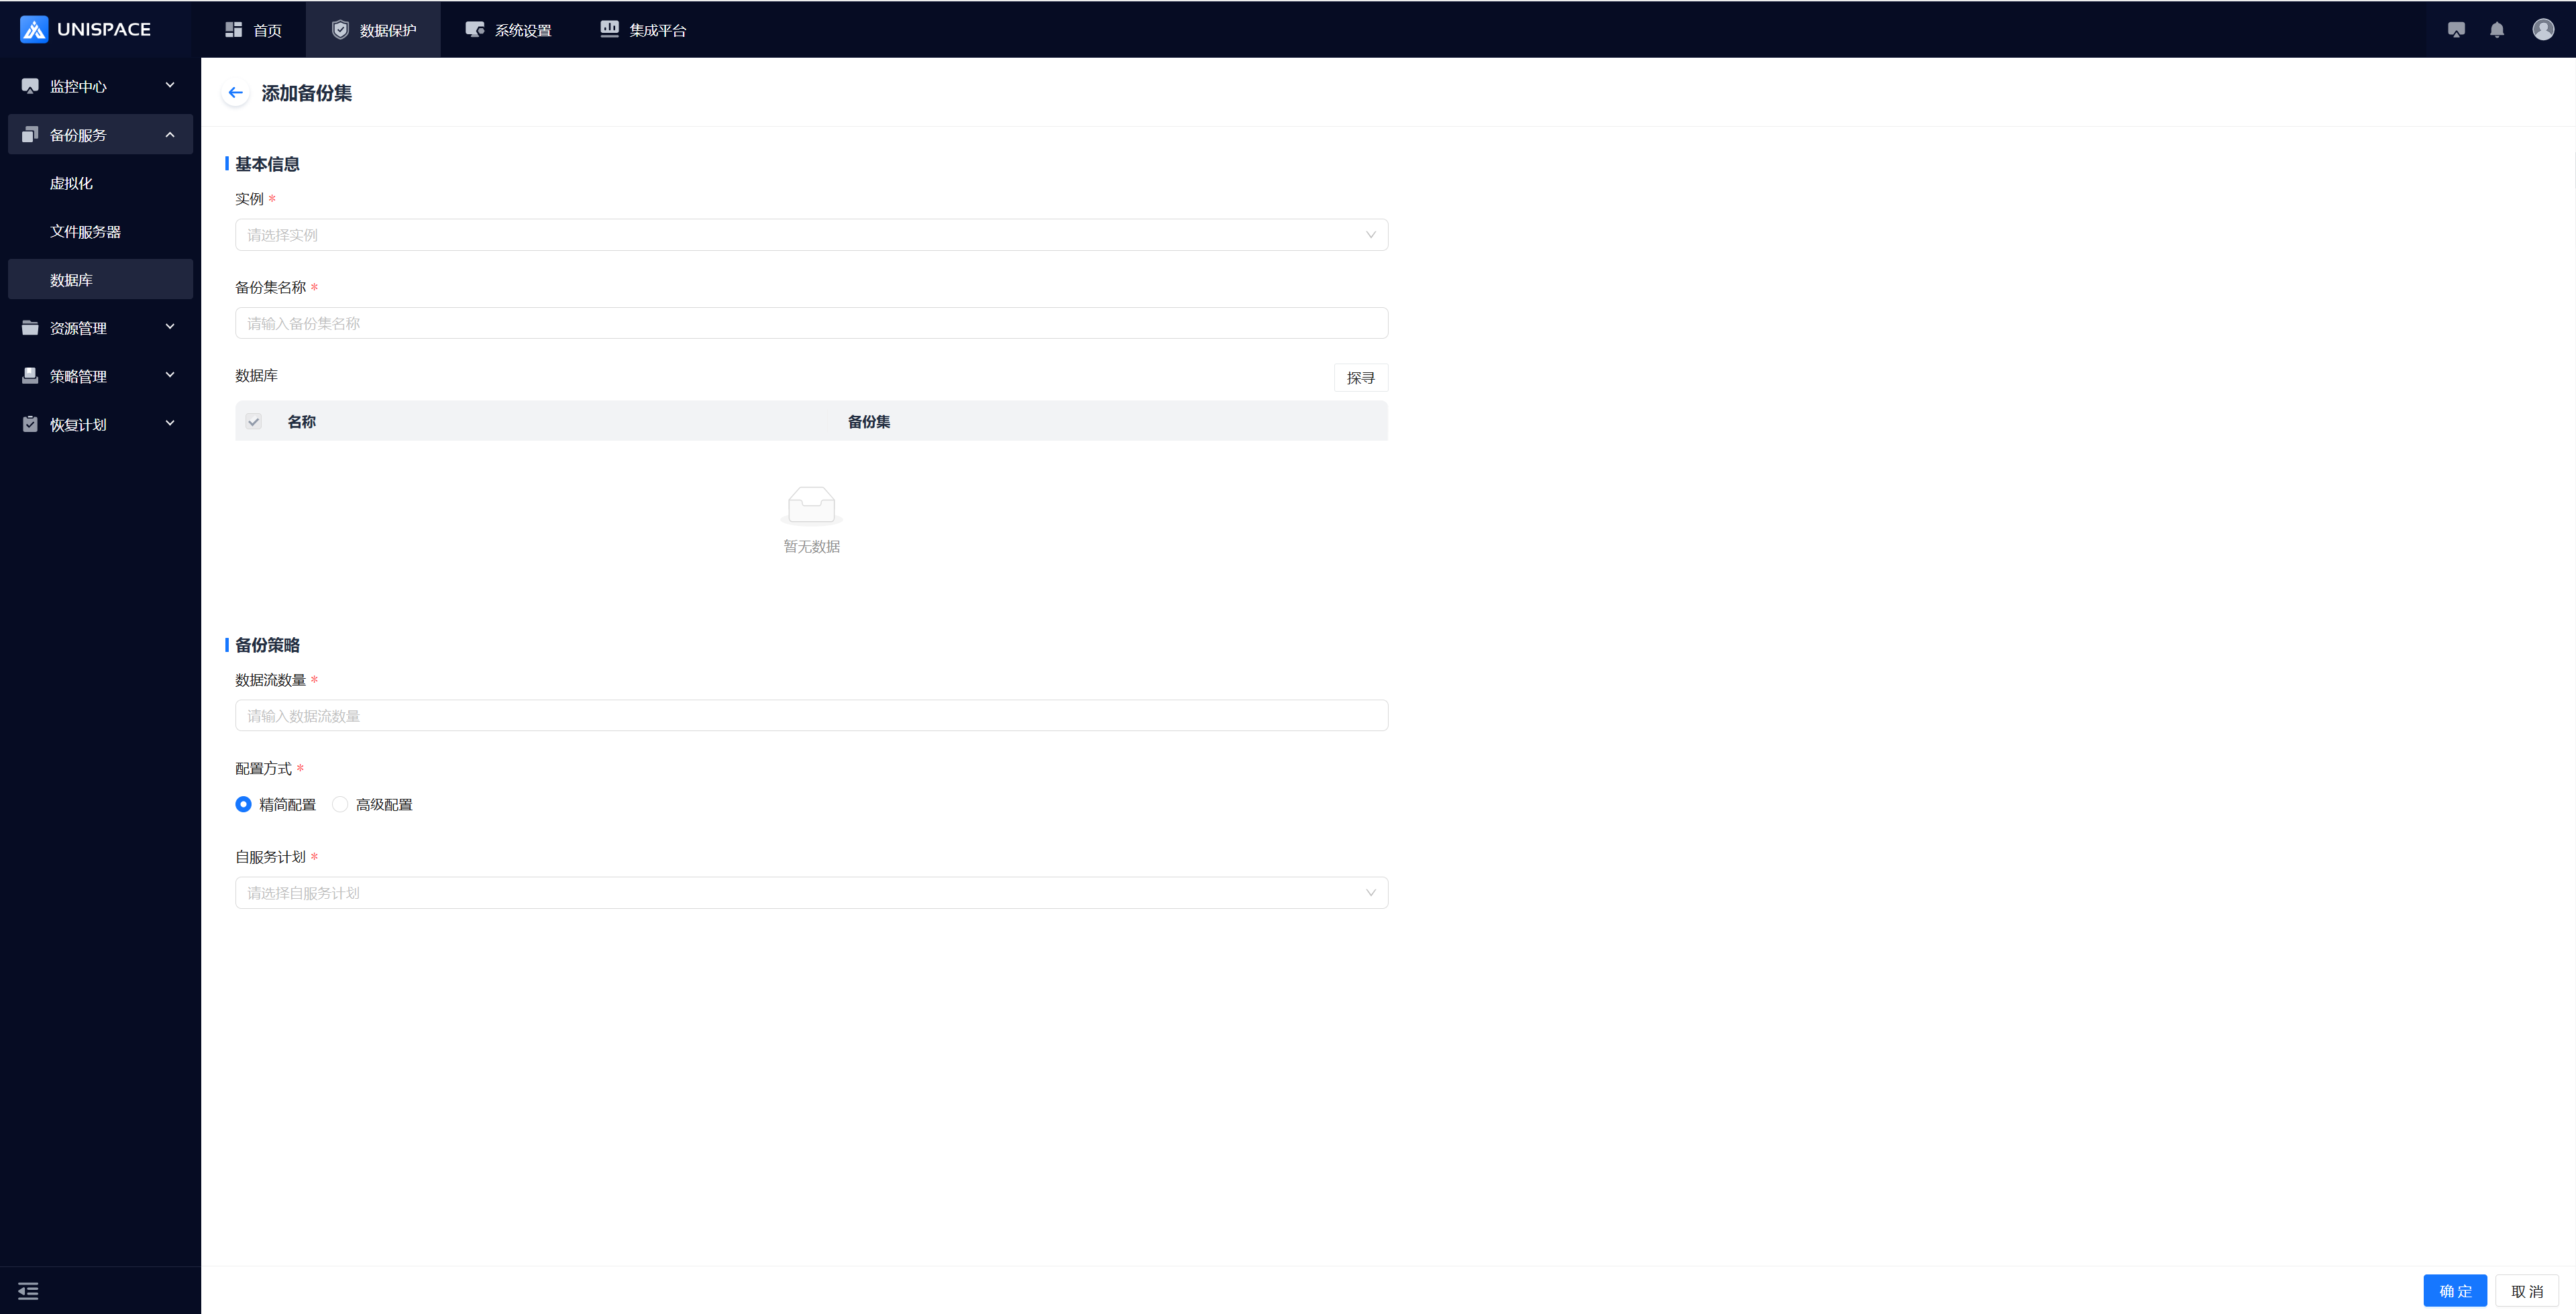 Step 3: Fill in the necessary parameters as shown below:
| Parameter Name | Description | Setting Principle |
|---|---|---|
| Instance | Drop-down list, required | Select the already created Highgo instance |
| Backup Set Name | Text input, required | Length no more than 50 characters, no special characters |
| Backup Mode | Database Backup or Full Instance Backup | Database Backup: Select one or more databases (existing backup sets will be grayed out) |
| Data Stream Count | Numeric input | Instance Backup: Single stream (1); Database Backup: Multi-stream (max 200, recommended 4) |
| Configuration Method | Single selection, required | Simplified or Advanced Configuration |
| Service Plan | Single selection, required | Choose an appropriate plan |
Step 4: Click OK. A message will appear indicating that the addition was successful.
2.3 Highgo Instance Backup
Prerequisites
- A Highgo instance backup set has been configured.
Steps
Step 1: Click the system menu Backup Service - Database - Server Name to enter the Backup Set** list.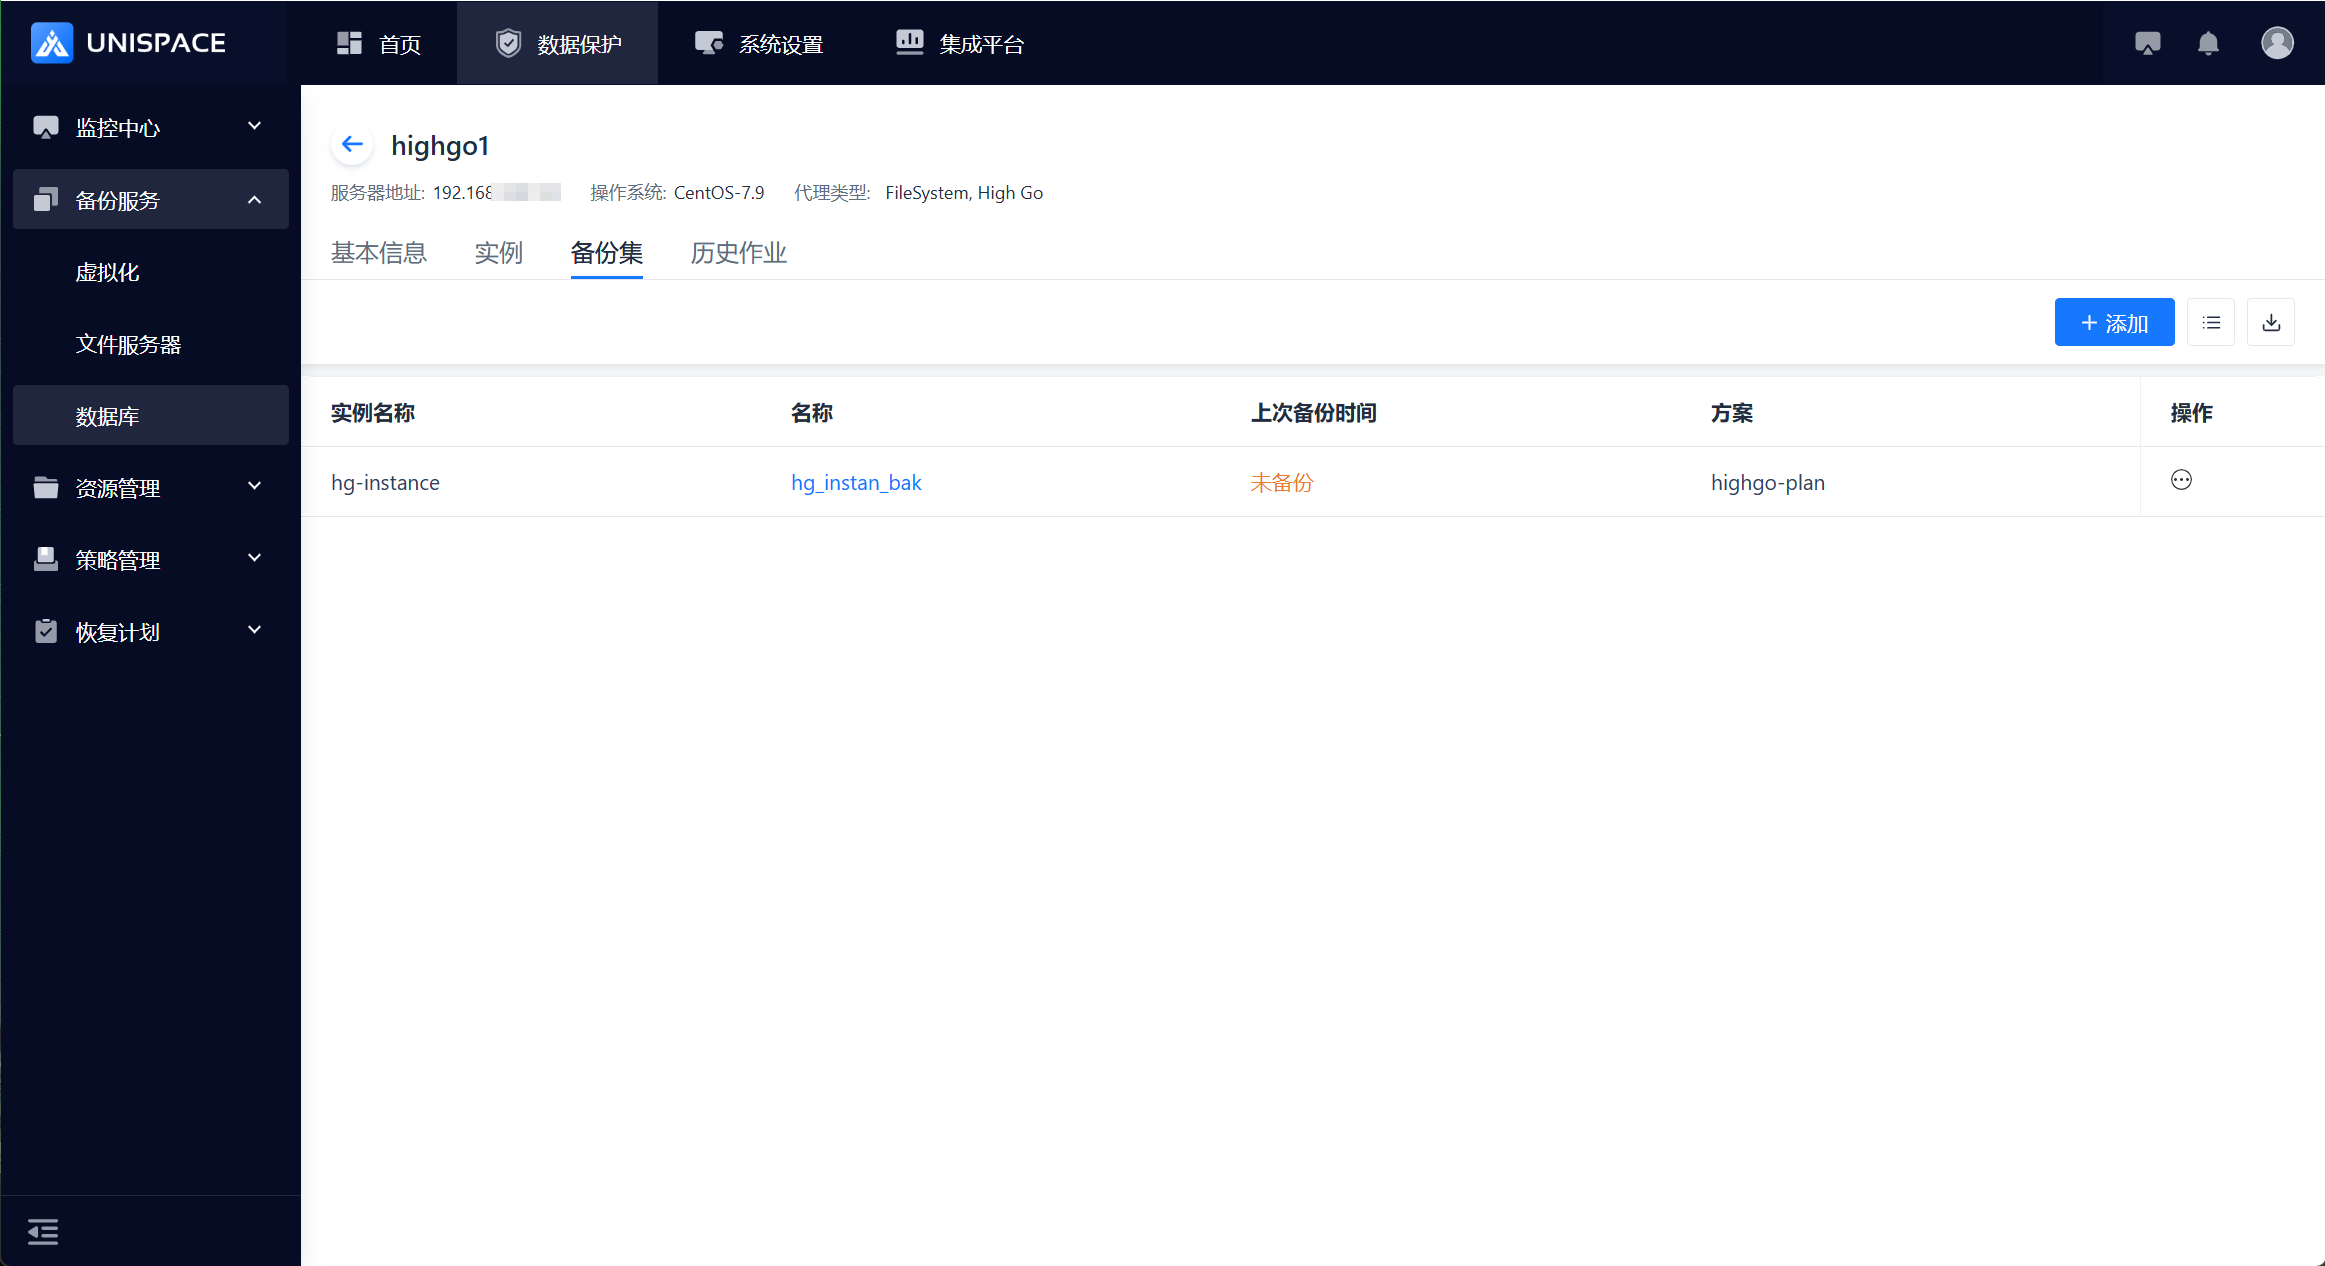
 Step 2: Select the instance backup set and click Action under the Operation column, then choose Backup and select Full.
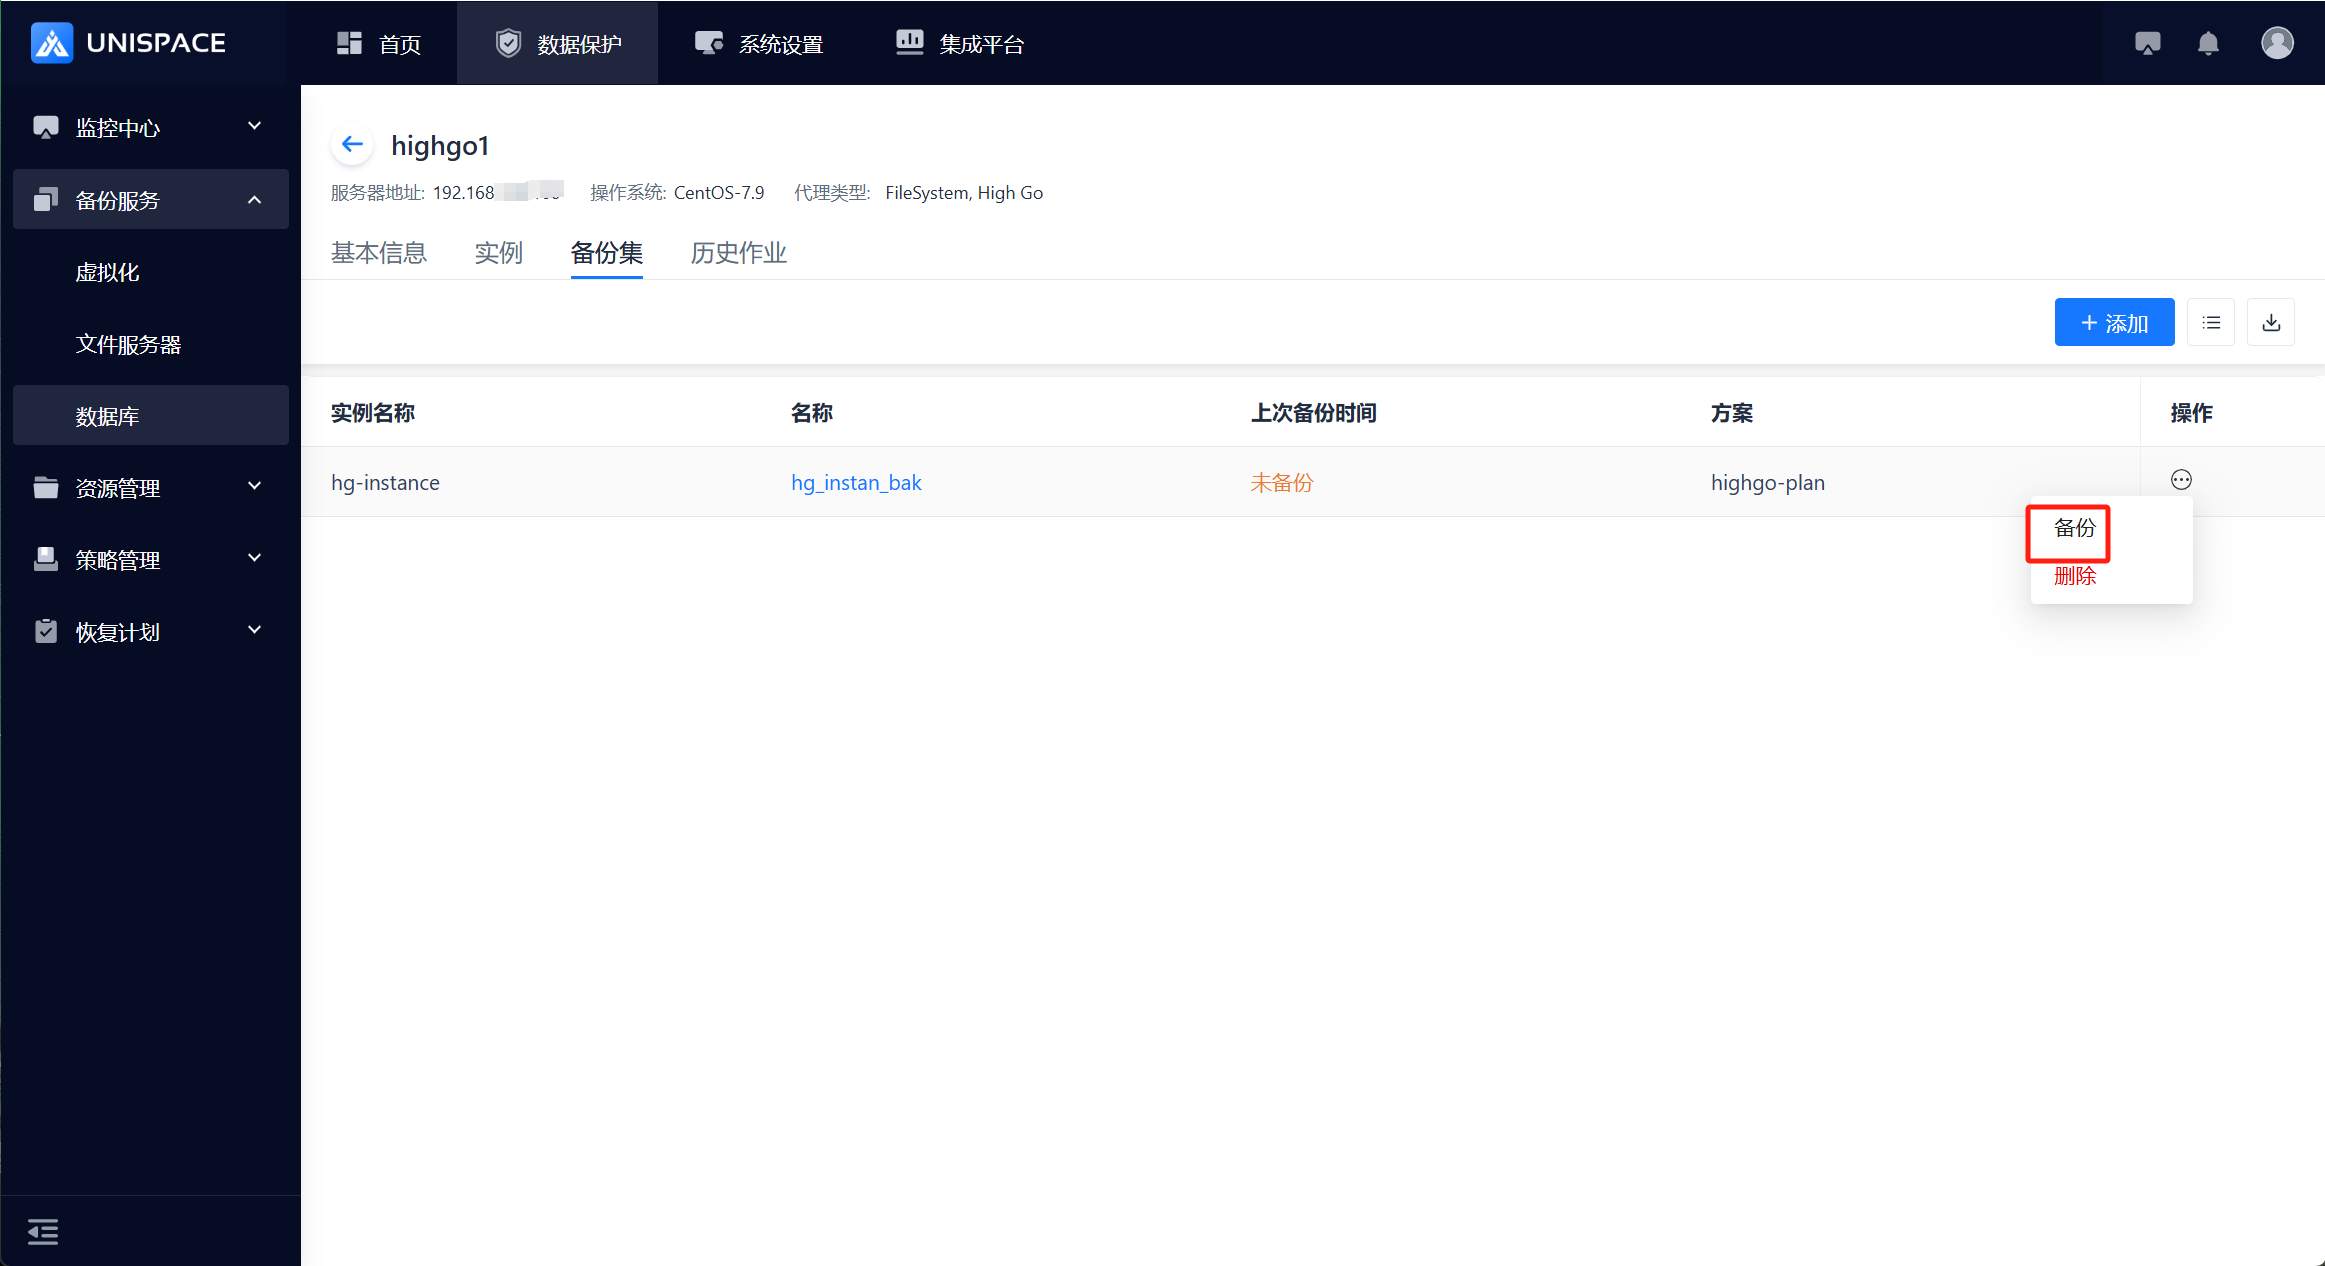
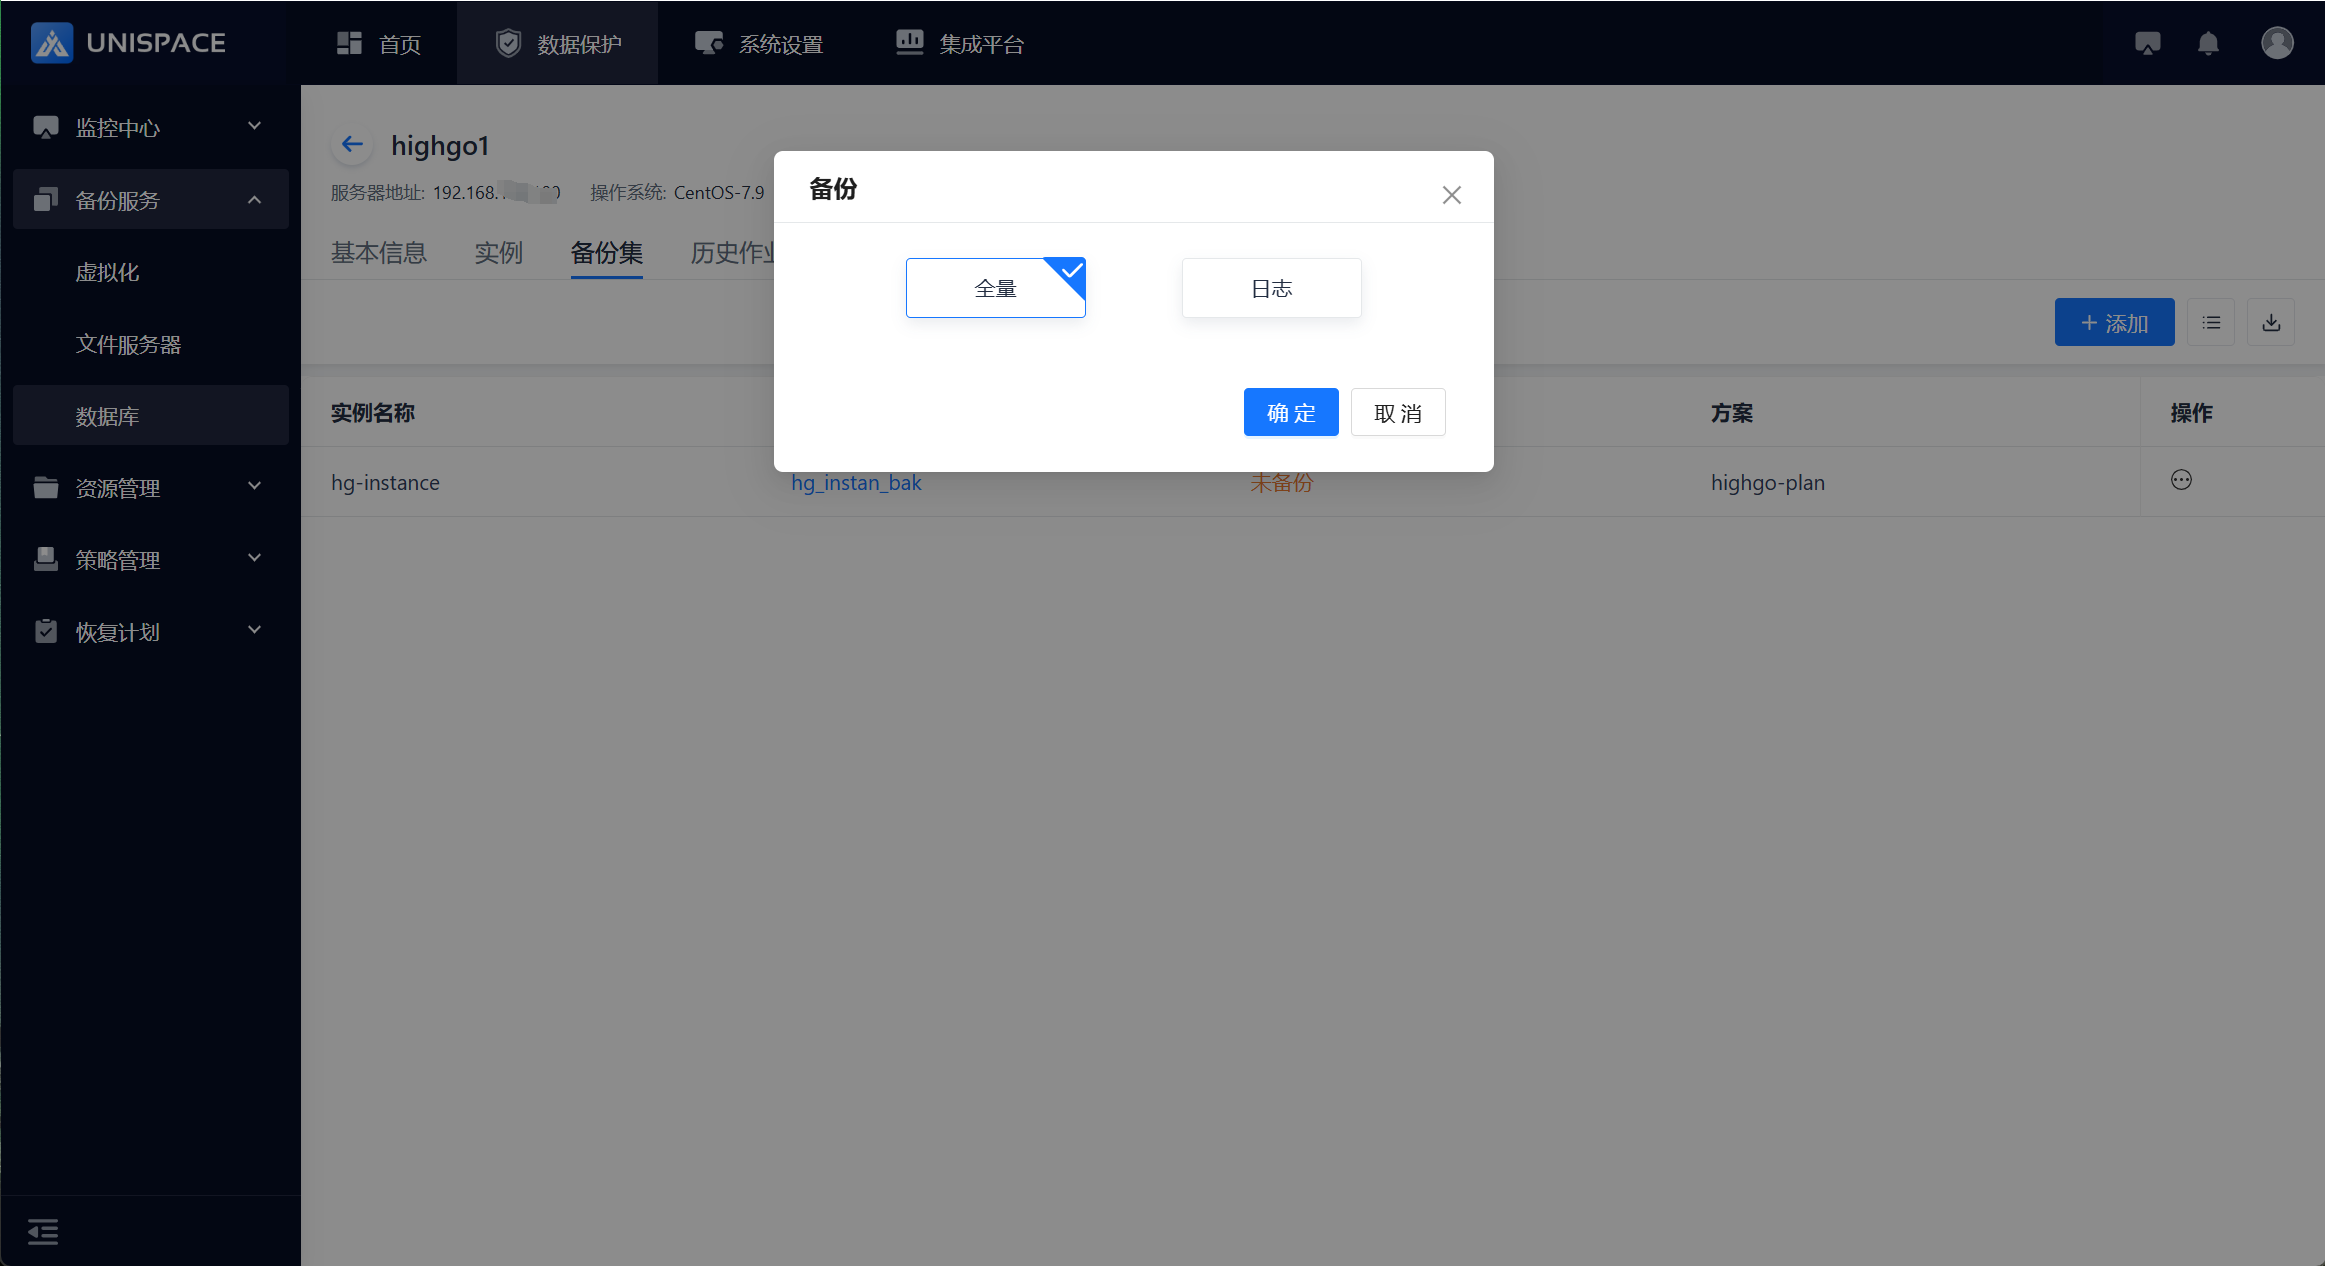 Step 3: Click OK. The page will display a message: "Backup job submitted successfully."
 Step 4: Once the backup job starts successfully, click Monitoring Center - Job - Active Jobs to view the backup job.
 Step 5: After the backup is completed, click Monitoring Center - Job - Job History to view the backup job and its status as "Completed."
2.4 Kingbase Log Backup
Prerequisites
- A Kingbase instance backup set has been configured.
Steps
Step 1: Click the system menu Backup Service - Database - Server Name to enter the Backup Set list.Step 2: Select the instance backup set and click Action under the Operation column, then choose Backup and select Log.
 Step 3: The page will display a message: "Backup job submitted successfully."
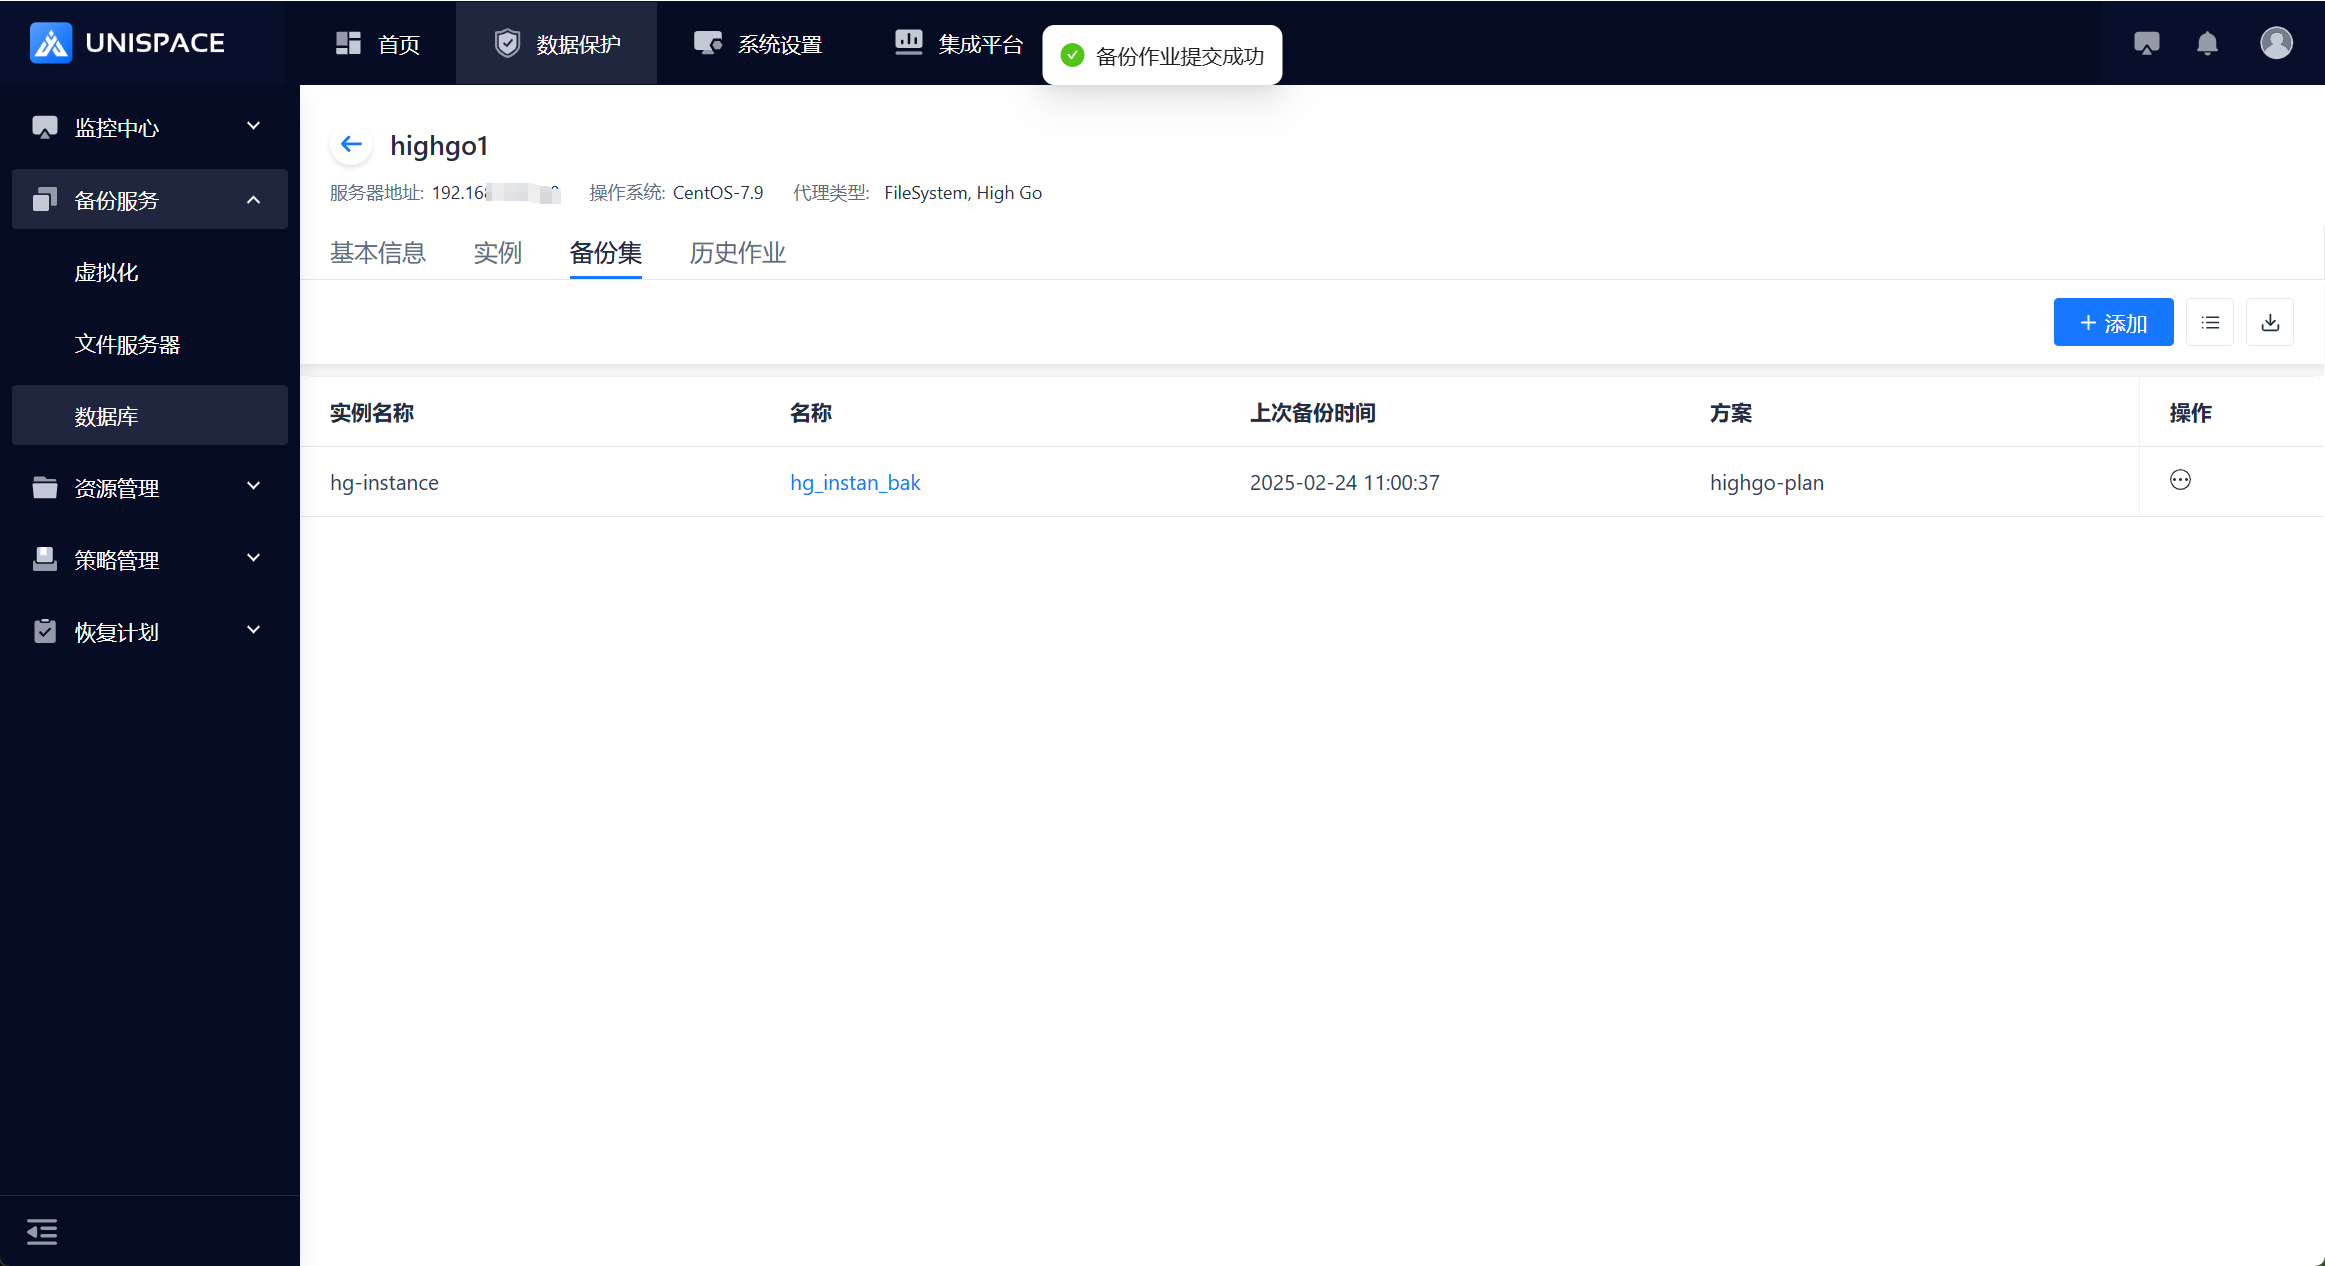 Step 4: Once the backup job starts successfully, click Monitoring Center - Job - Active Jobs to view the backup job.
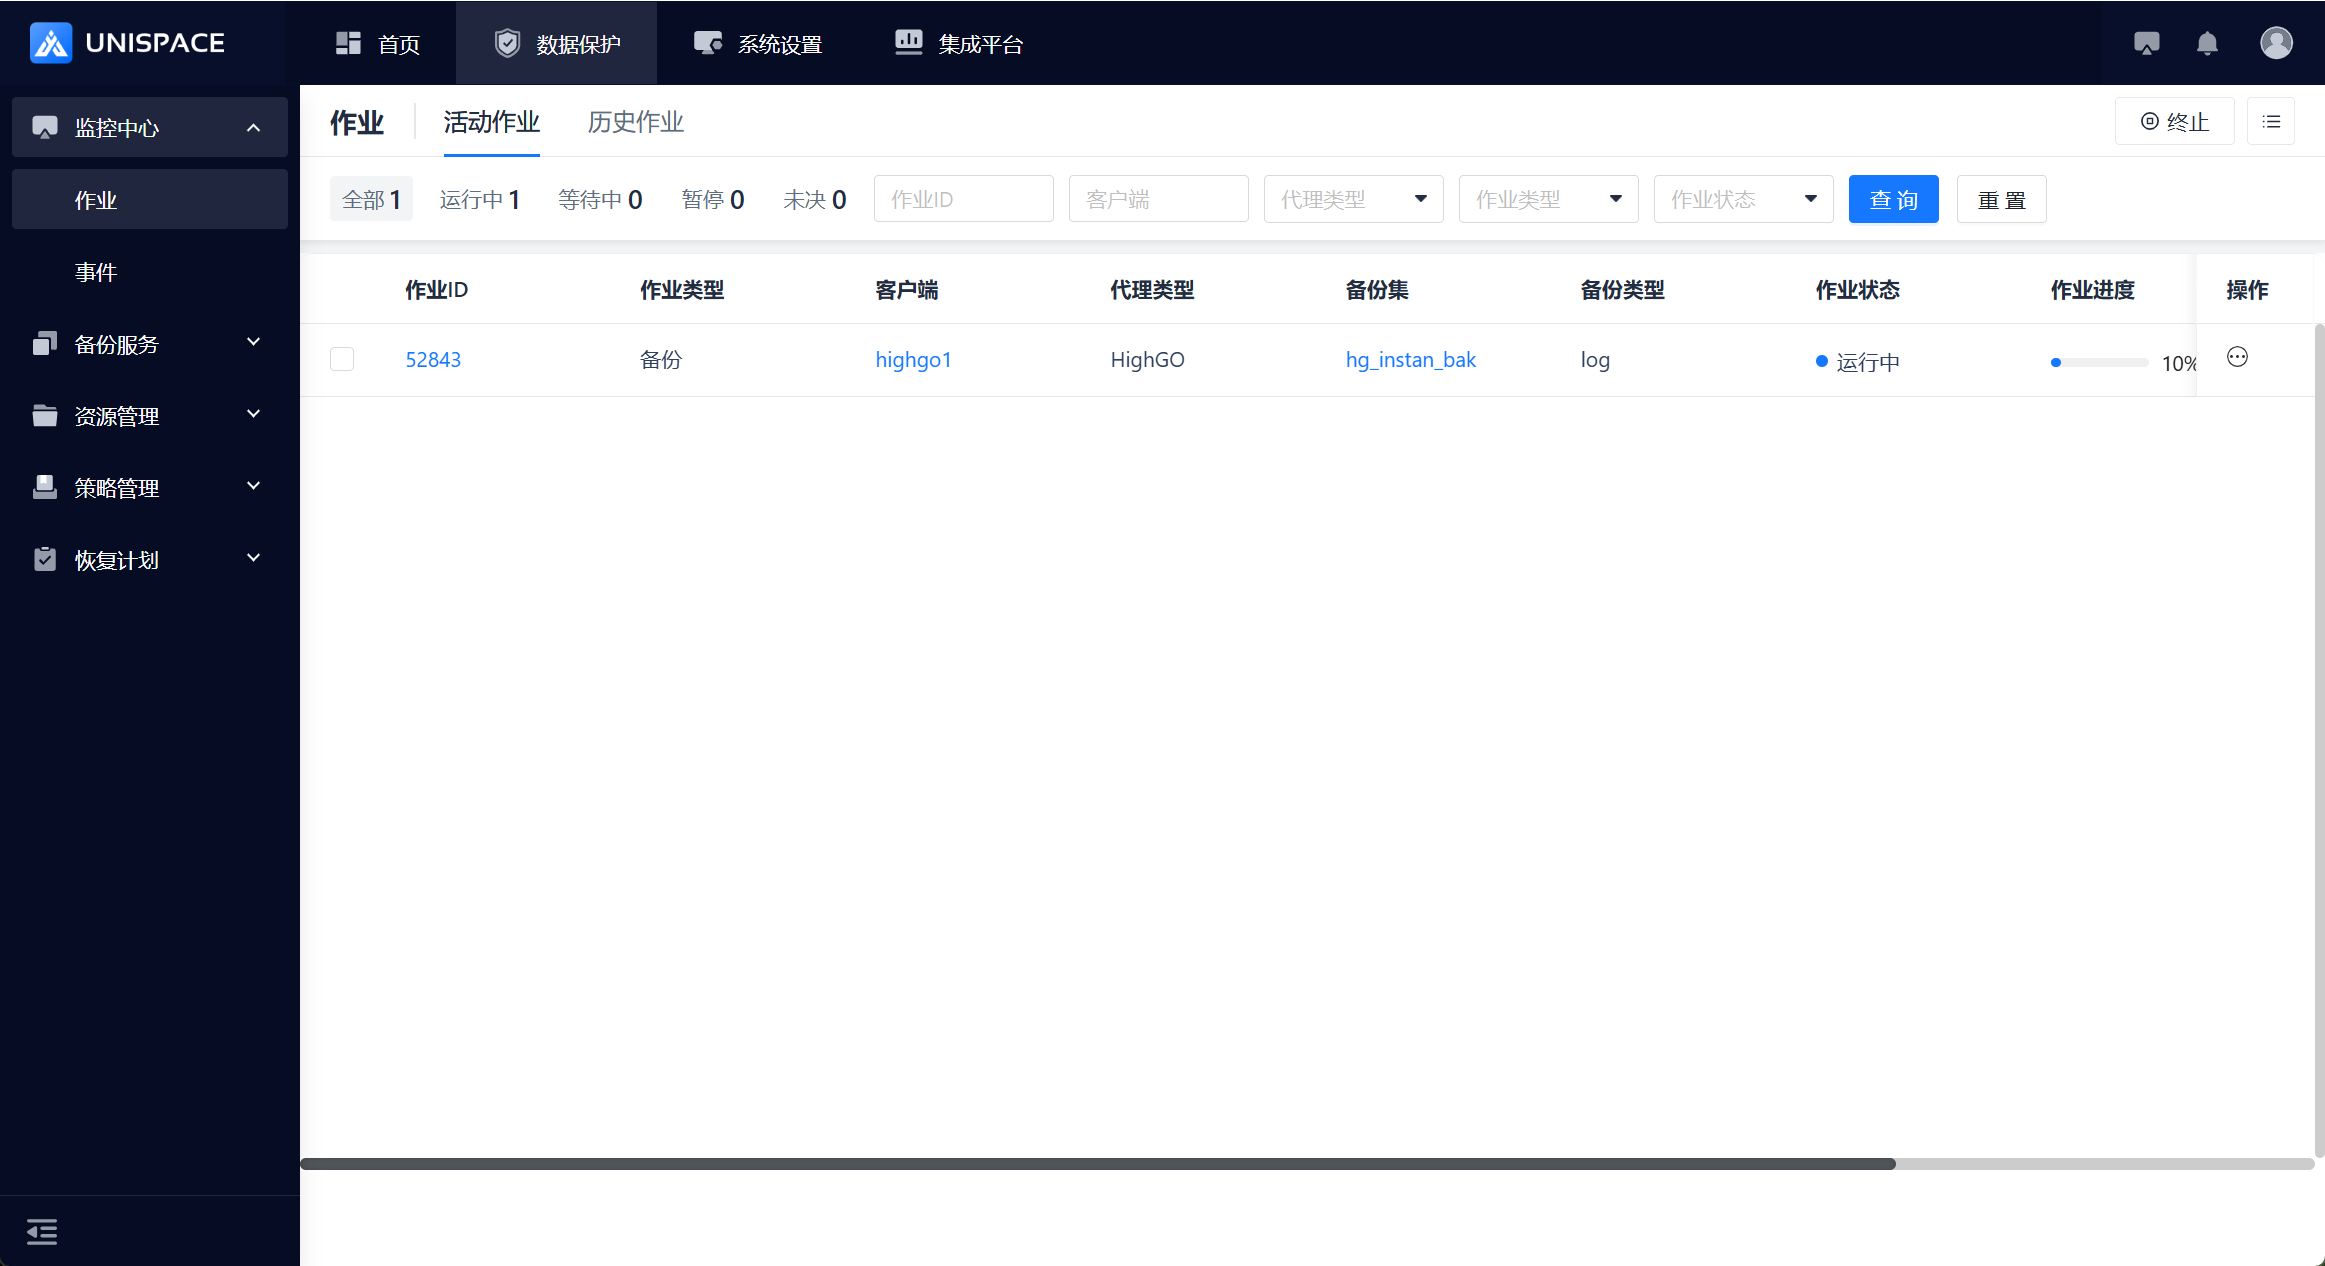 Step 5: After the backup is completed, click Monitoring Center - Job - Job History to view the backup job and its status as "Completed."
2.5 Highgo Database Backup
Prerequisites
- A Highgo database backup set has been configured.
Steps
Step 1: Click the system menu Backup Service - Database - Server Name to enter the Backup Set list.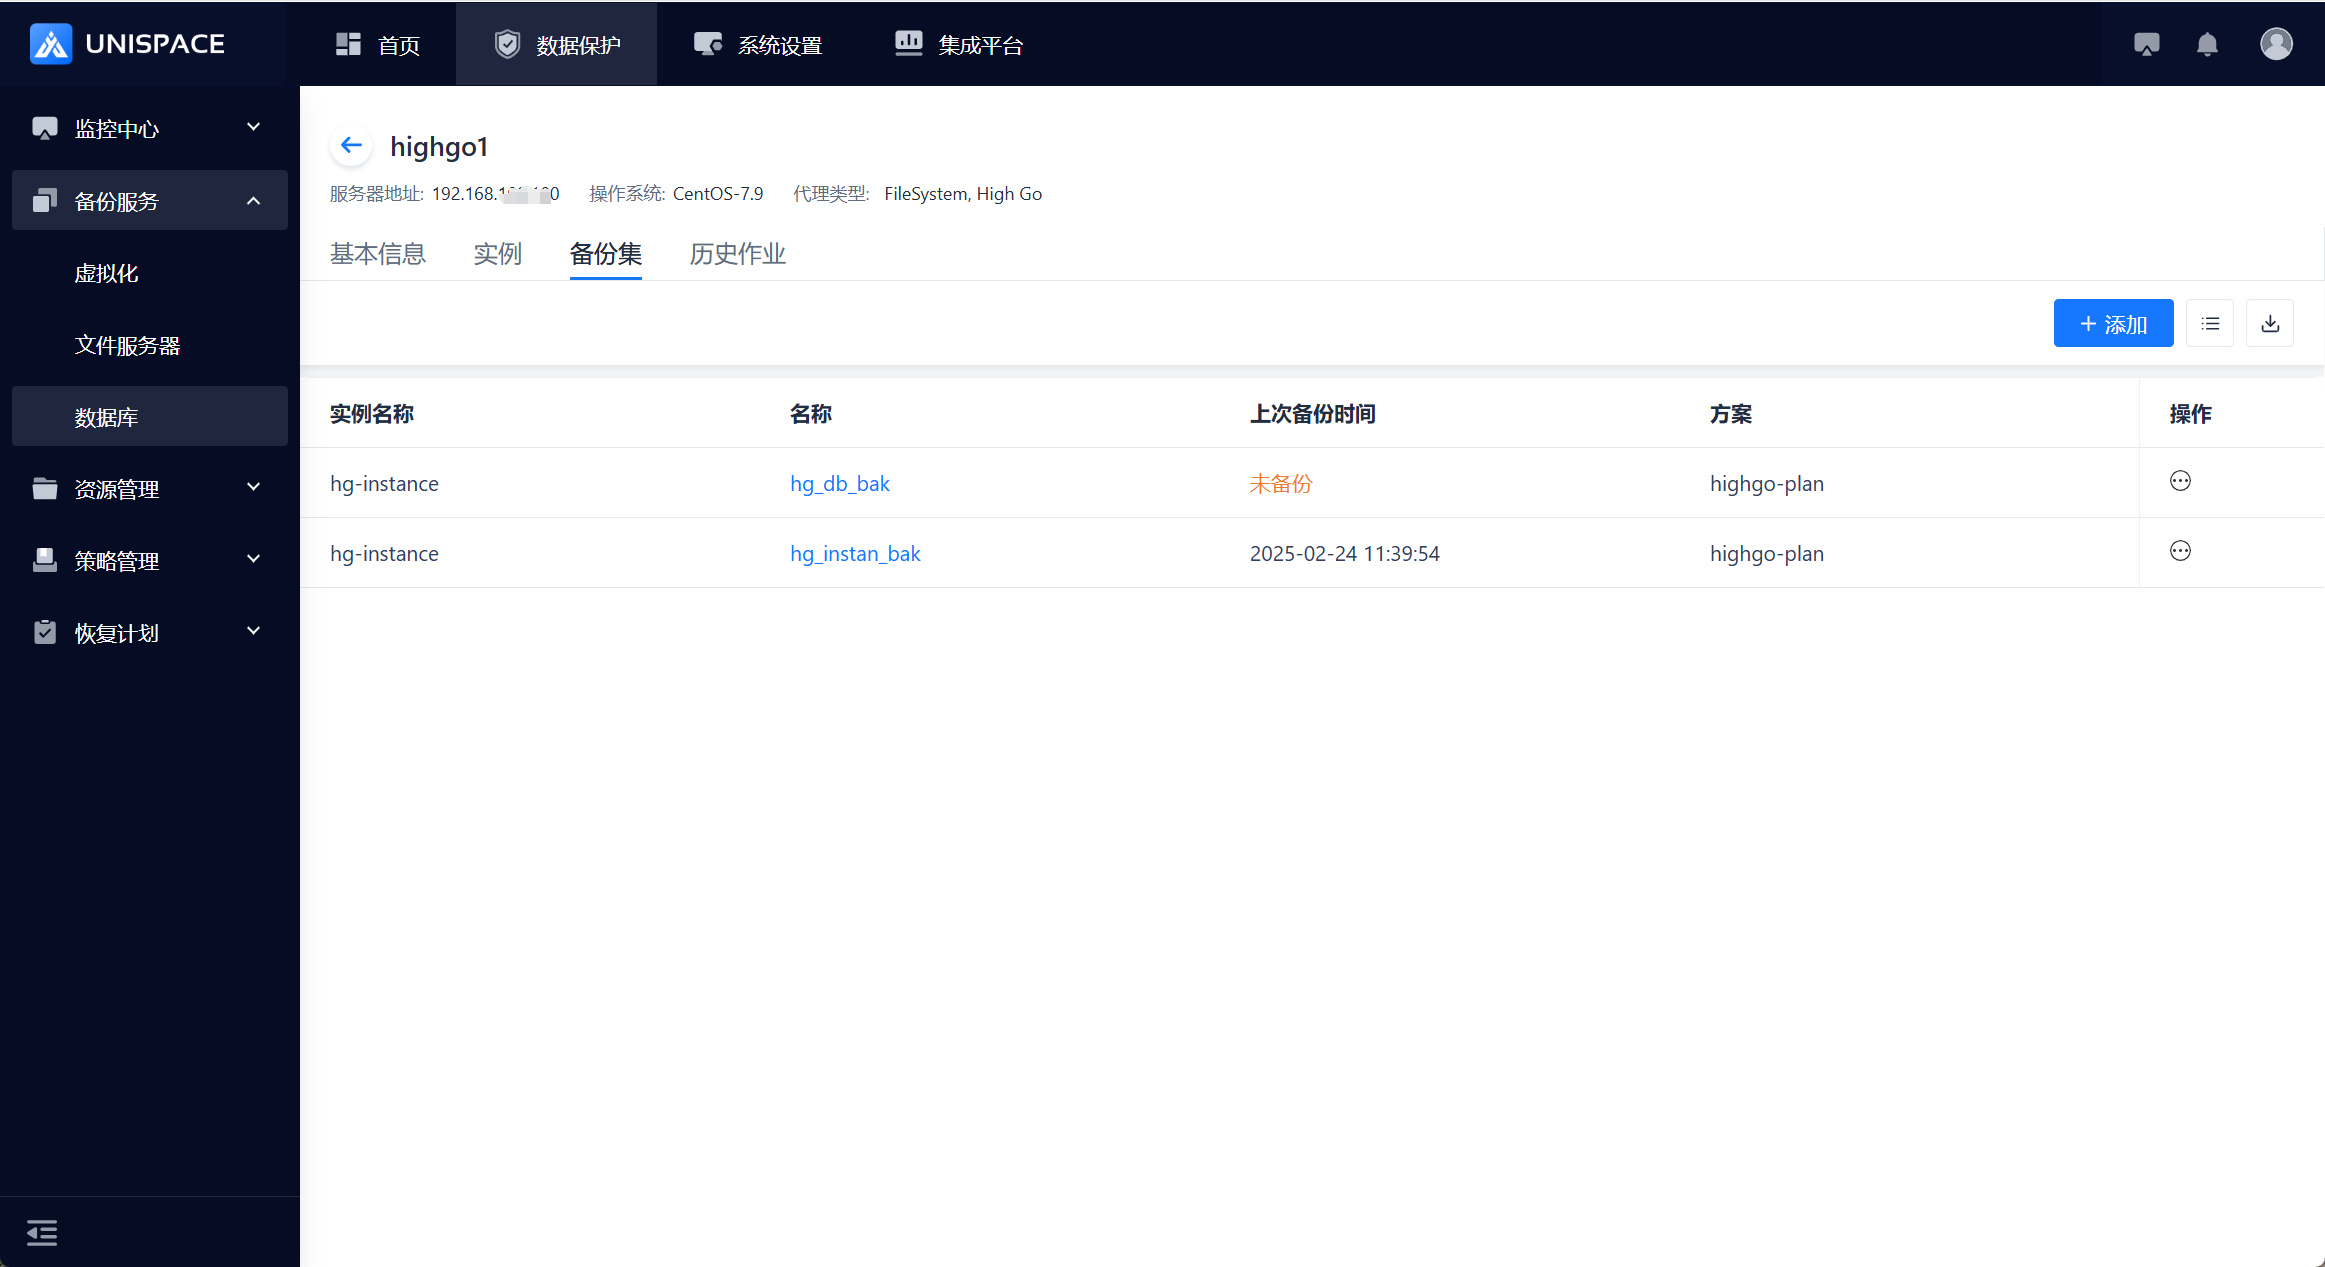 Step 2: Select the database backup set and click Action under the Operation column, then choose Backup and select Full.
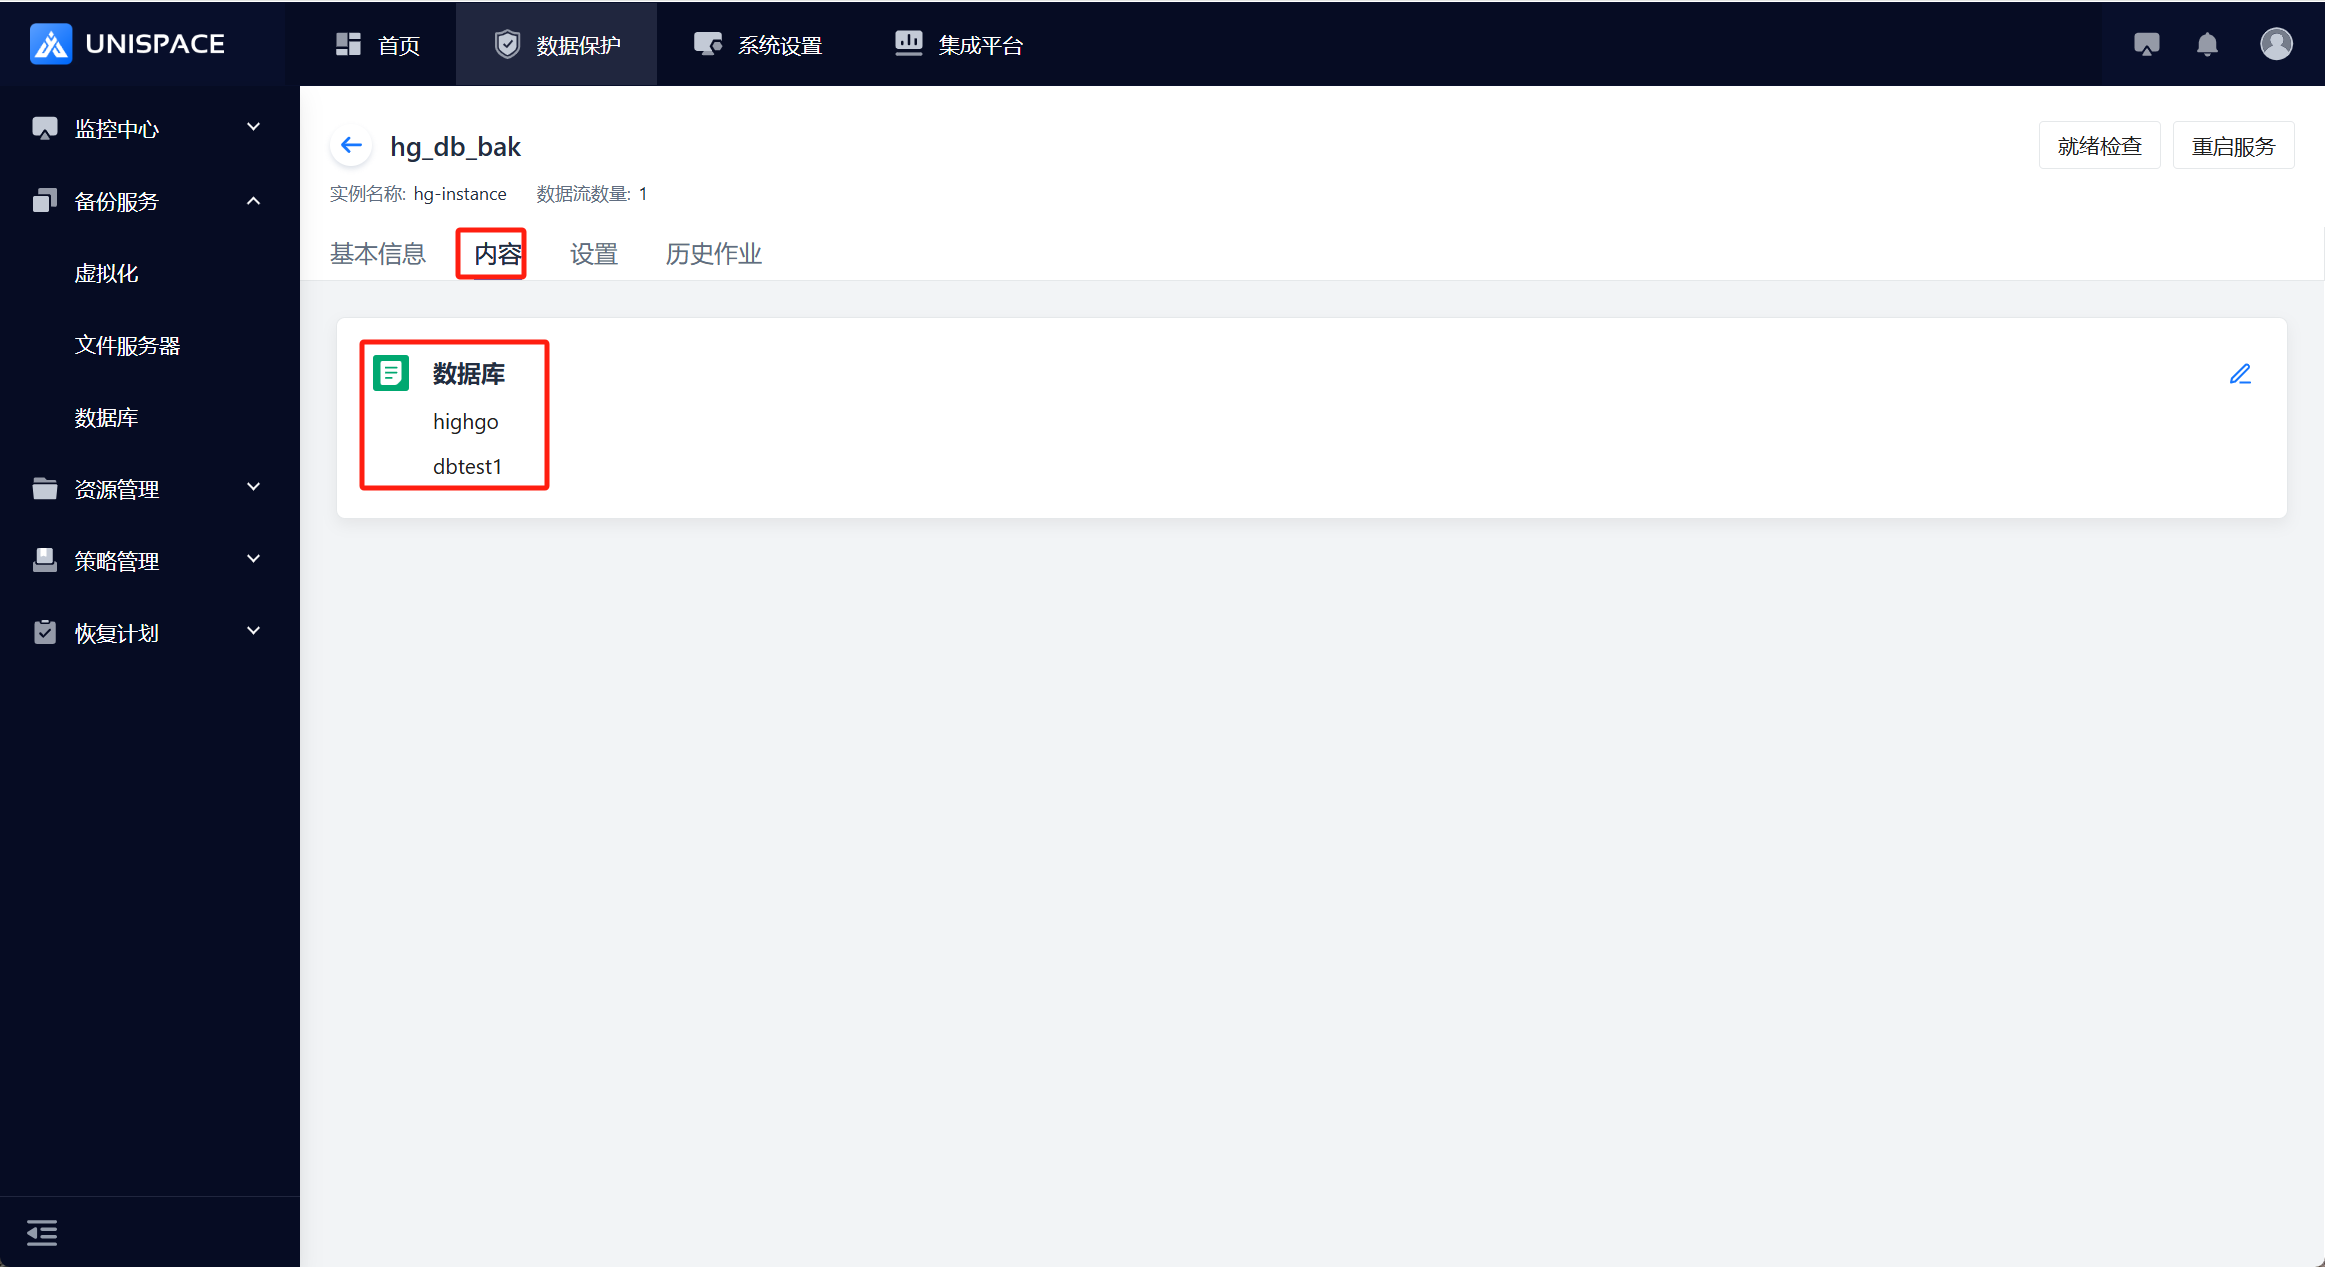
 Step 3: Click OK. The page will display a message: "Backup job submitted successfully."
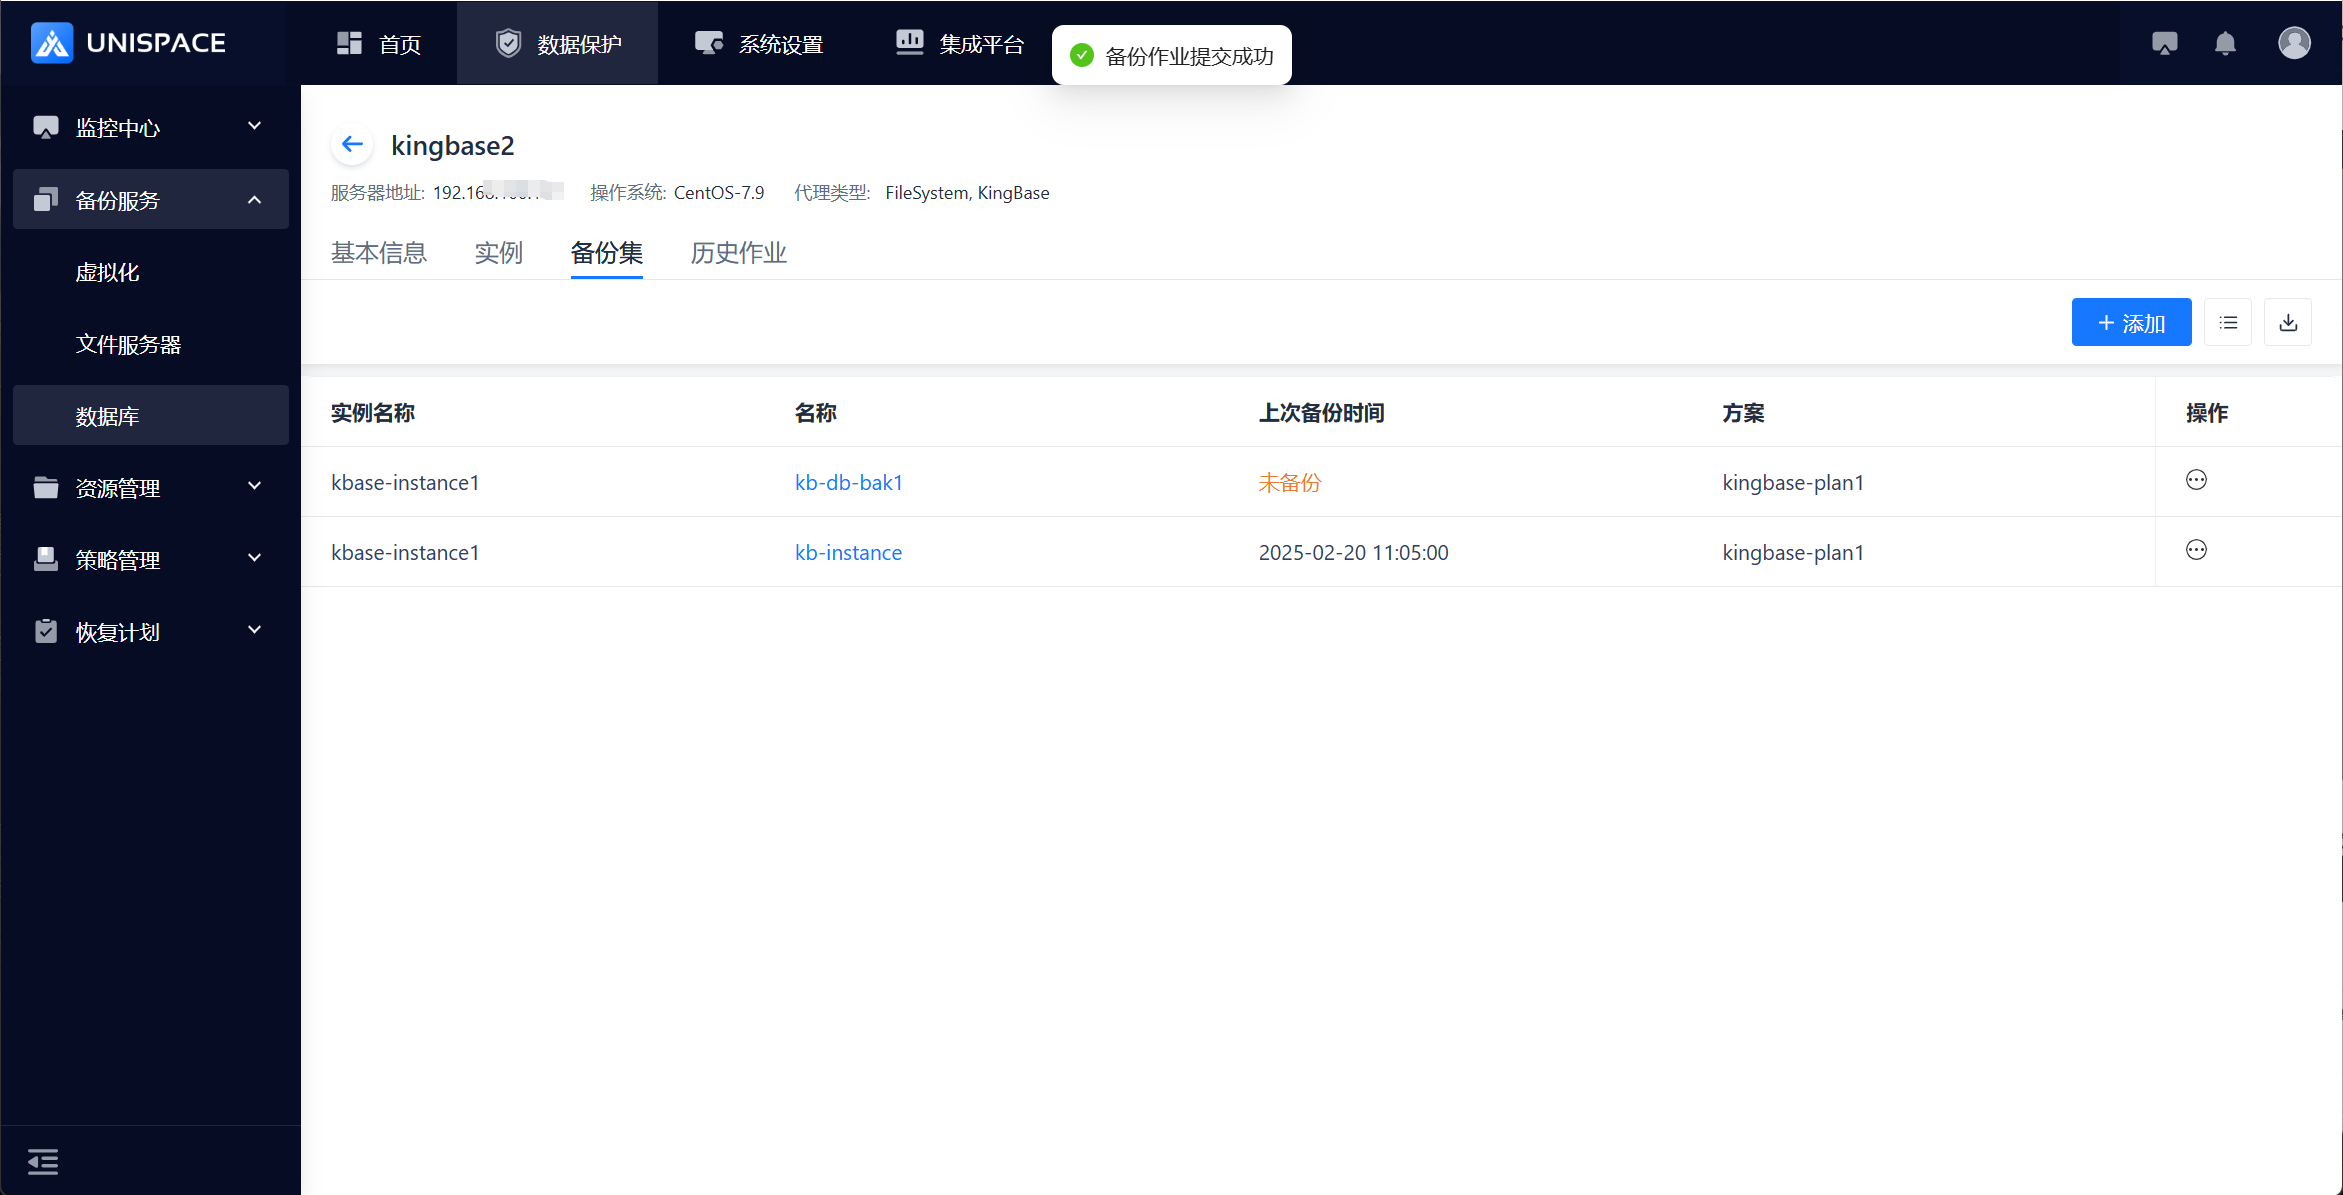 Step 4: Once the backup job starts successfully, click Monitoring Center - Job - Active Jobs to view the backup job.
 Step 5: After the backup is completed, click Monitoring Center - Job - Job History to view the backup job and its status as "Completed."
2.6 Highgo Database Recovery
Prerequisites
- The Highgo database has been backed up.
- System databases are not supported for recovery.
Steps
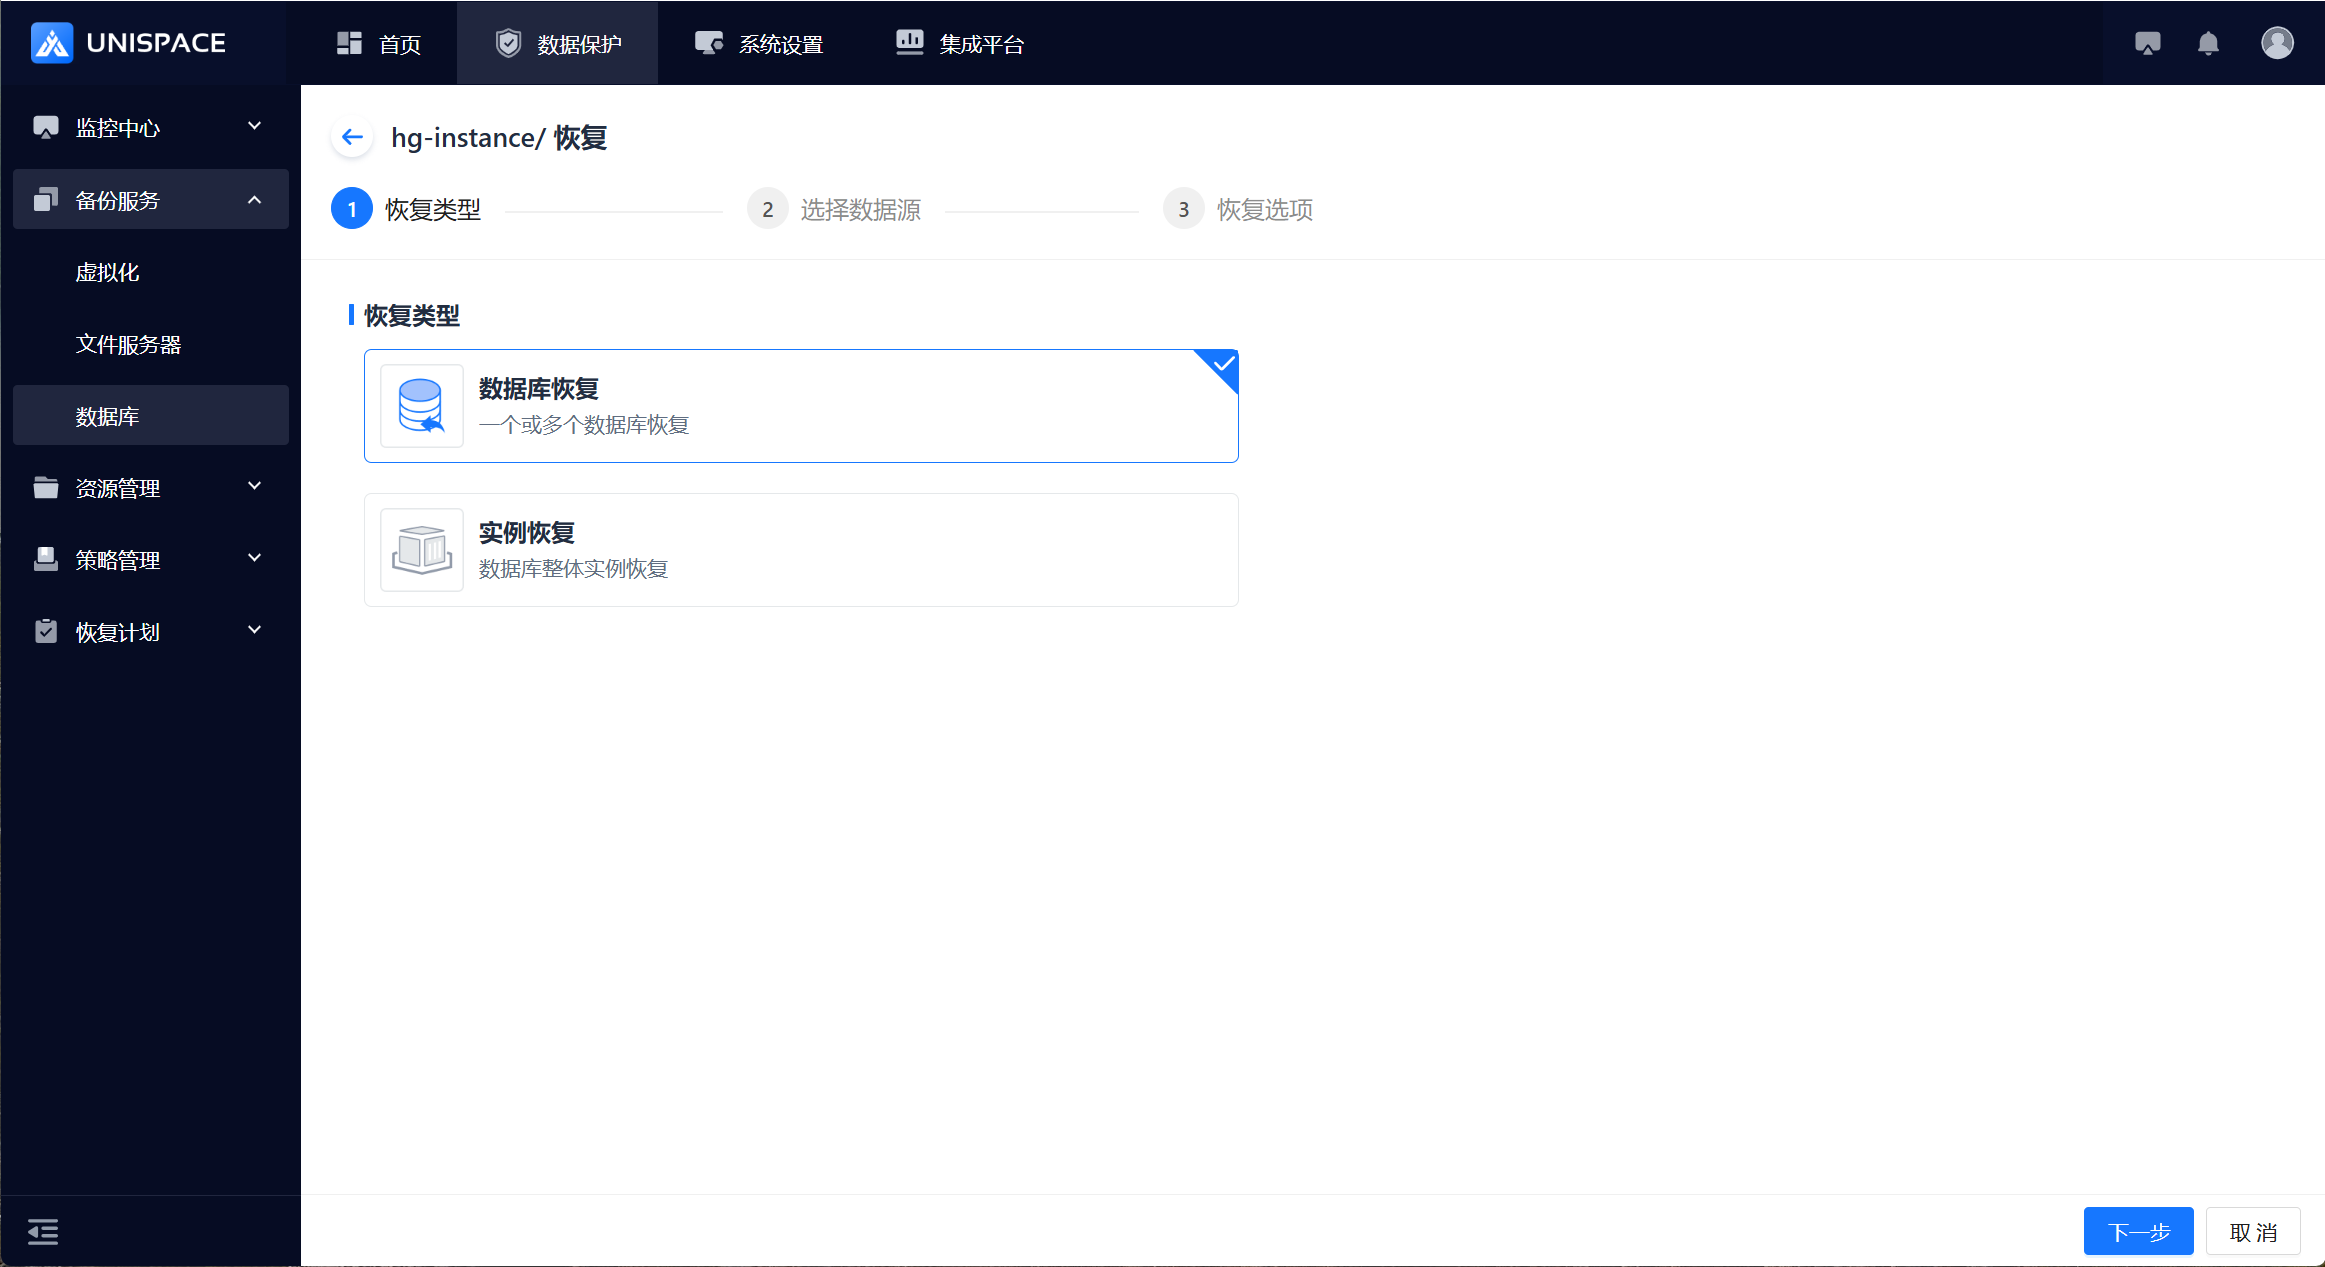
Step 1: Click the system menu Backup Service - Database - Server Name to enter the Instance list.Step 2: Select the Instance, click Action under the Operation column, then choose Restore and select Database Recovery. Click Next.
 Step 3: A recovery window will pop up. Choose the recovery point. You can query the recovery point based on the time range. Select the Database and Backup Time, then click Next (cross-backup set recovery is not supported).
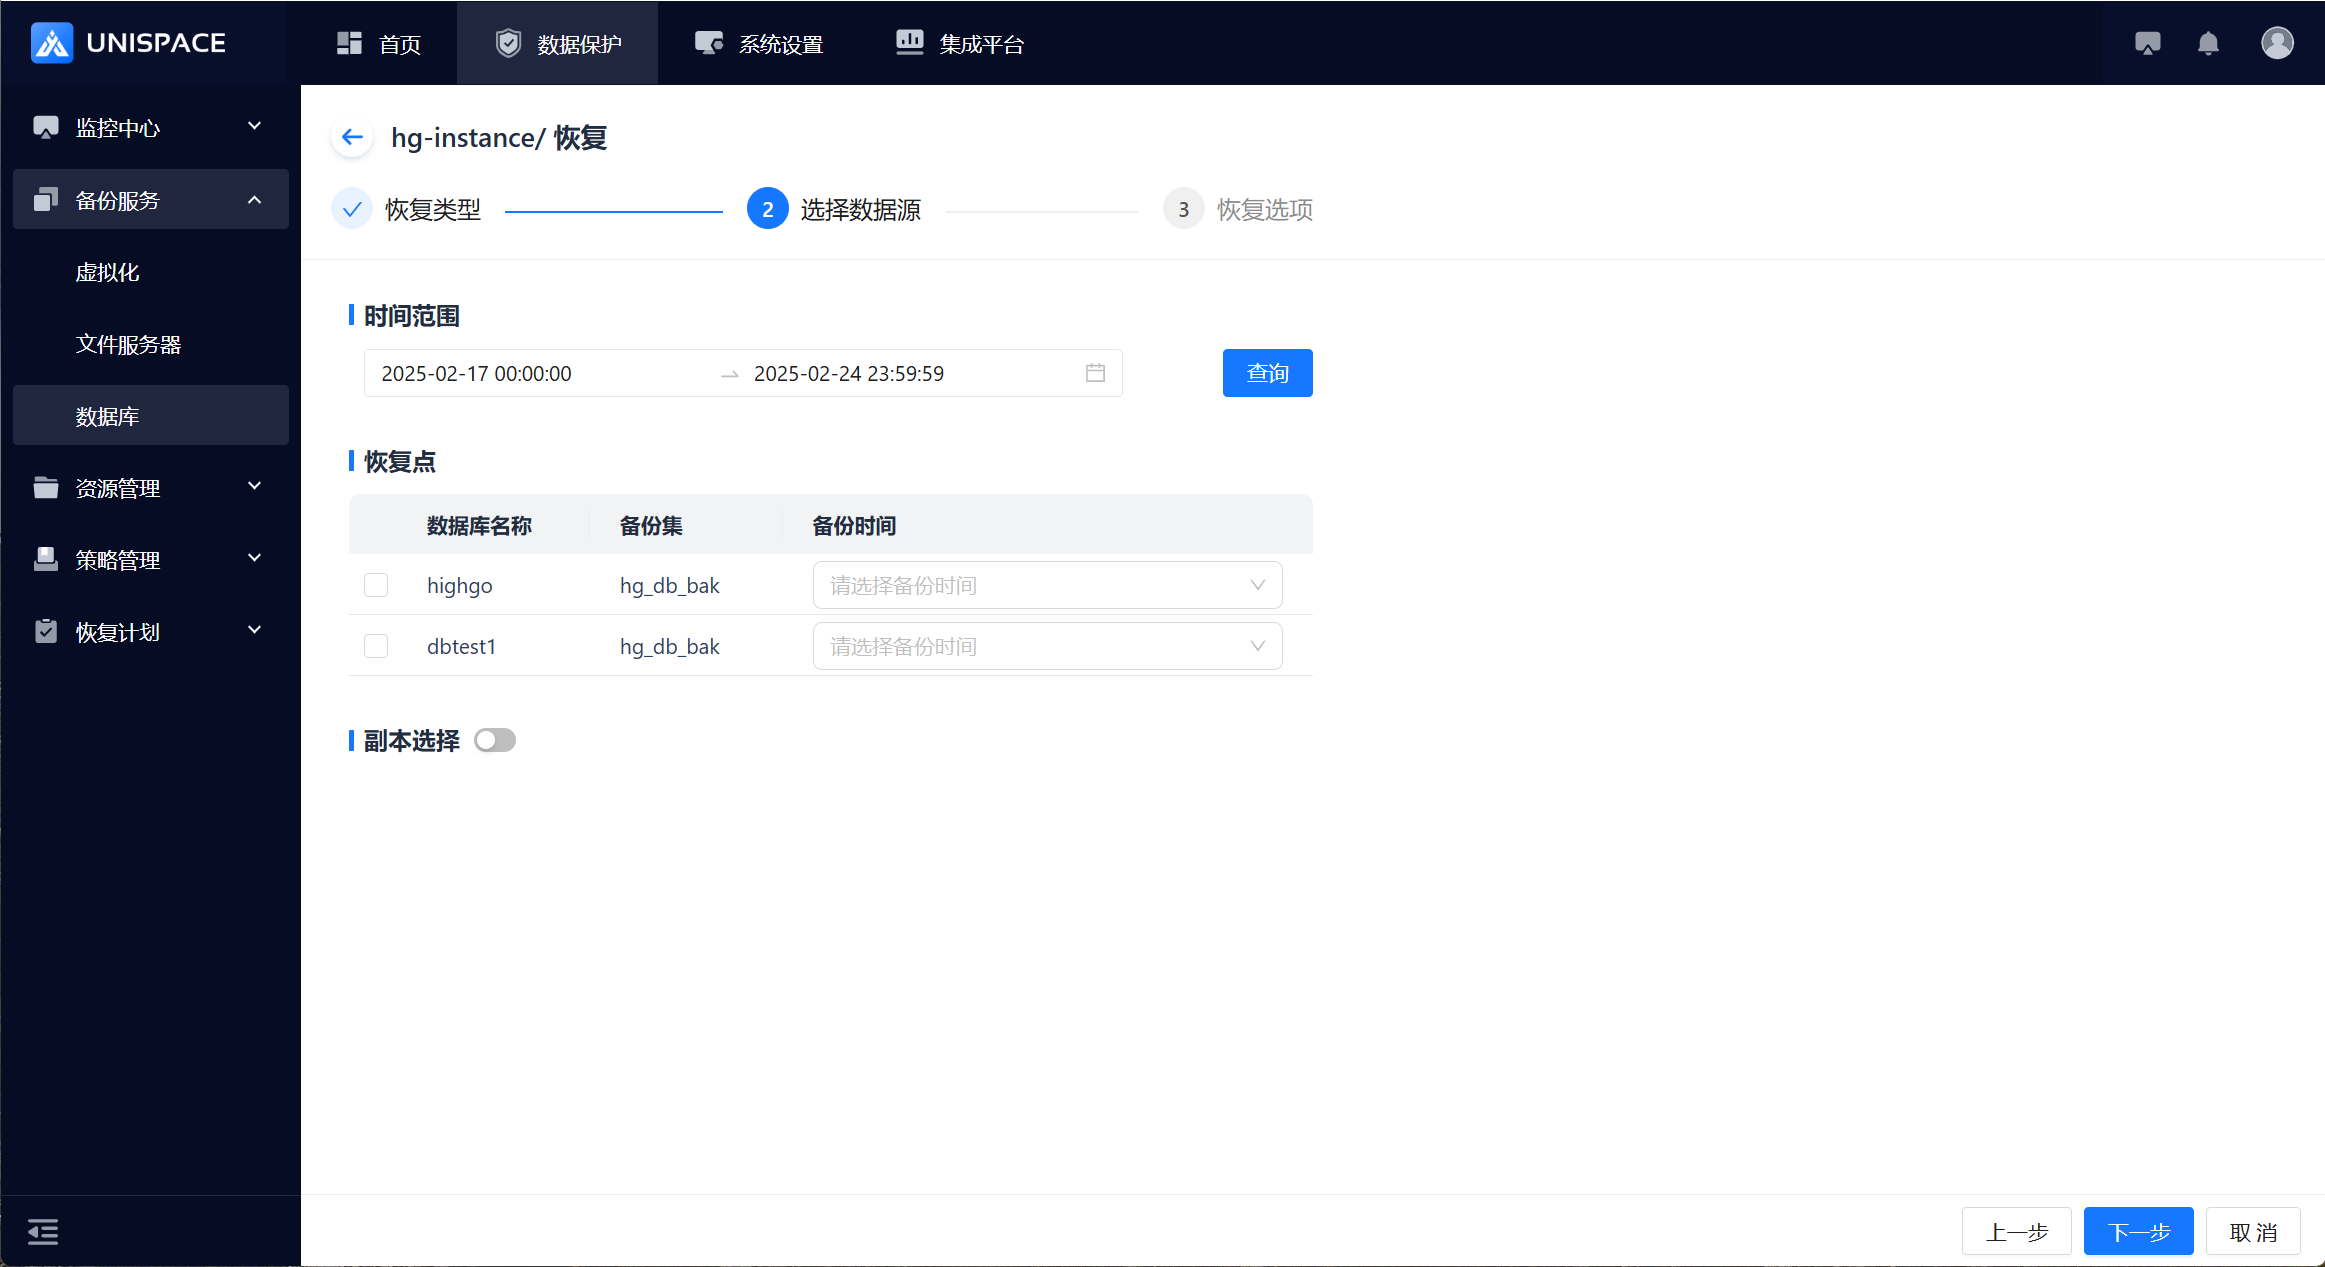 Step 4: Configure the recovery options and click OK.
 Step 5: Fill in the necessary parameters as described below:
| Parameter Name | Description | Setting Principles |
|---|---|---|
| Recovery Target | Default to cross-machine recovery | Options: Source Machine Recovery; Cross-Machine Recovery; Recover to Disk |
| Target Host | Default to cross-machine recovery | Dropdown list, client node where Highgo service is installed |
| Target Instance | Linked with the target host, choose an instance | Default instance for source machine, greyed out |
| Recovery Stream Count | Numeric | Maximum value 200, recommended count 4 |
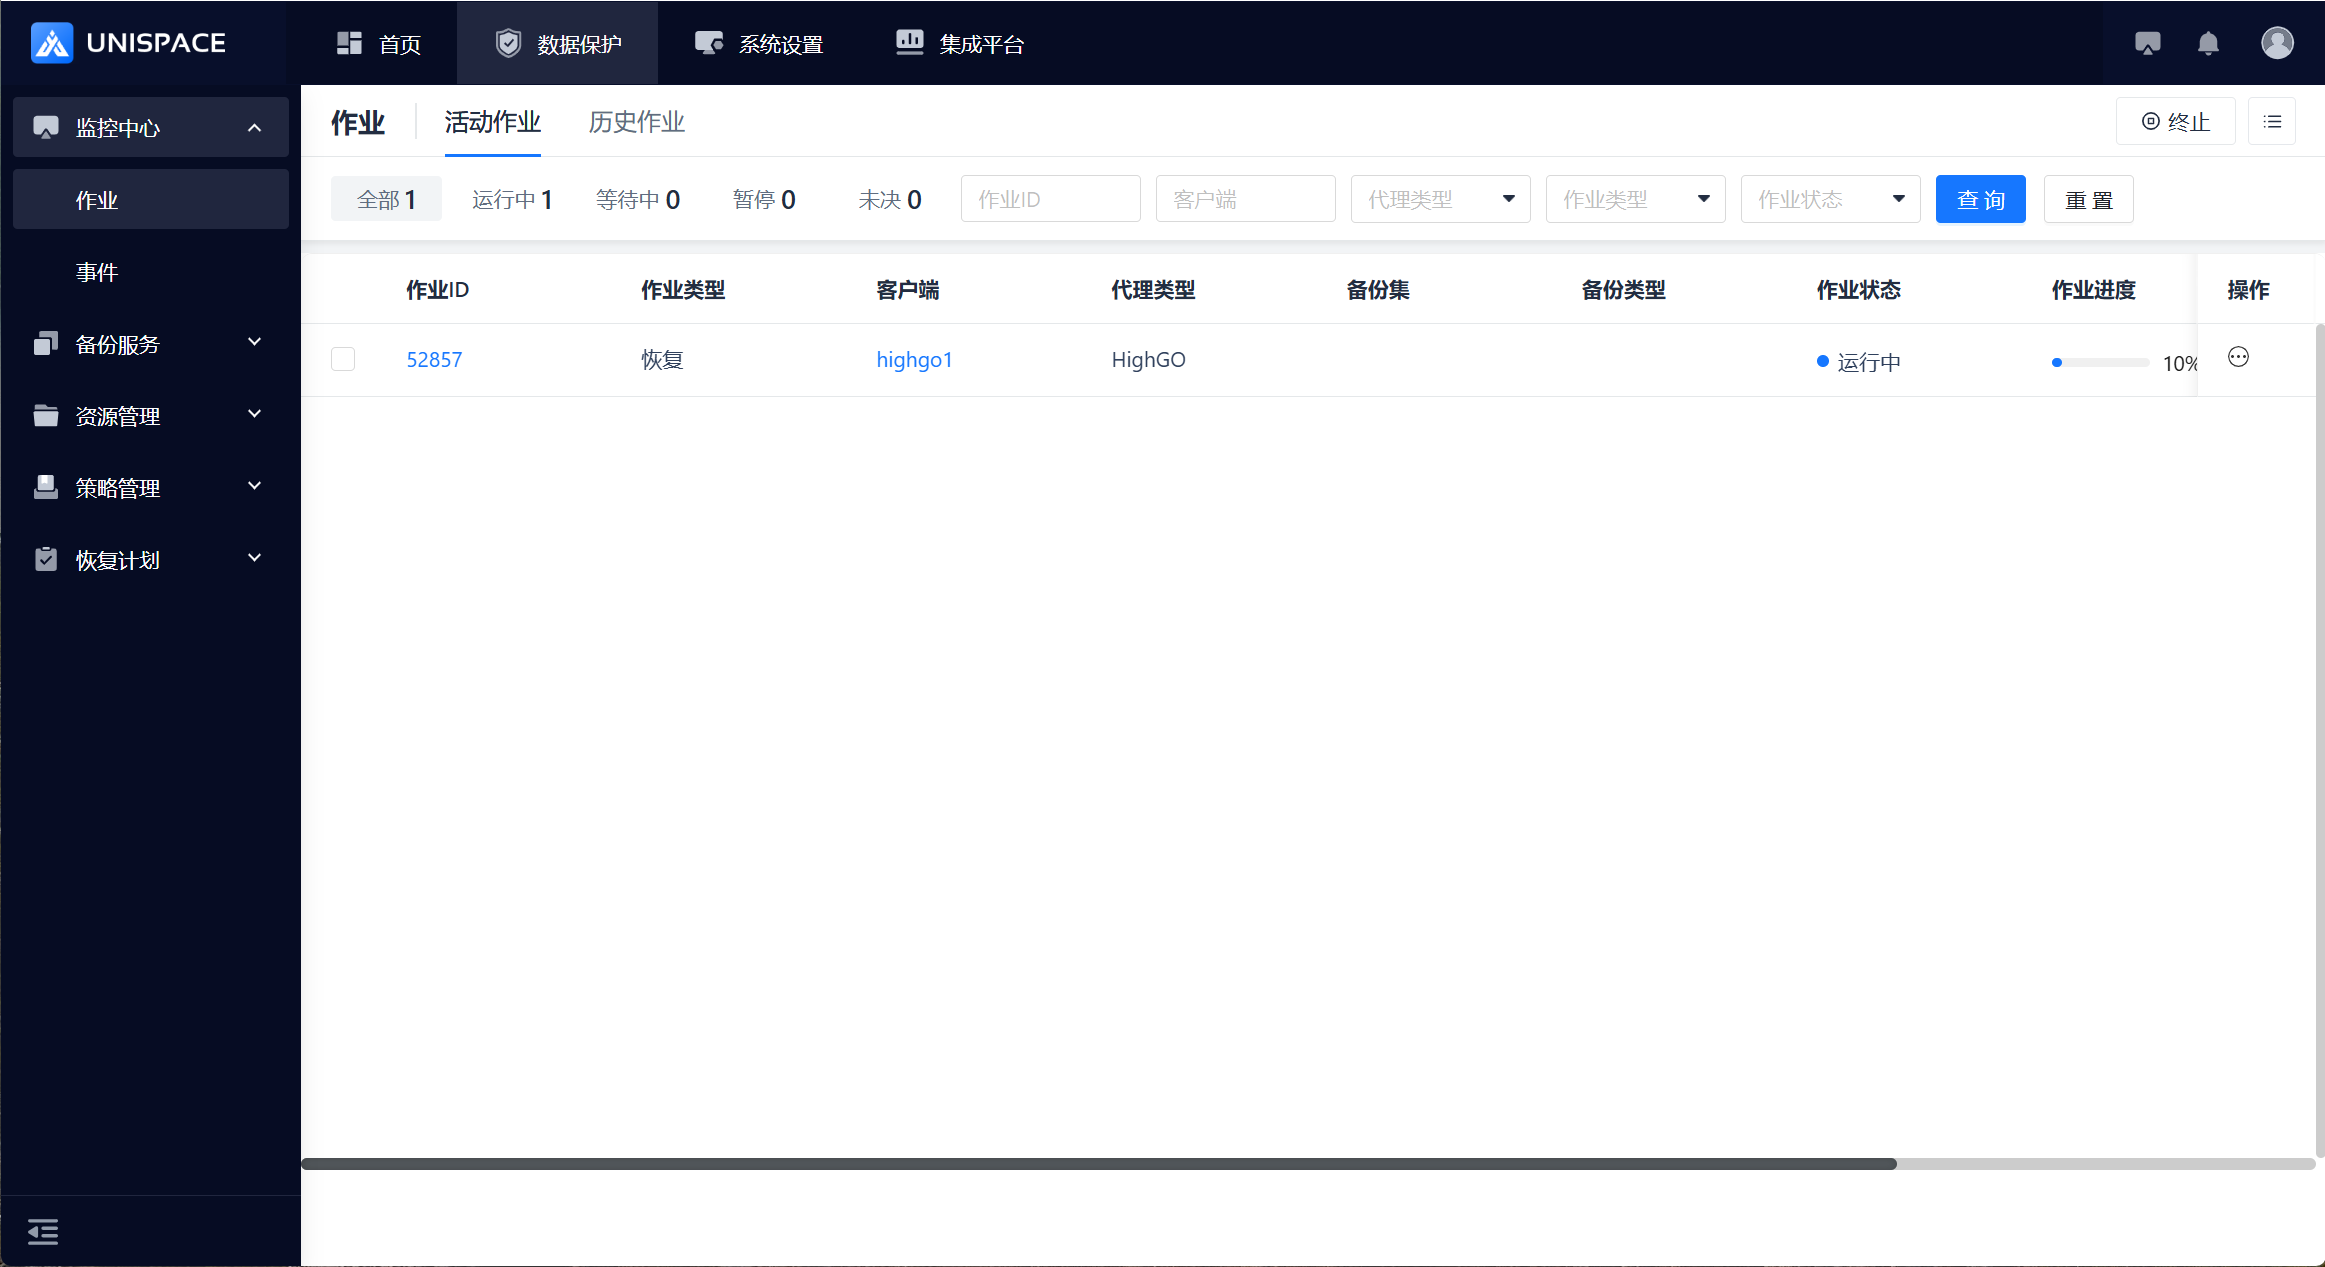
Step 6: After the job starts successfully, click Monitoring Center - Job - Active Jobs to view the job.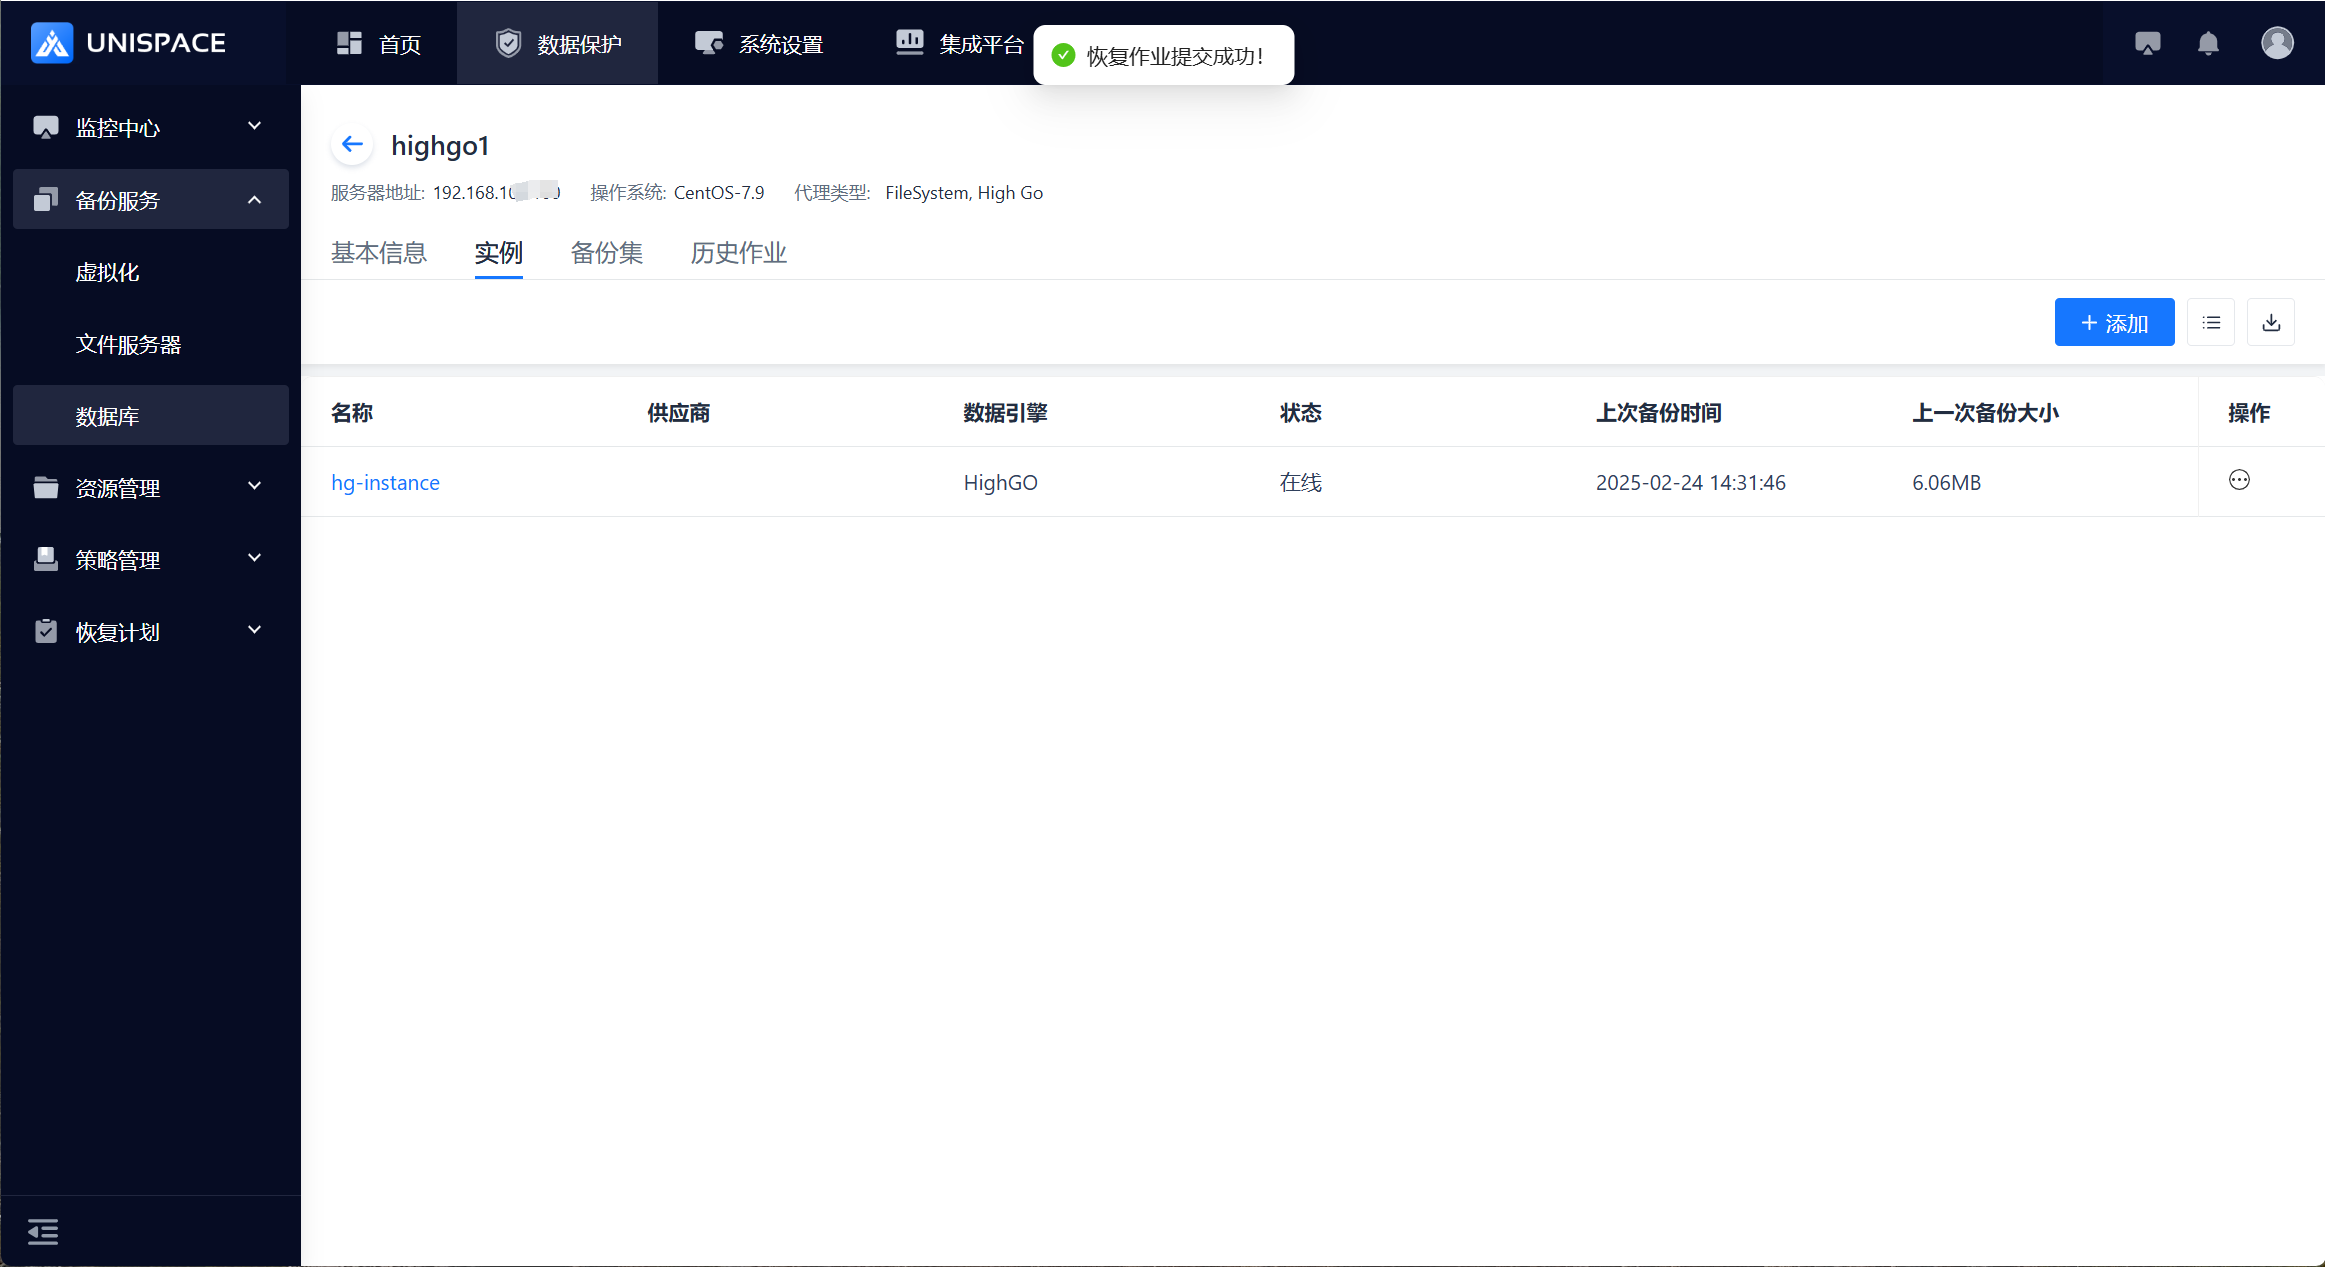
 Step 7: Once the job is completed, click Monitoring Center - Job - Job History to view the job and its status.
2.7 Highgo Database Recovery to Disk
Prerequisites
- The Highgo database has been backed up.
Steps
Step 1: Click the system menu Backup Service - Database - Server Name to enter the Instance list.Step 2: Select the Instance, click Action under the Operation column, then choose Restore and select Database Recovery. Click Next.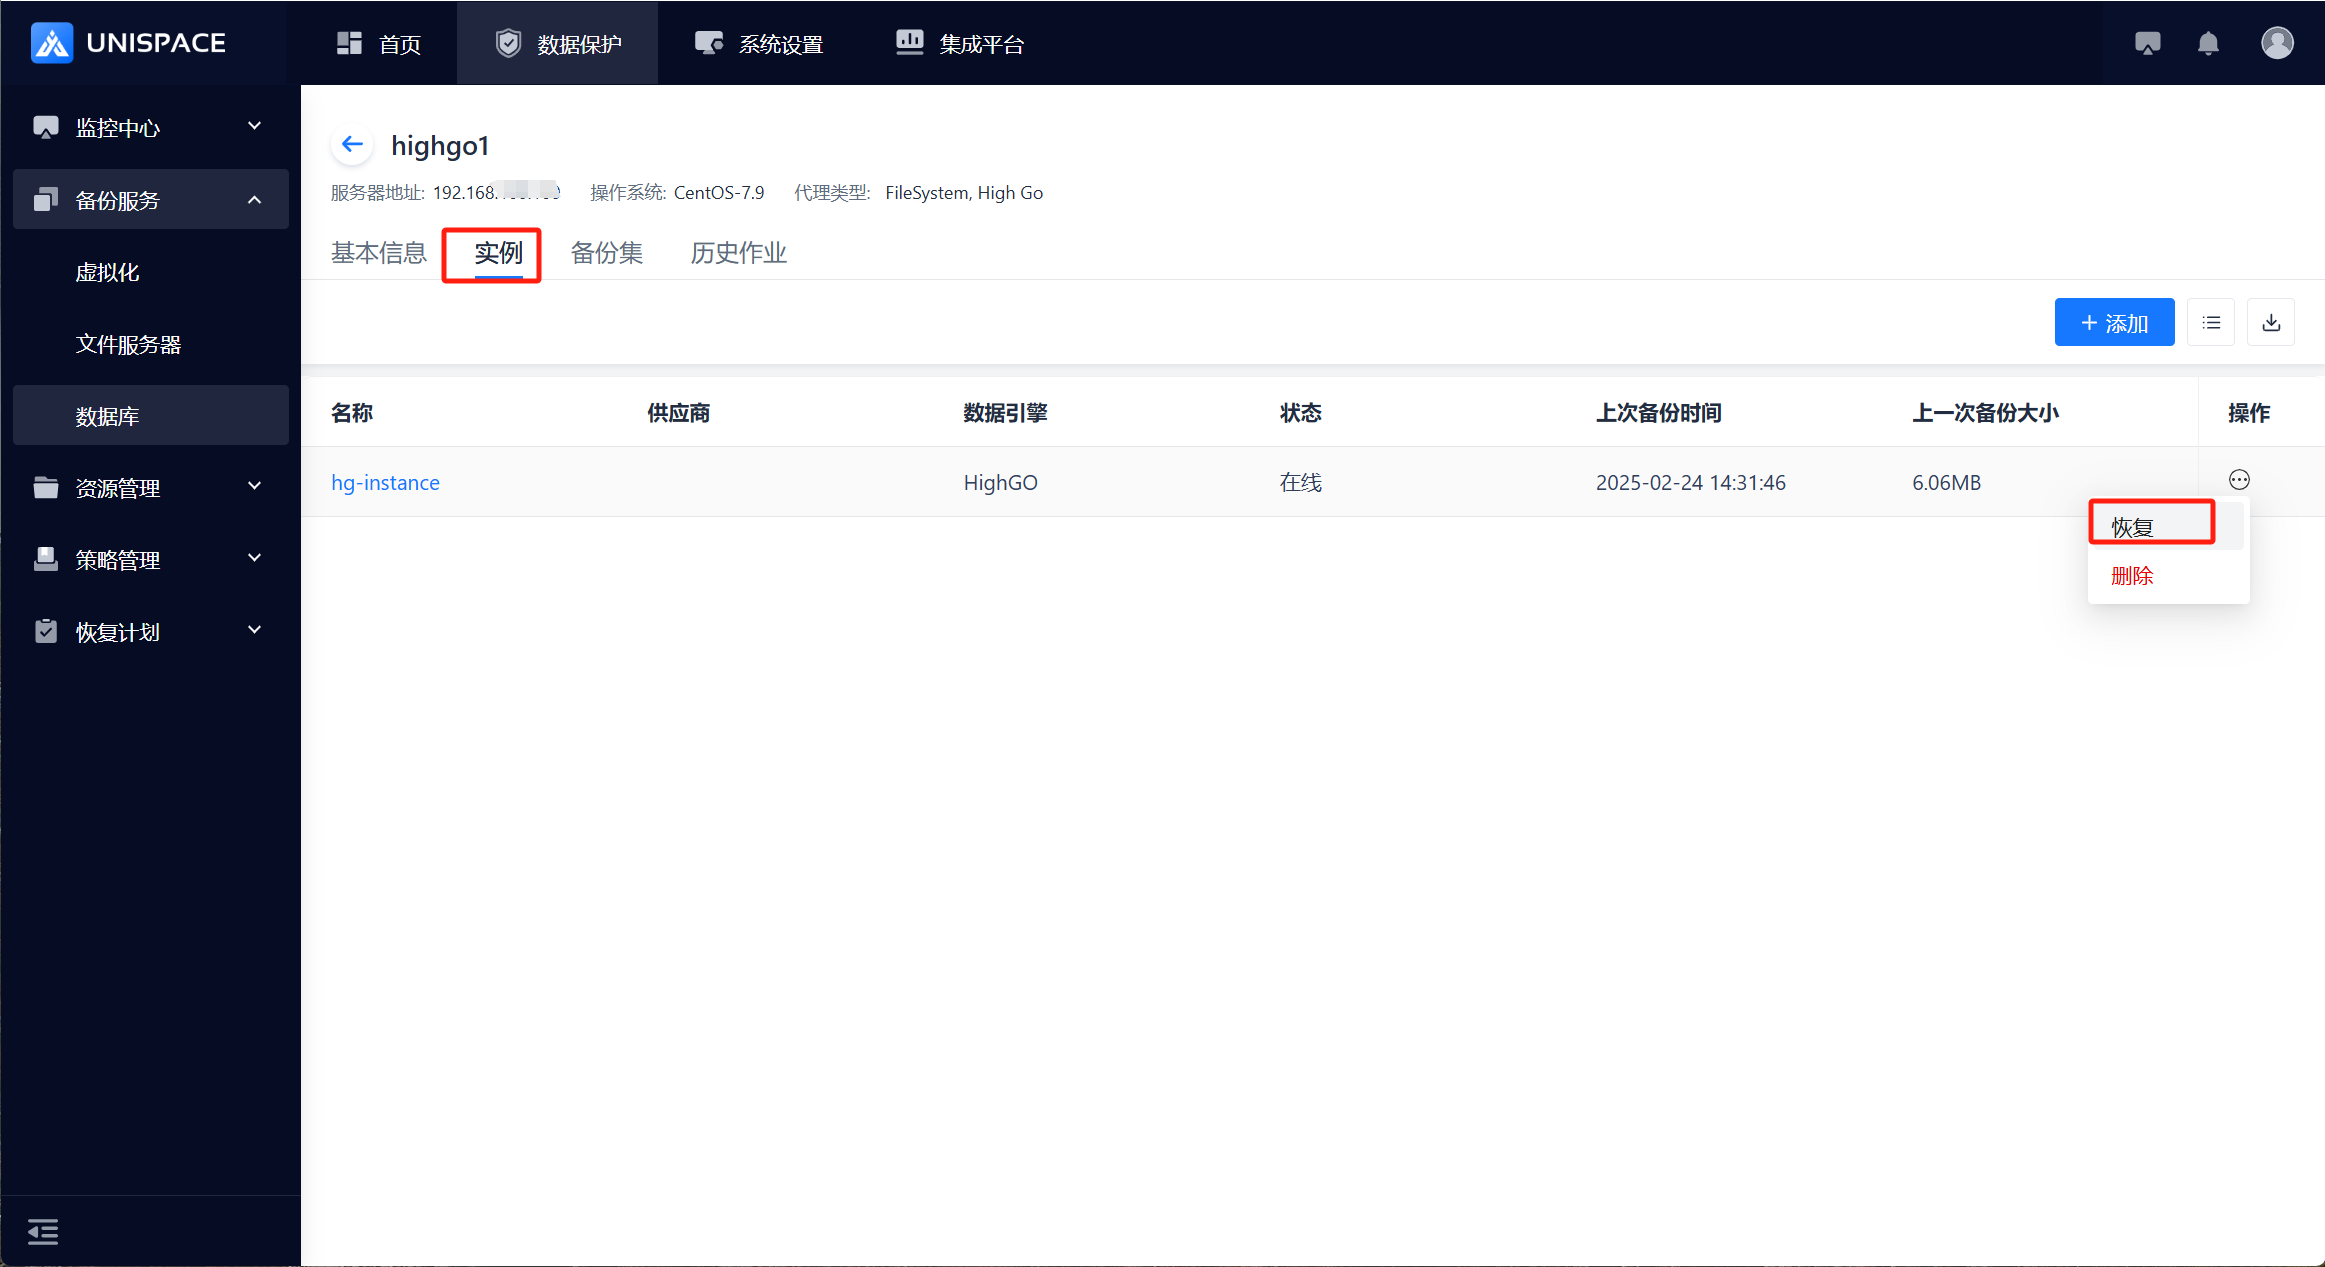
 Step 3: A recovery window will pop up. Choose the recovery point. You can query the recovery point based on the time range. Select the Database and Backup Time, then click Next (cross-backup set recovery is not supported).
 Step 4: Set the recovery options, choose Disk, fill in the necessary parameters, and click OK.
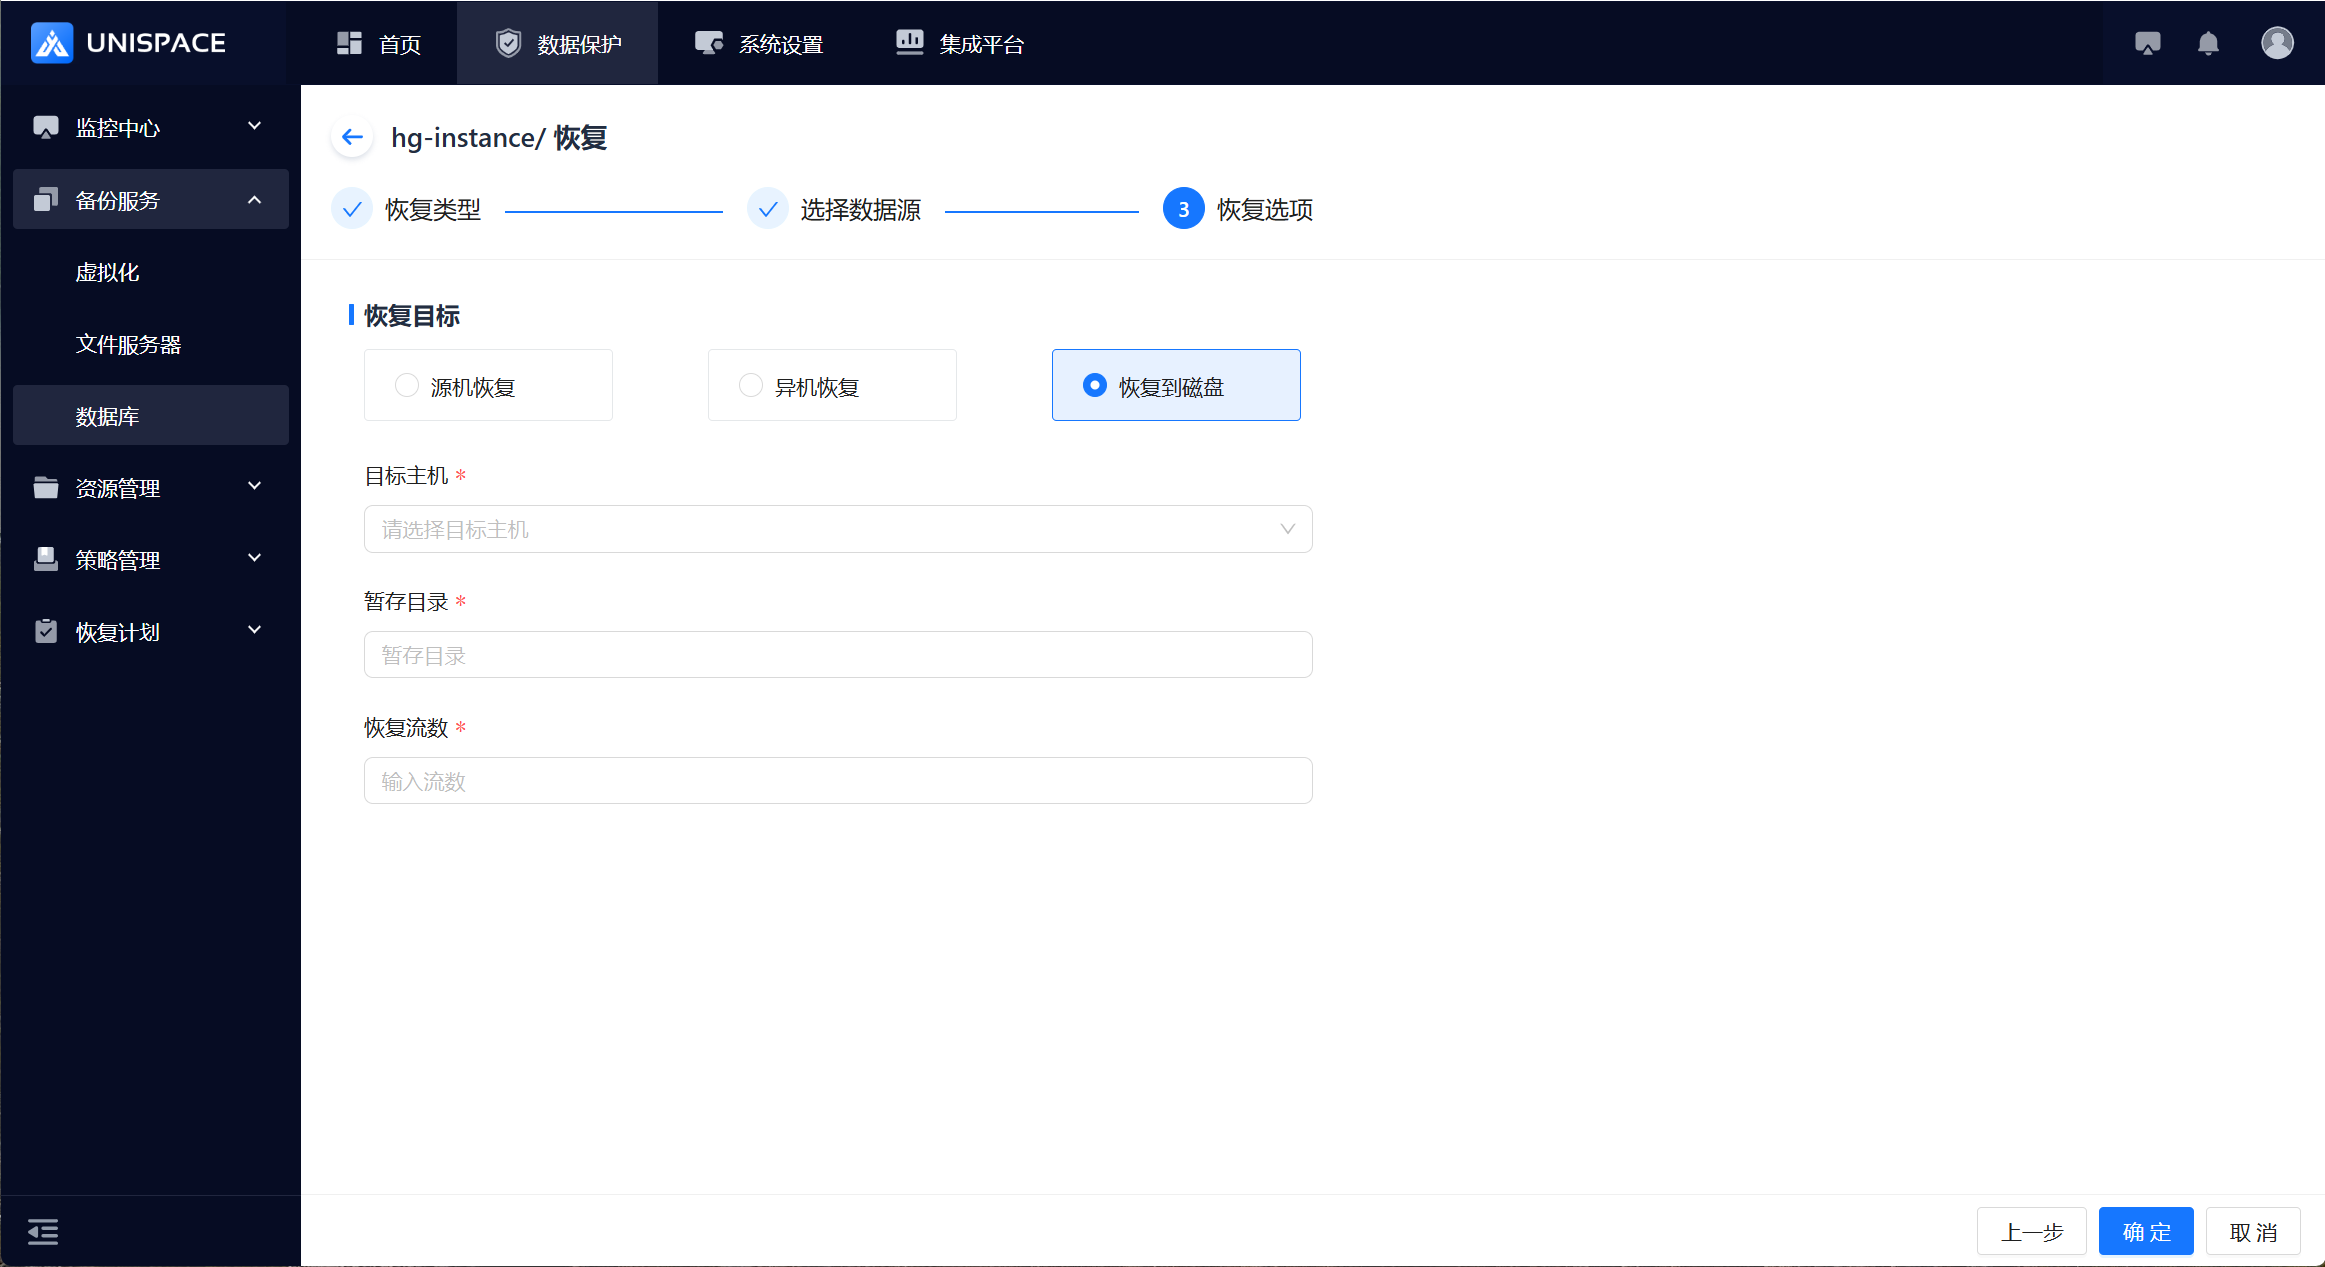 Step 5: After the job starts successfully, click Monitoring Center - Job - Active Jobs to view the job.Step 6: Once the job is completed, click Monitoring Center - Job - Job History to view the job and its status.
2.8 Highgo Instance (Log) Recovery
Prerequisites
- Highgo instance and log backups have been completed.
Steps
Step 1: Click the system menu Backup Service - Database - Server Name to enter the Instance list.Step 2: Select the Instance, click Action under the Operation column, then choose Restore and select Instance Recovery. Click Next.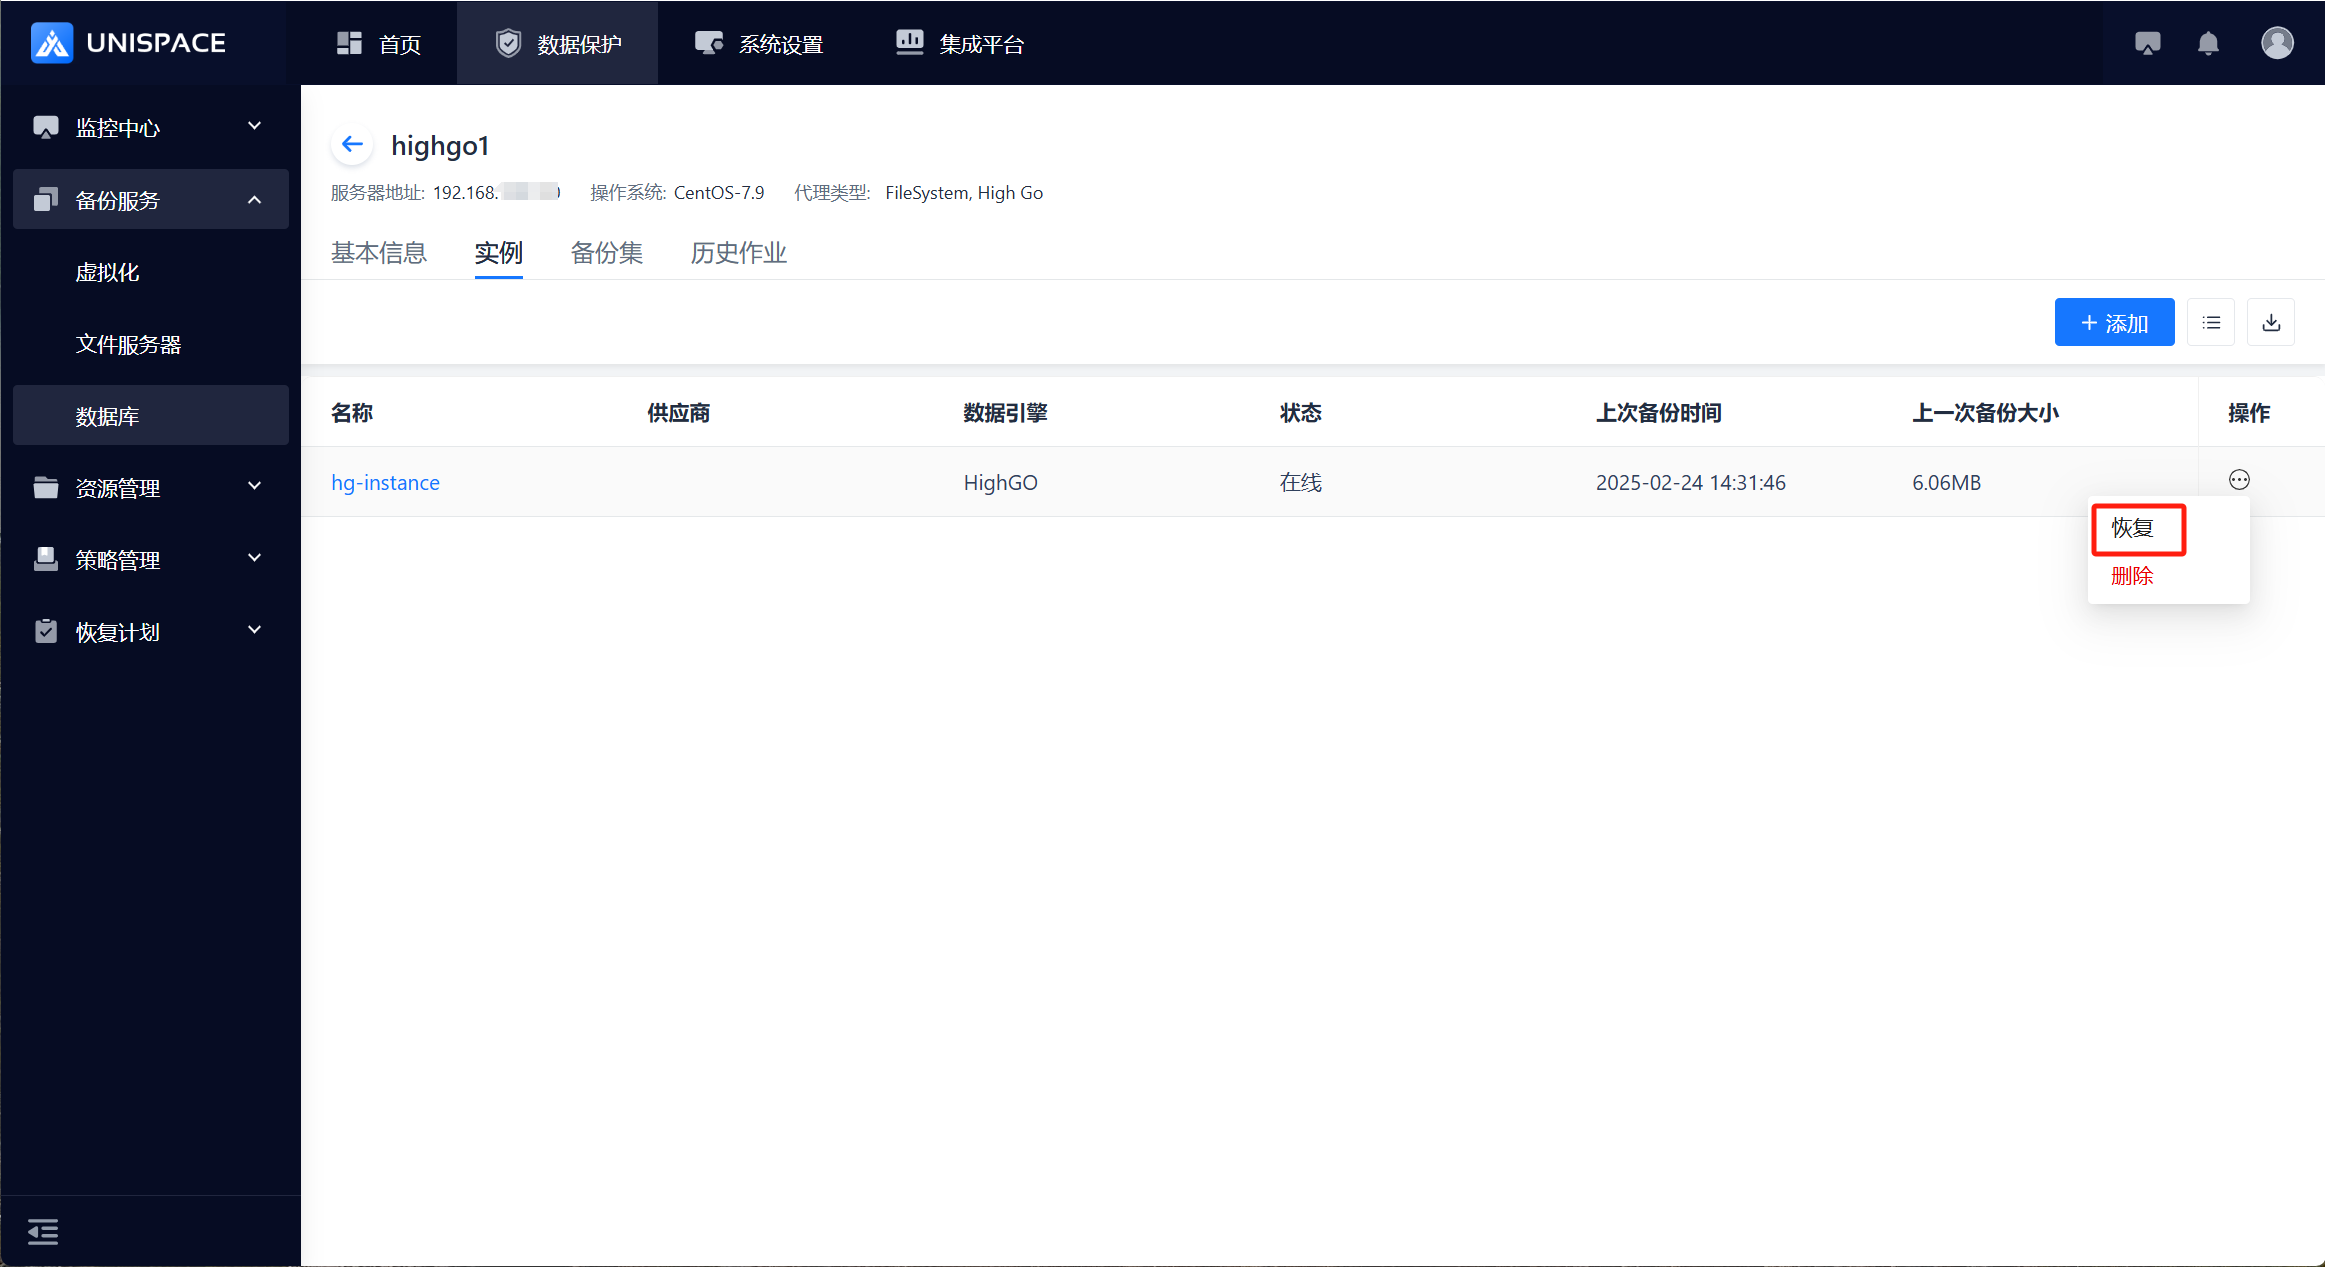
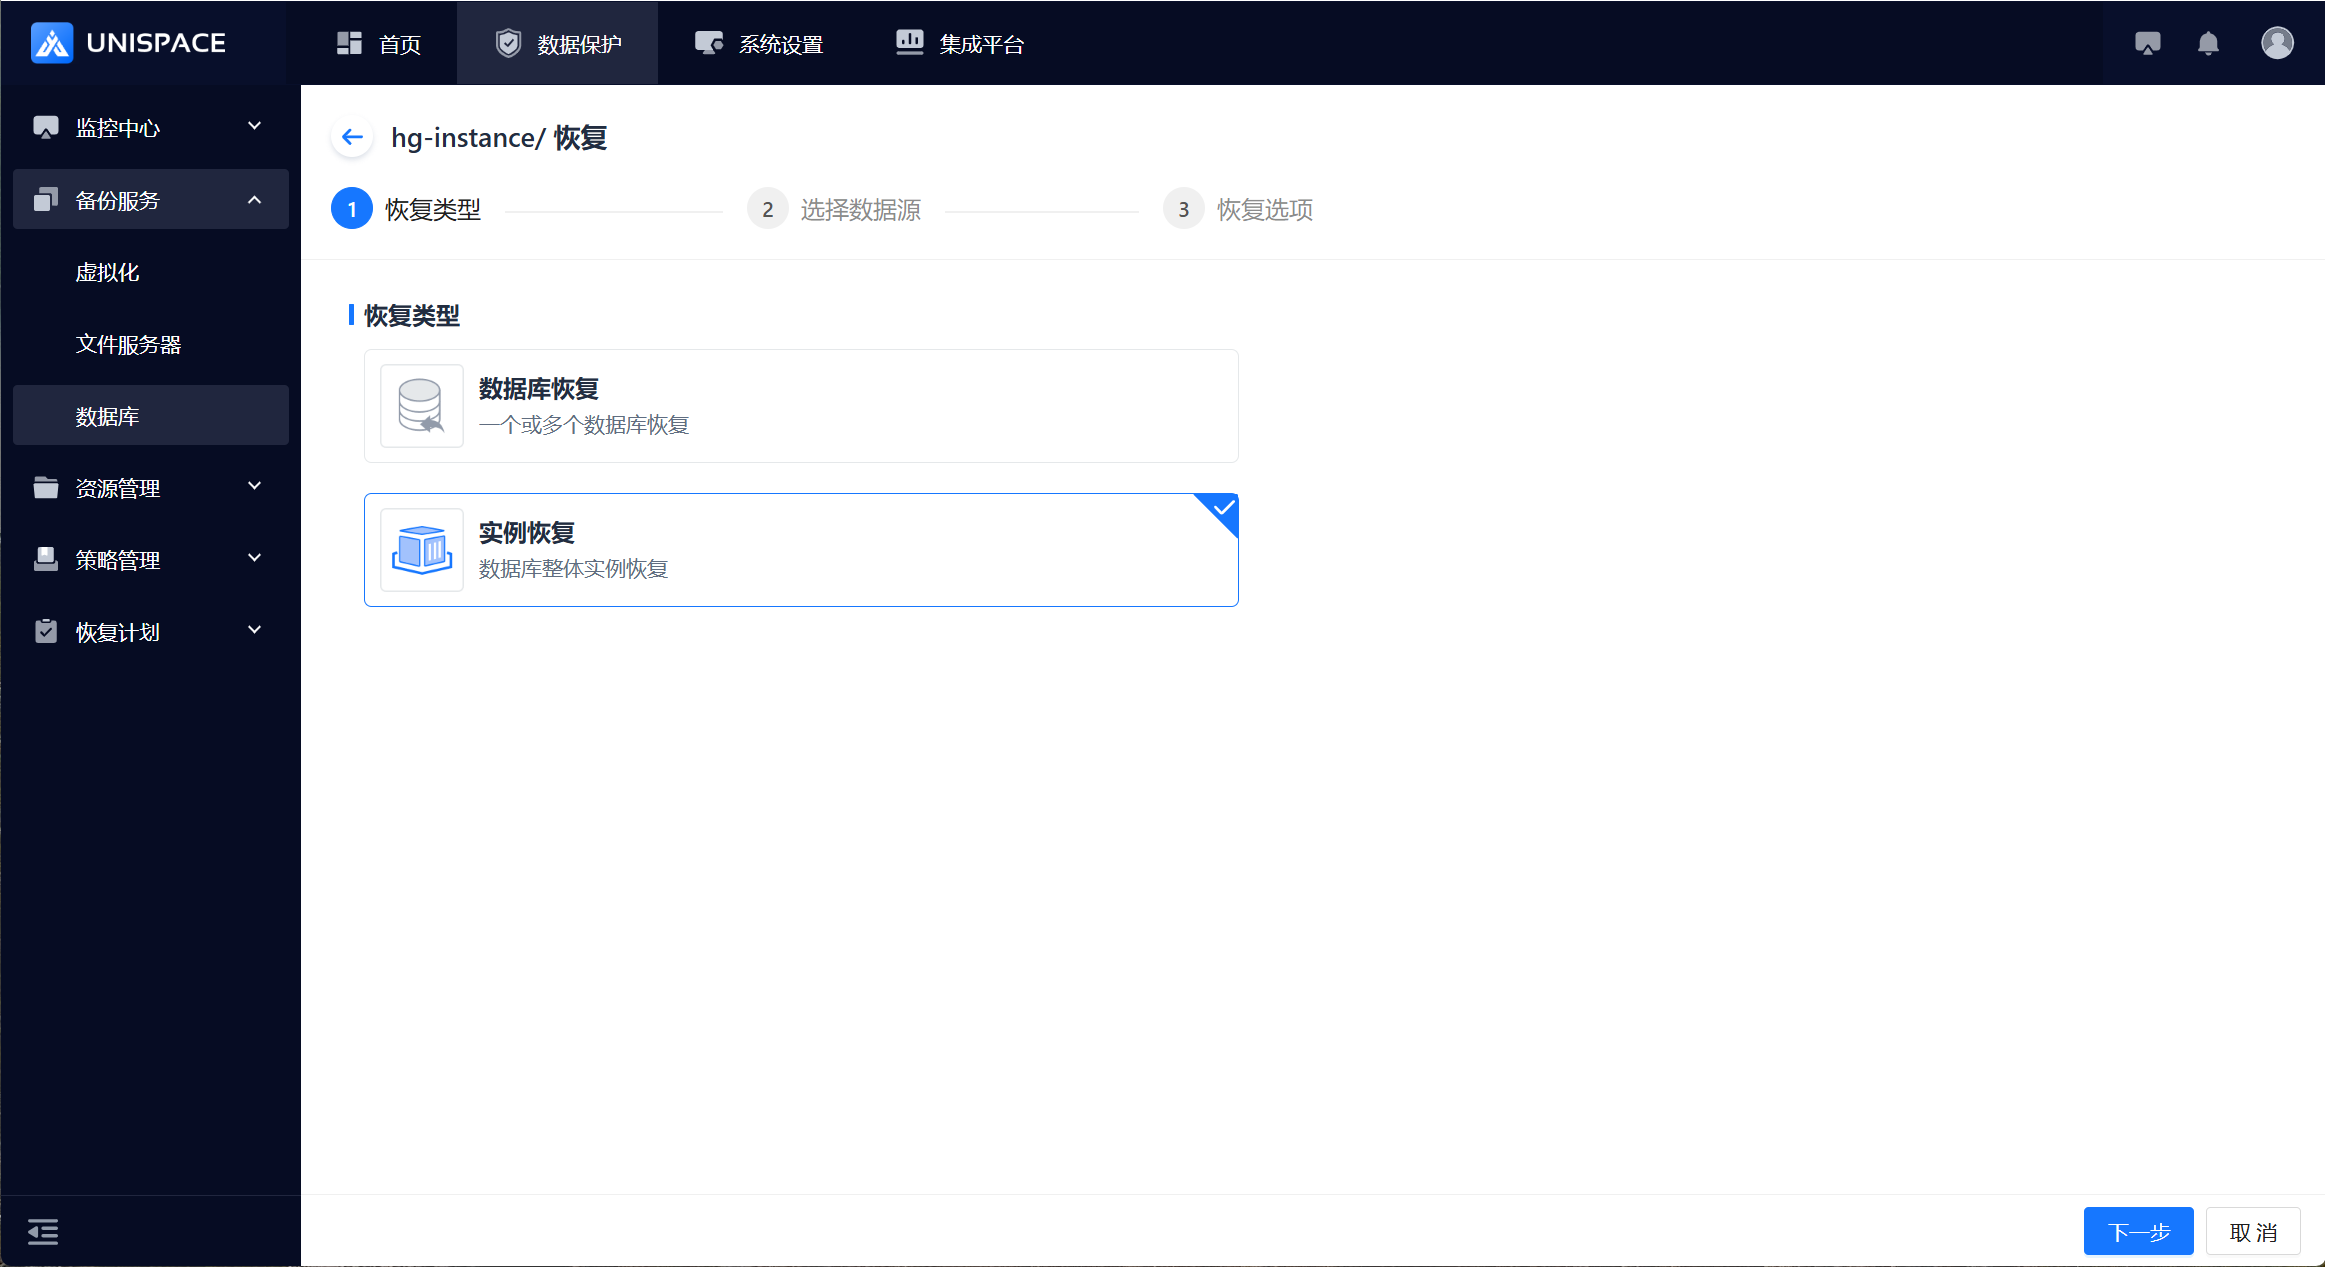 Step 3: A recovery window will pop up. Choose the recovery point. You can query the recovery point based on the time range. Select Full or Log, then click Next.
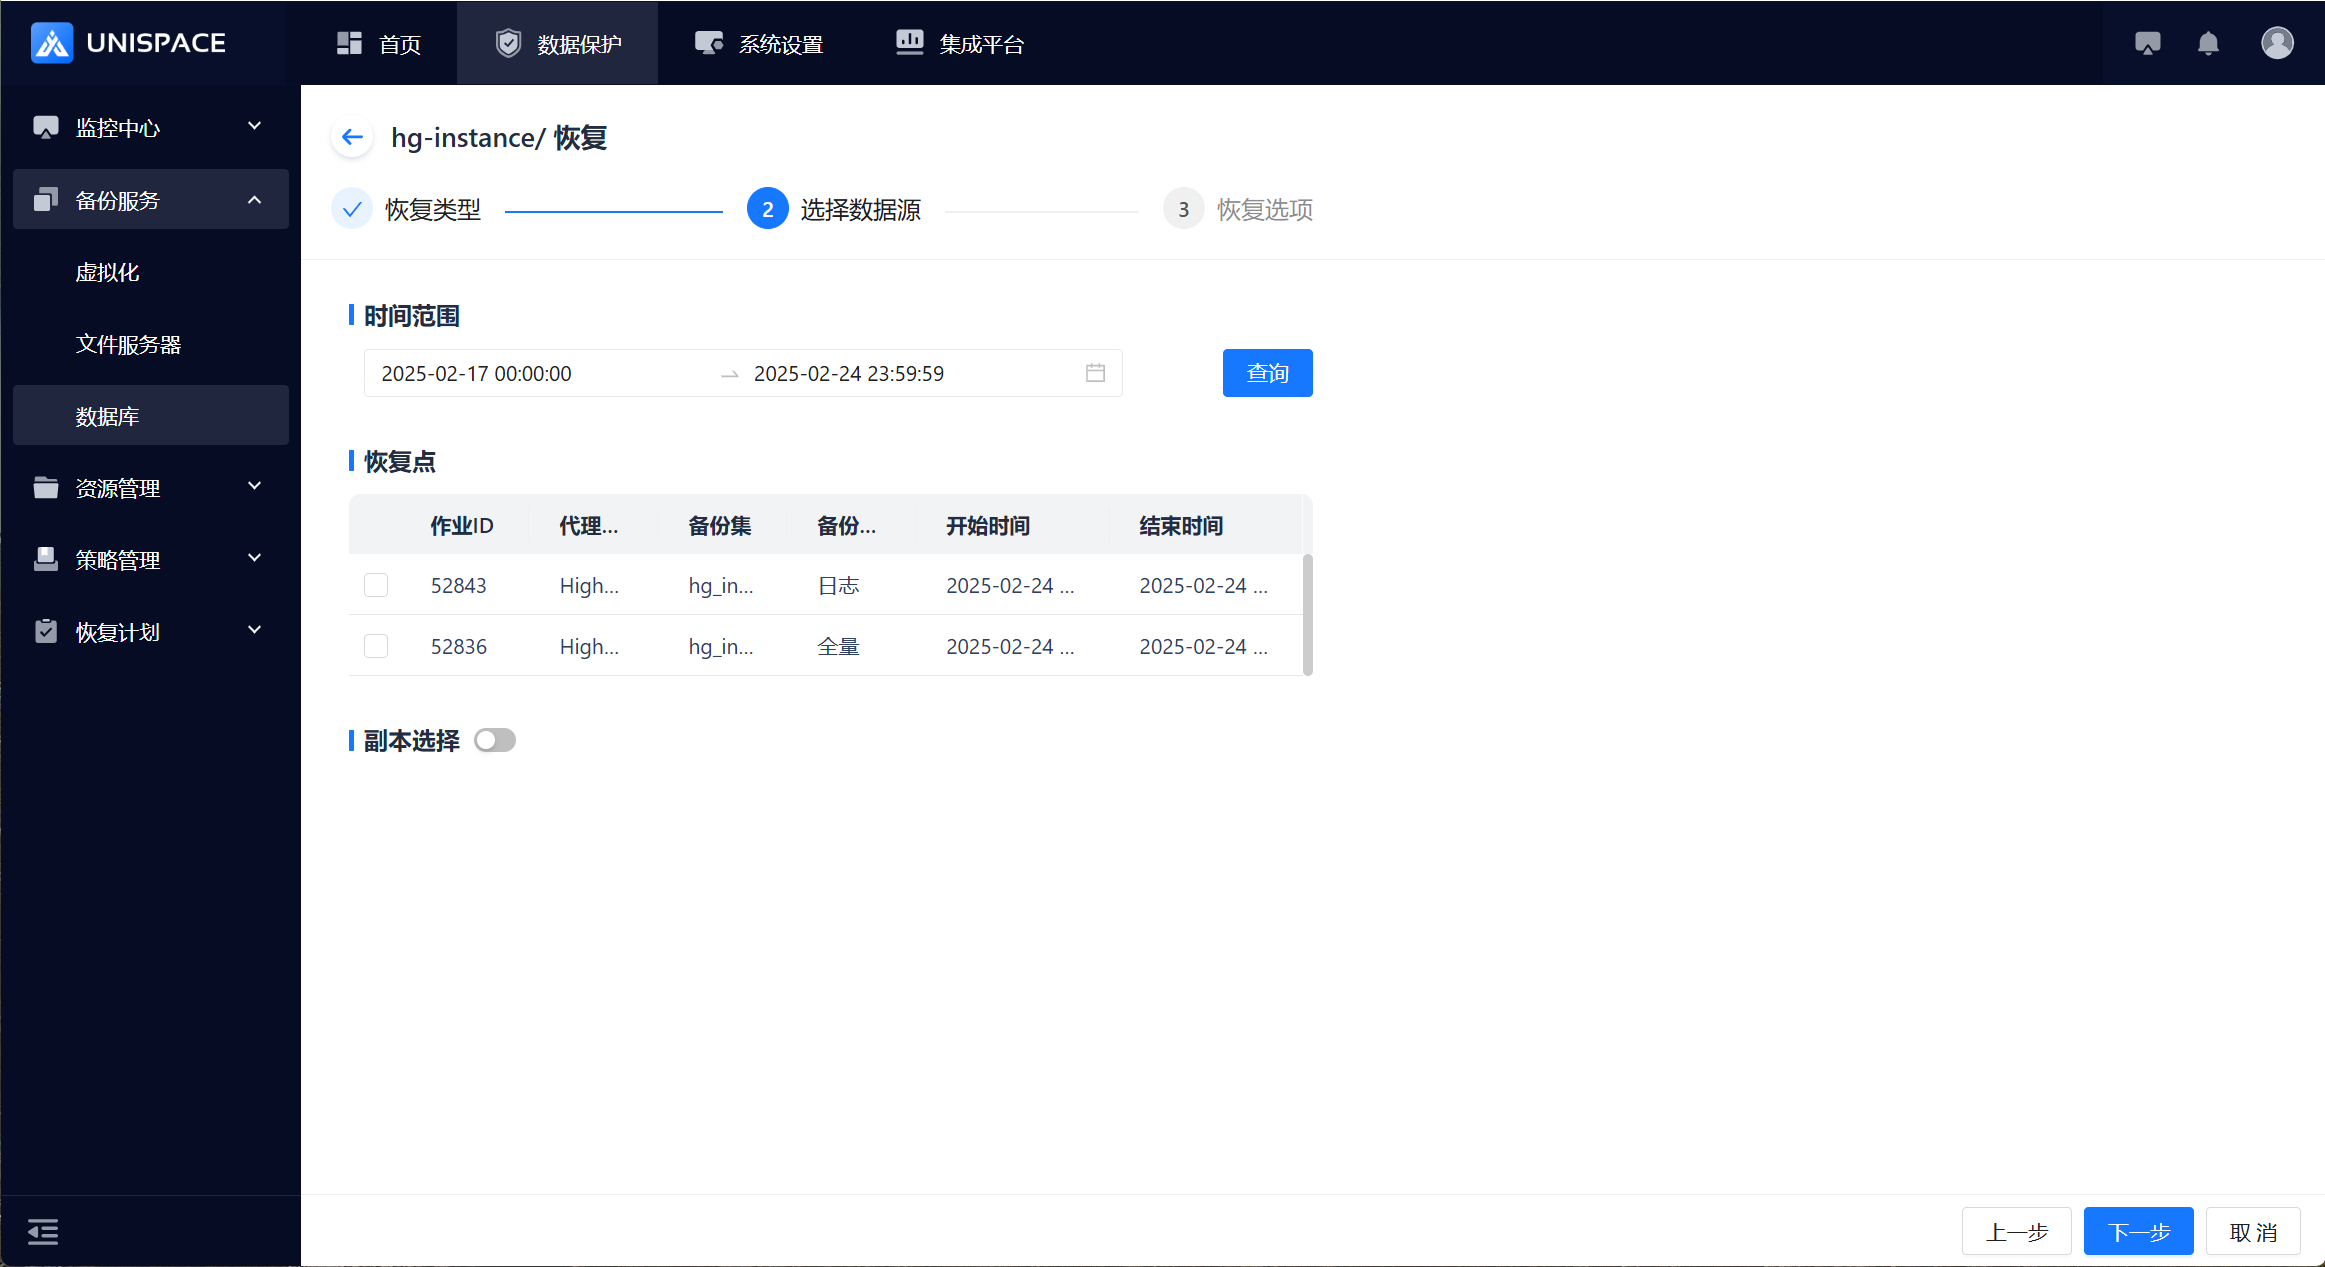 Step 4: Set the recovery options. Supported methods: Source Machine, Cross-Machine, Recover to Disk. Fill in the necessary parameters and click OK.
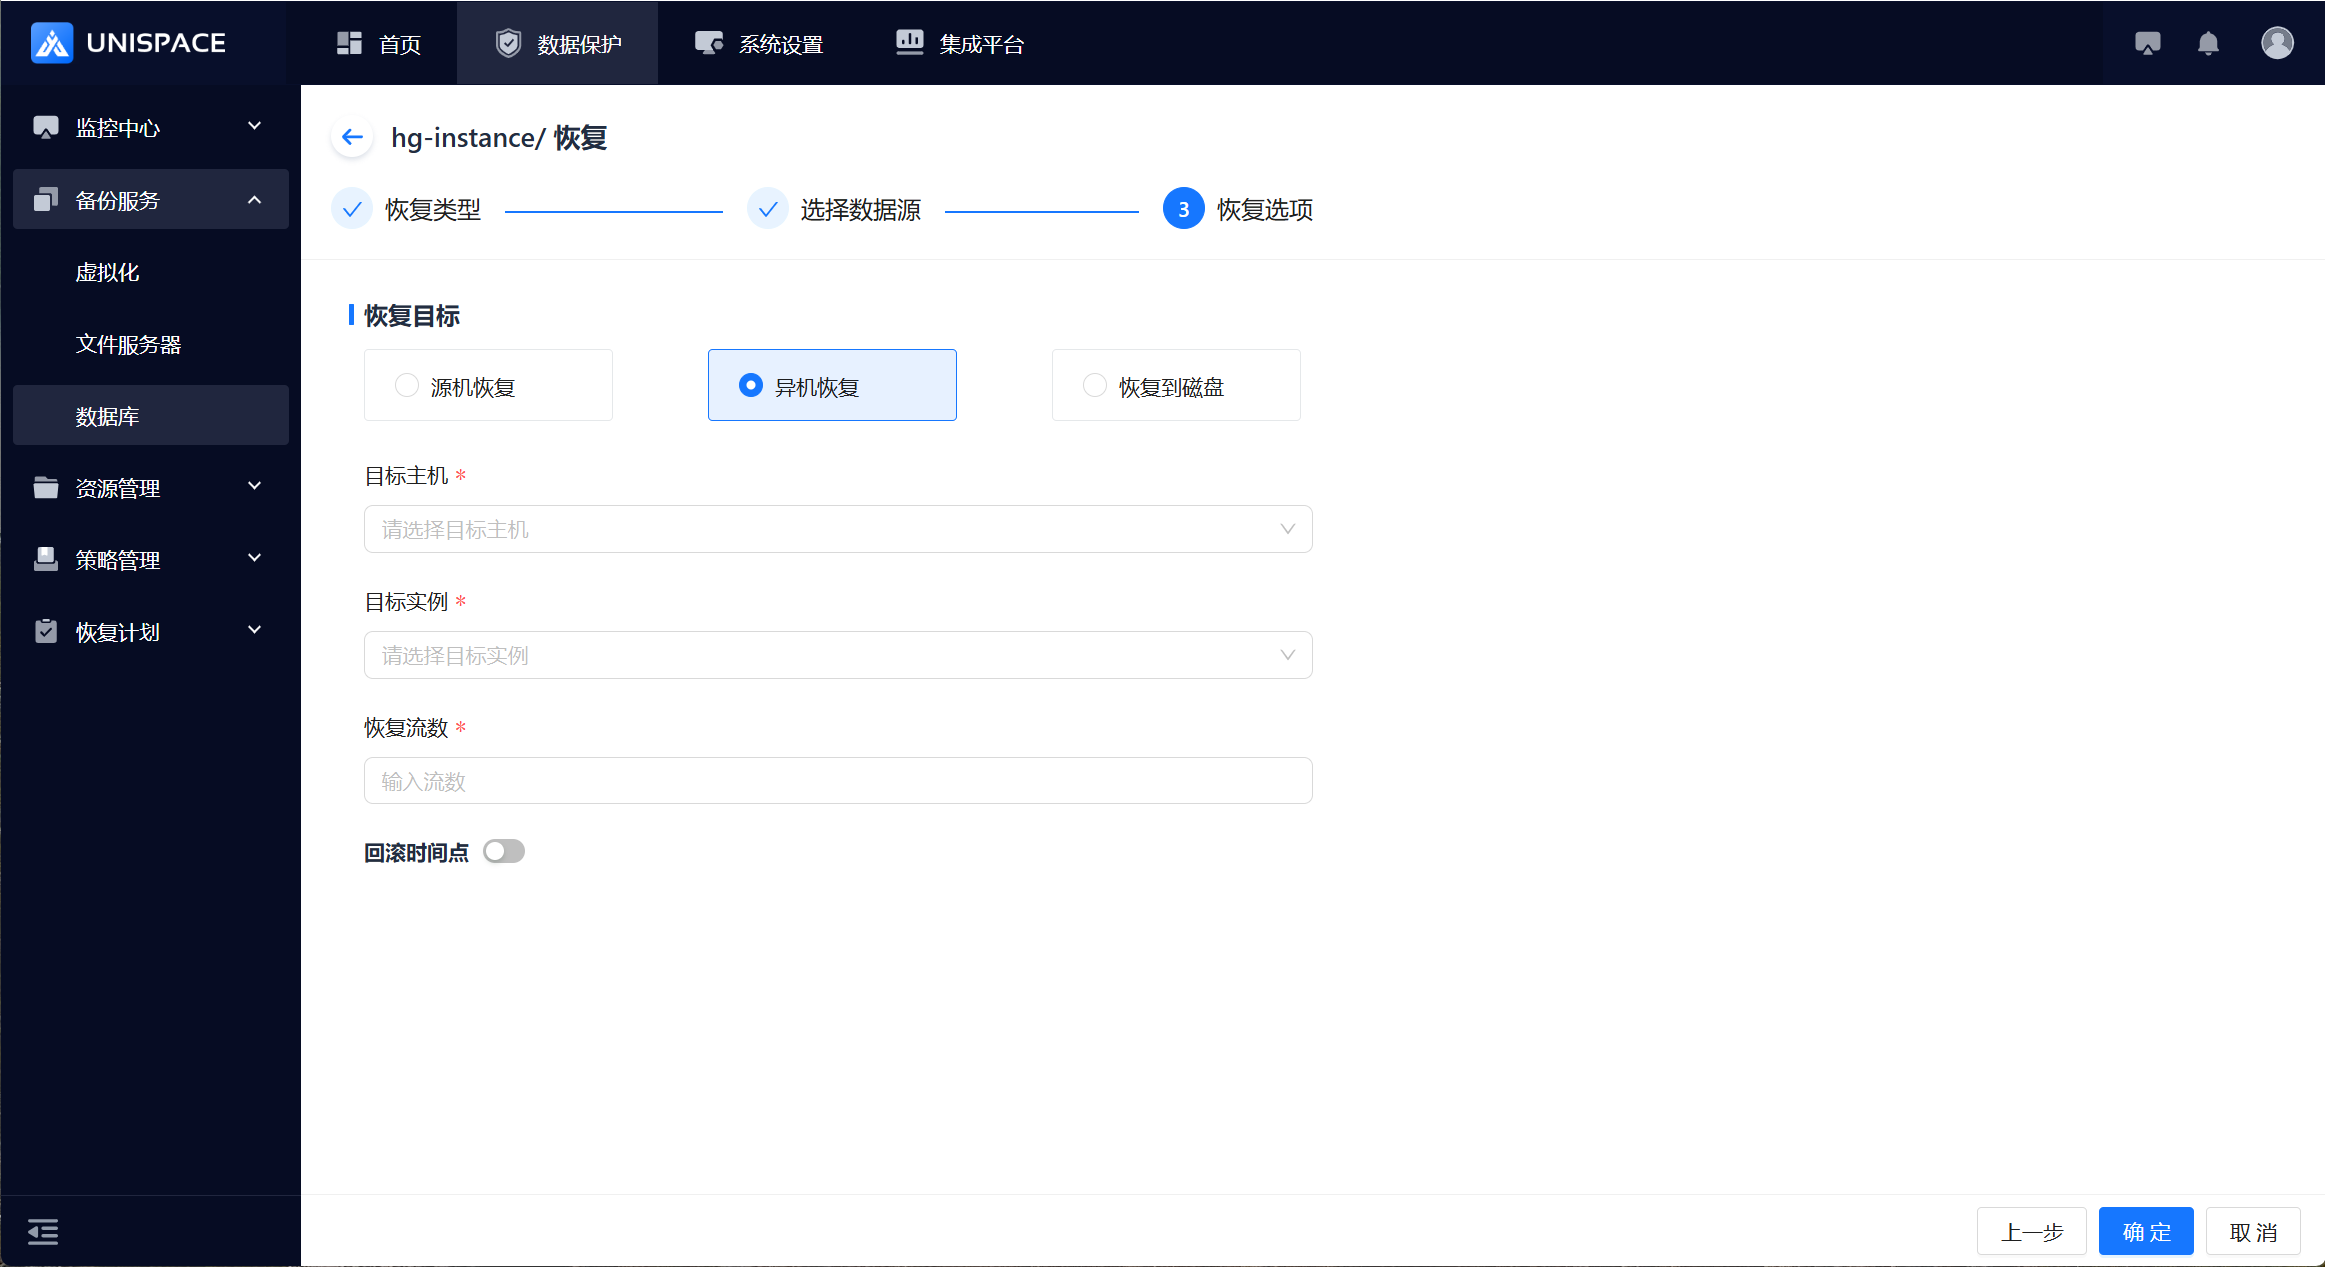
 Step 5: Fill in the necessary parameters as described below:
| Parameter Name | Description | Setting Principles |
|---|---|---|
| Recovery Target | Default to cross-machine recovery | Options: Source Machine Recovery; Cross-Machine Recovery; Recover to Disk |
| Target Host | Default to cross-machine recovery, dropdown list | Client node where Highgo service is installed |
| Target Instance | Linked with the target host | Choose the successfully created Highgo instance under the target host |
| Recovery Stream Count | Numeric | Maximum value 200, recommended count 4 |
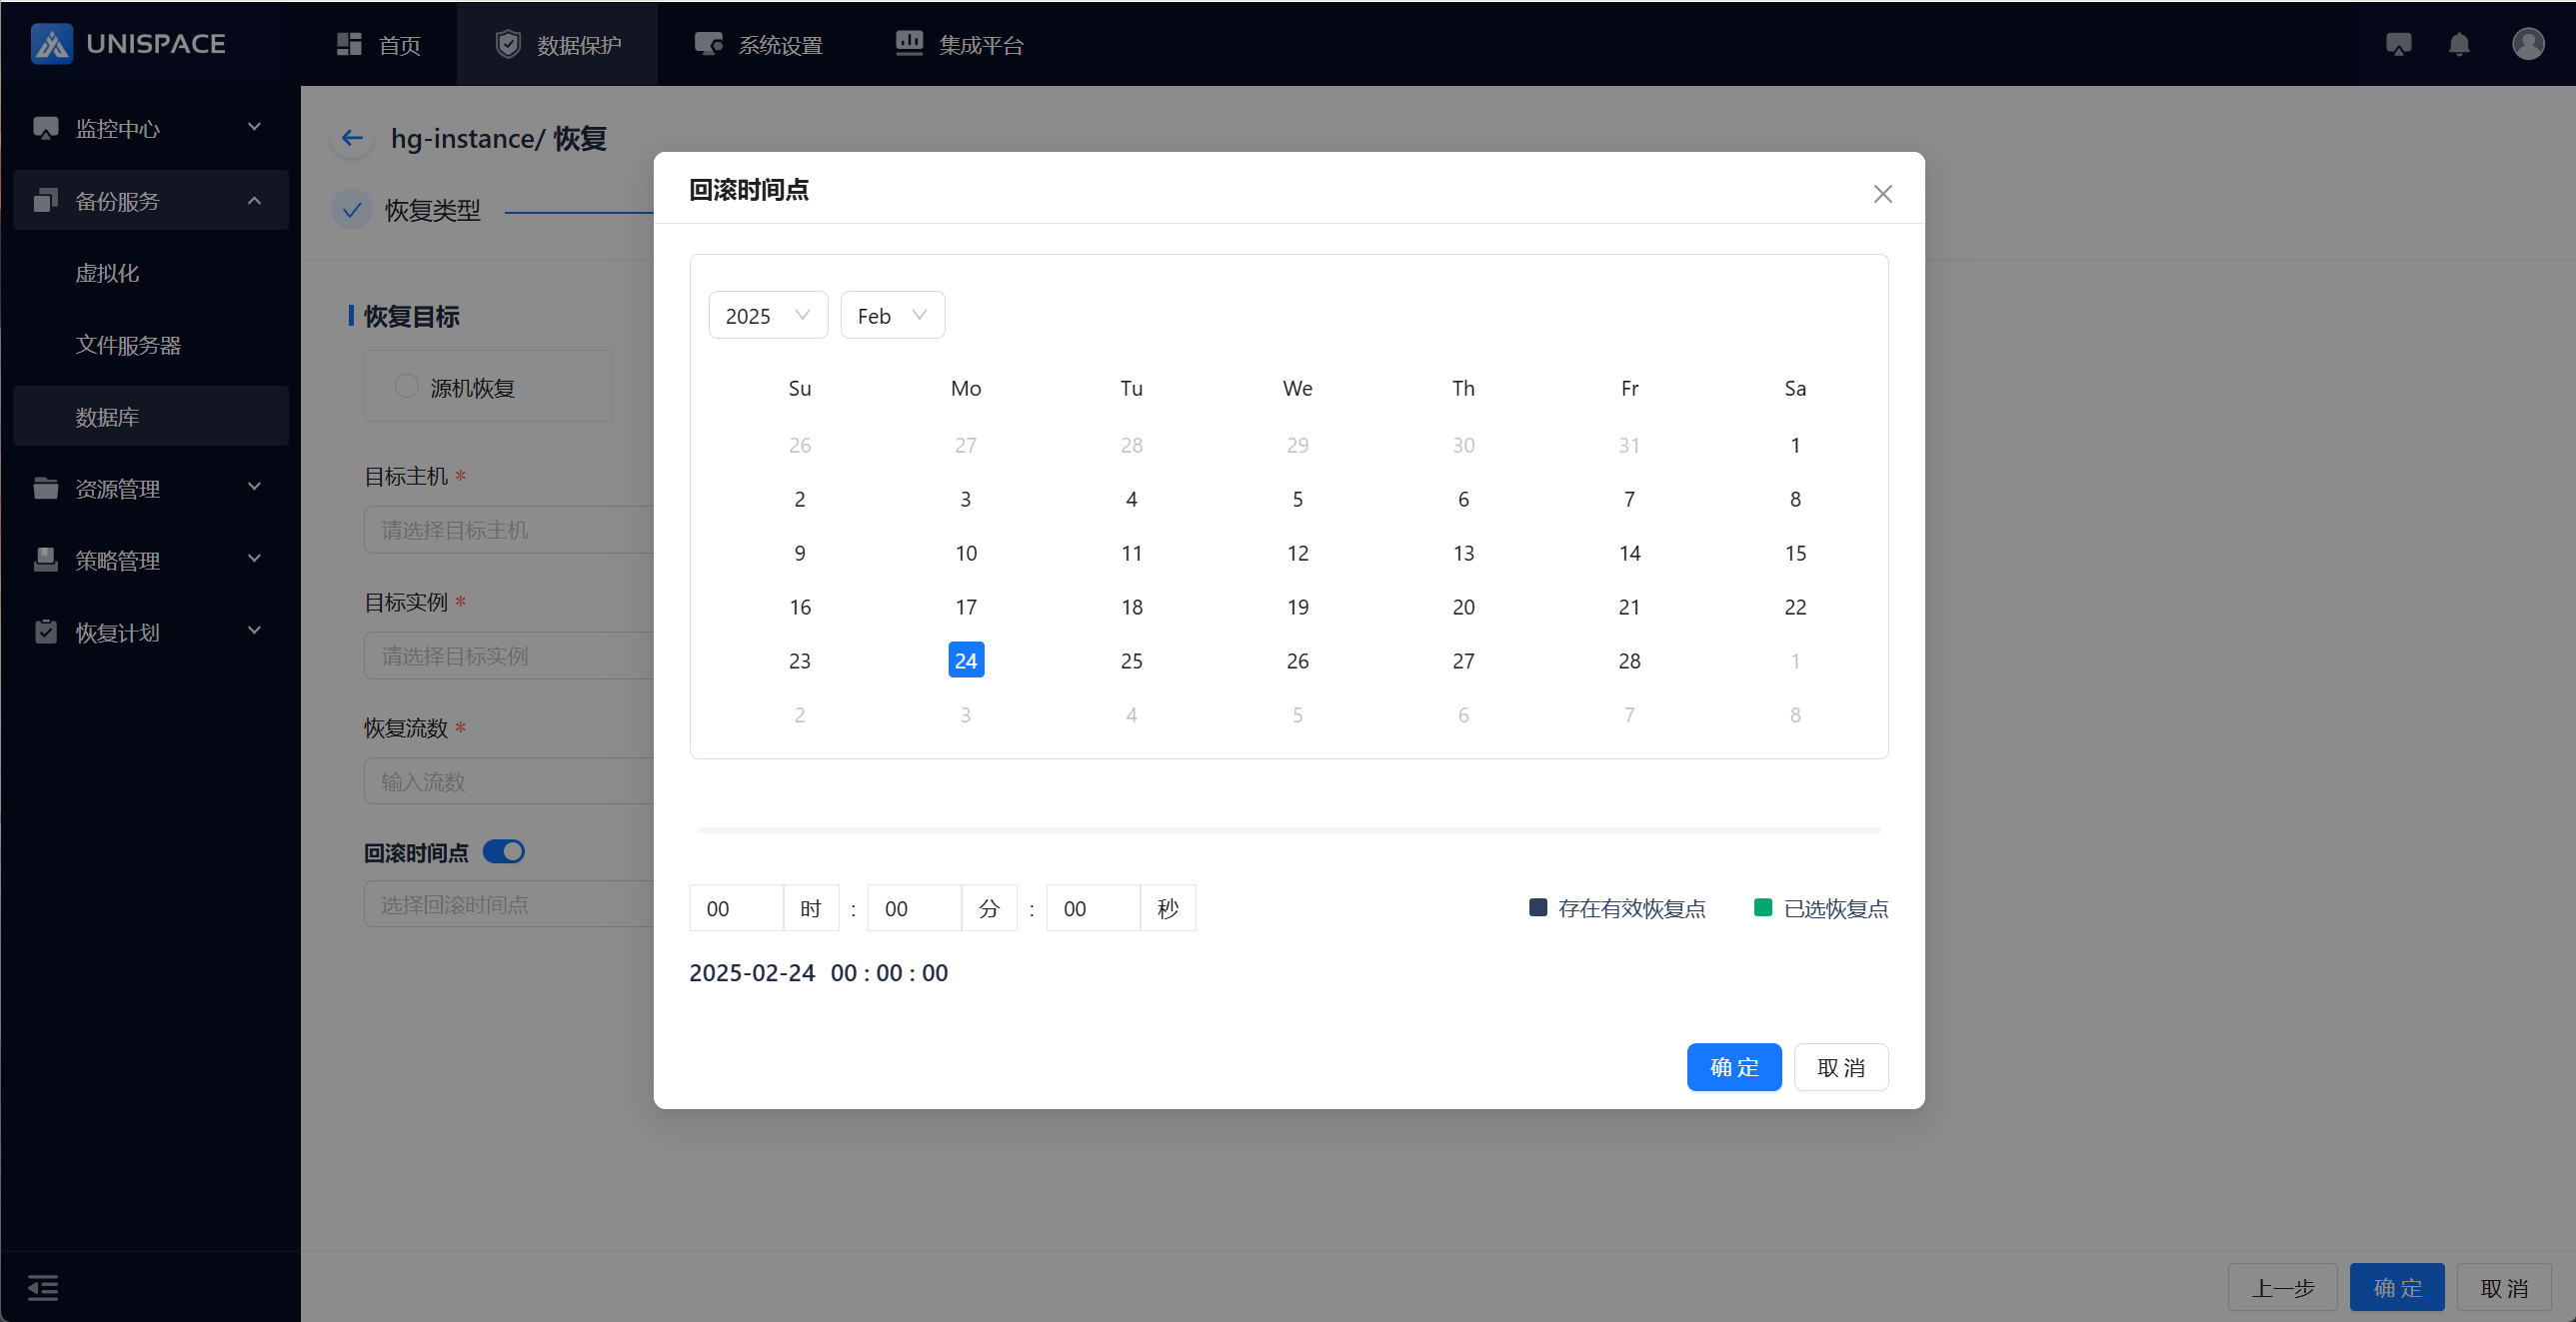
| Rollback Time Switch | Default to off, restores to the selected recovery point backup completion time | Turn on; select rollback time from the calendar, supports custom time |
Step 6: After the job starts successfully, click Monitoring Center - Job - Active Jobs to view the job.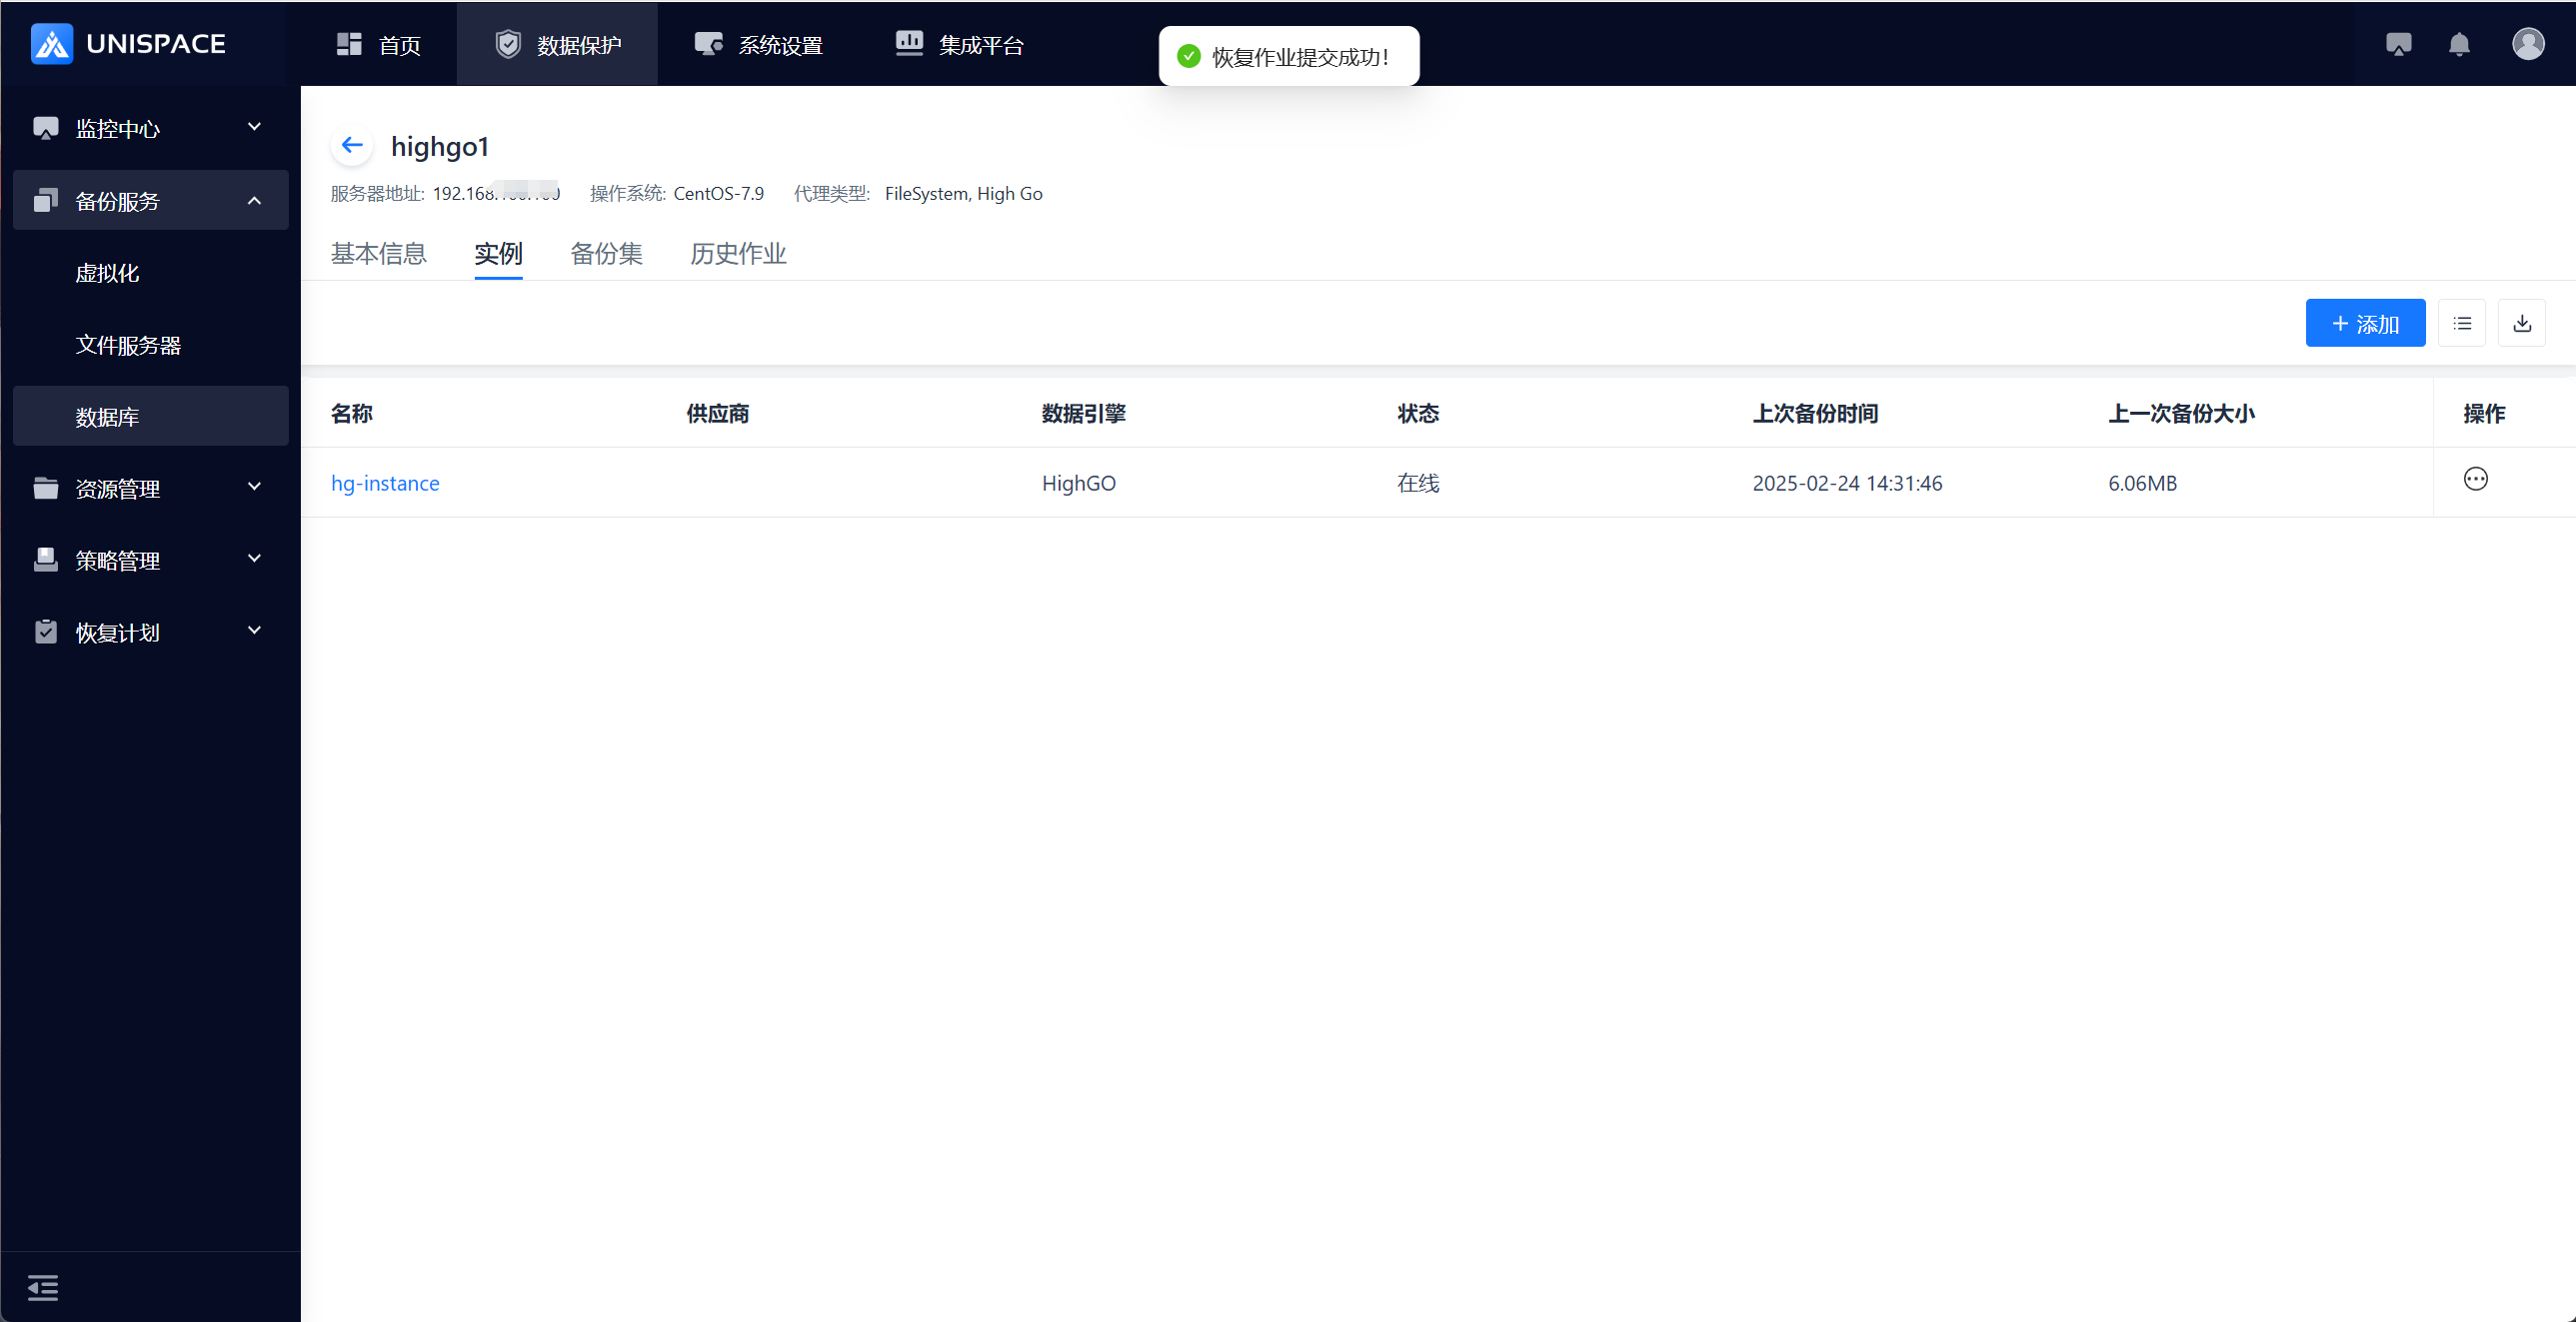
 Step 7: Once the job is completed, click Monitoring Center - Job - Job History to view the job and its status.