Agent-Oracle RAC
1.1 Create an Oracle Cluster
Prerequisites
- Created a new storage repository.
- Created a new service plan.
- Ensure that the Oracle RAC service is installed and accessible.
Steps
Step 1: Click the system menu Backup Services - Database - Virtual Cluster to enter the virtual cluster page.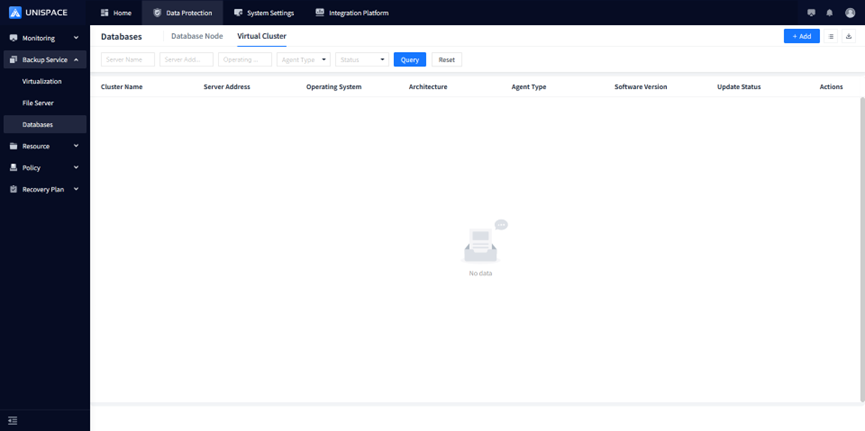 Step 2: Click the Add button at the top right of Instance, and a pop-up window will appear.
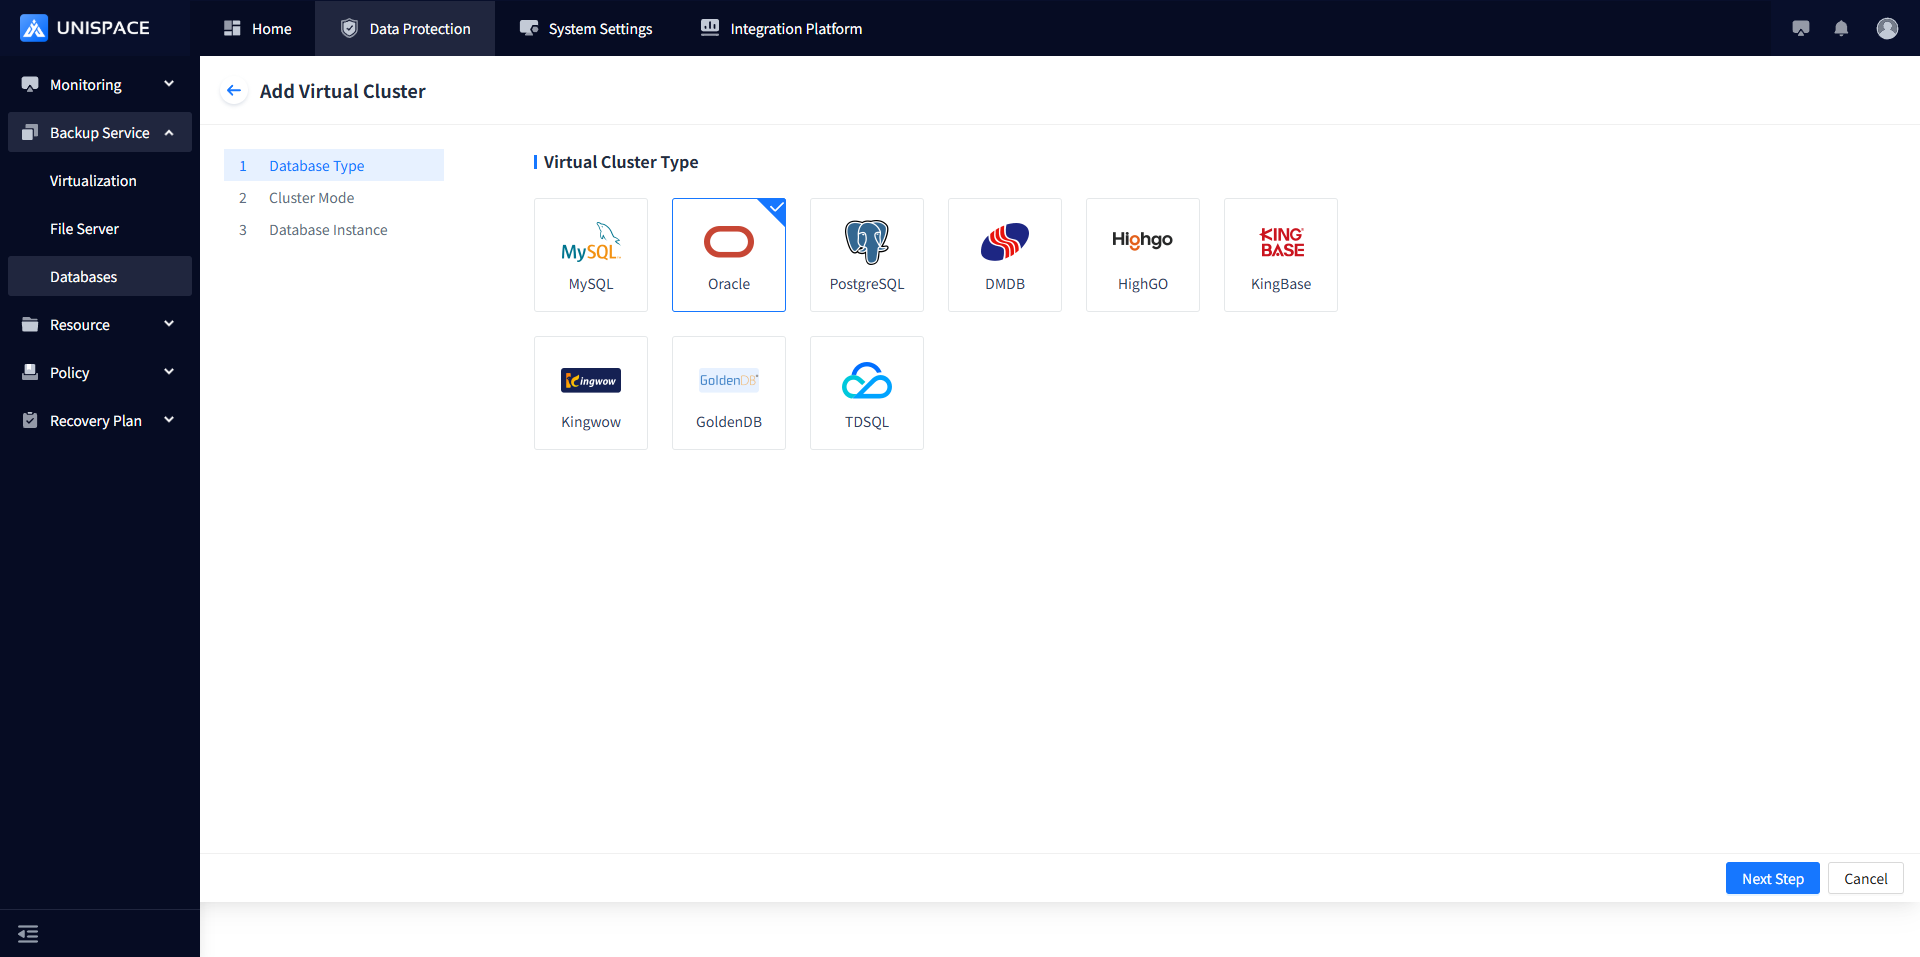 Step 3: Select Oracle, click Next Step, enter the cluster name, and click Next Step.
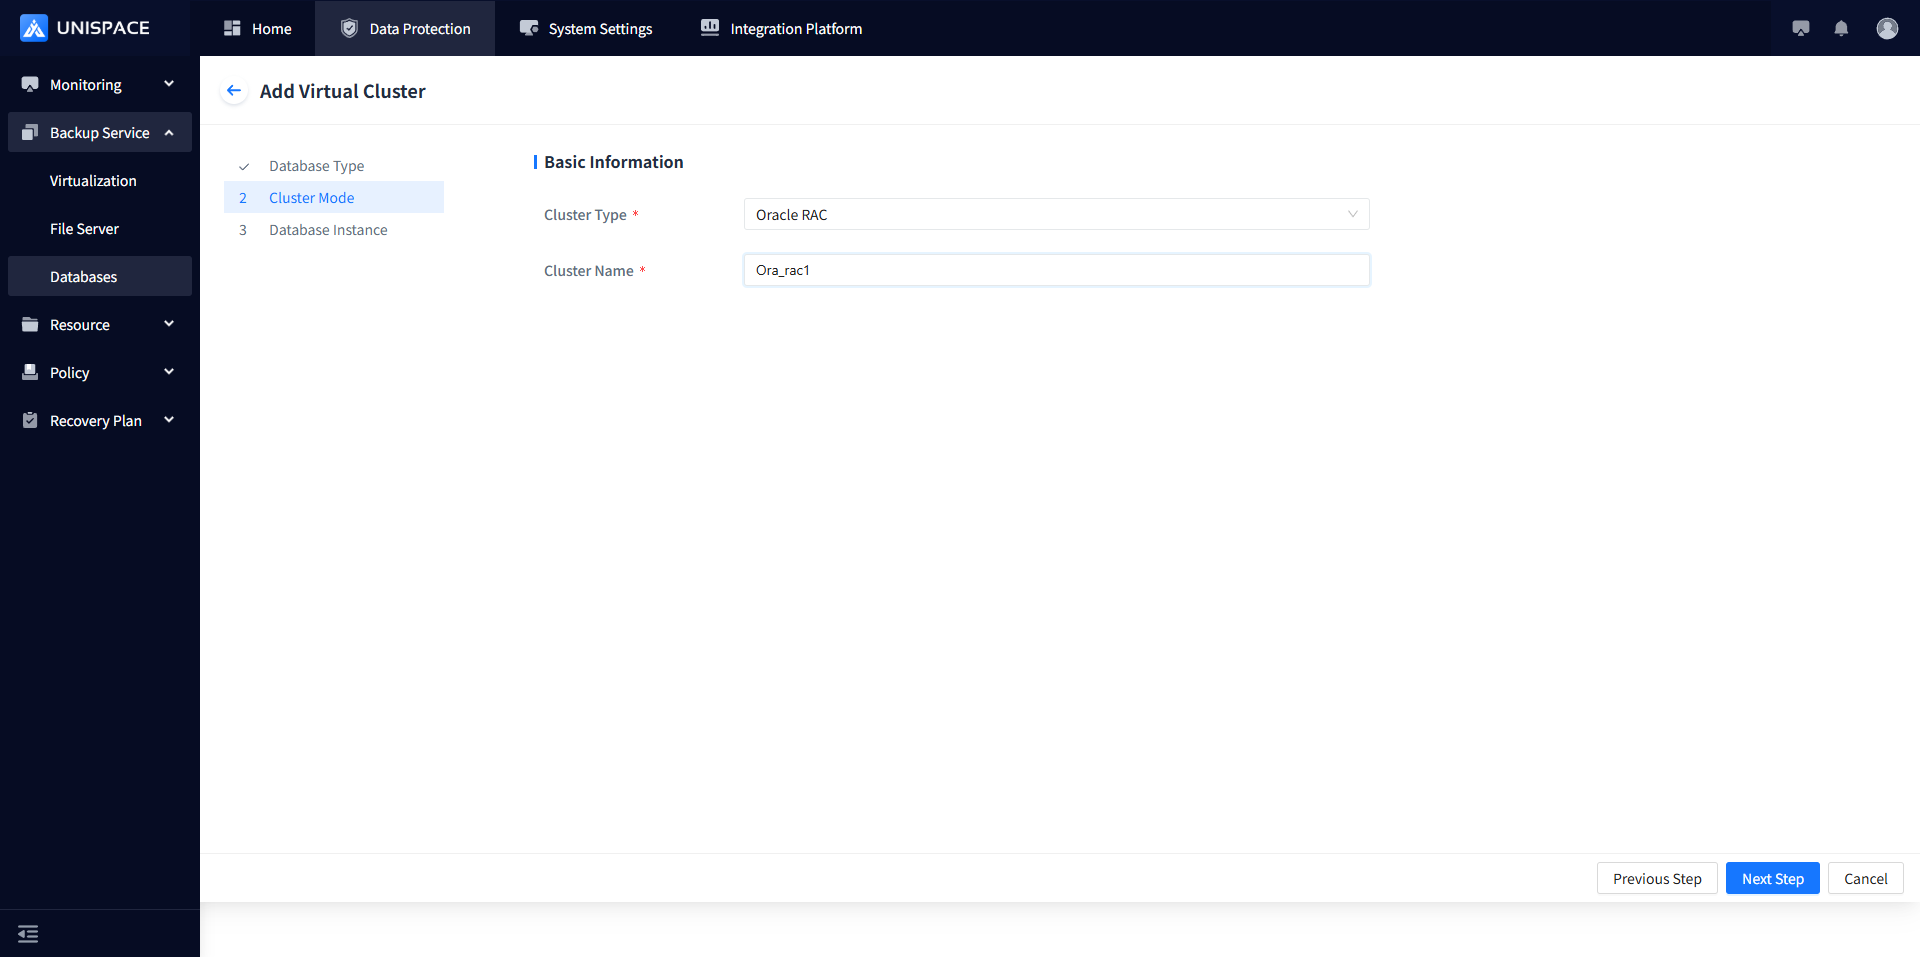 Step 4: Add instances (one or more according to the number of cluster nodes), and fill in the necessary parameters as shown below:
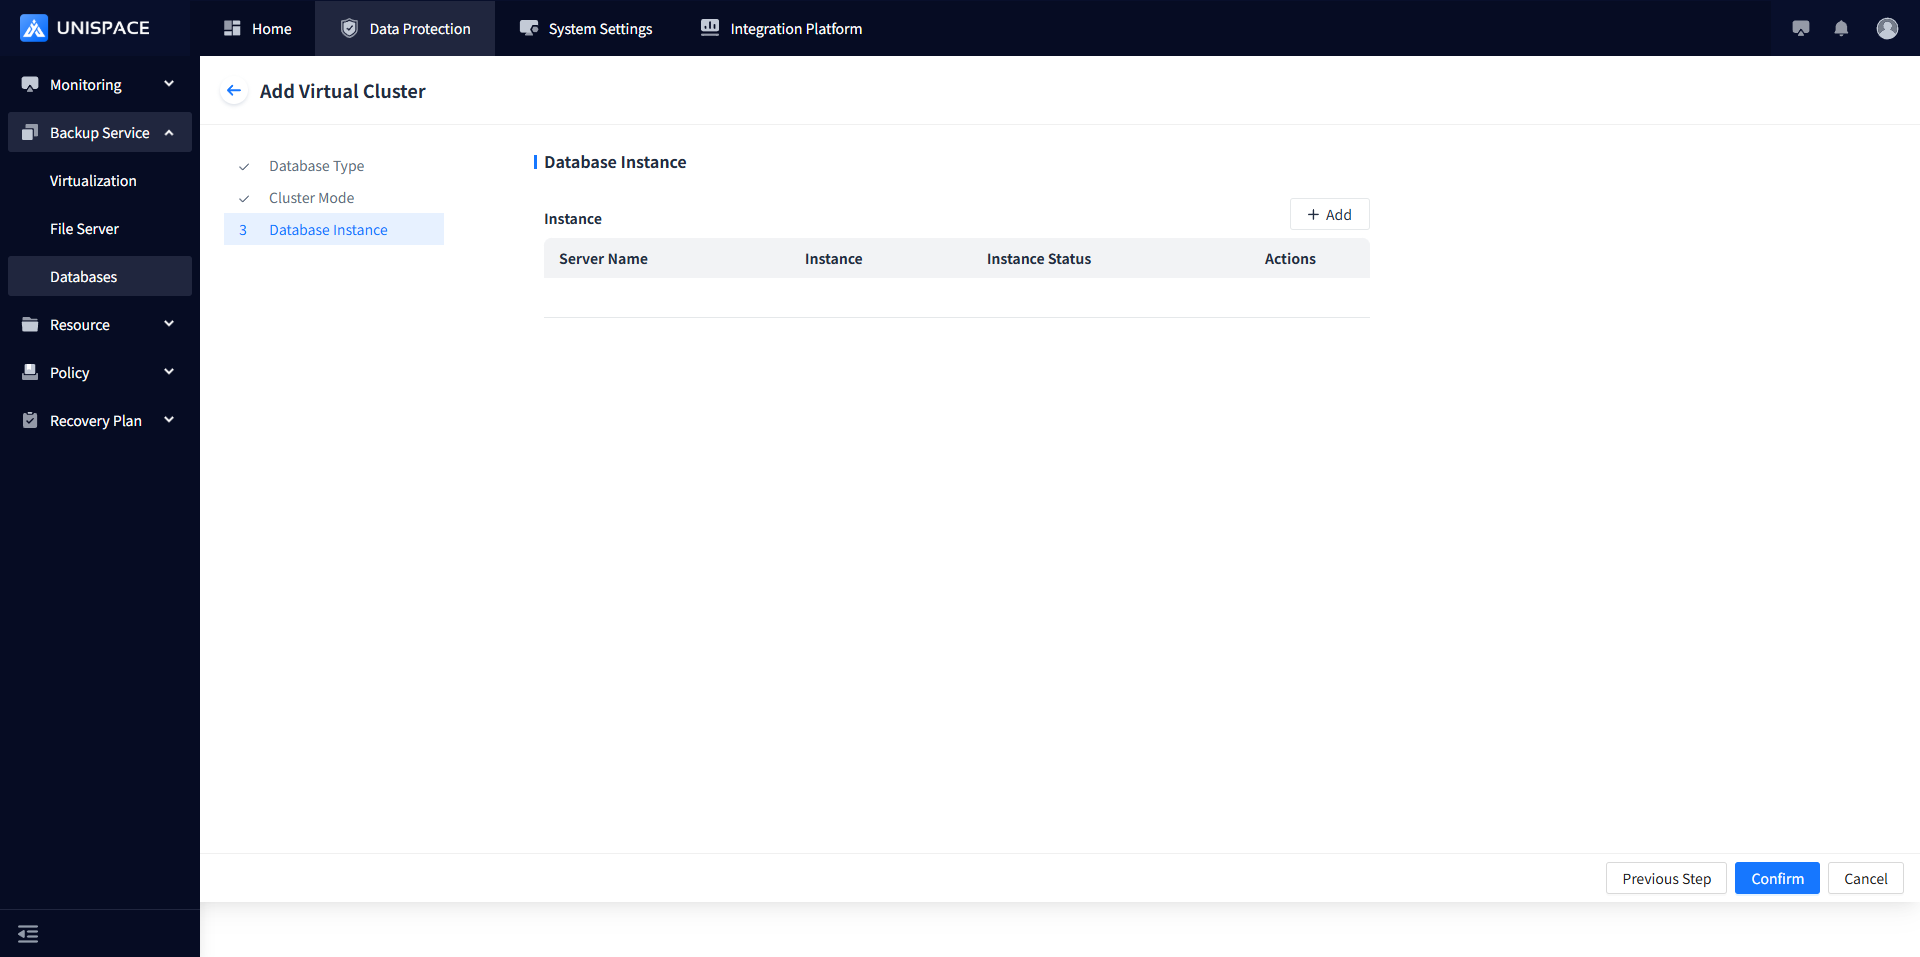
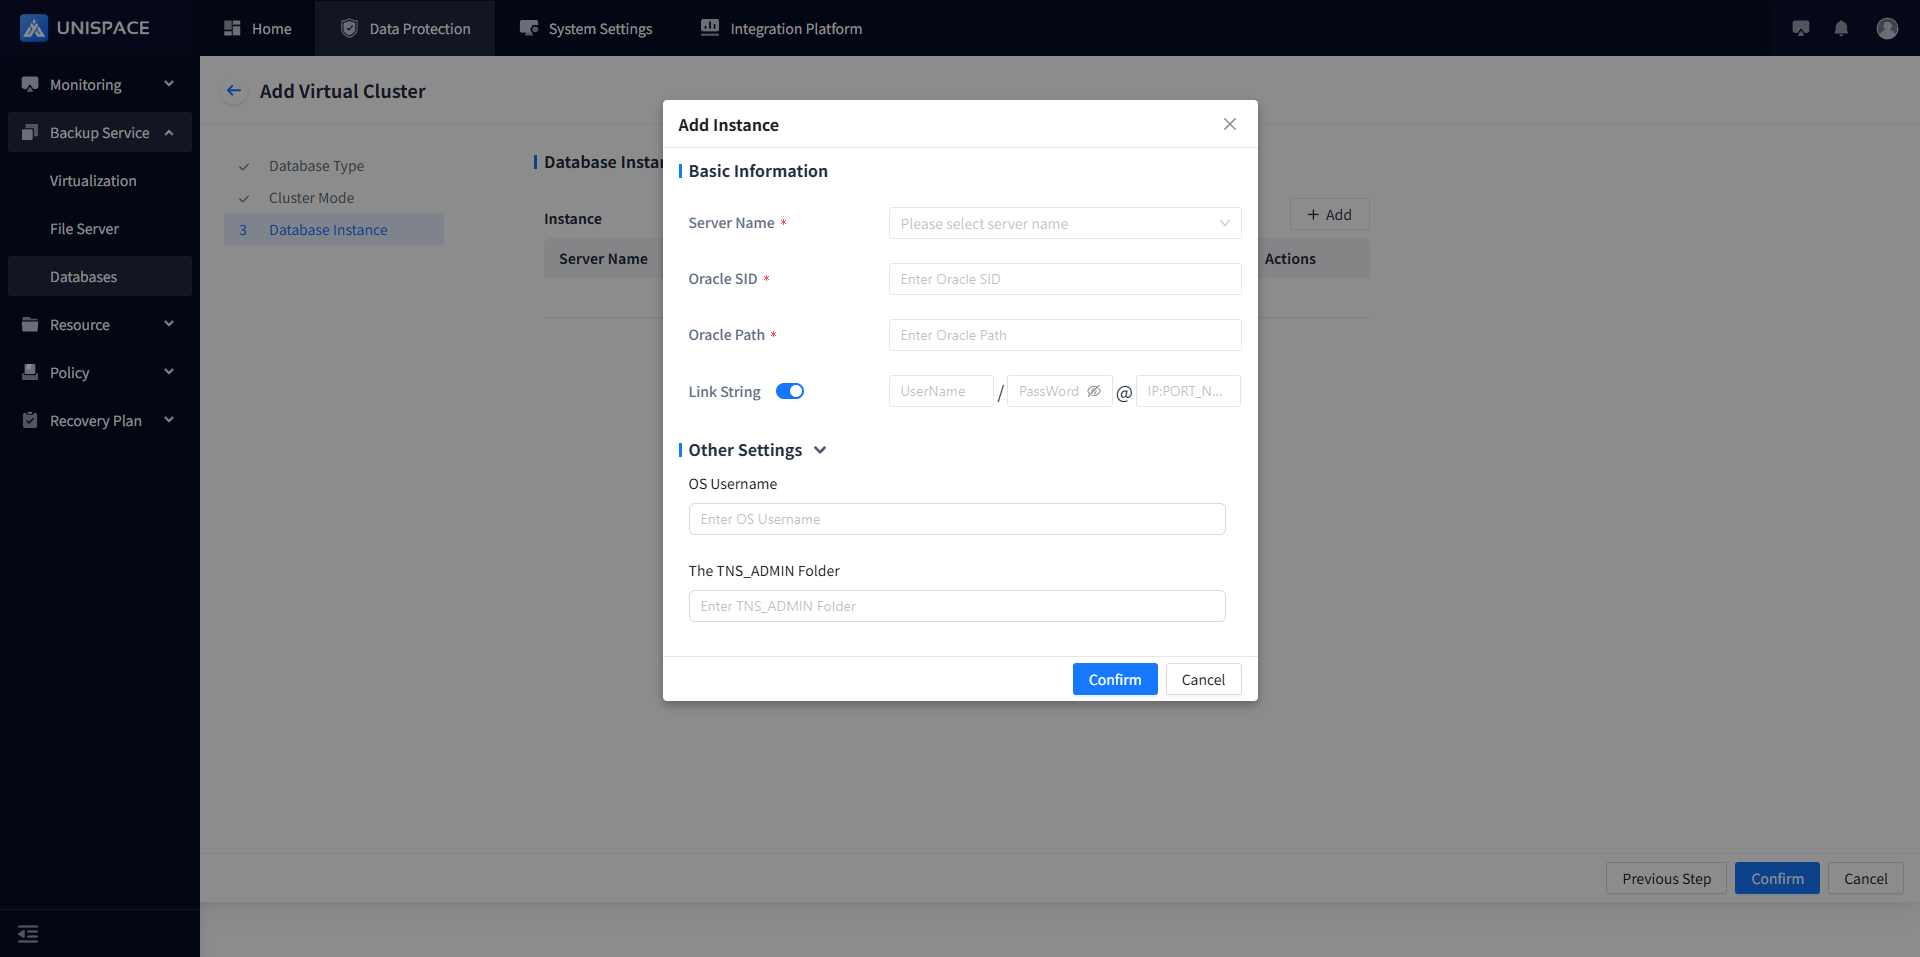
| Parameter Name | Description | Configuration Rule |
|---|---|---|
| Server Name | Radio button, required, options are Oracle server names | Choose the Oracle server to be added |
| Oracle SID | Text box, required, enter the correct instance name | Name of the Oracle database instance |
| ORACLE Path | Text box, required | Enter the Oracle software installation path, e.g., /u01/app/product/21.3.0/db |
| UserName | Text box, required | Enter the Oracle username |
| PassWord | Password box, required | Enter the Oracle password |
| IP:PORT_NUM | Text box | Enter in the format: IP:Port/DatabaseName, e.g., 192.168.110.34:1521/db |
| OS Username | Default: oracle | |
| TNS_ADMIN Folder | Currently not supported, leave blank |
Step 5: Add one or more instances as needed, then click Confirm.
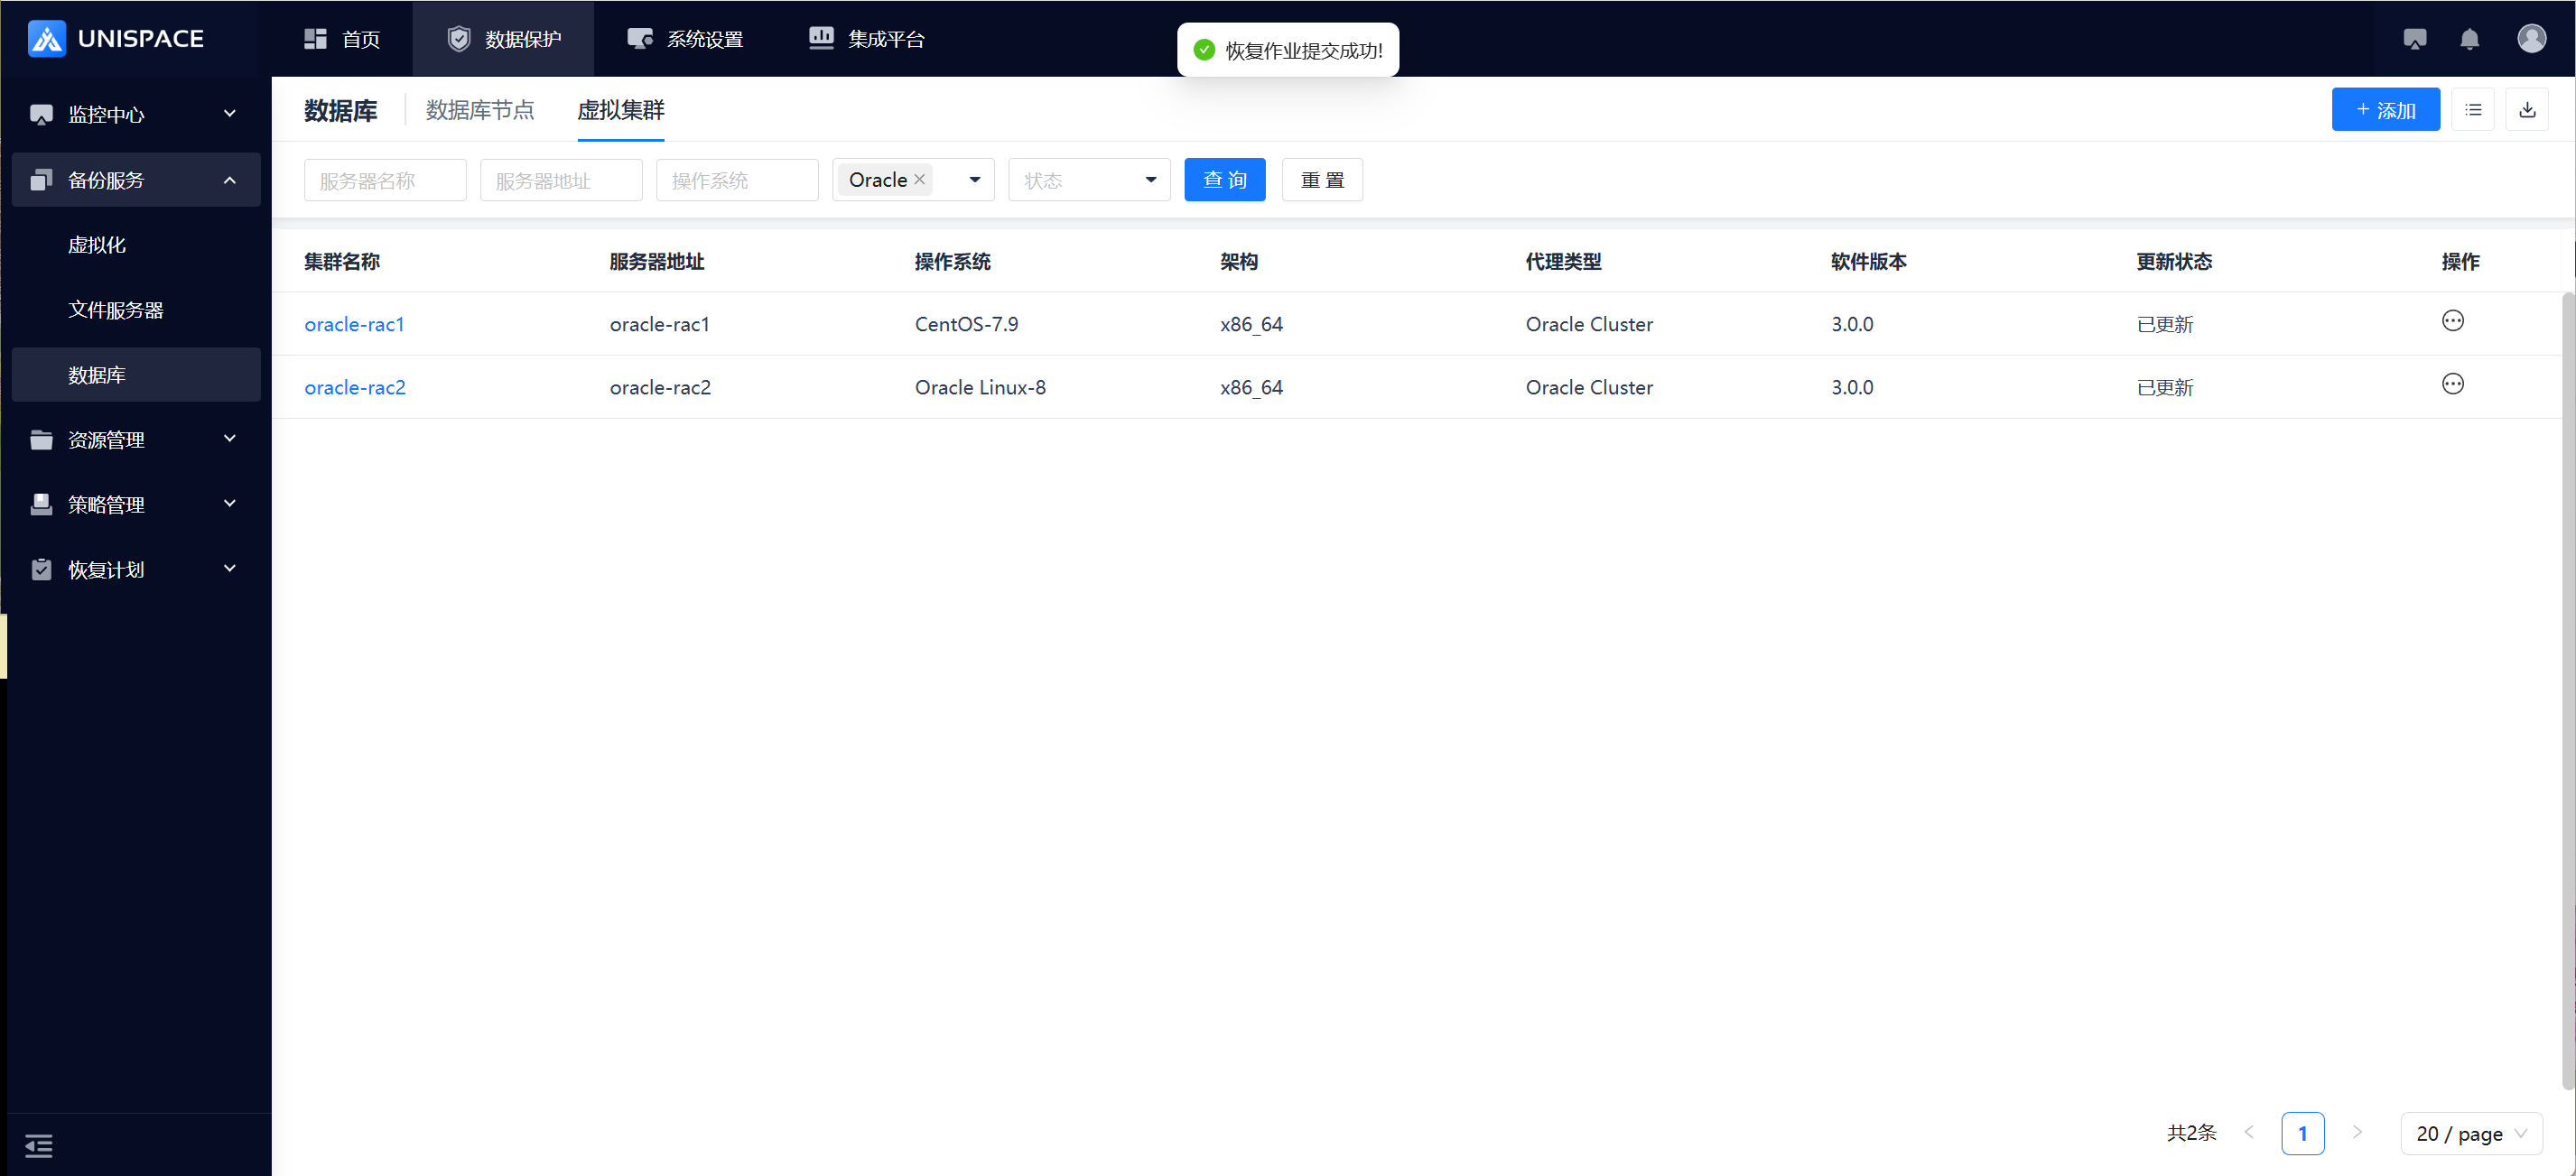
 Step 6: After successfully adding the cluster, it will be displayed in the Virtual Cluster list.
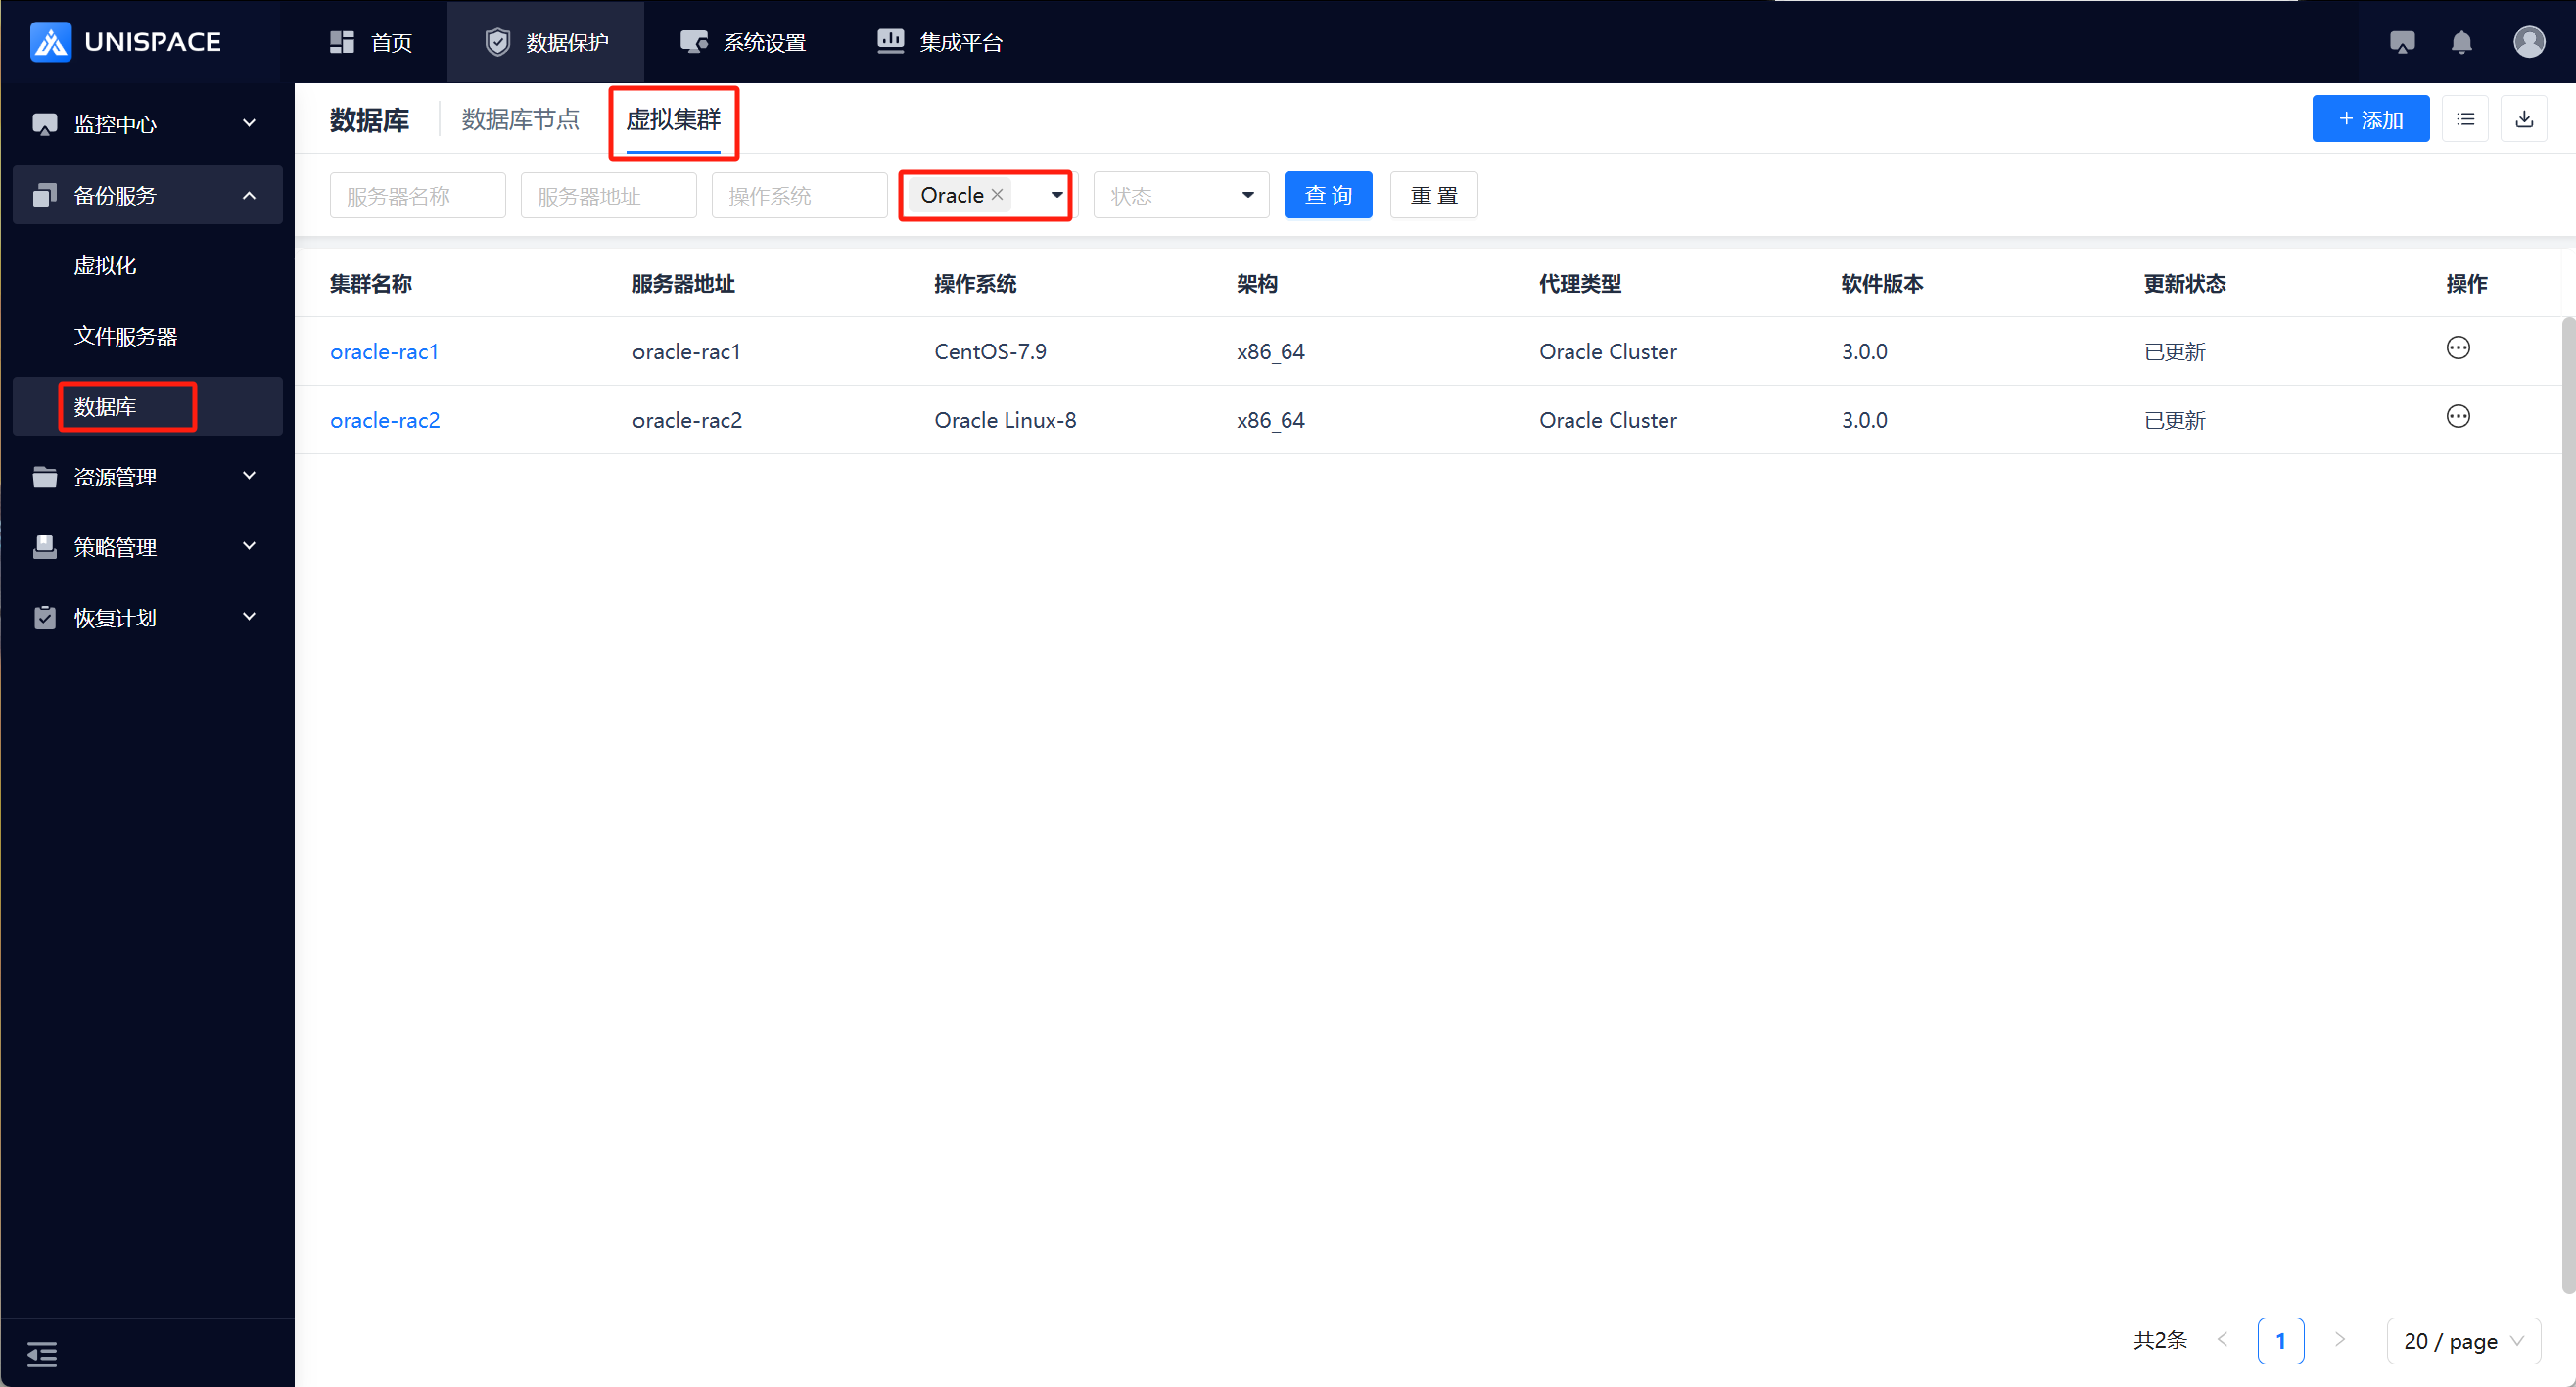
1.2 Create Oracle Backup Set
Prerequisites
- Oracle cluster has been added.
Steps
Step 1: On the Virtual Cluster list page, select the cluster, click the Cluster Name to enter the cluster details page, and click Backup Set.
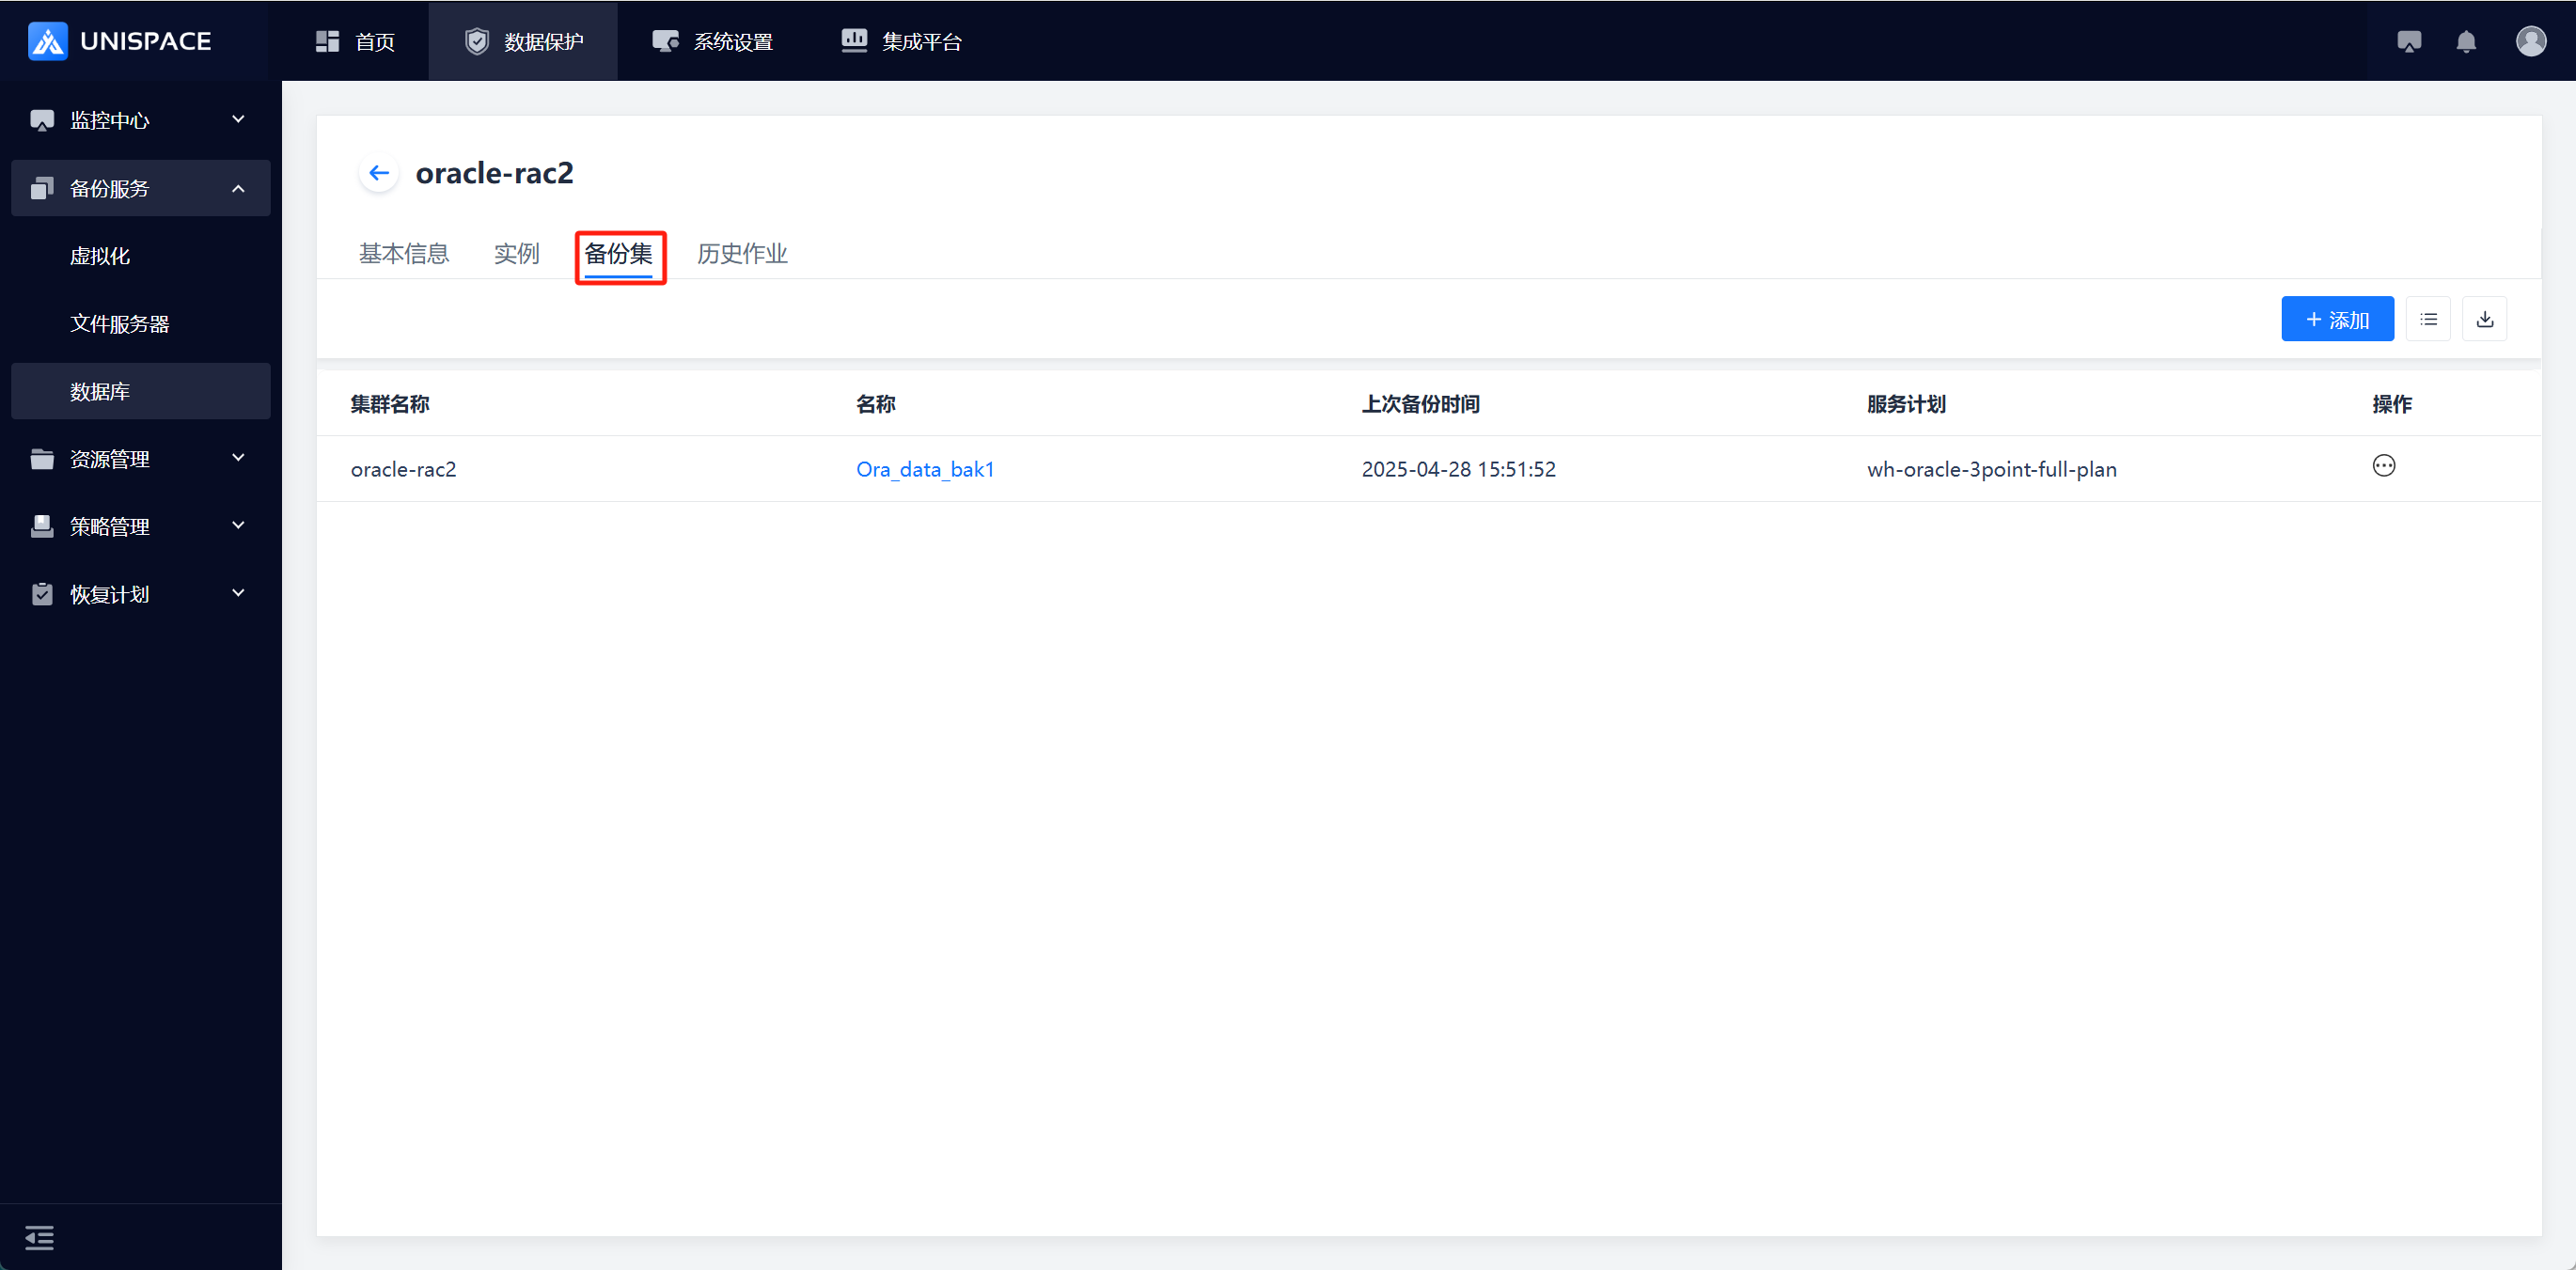 Step 2: Click the Add button at the top right of Backup Set, and a pop-up window will appear.
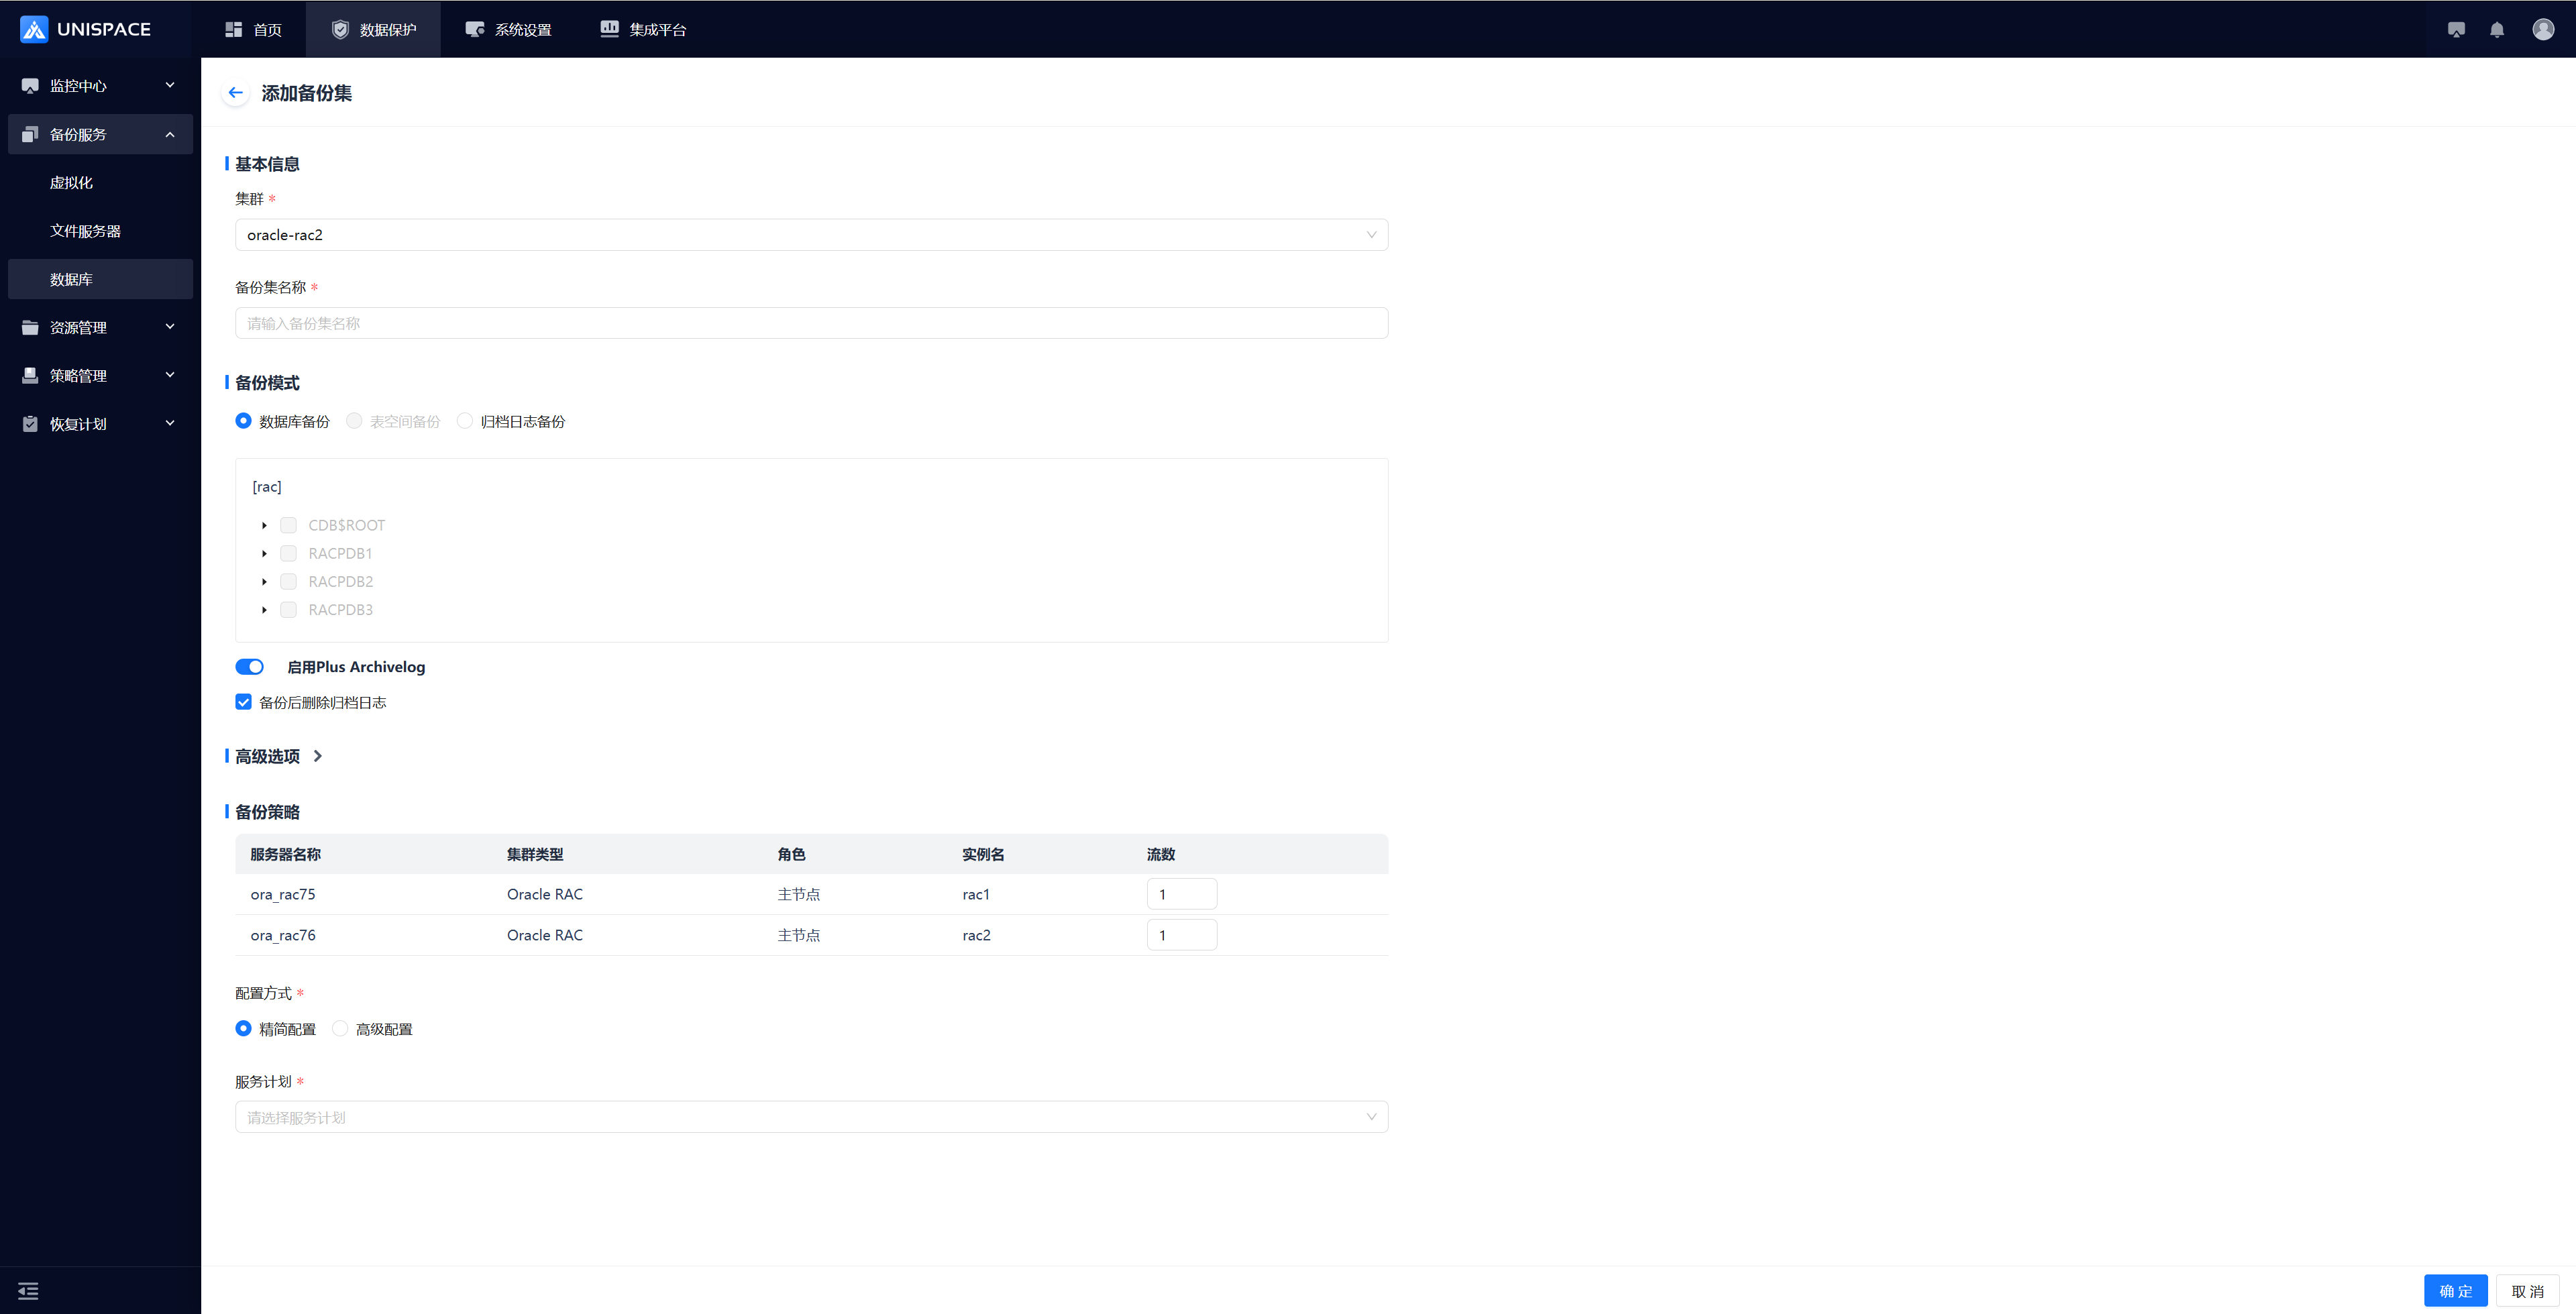 Step 3: Fill in the necessary parameters as shown below:
| Parameter Name | Description | Configuration Rule |
|---|---|---|
| Cluster | Cluster name | Automatically filled, no need to set |
| Backup Set Name | Text box, required | Max length: 50 characters, no special symbols allowed |
| Backup Mode | Radio button, default is database backup | Options: Database Backup, Archive Log Backup |
| Advanced Options | Toggle switch, default is to enable auto-backup of control files | Keep it enabled |
| Backup Policy | Displays node information, configurable stream count | Supports single or multiple streams, max value: 200 |
| Configuration Mode | Radio button, required | Choose Simplified or Advanced Configuration |
| Self Service Plan | Radio button, required | Choose an appropriate plan |
Step 4: Click **Confirm**, and a success message will appear.
1.3 Oracle Database (Log) Backup
Prerequisites
- Oracle database backup set has been configured.
Steps
Step 1: Select the backup set and click Actions - Backup.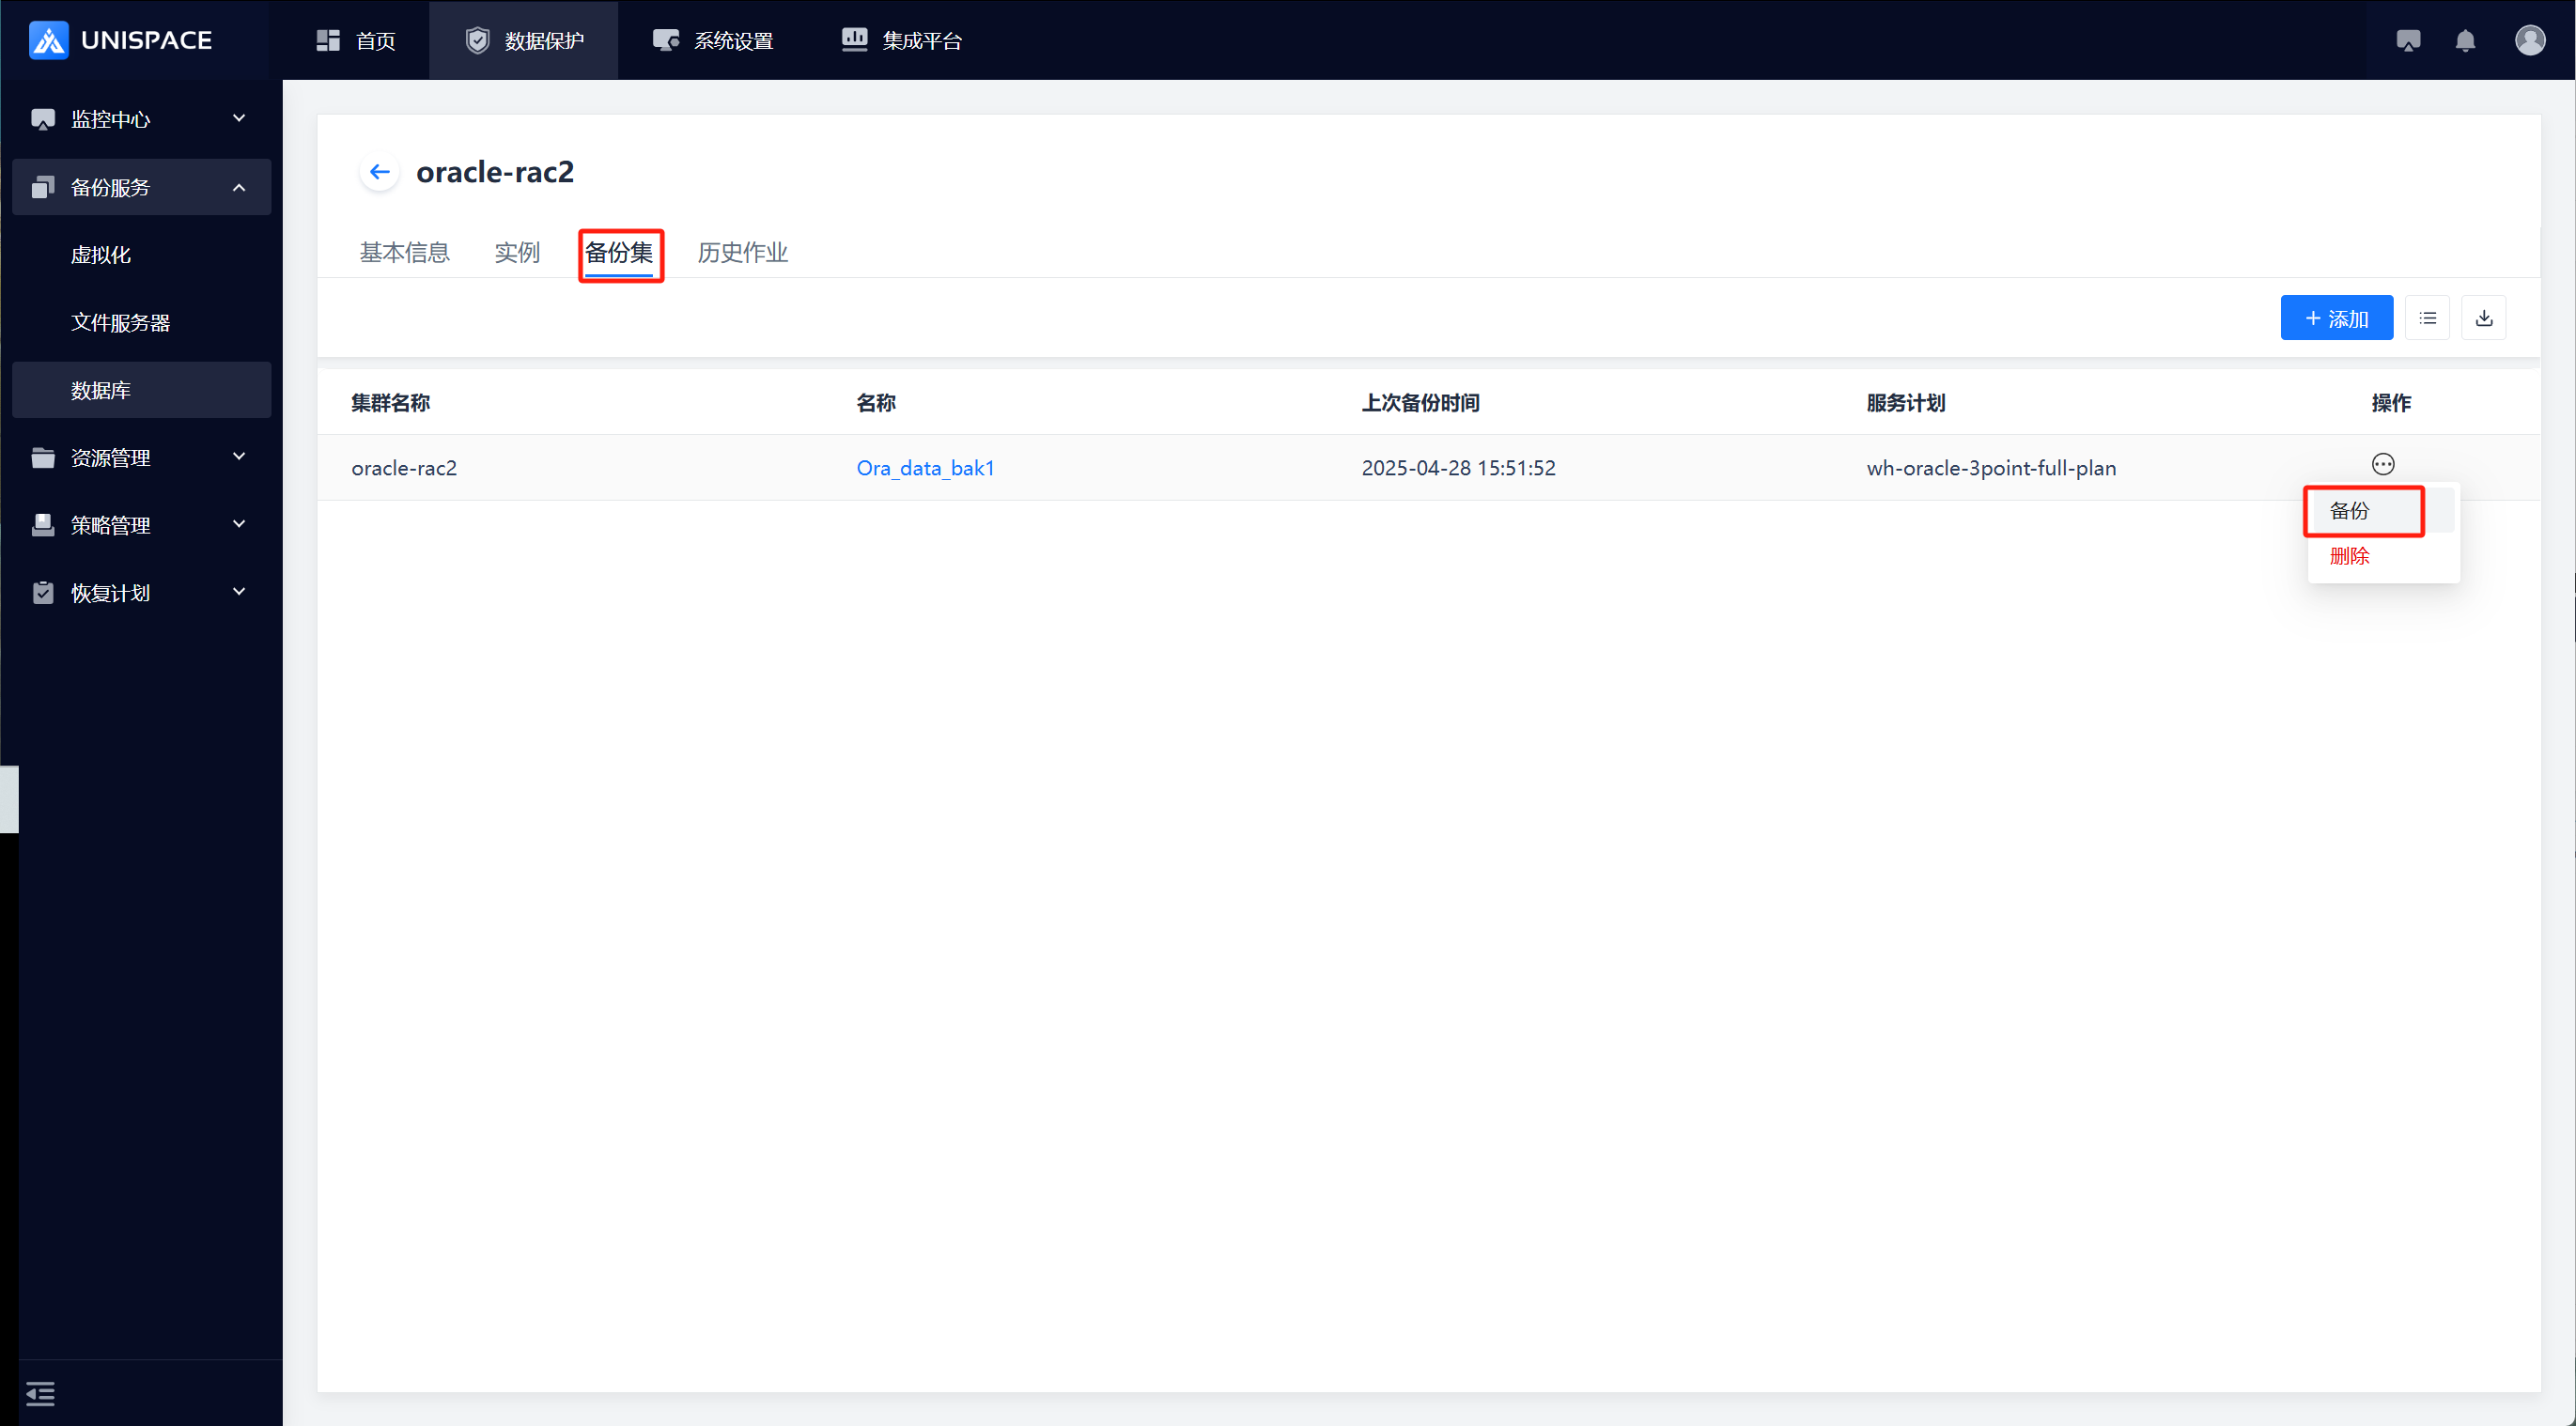 Step 2: In the pop-up, choose Full, Incremental, or Log, and click Confirm.
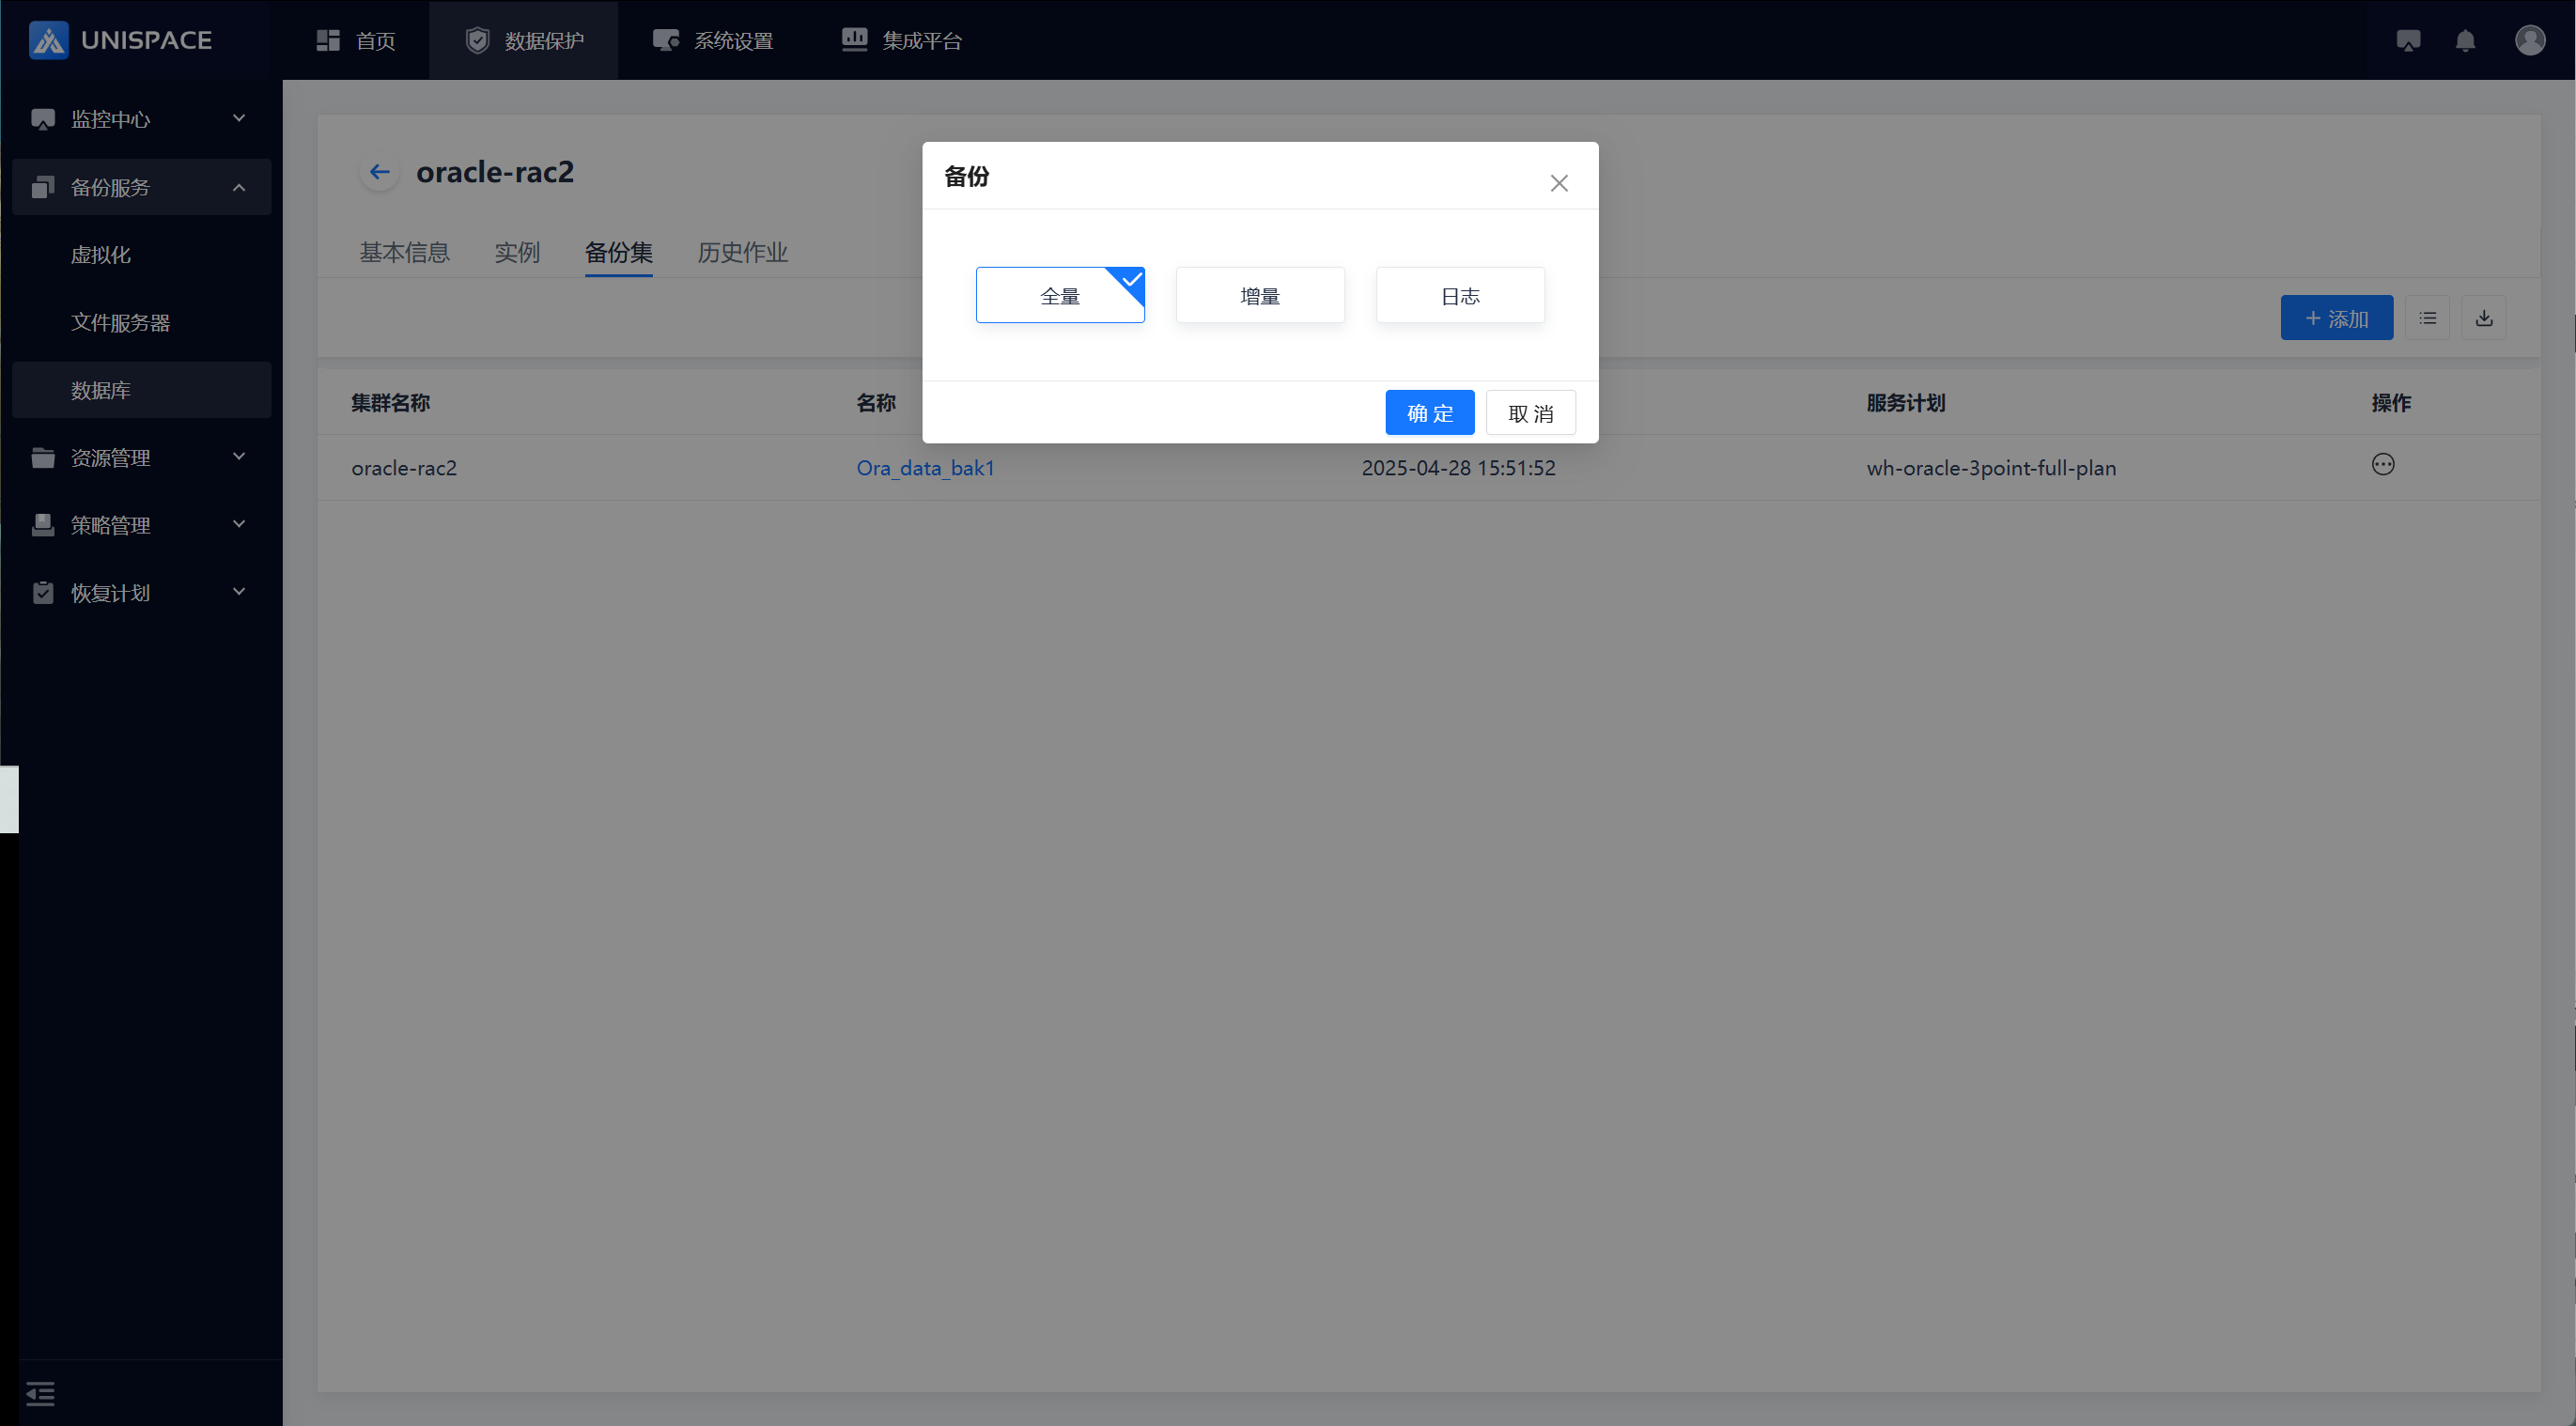 Step 3: A message "Backup job submitted successfully" will appear.
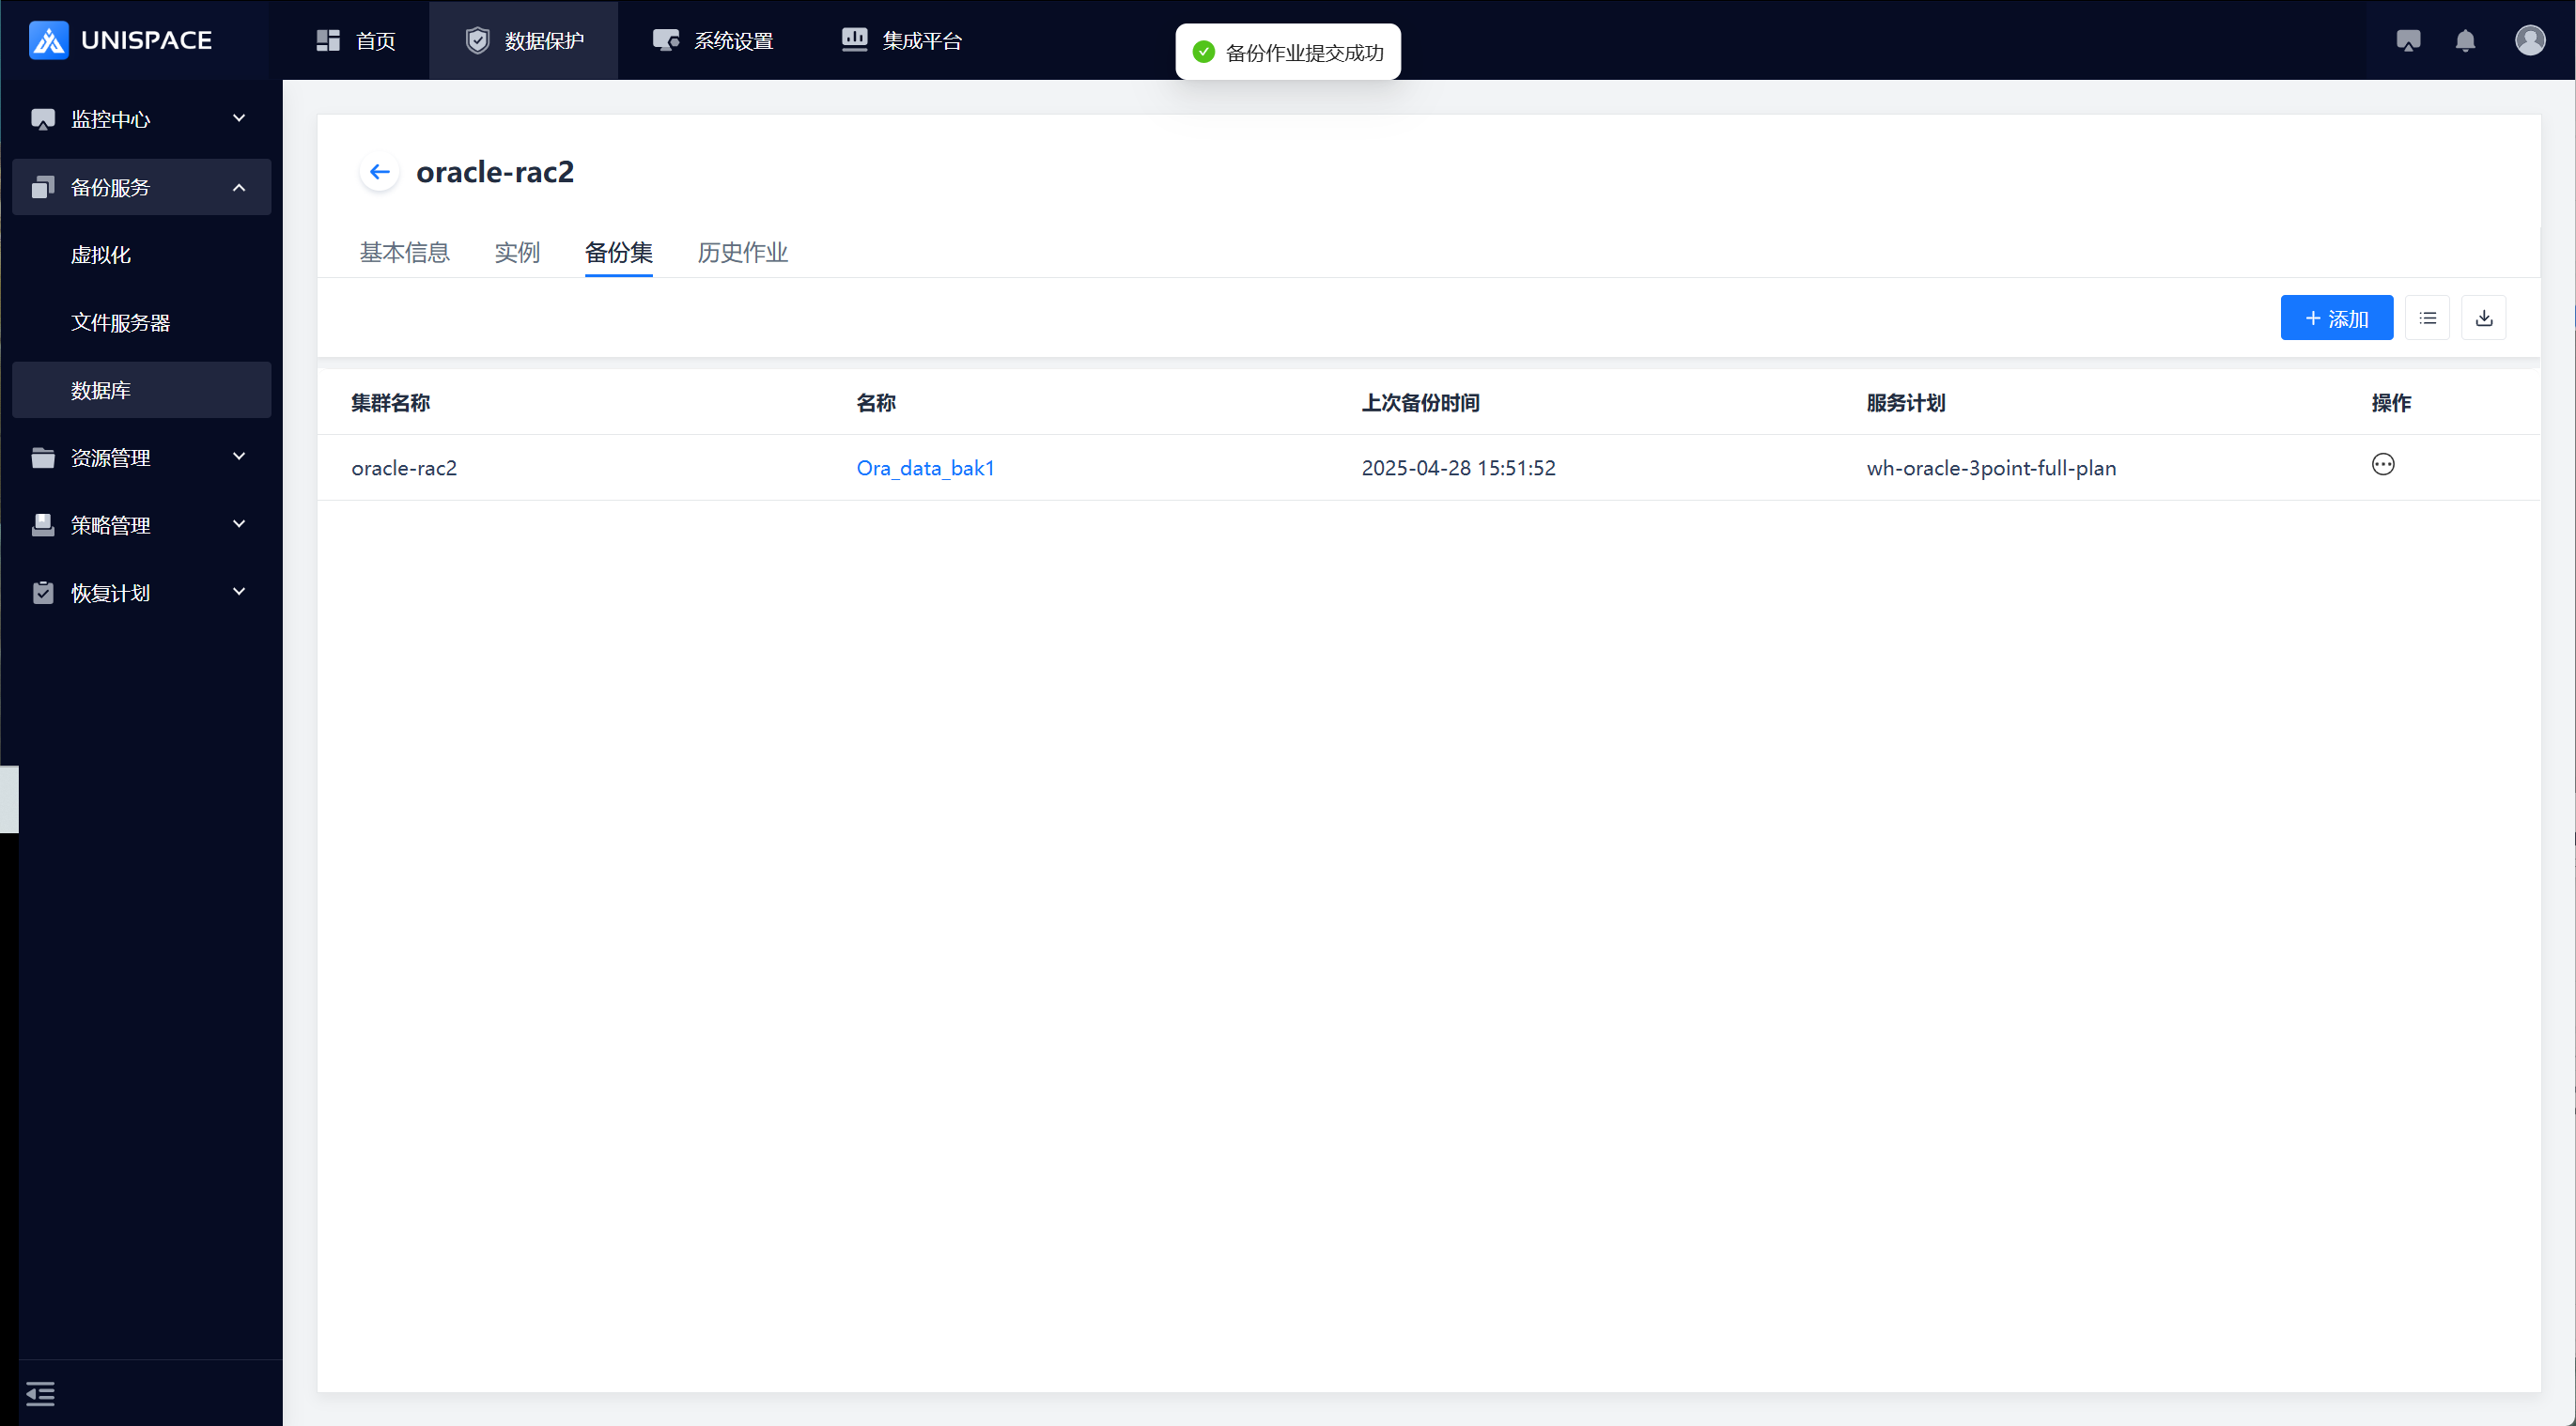 Step 4: Once the backup job is successfully started, go to Monitoring - Job - Active Jobs to view the backup set job.
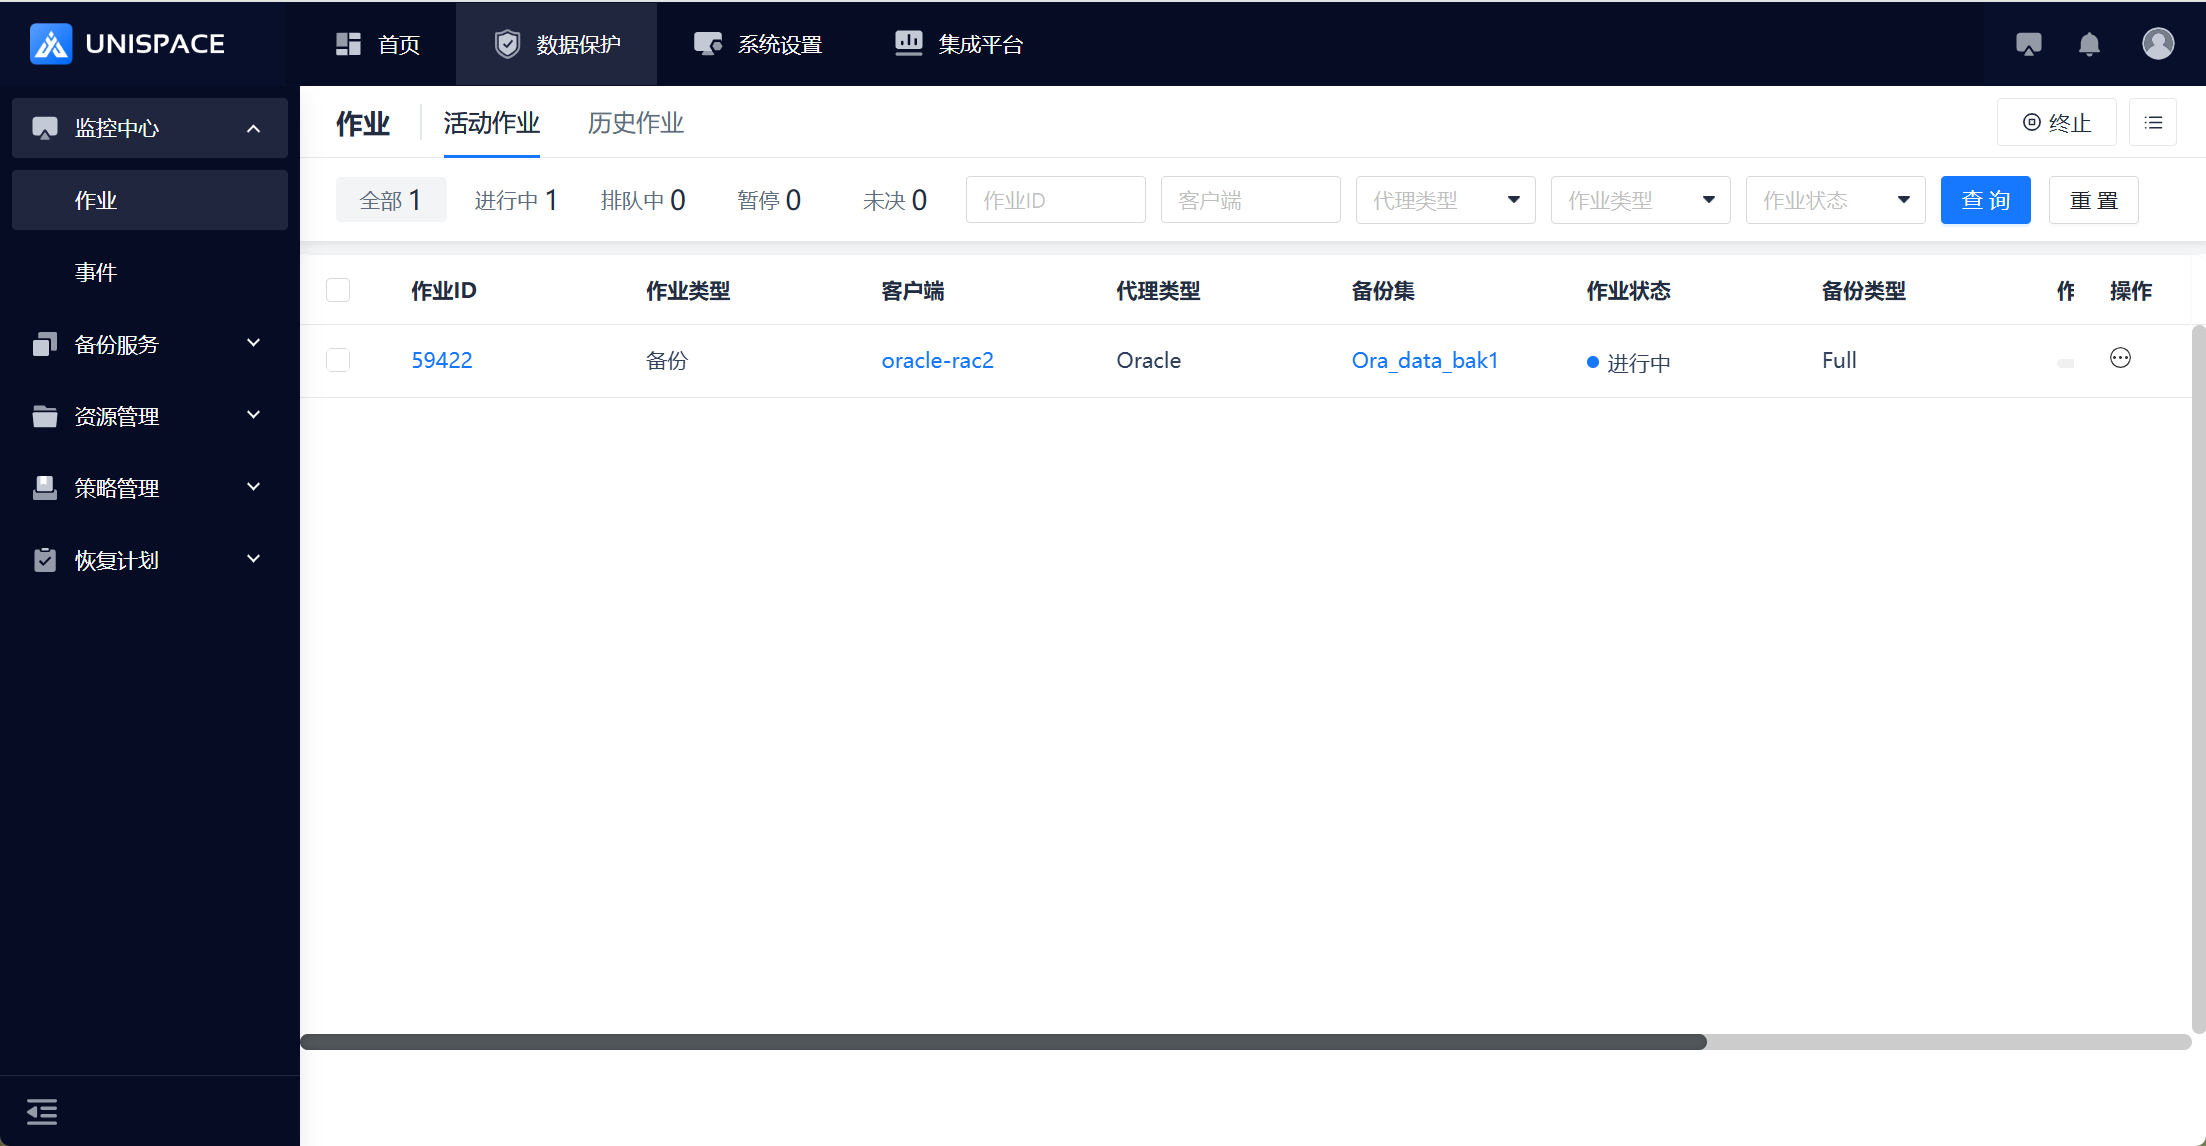 Step 5: After the backup is complete, go to Monitoring - Job - Historical Jobs to view the job, which should display a status of "Completed".
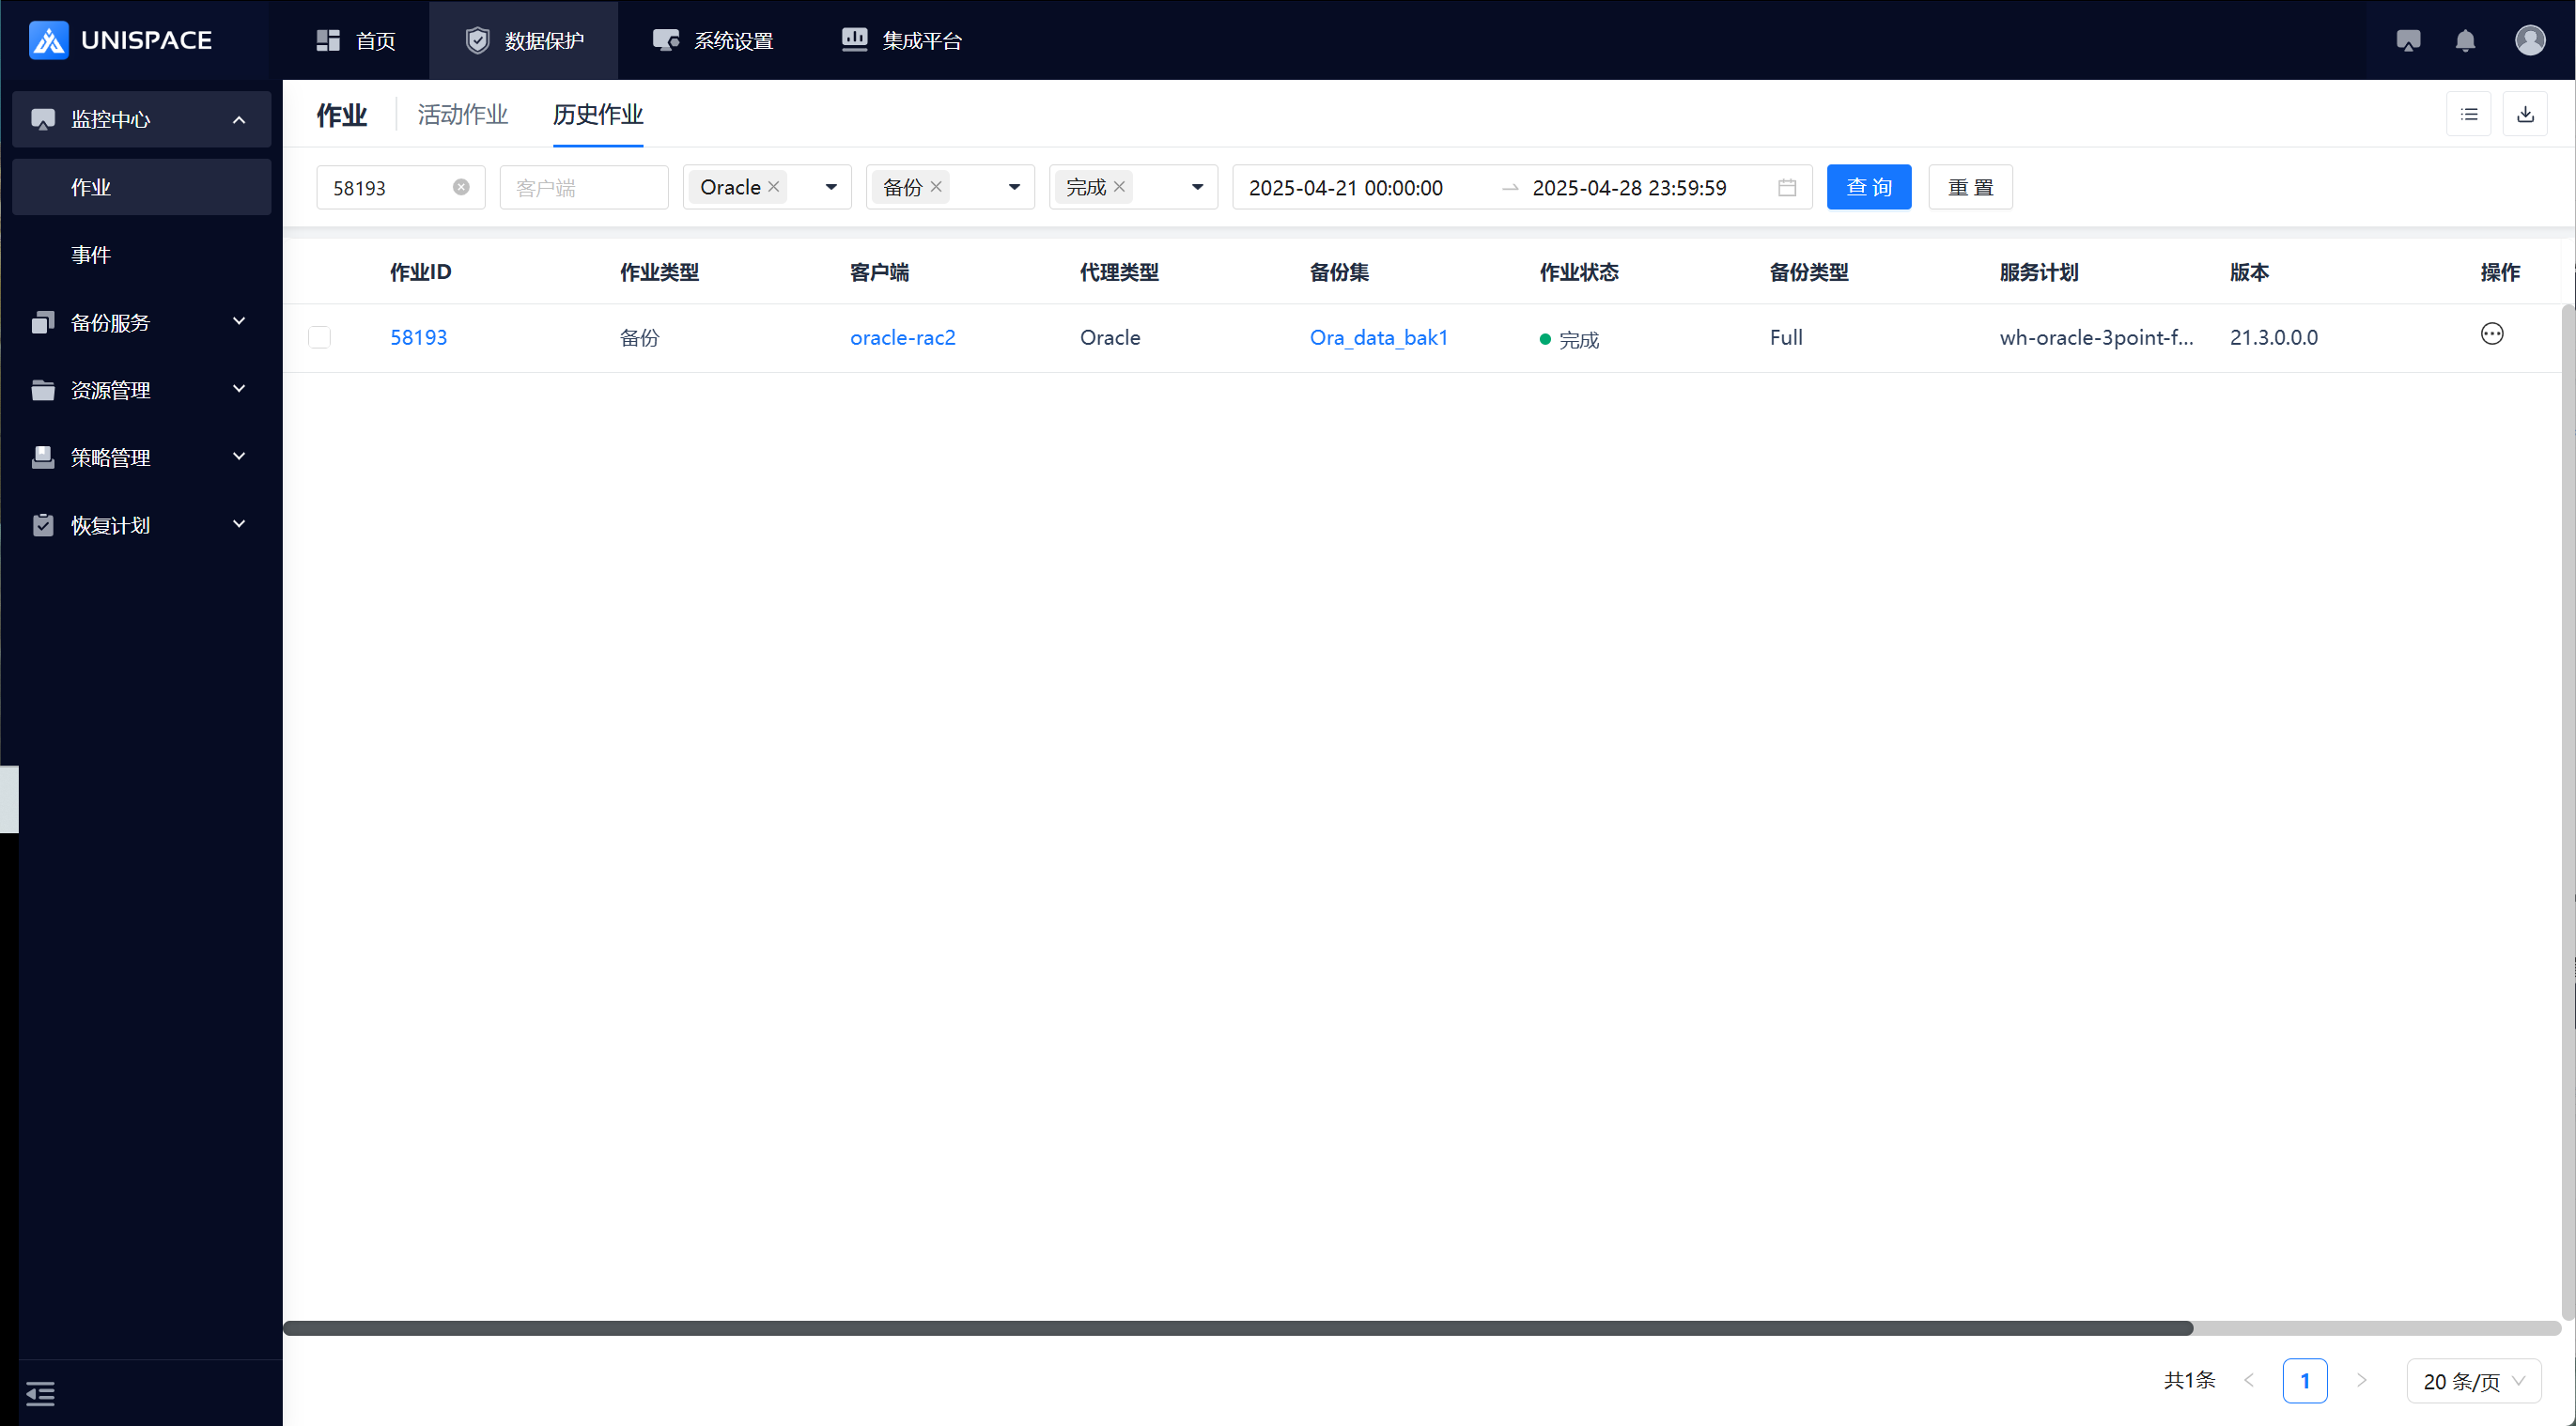
1.4 Oracle Log Backup
Prerequisites
- An Oracle log backup set has been configured.
Steps
Step 1: Select the log backup set and click Actions - Backup.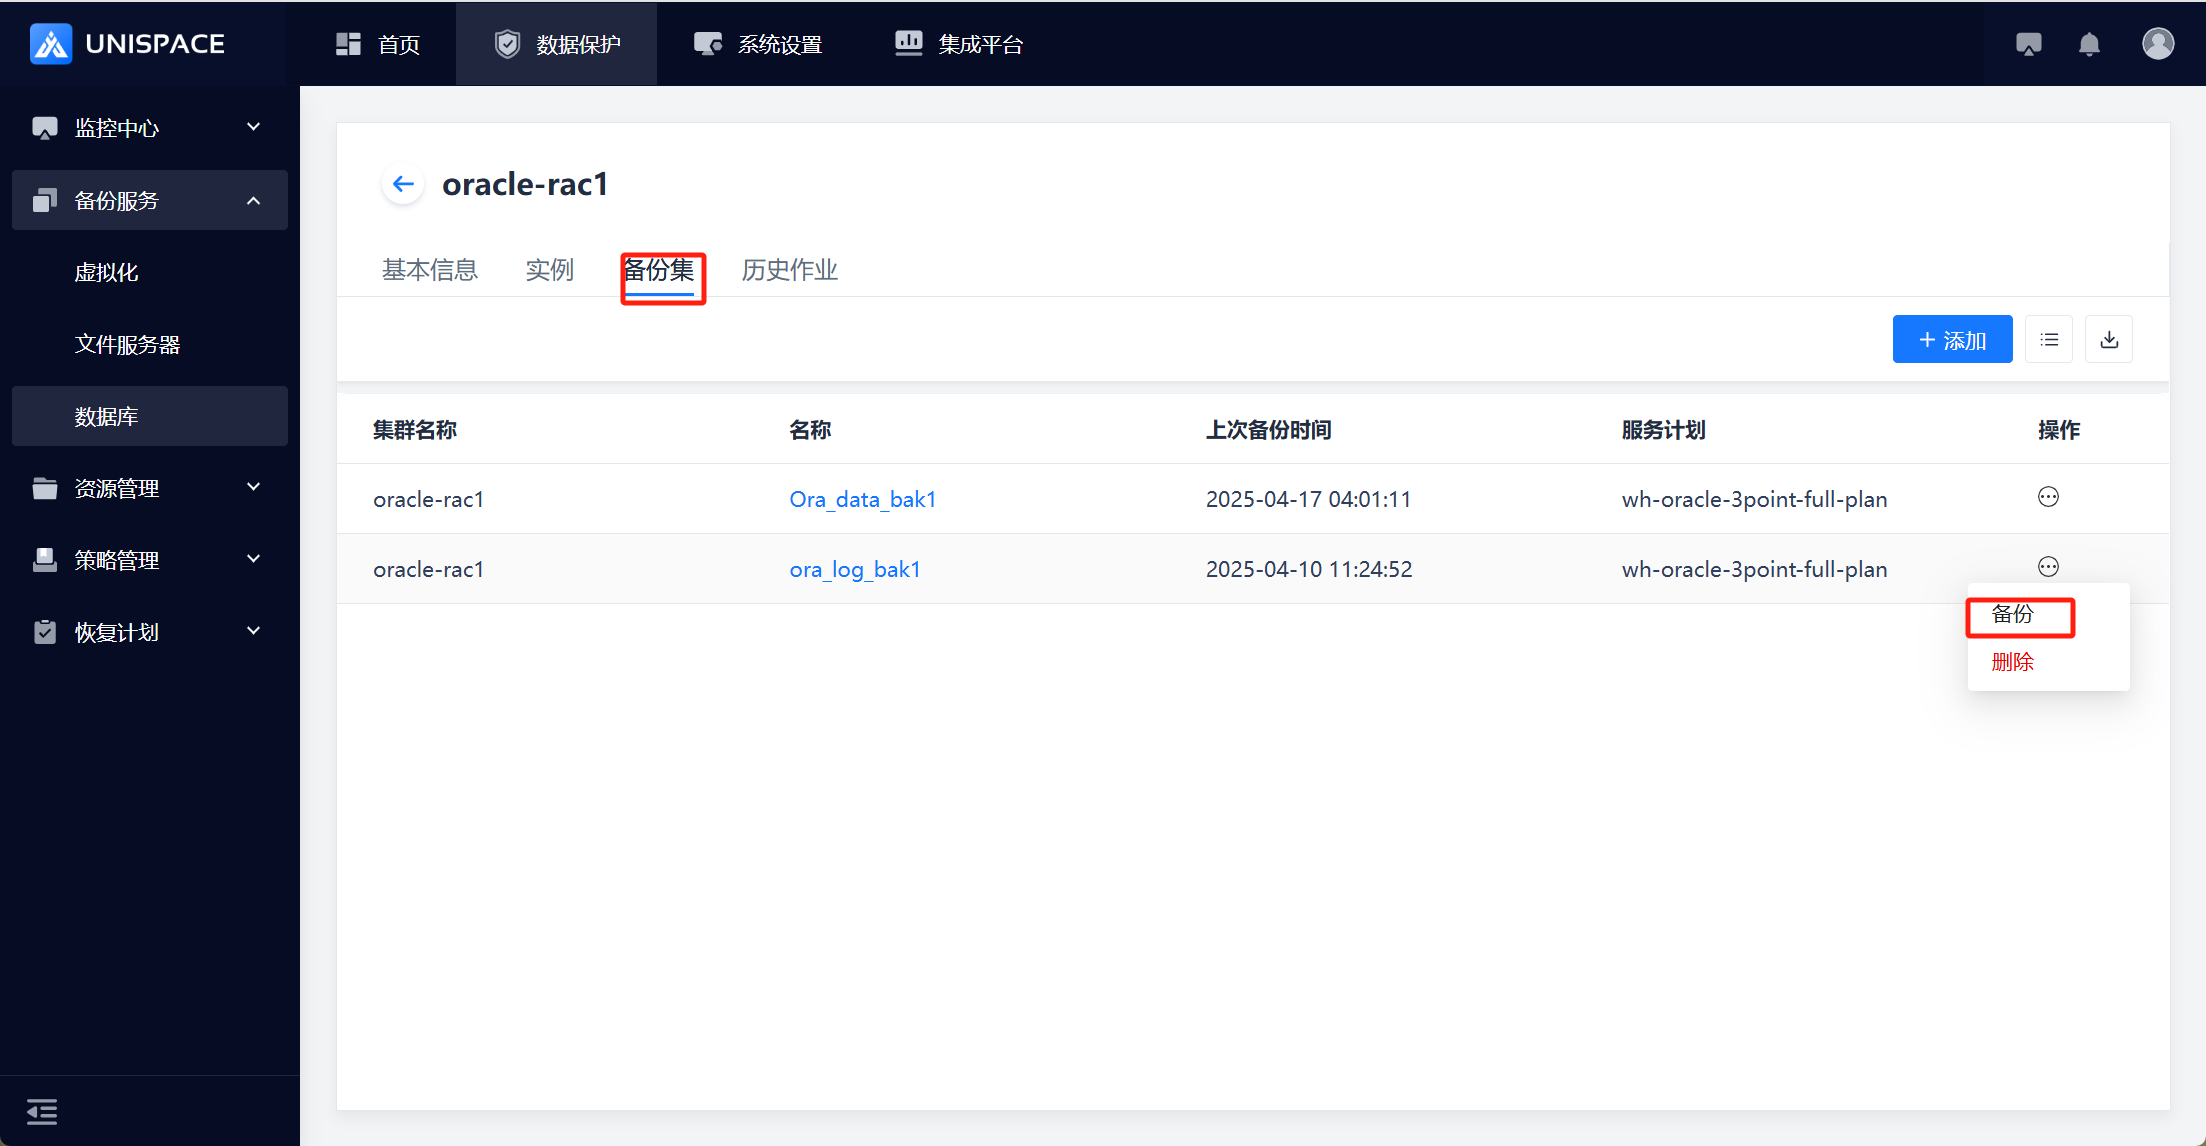 Step 2: In the pop-up, select Log, and click Confirm.
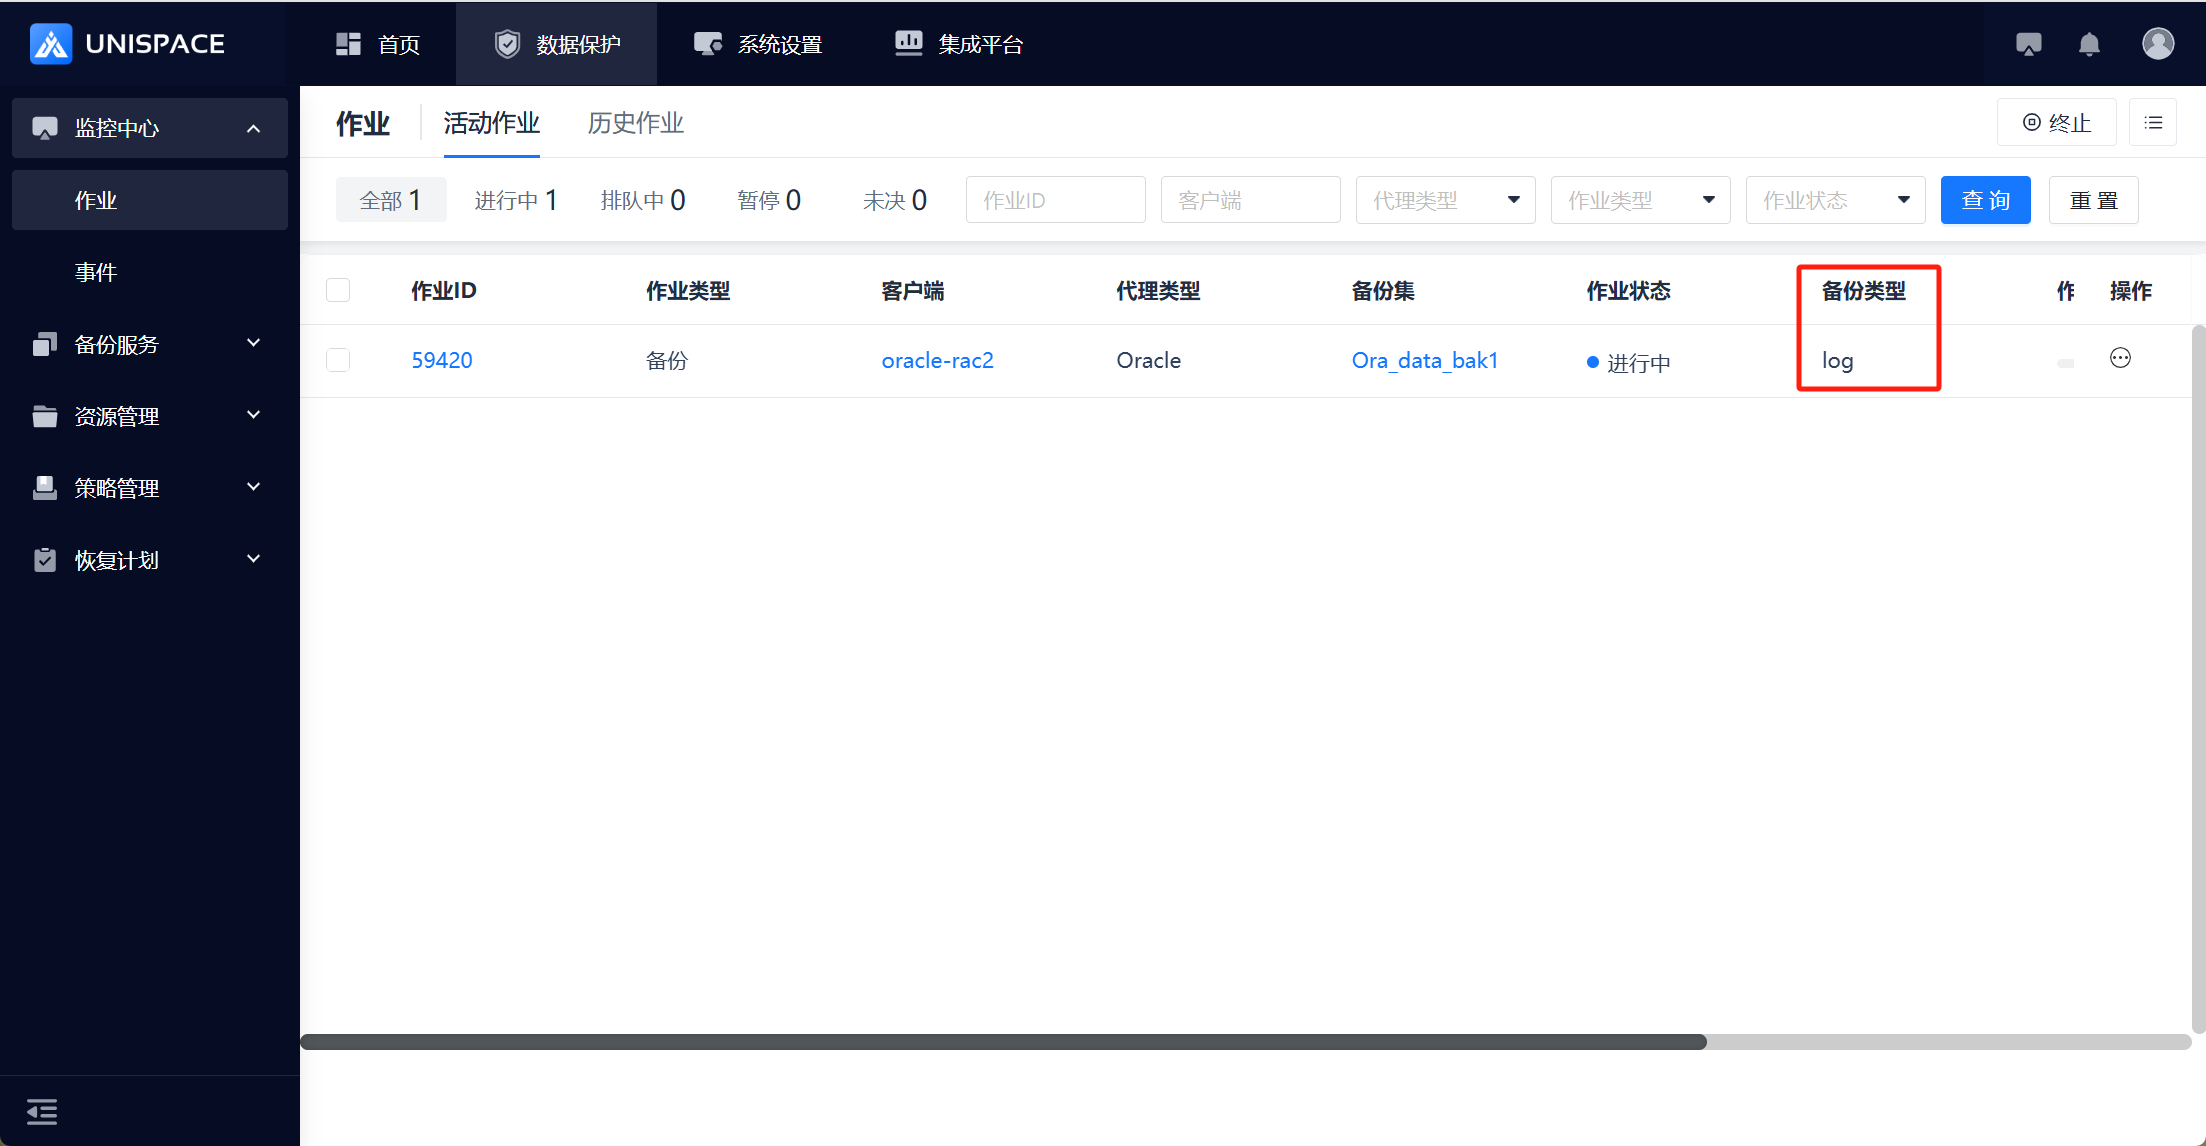
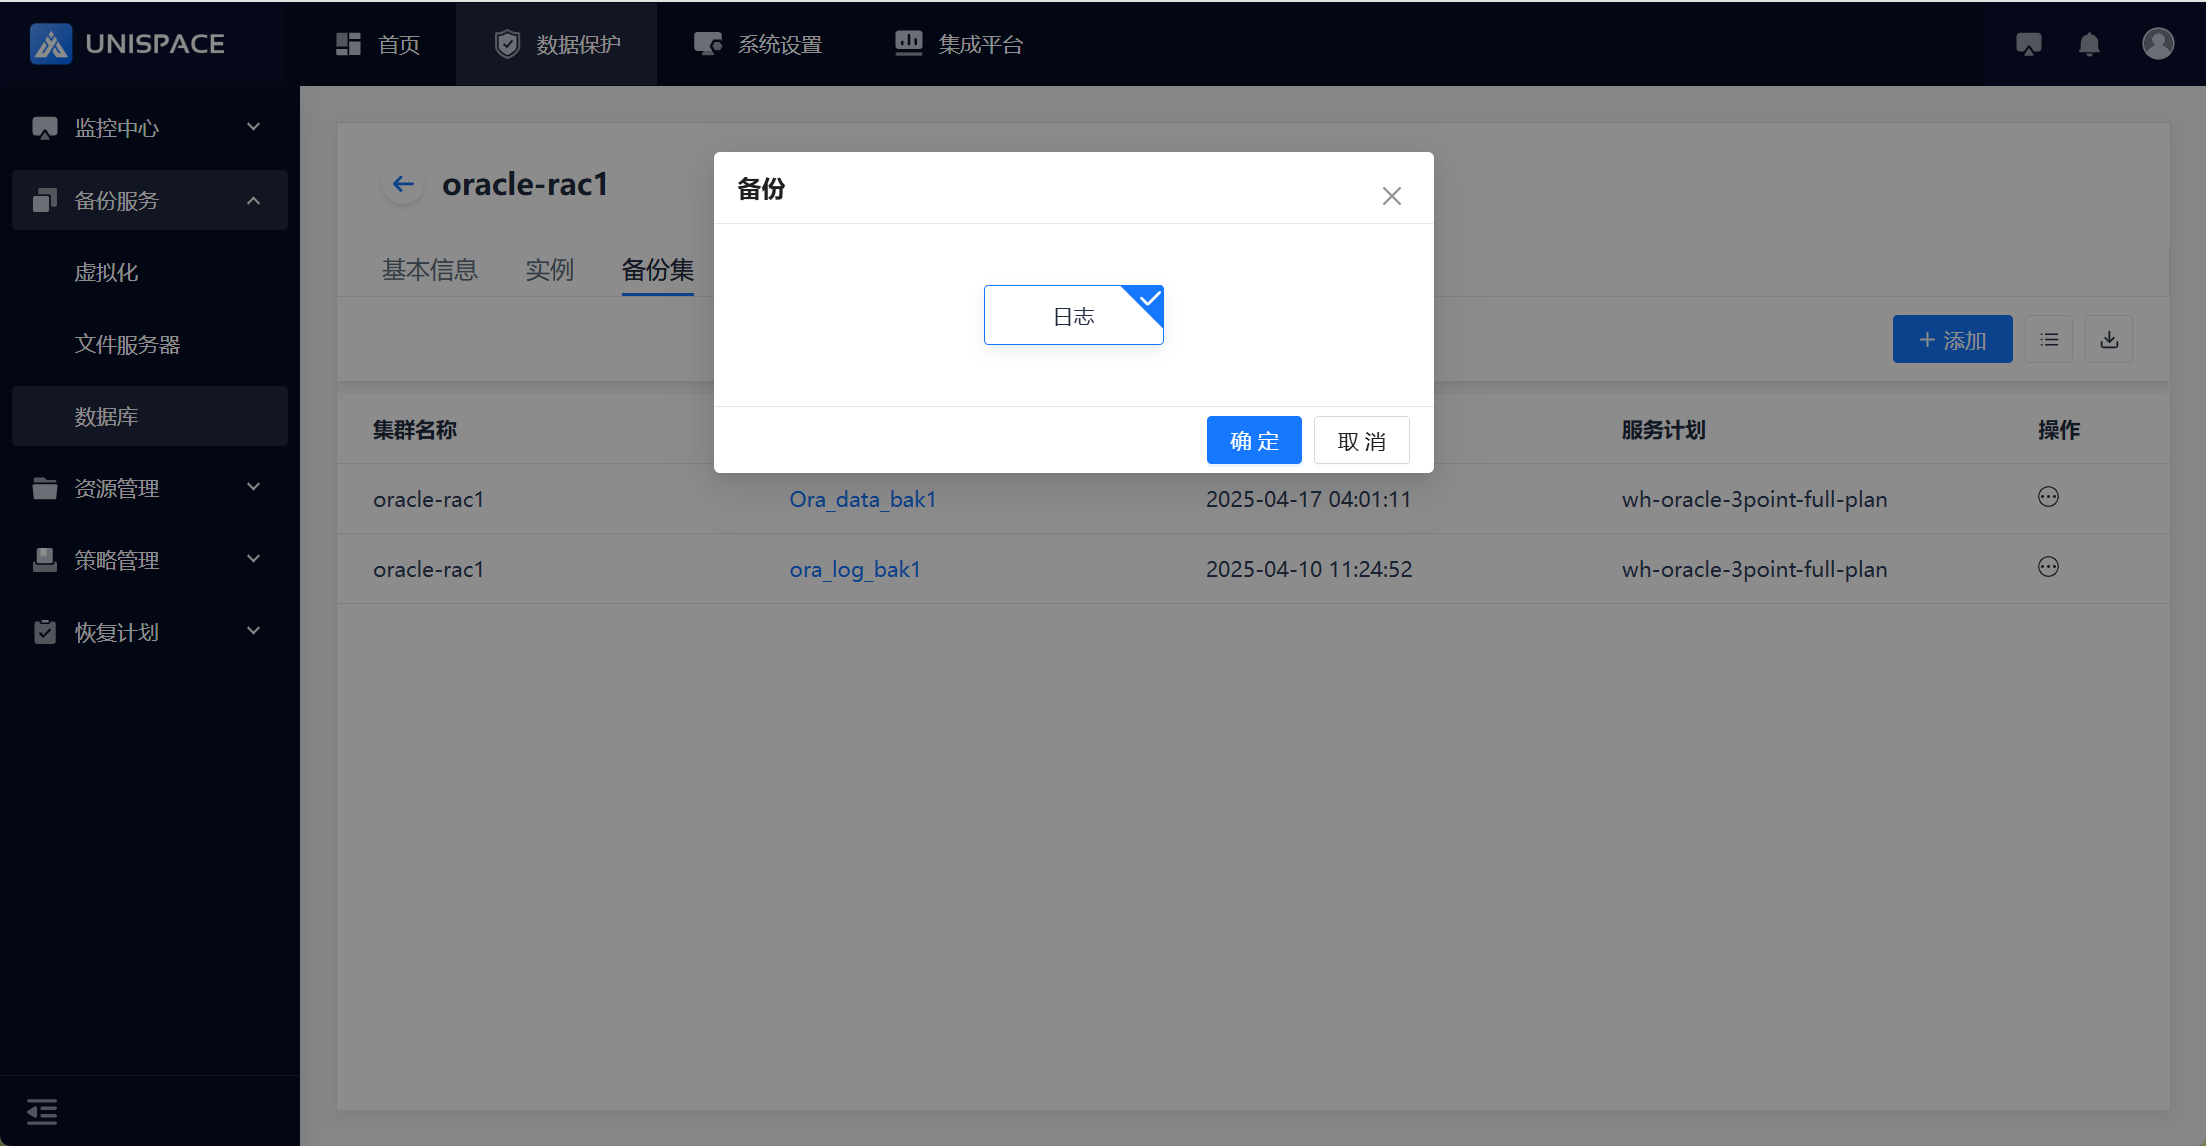 Step 3: A message "Backup job submitted successfully" will appear.Step 4: After the backup job starts, go to Monitoring - Job - Active Jobs to see the job.
 Step 5: Once the backup is complete, go to Monitoring - Job - Historical Jobs to view the job, which should display a status of "Completed".
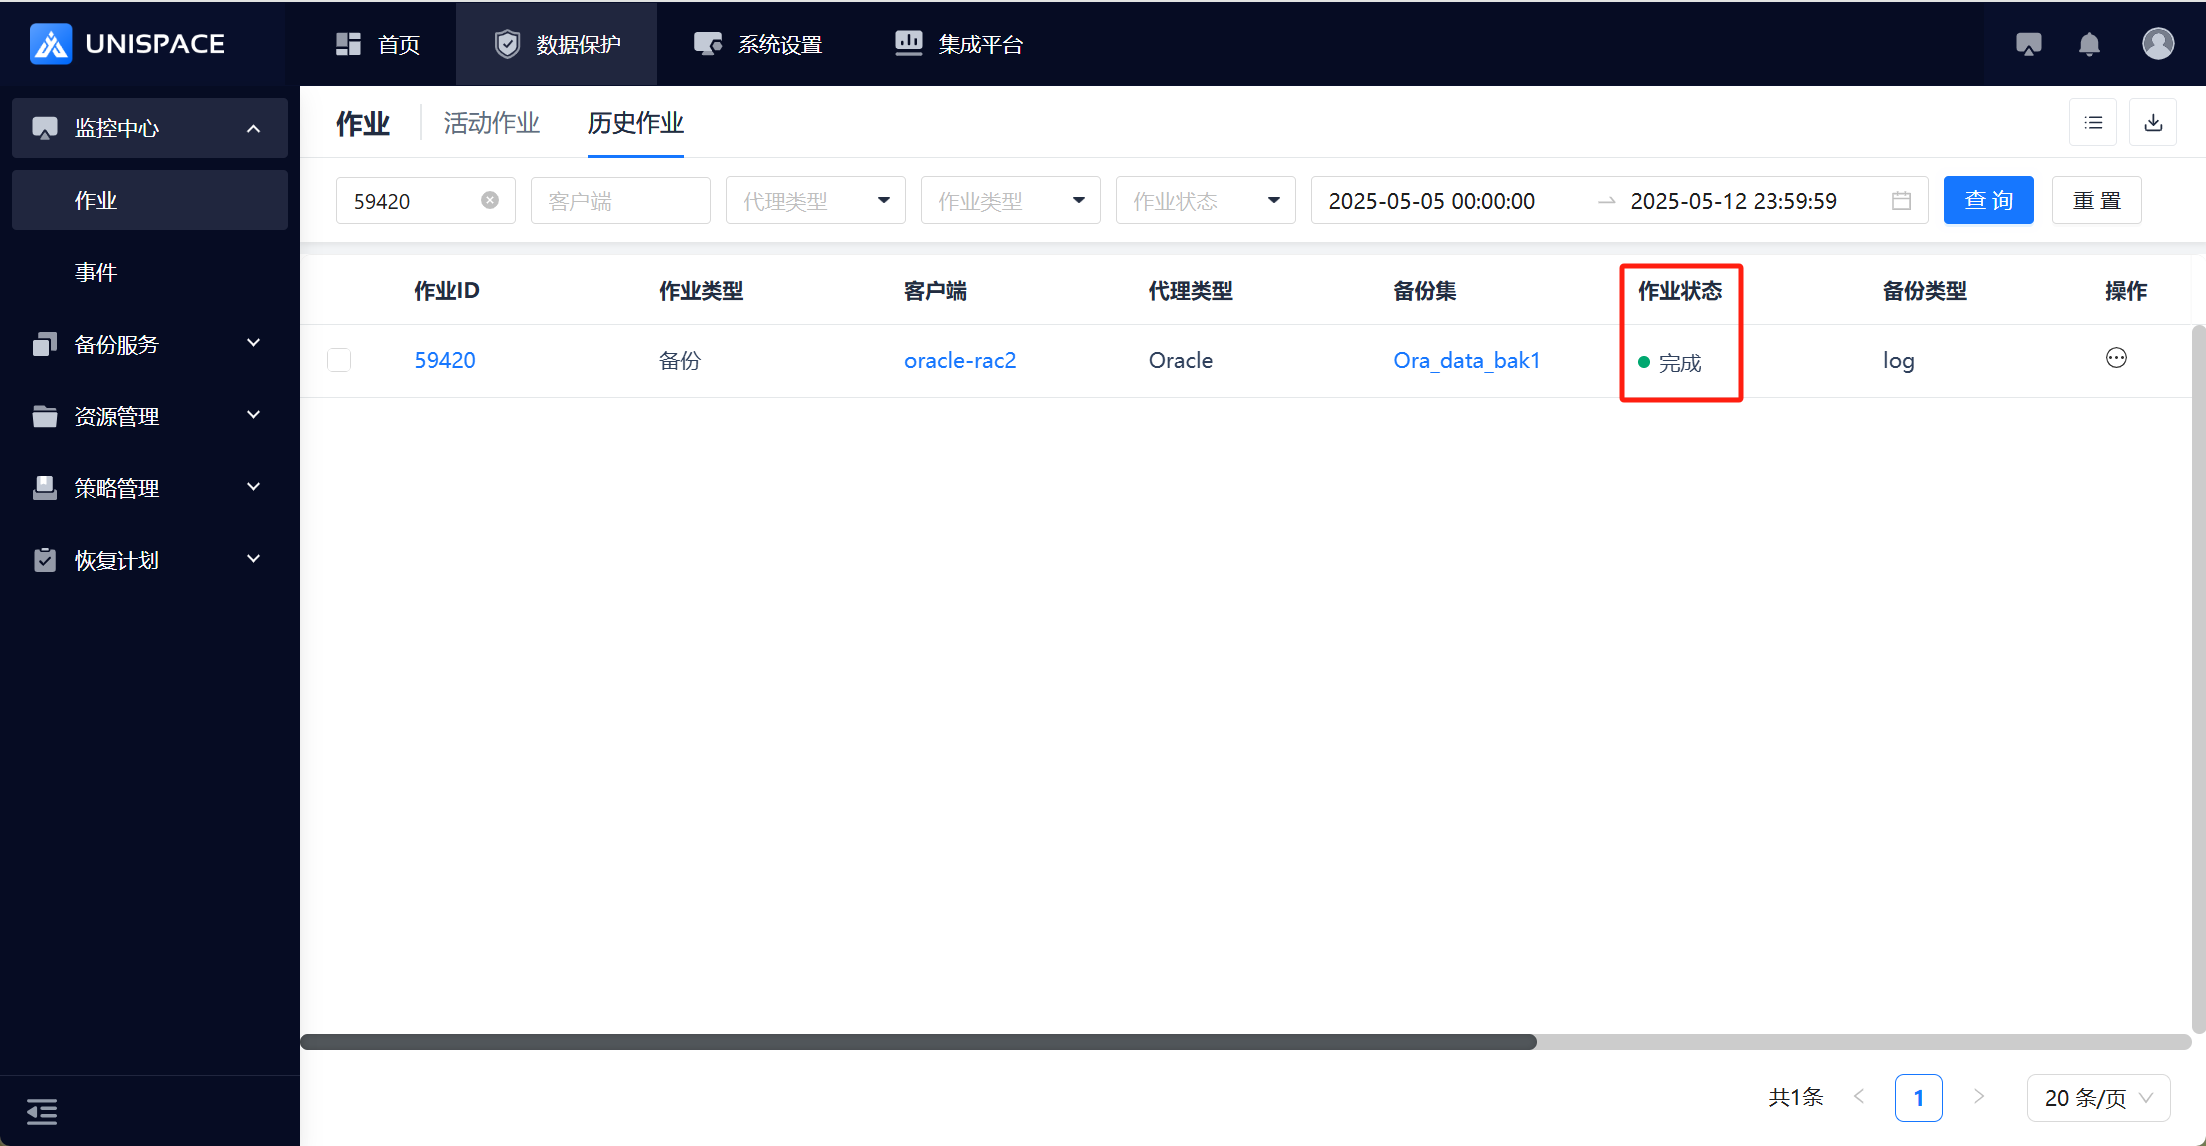
1.5 Oracle Database Restore
Prerequisites
- The Oracle database has been backed up.
Steps
Step 1: On the Virtual Cluster page, select a cluster, and click Actions - Restore.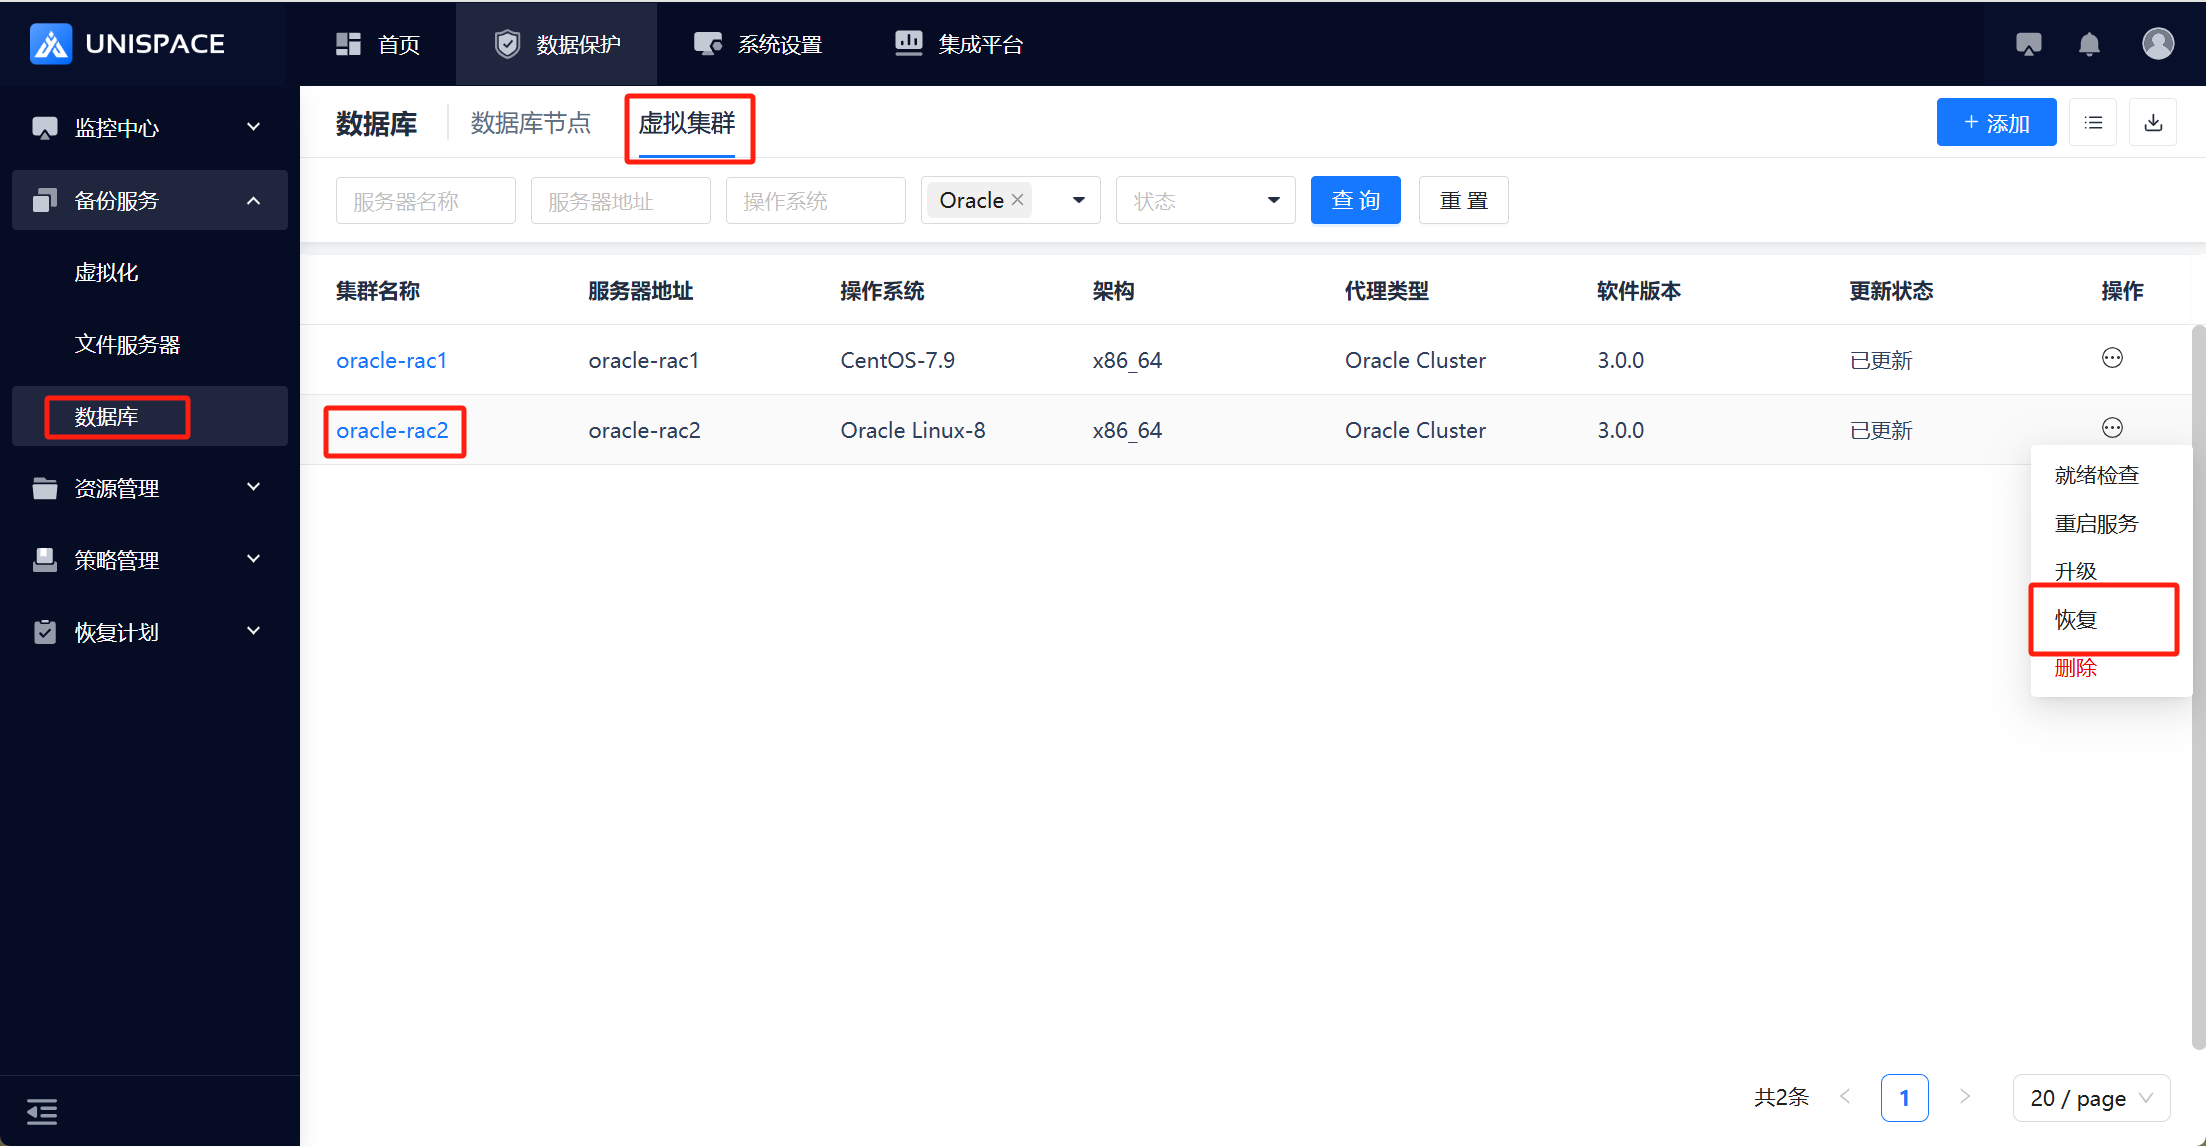 Step 2: A restore window appears, choose Database Restore, and click Next.
 Step 3: Select the restore point (full, incremental, or log) based on the time range, choose the Job ID of the restore point, and click Next Step.
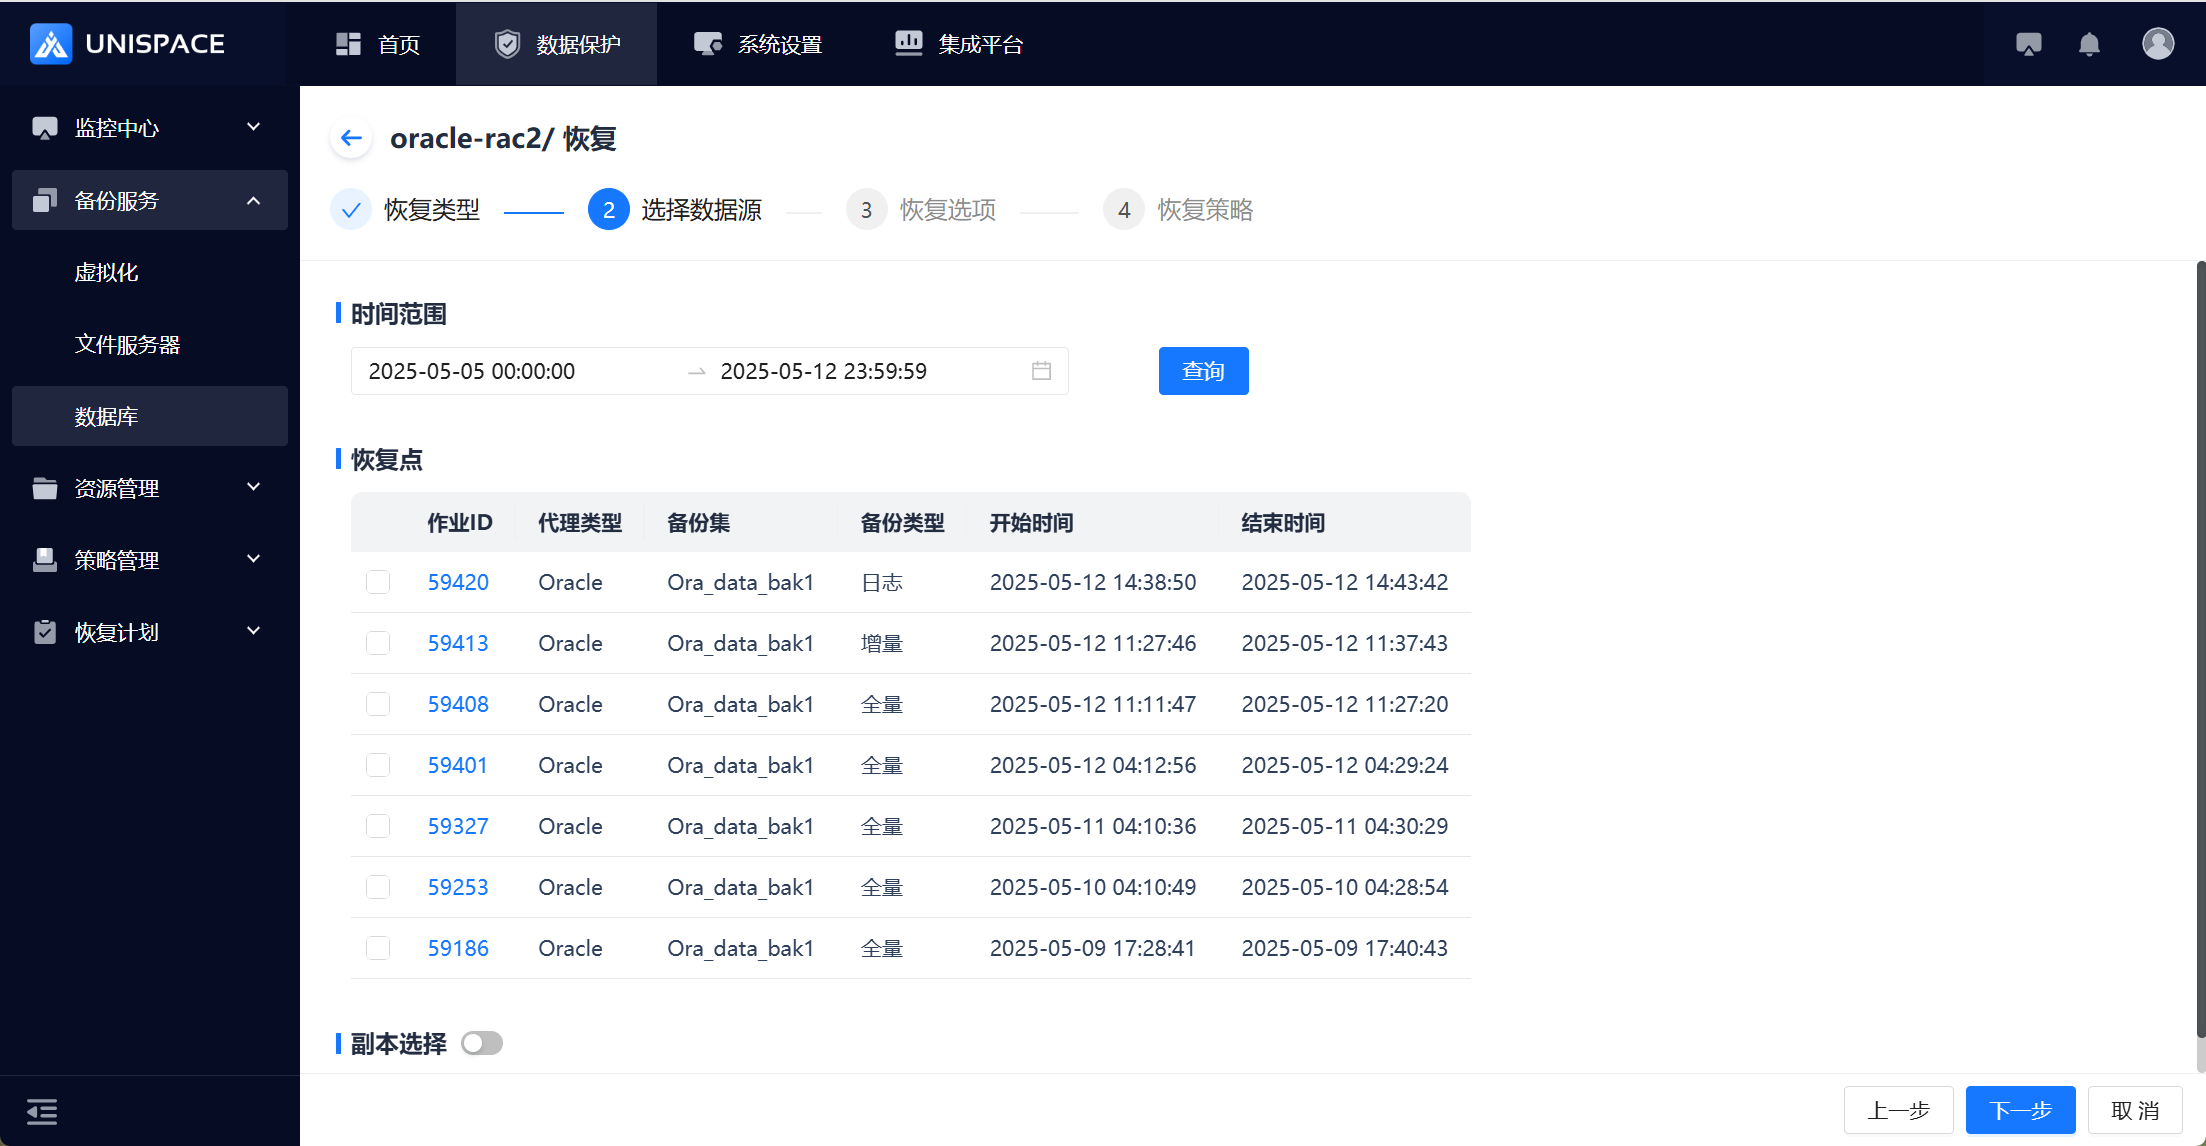 Step 4: Fill in the necessary parameters as shown below:
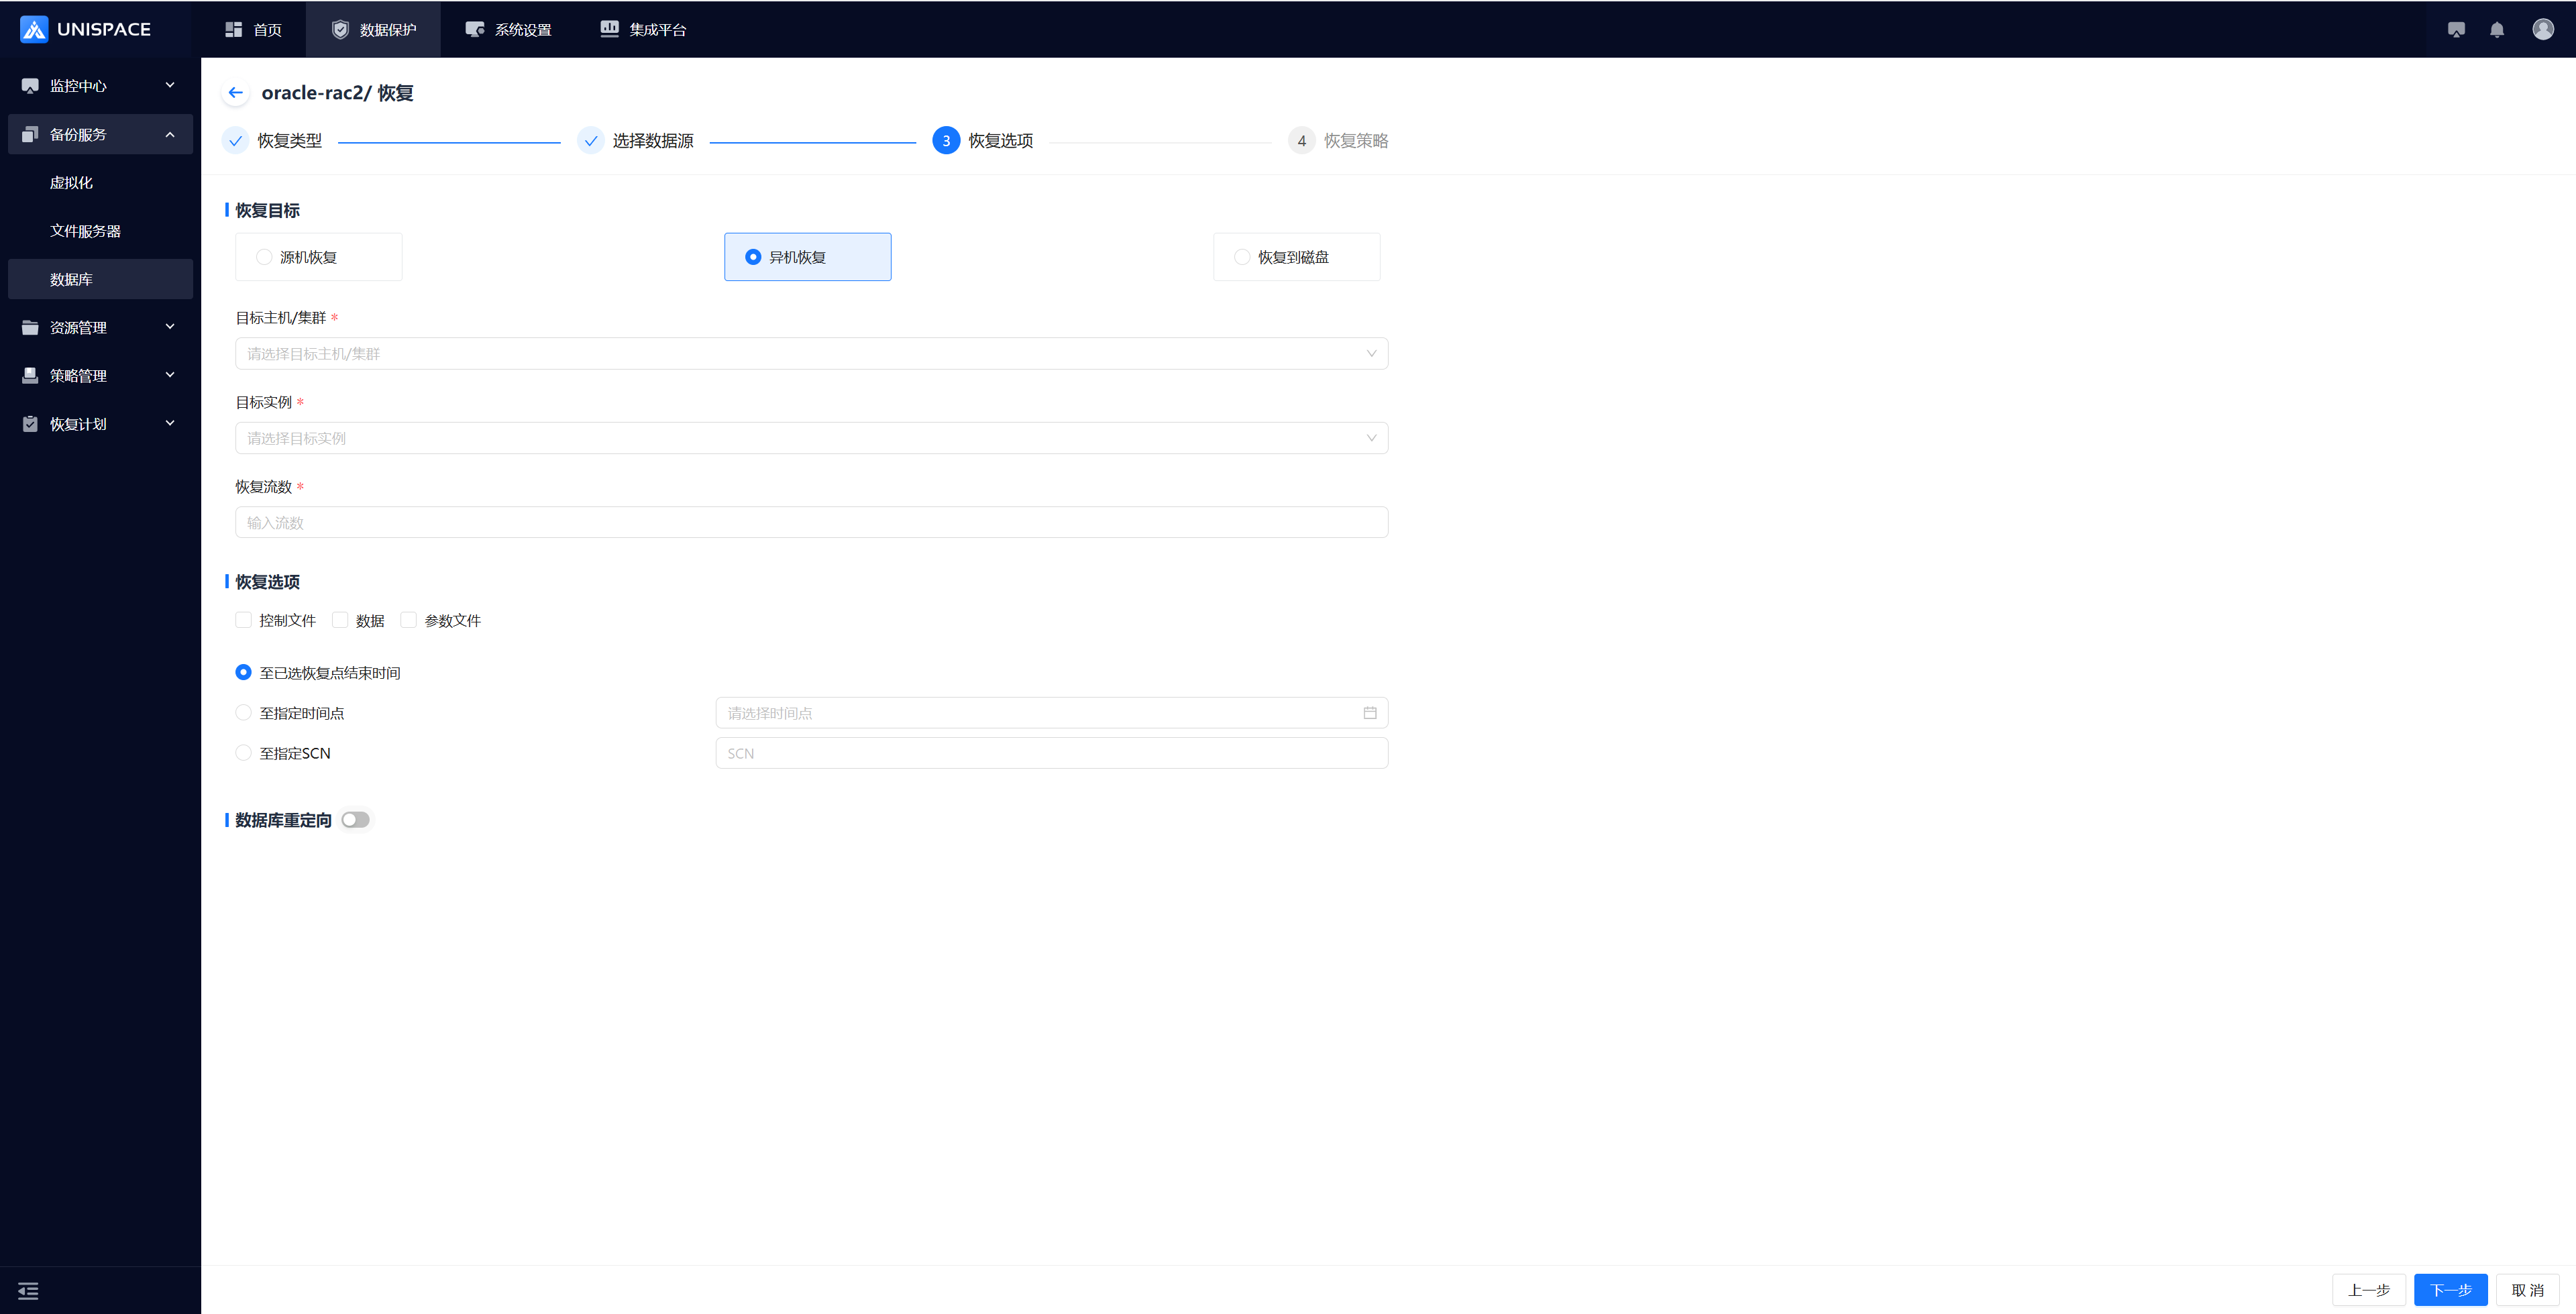
| Parameter Name | Description | Configuration Rule |
|---|---|---|
| Restore Target | Radio button, default is Off-Machine Restore | Options: Source Machine Restore (Original Cluster), Off-Machine Restore, Restore to Disk |
| Target Instance | Select the Oracle instance on the target host | For source machine: Choose one instance from the original cluster. For off-machine: Choose one or more instances from a single/multiple nodes. |
| Restore Stream Count | Numeric, required | Range: 1-200, recommended: 4 |
| Restore Option | Single/Multiple selection | Options: Control File, Data, Parameter File |
| Restore Point Type | Default: End at Selected Restore Point | Options: To Selected Restore Point, To Specified Time, To Specified SCN |
| Database Redirection | Toggle switch, default is Off | Redirect tablespaces or REDO logs |
Step 5: Check the Advanced Restore Options and click Confirm.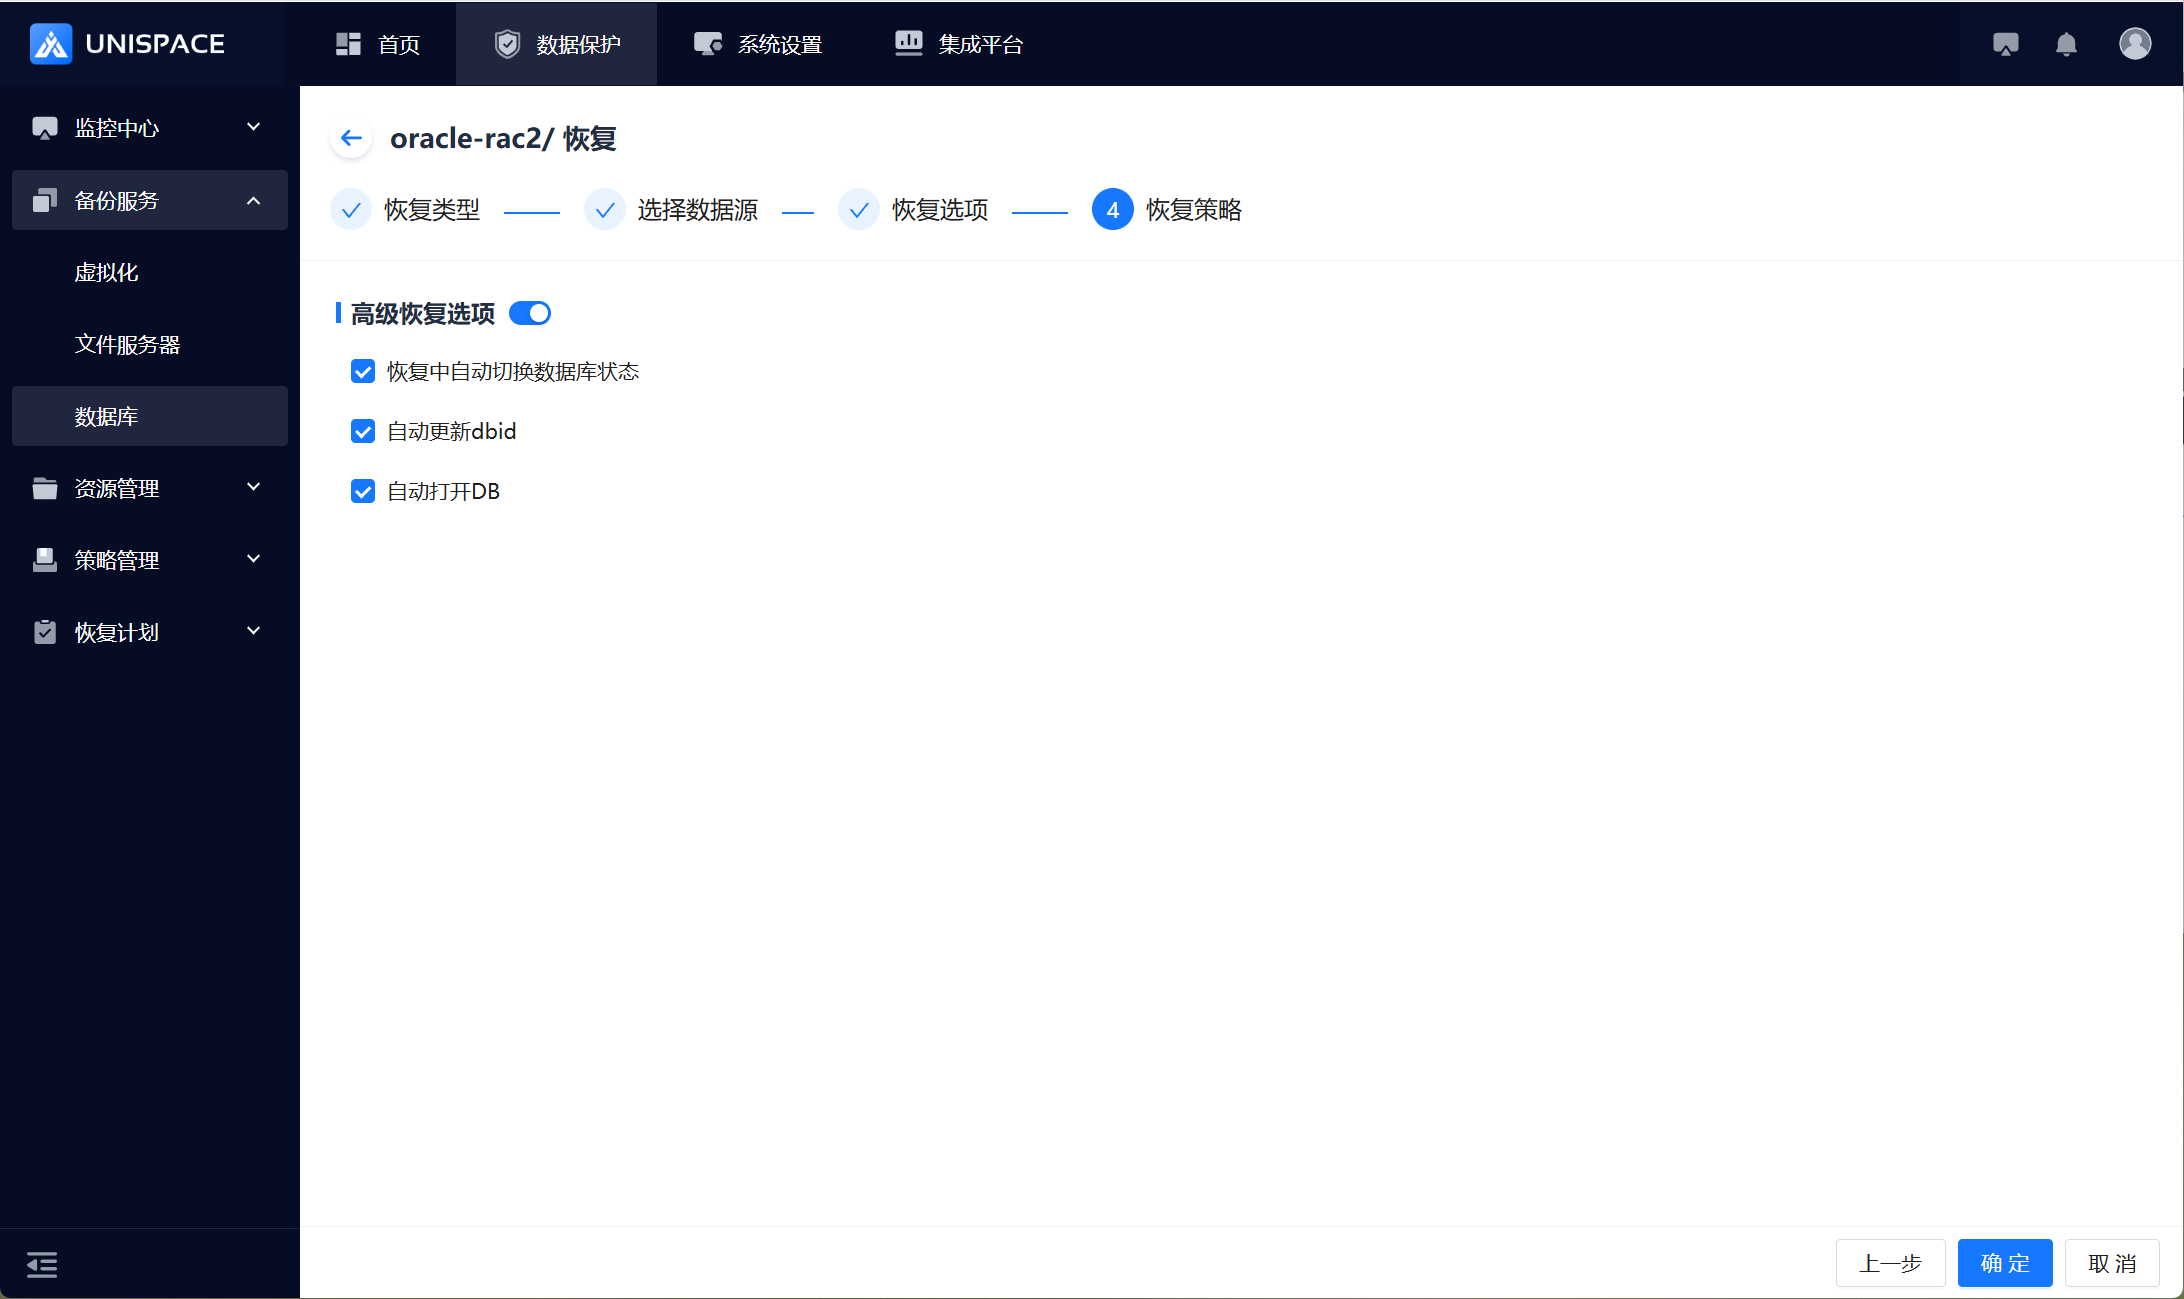
 Step 6: After the job starts successfully, go to Monitoring - Job - Active Jobs to see the restore job.
 Step 7: Once the job is complete, go to Monitoring - Job - Historical Jobs to view the job and its status.
1.6 Oracle Database Source Machine Recovery for a Specific PDB
Prerequisites
- The Oracle database has been backed up.
Steps
Step 1: On the Virtual Cluster page, select a cluster, and click Actions - Restore.Step 2: A restore window appears, choose Database Restore, and click Next.Step 3: Select the restore point (you can search by time range), check the restore point, and click the Job ID of the restore point. The right panel will display the available pluggable databases (PDBs). Check the PDB database to be restored and click Next.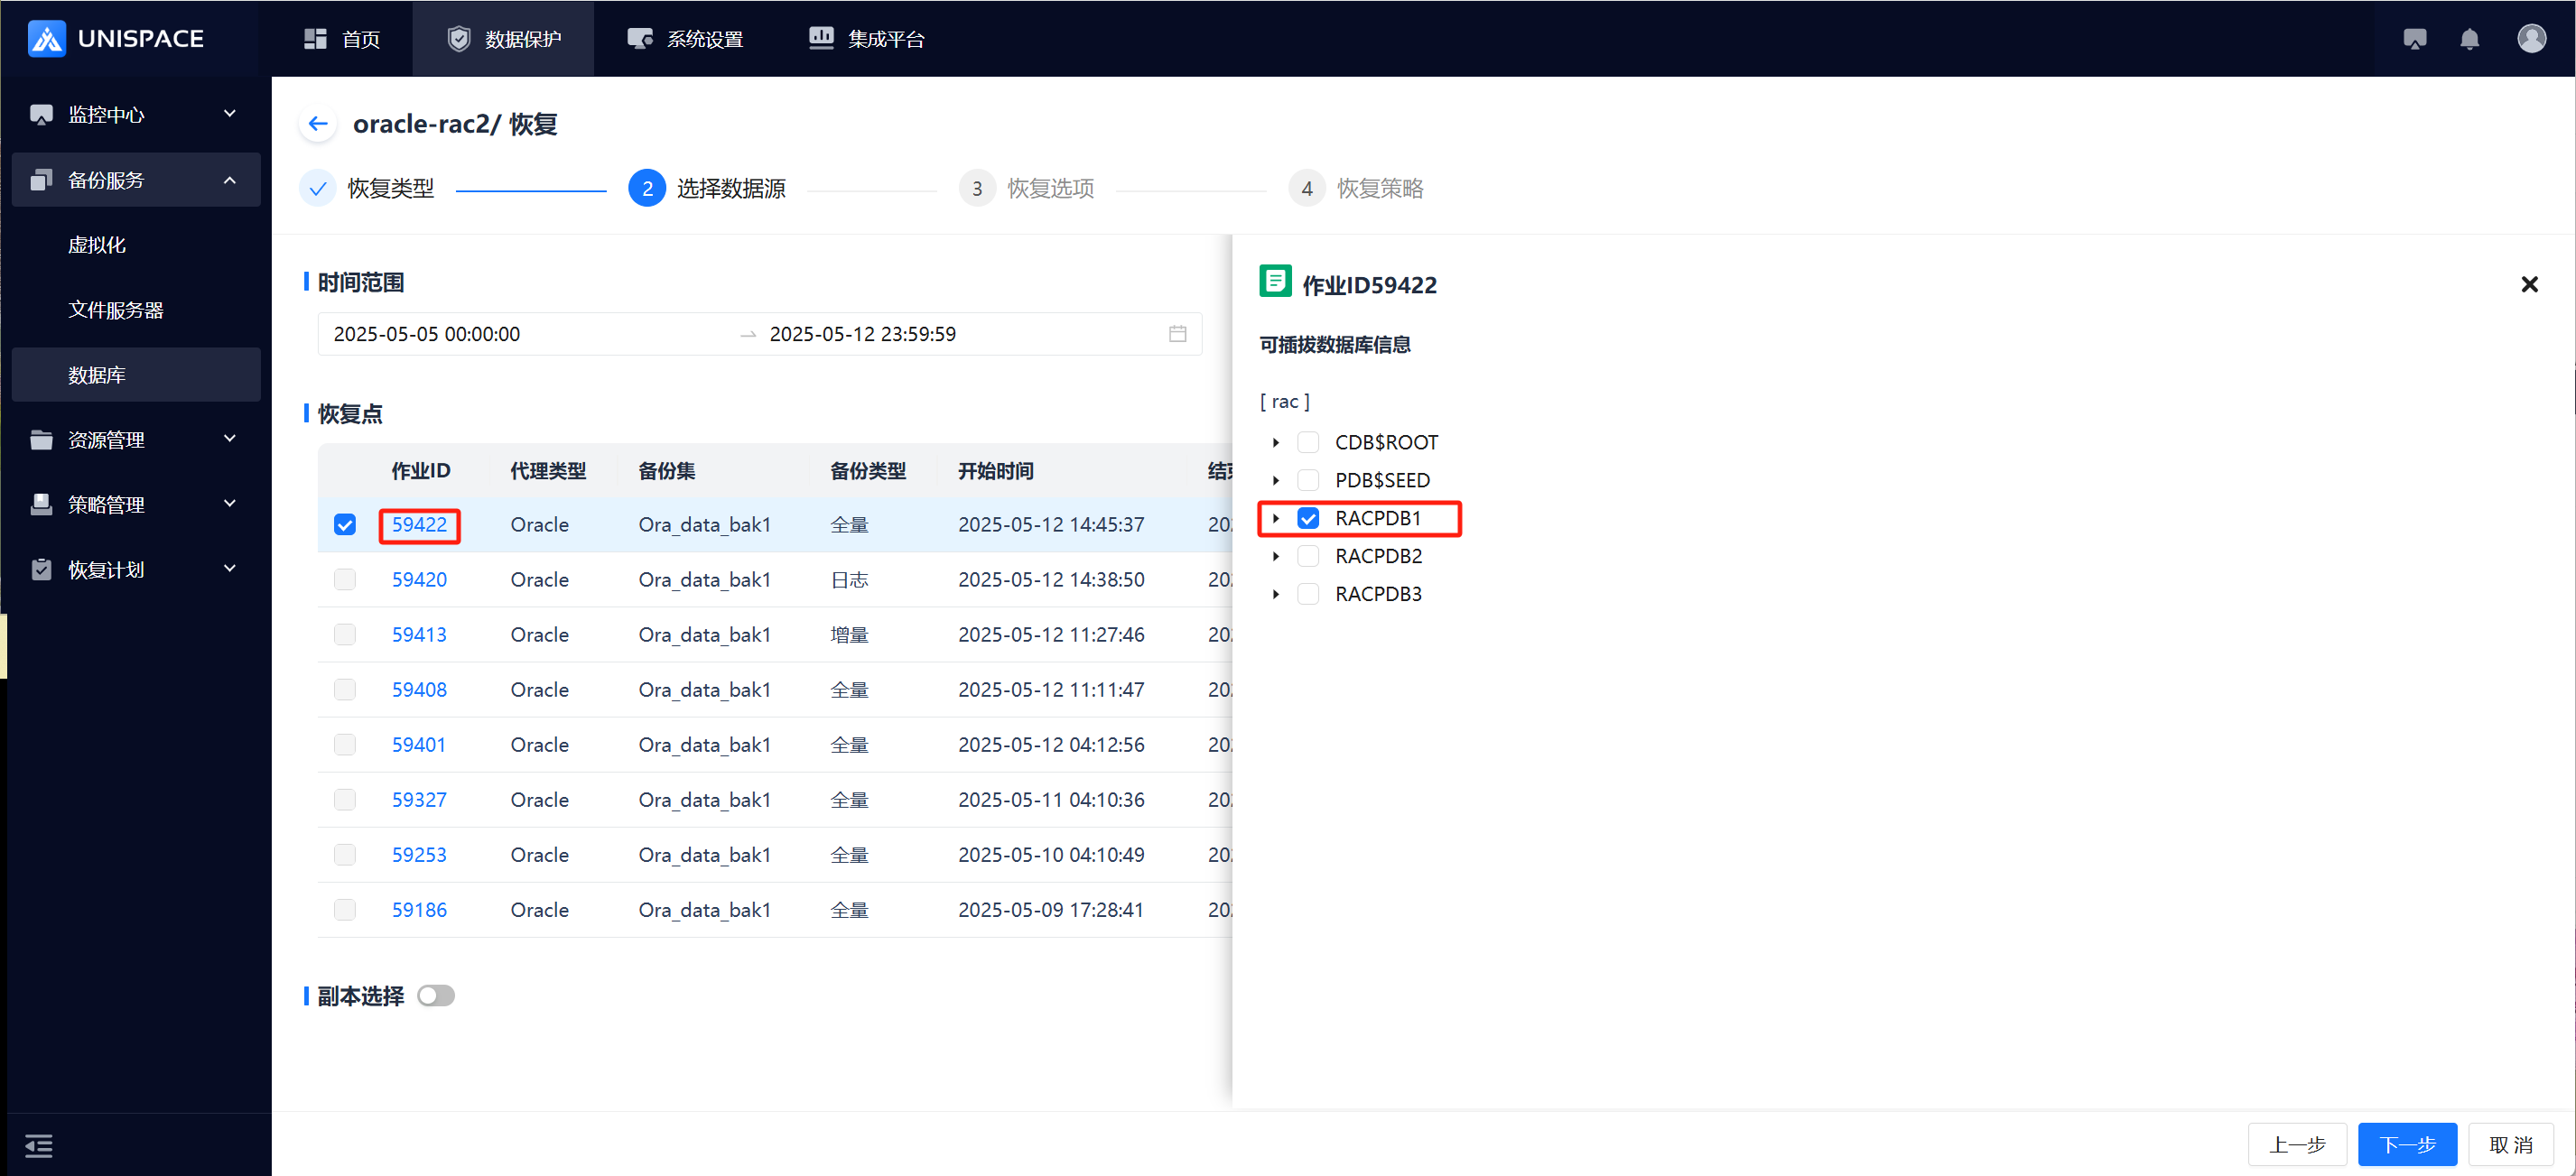 Step 4: Choose Source Machine Recovery, check the Data recovery option, fill in other necessary parameters, and click Next Step.
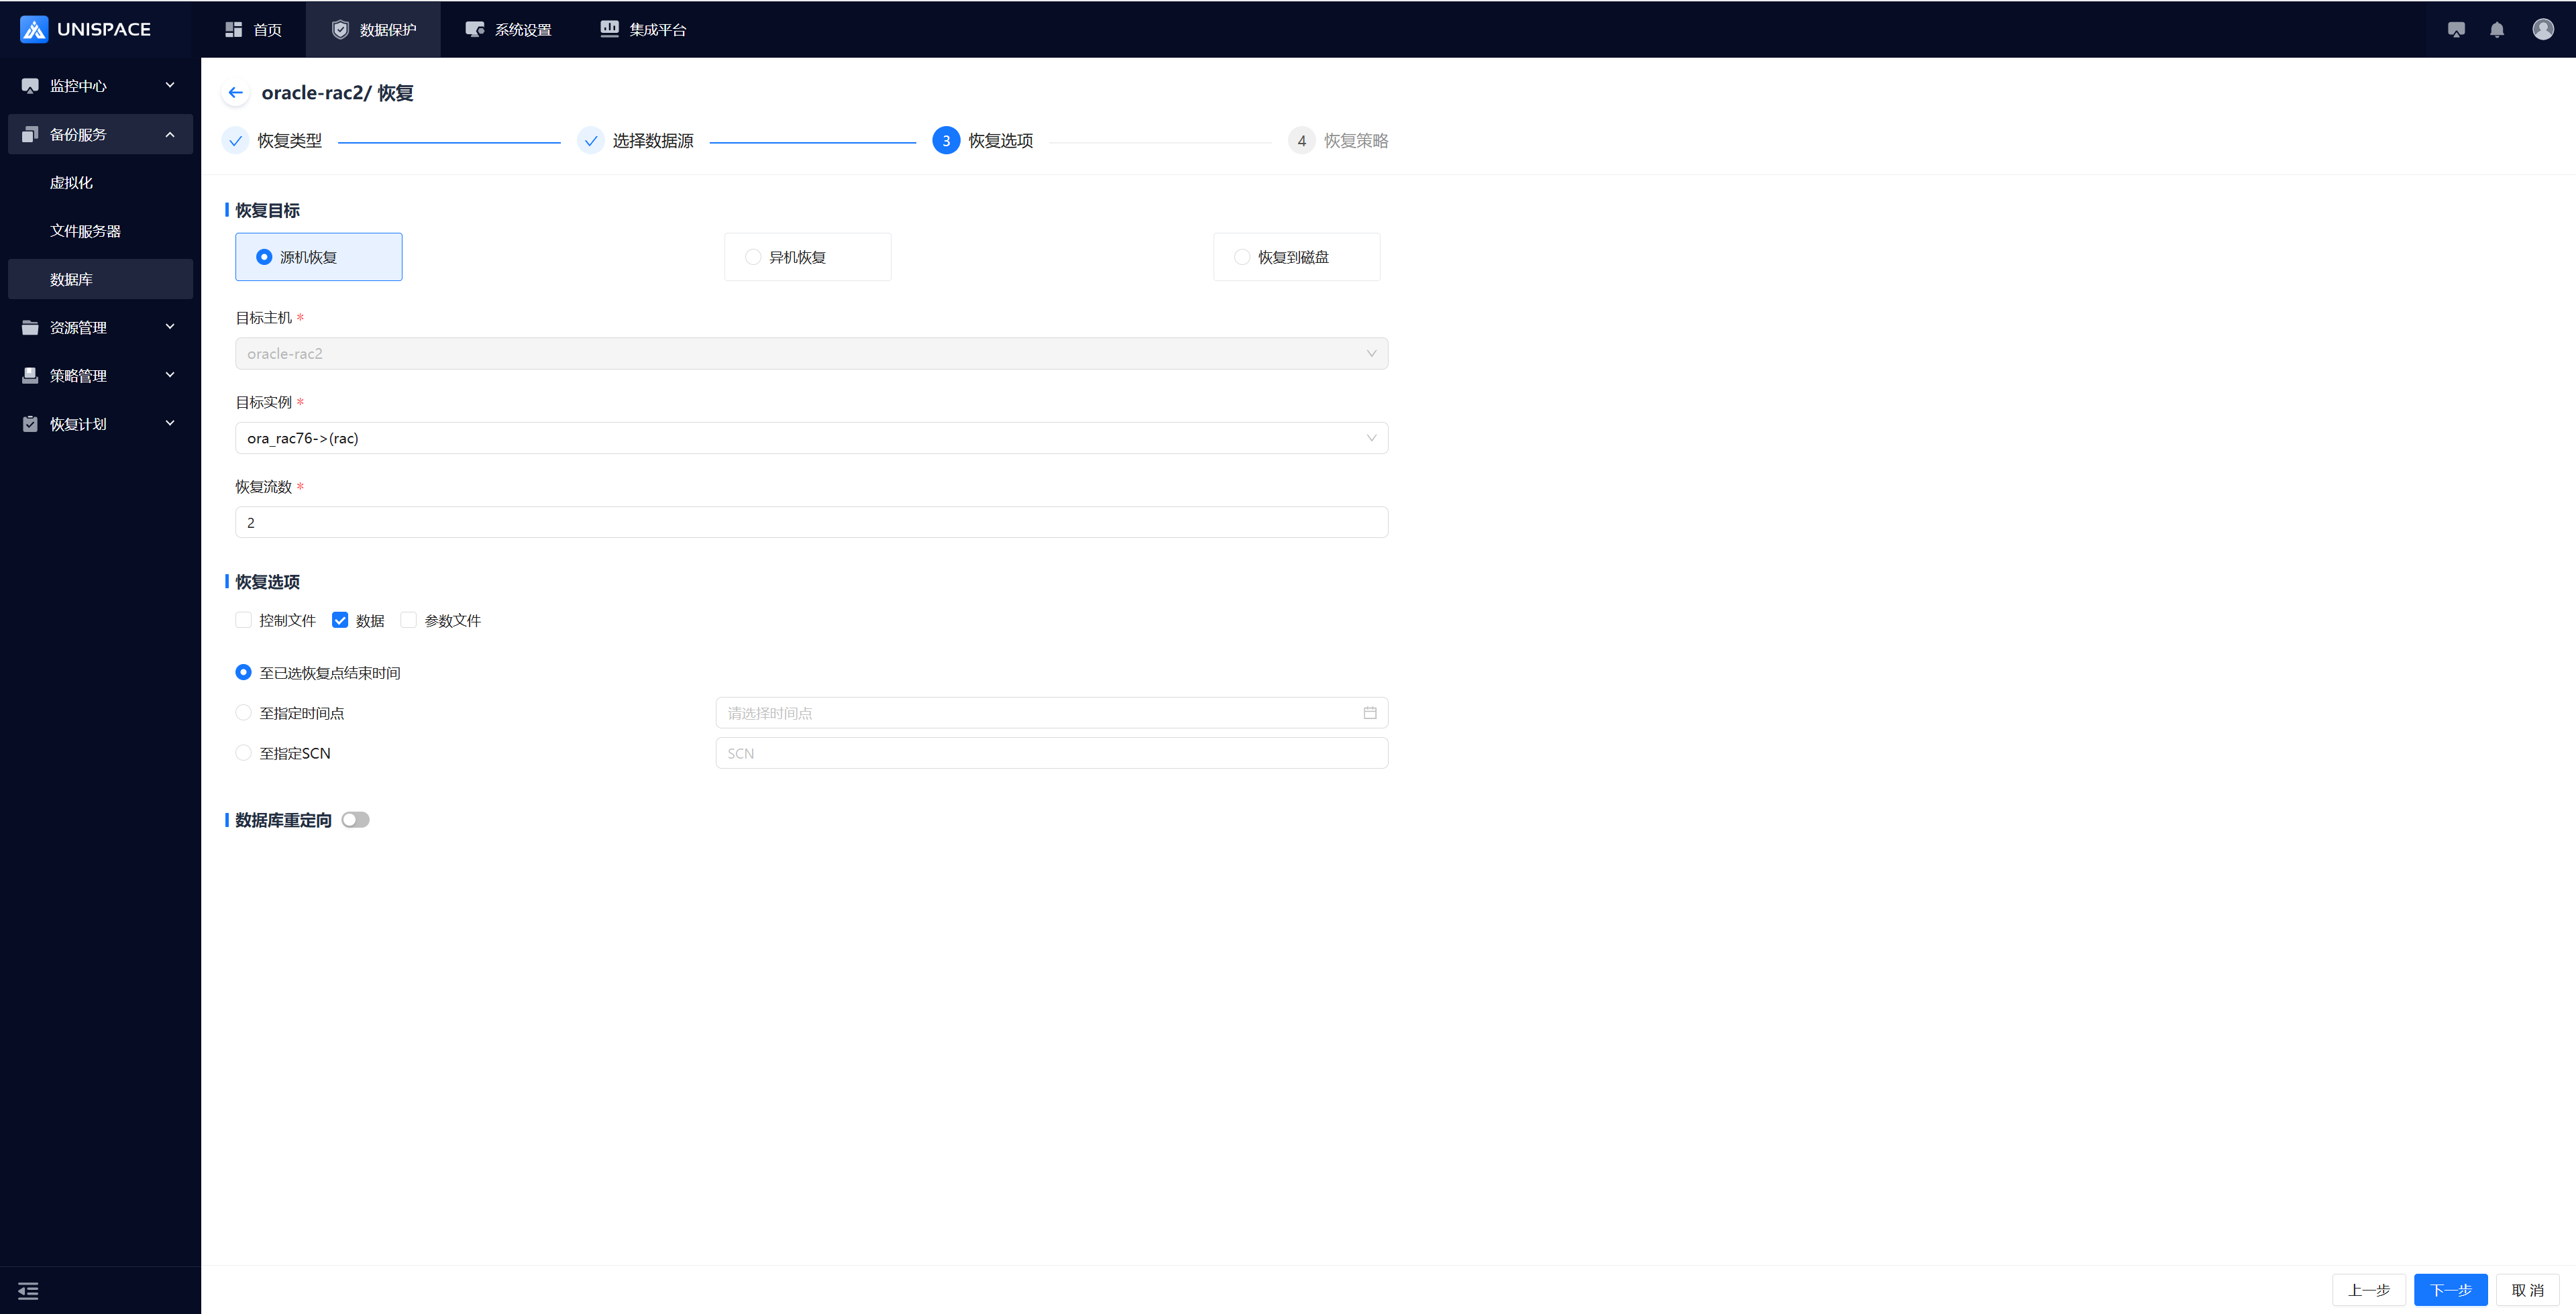 Step 5: Check the Advanced Restore Options box, and click Confirm.
1.7 Oracle Log Recovery
Prerequisites
- Oracle logs have been backed up.
Steps
Step 1: On the Virtual Cluster page, select a cluster, and click Actions - Restore.Step 2: A restore window appears, choose Restore Archive Logs Only, and click Next Step. Step 3: Fill in the necessary parameters as shown below and click Confirm:
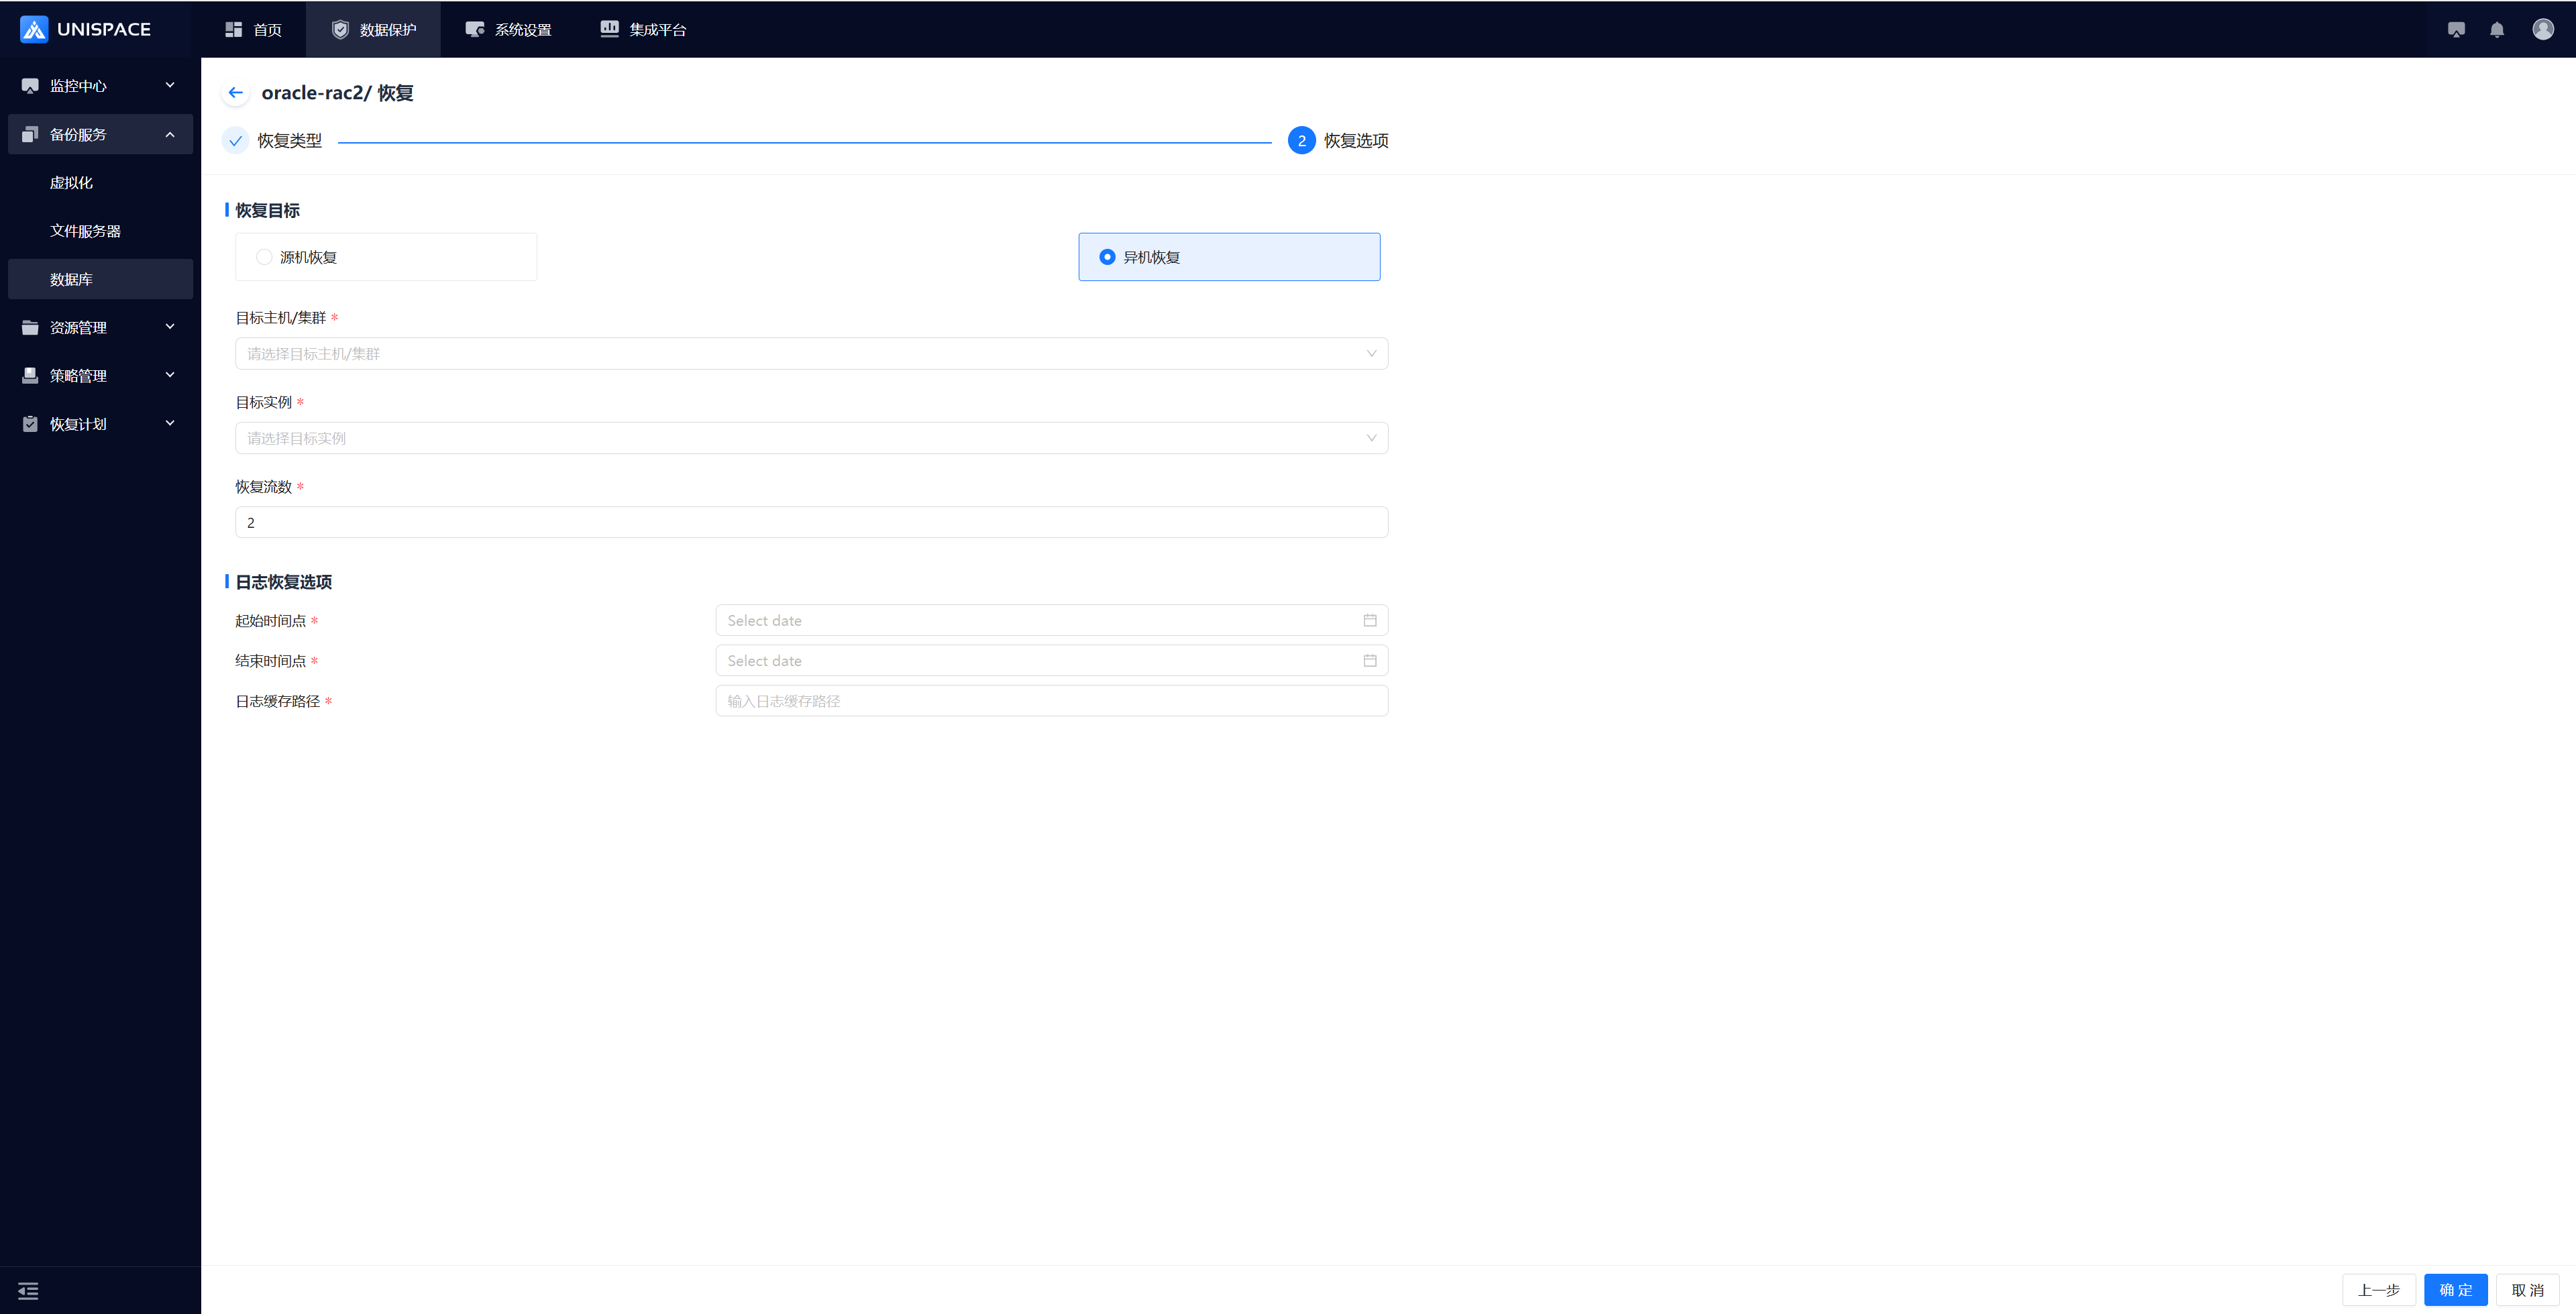
| Parameter Name | Description | Configuration Rule |
|---|---|---|
| Restore Target | Radio button, default is Off-Machine Restore | Source machine recovery (original cluster); Off-machine recovery: register oracle client standalone node/cluster |
| Target Instance | Select the Oracle instance on the target host | For source machine: Choose one instance from the original cluster. For off-machine: Choose one or more instances from a single/multiple nodes. |
| Restore Stream Count | Number type, number of concurrencies during operation | Range: 1-200, recommended: 4 |
| Log Recovery Options | Specify the start and end time | Calendar selection, choose the time range to restore logs |
| Log cache path, Path to restore logs on the target host | Custom path format, ensure proper permissions |
1.8 Oracle Database Recovery to Disk
Prerequisites
- The Oracle database has been backed up.
Steps
Step 1: On the Virtual Cluster page, select a cluster, and click Actions - Restore.Step 2: A restore window appears, choose Database Restore, and click Next Step.Step 3: Select the restore point (you can search by time range), check the restore point, and click Next Step.Step 4: Fill in the necessary parameters as shown below and click Confirm: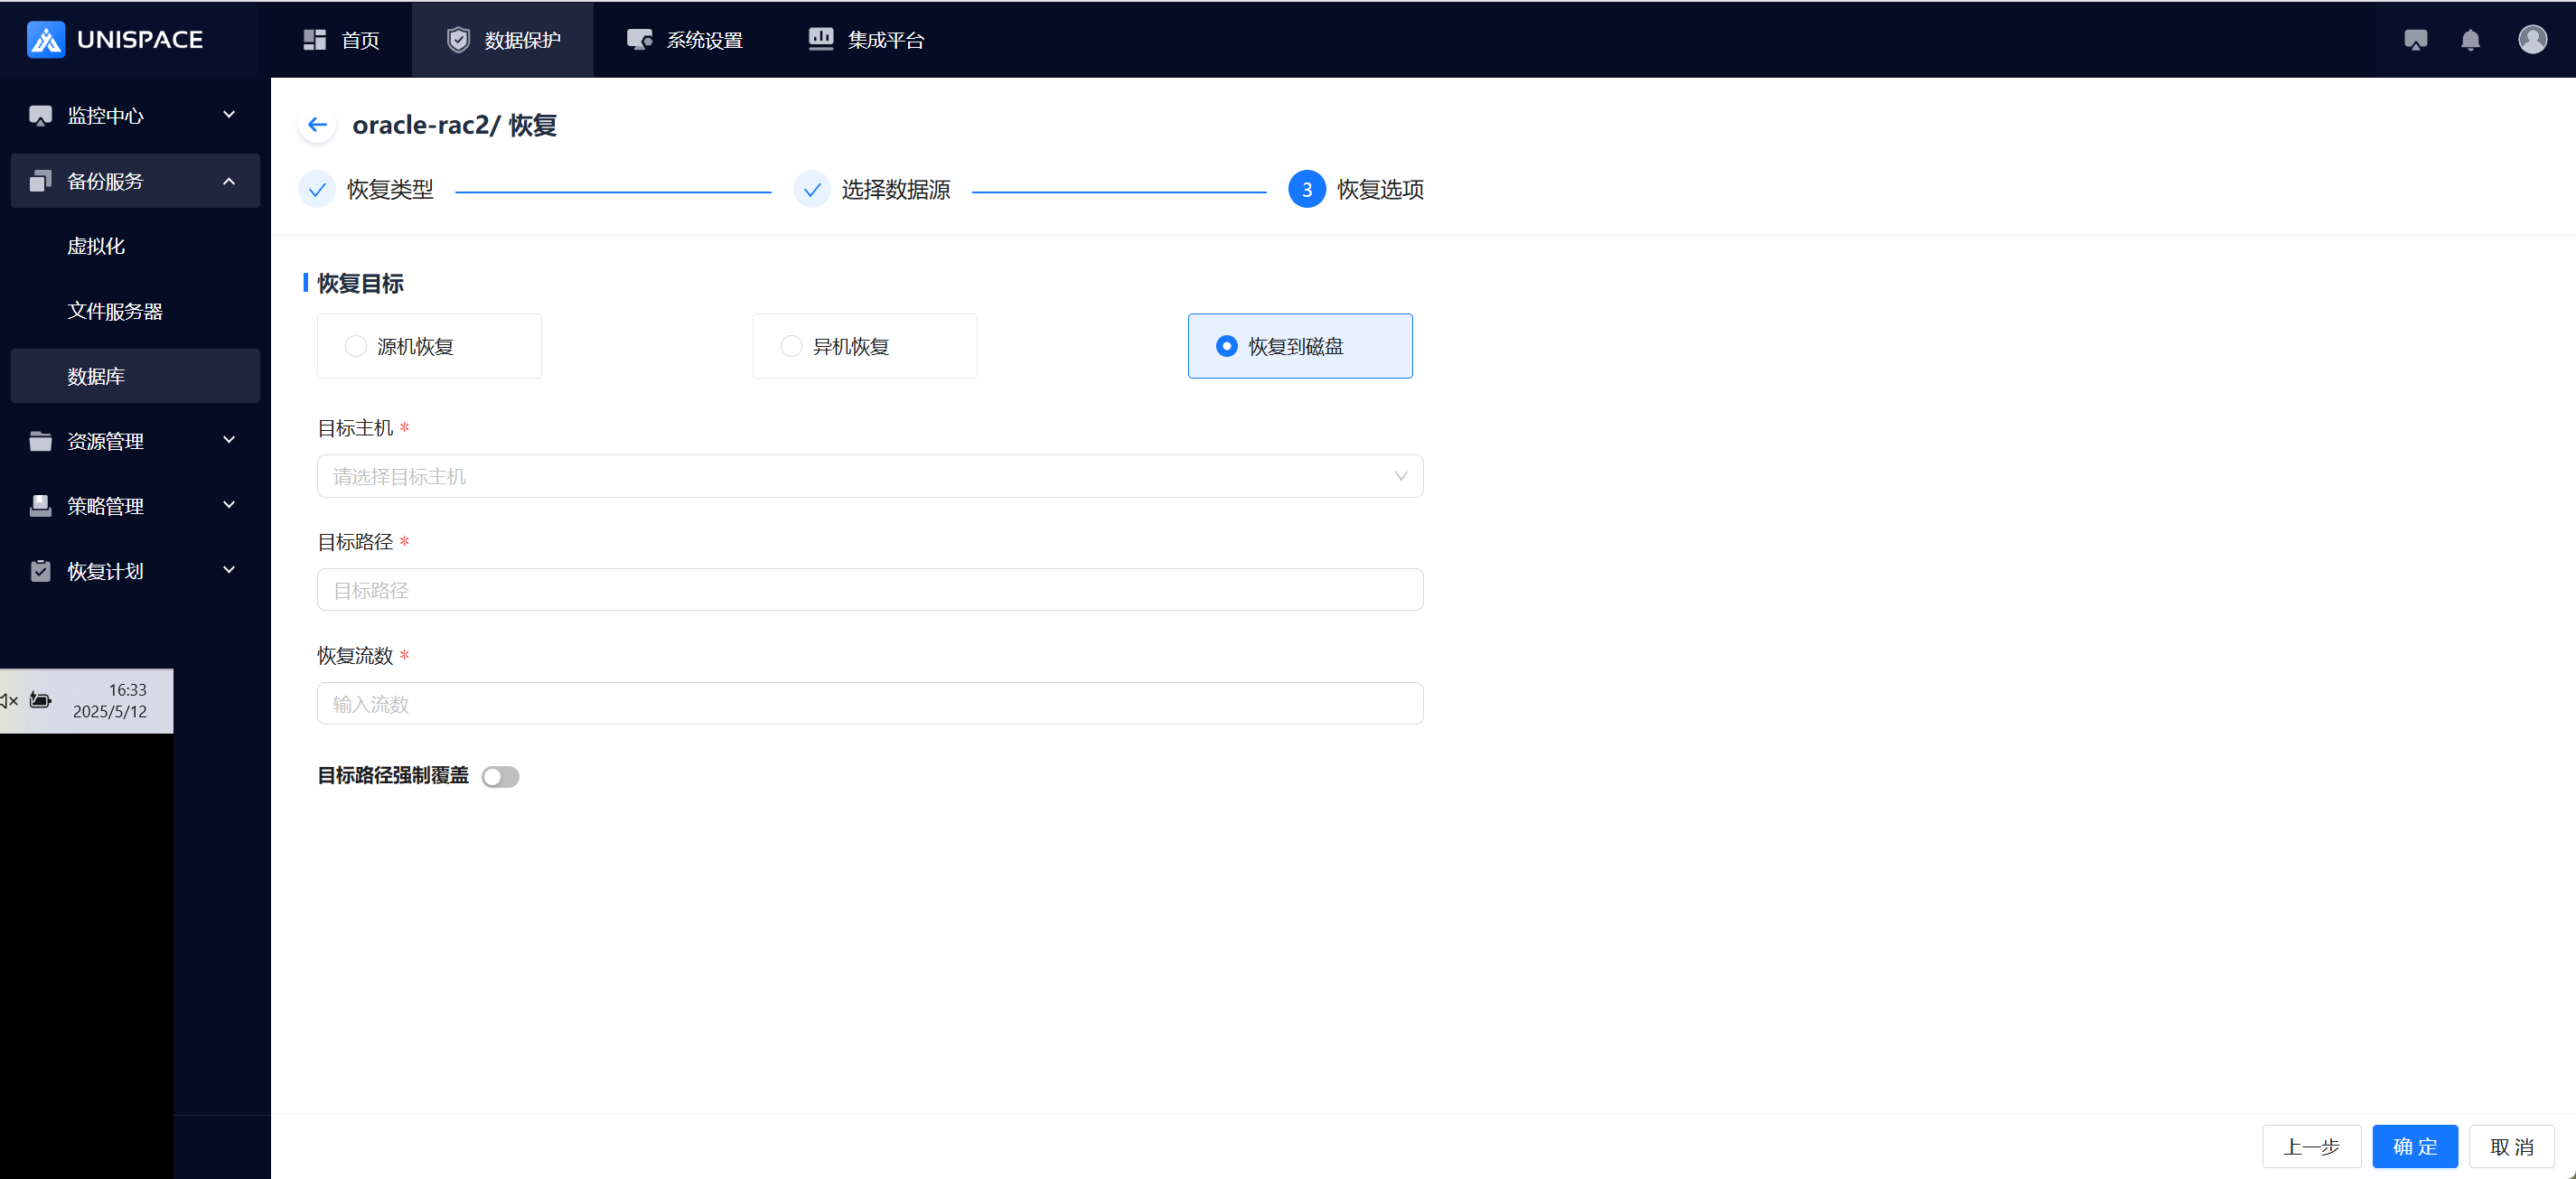
| Parameter Name | Parameter Description | Configuration Principle |
|---|---|---|
| Recovery Target | Single choice, default is cross-machine recovery | Select "Recover to Disk" |
| Target Host | Any host registered as a client node | Drop-down list, single choice |
| Target Path | Any path on the target host | Path format, customizable |
| Recovery Streams | Numeric type, indicates concurrency during the job process | Range: 1-200, recommended stream count: 4 |
| Force Overwrite Target Path | Toggle, default is off |